Disk Drill brings game-changing improvements for Mac users, especially when dealing with complex setups like Apple’s Fusion Drive. Whether you’re using an older HFS+ configuration or a modern APFS‑based Fusion Drive, Disk Drill now offers robust recovery tools you can count on.
Apple Fusion Drive Explained: How It Works, Typical Layout, Pros & Risks
Why Fusion Drives Are Different
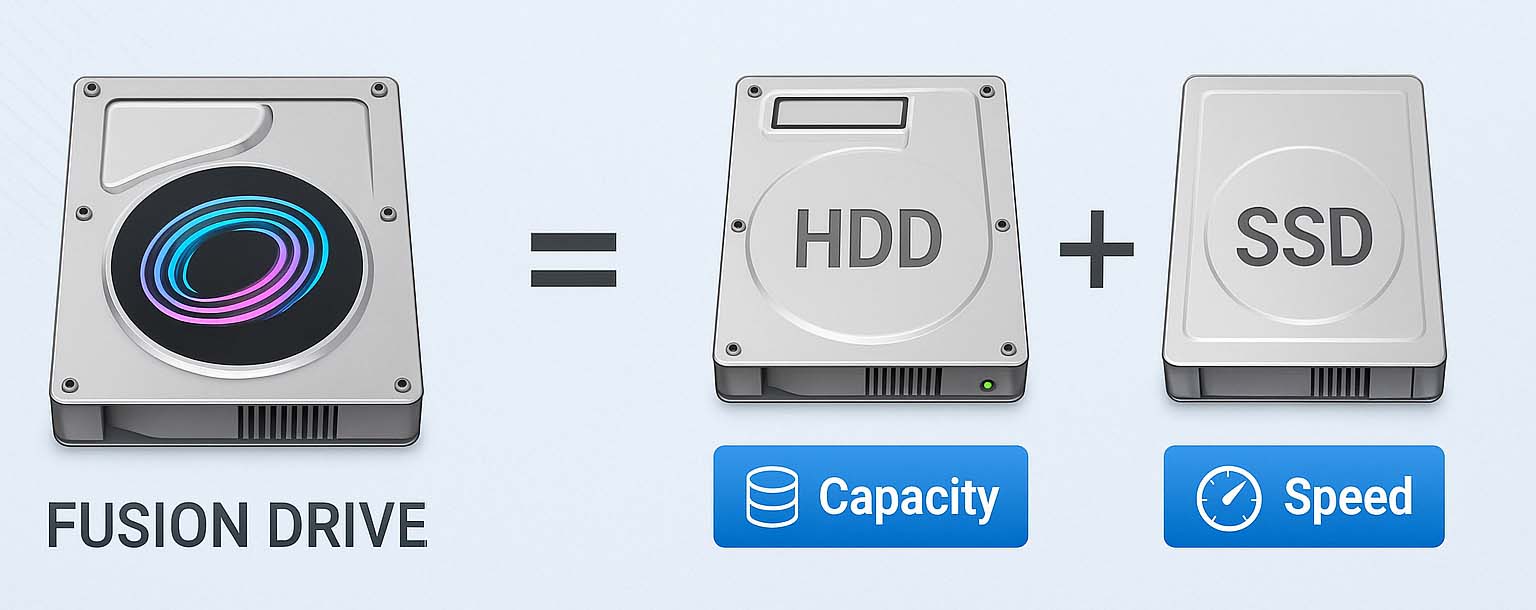
A Fusion Drive is a logical volume that spans two physical devices: a small SSD for speed and a large HDD for capacity. macOS transparently places frequently used blocks on the SSD tier and colder data on the HDD tier. Because files are often split across tiers, successful recovery usually requires access to both devices at the same time.
- Pre–High Sierra era: Fusion commonly used HFS+ on Core Storage (CS).
- High Sierra and later: Fusion commonly uses APFS, where an APFS container is distributed across both tiers (fast/slow stores).
This tiering means a photo, video, or database file may have extents on both the SSD and HDD. If one member is missing or physically failing, you’re likely to see partial files after recovery.
Why Fusion Drive Recovery Is Different
- No duplication: Blocks are distributed, not copied, across the SSD and HDD. If a file’s blocks live on both tiers, losing one member can break the whole file.
- High fragmentation: The system places and moves data in small block chunks to optimize performance. Over time, most files end up fragmented across both devices.
- Metadata split across tiers: On APFS Fusion, crucial container/volume metadata often resides on the SSD tier.
- Directory view depends on metadata: The file and folder tree (catalog, object maps, etc.) is reconstructed from metadata that generally lives—primarily or exclusively—on the SSD portion. If that metadata isn’t available, the logical view can’t be rebuilt.
When Fusion Drives Full Recovery Is Unlikely
- One member is gone or dead: If the SSD or HDD has failed completely, end‑to‑end reconstruction is typically impossible. At best, you might salvage small files that happened to live entirely on the surviving device.
- Severe metadata damage: If the volume header, container records, or Fusion Drive descriptors are corrupted beyond repair, you won’t be able to rebuild the directory structure.
- APFS Fusion with SSD failure: Because APFS often places container metadata on the SSD, a dead SSD can prevent the container from mounting even if the HDD looks fine.
- Encrypted but no keys: Encrypted blocks can’t be interpreted without valid credentials.
Introduced alongside OS X Mountain Lion (late 2012), Fusion Drive appeared in select iMac and Mac mini configurations running macOS 10.8+. Under the hood, it combines two physically separate devices:
- A solid‑state drive (SSD) for low‑latency reads/writes and fast app launches
- A hard disk drive (HDD) for high‑capacity, economical storage
macOS presents these two devices as one logical volume in Finder, so users don’t manage tiers or move files manually. The system continuously studies access patterns and moves data between tiers for the best real‑world speed.
How Fusion Drive Improves Performance (Automatic Tiering)
Think of Fusion as automated storage tiering rather than simple caching:
- Frequently accessed files (OS components, apps, working documents) reside on the SSD tier.
- Infrequently accessed items migrate to the HDD tier.
- When usage changes, the system rebalances placement in the background.
Fusion Drive Data Organization: Layout, Metadata & Behavior
Physical‑to‑Logical Map (Typical)
On Fusion Drive–based systems, you’ll usually see something like:
/dev/disk0→ physical SSD (member of the Logical Volume Group)/dev/disk1→ physical HDD (member of the Logical Volume Group)/dev/disk2→ a logical volume which includes both disk0 and disk1
Fusion Drive Partitioning at a Glance
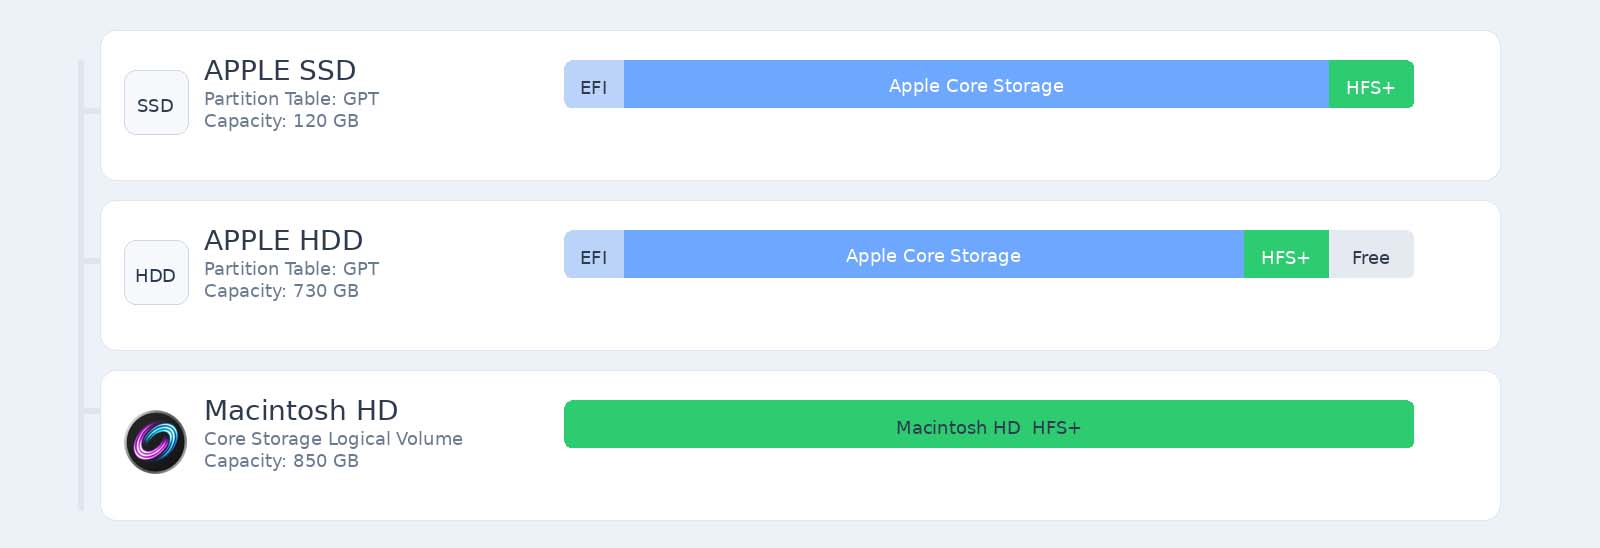
Each physical member (the SSD and the HDD) generally carries at least three partitions:
- EFI system partition at the front (small service area)
- Large Fusion data partition in the middle (the actual tiered storage)
- Small Apple/macOS service/config partition toward the end
The data partition typically consumes ~98–99% of the device and commonly begins around LBA 409,640. This is the only partition used by Fusion and it contains both user data and the metadata required to assemble the logical volume and read files correctly.
Metadata Regions (Inside the Data Partition)
Core Storage stores several distinct metadata zones so the OS can reassemble the volume even if one copy is damaged. The major regions are:
1) Encrypted‑Metadata Blocks (trailing area)
- Lives near the end of the data partition.
- Holds encrypted descriptors that tell the system how to interpret the LVG/LV structures.
- The SSD and HDD typically use different keys and keep non‑identical copies; either copy can be enough to rebuild the configuration if intact.
2) Volume‑Header Copies (at the very start and very end)
- Found in the first and last sectors of the data partition.
- Stores the partition UUID, the Logical Volume Group (LVG) UUID, the volume size, references to the keys needed for the encrypted‑metadata region, and pointers to redundant disk‑label locations.
3) Disk‑Label / Volume‑Descriptor Region
- Contains a descriptor (often XML‑style) with the location of encrypted blocks, LVG identity (UUID matching the header), friendly names, and the membership list that defines which physical devices participate.
How Data Flows Between SSD and HDD
Fusion Drive’s magic is automatic tiering at the block level, controlled by Core Storage:
- Write intake: New writes land on the SSD first until it approaches a threshold; a small buffer (~4 GB) is typically reserved to absorb incoming data.
- Spill & balance: After the SSD nears full, fresh writes go to the HDD, while the system quietly demotes cold SSD blocks and promotes frequently read HDD blocks.
- Migration mechanics: Moves happen in 128 KB blocks, grouped as block chains (there can be millions). Rebalancing usually runs during idle windows to reduce performance impact.
- Heat‑based decisions: If a once‑cold file becomes popular again, its blocks are moved back up to the SSD tier.
Capacity Mix by Model Year (Typical Ranges)
Fusion builds have varied over time, but common combinations include:
- Earlier iMac/Mac mini (≈2012–mid‑2015): 128 GB flash + 1 TB or 3 TB HDD
- Later configurations: flash tiers commonly ranged 24–128 GB with 1–3 TB HDDs
Apple favored smaller SSD tiers to keep costs down while still delivering a noticeable speed boost for everyday workflows.
Fusion vs. “Hybrid” (SSHD) Drives
Don’t confuse Fusion with consumer hybrid/SSHD designs:
- Hybrid/SSHD: Flash acts as a cache layered over an HDD; most data lives on the hard drive and a controller mirrors only small, algorithmically chosen portions to flash.
- Fusion (Core Storage): A single, unified logical volume with persistent block placement across two real devices. macOS actively tiers blocks based on real usage—not just caching them.
- Much faster than HDD‑only Macs for booting, app launches, and opening frequently used files
- Single, easy‑to‑manage volume—no manual juggling of “fast” and “large” drives
- Excellent cost‑to‑capacity balance in the 1–3 TB range
🙅 Limitations
- Not as fast as pure SSD, especially for large, older, or infrequently used files that sit on the HDD tier
- Historically limited to iMac and Mac mini configurations; Apple’s newer systems skew toward all‑flash
- Two points of failure: if either the SSD or HDD dies or is disconnected, the unified volume can break and data loss risk rises
1) Finder shows two separate disks instead of one Fusion volume
👀 What you’ll see: The SSD and HDD appear as independent drives.
🔎 What it means: The pair has de‑fused (the members are no longer linked as a single logical volume). This often follows incorrect use of disk utilities, software bugs, or replacement of one member. In this state, the data is effectively unreadable as a coherent volume.
2) The Mac won’t boot from the Fusion Drive
👀 What you’ll see: One member has failed. HDDs tend to fail abruptly; SSDs often degrade more gradually and may throw SMART alerts, I/O errors, or write failures first.
🔎 What it means: Even if only one device dies, the entire logical volume becomes inaccessible; the intact member can’t stand in for the missing half.
3) Partitions or volumes go missing
👀 Common triggers: Filesystem corruption from power loss, OS crashes, buggy updates, or risky use of disk management tools.
🔎 Risk: Rebuild/repair attempts on a marginal disk can worsen logical damage.
4) Bad sectors on the hard drive
👀 Symptom: Slow reads, clicking, I/O errors, or repeated stalls.
🔎 Danger: Running Disk Utility repairs or third‑party “fixers” on a disk with physical defects can convert a recoverable case into permanent loss.
Apple Core Storage: The Complete Guide
Why Core Storage Drives Are Different
Core Storage is Apple’s logical volume manager (similar in spirit to Linux LVM). Instead of binding a file system to a single, rigid partition, Core Storage inserts a virtualization layer that lets macOS manage space more flexibly.
- They’re virtualized. Your “disk” is a logical volume backed by an LVG that can span one or more devices. That abstraction introduces extra metadata layers you won’t find on plain HFS+ partitions.
- They’re encryption‑aware. LVFs carry FileVault properties and key info, so encryption is baked into the storage stack rather than bolted on as a file‑based wrapper.
- They can be multi‑device (Fusion). A single logical volume may rely on two physical devices working in concert; unplug or fail one, and the whole LV can go offline.
Why Core Storage Drive Recovery Is Different
Recovering data from Core Storage isn’t the same as pulling files from a single HFS+ partition:
- You need every member device. The LVG’s layout and user data are spread across its PVs; missing any PV (e.g., the HDD of a Fusion set) usually sinks the volume.
- Metadata is critical. Core Storage stores essential, sometimes encrypted, metadata near the end of each device. If that metadata is damaged, reconstruction gets very hard.
- Encryption raises the stakes. Without the proper keys (password, recovery key, or the expected metadata such as the EncryptedRoot.plist.wipekey on older systems), you can’t decrypt the LV—even if you can assemble the group.
When Core Storage Full Recovery Is Unlikely
- One device in a Fusion pair is missing or dead. Because the logical volume spans both SSD and HDD, losing either typically prevents full recovery.
- Core Storage metadata is corrupted or erased. If the end‑of‑disk metadata areas (or the group’s GUIDs) are gone, the LVG may not be reconstructable.
- Encryption context is unavailable. If the EncryptedRoot.plist.wipekey (older setups) or equivalent LVF encryption context can’t be accessed, blocks remain unreadable.
Traditionally, a partition map carves a disk into discrete regions (“partitions”), and each partition gets its own file system. It’s simple and predictable—but rigid. A logical volume manager, by contrast, lets the operating system allocate space dynamically and even build a single logical volume out of multiple physical devices.
Core Storage originally shipped to enable two headline features:
- FileVault 2 – true full‑disk, block‑level encryption for your Mac.
- Fusion Drive – a tiered setup that blends an SSD’s speed with an HDD’s capacity.
How Core Storage Organizes Data
Core Storage uses four object types, each identified by a UUID. The names are Apple‑specific, but the concepts will feel familiar if you know LVM.
- Physical Volume (PV): The raw building block. This is usually a real disk (HDD/SSD), but it can also be a disk image or a member of an AppleRAID set. To participate, the device is typically partitioned with GUID Partition Table (GPT) and has its own GUID. Each PV stores small bits of metadata about the group it belongs to.
- Logical Volume Group (LVG): A storage pool formed by one or more PVs. The LVG is where logical volumes live and from which they draw capacity. In many setups, you’ll see a single logical volume that spans the sum of all PVs.
- Logical Volume Family (LVF): An Apple‑specific container for shared properties—most notably encryption settings—that apply to one or more logical volumes inside the LVG.
- Logical Volume (LV): The virtual device that receives a file system (historically HFS+) and mounts in Finder. From the user’s perspective, the LV looks and behaves like any other volume.
Core Storage Data Organization: Layout, Metadata & Behavior
FileVault 2 (block‑level full‑disk encryption)
Prior to Lion, FileVault encrypted user data within files. Core Storage moved encryption to the block layer. When you unlock an encrypted disk, Core Storage exposes a decrypted logical volume you can mount. The keys and encryption context live in Core Storage metadata, which is why losing that metadata (or the relevant key files) can make decryption impossible.
A simplified example you might see in Terminal:
/dev/disk0— the physical device/dev/disk0s3— the Core Storage Physical Volume that stores encrypted content and is a member of the LVG/dev/disk1— the Logical Volume presented after you unlock and decrypt
Fusion Drive (SSD + HDD, presented as one)
A typical Fusion setup looks like:
dev/disk0— the SSD (a PV in the LVG)dev/disk1— the HDD (another PV in the LVG)dev/disk2— the LV spanning both devices
The SSD is marked primary, so frequently accessed data gravitates to flash in roughly 128 KB chunks; colder data flows back to the HDD. Under the hood, Core Storage uses internal routines (historically surfaced as names like RdChunkCS, WrChunkCS, WrBgMigCS, and RdBgMigrCs) to migrate those chunks without user involvement. You get SSD‑like responsiveness with hard‑drive capacity, all through one logical volume.
- Enabled in‑place full‑disk encryption (FileVault 2)
- Made Fusion Drive tiering transparent to the user
- Was generally fast and dependable for HFS+ volumes
🙅 Limitations
- No thin provisioning: Unlike Linux LVM, Core Storage never added thin pools.
- Limited online resizing: While diskutil cs offers resize options, they’re poorly documented and carry real data‑loss risk.
- GUI gaps: Disk Utility exposes very little of the Core Storage layout; meaningful operations typically require Terminal.
- No APFS support: On High Sierra and later (Mojave for Fusion Drives), upgrades move you to APFS containers instead of maintaining Core Storage.
- No fault tolerance: Core Storage doesn’t provide redundancy. In multi‑device layouts (e.g., Fusion), each member is part of one inseparable whole. If a member device is absent or dead, the logical volume can’t be mounted as‑is.
Automated Fusion Drive Recovery With Disk Drill for macOS
Step 1. Get both members online
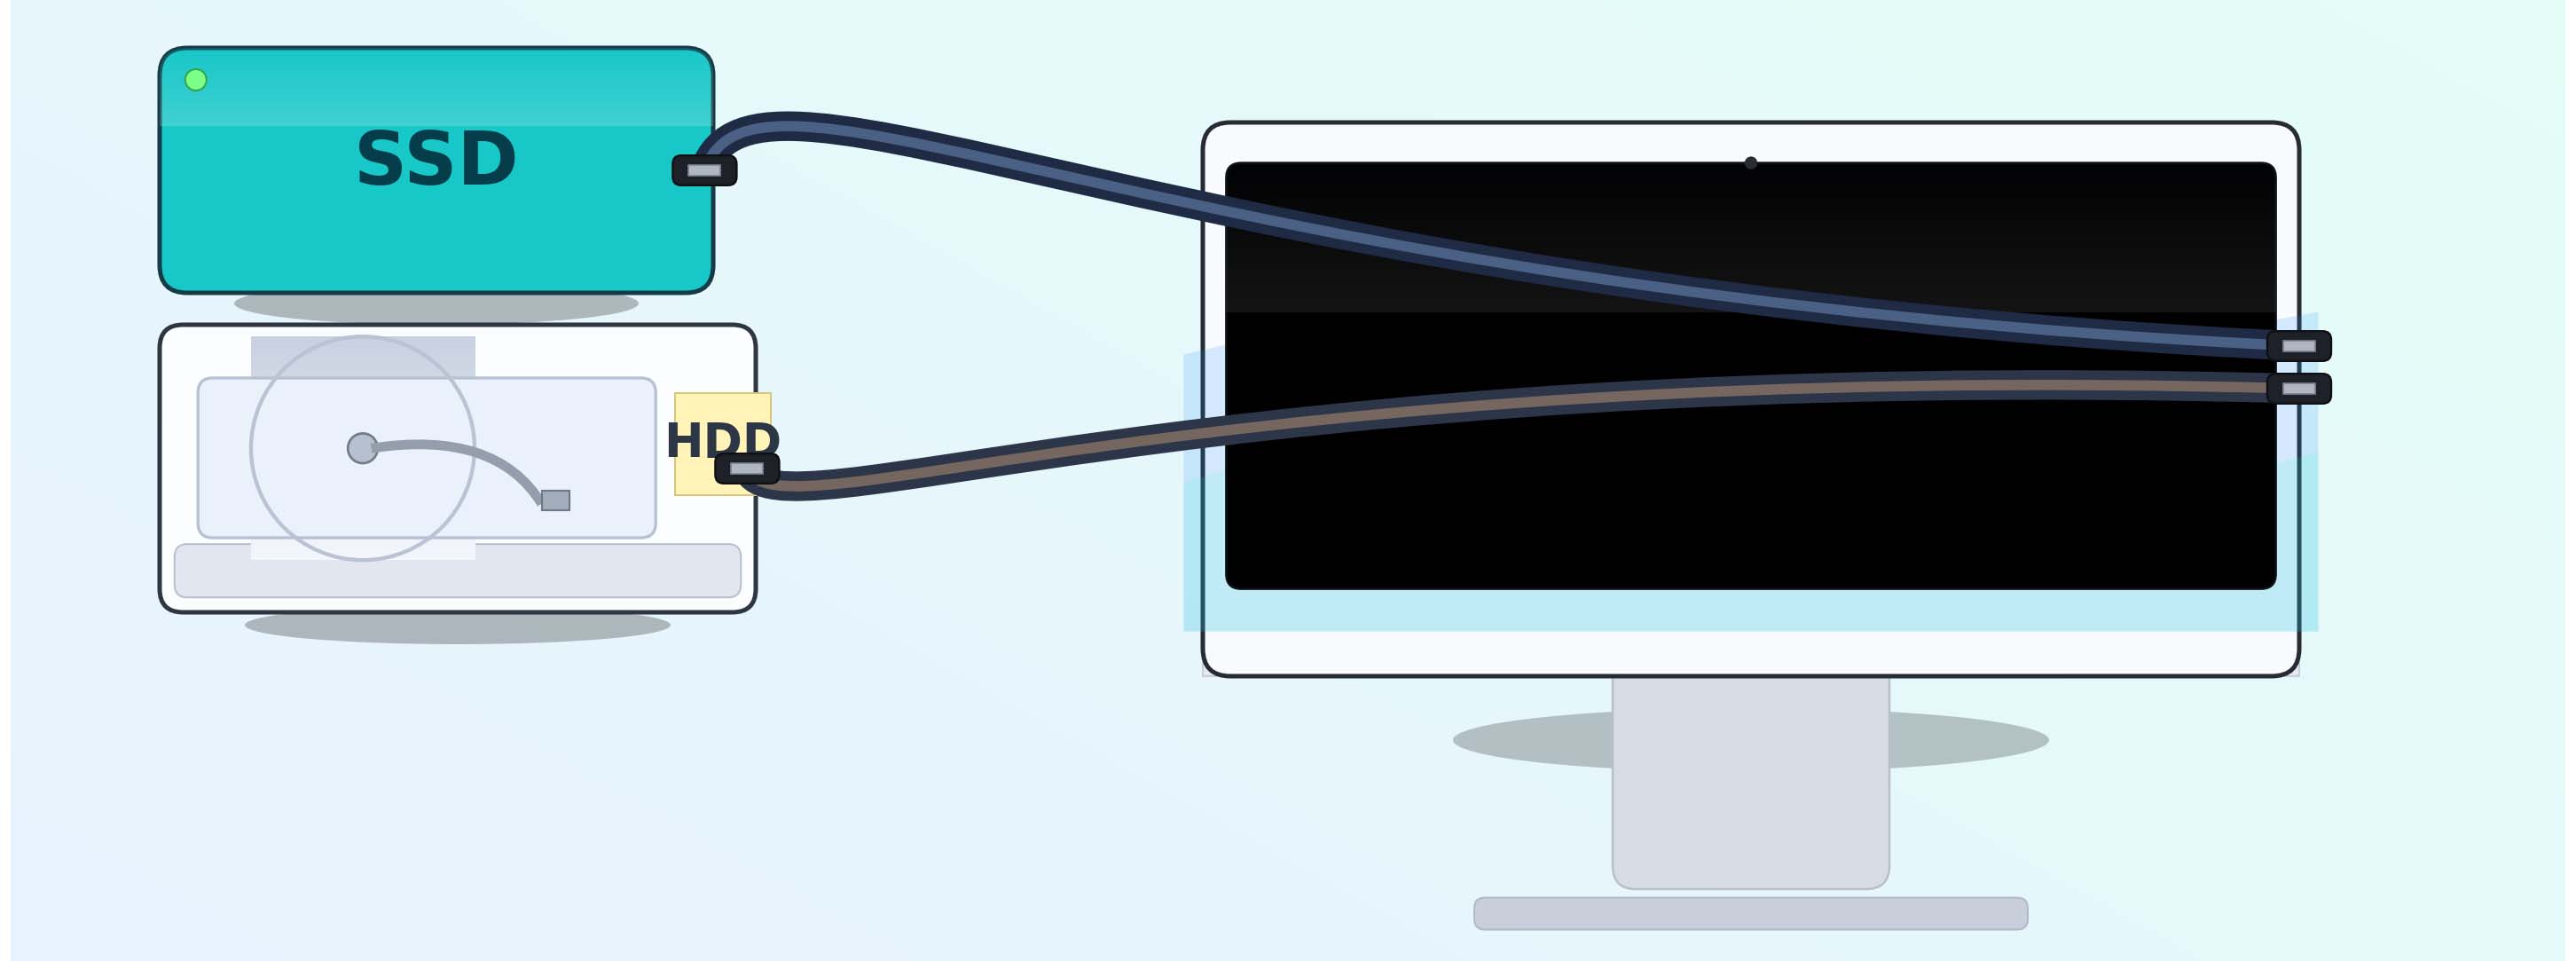
- If the Mac still boots, install and open Disk Drill there.
- If it doesn’t boot, connect the Fusion members to another Mac using Target Disk Mode or USB/SATA adapters.
- You should have two devices available: the SSD (fast tier) and the HDD (capacity tier).
Step 2. Launch Disk Drill
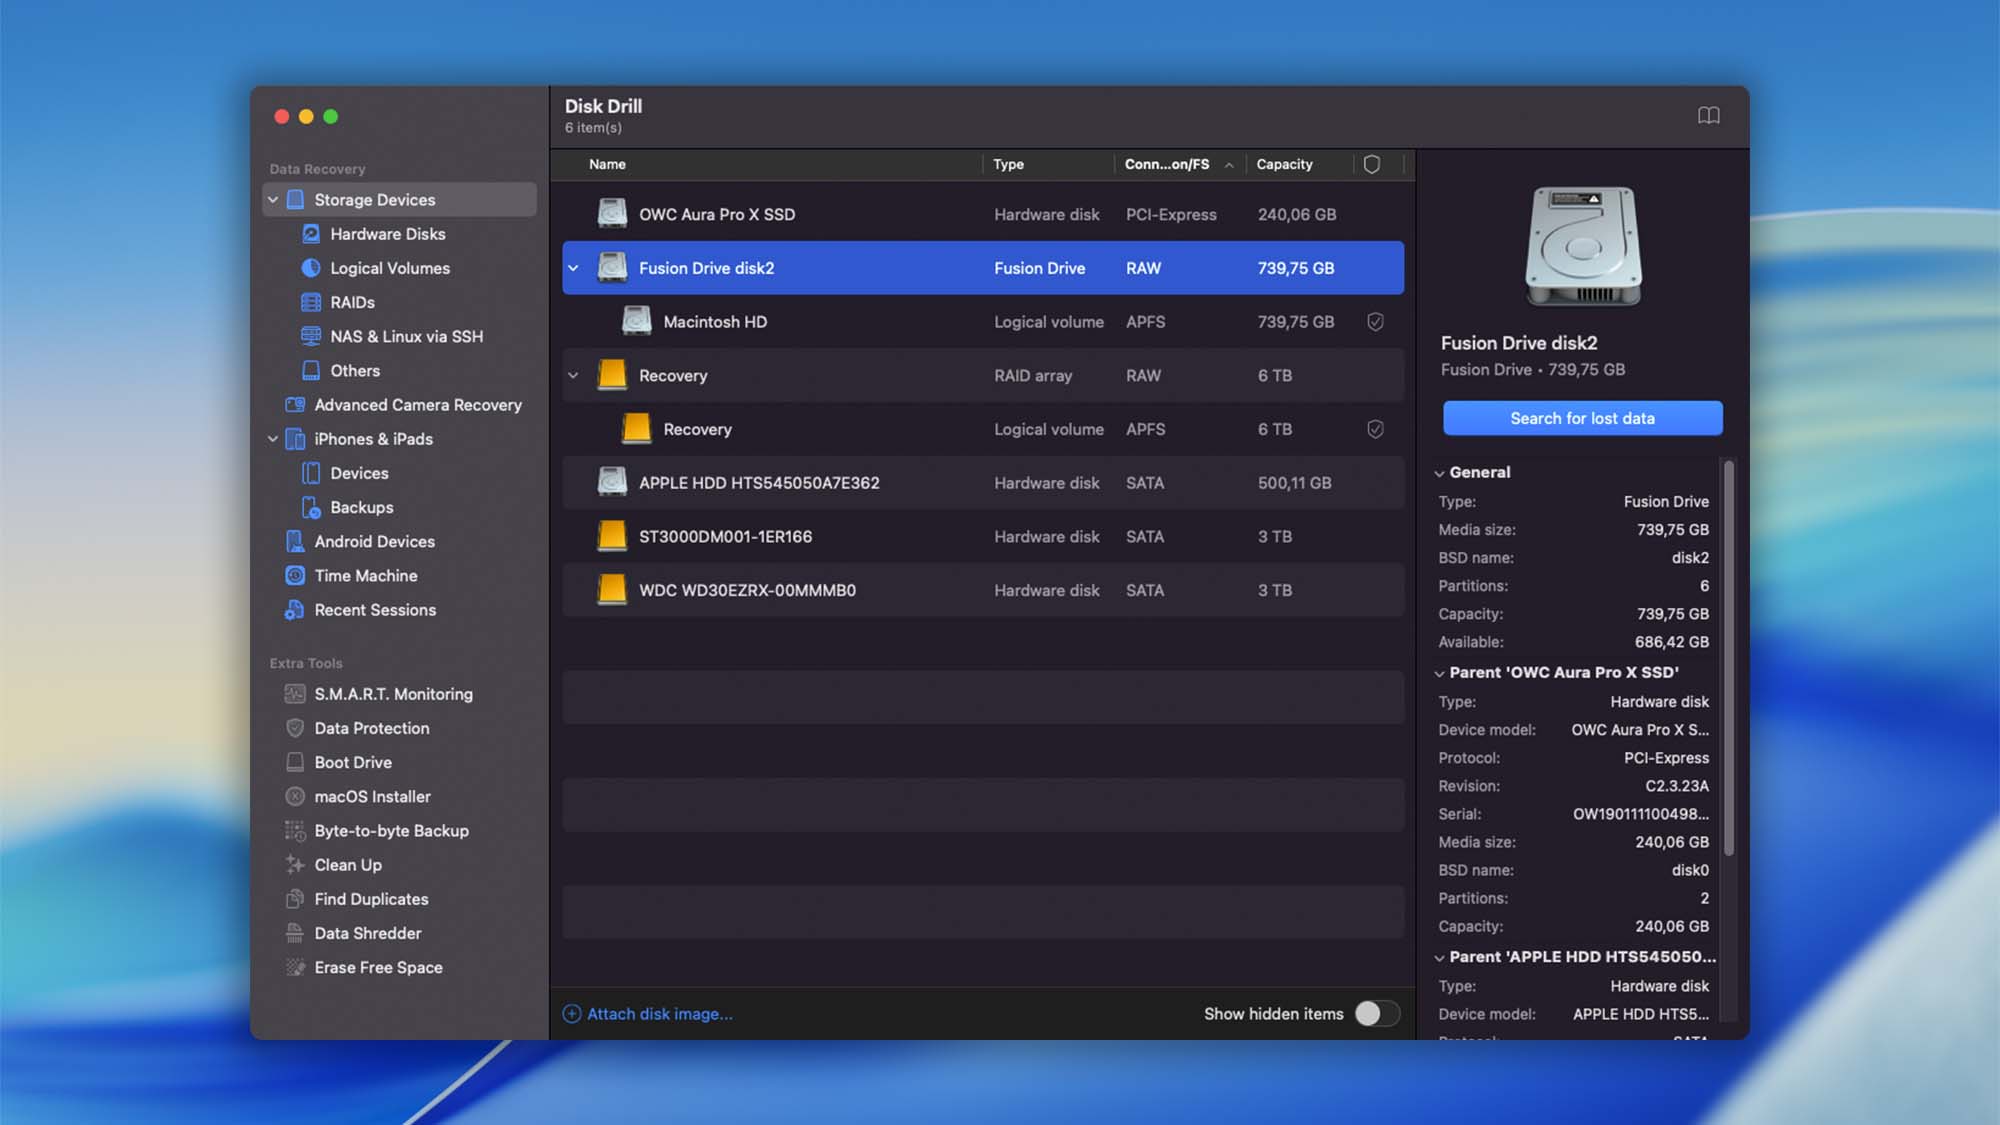
Open Disk Drill. On the device list, wait a moment: Disk Drill will automatically detect and virtually assemble the Fusion set (Core Storage or APFS) into a single scan target.
- You’ll typically see an “Fusion Drive Disk[number]” (for newer Fusion) or a Core Storage / Logical Volume (for older Fusion).
- Select the unified entry, not the raw physical disks.
Step 3. Start an all‑in‑one scan

Click Search for lost data. Disk Drill will:
- Use available metadata to rebuild the file/folder view when possible.
- Fall back to content‑aware (signature) scanning where metadata is missing or damaged.
Step 4. Unlock if encrypted (when prompted)
If FileVault was enabled, Disk Drill will ask for the password or recovery key. Without valid credentials, encrypted blocks cannot be interpreted.
Step 5. Review results as they appear
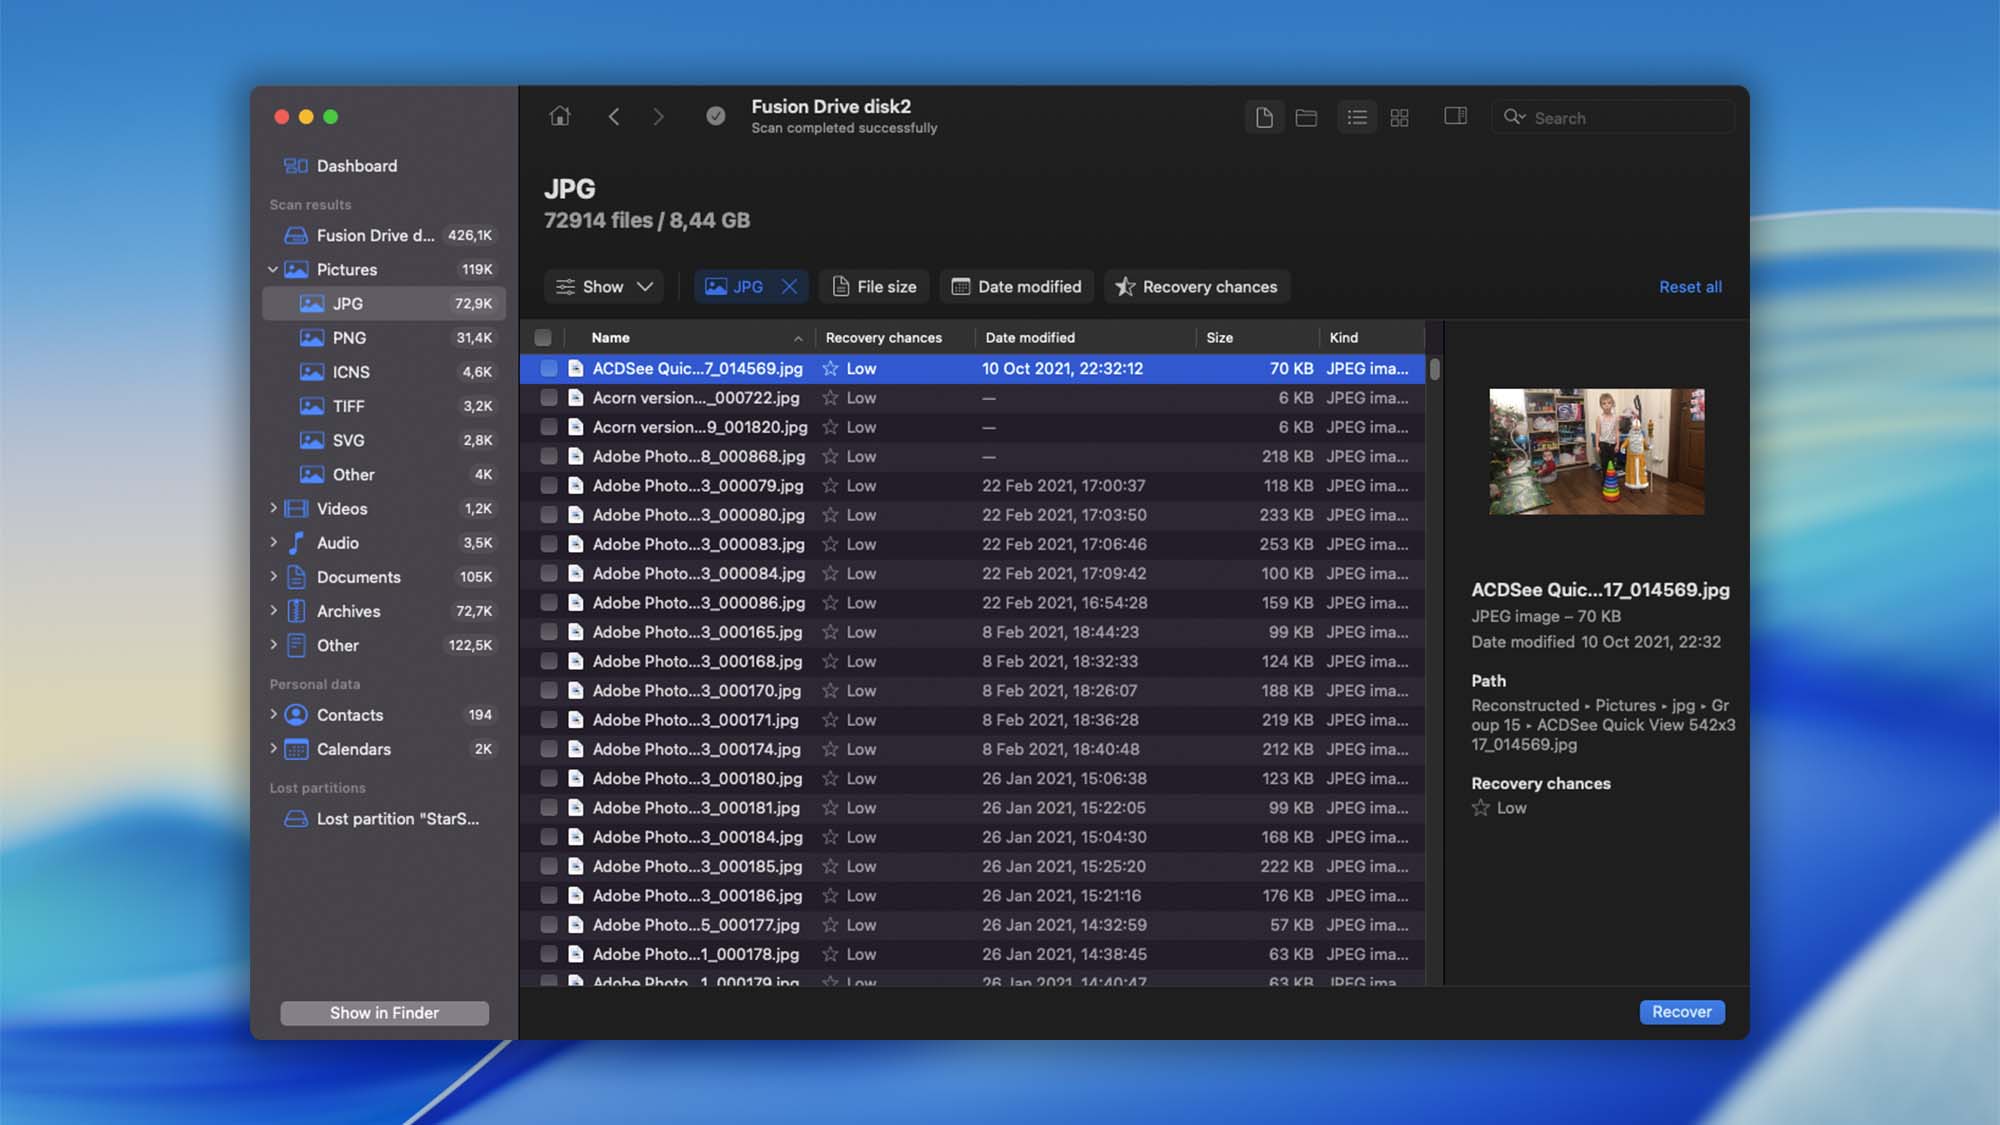
- Use filters (type, date, size) and preview files to verify integrity.
- Expect some fragmentation on long‑lived Fusion systems; it’s normal for large files to have pieces on both tiers.
Step 6. Recover to a safe location
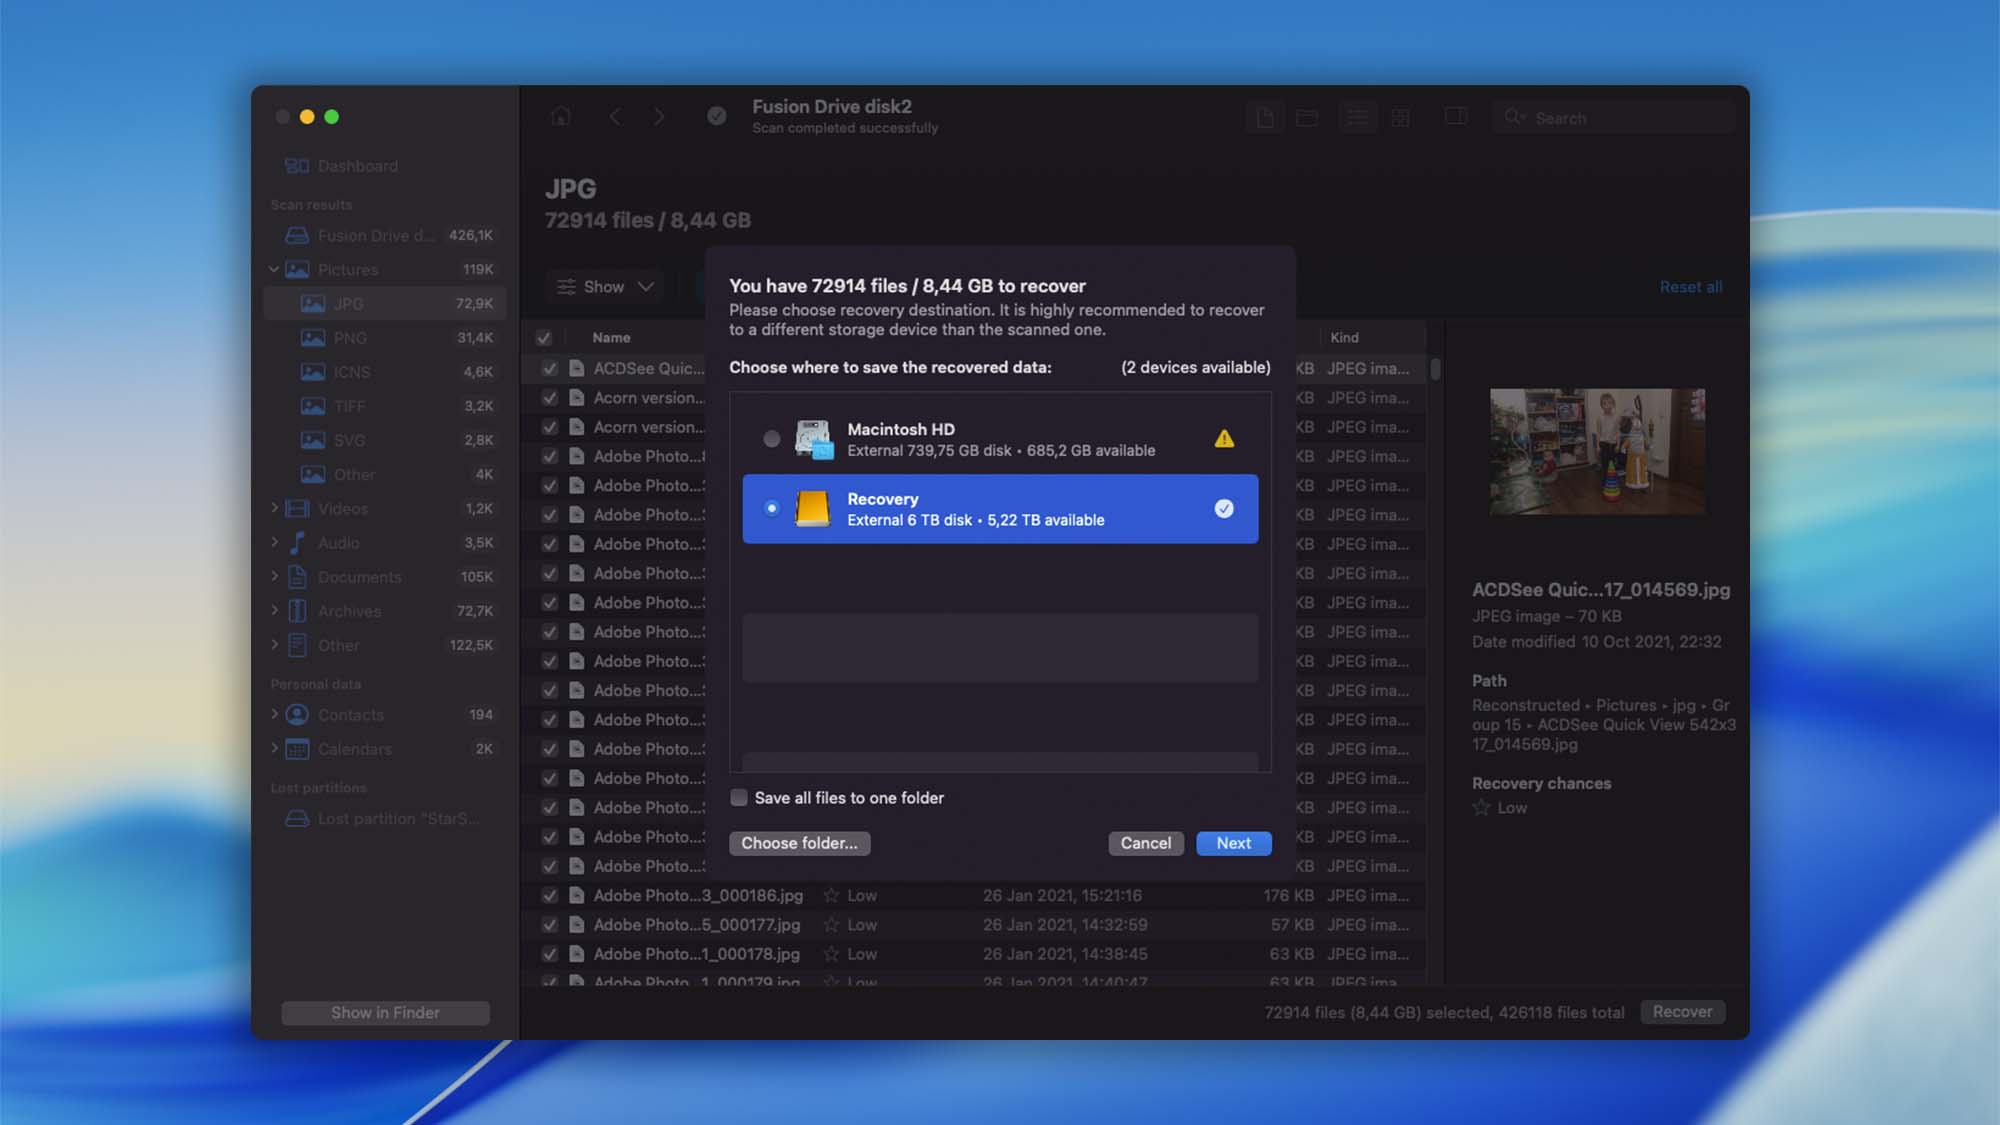
- Click Recover and choose a destination that is not either Fusion member (e.g., an external drive).
- Save and verify your recovered files.
FAQ
No. Disk Drill automatically recognizes and virtually assembles Fusion sets (both Core Storage and APFS) when both members are present.
- Verify connections. Check cables/ports and make sure both the SSD and HDD are visible in Disk Utility (or via diskutil list). If you’re using enclosures, confirm they’re powered.
- If a drive is unstable, image first. Create 1:1 (byte‑to‑byte) images of both Fusion members, mount those images read‑only, then reopen Disk Drill. It will try to auto‑assemble the Fusion set from the mounted images.
- If it still doesn’t appear, scan separately. This usually means the Fusion metadata is missing or badly damaged. Scan each member (or their images) separately. Expect limited results—directory structure may be absent and large files can be incomplete.
Tip: Avoid erasing, initializing, or running repairs on the source drives. If the data is mission‑critical, consider a professional recovery service.
Fusion systems are highly fragmented. If one member has unreadable regions or is missing, some files will be partial even if previews succeed.
Important note about TRIM on SSDs: When TRIM is enabled, macOS tells the SSD which blocks are free; the SSD may then erase those blocks internally. If part of a deleted file was on the SSD and has been trimmed, that portion is typically unrecoverable.