The technology behind a good computer operating system never stands still. Apple and Microsoft, the architects behind the two most popular operating systems, are constantly making major and minor upgrades to their products. These upgrades provide new features for users and improve the efficiency of the operating system’s internal routines.
 In this article, we are going to take a look at the latest iteration of macOS which is named Mojave. We will investigate why you will want to upgrade to this new version if you use Apple computers. Since operating system upgrades always hold the potential for unexpected behavior of your machine, we will show you how Disk Drill can be an indispensable tool to have when performing a system upgrade.
The History of macOS
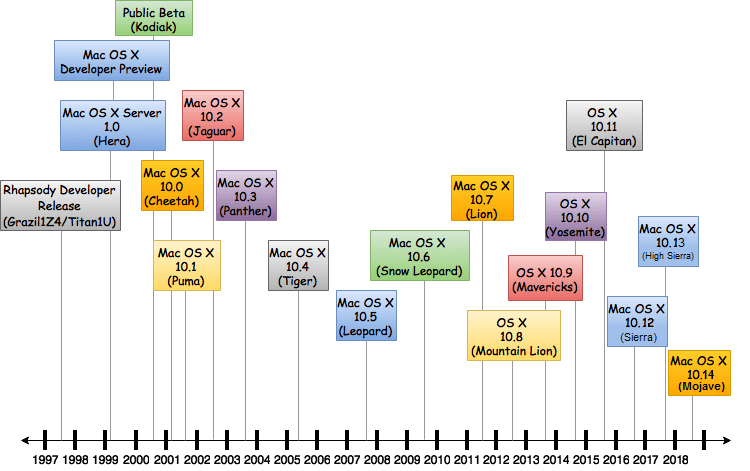
The first version of Apple’s Mac OS X was released on March 24, 2001. Building on top of a Unix-based architecture, the operating system has become widely popular for its clean interface, ease of use, and advanced security and functionality. Apple has chosen to creatively name their operating systems rather than simply appending a version number. Here’s a quick overview of the evolution of Mac OS X through its most recent offering named Mojave.
2001-2002
Released March 24, 2001, Cheetah was the first version of the Mac OS X which was a major departure from Apple’s previous operating systems. It featured the Aqua User Interface and introduced the dock and new apps like Mail and Address Book. It was followed in September of 2001 by Puma and in August 2002 by OS X 10.2 named Jaguar.
2003-2009
Panther or OS X 10.3 was released on October 24, 2003. Apple dropped support for Internet Explorer making Safari its default web browser and added FileVault to encrypt hard drives. Tiger became available in April 2005 and was the longest-running Apple OS, lasting for 30 months before being passed by Leopard on October 26, 2007. Leopard was the debut OS for Time Machine, Boot Camp, and multi-touch gestures. In August 2009, a more efficient version named Snow Leopard was released.
2011
OS X 10.7 which was named Lion came next in July of 2011. It incorporated developments made in IOS like the Launchpad. Mountain Lion was released a year later and was the last OS to be named after an animal. It featured Gatekeeper to limit apps to those available through the App store or other specific developers.
2014-2015
Mavericks, named after a popular surfing location in Apple’s home state of California continued the app integration from mobile systems with iBooks and Maps. October 2014 saw OS X 10.10. Named Yosemite, it featured a radical user interface redesign. OS X El Capitan was released in September 2015. Among its features was Split Screen allowing two apps to be viewed side-by-side.
2016-2017
Naming conventions again changed with the next Apple OS upgrade. Named macOS Sierra, this new OS was made available in September of 2016. It brought the voice-activated assistant Siri to the Mac desktop. High Sierra, introduced in the fall of 2017 delivered the new Apple File System (APFS) for enhanced performance as well as an improved Siri and message syncing with iCloud.
2018
Which brings us to Mojave, the newest entry in the continuously evolving operating systems from Apple. It is currently available for download as a beta version with the official release slated for the fall of 2018. It should run on most Macs manufactured after 2012 and may work on earlier models as well.
Why Would You Want to Upgrade to Mojave?
As with all operating system upgrades, there are some questions to consider before going through with the procedure.
- You need to ensure that your hardware can handle any new requirements of the OS.
- If you have proprietary or custom written software you may need to ensure compatibility before upgrading.
- You may have to obtain updates of commercial software in order to be compatible with a new operating system.
These are issues that vary from user to user but need to be addressed when considering an operating system upgrade.
Assuming that you have verified that an upgrade won’t break anything, the next consideration is if the features offered by the upgrade are worth the time required to perform the installation. In some cases, you may skip some upgrades that do not offer enough differences to warrant the effort. Let’s look at what improvements you can expect if you install macOS Mojave on your machine.
- Security – Privacy is enhanced in the Safari browser which promises to block ad trackers. Mojave also offers increased security by extending permissions throughout various aspects of your system such as Time Machine backups, Mail database, and system camera.
- Dark mode – In Mojave, you can put your entire desktop and the apps running on it into dark mode. This can be useful to make photos stand out and to help relieve eye-strain for users.
- Dynamic desktop – This cosmetic feature changes the lighting on certain wallpapers throughout the day to mimic the time of day.
- Continuity Camera – This feature integrates your iPhone’s camera with your Mac making it easy to add photos to documents on your system.
- New App Store – The App Store has been redesigned and offers a wider selection of applications for your Mac.
- Screenshot tool – Improved to allow recording parts of your screen and offers sharing options.
- Stacks – Files on your desktop are automatically organized by the stacks feature of Mojave.
- Gallery view – The new Finder view that is great for browsing photos.
- iOS apps – Four iOS apps move to the desktop: News, Voice Memo, Stocks, and Home.
- Group FaceTime – Multi-person chats with up to 32 users are supported. Though it might not be available immediately after the public release of the new macOS.
As you can see, there are a number of reasons that you might want to go ahead and upgrade your operating system, not the least of which is the heightened attention to privacy and security.
Is Disk Drill Ready for macOS Mojave?
Absolutely, the release of Disk Drill 4 for Mac is totally compatible. Please note: Disk Drill 4 is the last version that works with Mojave. To install a newer version of Disk Drill and get the latest improvements, you’ll need to upgrade your macOS.
How to Upgrade to macOS Mojave
#1 – Consider Potential Problems with Operating System Upgrades
Upgrades to operating systems are designed to go smoothly but can often run into problems that can impact your system and its data. Some of the most common issues you might experience during or after an upgrade are:
- Incomplete or failed upgrade – This can be caused by lack of hardware resources such as storage space or memory capacity.
- Performance issues – Your upgrade may complete successfully but leave you with a machine that is not performing as it was before the new OS was installed.
- Data loss – There is always the potential for data loss when upgrading your system. In a worst-case scenario, you may be forced to re-install an operating system and reformat your drives. This could have catastrophic consequences if your data was not adequately protected.
Problems after an upgrade can necessitate data recovery to return your system to its full functionality and recover all of your precious data.
The CleverFiles team constantly sees an increase in requests to our tech team during macOS public updates. a proper backup system is always helpful. Our clients are already reporting issues like lost APFS containers on top of Fusion Drives forcefully (or silently) converted to APFS by the Mojave Beta. We are also hearing more and more about unbootable Macs after Mojave installations and we are working closely with the reporters on improving Disk Drill to handle such cases reliably.
Rumors are surfacing on possible hardware limitations for data recovery experts on Mojave. This adds to the overall stress about major releases and inevitable change to familiar routines among common users.
Still, while all these issues are quite possible and have to be well-considered, the actual percentage of flawed upgrades is not that high. And also, we all know it, upgrades are inevitable.
#2 – Protect Your System During Upgrades with Disk Drill
Disk Drill is an essential Mojave data recovery tool that you should use when upgrading your OS. It is a feature-rich application that can help protect your system before and after the upgrade. It is fully compatible with the new Apple OS and is constantly undergoing updates to increase its functionality when used with Mojave.
Planning is essential for a successful upgrade and the first step should be to have Disk Drill installed on your system. Download it from www.cleverfiles.com and install the application. It can protect your data in various ways.
Installing Disk Drill before your upgrade lets you take advantage of data protection feature called Guaranteed Recovery. Here’s what it does:
- Guaranteed Recovery – Saves invisible copies of files sent to Trash making them available for recovery through Disk Drill.
These two features can make your life much easier if you ever need to recover inadvertently deleted or lost data. Since the potential exists that you may face this situation after your OS upgrade, activating these file protection elements of Disk Drill is a precaution you definitely should consider taking.
#3 – In Case of Data Loss, Be Ready
If you are subject to actual data loss during an upgrade to Mojave, Disk Drill can help even if you have not activated Guaranteed Recovery. It is fully compatible with encrypted APFS and Fusion drives. Disk Drill scans your storage devices safely in read-only mode to prevent further data loss and can be used on any peripheral or internal drives. It is an economical alternative to data recovery services, and a free download lets you preview the data recovery that the tool will be able to perform.
You have four options:
- Enable Disk Drill’s kernel extension
- Reconfigure your file system protection.
- Run Disk Drill in macOS Recovery Mode
- Use your Mac in Target Disk Mode.
Disk Drill’s developers are committed to keeping up with Apple’s upgrades and ensuring that it is the best data recovery tool for Mojave and all Mac users.
#4 – Install the Beta Version of macOS Mojave
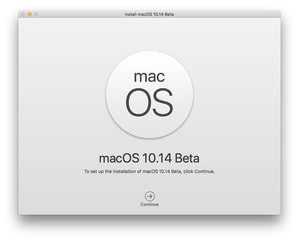
To Install the Beta Version follow these steps:
- Join the Apple Beta Software Program
- Download macOS Mojave public beta access utility.
- Download and install the Mojave beta on a selected drive or partition.
If you are searching for information on how to try the beta version of the OS and some professional recommendations for the process, try these links:
Downloading Mojave Beta version
Installing the Mojave Public Beta
Should You Upgrade to Mojave?
The decision to upgrade your operating system should be done after some consideration as to the benefits afforded by the OS versus any potential problems or compatibility issues you may encounter after the upgrade. Even if you do not need most of the new features of the OS, the security and privacy enhancements mean you probably should upgrade to Mojave.
To help you decide if Mojave is right for you, try visiting some of these sites that provide some macOS Mojave FAQs.
The bottom line is that the added security and features of Mojave will influence you in the direction of upgrading your system at some point. Take the extra step and be prepared by having Disk Drill in your toolbox before you get started.