APFS snapshots are one of the most important “quiet” features in modern macOS. They help Time Machine recover earlier versions of files, make macOS updates safer, and can even give recovery tools a point‑in‑time view of your data.
This guide explains what APFS snapshots are, how they work under the hood, how to view/manage them, and how to restore or recover files using built‑in macOS tools and Disk Drill.
Advantages of APFS
Apple introduced the Apple File System (APFS) at their developers’ conference in 2016. It replaced the aging HFS+ file system which had been used since 1998. It became the default file system for iOS 10.3 in March of 2017. Starting with High Sierra, macOS 10.13, it replaced HFS+ on Macs.
There are a number of features that make APFS a superior file system to its predecessors. Among them are:
- Snapshots — Create point-in-time and read-only instance of the file system.
- Clones — This feature allows efficient file copying that eliminates the need for additional storage space.
- Encryption — Full disk and file encryption are supported in APFS.
- Crash protection — Protects from system crashes by avoiding metadata corruption.
- Increased maximum number of files — You can now have up to 9 quintillion files resident on a volume.
We are going to focus on APFS snapshots and show you how an understanding of them can help you manage your computer.
What is an APFS Snapshot?
A feature of APFS that is particularly useful is the ability to create point-in-time snapshots of your file system. One of the most beneficial uses of snapshots is to produce backup points that would enable you to restore your machine to the state it was in at the time of the snapshot.
An APFS snapshot is a read‑only, point‑in‑time representation of an APFS volume. Think of it as freezing the volume’s state at an exact moment—without duplicating the entire drive like a traditional clone.
Snapshots are powered by APFS’s copy‑on‑write (CoW) design:
- Existing blocks are not overwritten in place.
- When data changes, APFS writes new blocks and updates metadata to point to them.
- A snapshot “pins” older metadata + block references so the system can still see the volume exactly as it was.
This is why snapshots can be created quickly and usually start small, but can grow as more data changes after the snapshot is taken.
macOS Updates and Automatic Snapshots
Apple automatically creates an APFS snapshot as part of the system upgrade process. They instituted this procedure starting with upgrades to macOS High Sierra. It enables you to recover from a faulty upgrade or simply return to a previous version of the OS. Your drive needs to be formatted with APFS in order for the snapshot to be created.
When you choose to install a new version of the macOS, system creates a snapshot in the background before modifying system files. A read-only APFS snapshot of the system volume is created using copy-on-write technology.
Apple does not publicly document every update type that triggers an automatic snapshot, though most system-level macOS updates and upgrades do. You may want to be proactive and create manual snapshots, either before an update or as an extra level of protection for your system. Let’s look at how to create a snapshot on demand.
Where Snapshots Show Up on a Modern Mac
In 2025-era macOS, snapshots commonly appear in three places:
A) Time Machine Local Snapshots (Most Common)
If you have Time Machine enabled (especially Back Up Automatically), macOS saves local snapshots on your internal startup disk so you can recover previous versions of files even when your backup drive isn’t connected.
B) Macos System/Update Snapshots (Signed System Volume)
Modern macOS uses a Signed System Volume (SSV) for the System volume, and APFS snapshots play a role in safer OS updates and rollbacks. Apple explicitly notes that SSV uses APFS snapshots to allow restoration of the prior system if an update can’t be completed.
Also, on macOS 11+ the OS can boot from a snapshot of the System volume, not just a read-only mount of it.
C) Third‑party Snapshots (Backup/Clone Tools)
Some backup tools can create their own APFS snapshots for versioning. These snapshots are still “real” APFS snapshots, so they’ll show up in snapshot lists right alongside Time Machine and system snapshots.
How APFS Snapshots Work (Deep Technical View)
- Copy‑on‑write and block sharing. APFS snapshots are reference-based, not “duplicate folders.” The snapshot and the live filesystem share blocks until changes occur.
- If a file never changes after the snapshot, the snapshot uses almost no additional space for that file.
- If you edit a large file (or many files), the snapshot must keep references to the older blocks, so the snapshot’s space usage increases.
- Why deleted files may not free space right away. A common surprise: deleting a huge file may not immediately free disk space if one or more snapshots still reference that file’s old blocks. You removed the live reference—but snapshots can still “own” the blocks.
- How macOS treats snapshot storage. Apple notes that macOS counts snapshot space as “available storage” and manages it automatically, keeping snapshots only when there’s plenty of free space, and removing them as needed.
Disk Drill and Time Machine Snapshots
Disk Drill data recovery software is a comprehensive application that enables you to recover deleted files from your Mac and peripheral storage devices. The software engineers behind this recovery tool are currently hard at work on developing custom support of Time Machine Snapshots on APFS system drives that would significantly increase their value to the average Mac user.
This additional support for Time Machine Snapshots will make Disk Drill and the snapshots themselves more useful to Mac owners who want to protect their valuable data. Time Machine is great when you know what you want to restore and where it lived. But if you:
- don’t remember the exact location,
- need a more “recovery-style” search,
- want to scan snapshot points like a data recovery source,
Disk Drill can help.
Typical workflow (Disk Drill + Local Time Machine Snapshots)
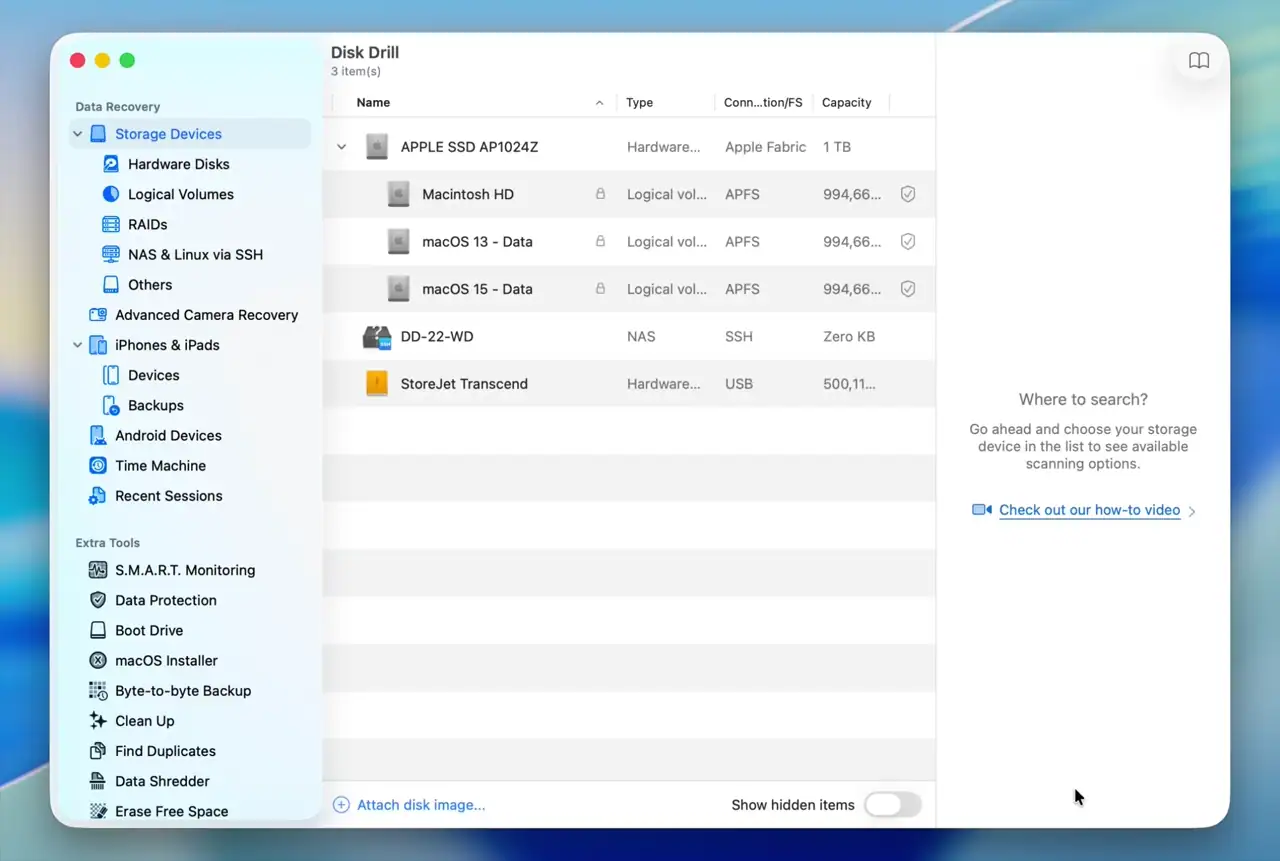
- In Disk Drill, select your “Macintosh HD” drive (your APFS startup disk), then right‑click it (or Control‑click on a trackpad/mouse).
- From the menu, choose the “Local TM Snapshots” (Local Time Machine Snapshots) scanning method.
- Pick a snapshot date/time from when you know the file still existed.
- Preview the found files, then recover them to a different destination drive (external disk or another volume)—not back to the same “Macintosh HD” volume.
Time Machine Local Snapshots in macOS
1. How Often are Local Snapshots Created?
Apple’s current guidance:
- Time Machine saves a snapshot of the startup disk about every hour.
- Snapshots are kept for 24 hours.
- macOS also keeps a snapshot of the last successful Time Machine backup until space is needed.
- And in macOS High Sierra or later, another snapshot is saved before installing any macOS update.
2. Requirements (Important)
Local snapshots are only stored on APFS disks, and Apple notes they’re tied to Time Machine being enabled (specifically Back Up Automatically).
3. What Local Snapshots are (and are not)
Local snapshots are great for:
- Restoring a file you edited or deleted recently,
- “Going back in time” for folders like Documents/Desktop,
- Quick point‑in‑time access without plugging in your backup disk.
Local snapshots are not a substitute for an external backup:
- If your internal SSD fails, local snapshots are gone too.
- If ransomware/malware or corruption affects the whole disk, local snapshots might not be a reliable long-term safety net.
Creating a Time Machine Snapshots manually (Terminal)
If you want to create a snapshot on demand (for example, right before installing a major app, driver, or update), you can do it from Terminal.
- Open Terminal (Applications → Utilities → Terminal)
- Run:
tmutil snapshot - Verify snapshots exist:
tmutil listlocalsnapshots /

You’ll typically see names that include timestamps (and many local snapshots are created/managed automatically by Time Machine).
Viewing and Deleting APFS Snapshots
Option A: Use Disk Utility (GUI)
Disk Utility now includes a snapshot browser:
- Open Disk Utility
- Choose View → Show APFS Snapshots
- Select a volume (for example, your Data volume)
- Snapshots appear in a table at the bottom
- Select the snapshot you want to remove, then click the minus (–) button to delete the APFS snapshot (confirm the deletion if prompted).
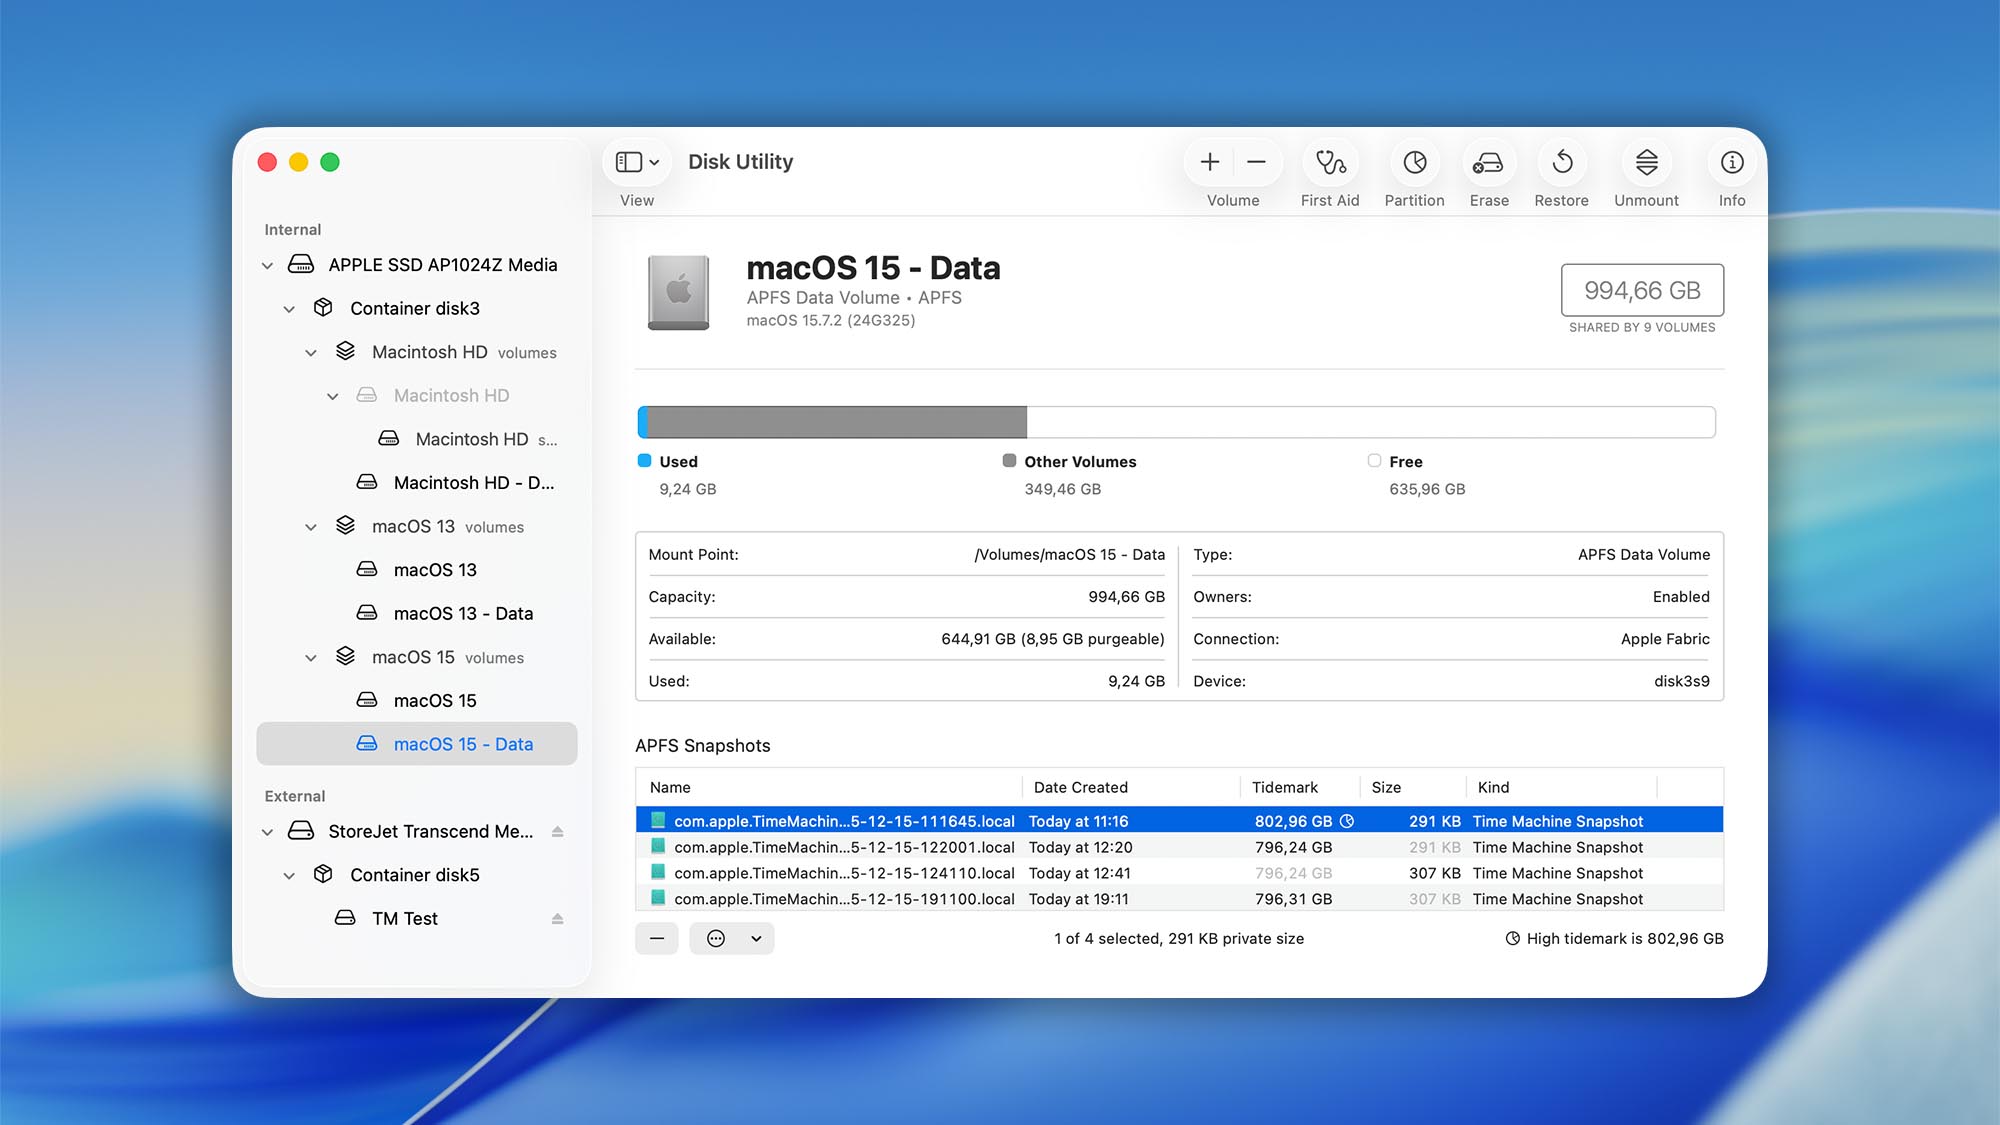
Apple notes Disk Utility can show columns like XID, UUID, Date Created, Tidemark, Private Size, Cumulative Size, and Kind.
Understanding Disk Utility’s Snapshot Size Columns
- Private Size: how much storage is unique to that snapshot (roughly the amount you’d reclaim by deleting it).
- Cumulative Size: how much storage is tied up by that snapshot plus older snapshots it depends on.
These numbers are extremely helpful when you’re troubleshooting “System Data” growth or mysteriously missing free space.
Option B: Use Terminal (Advanced)
Common commands include:
- List snapshots (Time Machine local snapshots):
tmutil listlocalsnapshots / - Delete a specific local snapshot (by date string):
sudo tmutil deletelocalsnapshots 2025-12-01-120102
If you’re working with snapshots shown in Disk Utility (UUID/XID), you may also use diskutil apfs snapshot verbs on a specific volume identifier. Because APFS tooling evolves, always check your exact syntax on your Mac:
diskutil apfs
diskutil apfs listSnapshots
diskutil apfs deleteSnapshot
FAQ
No. Snapshots are stored on the same disk and are typically short‑lived. A real Time Machine backup (external or network) protects you from disk failure and full-device loss.
Apple says about 24 hours, plus an additional snapshot of the last successful backup until space is needed, and another snapshot before installing a macOS update (High Sierra or later).
Yes—Disk Utility can show and delete APFS snapshots (View → Show APFS Snapshots).
Modern macOS relies on the Signed System Volume, and Apple explains APFS snapshots help make updates safer—allowing restoration of the prior system if an update fails.