Disk Drill for Mac includes a free duplicate file finder that helps you remove extra copies of photos, videos, documents, and other files. Scan folders on your Mac or an external drive, review the results, and choose which copies to remove.
1. Choose Your Scan and Removal Settings
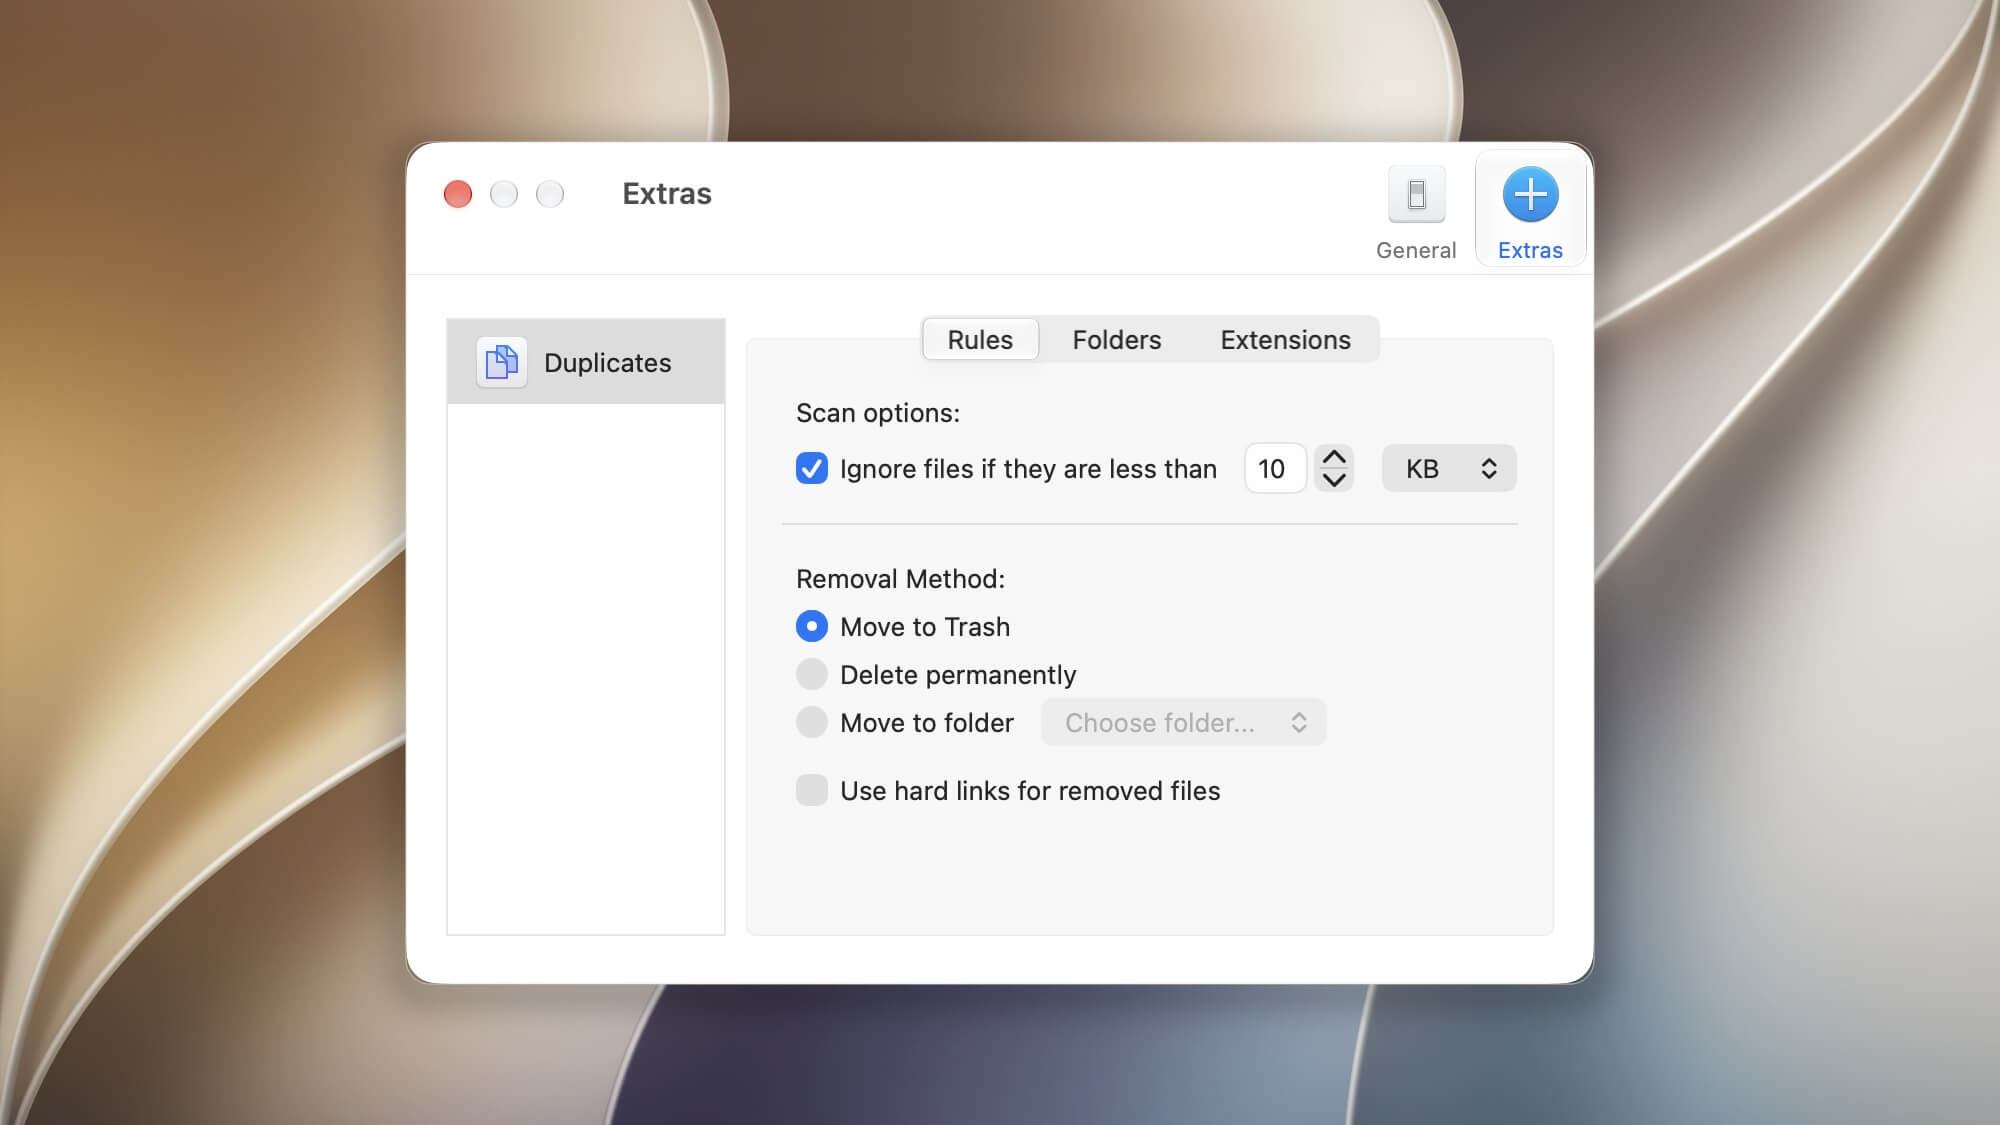
Open Disk Drill’s settings, then select Extras > Duplicates. Under Rules, you can skip files smaller than a size you specify, such as 10 KB, and choose a removal method:
- Move to Trash: Keep removed copies in the Trash so you can restore them if needed.
- Delete permanently: Remove selected copies without sending them to the Trash.
- Move to folder: Move selected copies to a folder you choose.
Choose Move to Trash if you want to check the remaining files before deleting the extra copies permanently.
2. Add Folders and Start the Scan
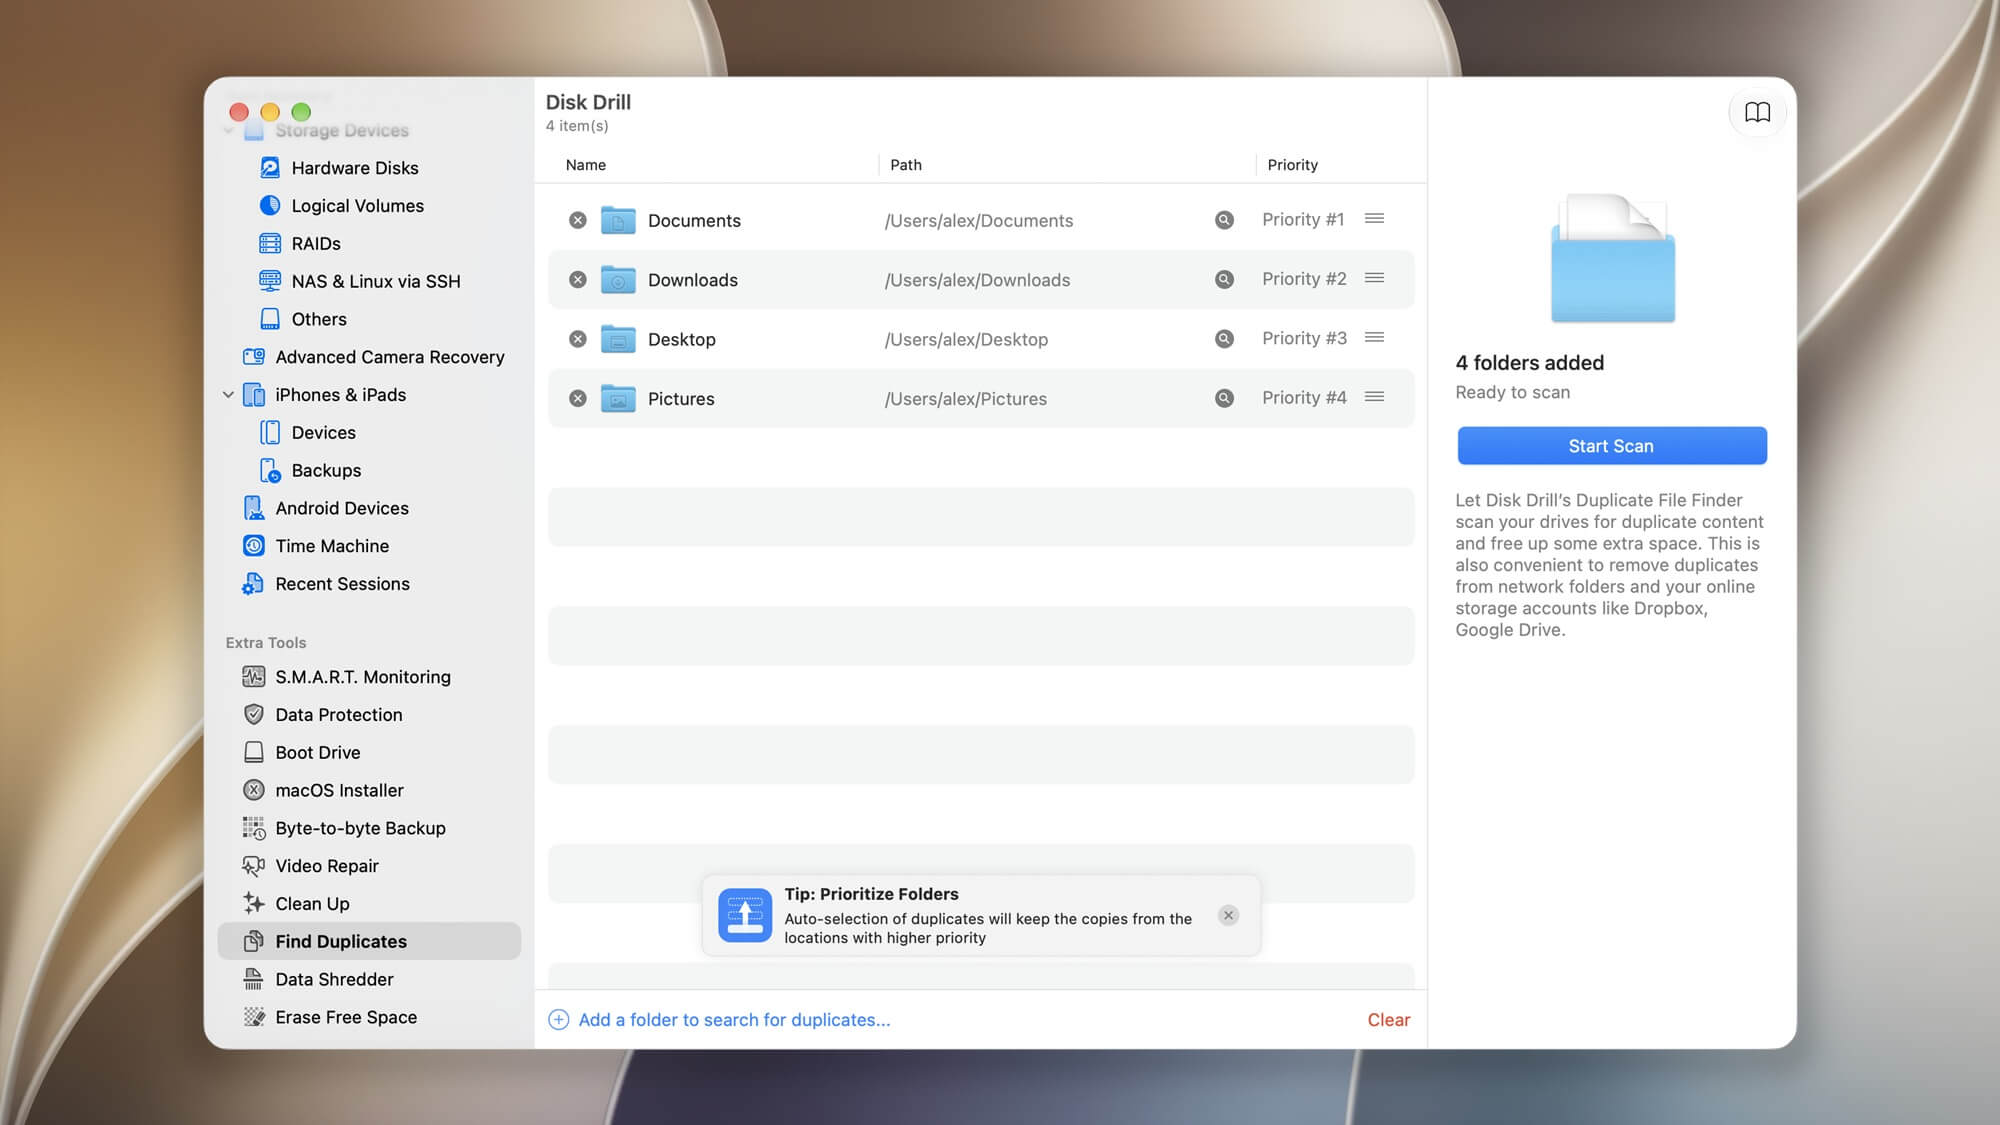
- Select Find Duplicates under Extra Tools in the sidebar.
- Drag folders into the window, or click Add a folder to search for duplicates… and choose your folders.
- Drag the handles on the right to set folder priorities. During automatic selection, Disk Drill keeps copies from higher-priority locations. Priority #1 is the highest.
- Click Start Scan and wait for the results.
3. Review and Select Duplicate Files
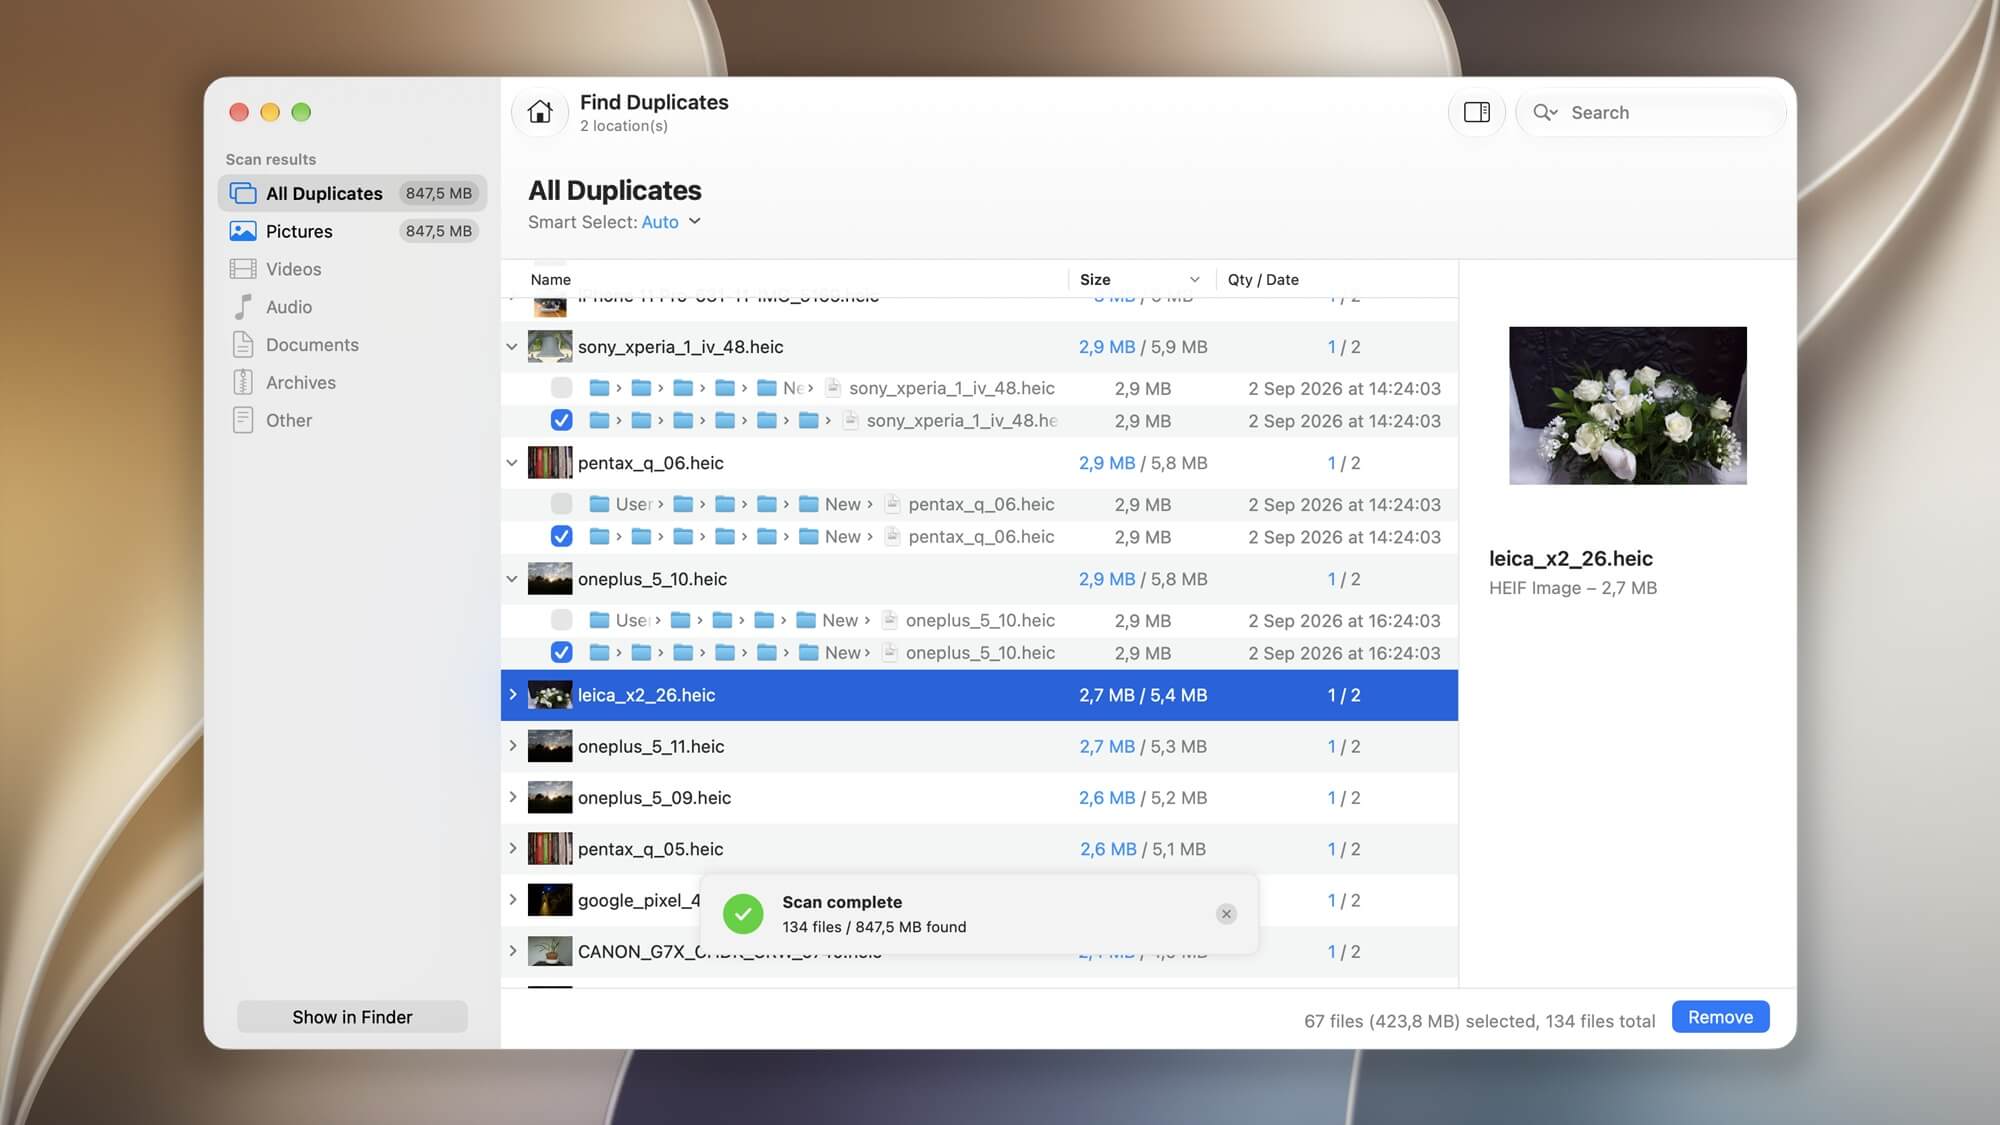
Choose All Duplicates or a category such as Pictures or Documents. Expand a duplicate group to compare file paths and dates, and select a file to preview it.
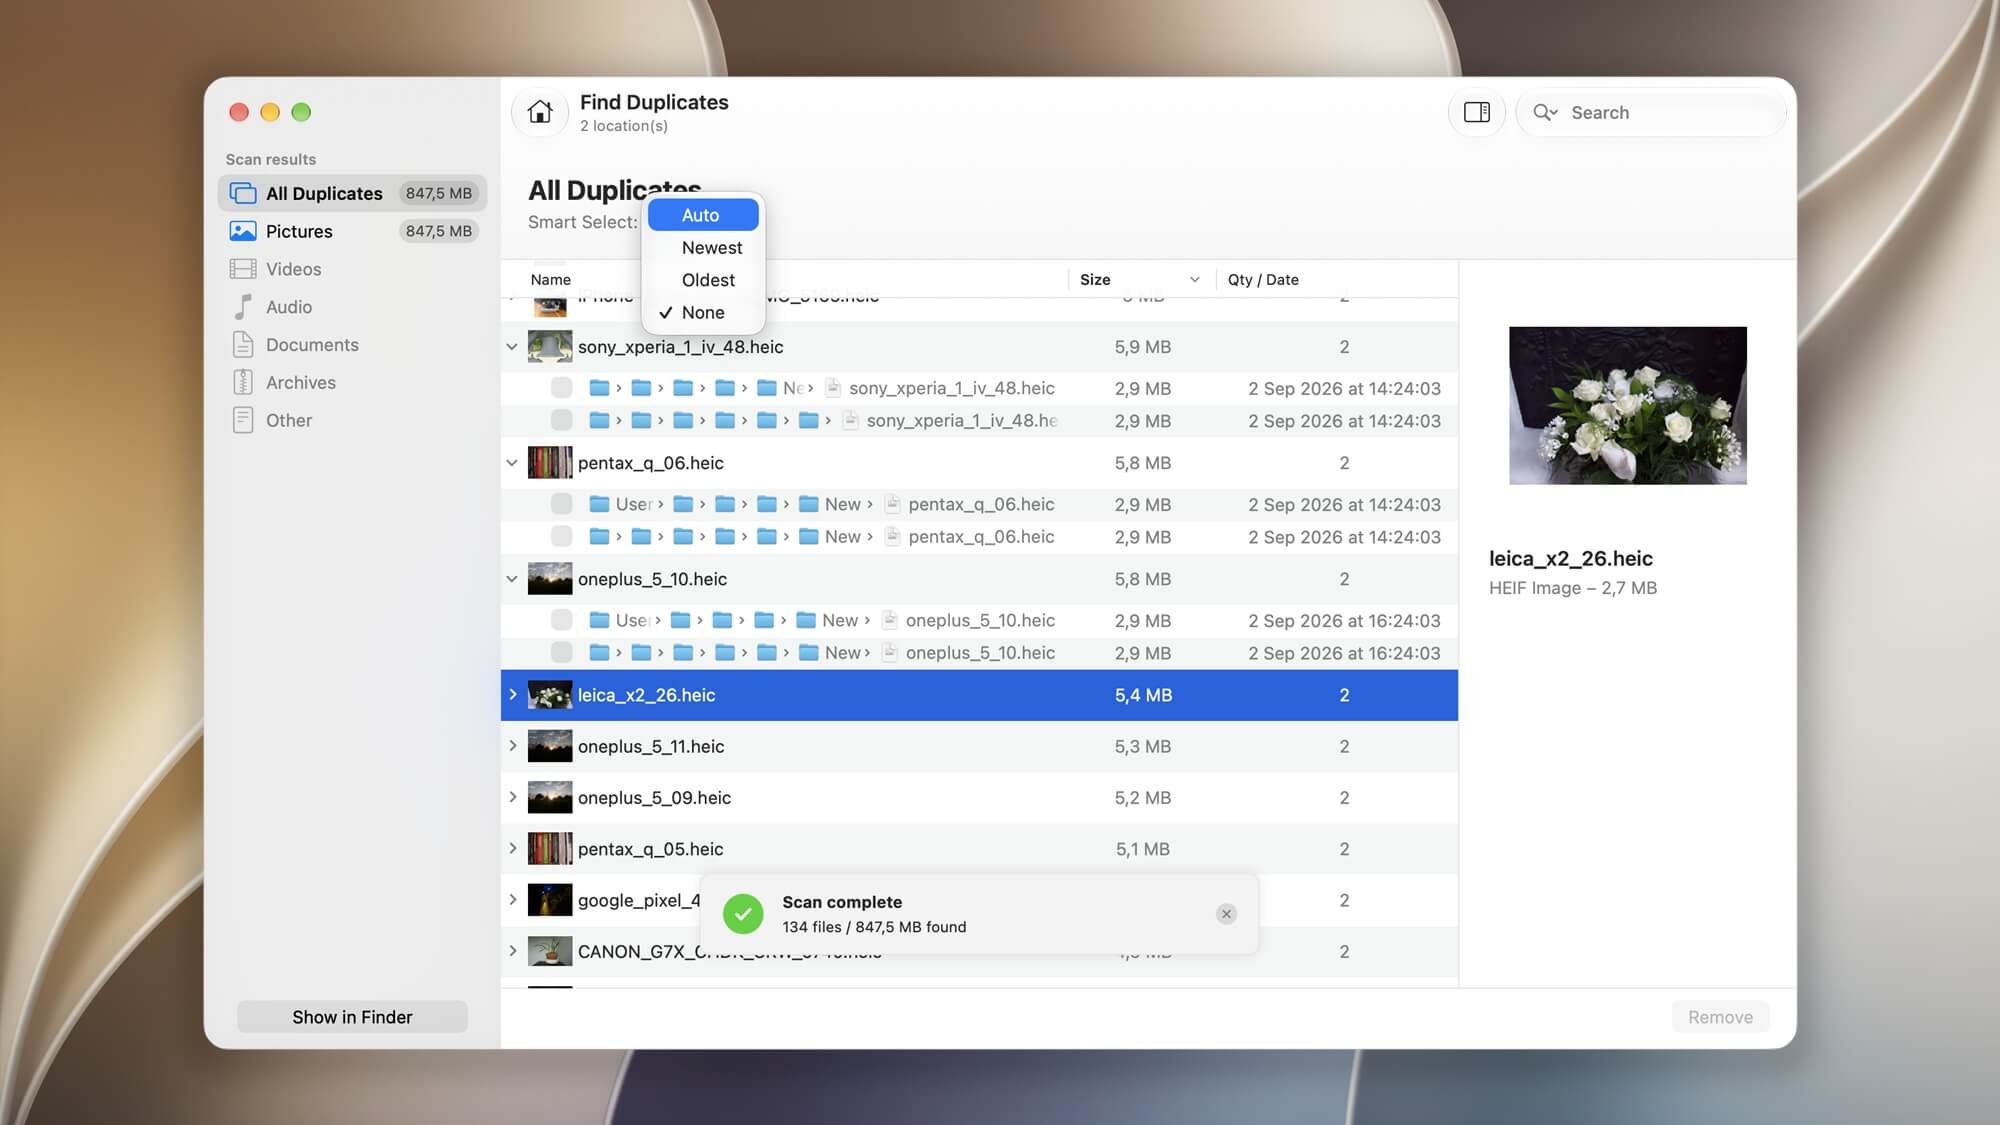
Use Smart Select to choose Auto, Newest, Oldest, or None, or mark files manually. Review the selection before continuing: checked files will be removed. Leave the copies you want to keep unchecked.
4. Remove the Selected Copies
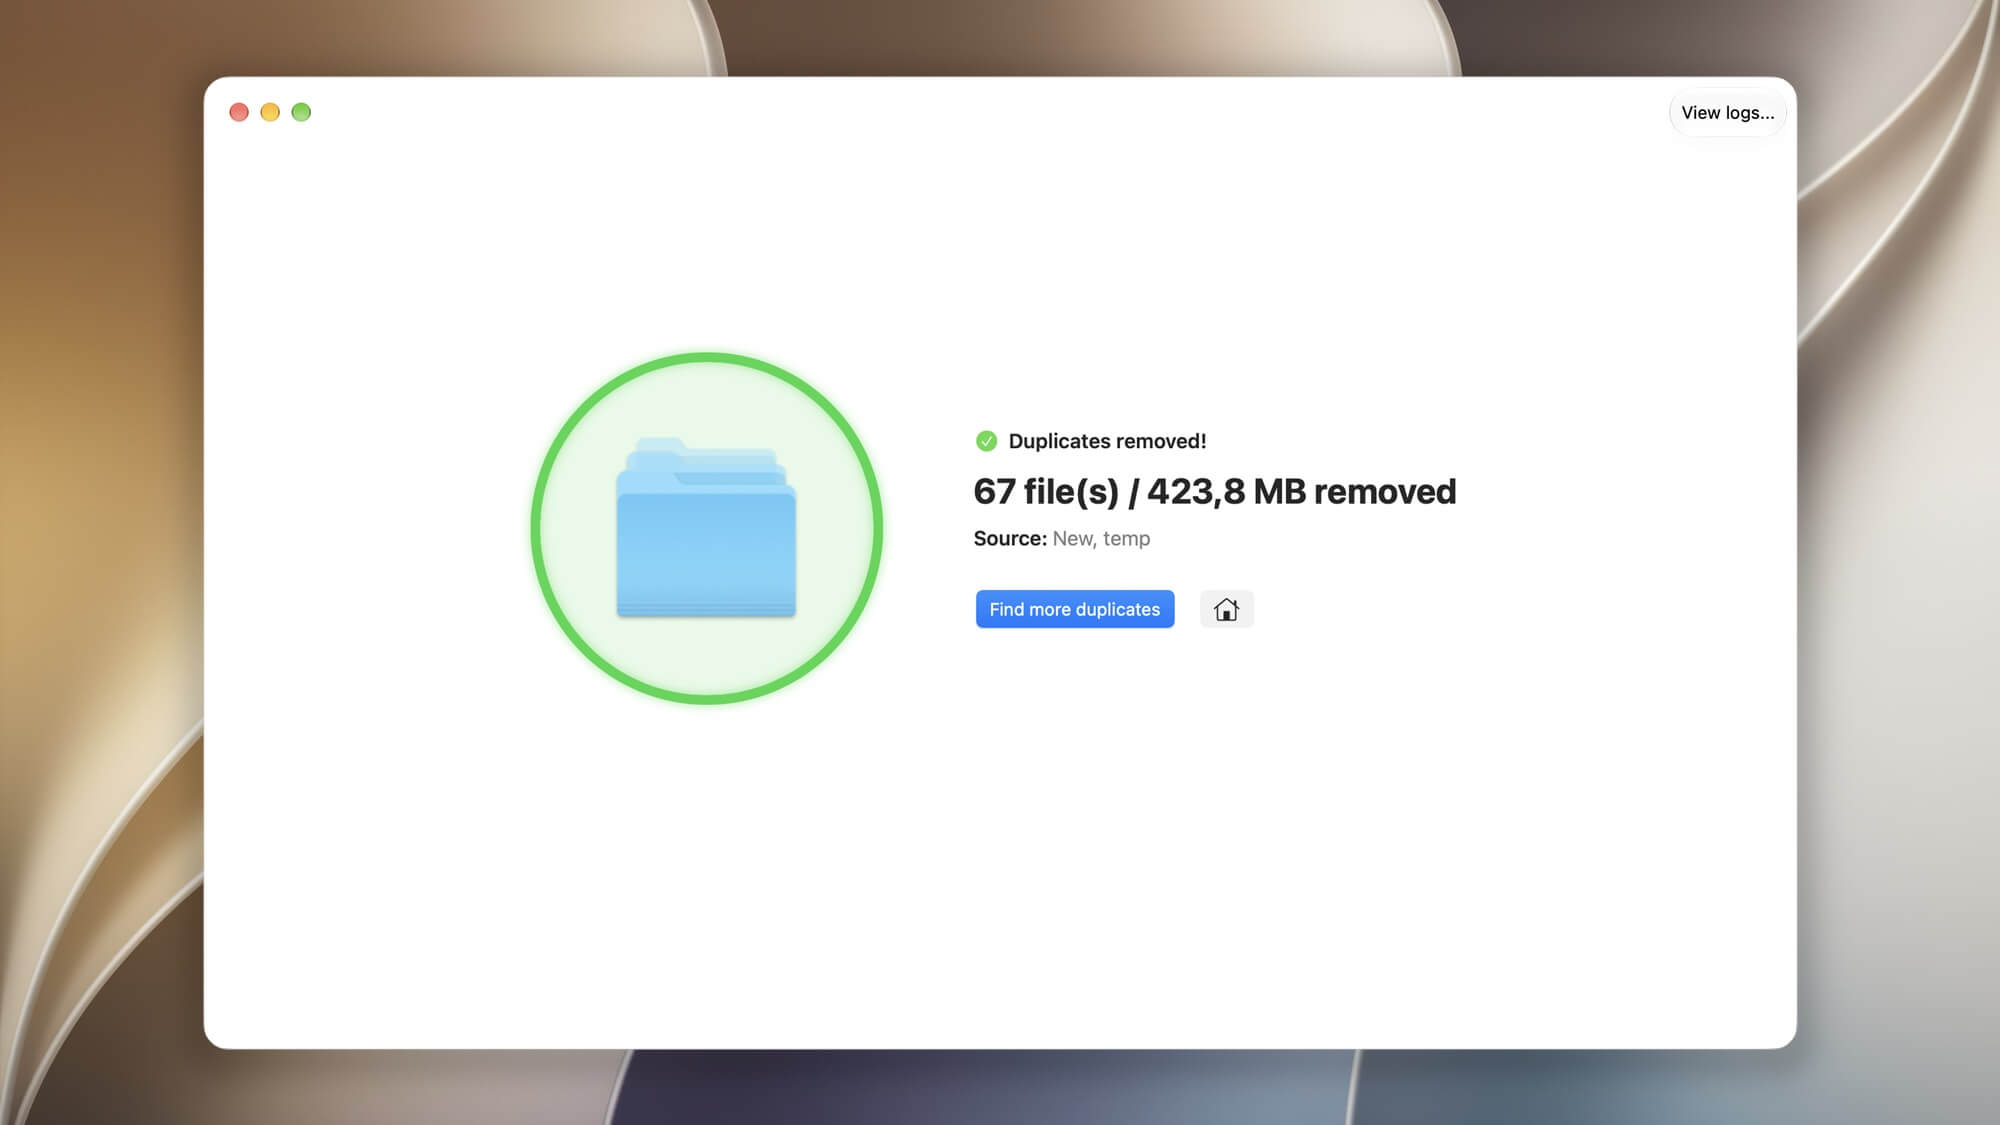
Click Remove in the lower-right corner. Disk Drill uses your chosen removal method and displays the number and size of the files removed. Click Find more duplicates to scan other folders.
If you used Move to Trash, check the files you kept before emptying the Trash to reclaim space. Focus on personal folders and avoid removing files from system or application folders.