Since Window 7, Microsoft has been including an incredibly handy tool with its operating system: Snipping Tool. According to Microsoft, the easiest way to make a copy of something is to take a snapshot of the screen, and that’s exactly what the Snipping Tool allows you to do.
In this article, we describe what the Snipping Tool does and how to use it, and we also list many Snipping Tool Mac alternatives.
Snipping Tool Under Microscope
The idiom “a picture is worth a thousand words” is especially applicable in today’s digital age. Sharing of images has become incredibly easy, and much of what we do every day takes place on a computer screen. As such, people naturally want to capture what they write, see, create, and do for a myriad of different reasons.
To make screenshot-taking easier for users, Microsoft has created Snipping Tool. To access this tool, select the Start button, type snipping tool in the search box on the taskbar, and then select Snipping Tool from the list of results.
A small window will appear on your screen with four snipping modes:
- Free-form snip: this option allows you to draw a free-form shape around an object and save it as an image file.
- Rectangular snip: this option allows you to drag the cursor around an object to form a rectangle and save it as an image file.
- Window snip: this option allows you to select a window, such as a browser window or dialog box, and save it as an image file.
- Full-screen snip: this option captures the entire screen and saves it as an image file.
Other features of Snipping Tool include the option to set a delay as well as the option to annotate your snips by selecting the Pen or Highlighter buttons. Snipping Tool also supports a number of keyboard shortcuts:
- Alt + M: choose a snipping mode.
- Alt + N: create a new snip in the same mode as the last one.
- Shift + arrow keys: moves the cursor to select a rectangular snip area.
- Alt + D: delays capture by 1-5 seconds.
- Ctrl + C: copies the snip to clipboard.
- Ctrl +: saves the snip.
- Ctrl + PrtScn: captures the entire screen, including the open menu.
As you can see, Snipping Tool is quite powerful for such a small utility that many users are not even aware of. Unfortunately, we have bad news for Windows users who wonder how to use Snipping Tool on Mac: Apple’s operating system doesn’t come with this useful application. But it comes with another screenshot-taking tool, called Grab, and you can think of it as Snipping Tool for Mac.
Best Snipping Tool for Mac: Grab
Grab is a Mac Snipping Tool alternative that makes it possible to take screenshots of your screen and save them as image files. Just like Snipping Tool for Windows, Grab has several screen-capture modes, and it also supports keyboard shortcuts. Best of all, there’s no need to look for Snipping Tool download for Mac links as Grab comes included with all recent versions of macOS.
To access Grab, you can either:
- Open it from the Utilities folder under Applications.
- Type /Applications/Utilities/
Grab.app in Finder. - Open Launchpad → Other → Grab.
- Open Spotlight and type in Grab.
By default, Grab saves screenshots in the PNG image file format. PNG is the most widely used lossless image compression format on the Internet, and it has a number of advantages over other lossless image compression formats. The problem with the PNG file format is that it produces somewhat large files. Fortunately, Grab allows you to change the default file format to JPG, TIFF, GIF, and PDF formats.
- To change it to JPG, open Terminal and type in “defaults write com.apple.screencapture type jpg” without the quotation marks.
- To change it to TIFF, open Terminal and type in “defaults write com.apple.screencapture type tiff” without the quotation marks.
- To change it to GIF, open Terminal and type in “defaults write com.apple.screencapture type gif” without the quotation marks.
- To change it to PDF, open Terminal and type in “defaults write com.apple.screencapture type pdf” without the quotation marks.
- To change it back to PNG, open Terminal and type in “defaults write com.apple.screencapture type png” without the quotation marks.

Okay, so you have Grab open, configured, and ready, but how do you take a picture of your screen or a part of it? You have several options:
- Grab → Capture → Selection: using this option, you can capture a specific region of your screen by dragging a selection box around.
- Shift + Command + A: this shortcut provides an alternative way how to trigger the selection option.
- Grab → Capture → Window: using this option, you can capture a screenshot of a window that you select.
- Shift + Command + W: this shortcut provides an alternative way how to trigger the window-capture option.
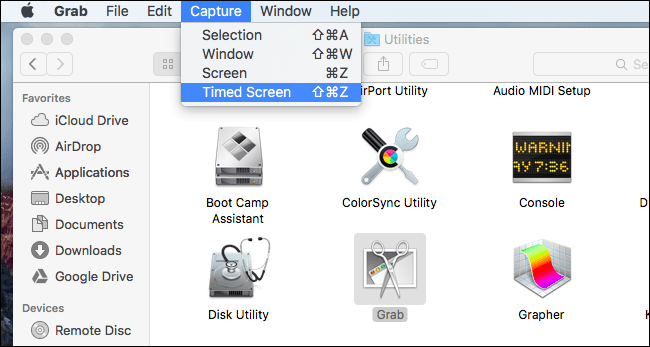
- Grap → Capture → Screen: using this option, you can capture a screenshot of your whole screen.
- Command + Z: this shortcut provides an alternative way how to trigger the screen-capture option.
- Grab → Capture → Timed Screen: using this option, you can start a 10-second timer, select a part of your screen, and then take a screenshot.
- Shift + Command + Z: this shortcut provides an alternative way how to trigger the timed screen-capture option.
More Snipping Tool Mac Alternatives
If you would prefer even simpler alternative to Snipping Tool for Mac than Grab, you’ll be pleased to know that macOS comes with not one but three such alternatives:
- Command + Shift + 3: captures a screenshot of your entire screen.
- Command + Shift + 4: turns the cursor into a crosshair, allowing you to select which portion of your screen you would like to capture.
- Command + Shift + 4 + Space: after pressing the space bar, the crosshair turns into a little camera icon, allowing you to move over any open window to take a screenshot of it.
All screenshots taken using these three shortcuts are saved to your desktop. You can also press control to save the screenshots to your clipboard instead, which is useful if you intend to paste them into other applications anyway.
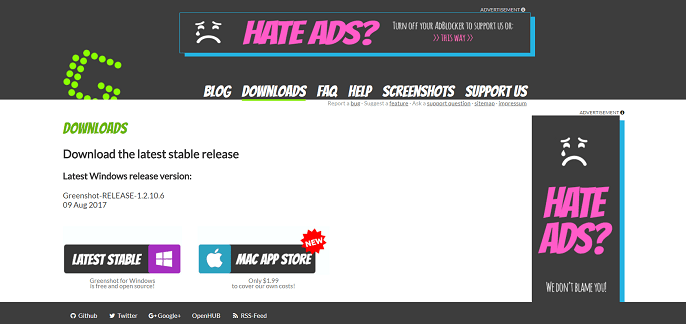
1. Greenshot
Greenshot is an advanced screenshot-taking tool with built-in OCR capabilities. Just like Snipping Tool for Windows, Greenshot allows you to create screenshots of a selected region, window, or entire screen. It can even capture complete web pages from Internet Explorer without any addons. You can easily annotate, highlight, or obfuscate, the screenshots you take with Greenshot using the application itself and export them in various ways. Greenshot is completely free, open source, and it runs on both macOS and Windows.
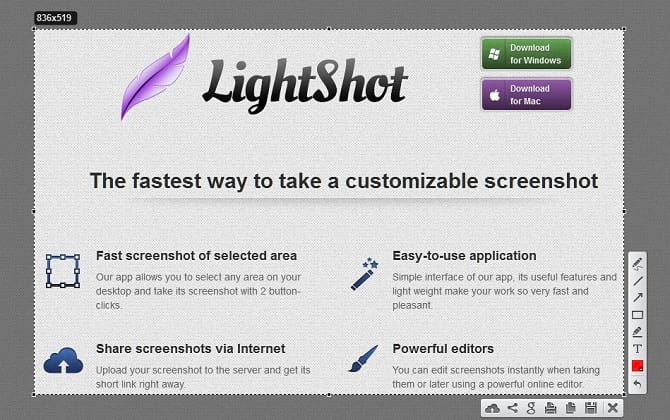
2. LightShot
LightShot is a Mac Snipping Tool alternative and arguably the fastest way how to take a customizable screenshot. The application features a simple and intuitive user interface, which allows you to select any area on your desktop and take its screenshot with just two button-clicks. You can then share your screenshots with others by saving them to your computer or uploading them to LightShot’s servers. LightShot comes with an intuitive yet powerful screenshot editor, so you don’t have to leave the application just to highlight a part of a screenshot or add an annotation.
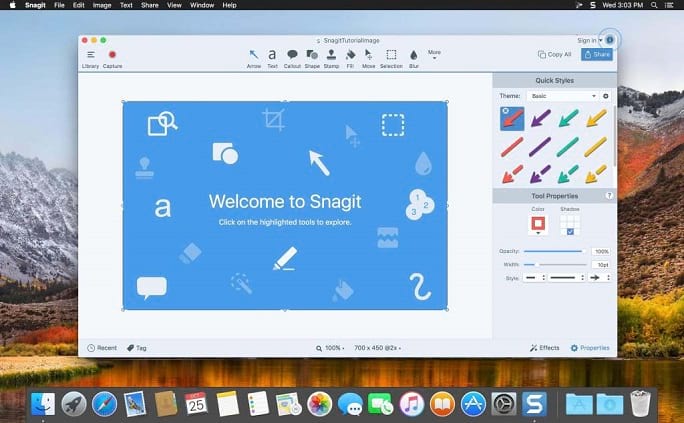
3. Snagit
Snagit is more than yet another Snipping Tool for Mac: it’s a full-featured screen-capture software with built-in advanced image editing and screen recording capabilities. The target audience of this powerful application is content creators, educators, business people, and really any one who wants to add visuals to communicate clearly and be more engaging. With Snagit, you can capture your entire desktop, region, window, or scrolling screen. It takes just a few clicks to make complex edits right within the application, and Snagit’s user interface is so intuitive that using it is a pleasure.
Bonus: How to Recover Deleted Screenshots on Mac
Disk Drill
Disk Drill isn’t a Snipping Tool alternative for Mac computers — it’s something even better. With Disk Drill, you can recover all common and not-so-common image file formats, so you’ll never lose any of your screenshots, pictures, videos, music, documents, or any other files since Disk Drill supports the recovery of over 200 file formats.
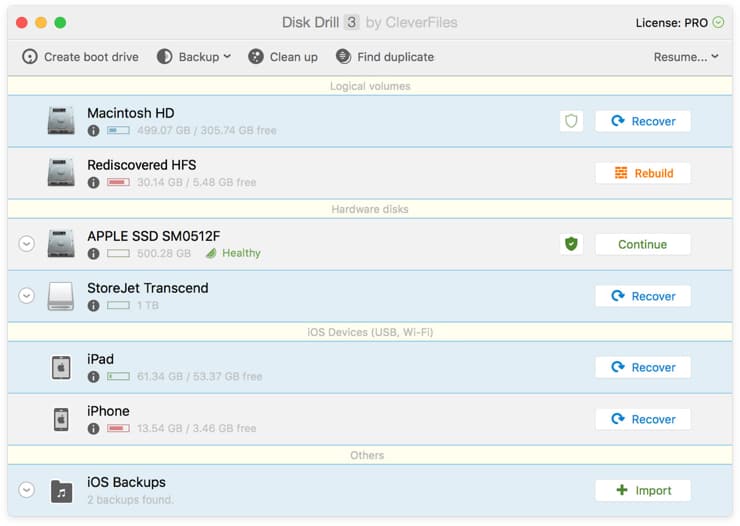
You can download Disk Drill for free and use it without any expert knowledge, and there are several extra reasons why you should definitely do so because it comes with extra free disk tools that can find duplicates on your hard drive, backup your data, or monitor the health of your hard drive, among many other things.

Disk Drill has been successfully used to recover important files by countless professional and home users alike, establishing itself as the most accessible and reliable data recovery solutions for macOS and Windows.