M4V is Apple’s version of the MP4 video and audio file format. Despite the similarity between the file types, there are some key differences between them.
On this page, we’ll explore what M4V files are. Then, we will explain how you can recover deleted M4V files.
What is the M4V file format?
M4V files are video containers that Apple uses for videos in their iTunes Store. They are occasionally used in other capacities, but that is by far their primary origin and purpose.
M4V files are very similar to the more common MP4 file format that is used by various platforms across the internet. Both types use the MPEG-4 video container format.
A key difference between the two file types lies in the DRM copyright protection that M4V has. The protection ensures that M4V files can only be played on computers that have authorized access to the account that purchased the video product. Not all M4V files are DRM protected, but the majority are.
M4V files can be played on Apple’s standard player, QuickTime, but also on several other applications that we will discuss in the Programs that Open M4V Files section below. Before getting into that, let’s explore how to recover deleted and corrupted M4V files.
How to Recover Deleted M4V Files
People often fear they can never get back their accidentally deleted, corrupted, and lost M4V files, but that is rarely the case. There are several options for getting missing files back after they disappear. The right one will depend partially on how the files were lost in the first place.
The first option that many users think of is visiting a data recovery center to retrieve their files. Such centers exist in most major cities and many towns of all sizes. Many people, however, find that getting to such a center is inconvenient and expensive. So, in the following sections, we’ll provide information on an easier and more affordable alternative.
How to Recover M4V Files with Software
Disk Drill is a free software solution that you can download for free from anywhere with an internet connection. It can restore files that have been corrupted and even files that have been lost completely.
Disk Drill is simple to use. Follow the steps below to go through the easy process.
One. The first step is to download Disk Drill.

Once you have it on your machine, open it as you would any other application. There will be a pop-up window asking if you’d like to allow Disk Drill to make changes to your computer. Click yes to initiate the system.
Two. The main Disk Drill interface will appear. In the center of that interface will be a list of devices that you can recover from. Choose whichever device has the files you want to restore.
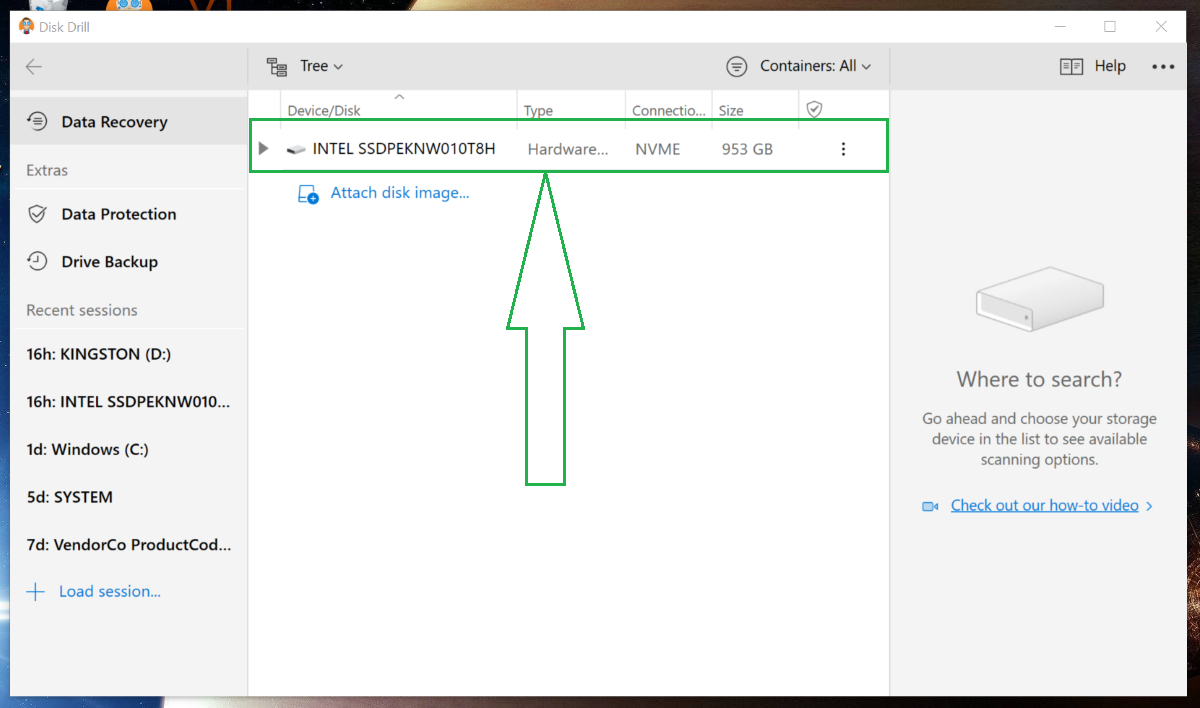
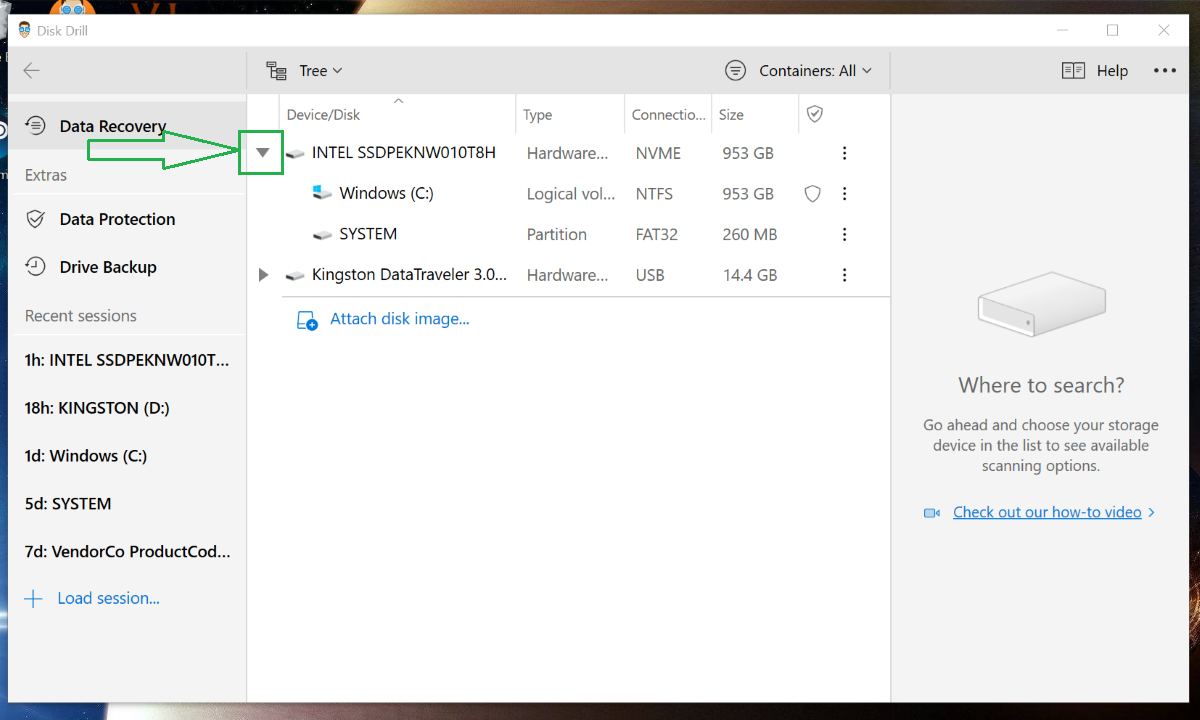
Some devices will have a gray arrow beside them. Clicking on that arrow will produce a dropdown showing smaller partitions within the device. The benefit of selecting such a narrowed-down option is speed—the scan will go faster with less files to look through.
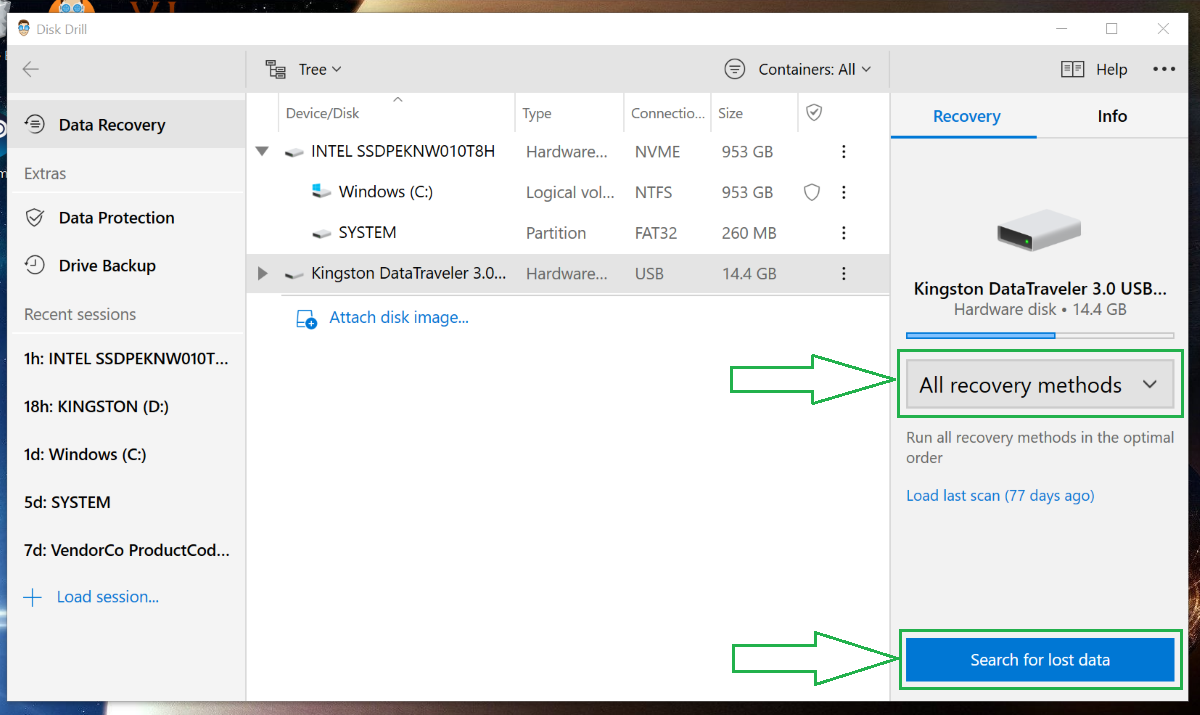
Three. Once you select the device to recover from, a bar will appear reading All recovery methods. Below that will be a blue button reading Search for lost data. Keep the default All recovery methods option selected and hit the blue button.
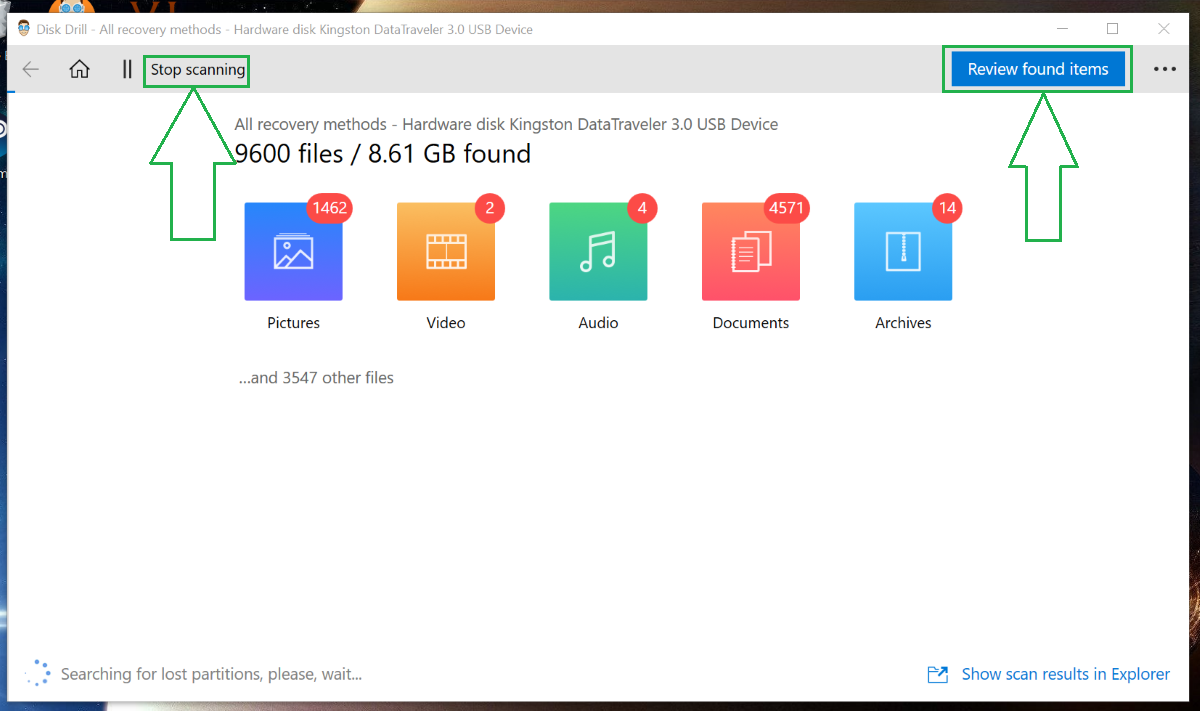
Four. Disk Drill will now scan the device you selected. It’s looking through all active files as well as all deleted files, which means it will take some time to complete the process despite how fast it works. You can stop the scan at any time and then resume when you’d like, or you can review the found items while the scan continues running in the background.
Five. There are now two options. You can either select the specific file(s) to recover, or you can recover all the files in the selected device as one big batch.
If you prefer selecting specific files, click the checkboxes to the left of the files you want. You can select as many as you’d like. Then, choose Recover.

Alternatively, you can recover all the files in the selected device by not checking the boxes beside any specific files and clicking Recover all.
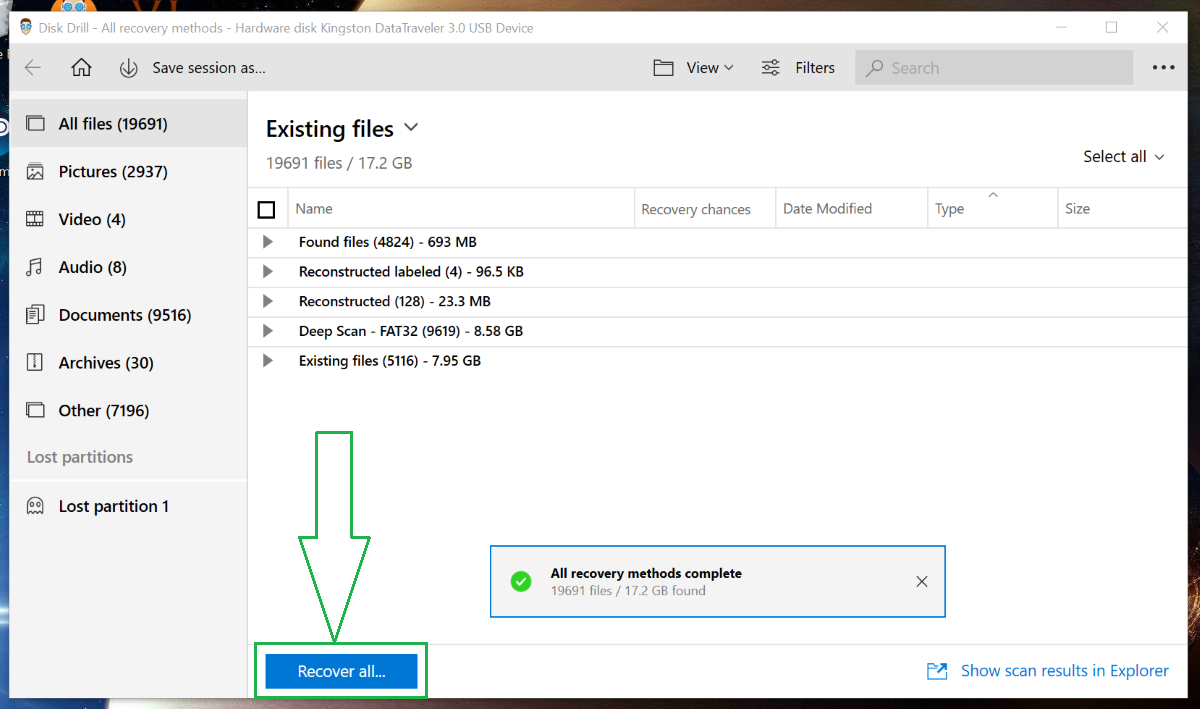
Six. Disk Drill will restore your files and ask where you’d like to save them. Choose whichever location you prefer.
Visit the Disk Drill help center or troubleshooting page if you have any problems.
Recover M4V Files from Windows Recycle Bin or Mac Trash
Files that were simply deleted one time go to the Recycle Bin for Windows users and Mac Trash for Mac users. Recovering files from either of these locations is easy. We explain how in the next two sections.
How to Recover M4V files from Your Windows Recycle Bin
One. Find the Recycle Bin icon on your desktop and open it.
Two. All your recently deleted files will be in the Bin. Find the one that you want to restore and either right-click or double-click on it. Each approach does essentially the same thing, but the interface is a bit different. In both cases, select the Restore button.
Double-click Option

Right-click Option
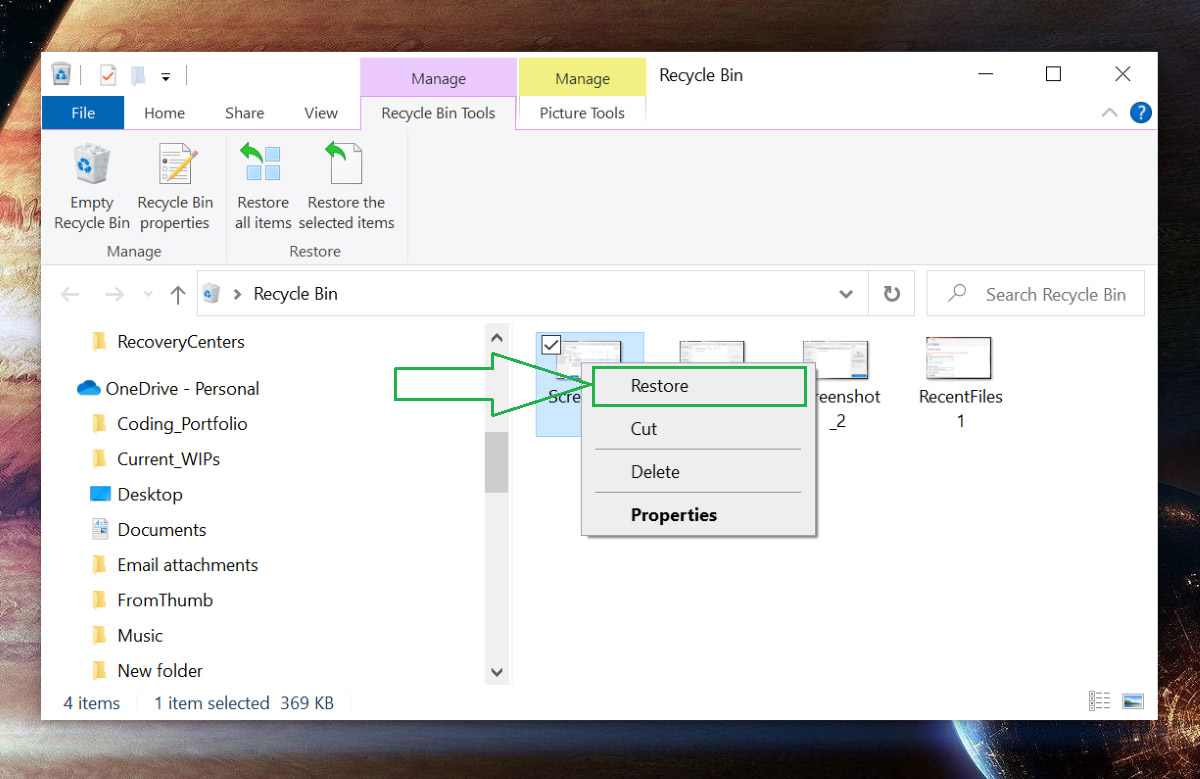
The system will replace the deleted file to the location it had been deleted from.
How to Recover M4V Files from Mac Trash
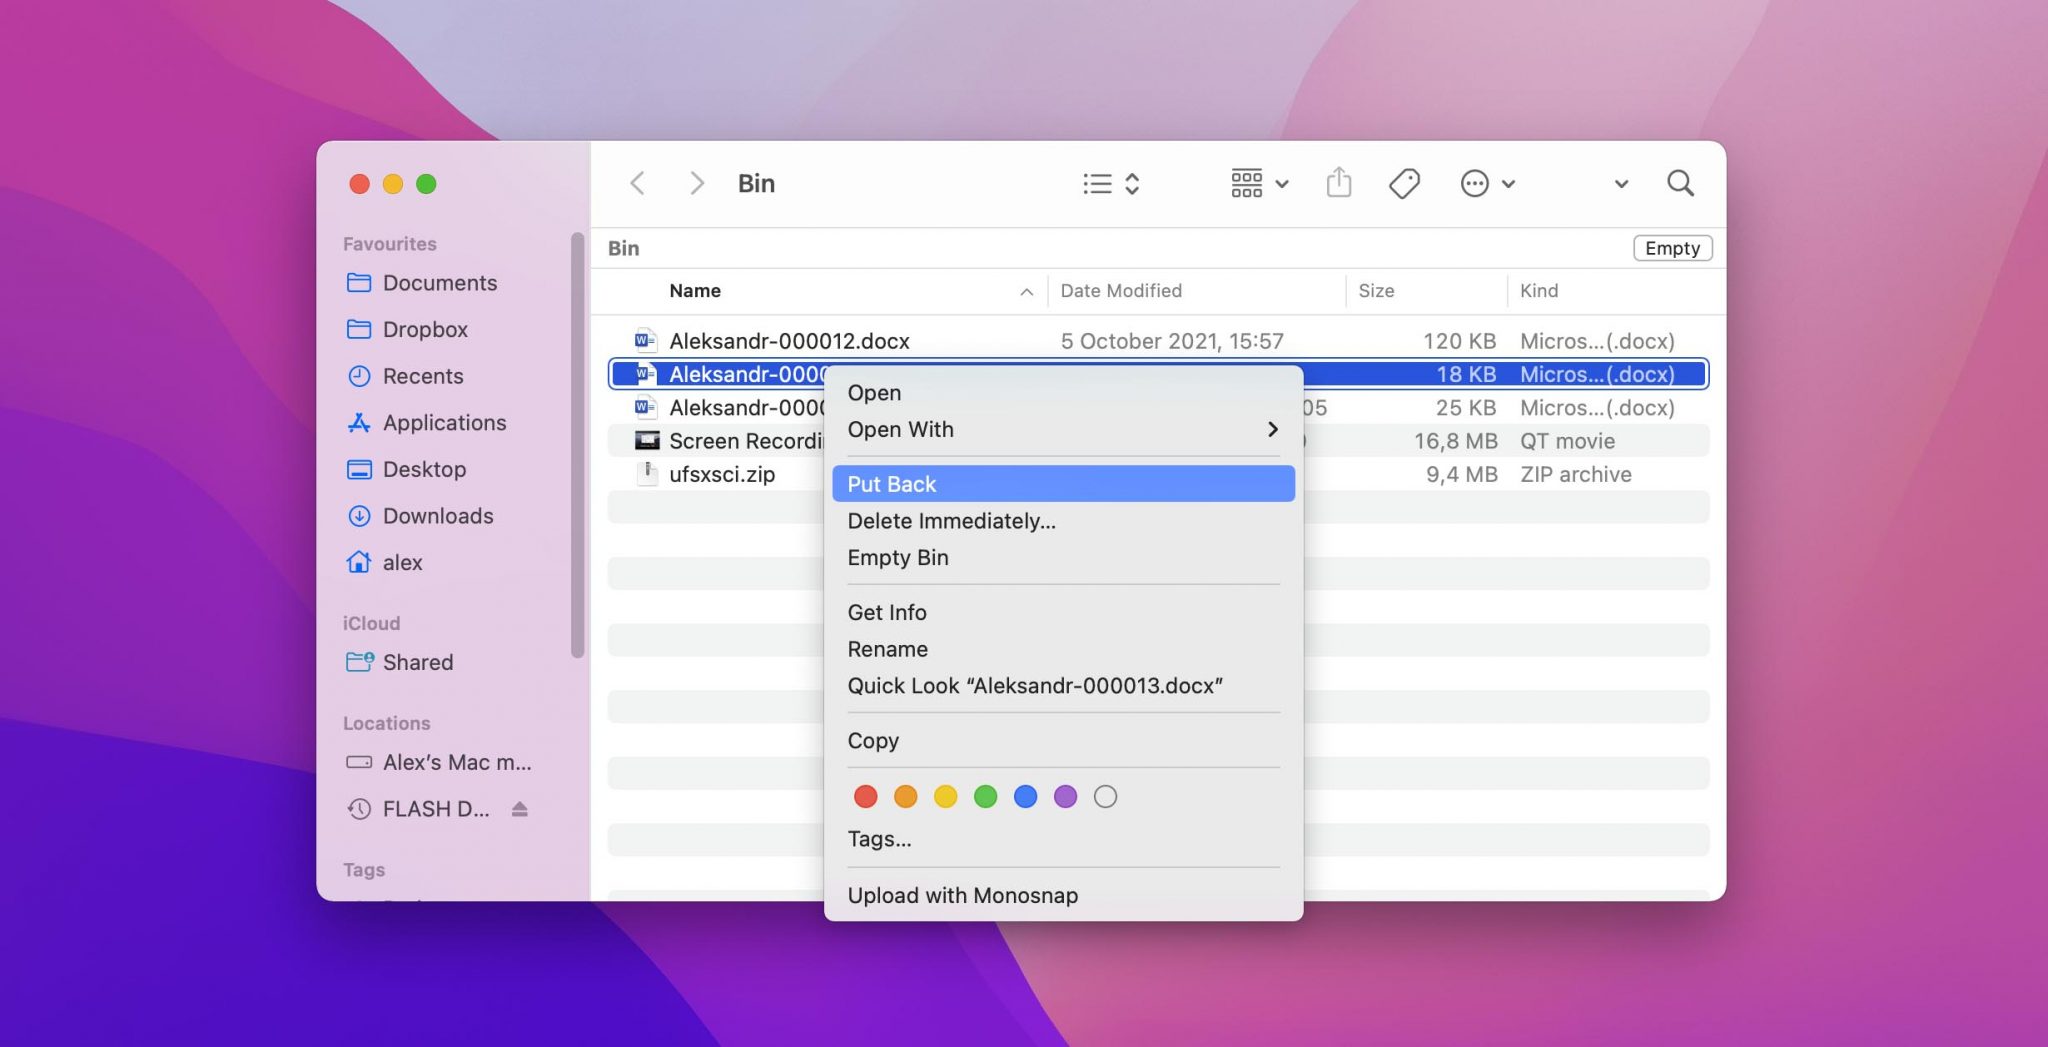
One. Open the Mac Trash icon.
Two. After you find the file you want to restore, control+click or right-click on it. A dropdown menu will appear. Select Put Back. Your computer will return the file to the location you deleted it from.
Restore M4V Files from a Recent Files folder
The Windows operating system records the files you’ve recently used. More than that, it records previous iterations of working files, meaning that you can restore old versions of the file. This is extremely handy if you accidentally saved over old work.
One. To access your Recent Files folder, press Windows + R. This will pull up your run dialogue bar.
Two. Type the word recent into the bar. Then press Ok.
Three. Click on the file that you want to restore. A dropdown menu will appear. Select restore previous versions.
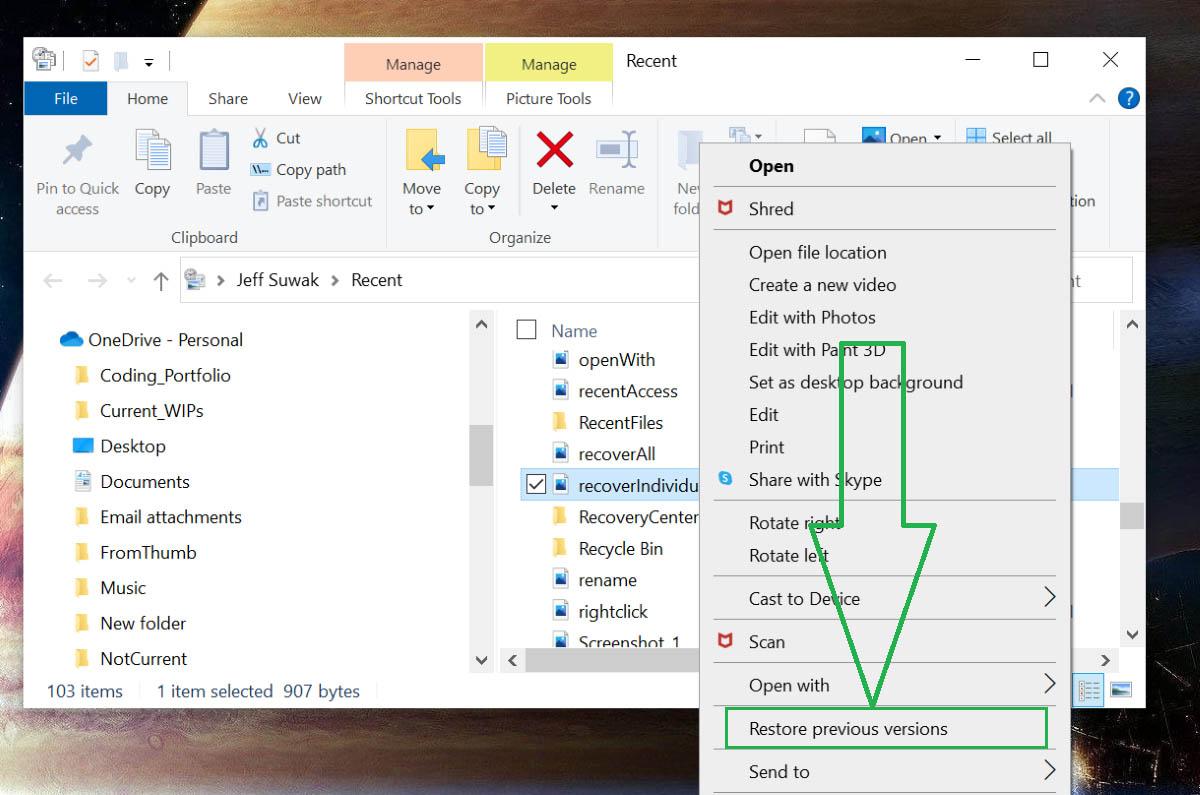
Any previous versions of the file will show up. Select the one with the timestamp closest to the version you want to recover. This technique doesn’t always work but is always worth a try.
How to Open M4V Files on Mac and Windows
Opening M4V files are simple on Mac devices if you are signed into the authorized account from which the product was purchased. In those cases, simply click and play with QuickTime Player or iTunes.
M4V files that are not DRM copyright protected can sometimes be opened on Windows systems by using an opener such as the Miro or VLC media players. Non-copyright-protected M4V files are also playable on Android operating systems and Palm Pre and Palm Pixi smartphones.
In some cases, you can trick a player by manually changing the file extension from .m4v to .mp4. The effectiveness of this will depend on the player you’re using.
Another option is using a third-party application to open your M4V files. We’ll list a few of those below.
Programs that Open M4V Files
QuickTime and iTunes play M4V files so long as the user is signed into the account authorized for access. They are standard in Mac systems, so we won’t cover them here. Instead, we’ll go over some other options for those who don’t have a Mac computer and for those simply wanting another option.
K-Multimedia Player: First released in 2022, the K-Multimedia Player is a popular option that plays a wide range of file formats, including M4V.
Media Player Classic: This free multimedia player works with a wide range of file types, including M4V. It can be used on old computers because it uses so little memory. It’s only available on Windows and is outdated, meaning that it doesn’t have the kind of active support that you get with newer products.
VLC Media Player: The VLC Media Player is one of the most widely used video players around. It’s free, open-sourced, and available for both Mac and Windows.
Zoom Player: Zoom Player is notable for flexibility and customizability. You can tailor it to your specific needs with a bevy of options. It’s Windows-only, but with QuickTime and iTunes being defaulted Mac players, that’s not likely to negatively affect anyone.
Tips to Avoid M4V File Loss
🛡️Backfiles up often: Backing up files means saving them in at least two different locations. There are many ways to approach this. You can manually save files on two devices, or you can sync your files to a cloud service. Windows and macOS both have various options for this process.
❤️Only use devices and software that you know and trust: There’s no worse way to lose your files than losing them to viruses or malware, and there’s no surer way to get viruses or malware than using strange devices and software. Validate anything you come across before connecting it to your computer. If you have no idea where something came from, it’s probably the best option to avoid using it altogether.
💾Save your work often: You never want to say that you lost your work because you simply forgot to save. Devise a system to systematize frequent saving or automate it with whatever options are available on the application you’re using. Unsaved files are frequently irretrievable, so this one is particularly important to follow.
🔌Switch to an uninterruptible power supply: Power surges are common culprits of file loss and corruption. If a surge hits while you’re transferring data, there’s a good chance that the data will be damaged. An uninterruptible power supply mitigates that threat by steadily feeding your computer electricity even during a power surge.