Like many other applications, Disk Drill can be installed directly on your Mac’s internal drive or used from an external storage device—a method known as Portable Mode. Portable Mode is particularly beneficial for data recovery tasks, as it helps prevent overwriting lost files and protects your internal drive. Here are some common scenarios where Portable Mode proves especially useful:
- Data loss on the internal drive: If you’ve lost data on your Mac’s main system drive, you might not want to risk overwriting important files by installing a new program.
- Internal drive issues: If your internal drive isn’t functioning properly and you can’t complete the usual installation—or if you already have Disk Drill installed but can’t open it—running Disk Drill in portable mode can help.
- Recovery on another computer: If you need to recover data on someone else’s Mac (or your second machine) but don’t want to install Disk Drill directly on it, portable mode is an easy solution.
How Does Portable Mode Work?
To use Disk Drill Portable Mode on macOS, first download the official Disk Drill DMG file from the CleverFiles website. After downloading, mount the DMG file and copy its contents onto any external storage device. Once copied, launch Disk Drill directly from your external drive, press and hold the Option (⌥) key, and then click the “Run in Portable Mode” button (macOS 13 and Earlier). This method enables you to use Disk Drill without installing it directly onto your Mac, providing safer, hassle-free data recovery.
Please note that the following modules and features won’t work when Disk Drill is run in this mode:
Step 1: Copy the Disk Drill App to an External Drive
- Use another Mac. If your own Mac isn’t working, borrow or use a different, fully functional Mac.
- Connect your external drive. Plug in a USB flash drive or an external hard drive to the working Mac. (Disk Drill doesn’t take up much space, so most drives will work.)
- Download Disk Drill. Visit the official Disk Drill download page to get the app. By default, it will save to your Downloads folder. If your browser asks where to save the file, choose any folder you prefer. The download may take a few minutes.
- Mount the Disk Drill DMG. Go to your Downloads folder and double-click the Disk Drill DMG file. You’ll see the Disk Drill icon and the Applications folder icon.
- Install to the external drive. Instead of dragging Disk Drill to your Applications folder, drag it directly to your external drive icon on the Desktop. Release the mouse when you see the green plus (+) sign. This installs Disk Drill onto the external drive.
- Verify installation. When it’s done, open your external drive and check that the Disk Drill icon is there.
- Eject the external drive and DMG. You can safely eject both by clicking the Eject button (the small triangle) next to their names in any Finder window, or by right-clicking the icons and selecting Eject.
Step 2: Running Disk Drill Directly From the External Drive
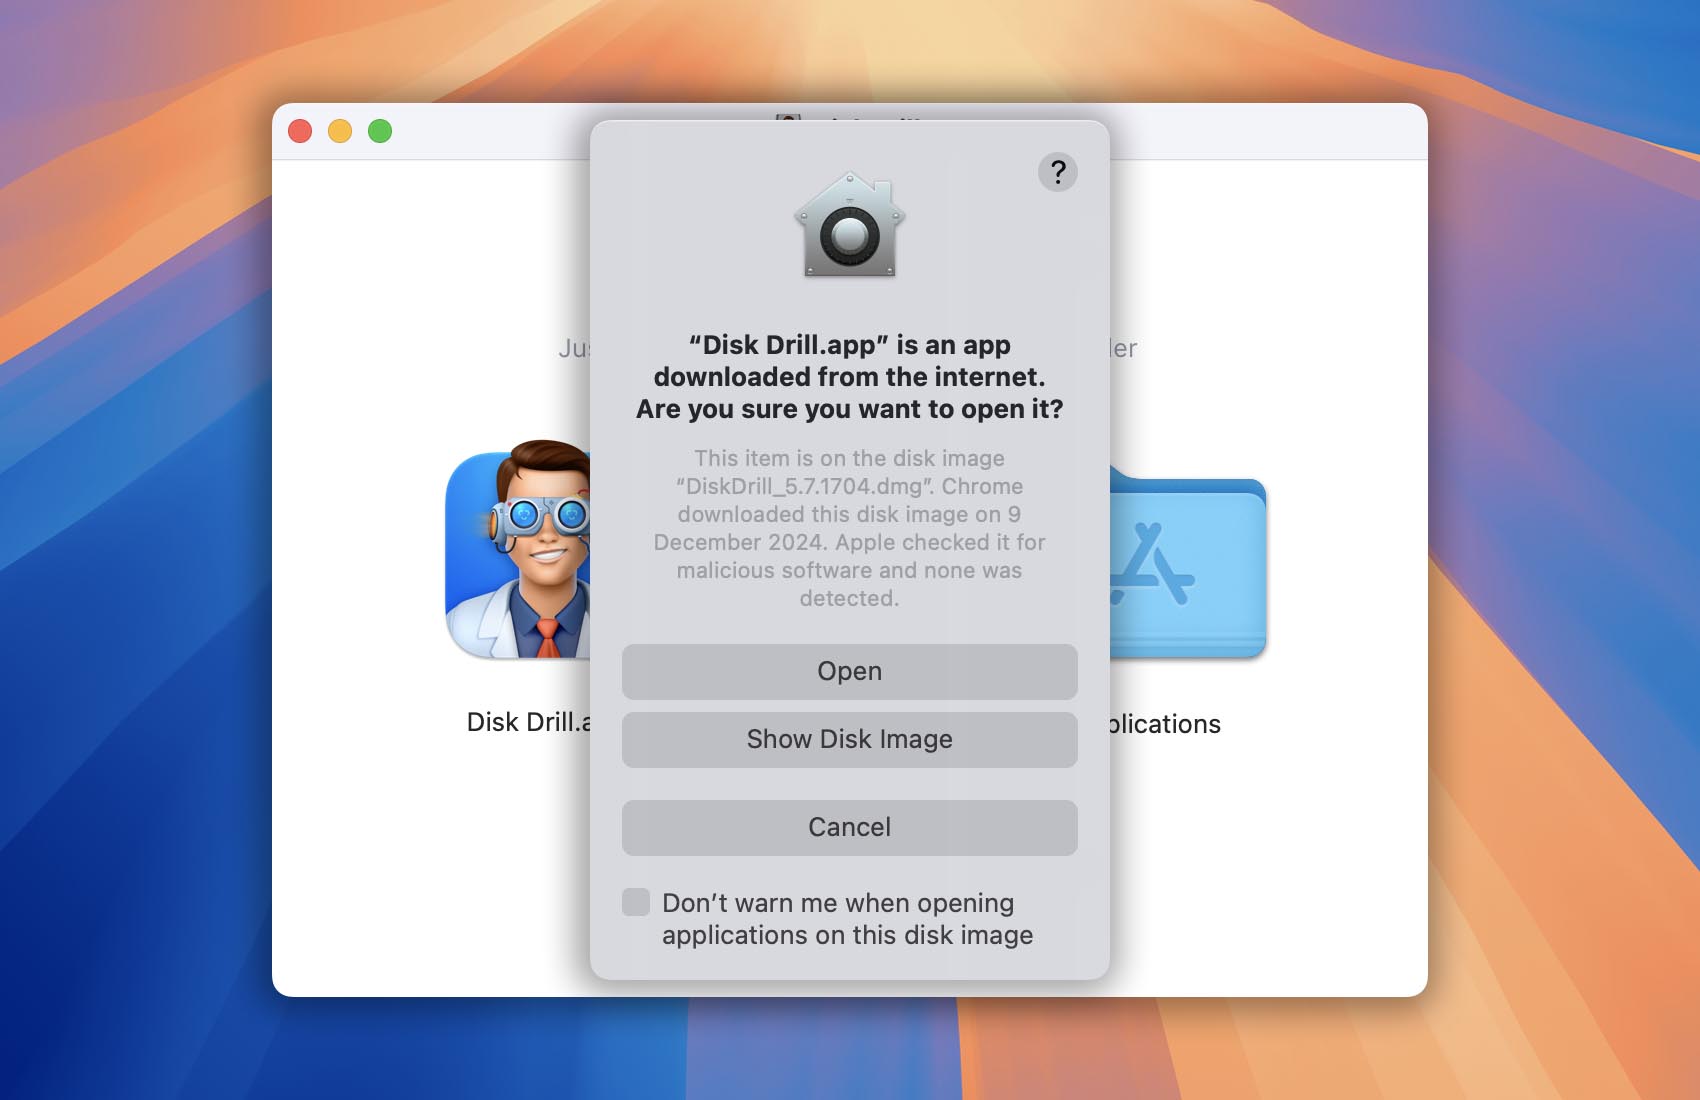
- Double-click the Disk Drill icon that you’ve previously copied to your external drive to launch the application. If prompted about opening an app downloaded from the internet, click Open.
- ONLY FOR MACOS 13 AND OLDER!
To run Disk Drill in portable mode (without installation), press and hold the Option (⌥) key and click Run in Portable Mode. Enter your account password to grant Disk Drill administrative privileges.
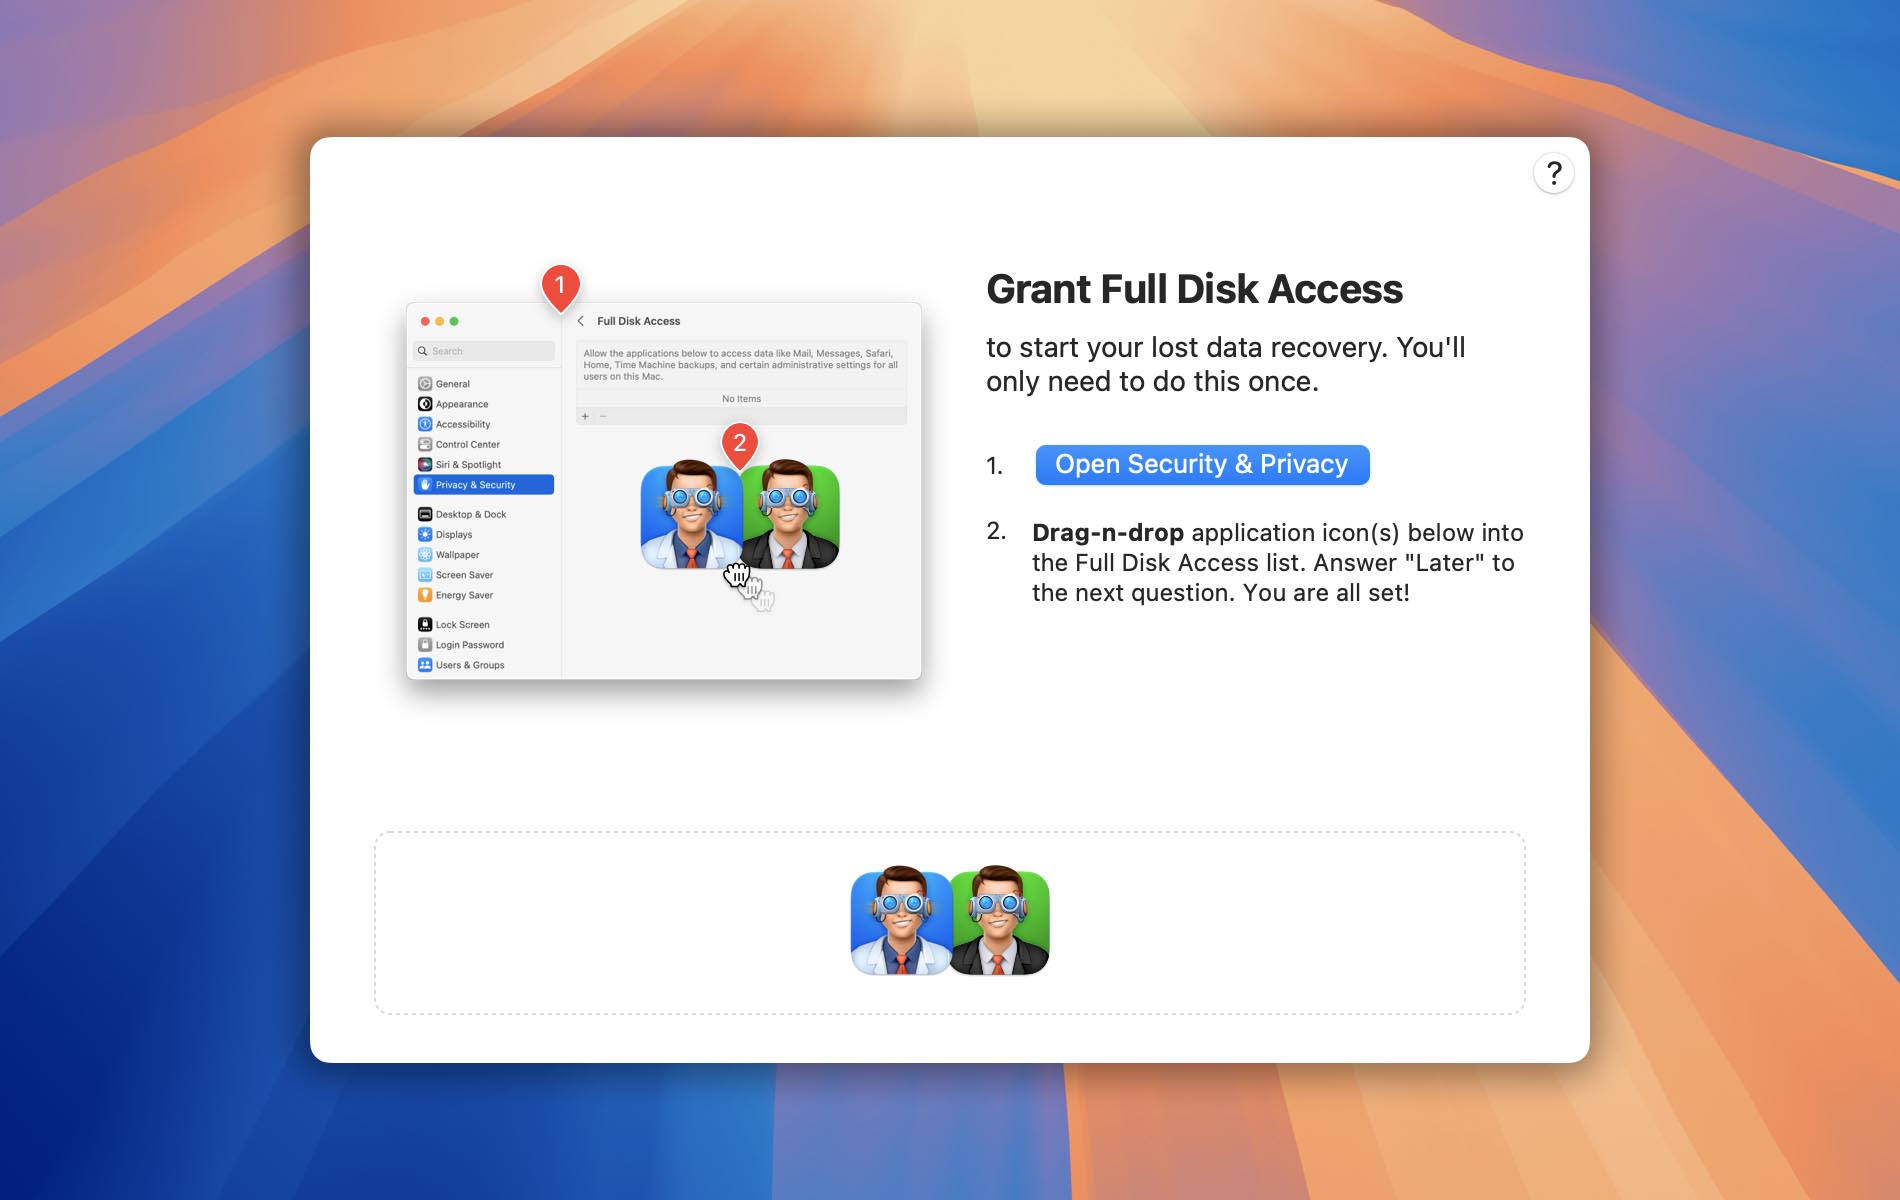
- Grant Full Disk Access so Disk Drill can scan your drives at a low level.