The hard drive on your Mac is where all of the files and data required to power the computer are stored. When you started your machine for the first time, you might have been confident that you would never fill up all of those gigabytes. Your Mac is screaming fast and you have storage to spare. Life is good!

Now fast forward a few months or years. You are still satisfied with the performance of your Mac but you may have noticed a slight slowdown. Maybe you were playing around with Disk Utility and found that your disk is more full than you would have expected. Whatever the reason, you have decided to embark on a disk cleanup to give yourself more storage room.
One thing that can cause confusion is that when looking at the storage space on your Mac, you may see a value named “Other” which doesn’t tell you what is taking up the space in that section.
What is Other Storage on Mac?
The standard storage categories on a Mac are Apps, Photos, Documents, Audio, and Video. When a file doesn’t fit into one of these, it will then go into the Other category.
A great way to get a sense of what is on your hard drive is to look at the ‘About This Mac’ tab. Once we go into the Storage section here, we can see a vague breakdown of what is taking up space on our computer.
Here’s how to view the storage currently on your Mac:
- Click on the Apple Icon in the upper left of your screen.
- Select ‘About This Mac’.
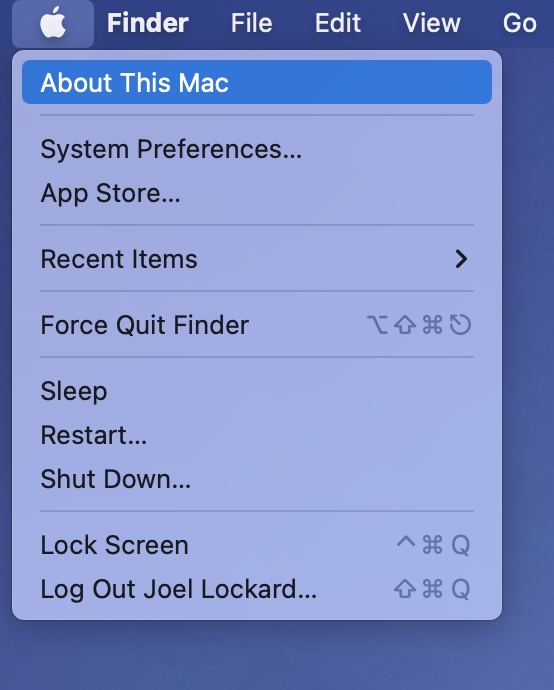
- Click on the Storage tab. Allow your system to complete calculating the breakdown of your disk’s storage.
You are now presented with a horizontal bar graph that displays the amount of storage currently in use on your hard drive. The graph is broken into segments that represent various types of storage such as Apps, Documents, Photos, and Other.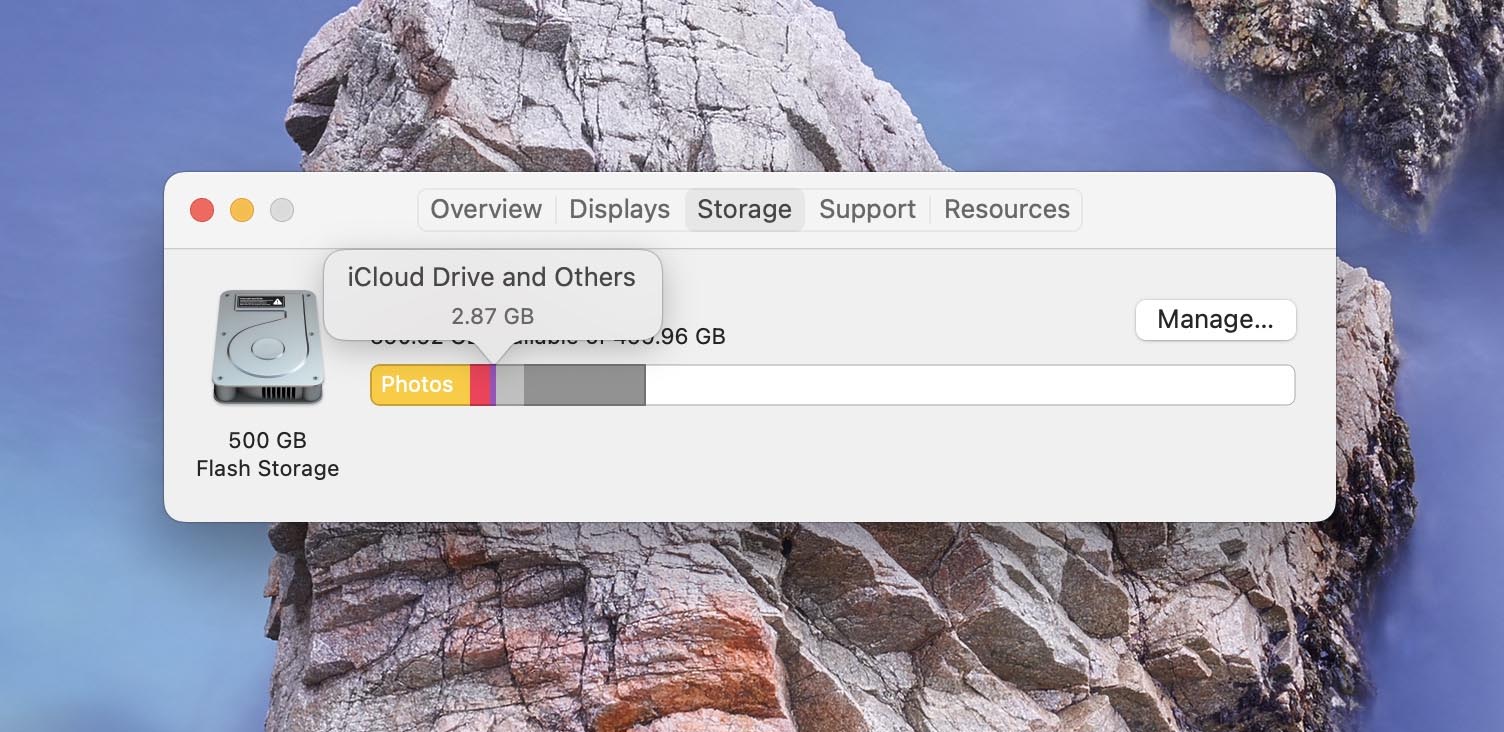
Most of the storage types are fairly self-explanatory. The colored bars for Photos, Apps, Documents, Audio, and Video all tell you exactly what types of files are occupying your storage.
But what about that Other category. What exactly is in there?
There is no easy answer to that question. Essentially, files grouped into the Other category are those which do not fit nicely into another classification. It can include system files and caches, browser extensions, media files stored inside other applications, and files that are created by third-party apps. Files that cannot be fully identified and classified by Spotlight are grouped as Other storage.
Ways to Clean Other Storage on Your Mac
There are basically two ways to remove Other storage from your Mac or MacBook. You can go about the task manually, which might give you a sense of more control but will take a considerable amount of your time.
The other option is to use a third-party software tool to assist you. This is by far the fastest and easiest method to employ. Let’s look at this option first and then we will talk about some others.
Way #1: Delete Other Storage on Mac With Disk Drill (Free)
Disk Drill software for the Mac is a versatile application that can do much more than restore files that have been inadvertently deleted from your computer. It can be used to view your storage in a variety of ways that allow you to make informed decisions regarding which files you should delete to clear the Other space on your Mac.
Here are step-by-step instructions to free up disk space on your Mac’s hard disk:
- Download and install Disk Drill for free onto your Mac.
- Launch the app and then select ‘Clean up’ from the main window.
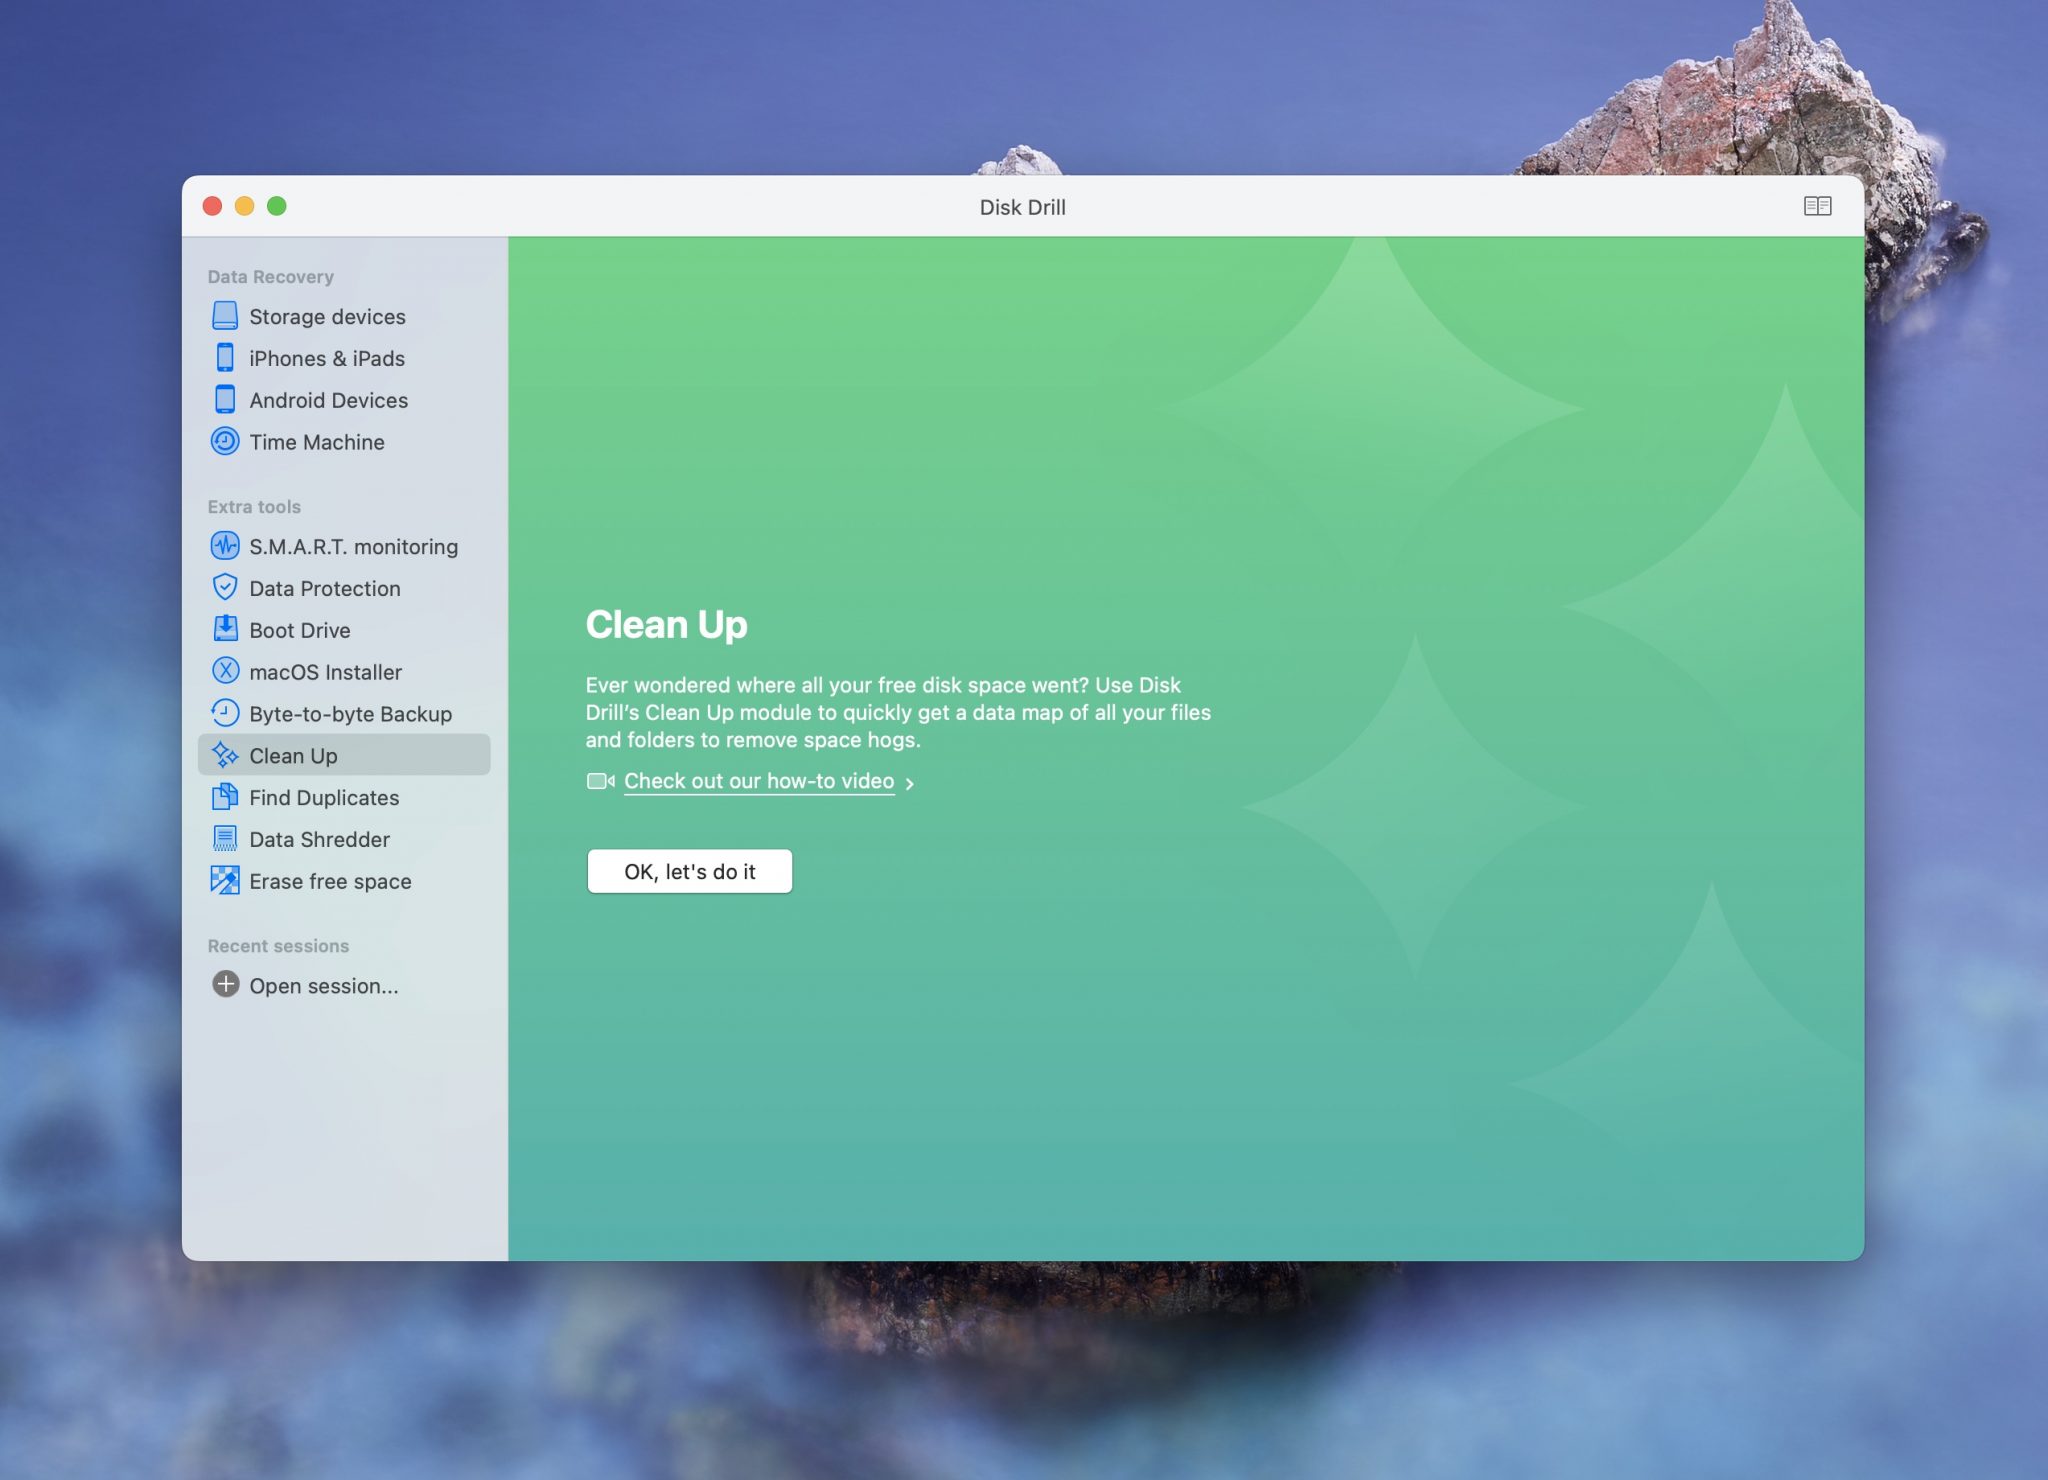
- Choose the disk that you wish to analyze and click ‘Scan’.
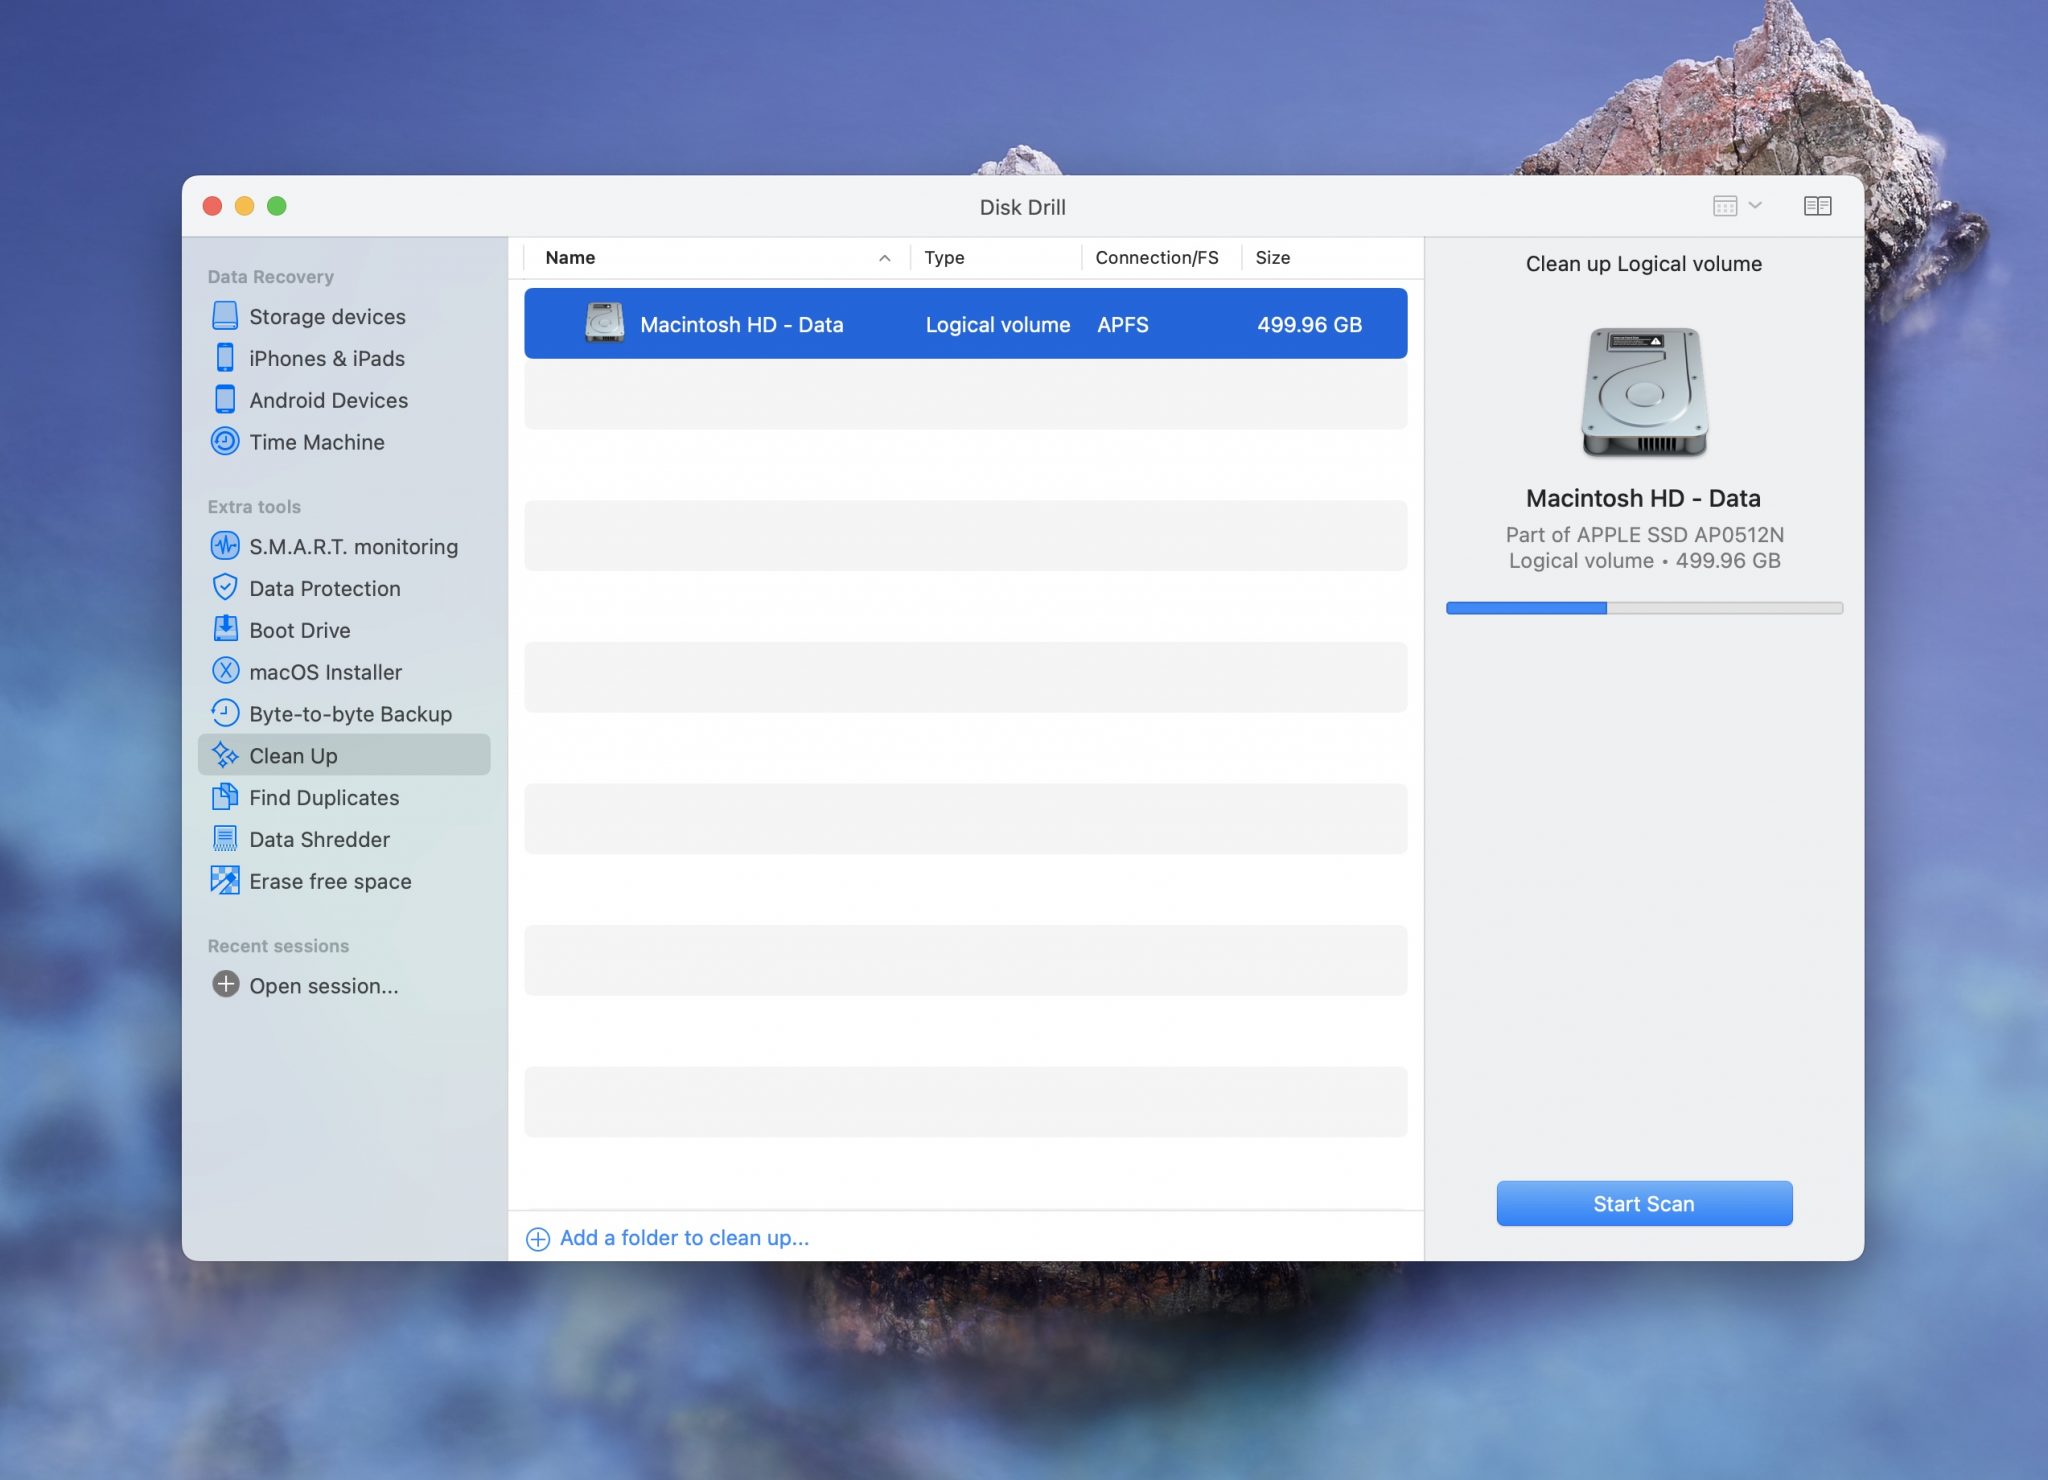
- Allow Disk Drill to fully analyze your disk. This may take several minutes depending on the size of the disk.
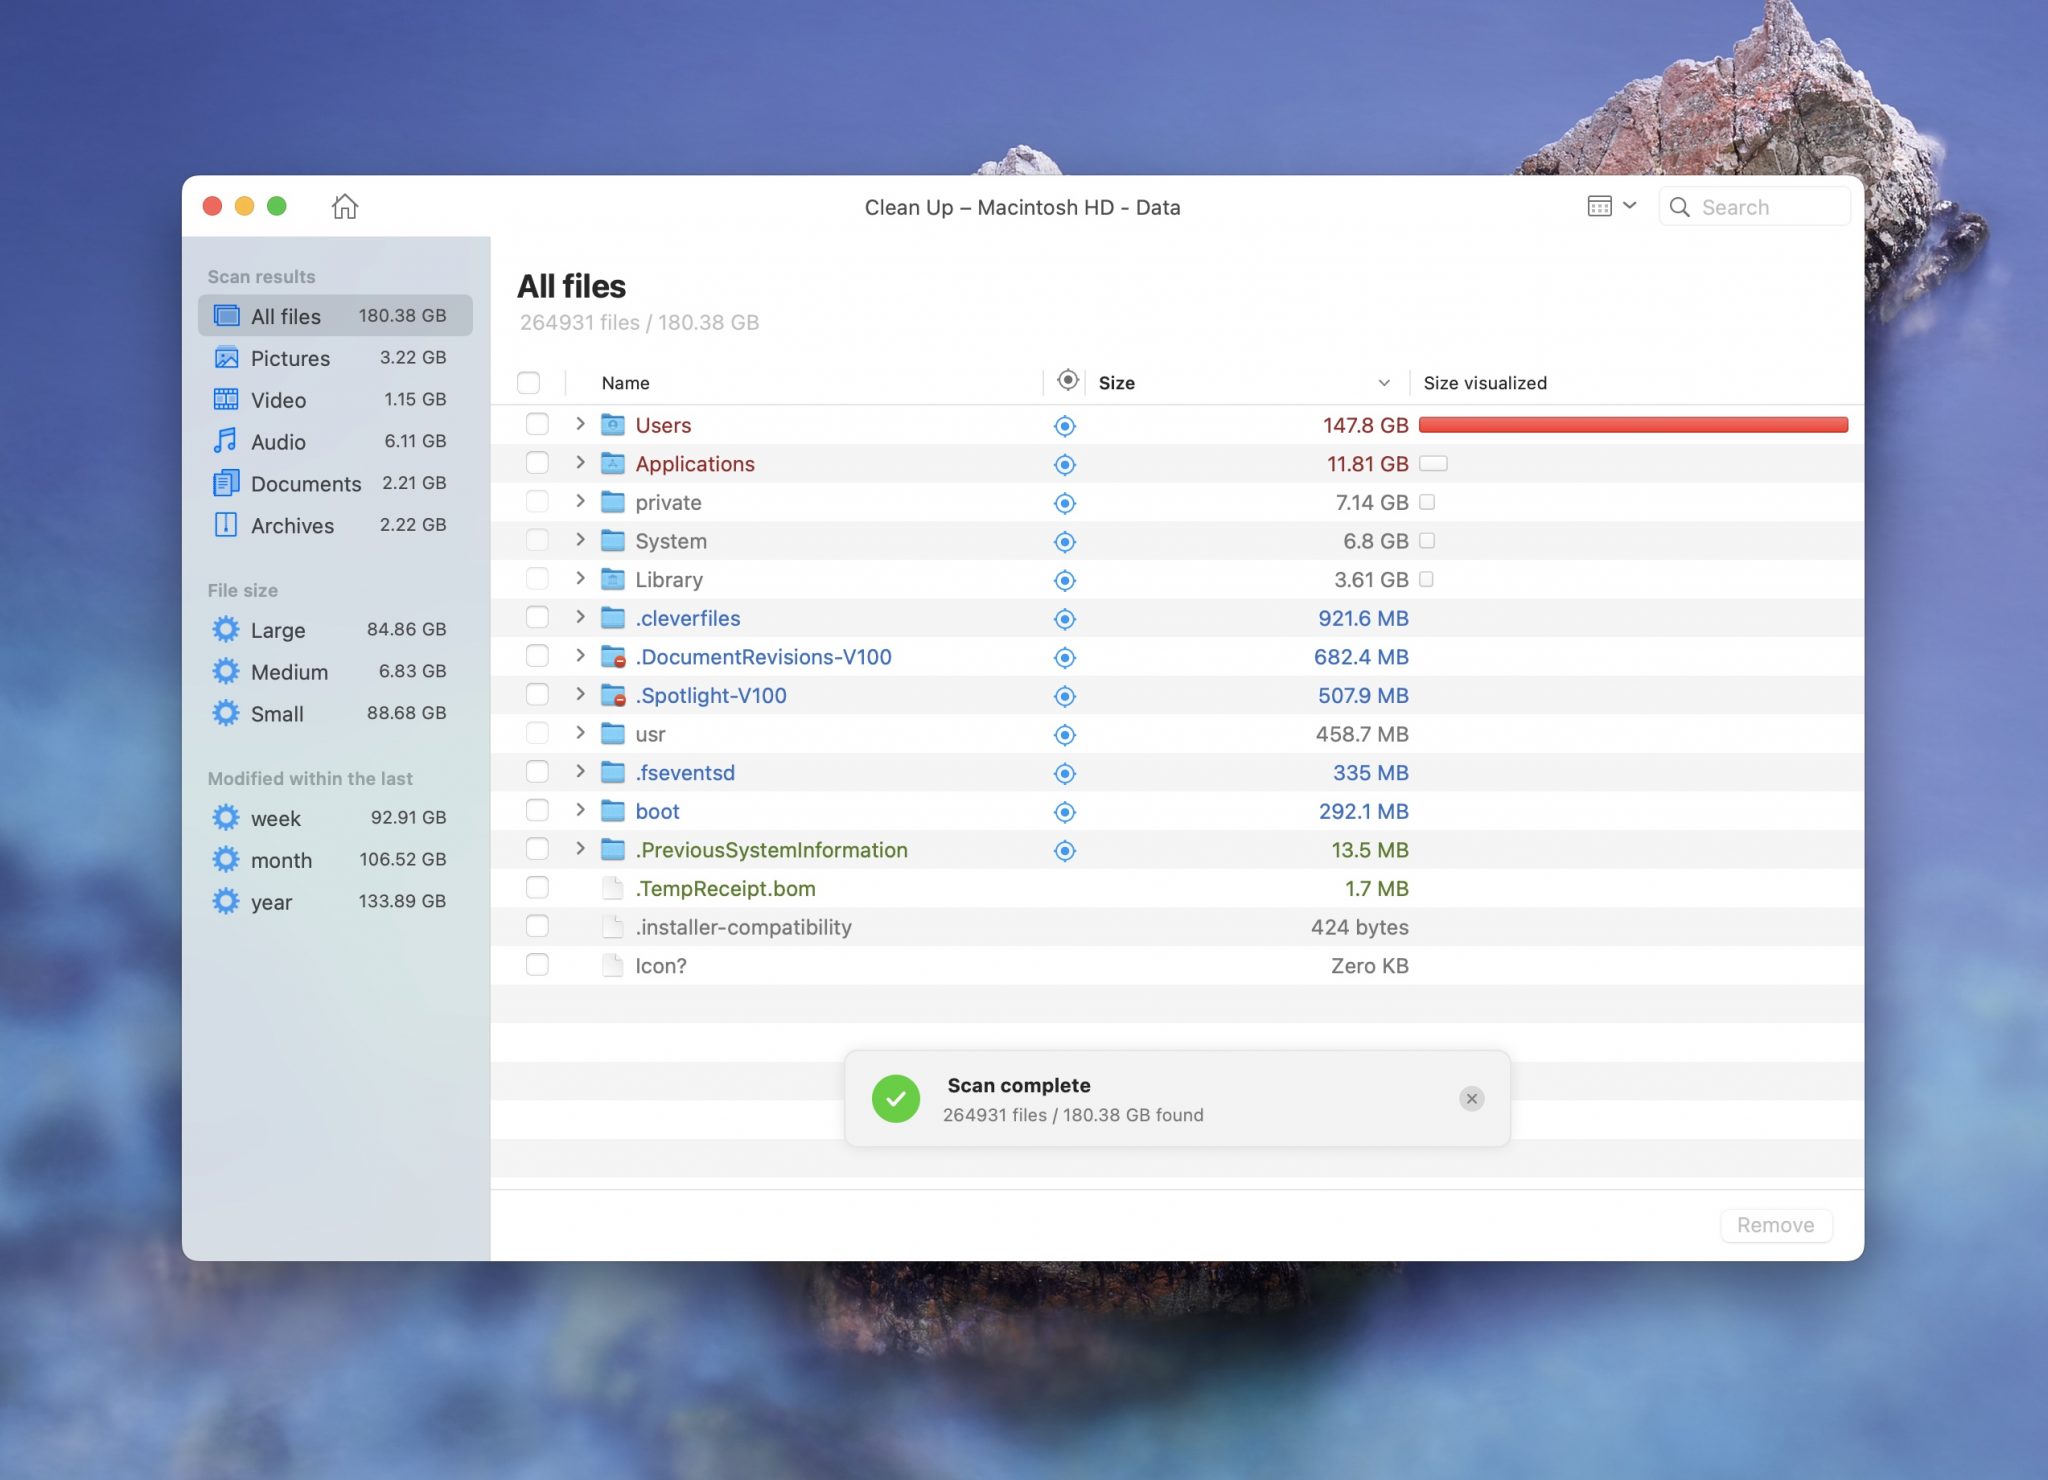
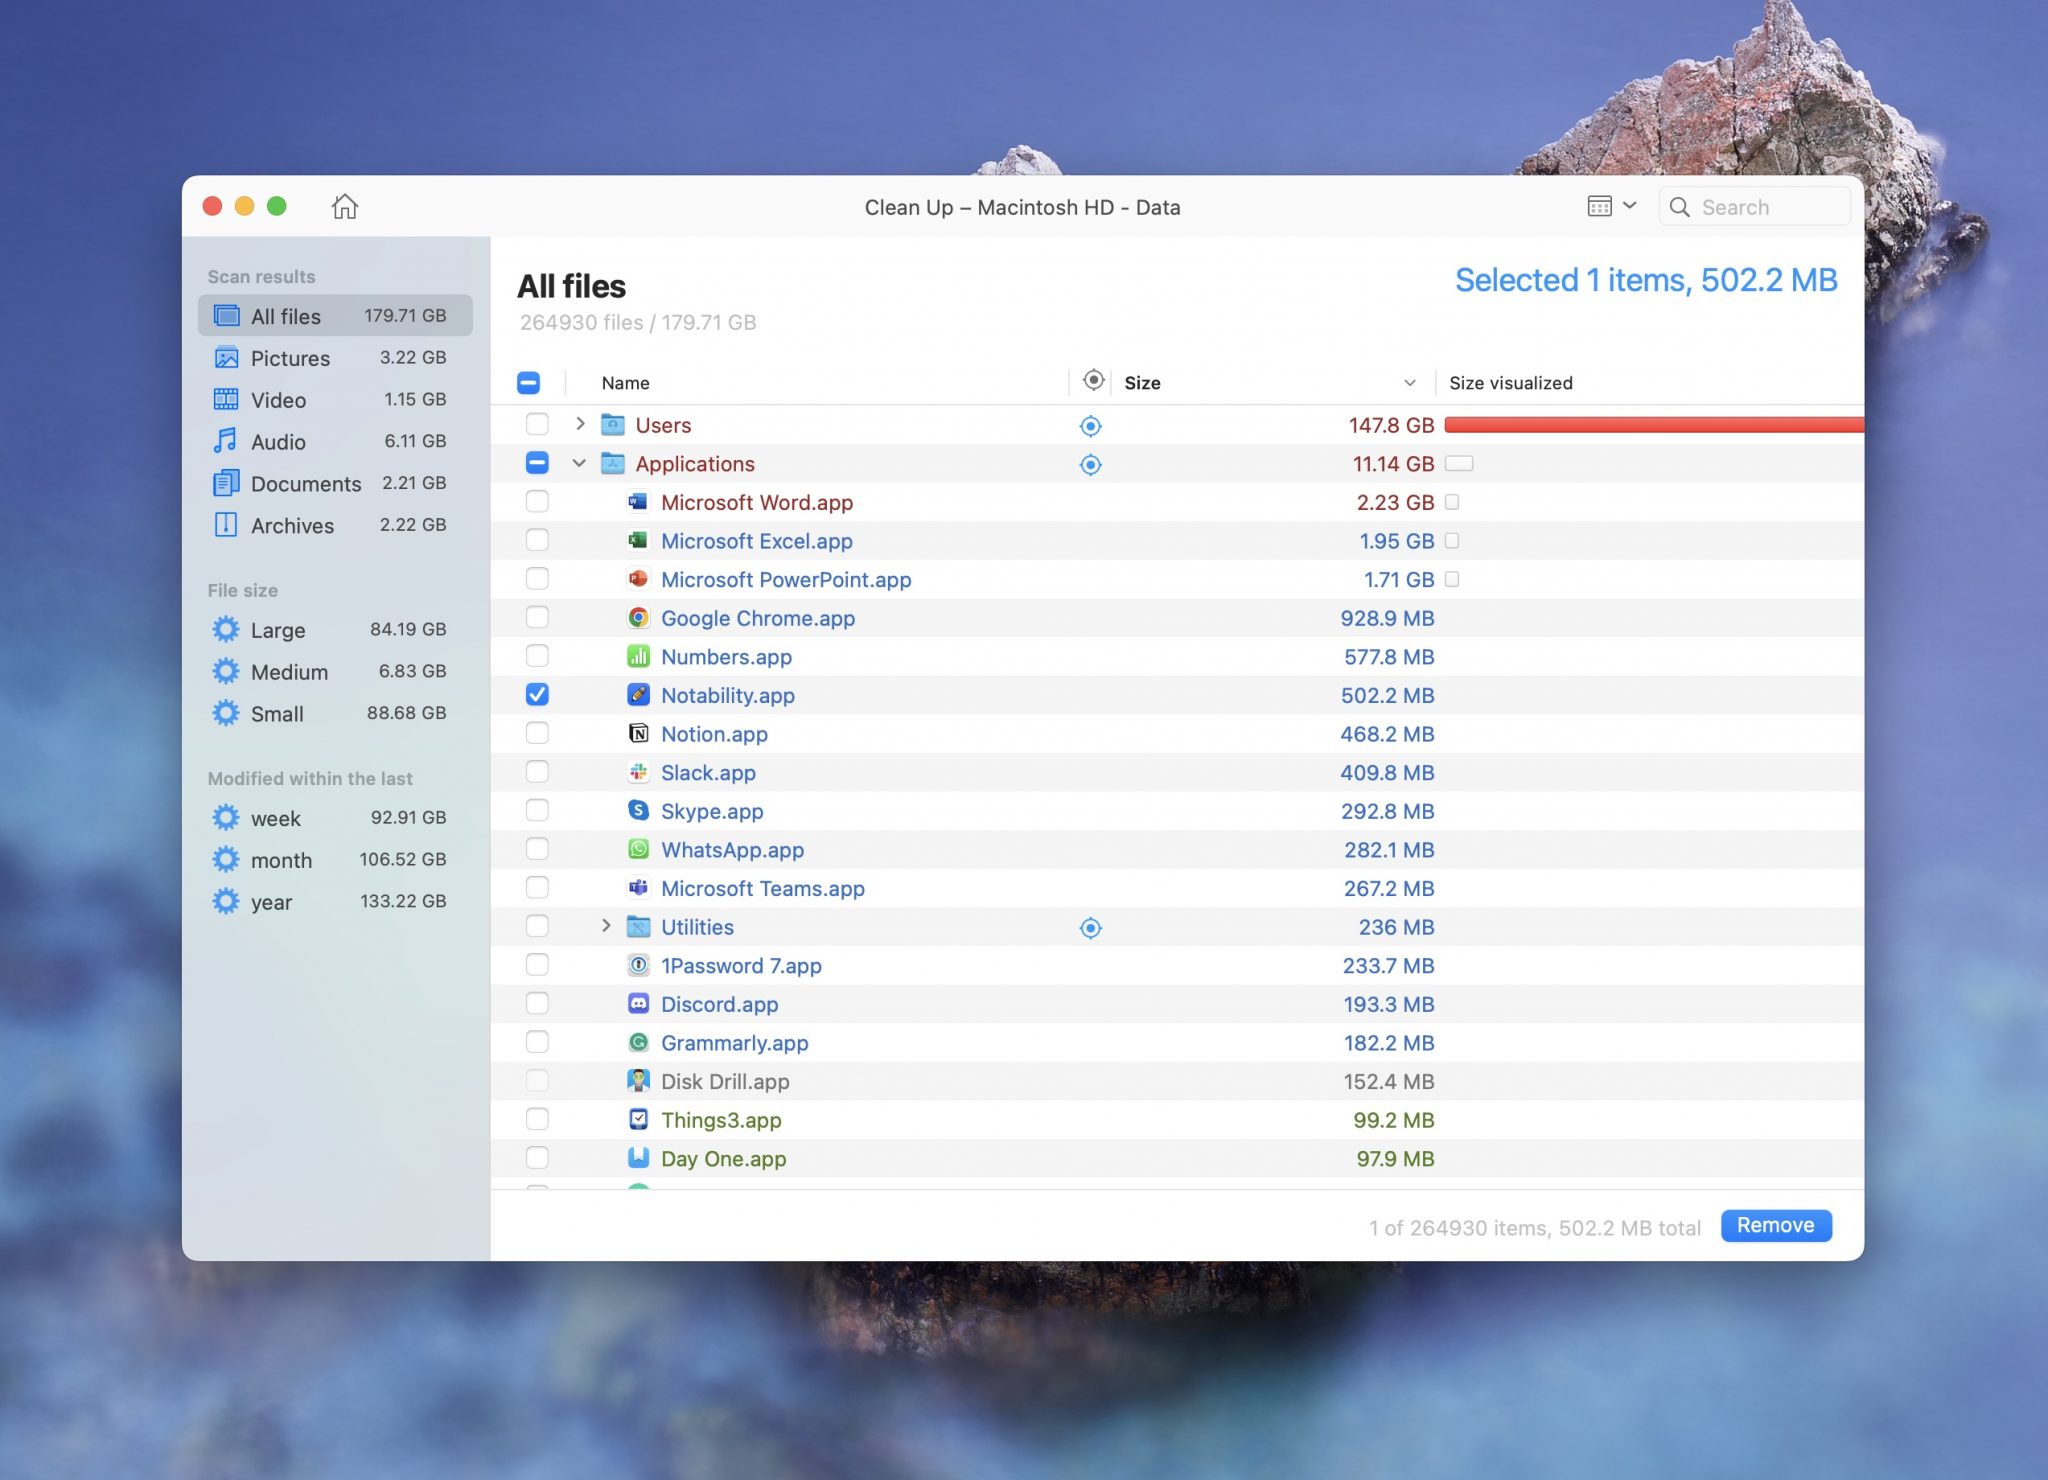
- Review the results that Disk Drill has displayed to you and remove any that you don’t need to clean up your Mac.
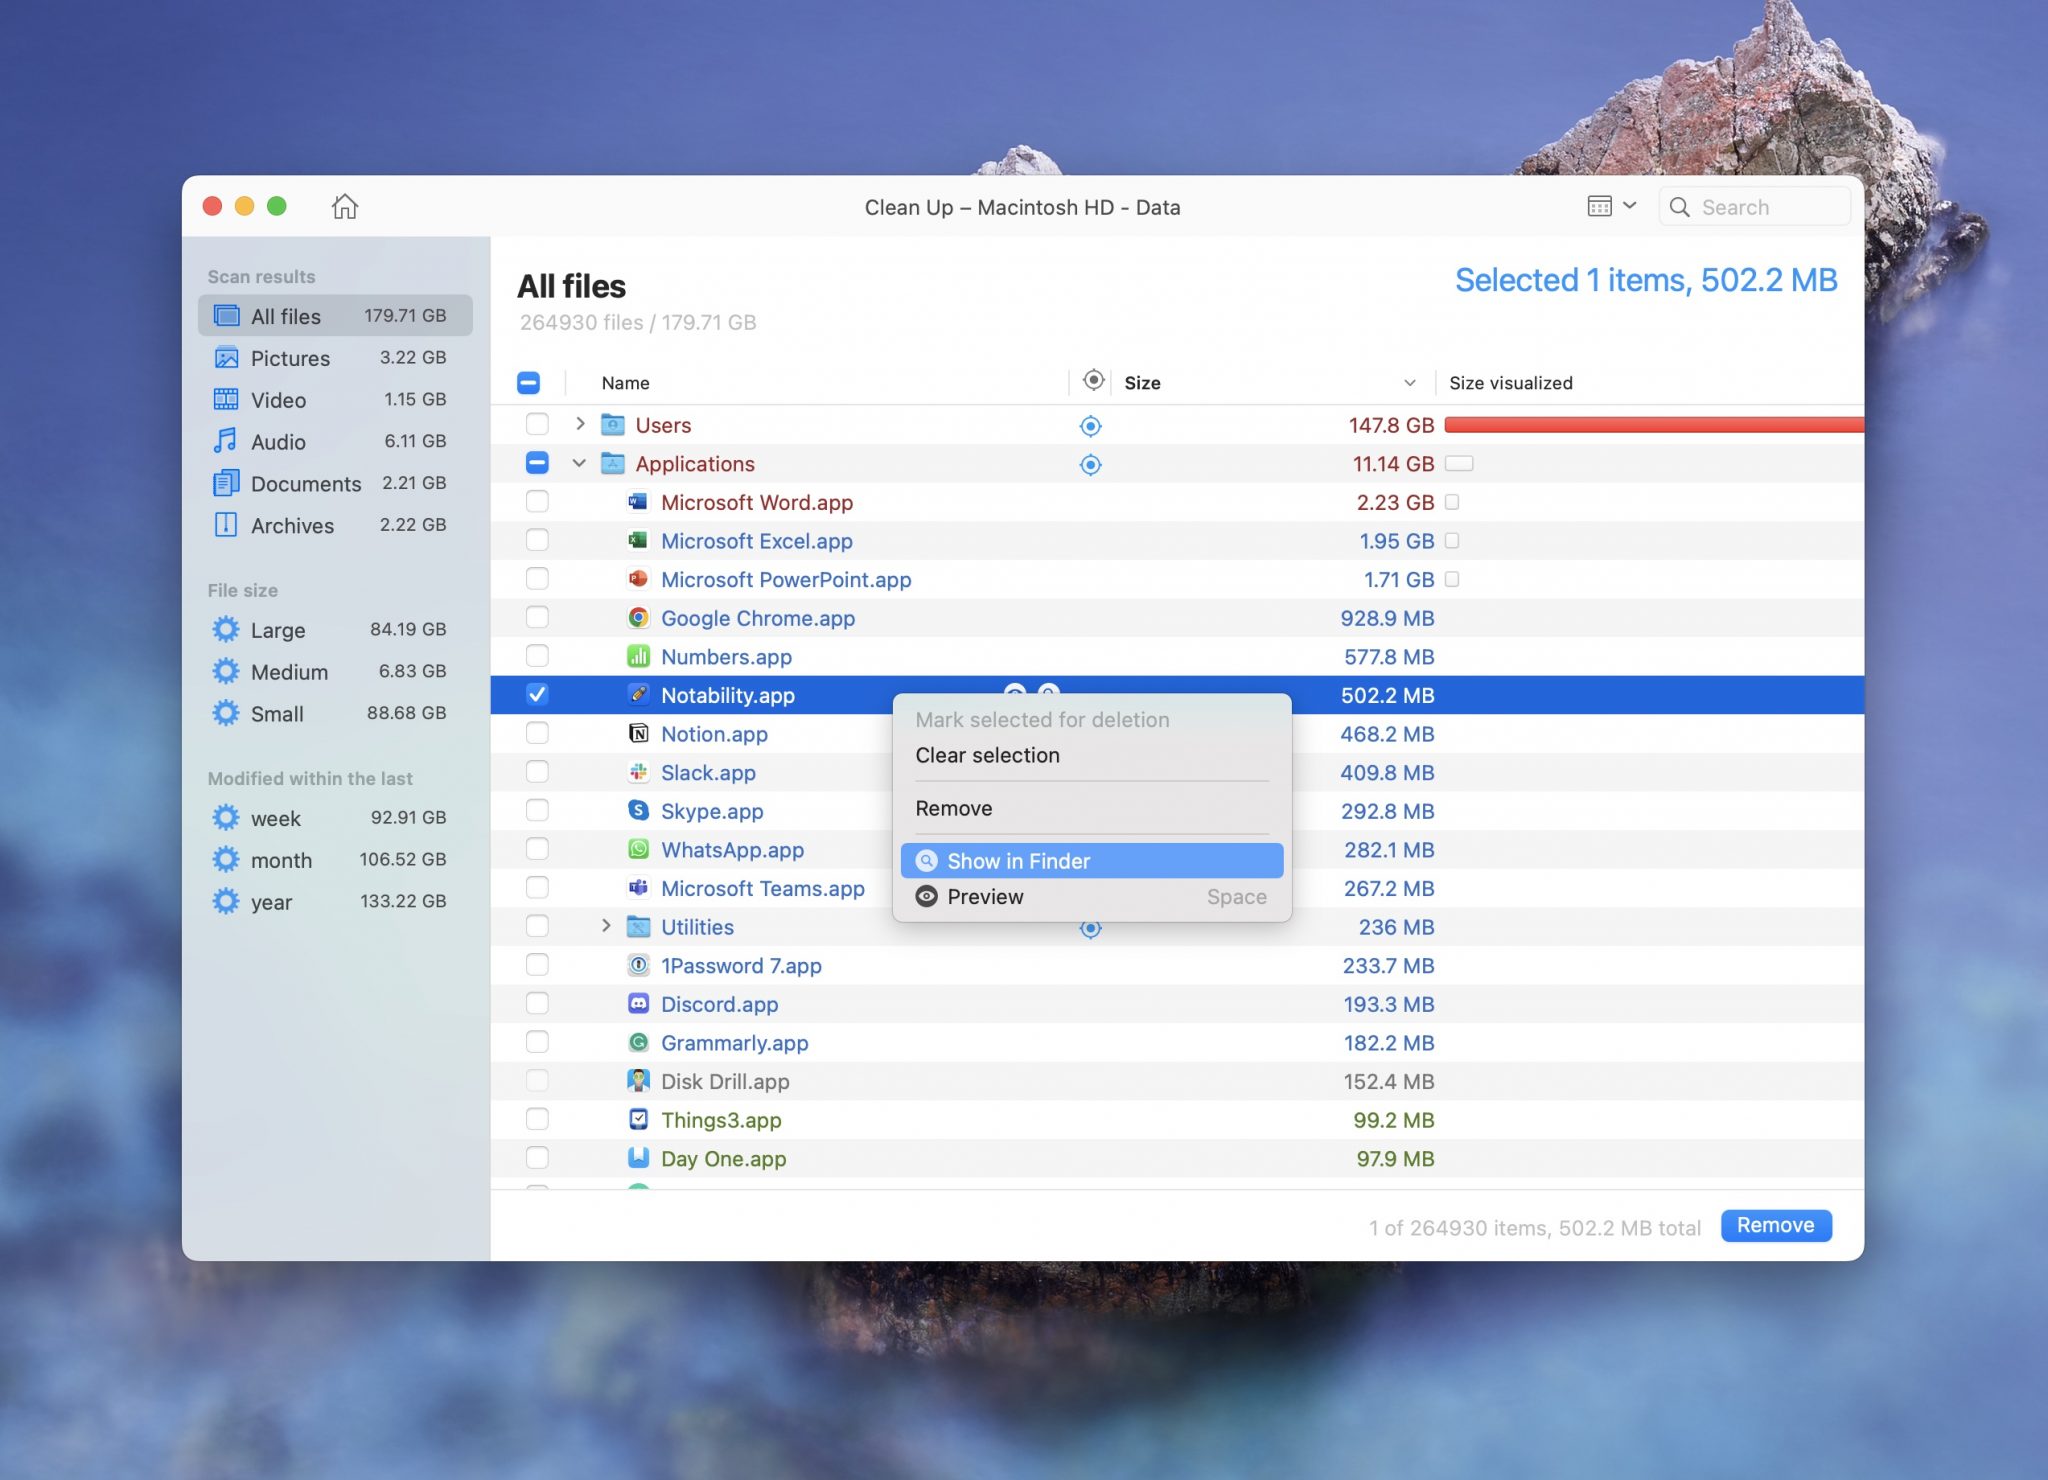
- If you are unsure about deleting the file fully from your disk, you can select the ‘Show in Finder’ option and then move it to the Trash. Disk Drill knows which files cannot be deleted without potentially harming your operating system and will not let you select these files.

Using Disk Drill you can address the issue of your Mac’s Other Storage in a simple and intuitive manner. The app protects you from inadvertently deleting files that could have a negative impact on your computer.
Let’s take a look at some other ways to clean up the Other storage on your Mac.
Way #2. Identify Files Using Finder
Many temporary files that are grouped into the Other category are stored in some specific locations on your Mac. Here’s how to find them.
- Open a Finder Window and press ⌘Cmd + ⇧Shift + G to open the ‘Go to Folder’ dropdown.
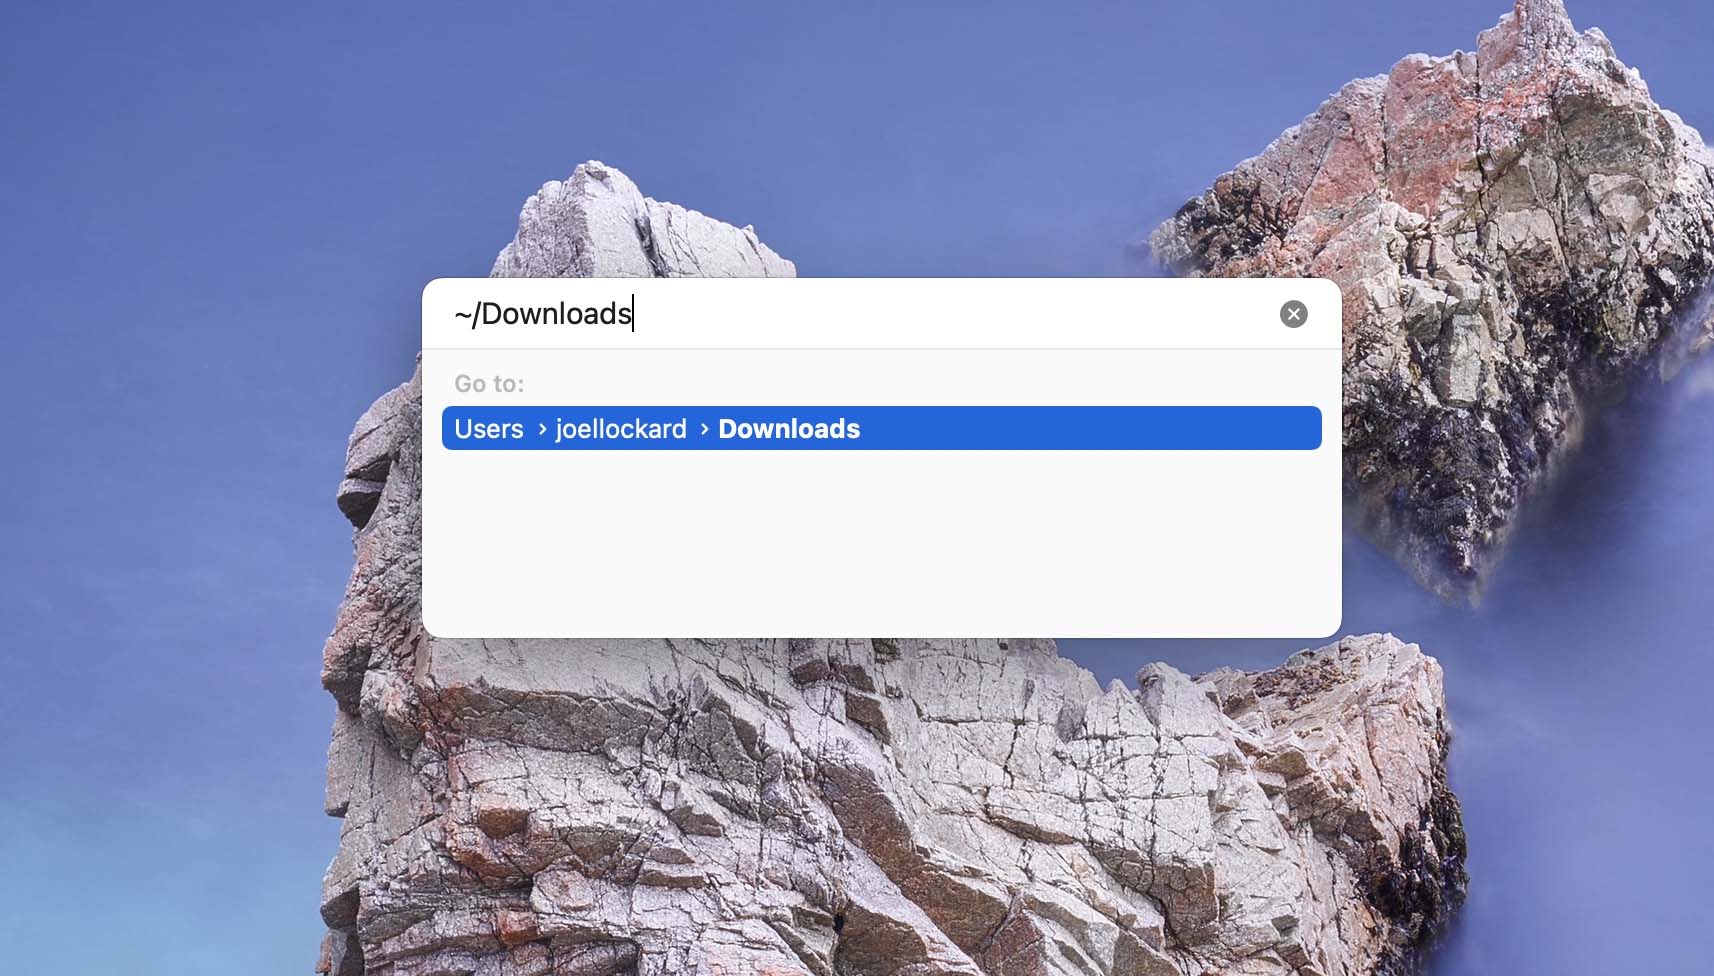
- Go to these locations:
• ~/Downloads
• ~/Library/Caches
• ~/Documents/Logs - Delete any unnecessary files that you find in these folders. I have found that the Downloads folder can hold a large number of tiles that take up space on your Mac.
Way #3. Identify Files With a Smart Folder in the Finder
Within the Finder on macOS, there are Smart Folders. These folders are a tool that can help us organize and find files. They’re basically a search criteria that we set and then search for things that much our parameters.
This is another powerful way that we can use to find and remove files that we don’t want on our Mac that take up the Other category when it comes to our storage.
- Сlick ⌘Cmd + F on the desktop.
- Click This Mac to use your Mac for the search.
- Click the ‘+’ sign to the far right to identify search parameters.
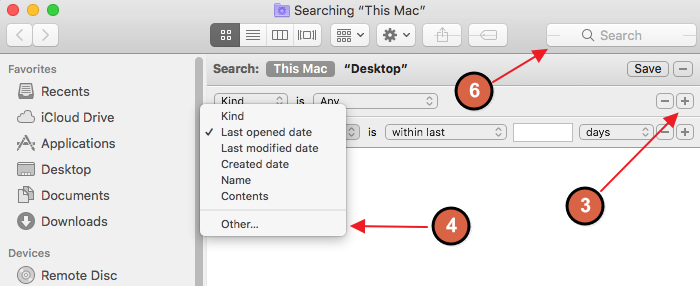
- Select ‘Other’ from the first dropdown menu.
- Select File Size and File Extension.
- Use the Search field to review different types of files such as .txt or .pdf. Identify unwanted files and delete them.
If you’re wanting a more visual way to see the data on your computer, then our next method is the one for you.
Way #4. Use DaisyDisk to Remove Files
DaisyDisk checks & frees up disk space on Mac computers with efficiency and simplicity. This is mainly because it has a beautiful interface, presented in the manner of an interactive wheel for easy and intuitive visualization. It’s awesome for trying to find individual files and just for a way to look at your disk space in visual representation.
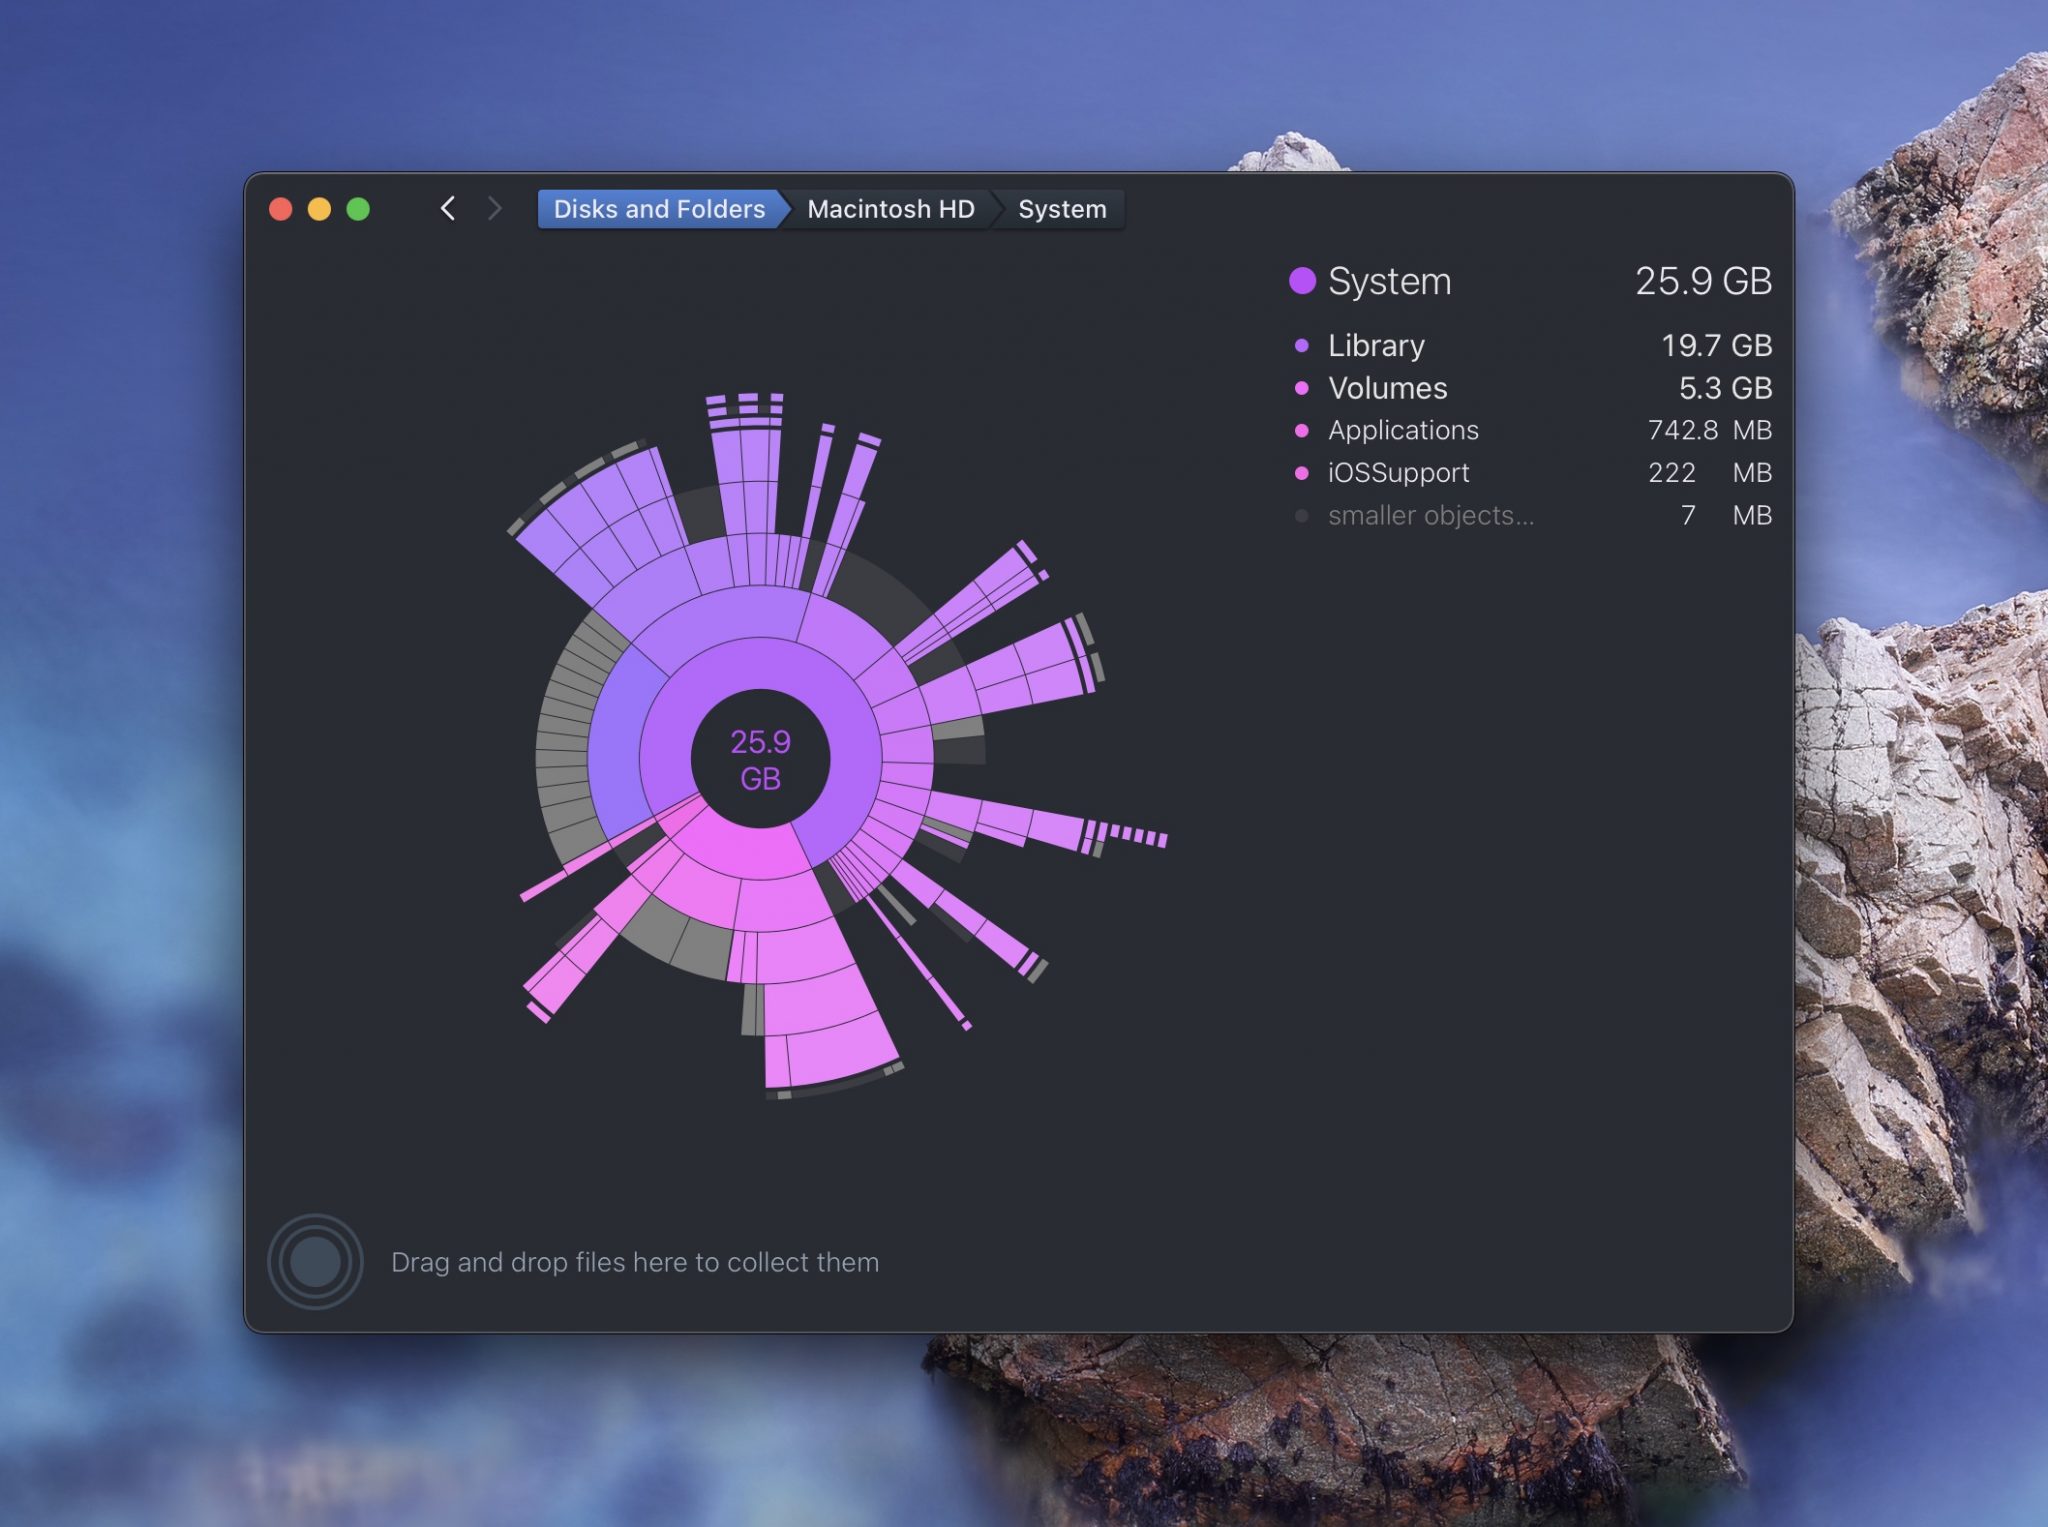
DaisyDisk is very fast and shows an overview of all disks connected to the Mac. Changes are updated in real-time, making it ideal for analyzing and making a wise decision on what to delete and what to keep.
Way #5. Use the Built-in Manage Storage Option
Apple has a built-in Manage Storage option that you can use to find large files and remove them from your Mac. This option is a solid choice as it doesn’t require you to download anything to use it.
- Click on the Apple logo and then select About This Mac in the upper left-hand corner.
- Select Storage from the options.
- Once on the Storage tab, select Manage…
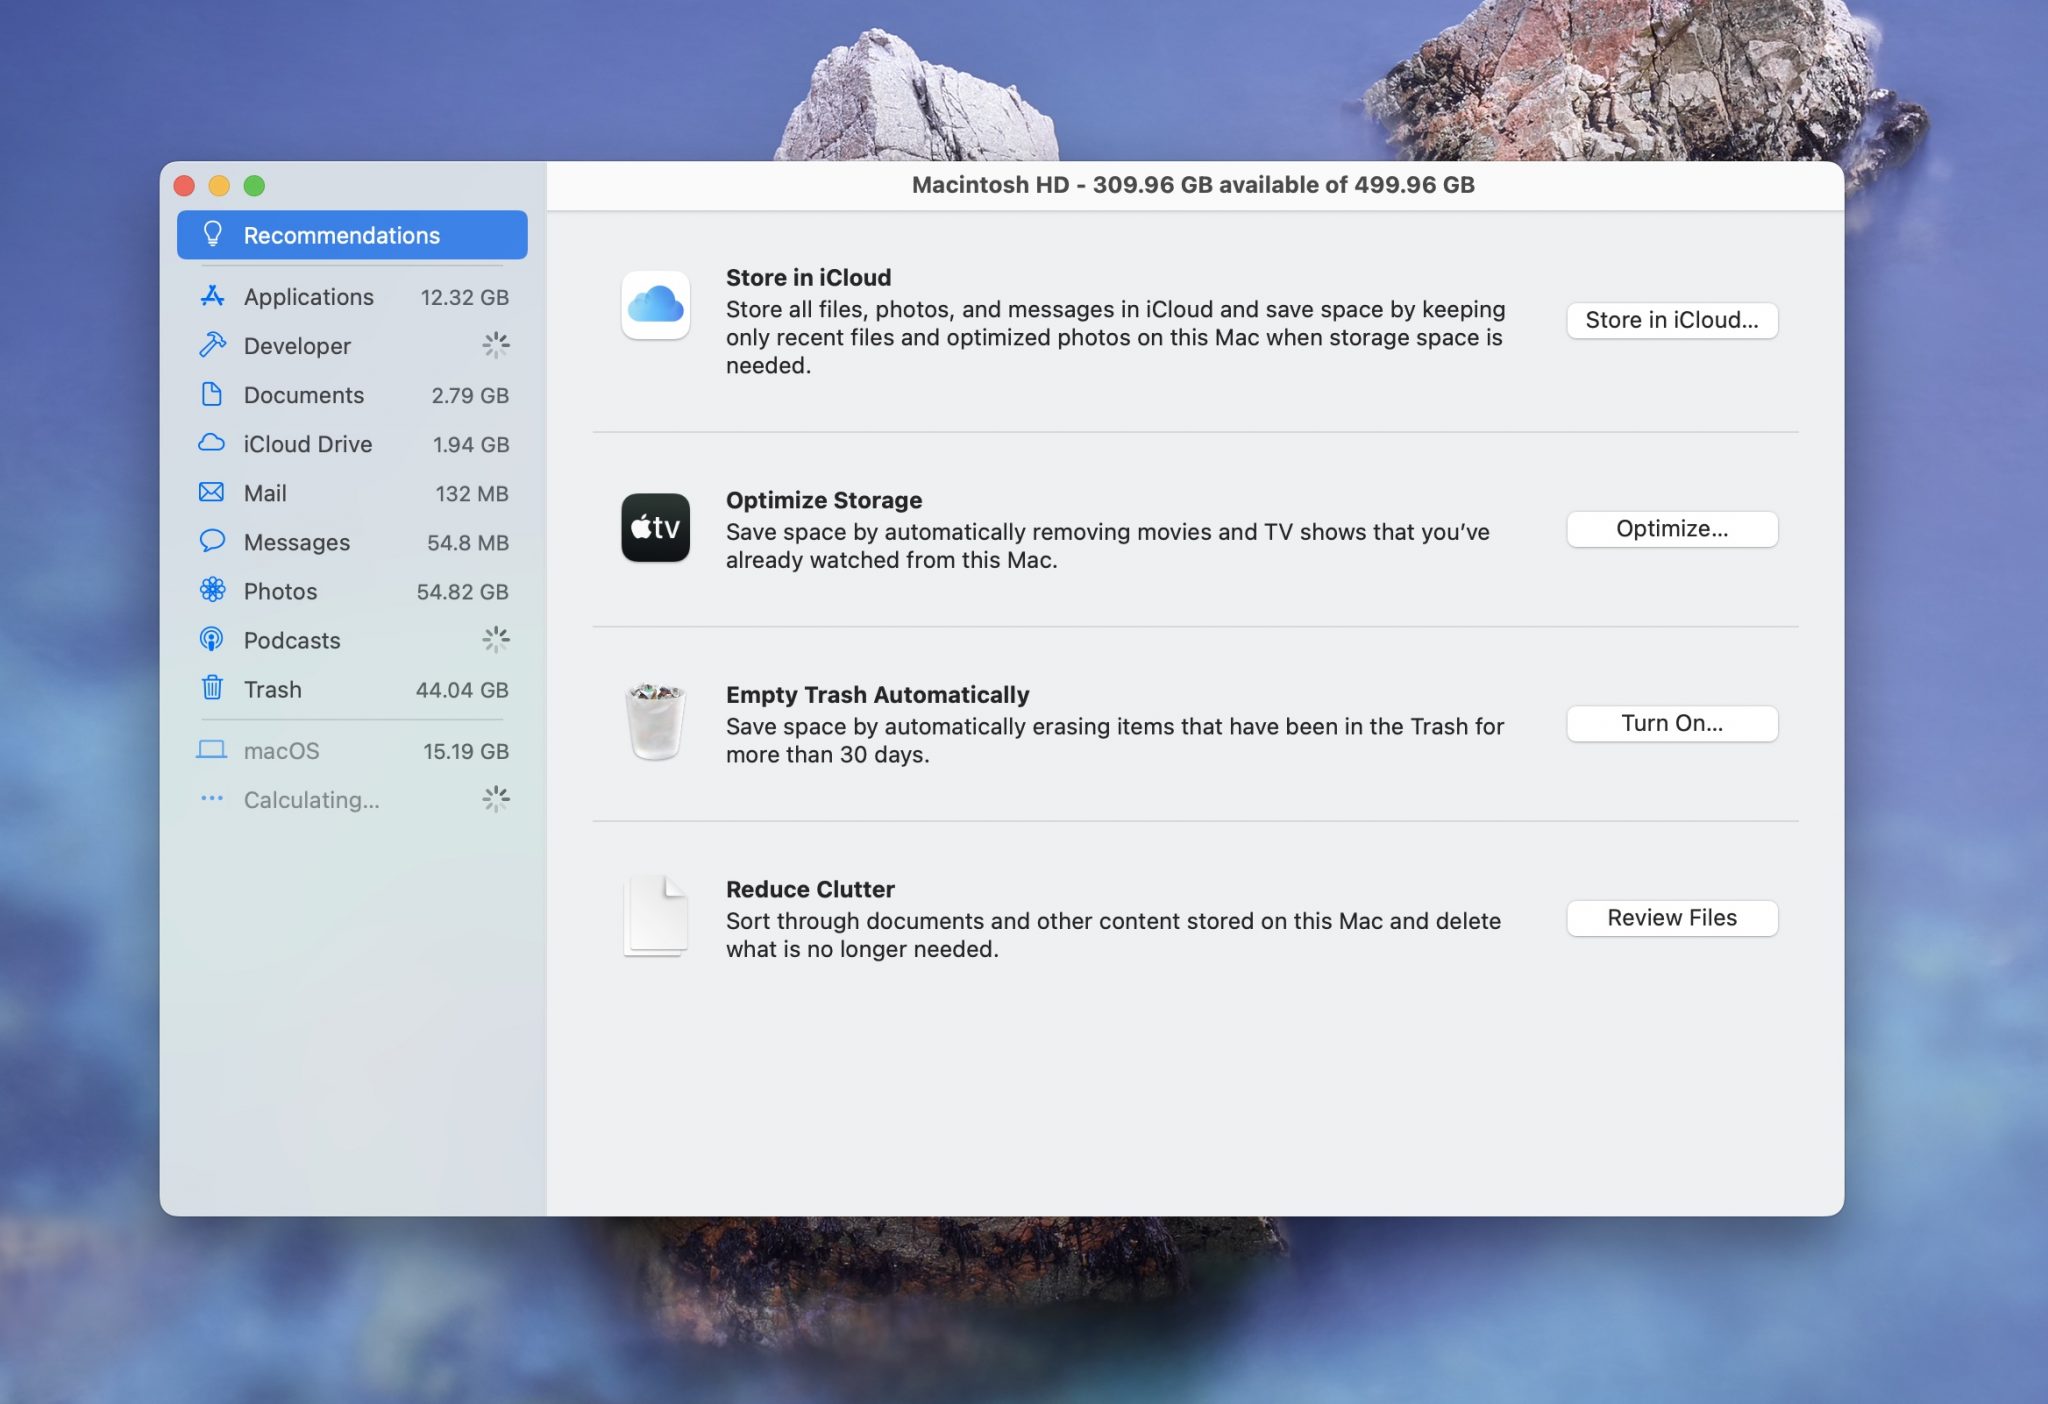
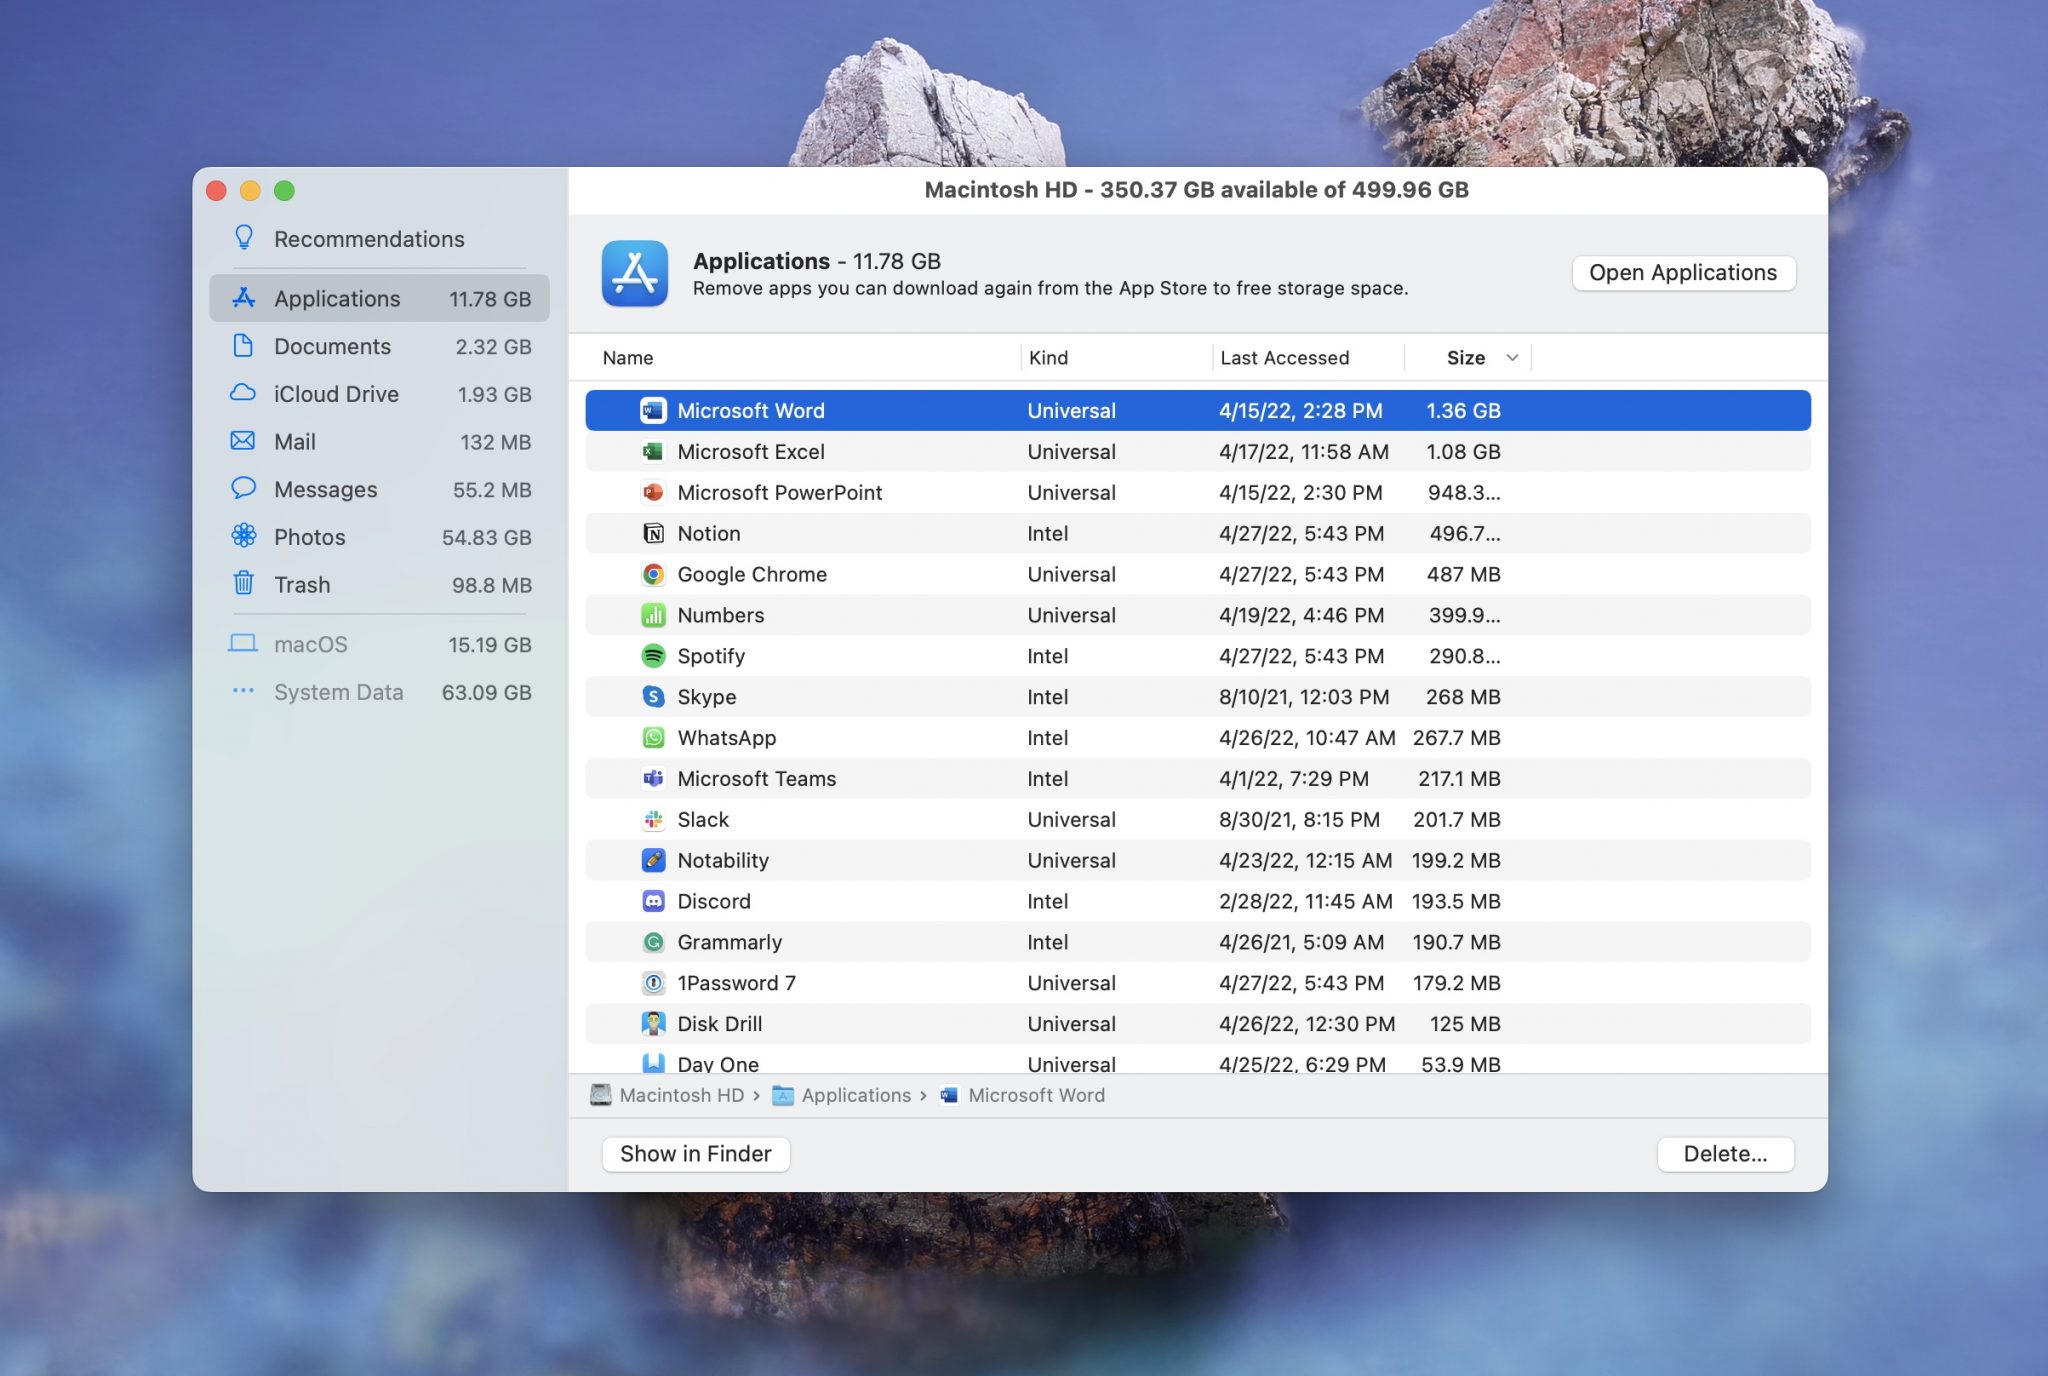
- There are many options that you can explore here for freeing us space on your Mac. I always recommend going to the Trash and then also checking your Applications for any large applications that may be on your Mac that you’re not using anymore.
Conclusion
Using the methods we have described will help you control the Other storage that is clogging up your Mac, leading to slower performance or reduced disk capacity. With all of these methods assisting you in eliminating unwanted files, there is something for everyone.
Use Disk Drill if you free and powerful Clean Up feature, Smart Folders in Finder allow you to take on a more tech savvy approach, DaisyDisk gives you a beautiful visual representation of your data on your Mac, and the Manage function is easy to use and doesn’t require you to download any additional software.
FAQ
Deleting Other storage on Mac is actually quite easy to do. Disk Drill offers a free feature called Clean Up that will allow us to get rid of the Other storage on our Mac.
- Download and install Disk Drill onto your Mac.
- Launch the app and then go to the Clean Up section on the left-hand side.
- Choose the disk that you wish to analyze and click ‘Scan’.
- Allow Disk Drill to fully analyze your disk. This may take several minutes depending on the size of the disk.
- Review your disk analysis and delete unwanted or duplicate files.
- If you are unsure about deleting the file fully from your disk, you can select the ‘Show in Finder’ option and then move it to the Trash. Disk Drill knows which files cannot be deleted without potentially harming your operating system and will not let you select these files.
The standard categories on a Mac are Apps, Photos, Documents, Audio, and Video. When a file doesn’t fit into one of these, it will then go into the Other category which can cause confusion as to what is taking up space on our Mac.
You can use DaisyDisk to get rid of the Other storage on your Mac. DaisyDisk checks & frees up disk space on Mac computers and does so by giving us a graphical interface.
- Download and install DaisyDisk.
- Launch the app and then scan your Mac so that we can find the Other files.
- Search through the results that DaisyDisk has presented to you.
- Review and delete the ones that you don’t need anymore.
I really love DaisyDisk due to how beautiful and easy to use the interface is and I would recommend that you download it and try it out.