ISO files are a fantastic way to back up important information or to digitally distribute software in a simple manner. But just like any other file type, ISOs are prone to loss due to various reasons, including loss of power during the writing process, virus and malware attacks, and more. Fortunately, the deletion of ISO files isn’t necessarily gone for good and there are a few effective ways to recover them.
In this guide, we’ll teach you a bit more about what ISO files are, what they’re used for, and the different methods you can leverage to get them back in case you’re ever faced with file loss or accidental deletion.
What is the .ISO Format?
An ISO file or image is a kind of archive that serves as a perfect copy of the contents that would be found on an optical disc, like a CD, DVD, or Blu-Ray. They’re most commonly used for creating exact backups of optical discs, for creating archives of files that are intended for writing onto an optical disc, or for distributing large sets of files, like programs or operating systems. The ISO file format got its name from the file system used in CD-ROMS which is ISO 9660
How To Recover ISO Files on Windows
ISO files may contain very sensitive information, especially when they’re being used for backup purposes, so accidentally deleting them or losing them to file deletion can be a pretty major setback. The good news is there are certain methods you can utilize to retrieve these files. One thing you should keep in mind, however, is that some of these methods only work in specific situations and may require you to have enabled certain features before you’ve incurred the data loss.
How To Recover ISO Files With Software
One of the most effective ways to get back your lost ISO files is through the use of an effective data recovery program since it works with a wide range of data loss scenarios. Disk Drill is a particularly impressive app because of its sky-high recovery rate, incredibly intuitive user interface, speedy retrieval process, and host of extra features.
It includes the ability to resume previous recovery sessions at any time and users can even use it to create their own ISO files for backup purposes. Moreover, Disk Drill offers a free version that allows the rescue of up to half a gigabyte’s worth of data before requiring to invest in a paid version. Follow the steps below to recover missing or deleted files using Disk Drill:
- Download the setup file from the official Disk Drill website.

- Launch the downloaded file and follow the on-screen instructions until the program is successfully installed on your computer.
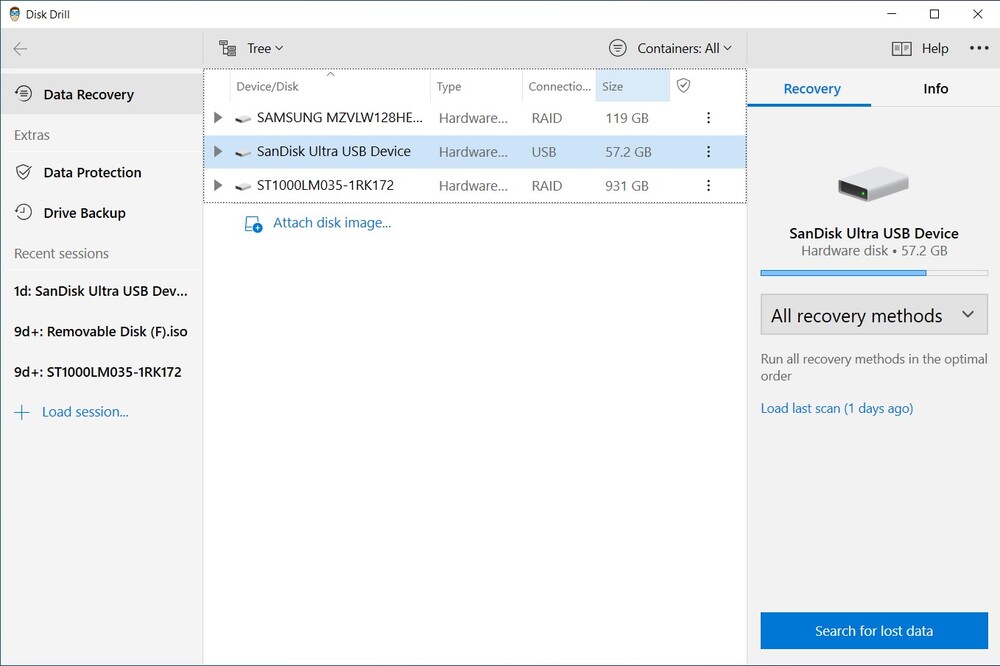
- Launch Disk Drill, select the storage medium you want to recover ISO files from, then click the Search for lost data button.
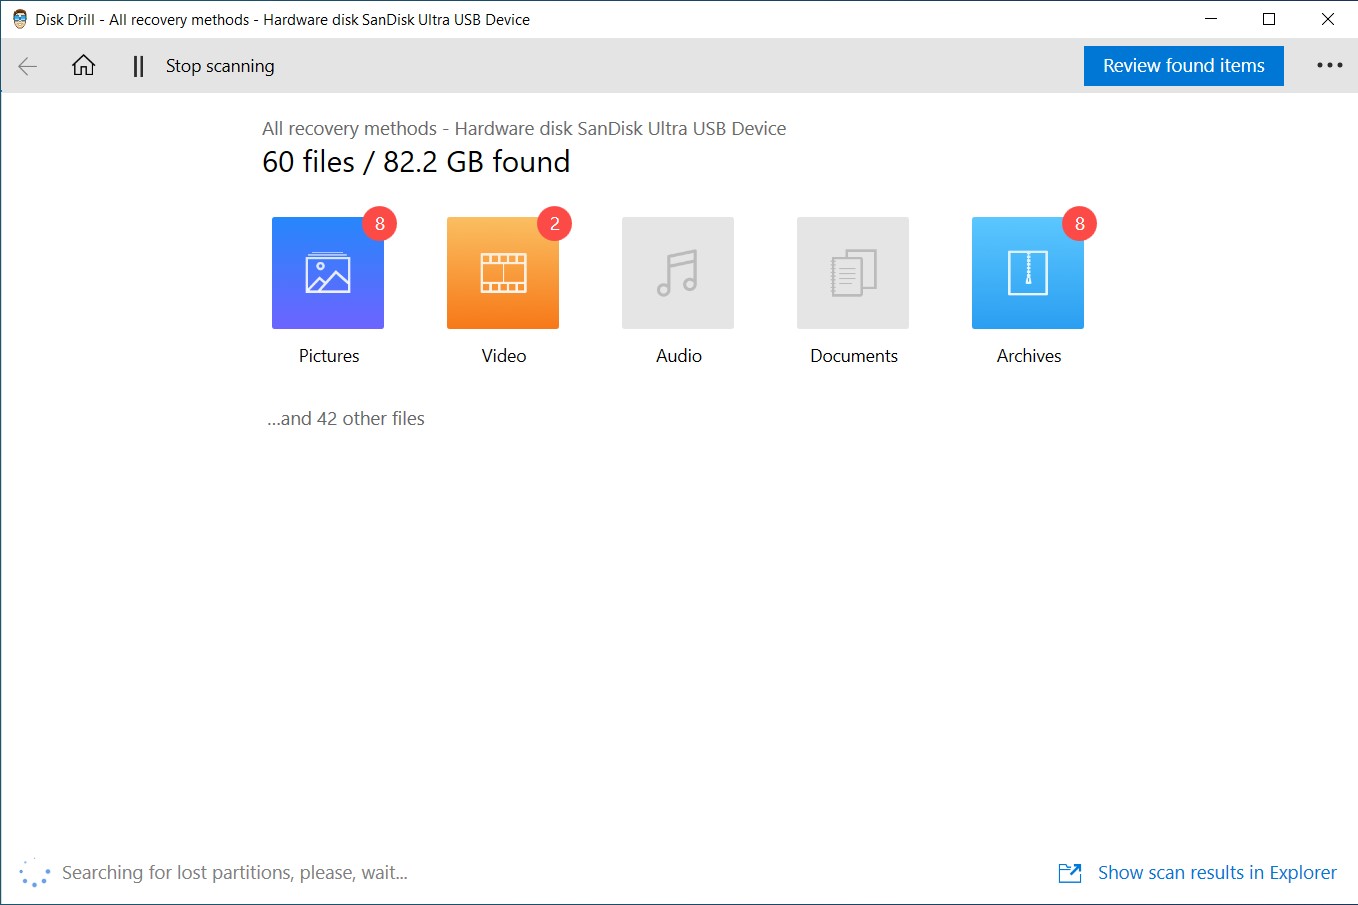
- This will start the scanning process which searches the storage medium for all recoverable files. How long this takes depends mostly on the overall size of your drive, as well as the speed at which it can be read. While the program is scanning, you can click any of the category icons shown on the window to go to the results page. That way, you can browse all the recoverable files that have been found so far.
- Once the drive is completely scanned, you can proceed to the results page where you’ll find any recovered ISO files in the Archives section. Just make sure you uncollapse the Found Files dropdown and browse the folder your ISO files were last in.
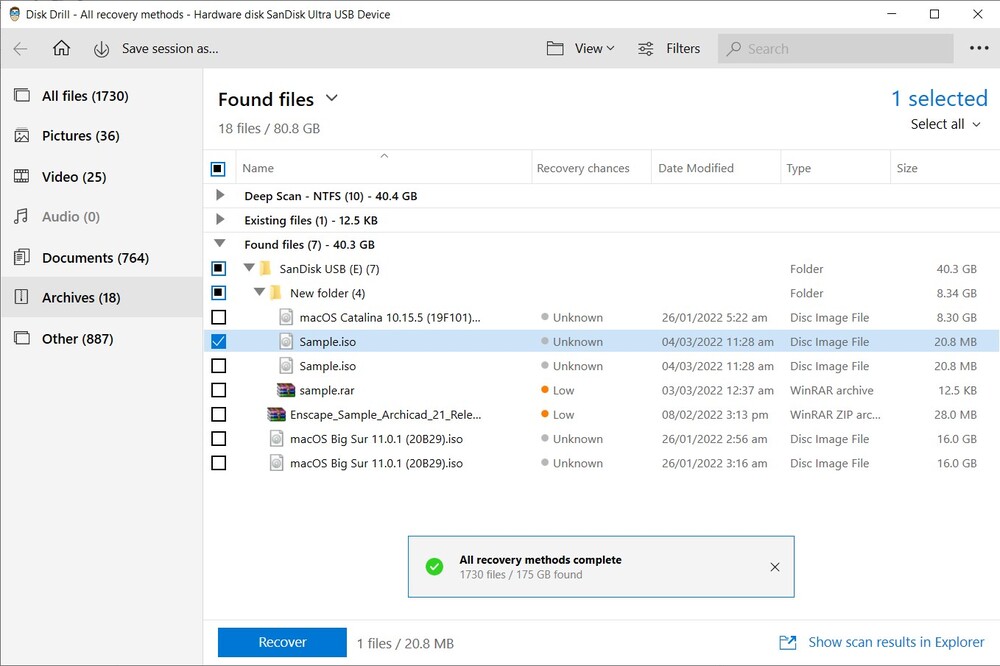
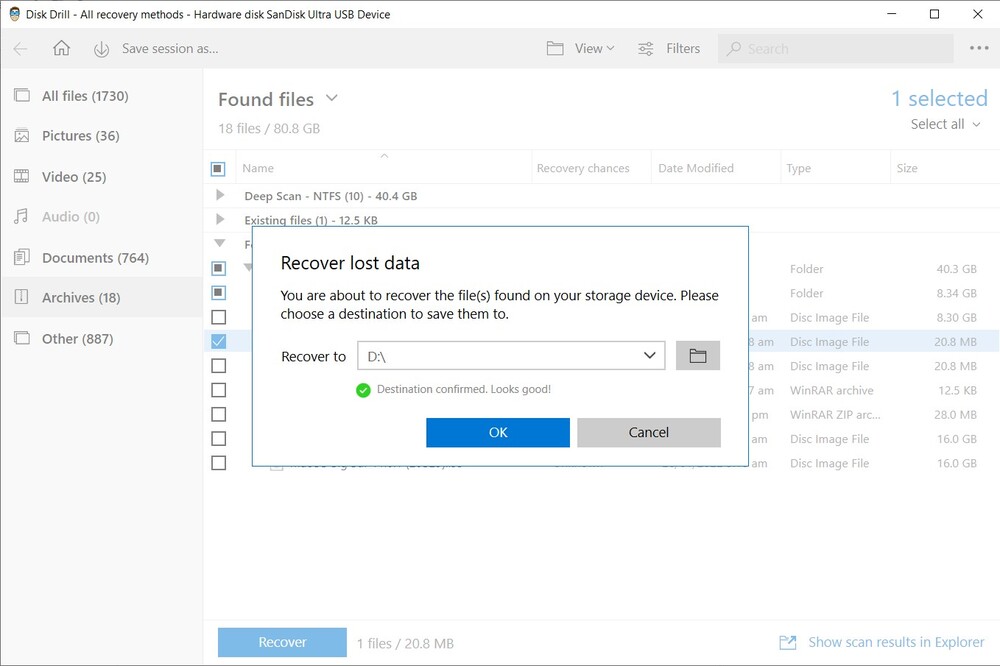
- Select the files you want to retrieve by ticking the checkboxes on the left side of the file name then click the Recover button. A pop-up should appear asking you to choose the destination path where your recovered files should be saved. Bear in mind that this location should be in a separate storage medium than the one you’re recovering from or you might end up facing overwriting problems. Click the OK button when you’re all set.
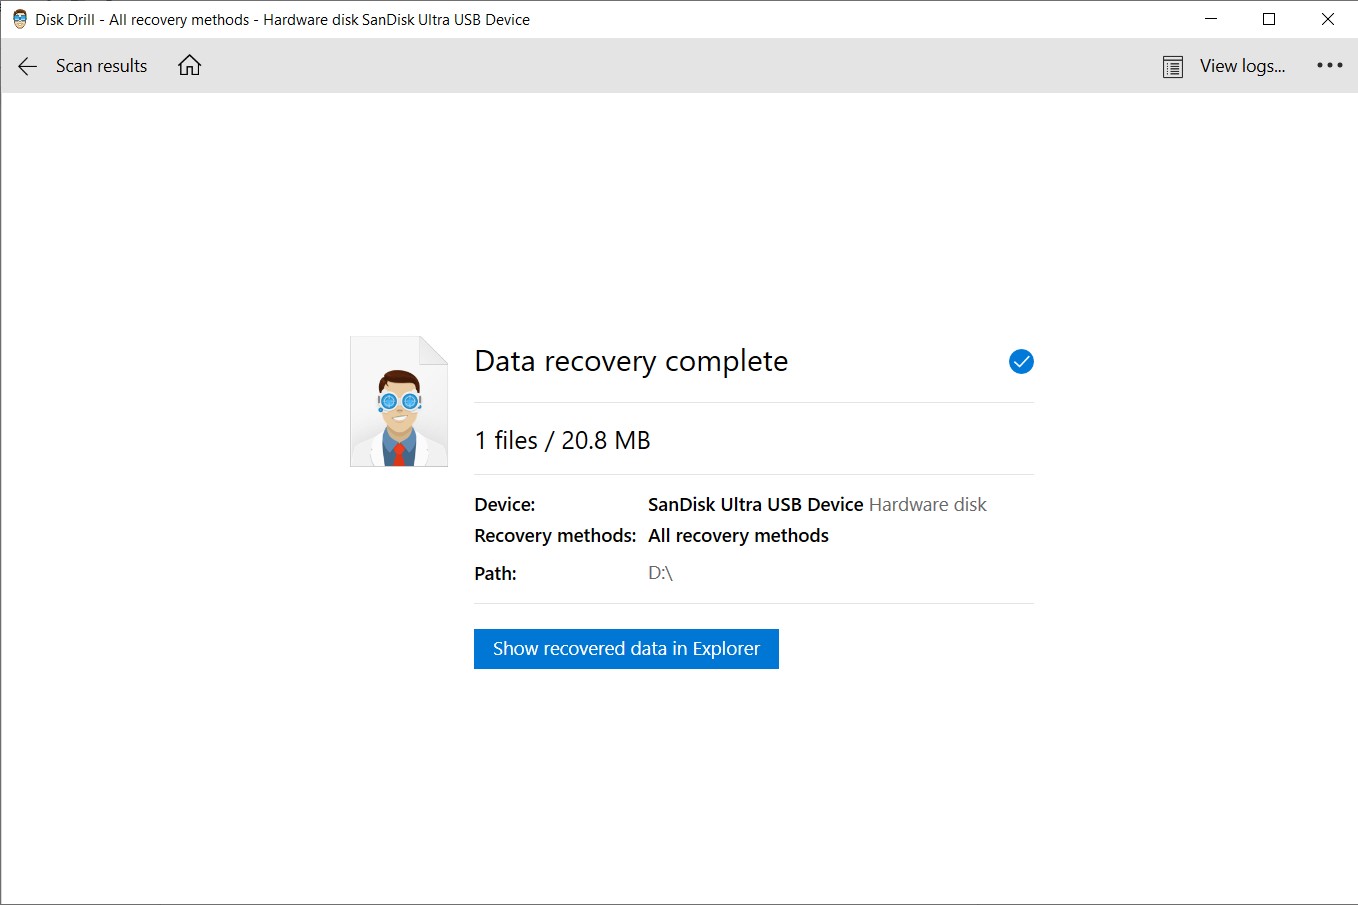
- The recovery process should now begin. ISO files can be quite large in size so it may take some time to retrieve them depending on what you’re trying to get back. Once the process is completed, you’ll be presented with a Show recovered data in Explorer button that you can click to be taken to your recovered files.
Recover ISO Files from Windows Recycle Bin
Restoring files from your Recycle Bin is an incredibly straightforward process, though it does have a few caveats. This method only works for files that are erased using the Delete key or through the right-click > Delete command since they don’t just disappear and are taken to the Recycle Bin first. If you deleted the files using the Shift + Delete method, then you’ll have to get them back using recovery software instead. Here’s how you can retrieve files from your Recycle Bin:
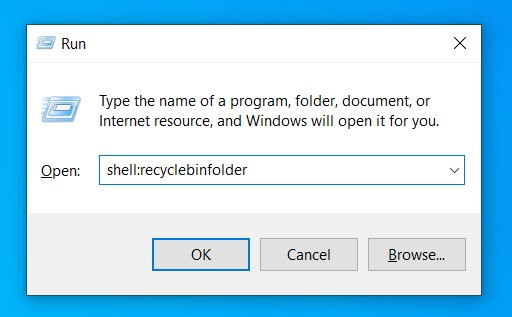
- Open the Recycle Bin from your Windows desktop or bring up the Run command window by pressing Windows + R, then type in “shell:recyclebinfolder” and hit Enter.
- If your ISO files are found here, highlight them, then right-click and select the Restore option.
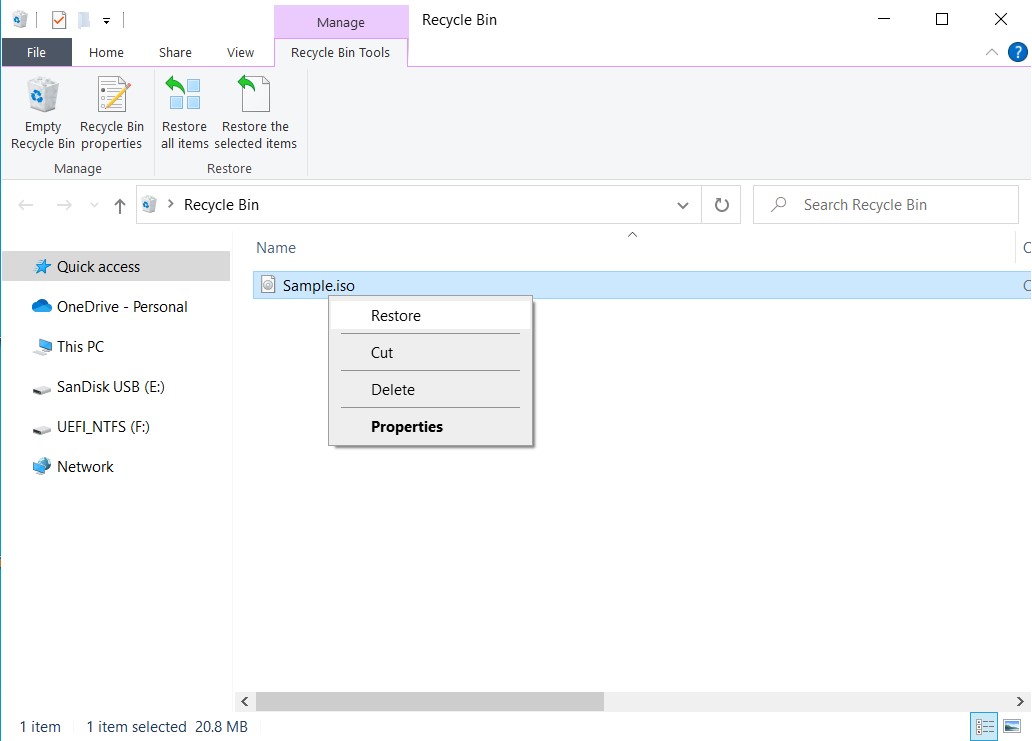
- The ISO files should now be returned to the location they were in before being deleted.
Restore from File History
File History is an exceedingly useful tool that’s built into more recent iterations of the Windows operating system. It allows you to restore specific versions of files as long as they’re located in one of the designated folders. You can customize the tool to regularly create backups at intervals of your choosing, which is a good way to keep your information safe and for you to be able to roll back files to their previous versions in case you make a mistake.
File History has its limitations, however. You can only recover files through the feature if you enable it prior to when the data loss takes place. It also requires your files to be located within one of its designated folders. Another thing you’ll need to keep in mind is that File History requires another storage medium to function since that’s where it saves all the backups. Follow the instructions below to recover files using File History:
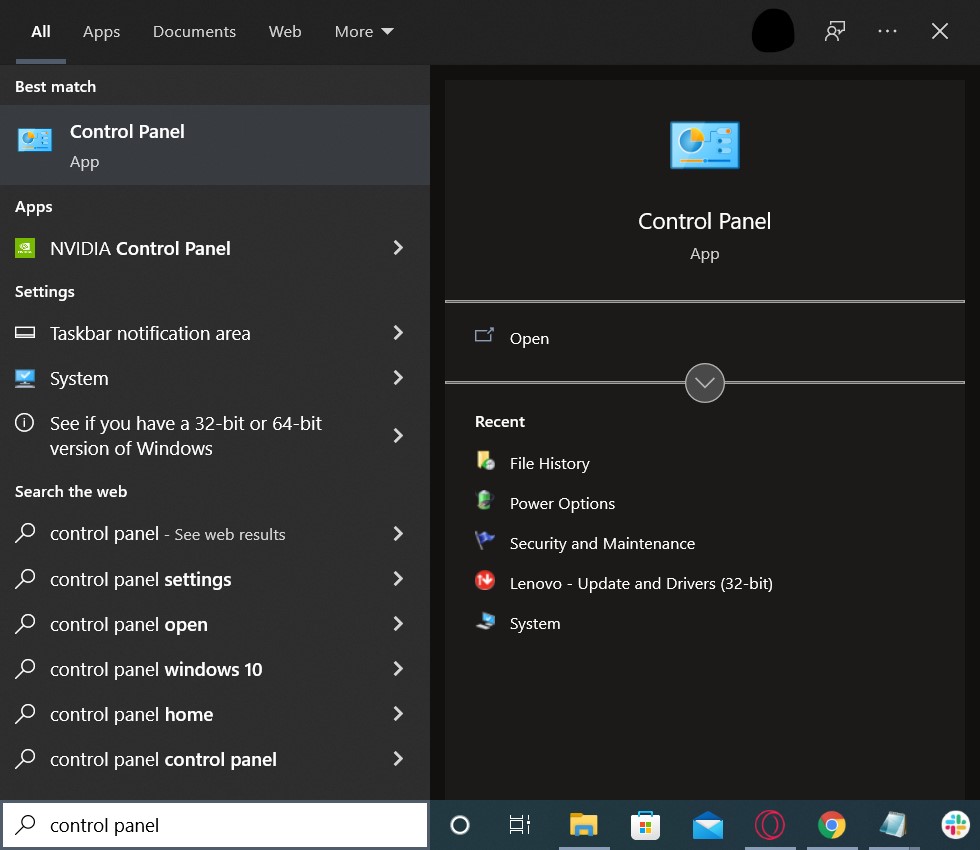
- Bring up the search tool on your Windows taskbar and type in “Control Panel”. Select the top result.
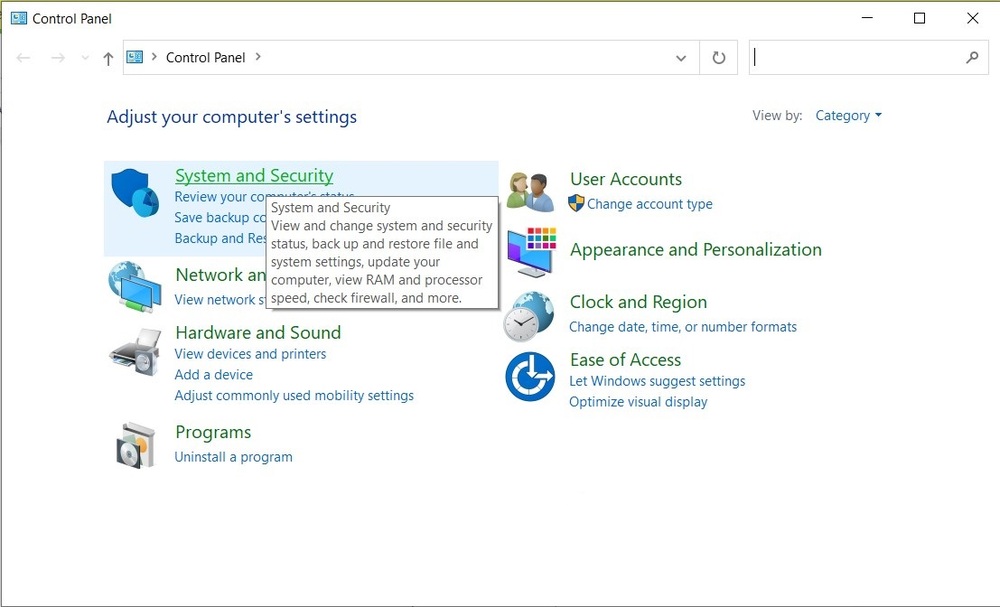
- Navigate to System and Security and then File History.
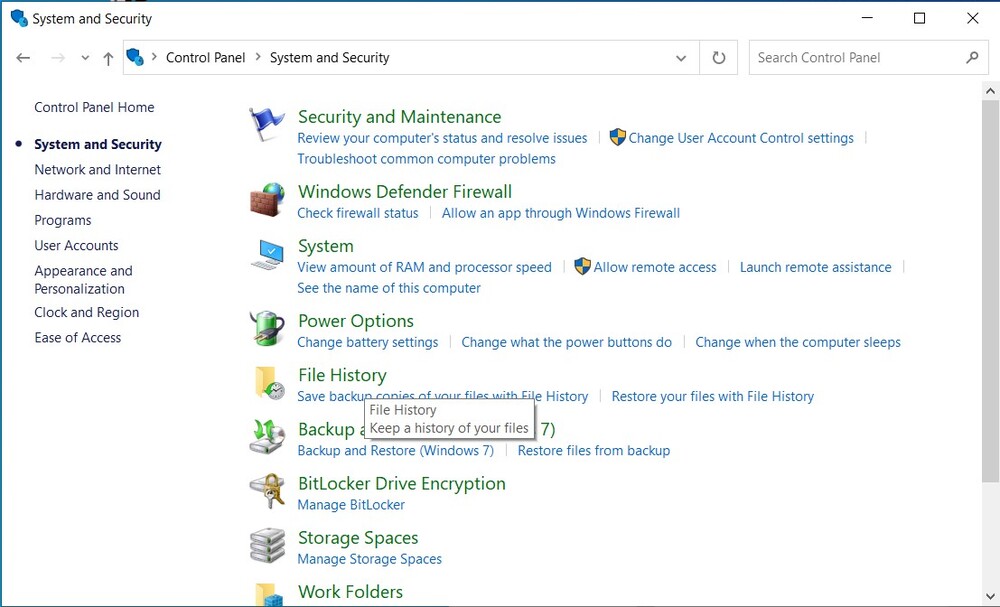
- Click the Restore personal files link found on the left side of the window.
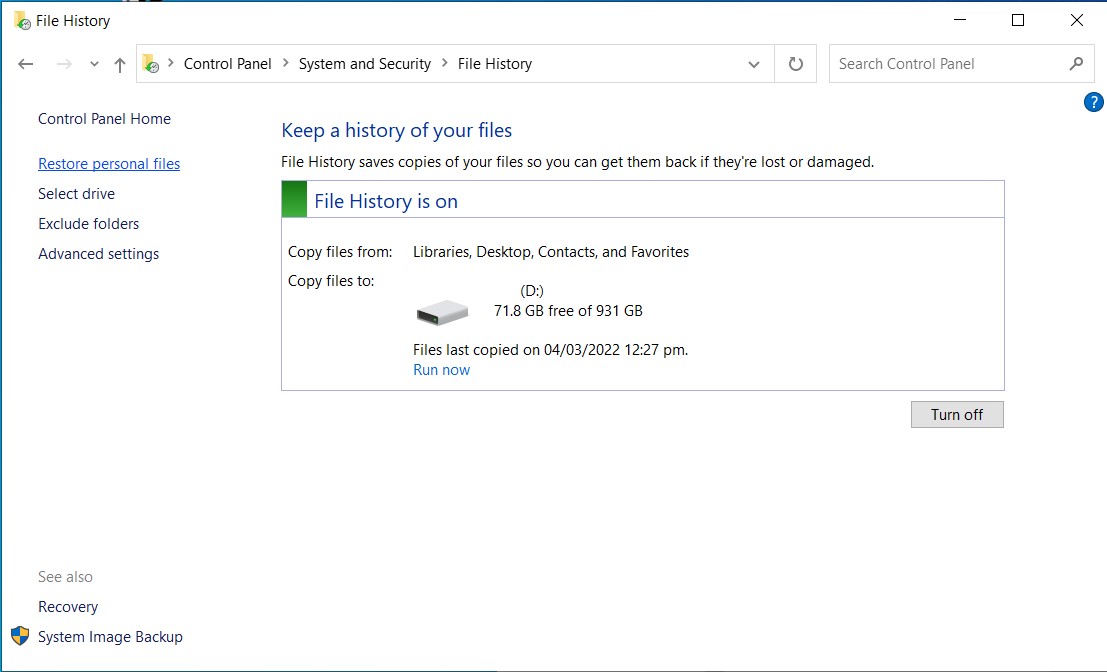
- Navigate to the location your ISO files were last in.
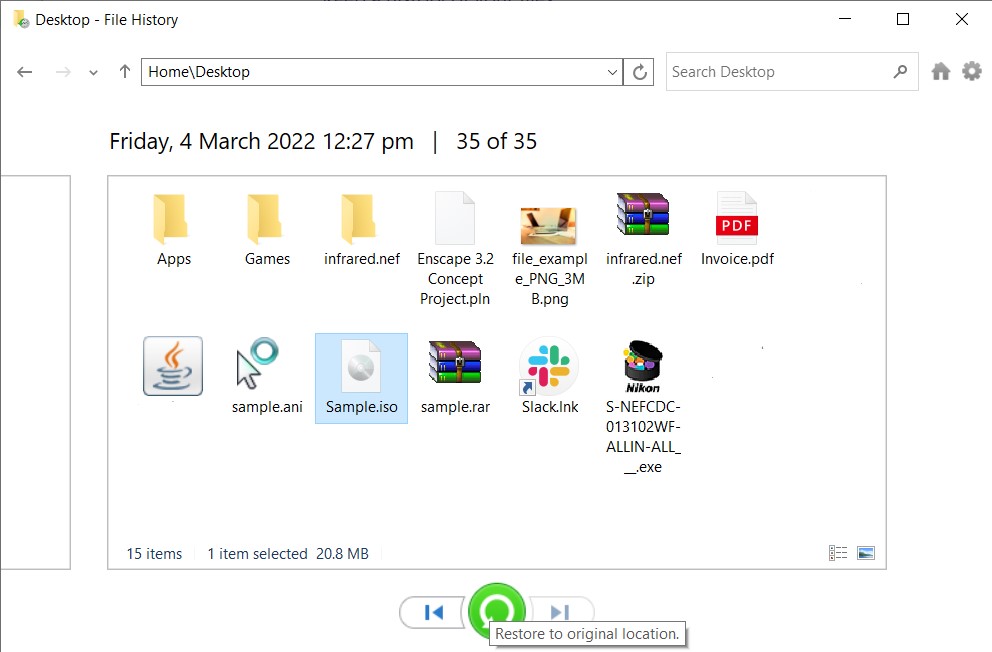
- Select any files you want to restore and click the green rounded arrow at the bottom of the window. This will return the files back to their original location.
How To Open ISO Files On Windows
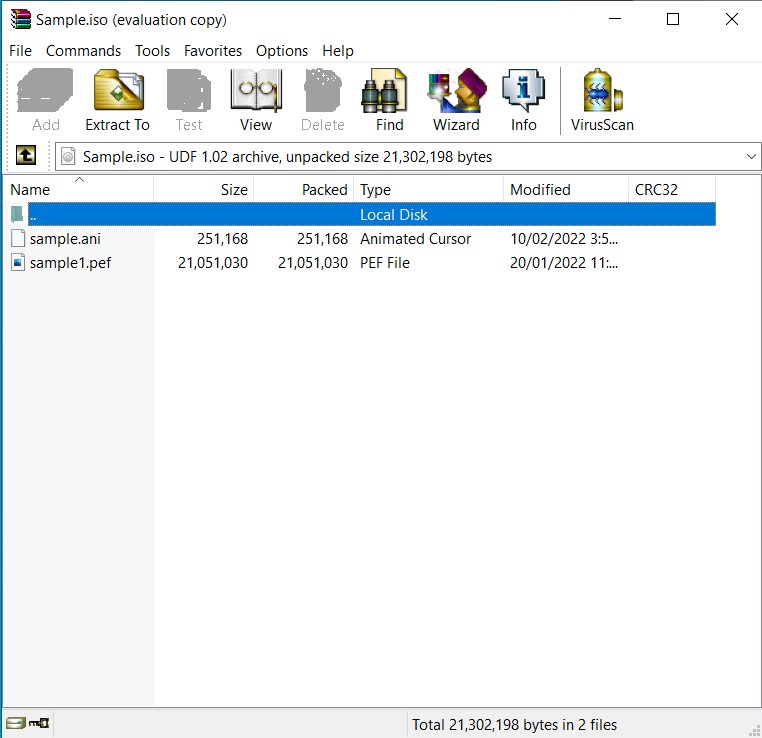
Newer versions of Windows should be able to open ISO files natively without the need for a third-party program. But a surefire way to access these types of files is through the use of one of the top-notch archiving tools available, like WinRAR. Here’s how to use WinRAR to open ISO files:
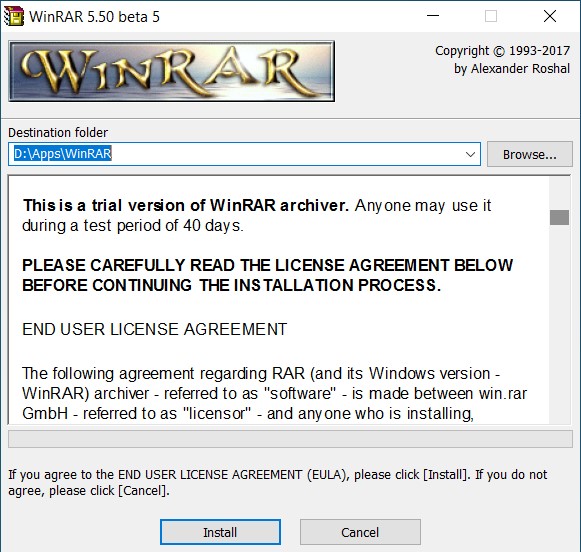
- Download the WinRAR setup file from the official website.

- Open the downloaded setup file and follow the on-screen instructions until properly installed.
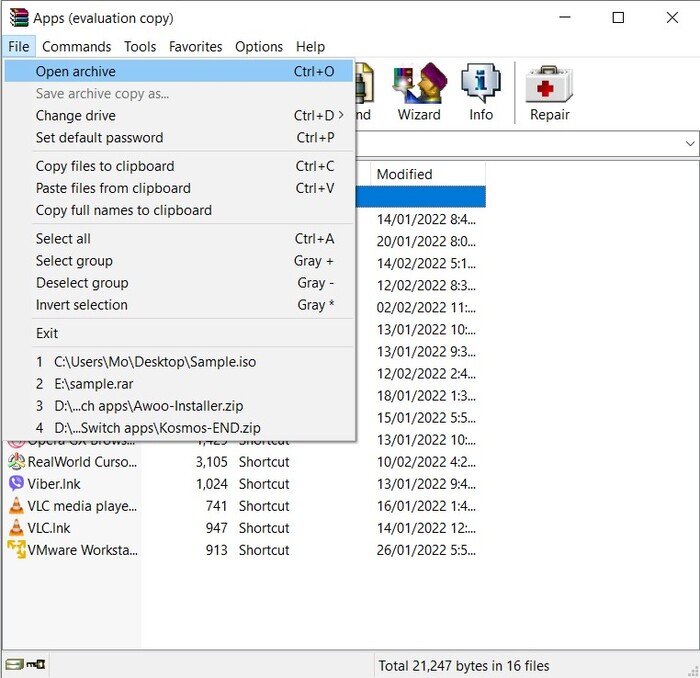
- Launch the app, click File on the top-left corner, and choose Open archive.
- Head to the folder where your ISO file is located, then select File and click the Open button.
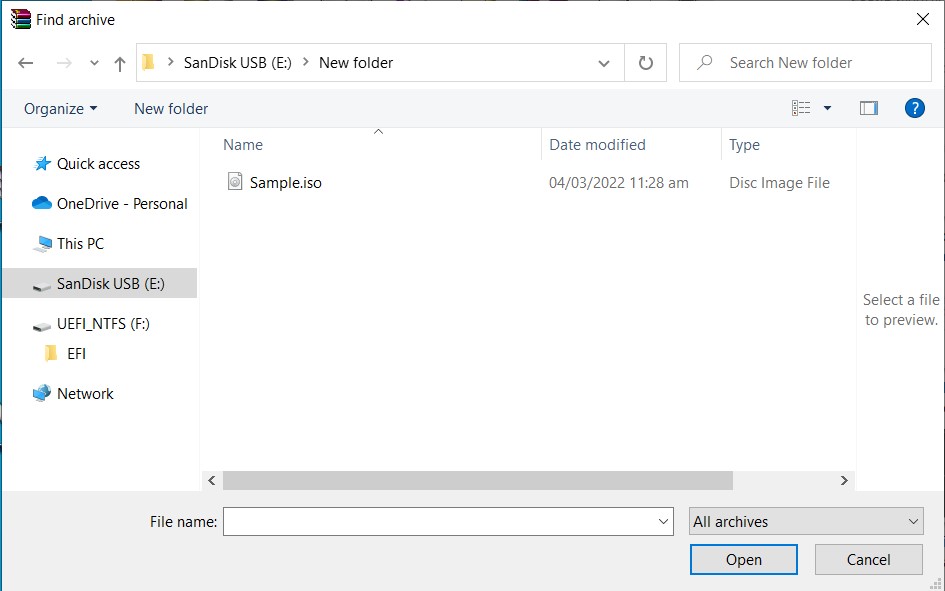
- The data inside the ISO archive should appear within the WinRAR app. You can use the Extract To button near the top of the window to extract the files to your desired destination.
How To Open ISO Files On Mac
Mac operating systems come with a utility that allows them to open ISO files and using it is pretty straightforward. Just follow the steps below:
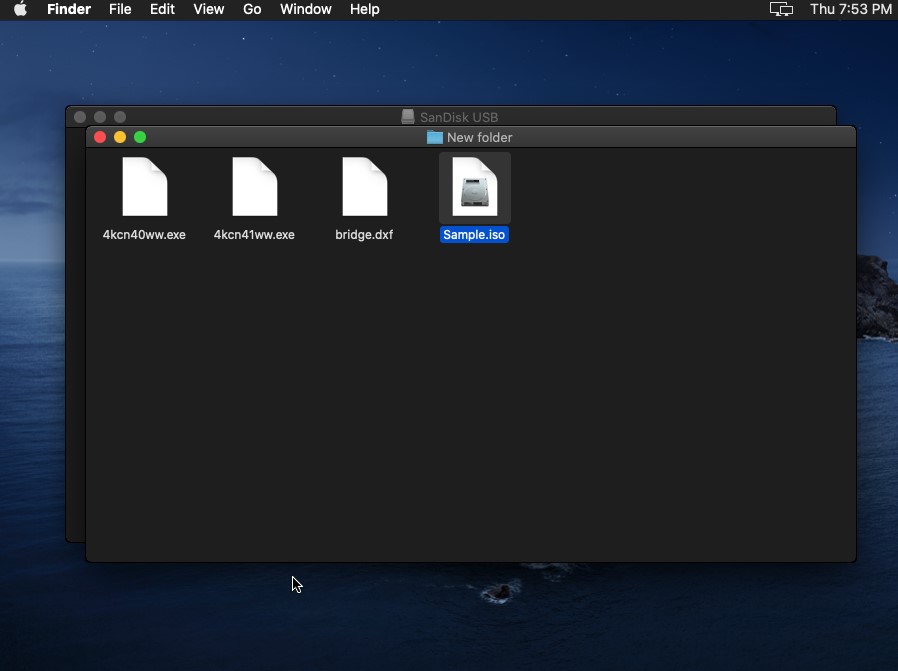
- Click the Finder icon on your dock and navigate to the folder your ISO files are located in.
- Right-click the ISO file, select Open With, and choose the DiskImageMounter (Default) option.
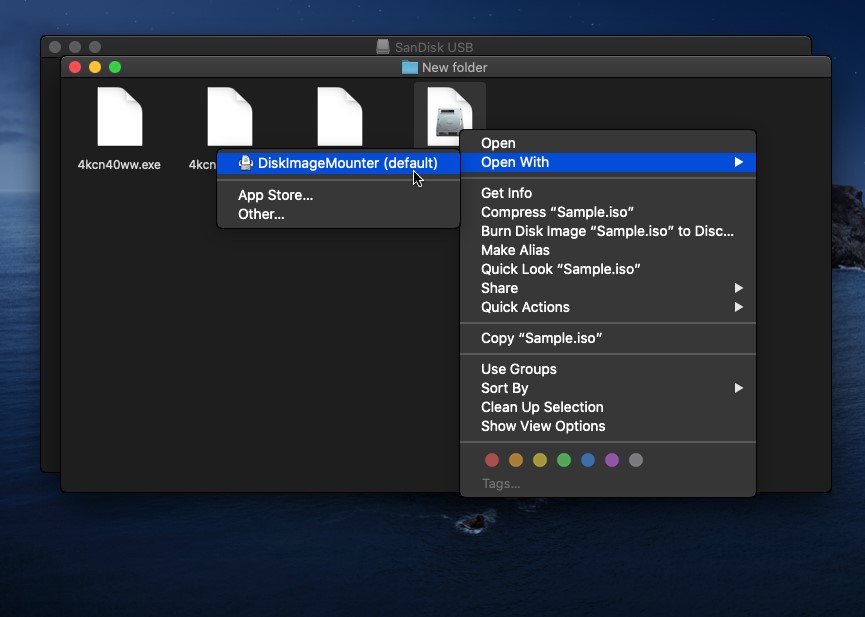
- The contents of the file should now appear in a separate window.

Frequently Asked Questions (FAQs):
Just like other file types, ISO files can become corrupted for a number of reasons, including power interruptions while the archive is being accessed, disconnecting the storage medium abruptly while the file is open, incurring a malware or virus attack, and more.
If your ISO file is corrupted, you’ll likely be greeted with a “file has been corrupted” or similar error which will prevent you from accessing the archive.
There are various methods you can use to potentially open a corrupted image file. You can try using the System File Checker tool from the Windows Command Prompt or you can try uninstalling your ISO opener app and installing a better one. If all else fails, you can re-download the ISO file.
There’s a good chance you can recover deleted files and the best way to do so is through the use of a premium data recovery solution, like Disk Drill.