Time Machine is one of my favorite features when it comes to the Mac. This is because it is implemented so well and is easy to use. It’s one of the best backup utilities that I’ve ever used.
However, not all Mac users actually use it or even understand what it’s for. In this article, we’re going to explain the benefits of Time Machine, show you how to set it up, and walk you through how to restore from a Time Machine backup if you’ve lost data and want to get back to a previous state.
How to Use Time Machine to Restore Mac Data
When you restore from a Time Machine, you can do it one of 2 ways.
- The first way is to restore just one file and put that back onto your Mac. It could be that you made changes to a document and don’t like how it looks now and want to go back to a previous version for example.
- The second option is to restore your entire computer to an earlier state. This would make your entire Mac look how it did back at that date and time, it wouldn’t update just one file.
Let’s first take a look at how to restore just an individual file from Time Machine and revert back to an earlier version of that file.
Way 1. Use Time Machine to Restore Individual Files That Have Been Deleted
If you’re working on a file and want to go back to an earlier version or the file has been deleted, then we can use Time Machine for that.
- Plug your external hard drive into your Mac.
- Launch Spotlight by pressing the keys COMMAND+SPACE BAR. You can also click on the magnifying glass in the upper right-hand corner of your Mac.
- Type in Time Machine and then hit return on your Mac keyboard.

- Navigate through your Mac to find the files that you want to restore. This will put it back to the version that it was at that time.
- Click on Restore.
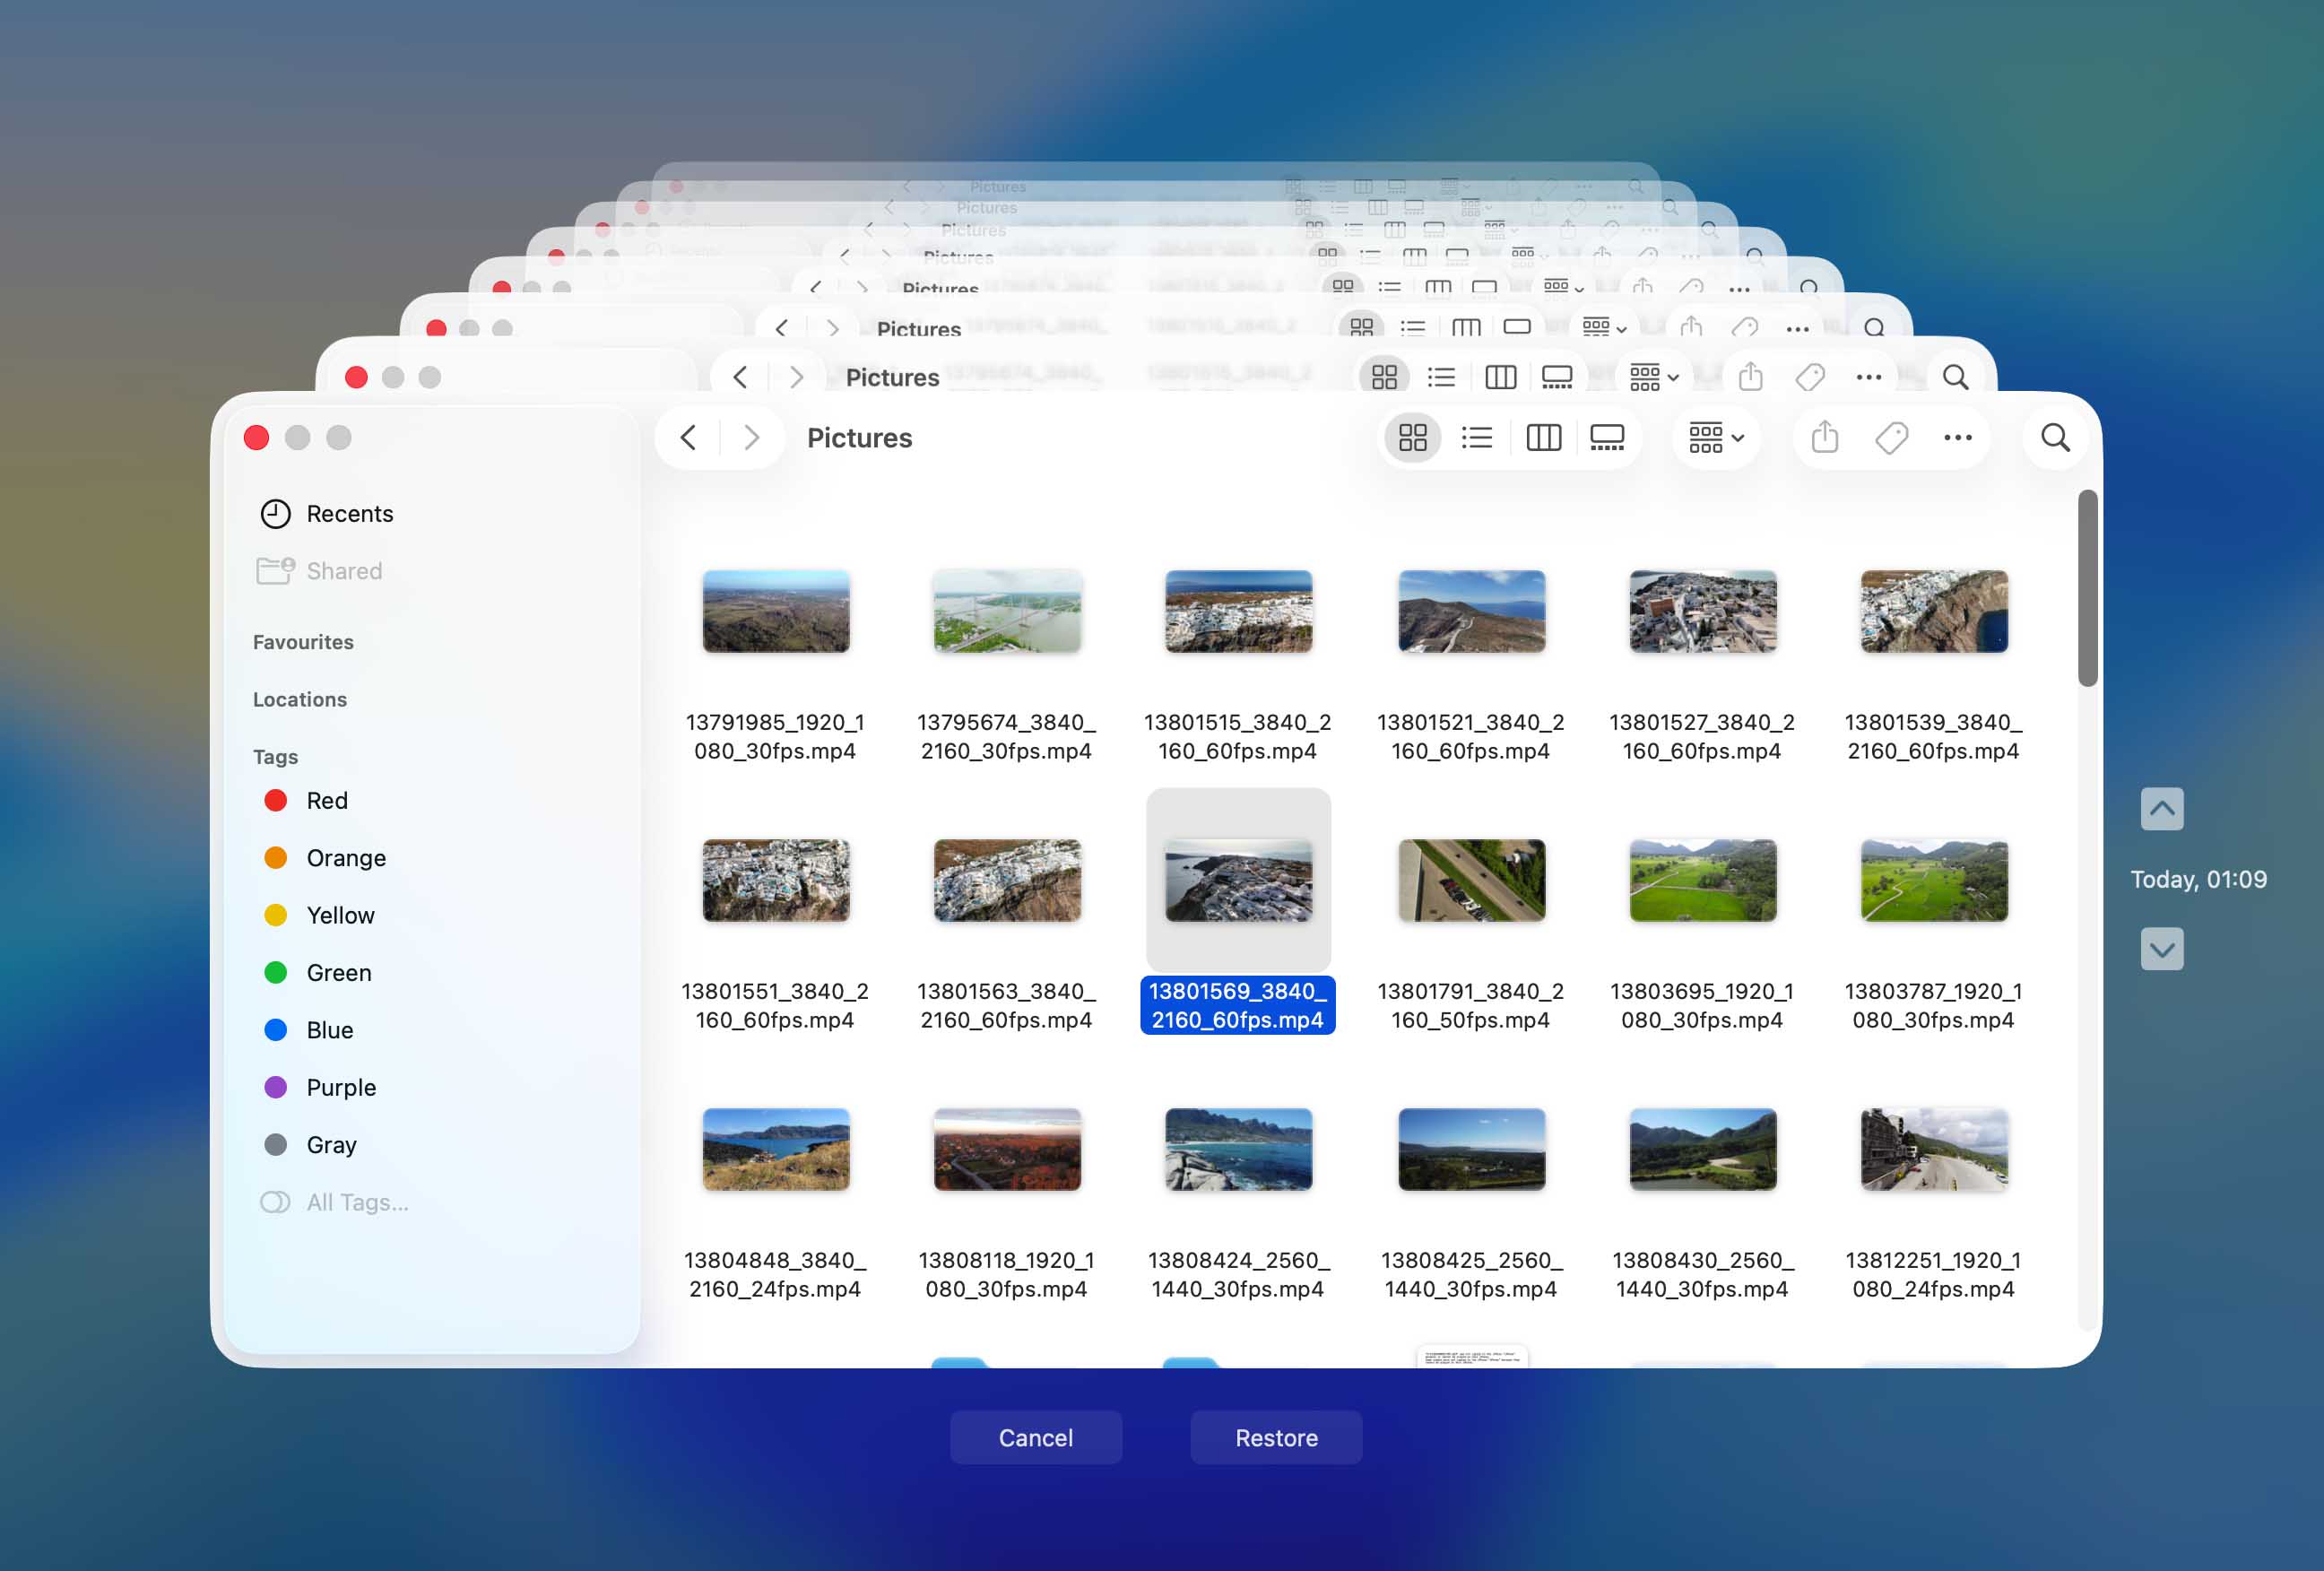
That’s it! This feature is really useful for restoring individual files to a certain point in time. It can also be used if you deleted a file and then realize that you didn’t want to delete it. You can enter Time Machine and restore the file back onto your Mac.
Now, let’s take a look at how to restore our entire computer back to how it looked at a certain date.
Way 2. Restore macOS From a Time Machine Backup Using Migration Assistant
If you had to reinstall macOS because something broke, like system errors, crashes, or a failed update, you can restore your data from a Time Machine backup after a clean install of macOS using Migration Assistant.
Migration Assistant is built into macOS and lets you transfer your user accounts, apps, files, and settings from a backup into your current system.
- Plug your external hard drive into your Mac.
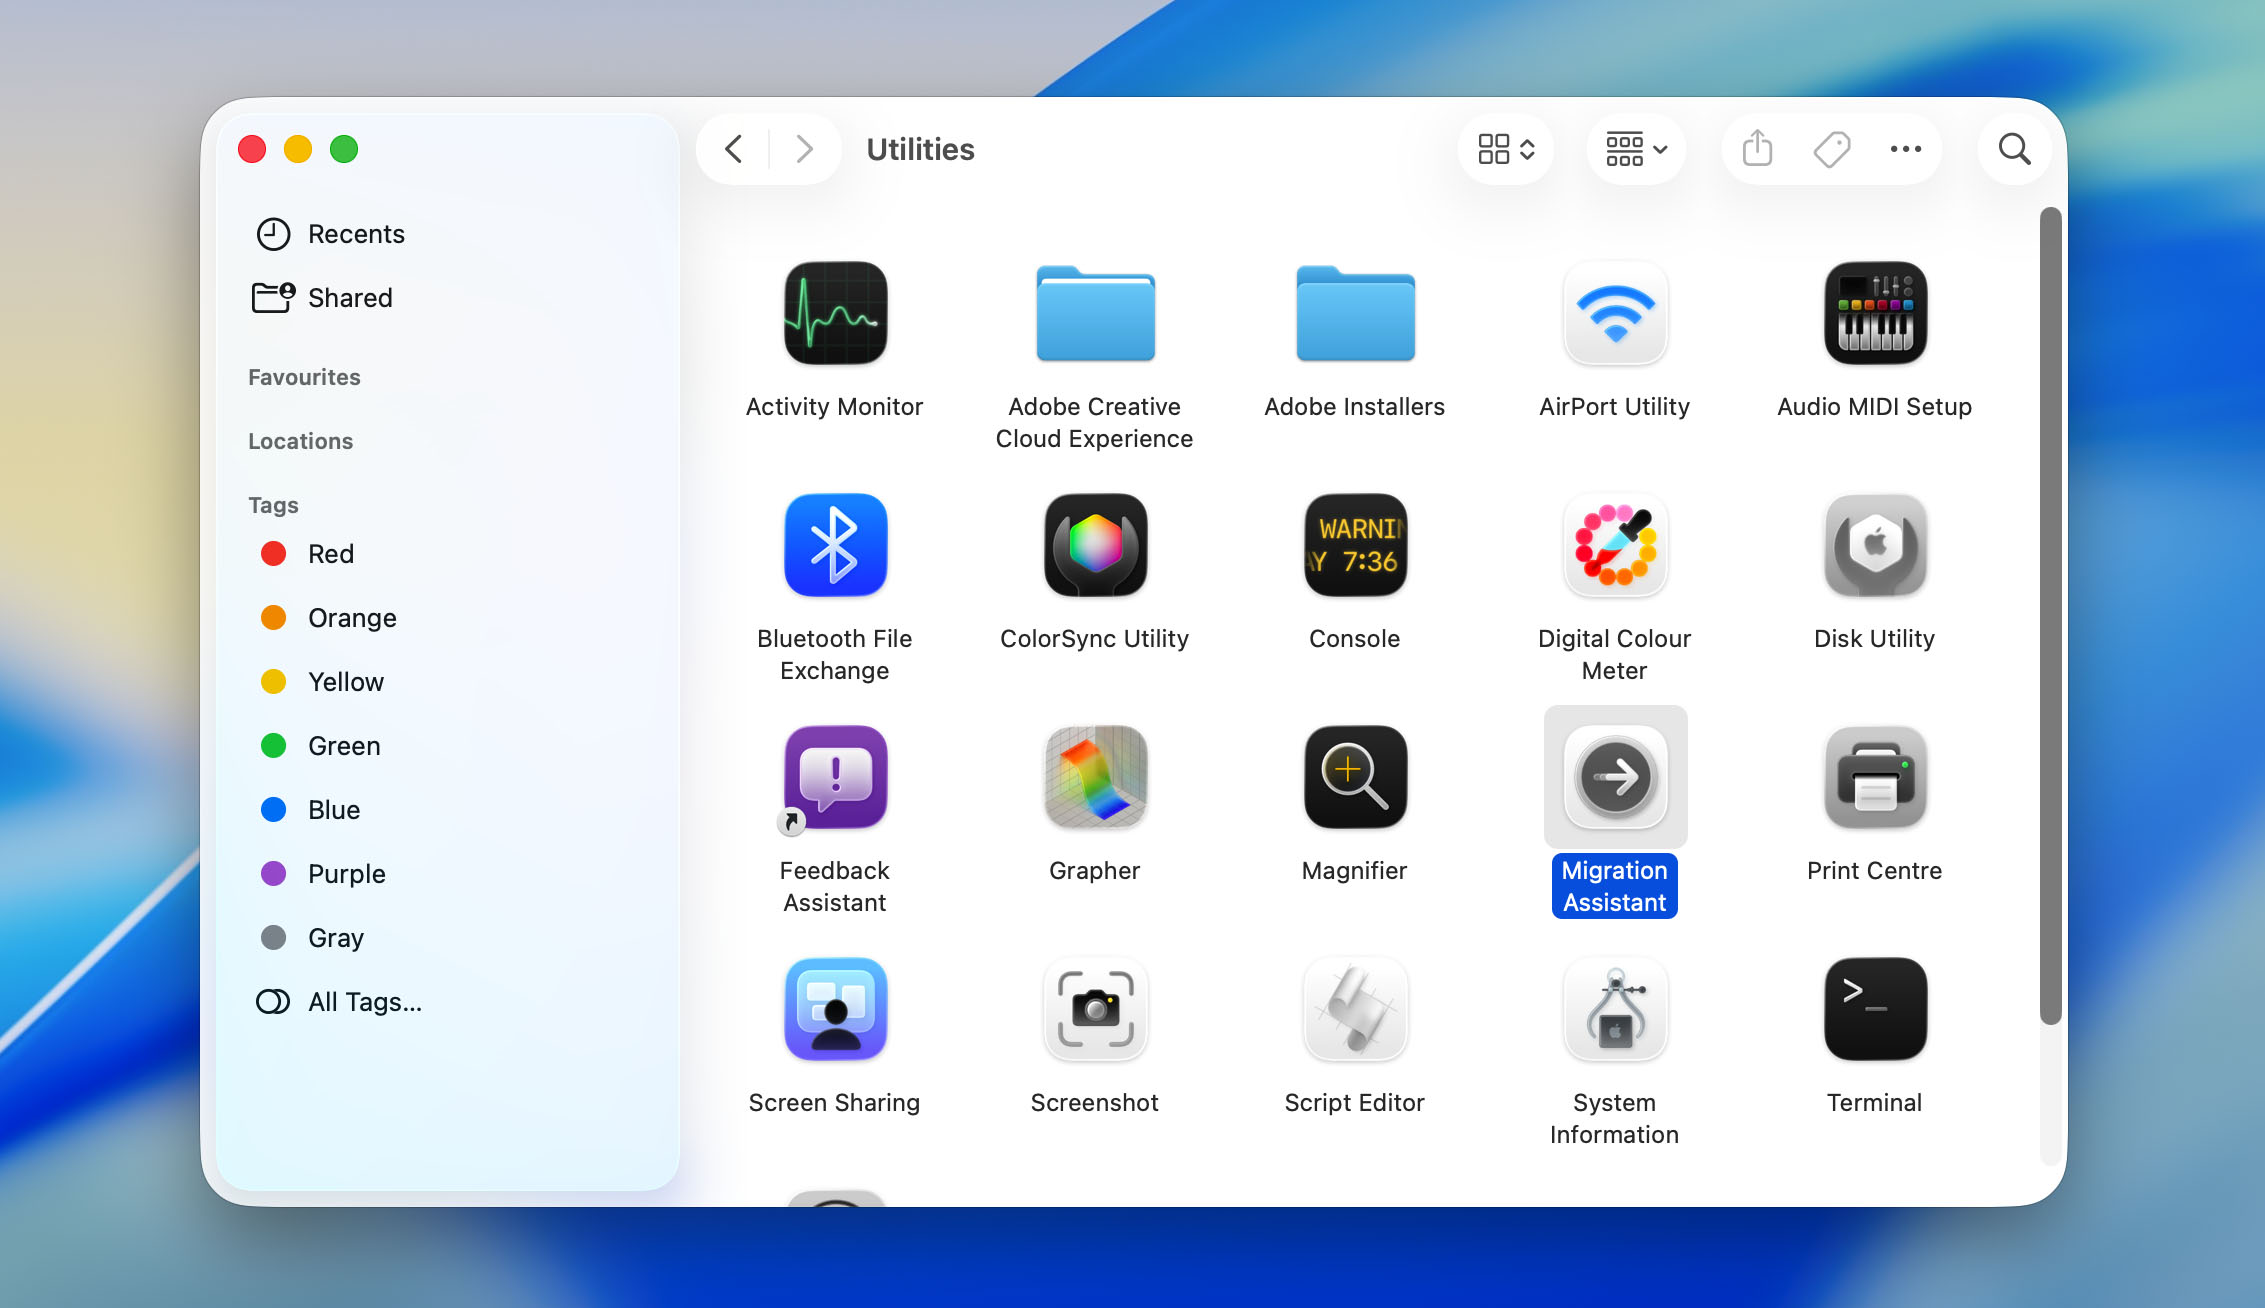
- Launch Migration Assistant from the Utilities folder.
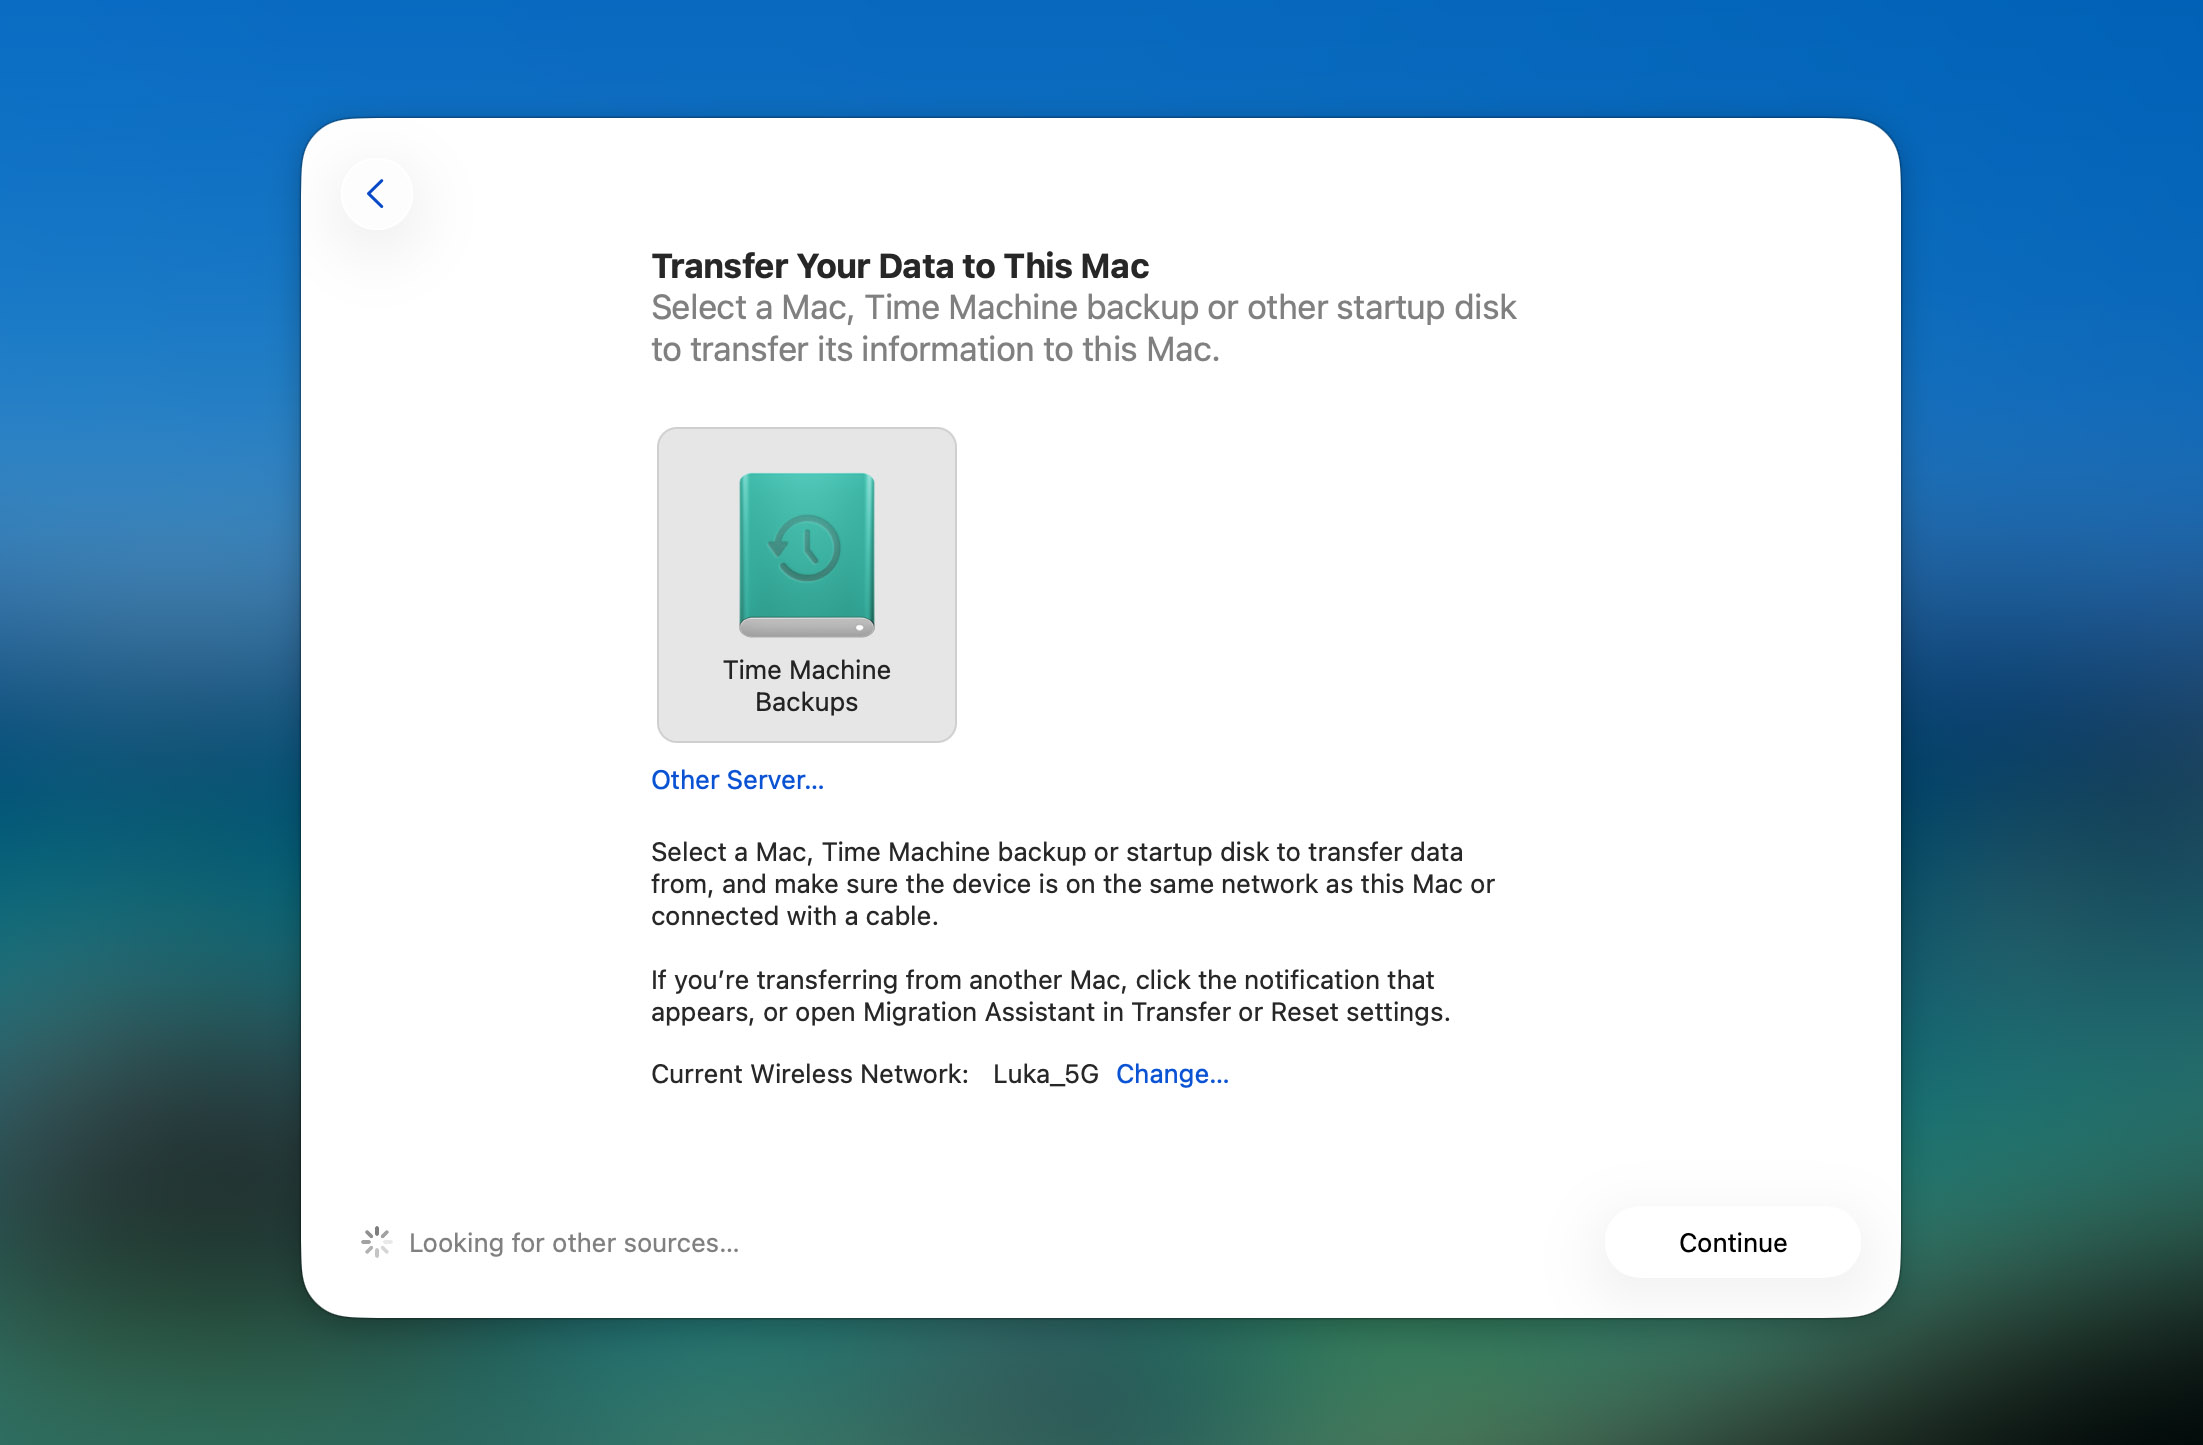
- Select the option to transfer from a Mac, Time Machine backup, or startup disk, then click Continue.

- Select your Time Machine backup disk when it appears, then click Continue.
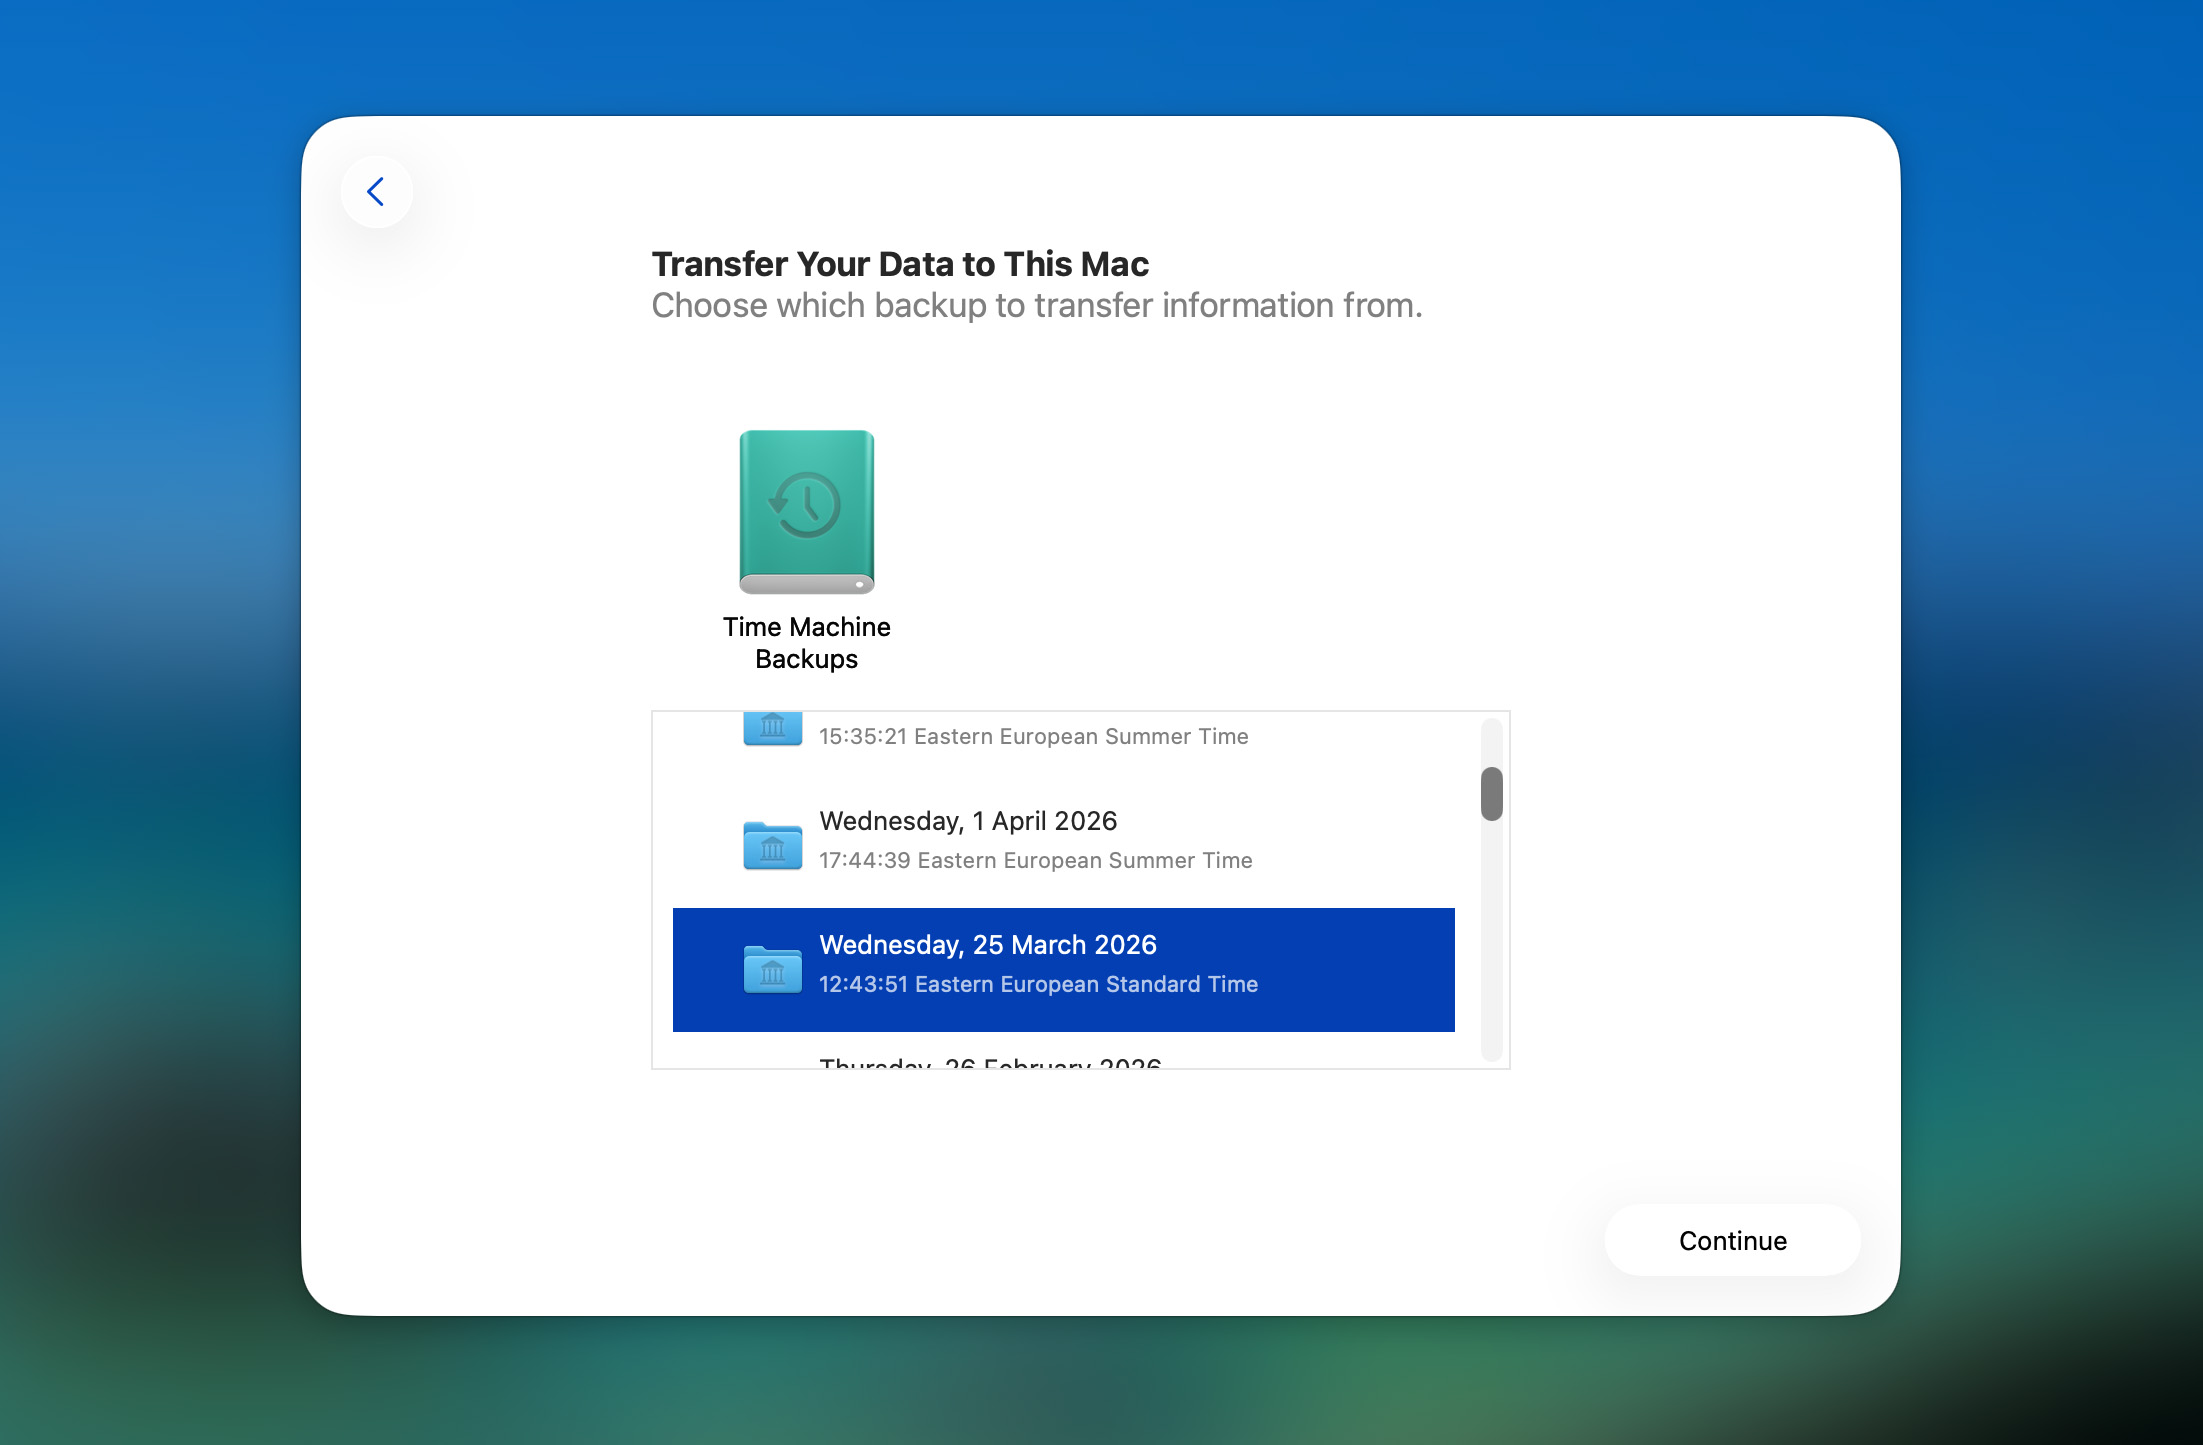
- Choose the backup you want to use. If needed, expand the list and pick an older one. Wait while macOS calculates the data available for transfer.
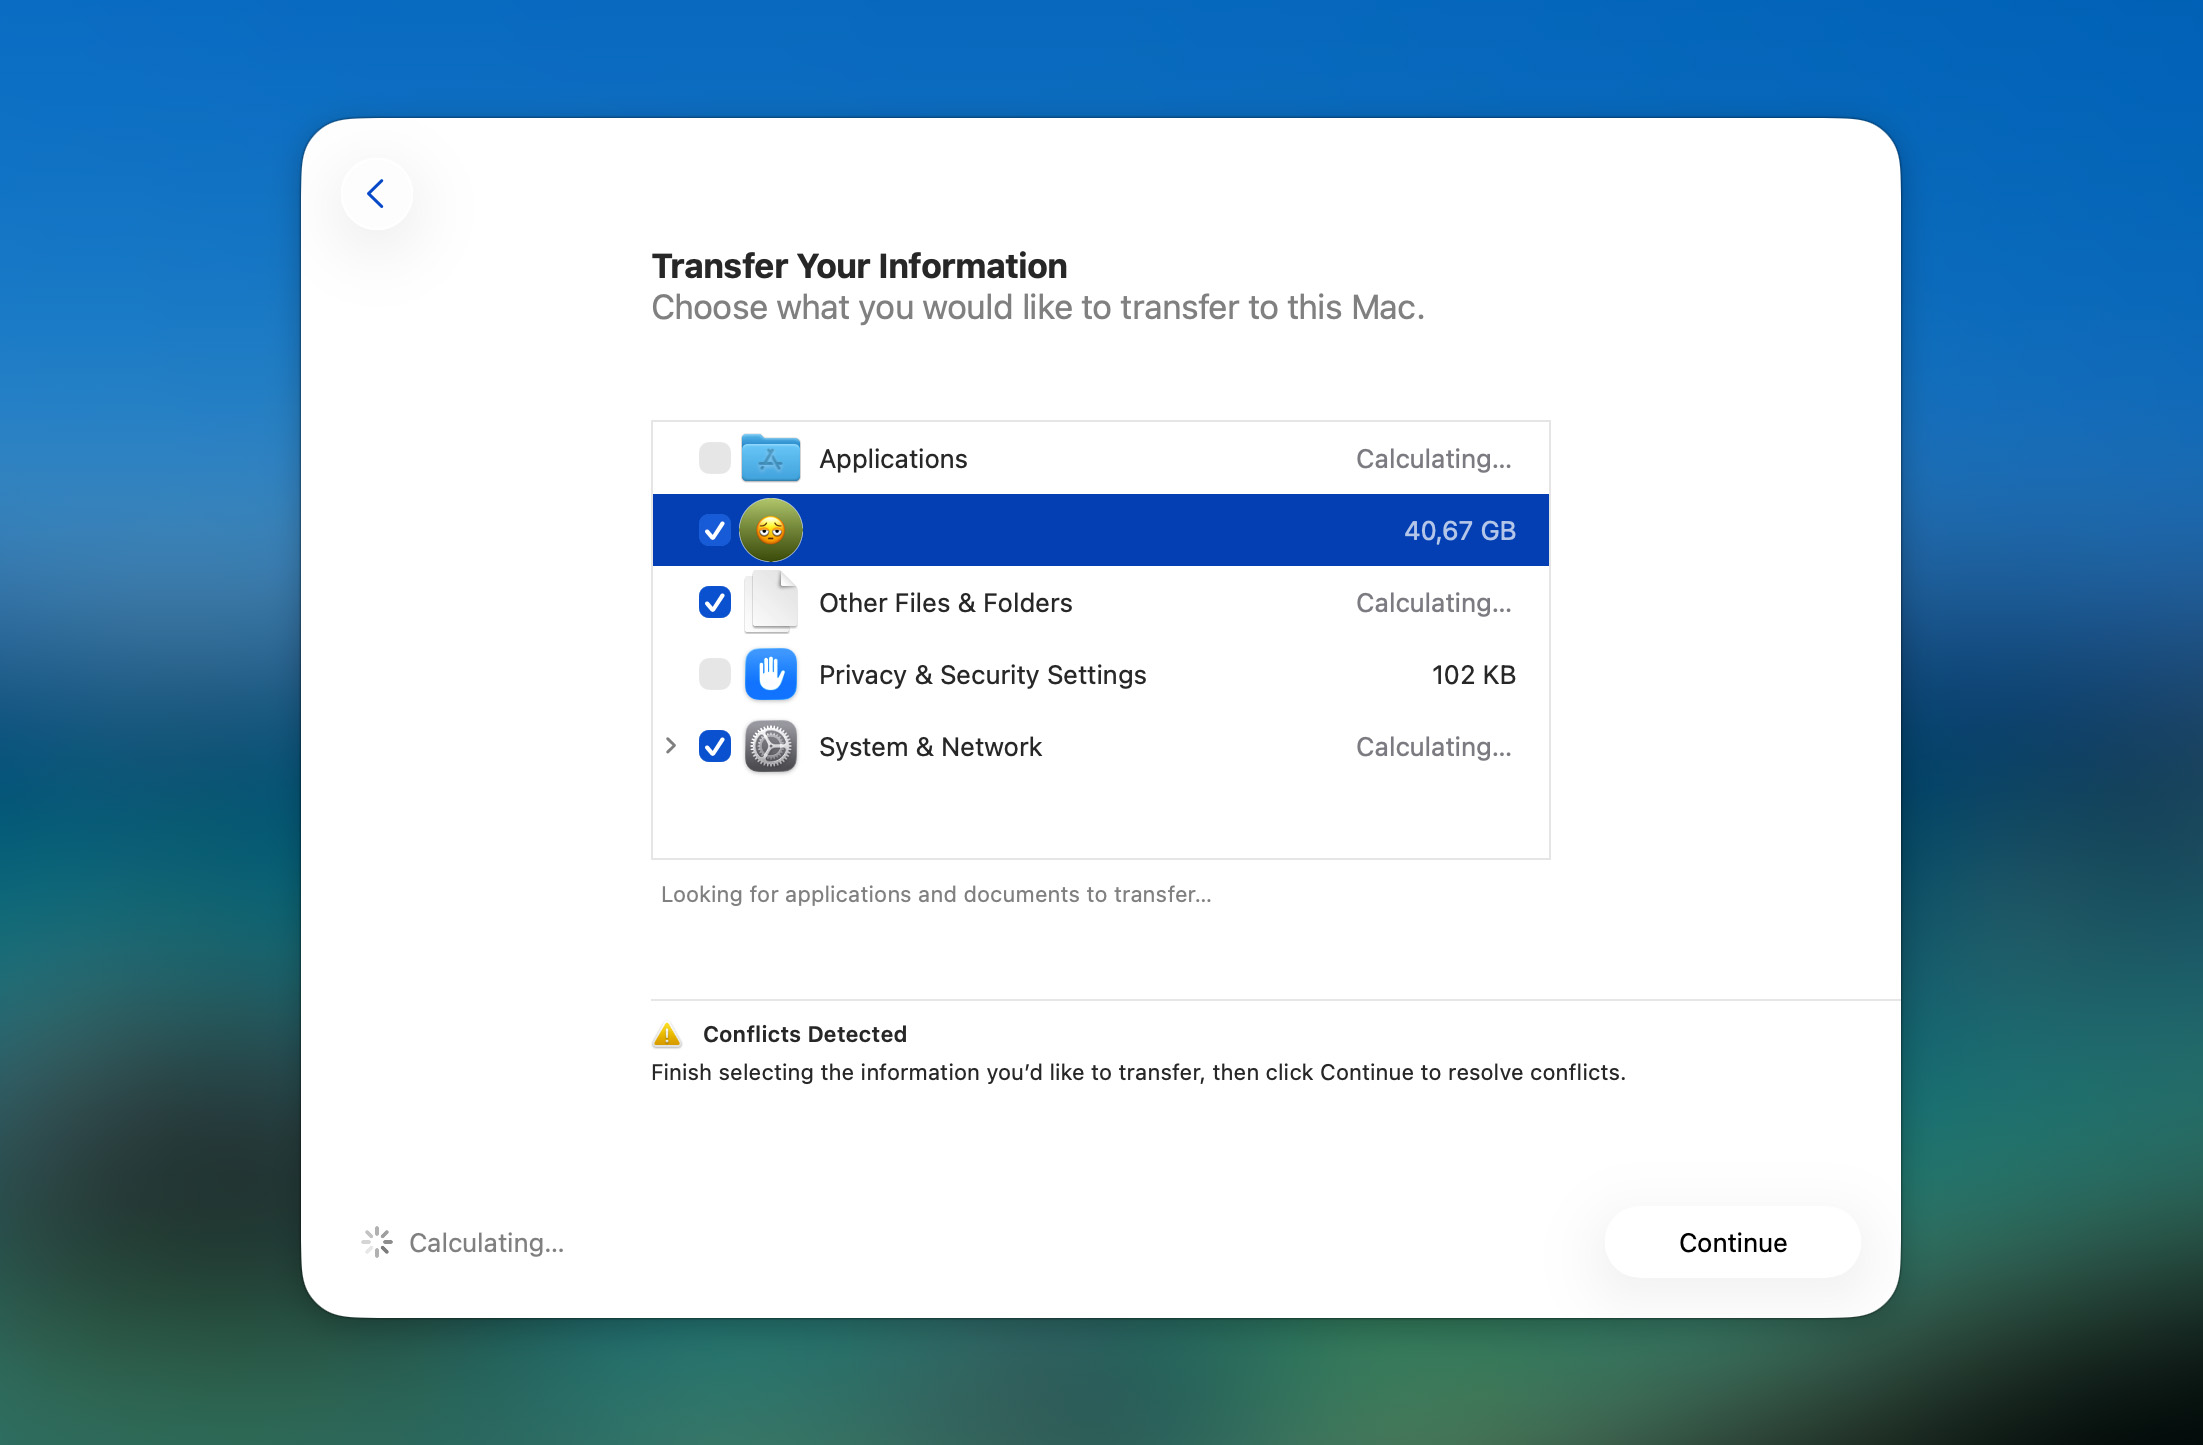
- Select what you want to restore, such as user accounts, apps, or files, then click Continue.
- If prompted, enter or set passwords for the accounts you’re transferring.
- Wait for the transfer process to complete.
The same steps work if you want to restore files from a Time Machine backup to another Mac. Just open Migration Assistant on the Mac you’re moving the files to, connect the drive with your Time Machine backup from the other Mac, and go through the same process.
Way 3. Restore Time Machine Backup to New Mac
If you purchased a new Mac and have been backing up your old one, then you can put all of the data from your old Mac onto the new one.
- Turn on your new Mac and start going through the setup process.
When you come to a screen that asks if you want to transfer data, choose from a Time Machine Backup. - Plug in your external hard drive and restore the saved data that is on your external hard drive.
How to Use Software Instead of Time Machine Recovery
After working with Time Machine backups for a while, I realized that in some cases it’s just easier to use third-party data recovery software to get your data back. For example, you can restore data from a Time Machine backup to a new Mac without adding it to your system. And if Time Machine wasn’t set up at all, this type of software is often your only option to recover lost files.
Either way, it’s worth going through the next two sections. They cover both scenarios and can save you a lot of time.
Option A: Recover Data on macOS Without Time Machine Backup
If you haven’t set up Time Machine or it’s unavailable, but you still need to recover lost files, this section is for you.
A data recovery software can scan your Mac and bring files back, as long as they haven’t been overwritten or erased. There are plenty of tools out there, but I use Disk Drill. Why Disk Drill? Good question. Out of everything I’ve tested, it works on Macs with M1-M5 chips and T2 security, and it’s the most reliable, easy-to-use, and it’s worth the price.
Let’s scan our Mac and see if we can recover some files even though we don’t have a backup.
- Download and install Disk Drill on your Mac. Just make sure you don’t install it on the same drive you’re trying to recover data from, as that can overwrite deleted files.
- Launch Disk Drill and scan the storage device you want to recover data from. In this example, I’m scanning my Mac’s internal drive.
- Wait for the scan to finish. Once it’s done, click Review found items. You’ll see everything sorted into categories like Deleted or Lost, Existing, and Reconstructed. Go into the section that makes the most sense for your case.
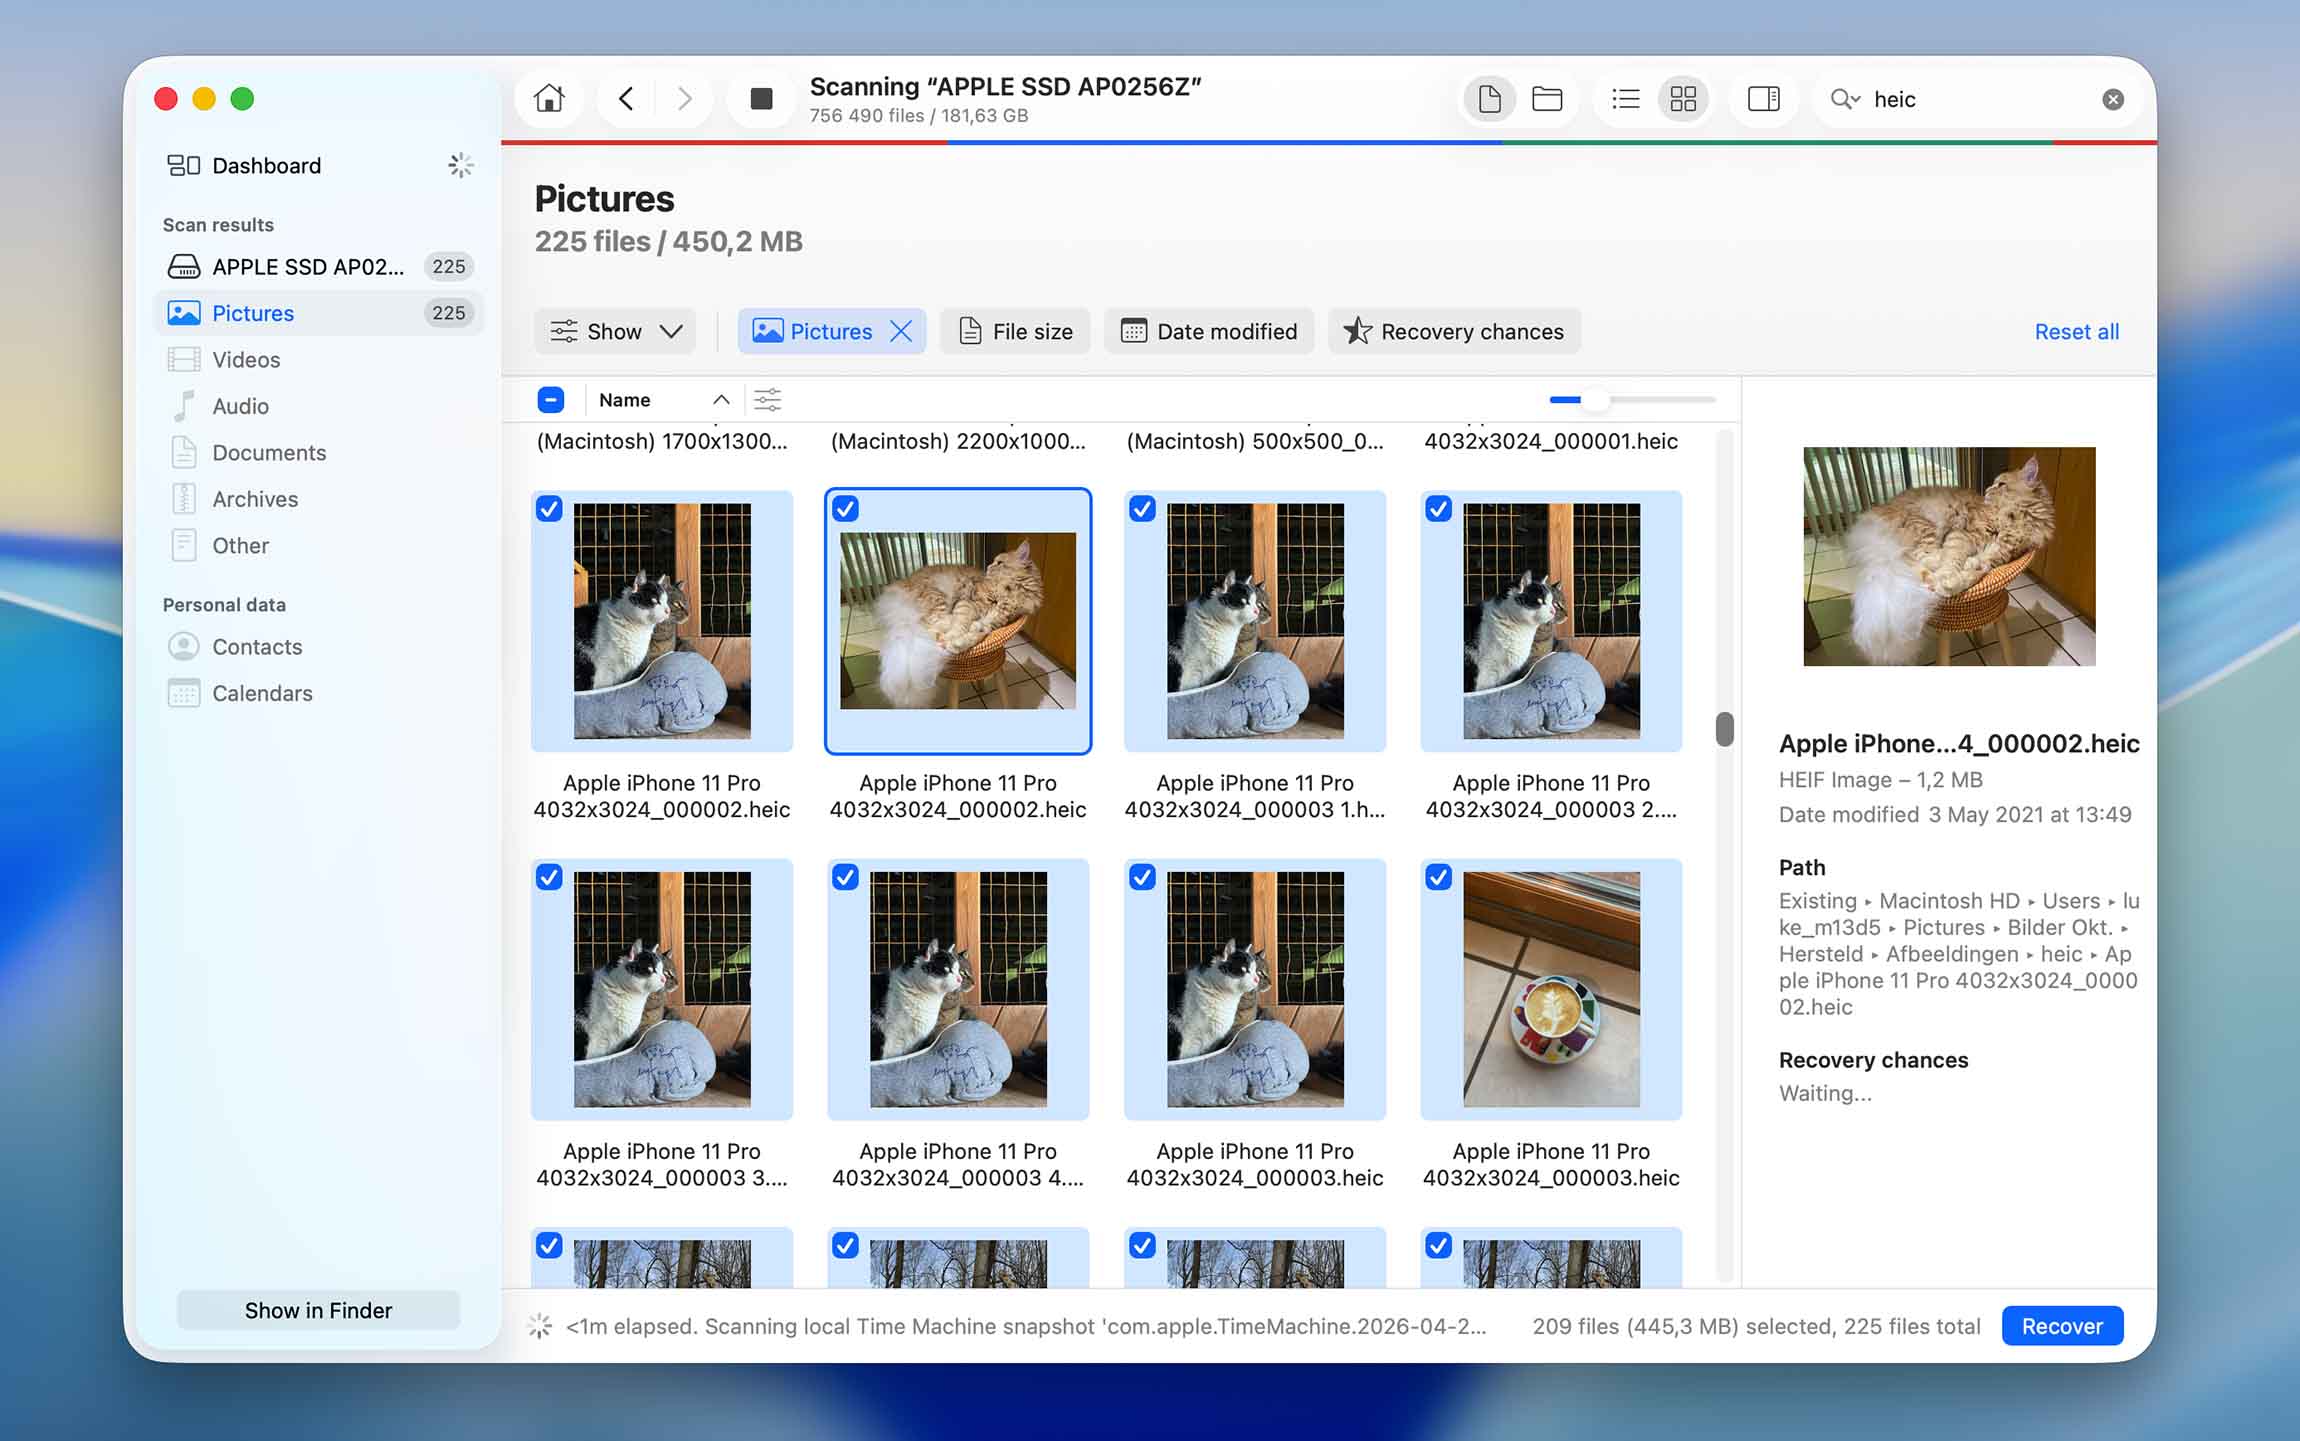
- Browse through the files, use the preview feature to check them, and select what you want to recover. Then click on the blue Recover button.
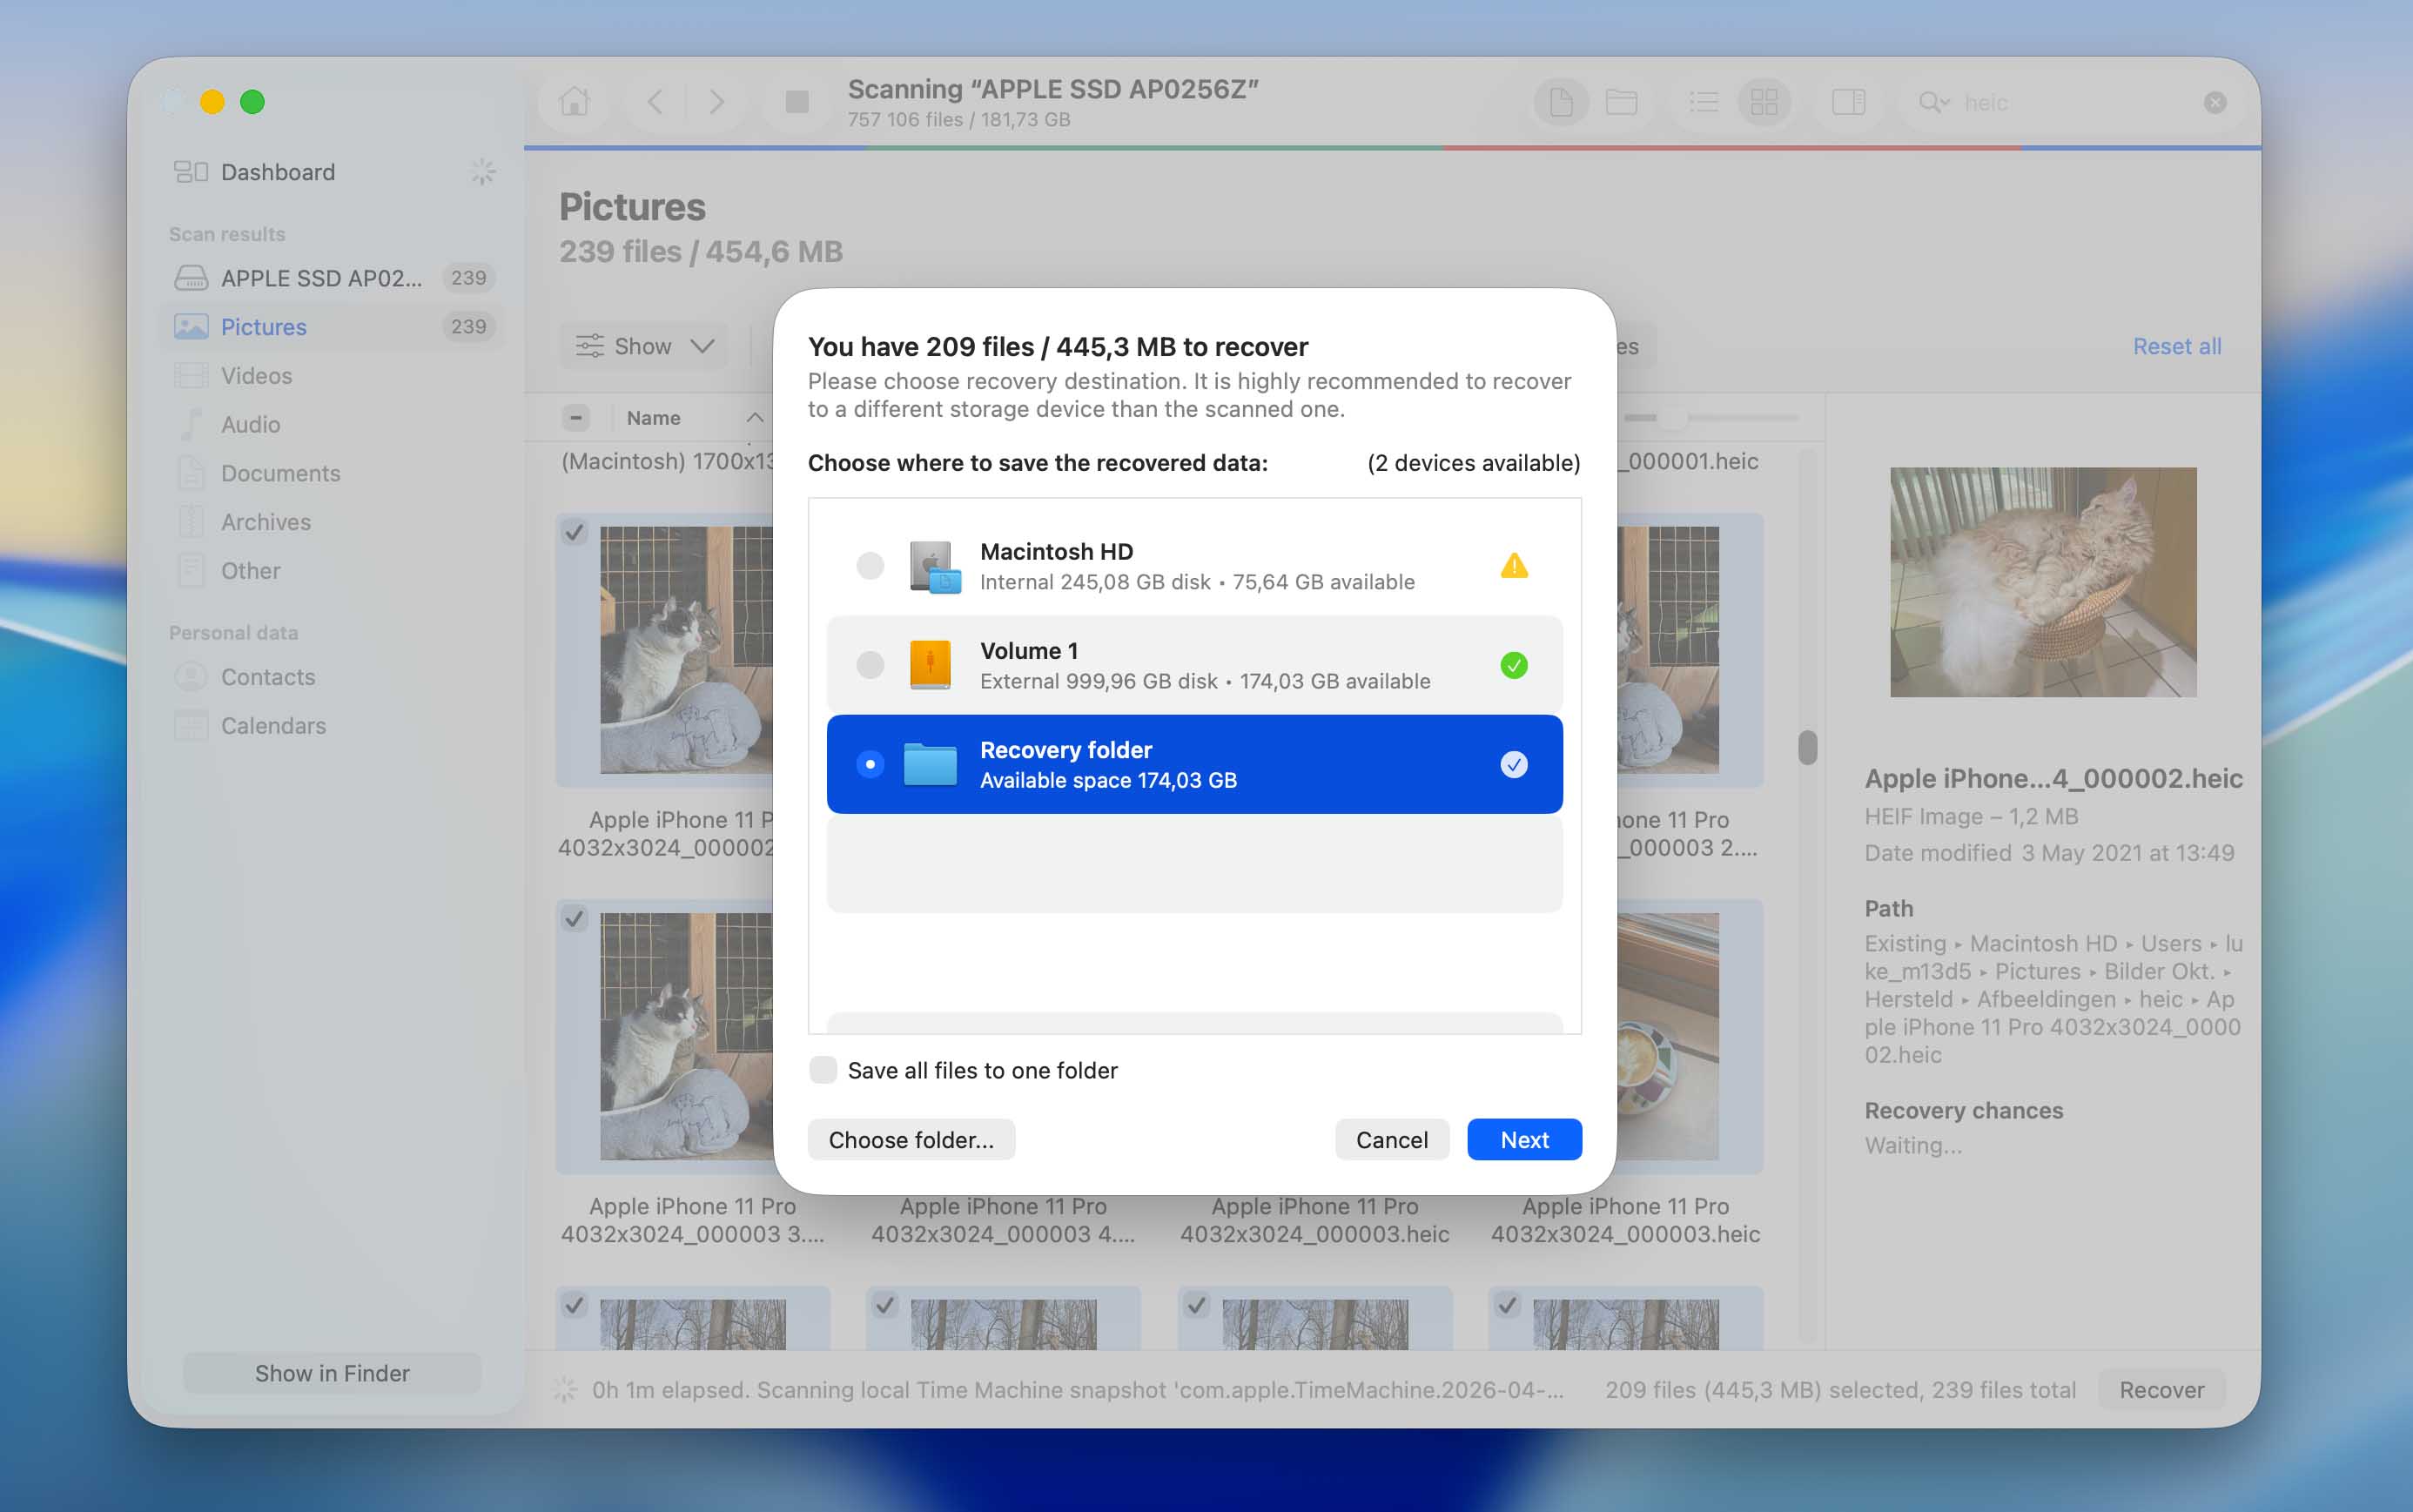
- Choose where you want to save the recovered files. It’s best to pick a different drive, not the one you’re recovering from. In this example, I connected an external hard drive and saved the files there.

That’s it! Disk Drill is great for recovering files and it’s a nice software tool to know about as if you can’t find your file using the above methods, you can usually recover it this way.
Option B: Access Time Machine Backup Files Without Restoring to a Mac
The idea is similar to the previous method, but instead of scanning your Mac, you scan the drive that contains the Time Machine backups using Disk Drill’s Time Machine section.
This option works if you want to recover files from a Time Machine backup without restoring it to your Mac. It also makes sense if the backup comes from another Mac and you just need to pull specific files from it.
- If you don’t have Disk Drill installed yet, download and install it first.
- Connect the drive that contains your Time Machine backups.
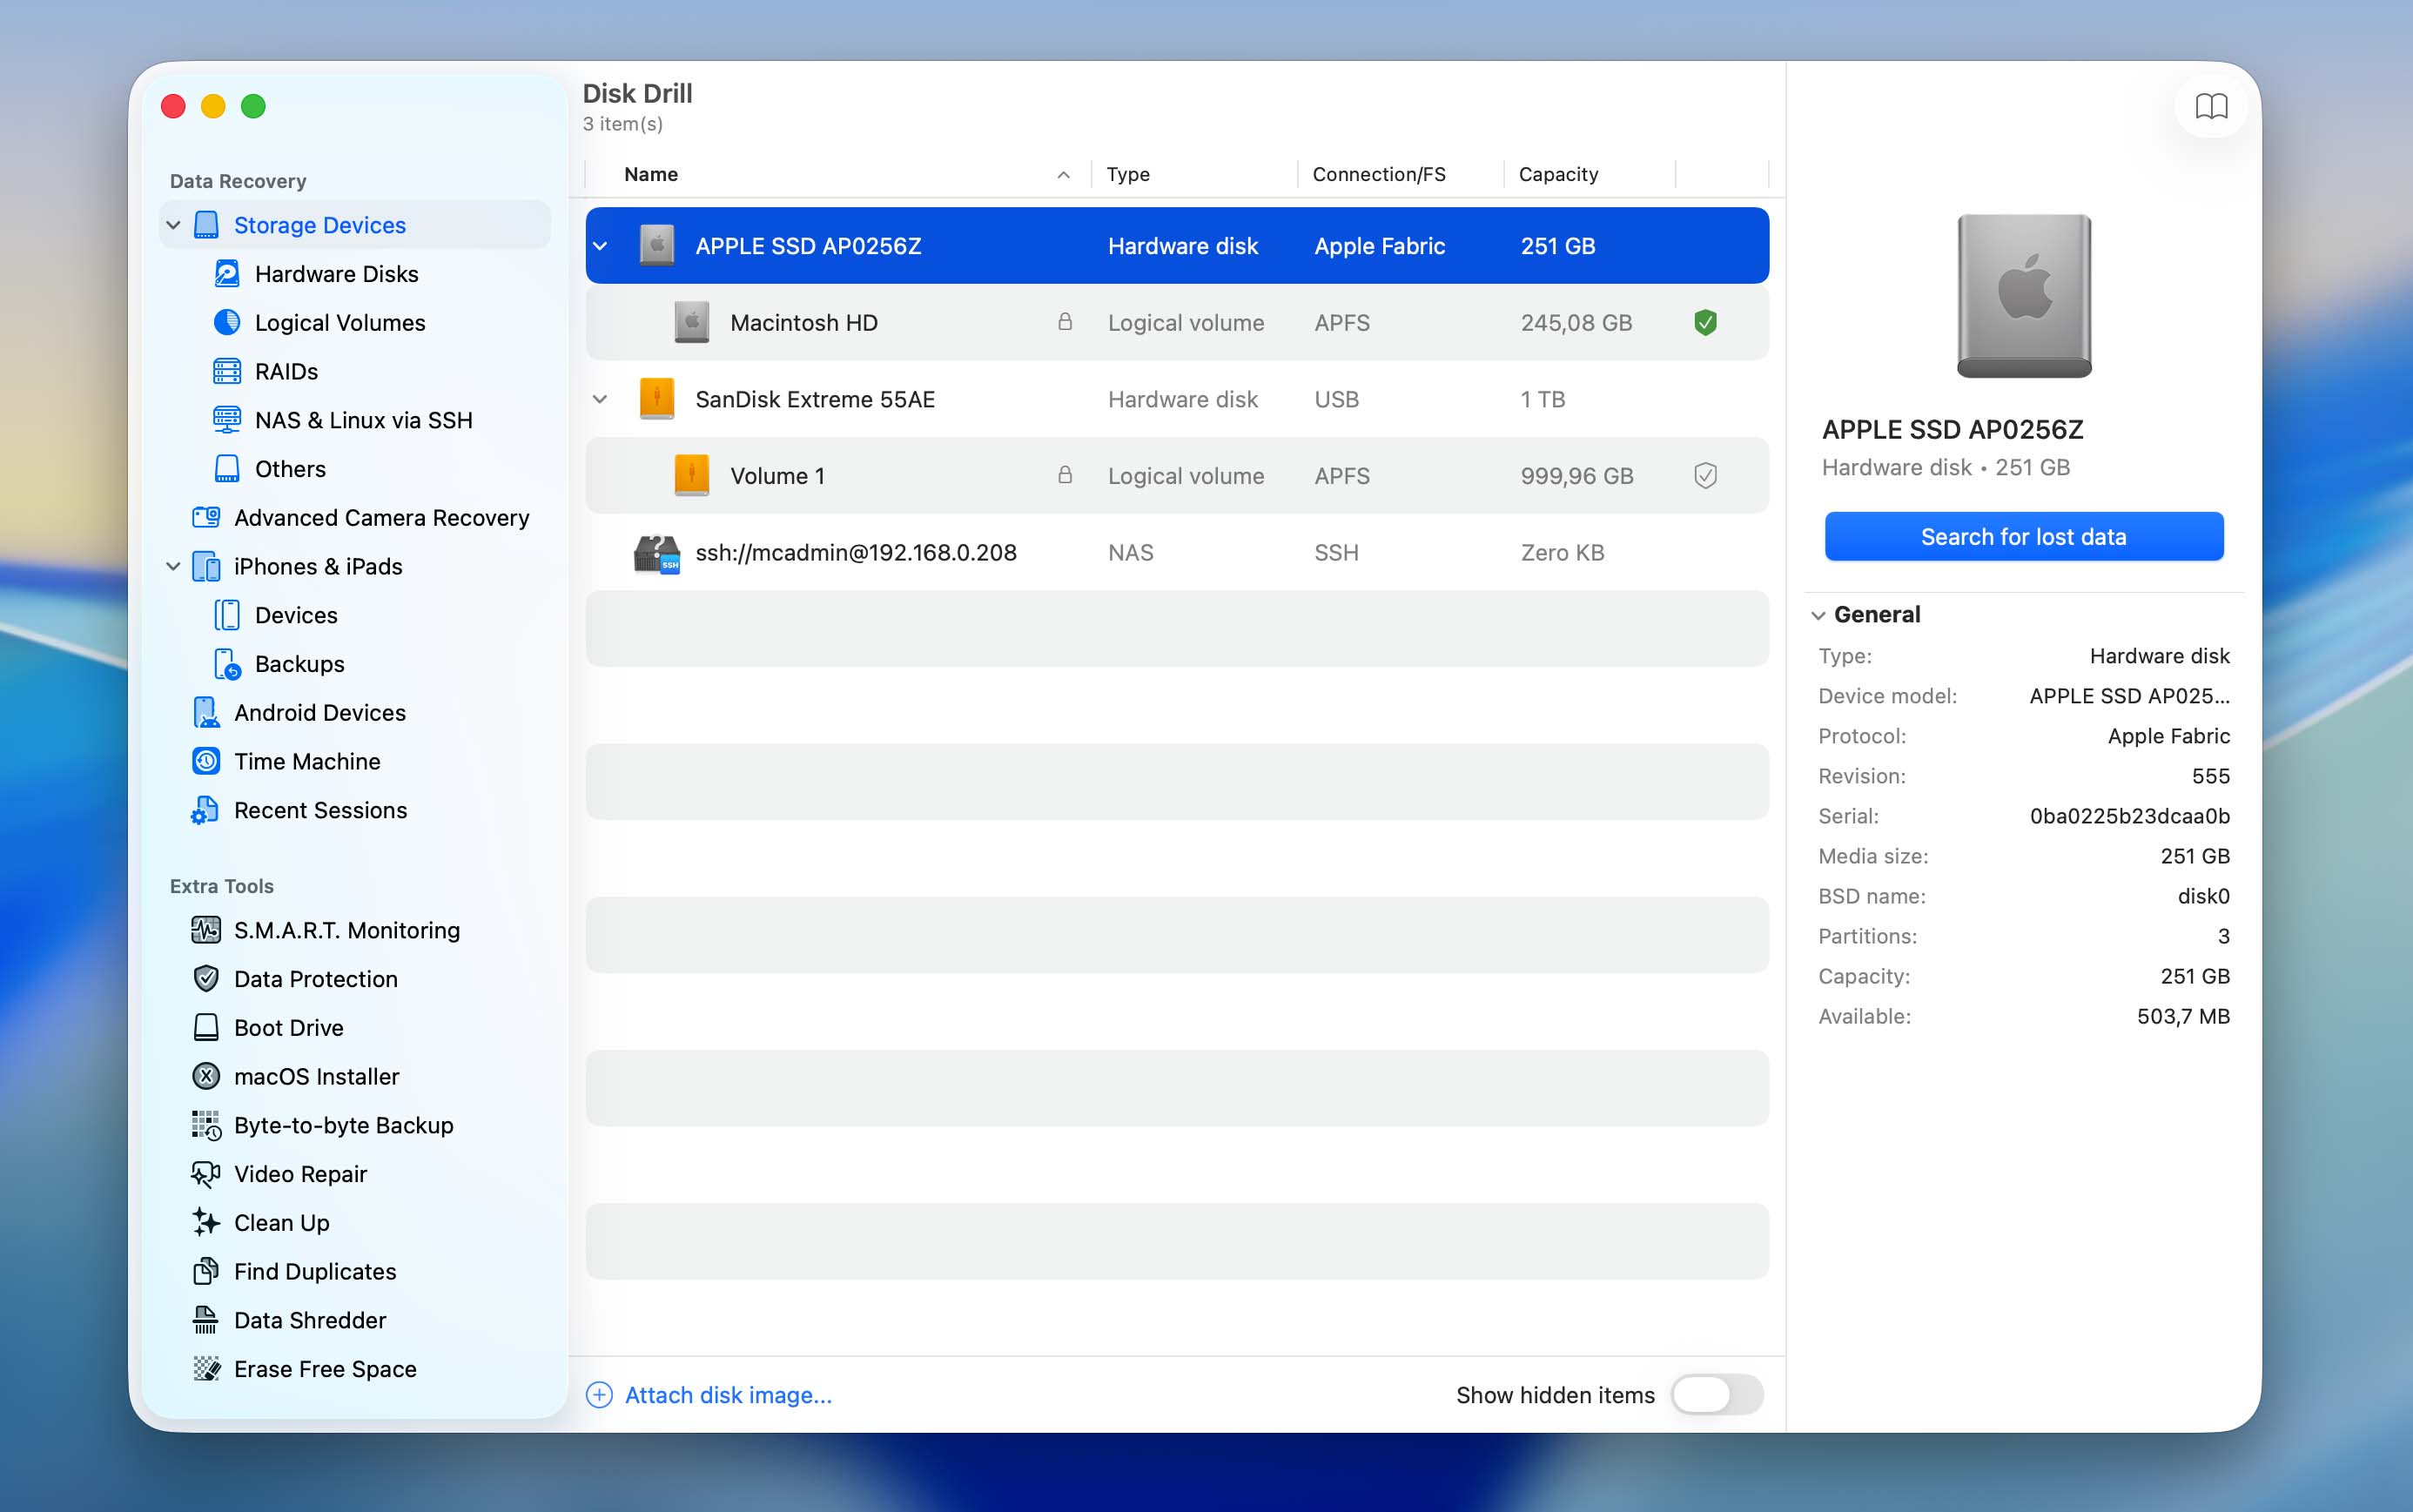
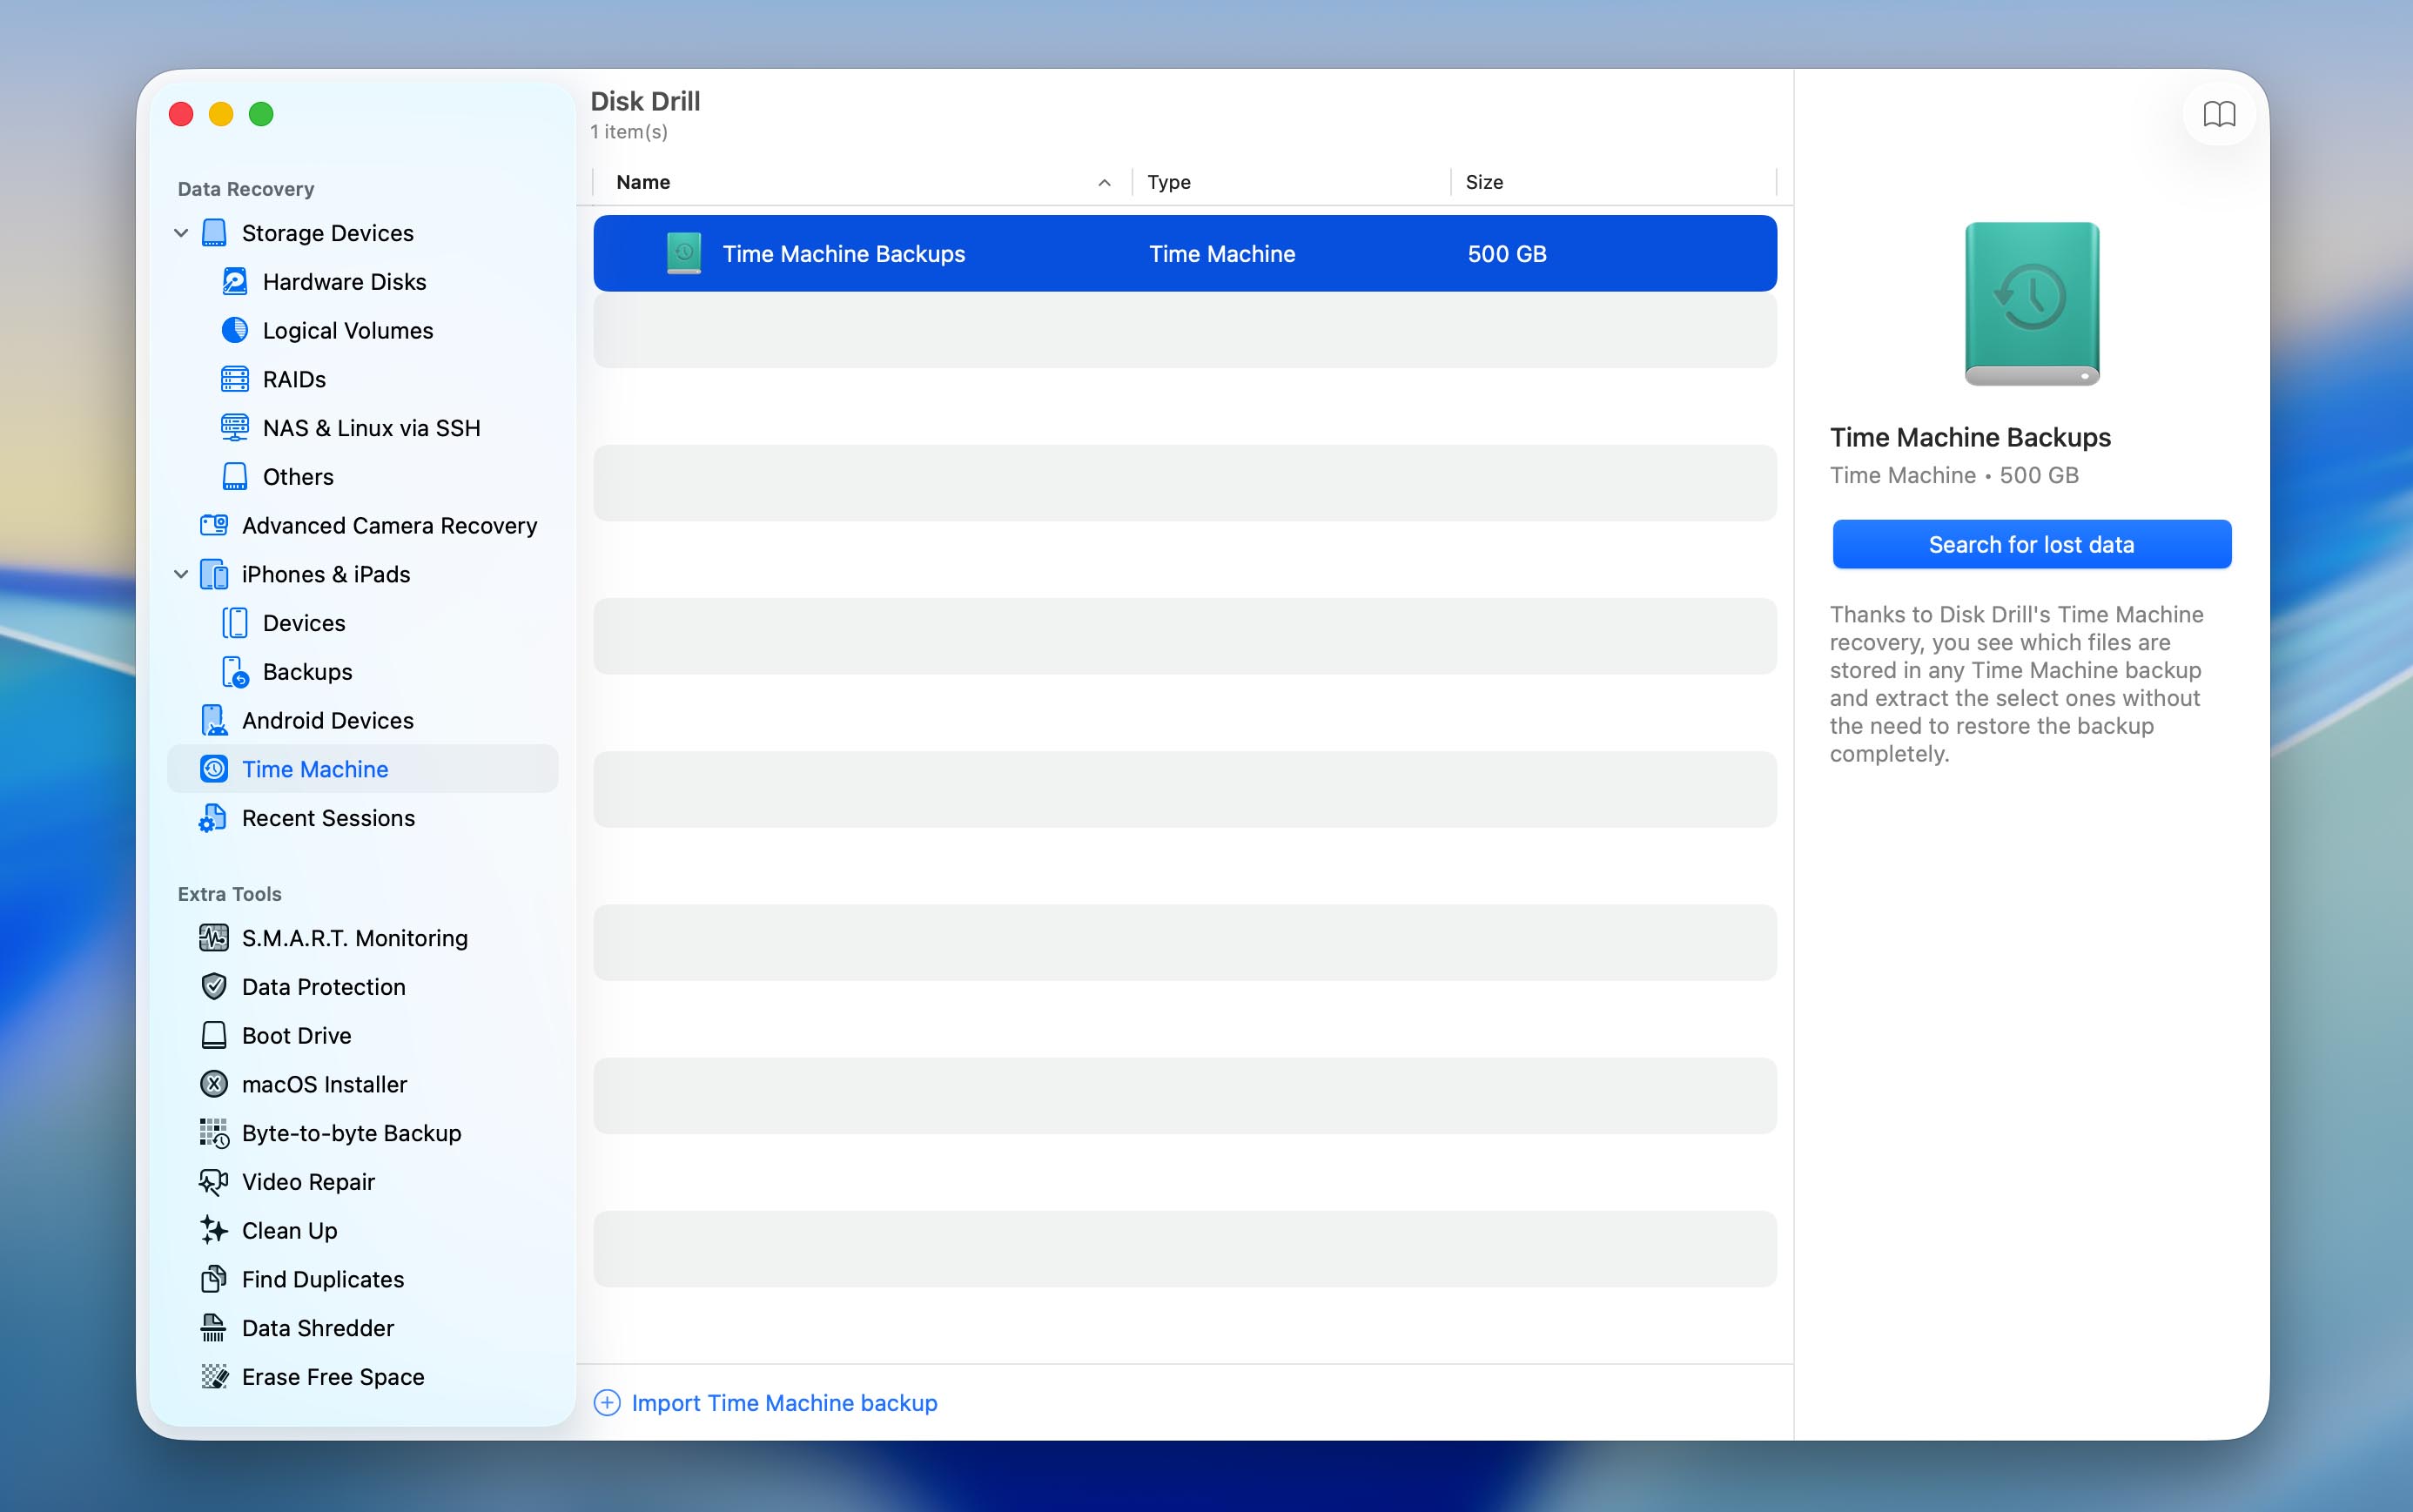
- Launch Disk Drill and go to the Time Machine section. Select the backup disk and click Search for lost data to scan it.
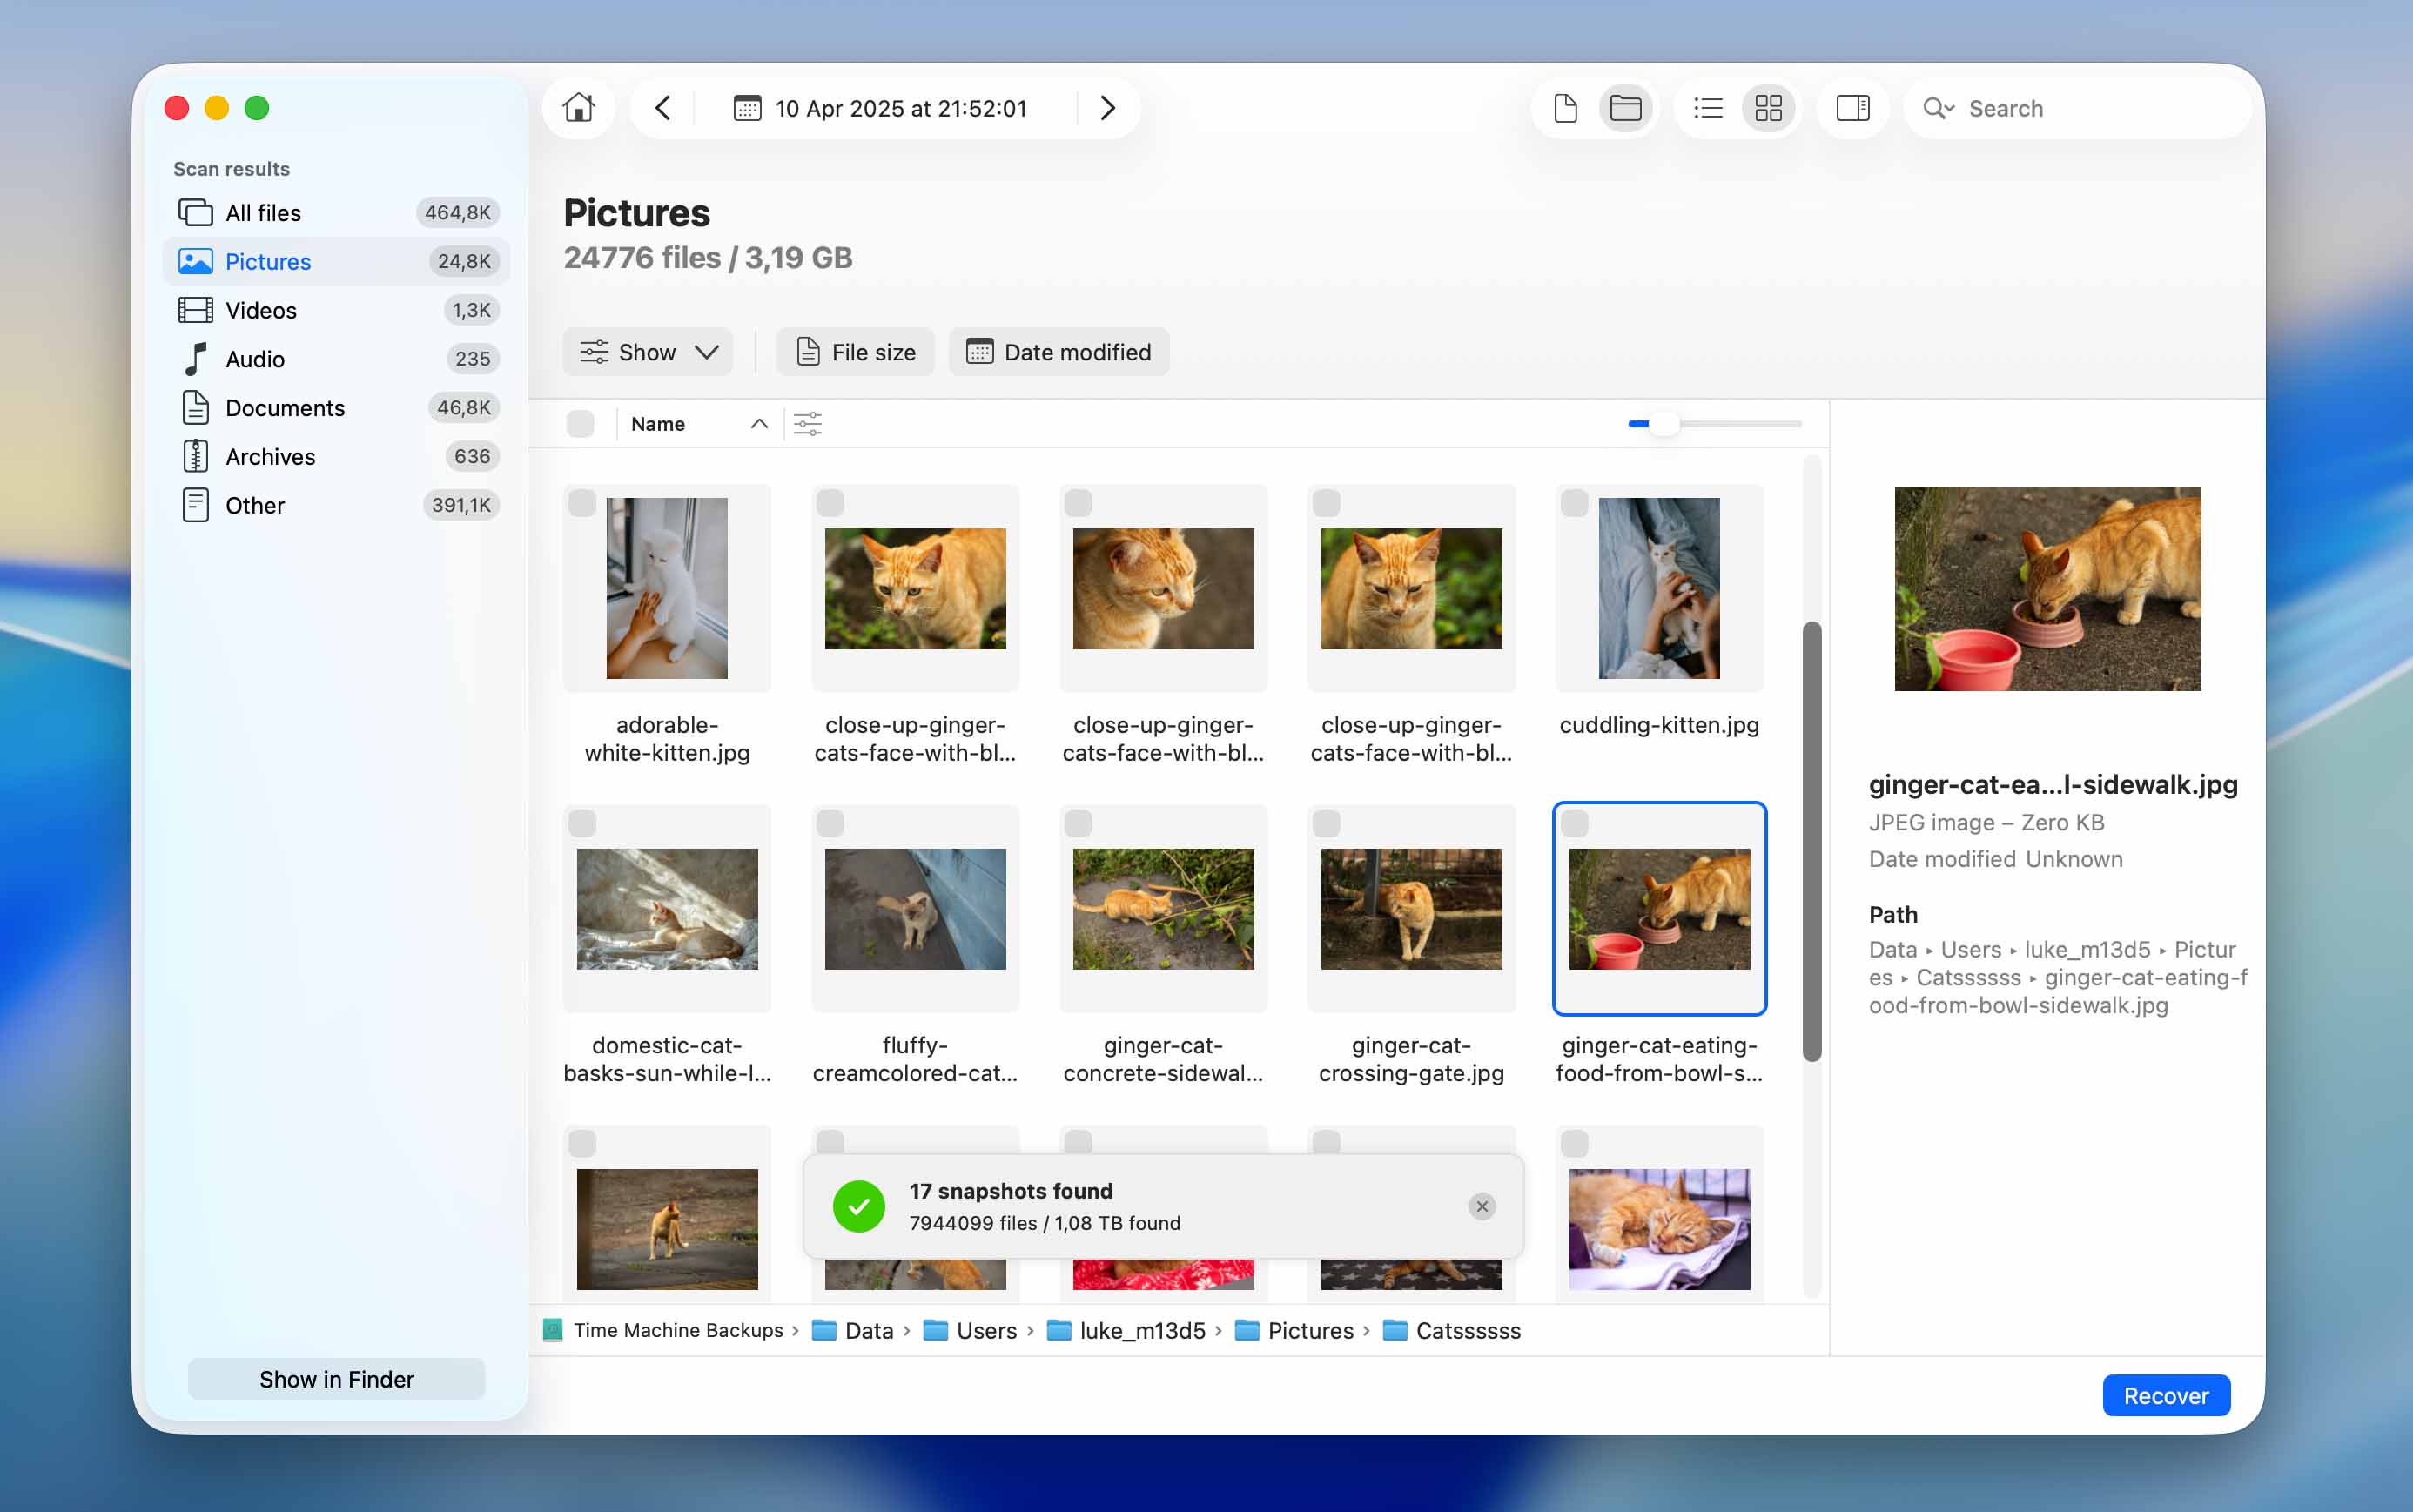
- Wait for the scan to complete, then review the files, find what you need, select them, and click Recover.
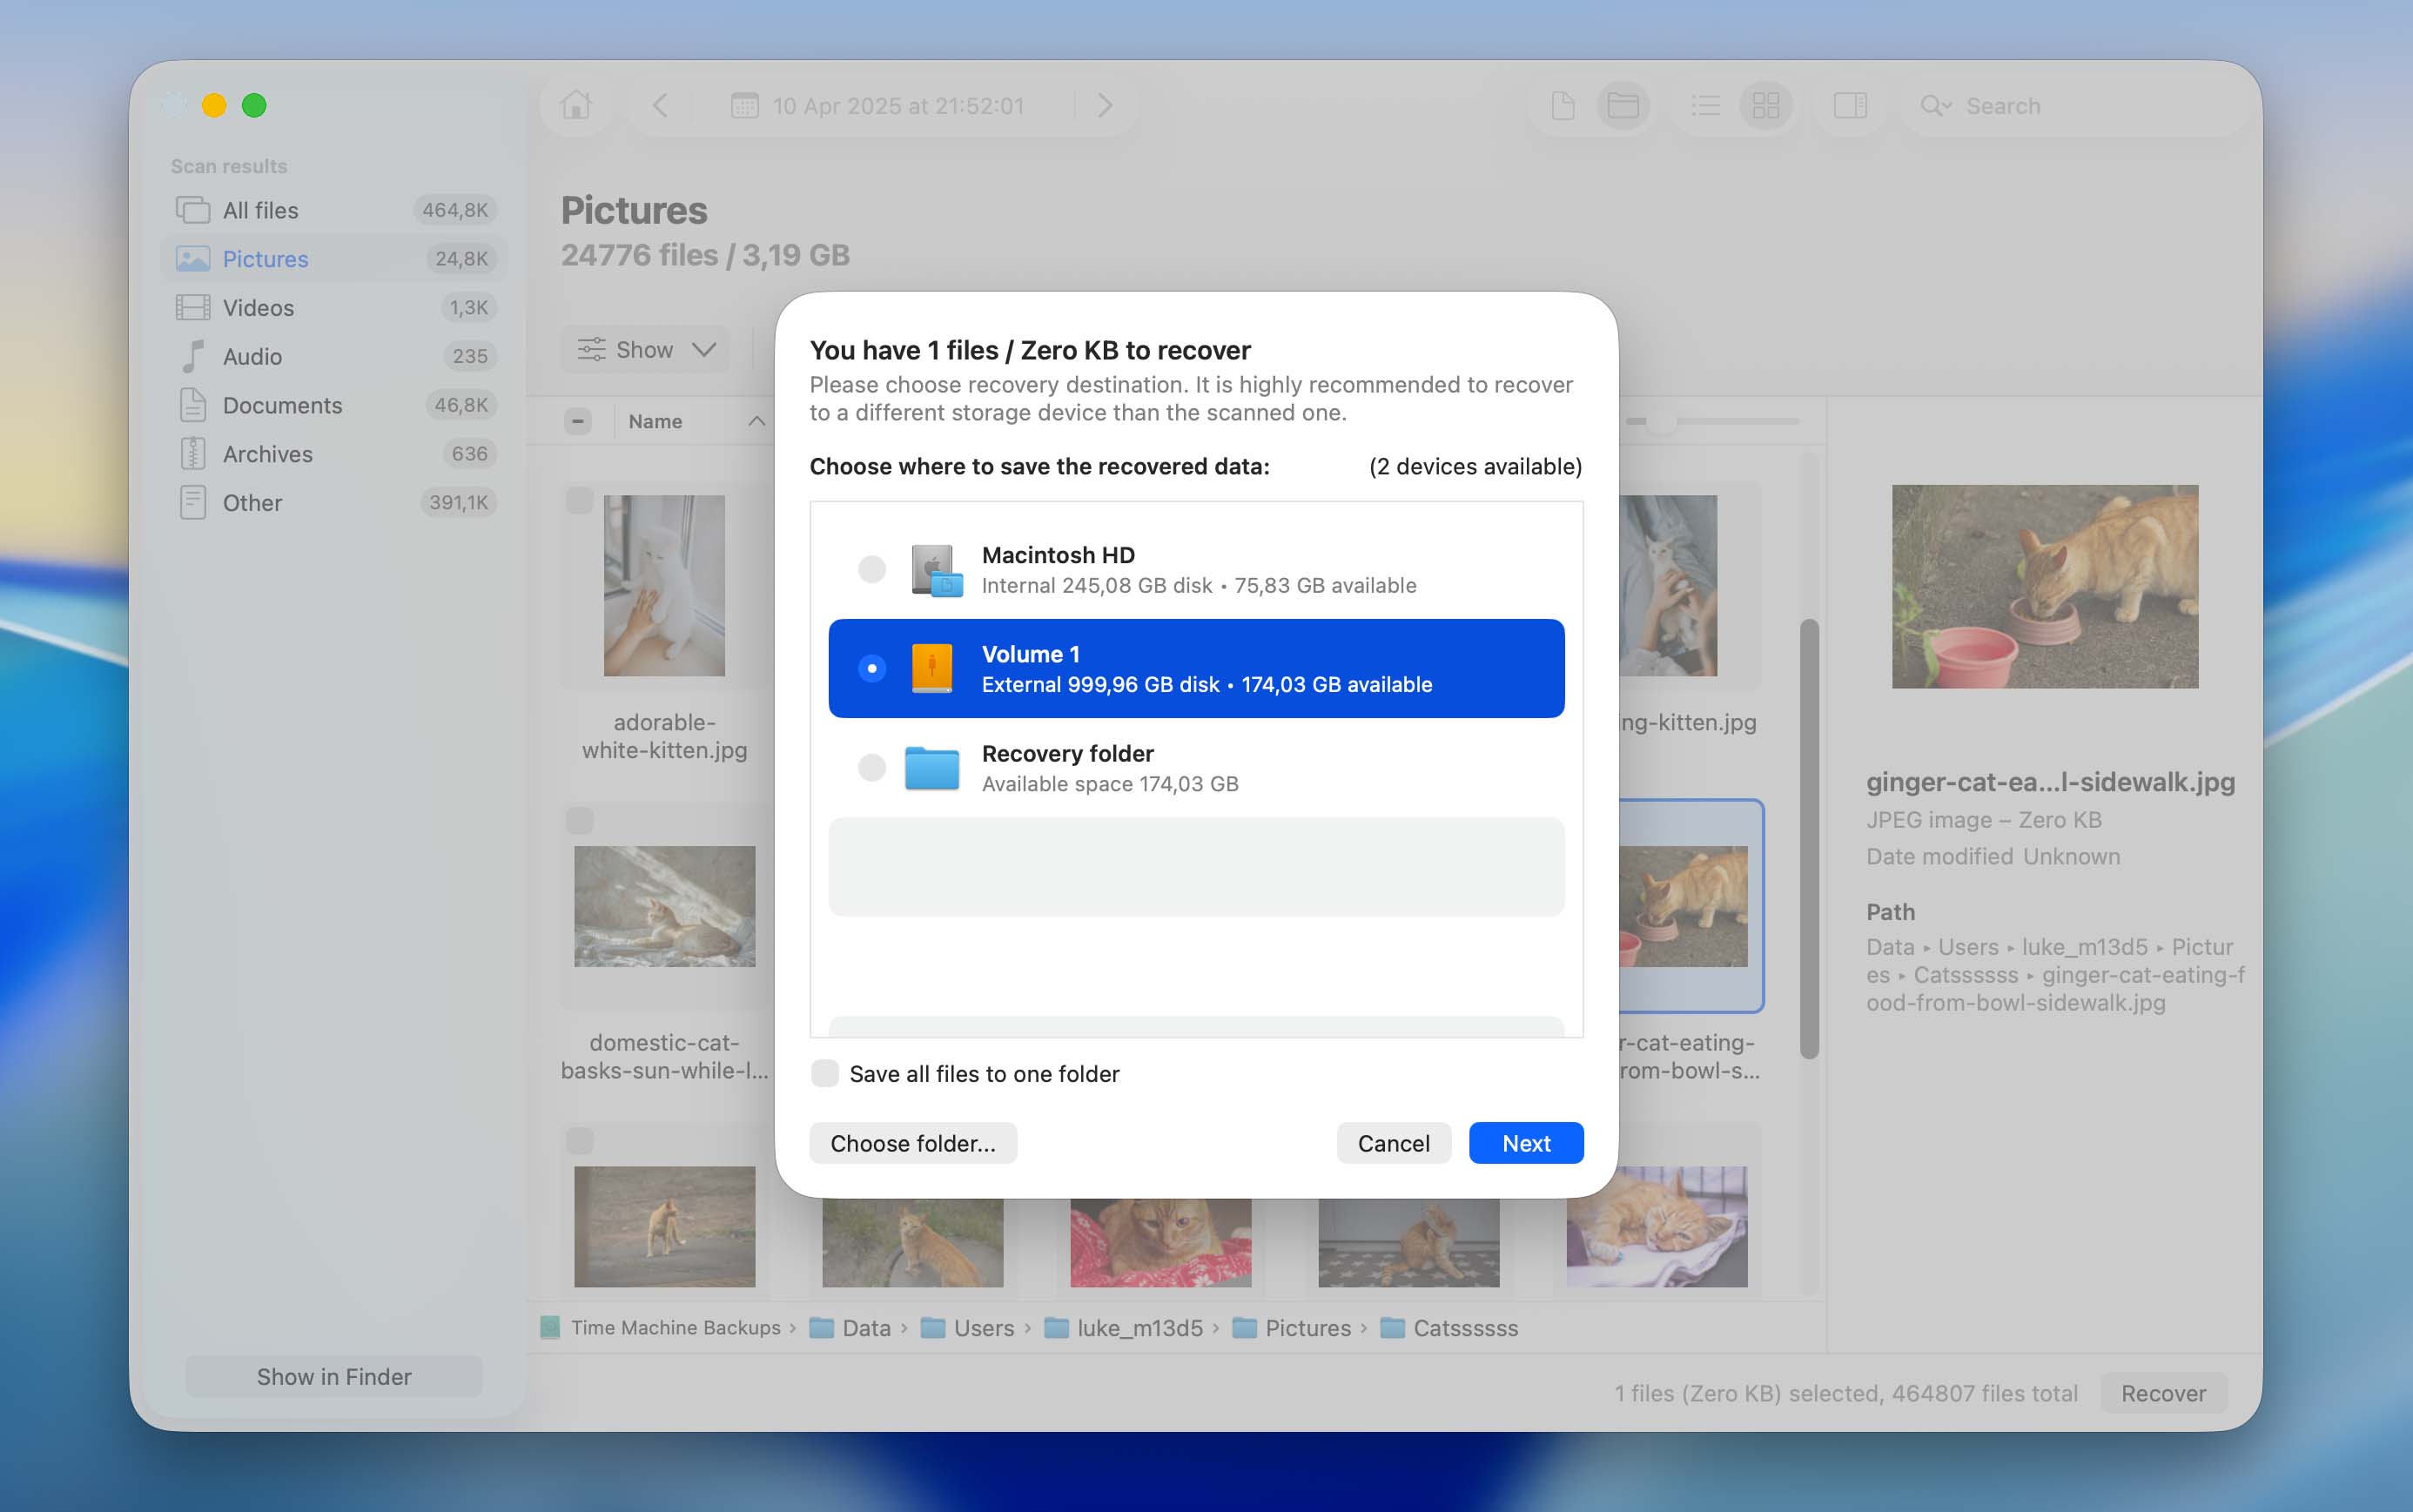
- When asked where to save the recovered files, choose a different drive. Don’t save them back to the Time Machine disk. In this example, I saved them to my Mac’s internal drive.
How to Back Up Files on Mac With Time Machine
If, while reading this article, you realized that you haven’t set up Time Machine and backups aren’t being created, the best solution for the future is to enable Time Machine, which allows you to back up the data on your Mac. Time Machine will keep the following:
- 👨🏾💻 Local snapshots
- 💾 Hourly backups
- 💻 Daily backups for the past month
- 🖥 Weekly backups for all previous months
To use Time Machine, you will need an external hard drive. You can get these pretty much anywhere. I purchased mine online and it’s pretty inexpensive. You don’t need the fastest most expensive one to use Time Machine, just a slower hard drive will take longer.
But don’t just grab any drive. Apple suggests using one that has at least twice the storage of your Mac. So if your Mac has 256GB, a 512GB backup disk is the minimum you should look for. It’s also better to keep that drive just for Time Machine. If you start using it for other files, you’ll run out of space faster and lose older backups sooner than expected.
- Plug your external hard drive into your Mac.
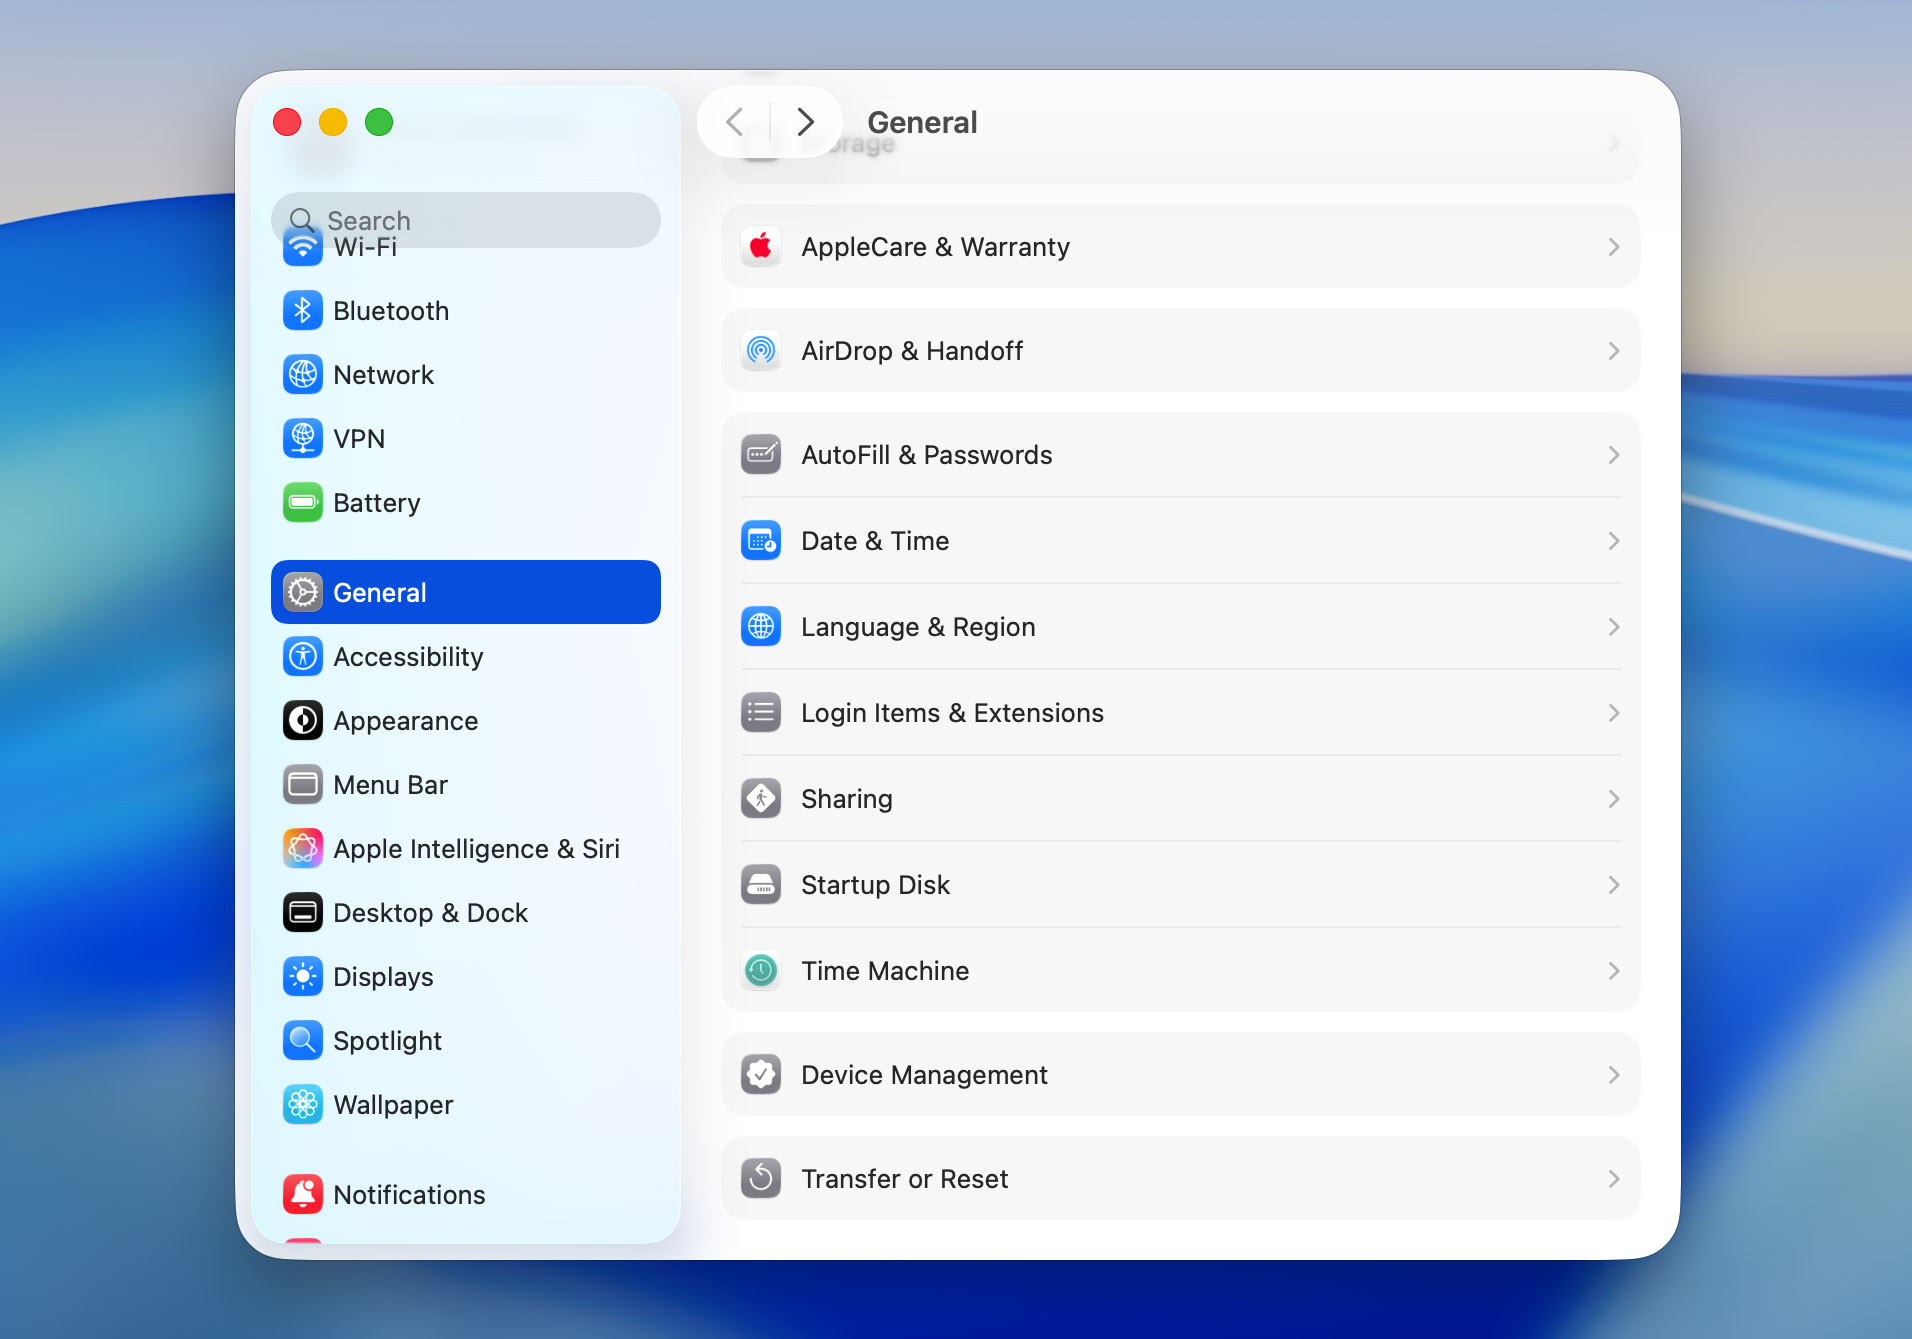
- Launch System Settings, then scroll down and click on General, then Time Machine.
- Click Add Backup Disk and select your external drive from the list.

- Confirm your choice and let Time Machine prepare the disk. The first backup will start automatically.
- Wait for the backup to complete.
That’s it! Backing up with Time Machine is a must if you ask me. From here on out, you can plug your external hard drive into your Mac and it will back up automatically.
If you have a desktop Mac or a laptop that sits on a desk frequently, you can leave the external hard drive plugged in and it will back up all on its own.
I would recommend that you back up your Mac once a week or anytime that you make huge changes to the files that are on it or work on something super important that is stored locally on your Mac.
Now let’s take a look at how to delete backups if your backup drive is running out of space.
How to Delete Time Machine Backups
When you back up your Mac to your external hard drive, backups will be created until all of the hard drive storage is full.
Once it is full, the oldest backups will then be deleted. It is done this way to give you access to as many backups as possible.
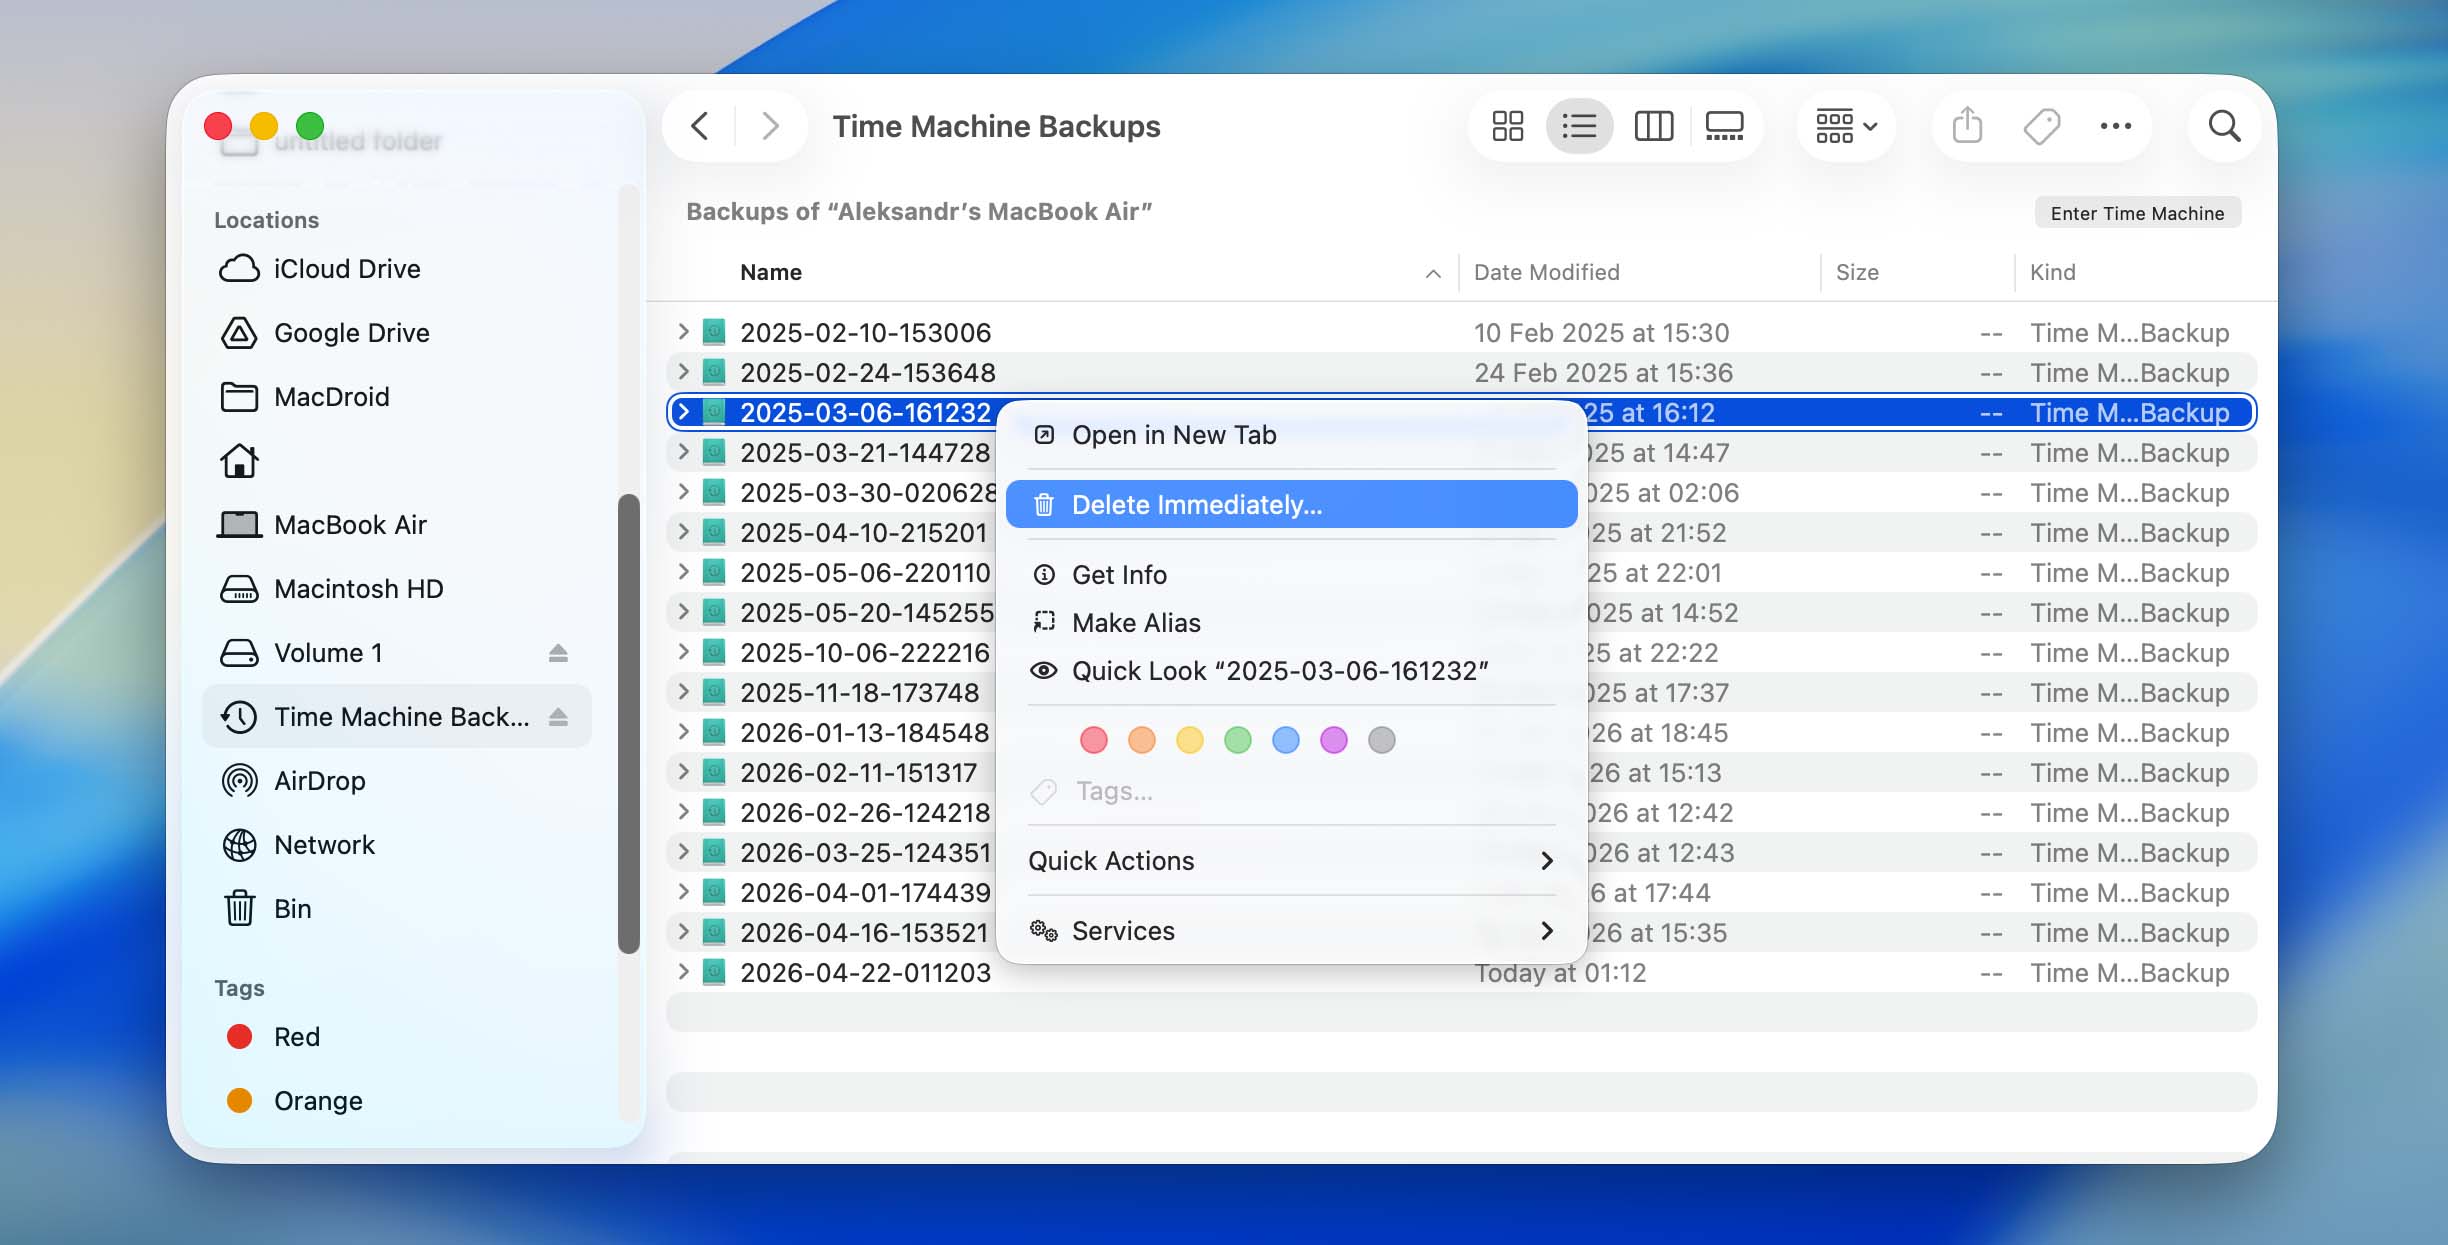
If you do want to delete Time Machine backups, you can do this by following the steps below.
- Plug your external hard drive into your Mac.
- Access the external hard drive by either clicking on the desktop icon or by going to Finder and selecting the backup drive from the left-hand side.
- Now that you’re in the hard drive, you will see the list of backups that Time Machine has created and you can delete the ones that you would like to.
I can’t see a reason why you would want to delete your Time Machine backups, but if you would like to, it is possible.
Conclusion
Our data is important. Backing up and understanding how to use Time Machine ensures that our files, pictures, and any other important information is saved in another location other than right on our Mac.
With this article, you now know how to back up, restore, and manage the data on your Mac. If you don’t have a backup, remember you can use services such as Disk Drill to find and recover files.
If you’d rather not deal with data recovery at all, it’s better to prevent data loss in the first place. Here are some of the best ways to protect your data:
- 💽 Back up your data to Time Machine: Plug in an external hard drive and back up your data. This gives you a copy of your important files in case something happens to your Mac.
- 🛡️ Use data protection features in Disk Drill: They help prevent accidental deletion and make it easier to recover files if something goes wrong.
- ✅ Keep your Mac in the right environment: Don’t leave your Mac in a place where it is too warm or too cold.
- 🔋 Keep your Mac updated: When new versions of macOS come out, install them. They fix bugs and help your Mac run more reliably.
That’s everything I’ve learned from working with Time Machine and data recovery, and now you have it too.
FAQ
You can restore your Mac from a backup by using Time Machine.
- Plug your external hard drive into your Mac.
- Launch Migration Assistant.
- Choose your Time Machine backup as the storage device.
- Wait for the restore to complete.
Yes, it does! When you restore from a Time Machine backup, your Mac will look exactly as it was the last time that backup was created. This means that even your wallpaper will be the same!
Yes, you can. While you would be restoring macOS, you would also be restoring all of your files as well.
When you restore a Mac from Time Machine, you will restore all of the files and the way that your Mac looked during the last time that it was backed up.
Restore a file from a Time Machine Backup
- Plug your external hard drive into your Mac.
- Press the keys Command + Space bar or click on the magnifying glass in the upper right-hand corner to launch Spotlight.
- Type in Time Machine. This will allow you to enter your Time Machine snapshots.
- Go to the date that you want to restore a file from.
- Select the file and click on Restore.
Restore from a Time Machine Backup Using Migration Assistant
- Launch Migration Assistant from within the Utilities folder.
- You will then be greeted by a window that will tell you about what Migration Assistant does. Click on Continue to move forward to the next screen.
- Then, select that you want to transfer information from a Time Machine Backup.
- Plug your external hard drive into your Mac and restore back to the date that you last had the data that you’re looking for.
- Wait for the backup process to complete.
If you want to use another Mac to restore a file or if you want to restore it to a backup from an external hard drive that has Time Machine backups on it, you can do that.
Restore a File From a Time Machine Backup
- Plug your external hard drive into your Mac.
- Press the keys Command + Space bar or click on the magnifying glass in the upper right-hand corner to launch Spotlight.
- Type in Time Machine. This will allow you to enter your Time Machine snapshots.
- Go to the date that you want to restore a file from.
- Select the file and click on Restore.
Restore From a Time Machine Backup Using Migration Assistant if Your Mac Is Already Set Up
- Launch Migration Assistant from within the Utilities folder.
- You will then be greeted by a window that will tell you about what Migration Assistant does. Click on Continue to move forward to the next screen.
- Then, select that you want to transfer information from a Time Machine Backup.
- Plug your external hard drive into your Mac and restore back to the date that you last had the data that you’re looking for.
- Wait for the backup process to complete.
Restore From a Time Machine Backup on a Mac That Isn’t Setup Yet
- Go through the setup process on your new Mac.
- Once you get to a spot where it asks if you want to transfer data from another Time Machine backup, choose that one.
- Plug in your external hard drive that has your Time Machine backups on them.
- Choose the backup that you would like to restore to.
- Wait for the restore to complete.
It depends on how you do it. If you restore your Mac from a Time Machine backup as a full system restore, your current data will be replaced by what’s in that backup. Your Mac will go back to the state it was in at that time. If you use Migration Assistant instead, your current system stays intact. You’re just transferring files, apps, and settings from the backup, not wiping anything. So in one case your data gets replaced, in the other it doesn’t.