FAT32 or File Allocation Table 32 is a file system format that uses 32 bits of data for identifying groups of data on your storage device. This data format works really well on storage devices such as USB drives.
FAT32 is still in use today. It’s reliable, fast, and there are many reasons that you might want to use this data format for storing and sharing your files.
Why Would I Want to Use FAT32?
FAT32 has some good things going for it which is why it’s still in use today. Here are some reasons why you might want to use it and what the pros are of FAT32 in general.
- 📱 It has a large compatibility with mobile devices. This would include things like smartphones, mobile game consoles, video cameras, and anything else of that nature.
- 💻 It supports a large variety of operating systems. This includes Windows, Linux, and macOS. This can be helpful if you’re moving across platforms frequently as it can be read by each of those operating systems.
If you’re wanting to use FAT32, let’s look at the best methods for formatting our USB drive to the FAT32 format.
How to Format a USB Drive to FAT32
Believe it or not, there is more than one method by which we can format our USB drive to the FAT32 file format. Below, I will look at two of them. One of them is a textual experience using the Terminal and then the other is going to be completed by using Disk Utility.
Both methods are free and don’t require you to download any additional software onto your Mac.
Formatting your USB drive will erase everything on it so please keep that in mind.
Textual How to Format FAT32 on Mac Using Terminal
The Terminal is a command line interface that allows you to type in commands. It doesn’t have a graphical interface with buttons that you can click on to select options.
Using the Terminal to format a USB drive is quite easy. Let’s walk through how we can format a USB drive to FAT32 by using the Mac Terminal. The Terminal is free and comes installed as part of macOS.
- Connect the USB drive that you want to format to FAT32 to your Mac.
- Launch the Terminal. This can be done by using COMMAND + SPACE (which launches Spotlight so that we can search for the app) and then type in ‘Terminal” without quotations.
- Select it from the list of results. Your other option is to go to the Applications folder, Utilities, and then launch the Terminal from there. Either option is fine.
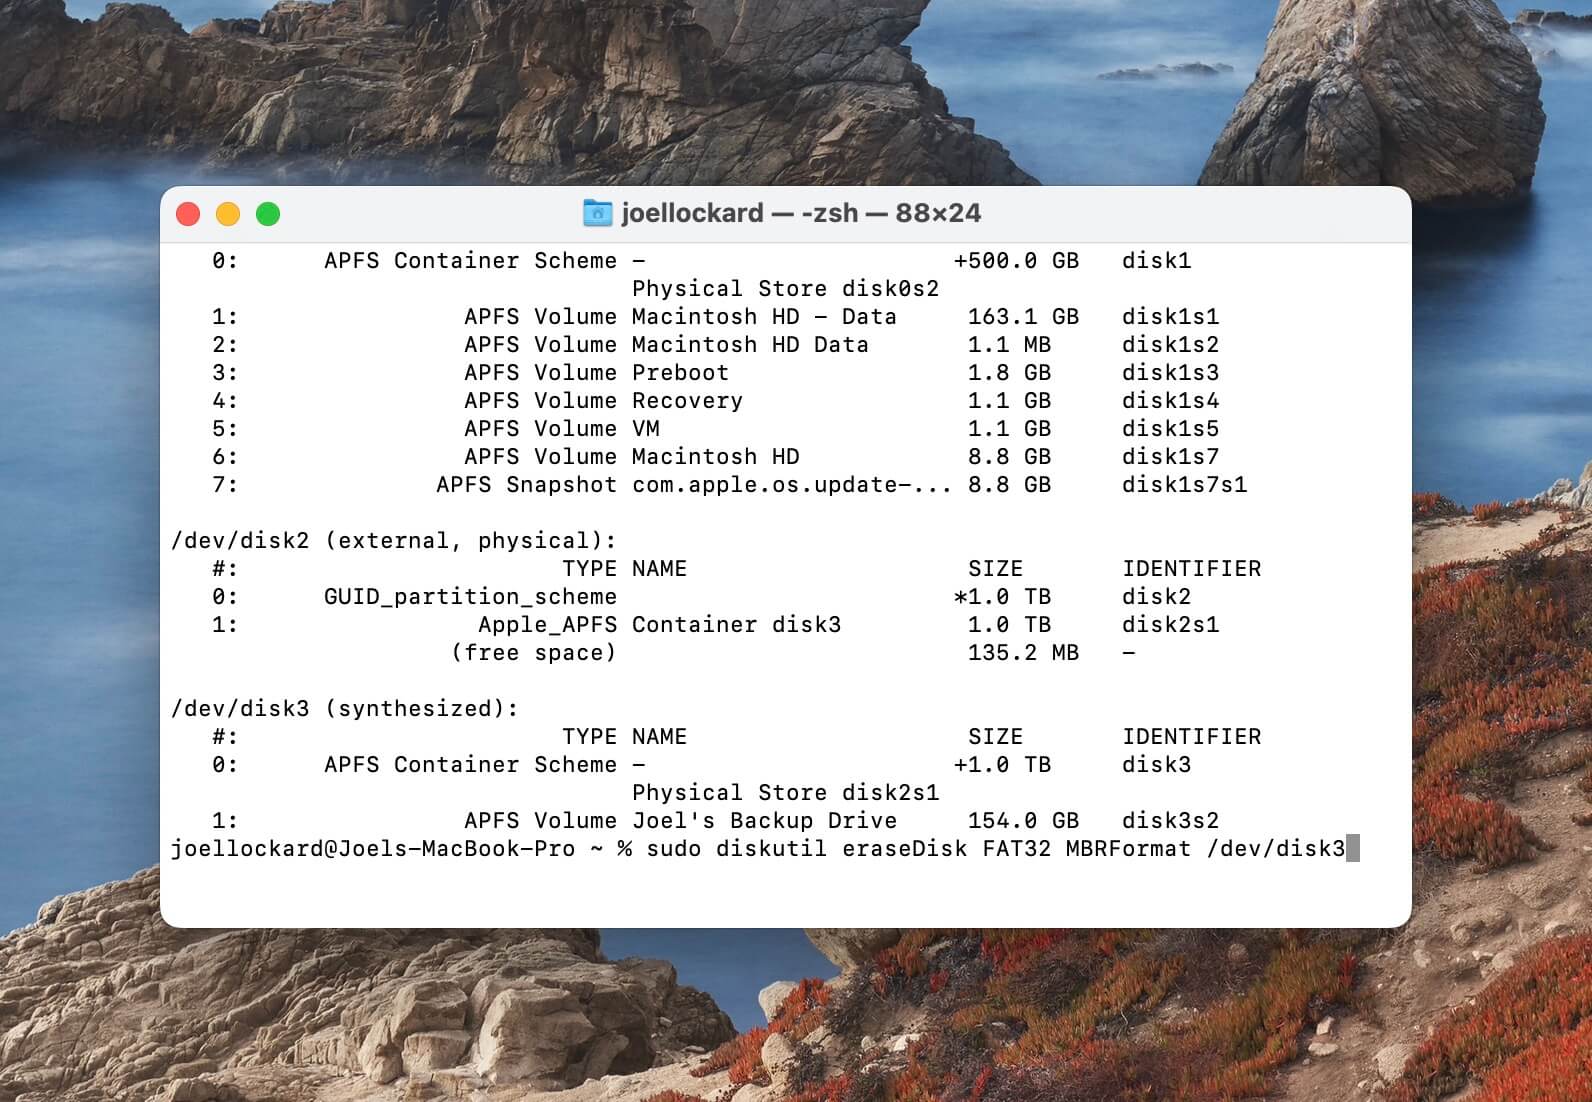
- Type in diskutil list to display the list of all your internal and external storage devices. You will want to make sure that you’re looking at external options as your USB won’t be internal.

- You can see my external storage device is located at /dev/disk3. Find where yours is and then type in sudo diskutil eraseDisk FAT32 MBRFormat /dev/disk3 except make the /dev/disk3 whichever path your external storage device is located at.
- Wait for the formatting to complete and then that’s it!
If you still want a graphic interface, let’s look at how we can format our USB drive using Disk Utility.
Graphical How to Format FAT32 on Mac Using Disk Utility
Disk Utility allows you to manage the internal and external storage on your Mac. You can also do many other things such as run First Aid to repair a disk that isn’t operating correctly. Disk Utility is free and comes installed as part of macOS.
We can use Disk Utility to format a USB drive to FAT32.
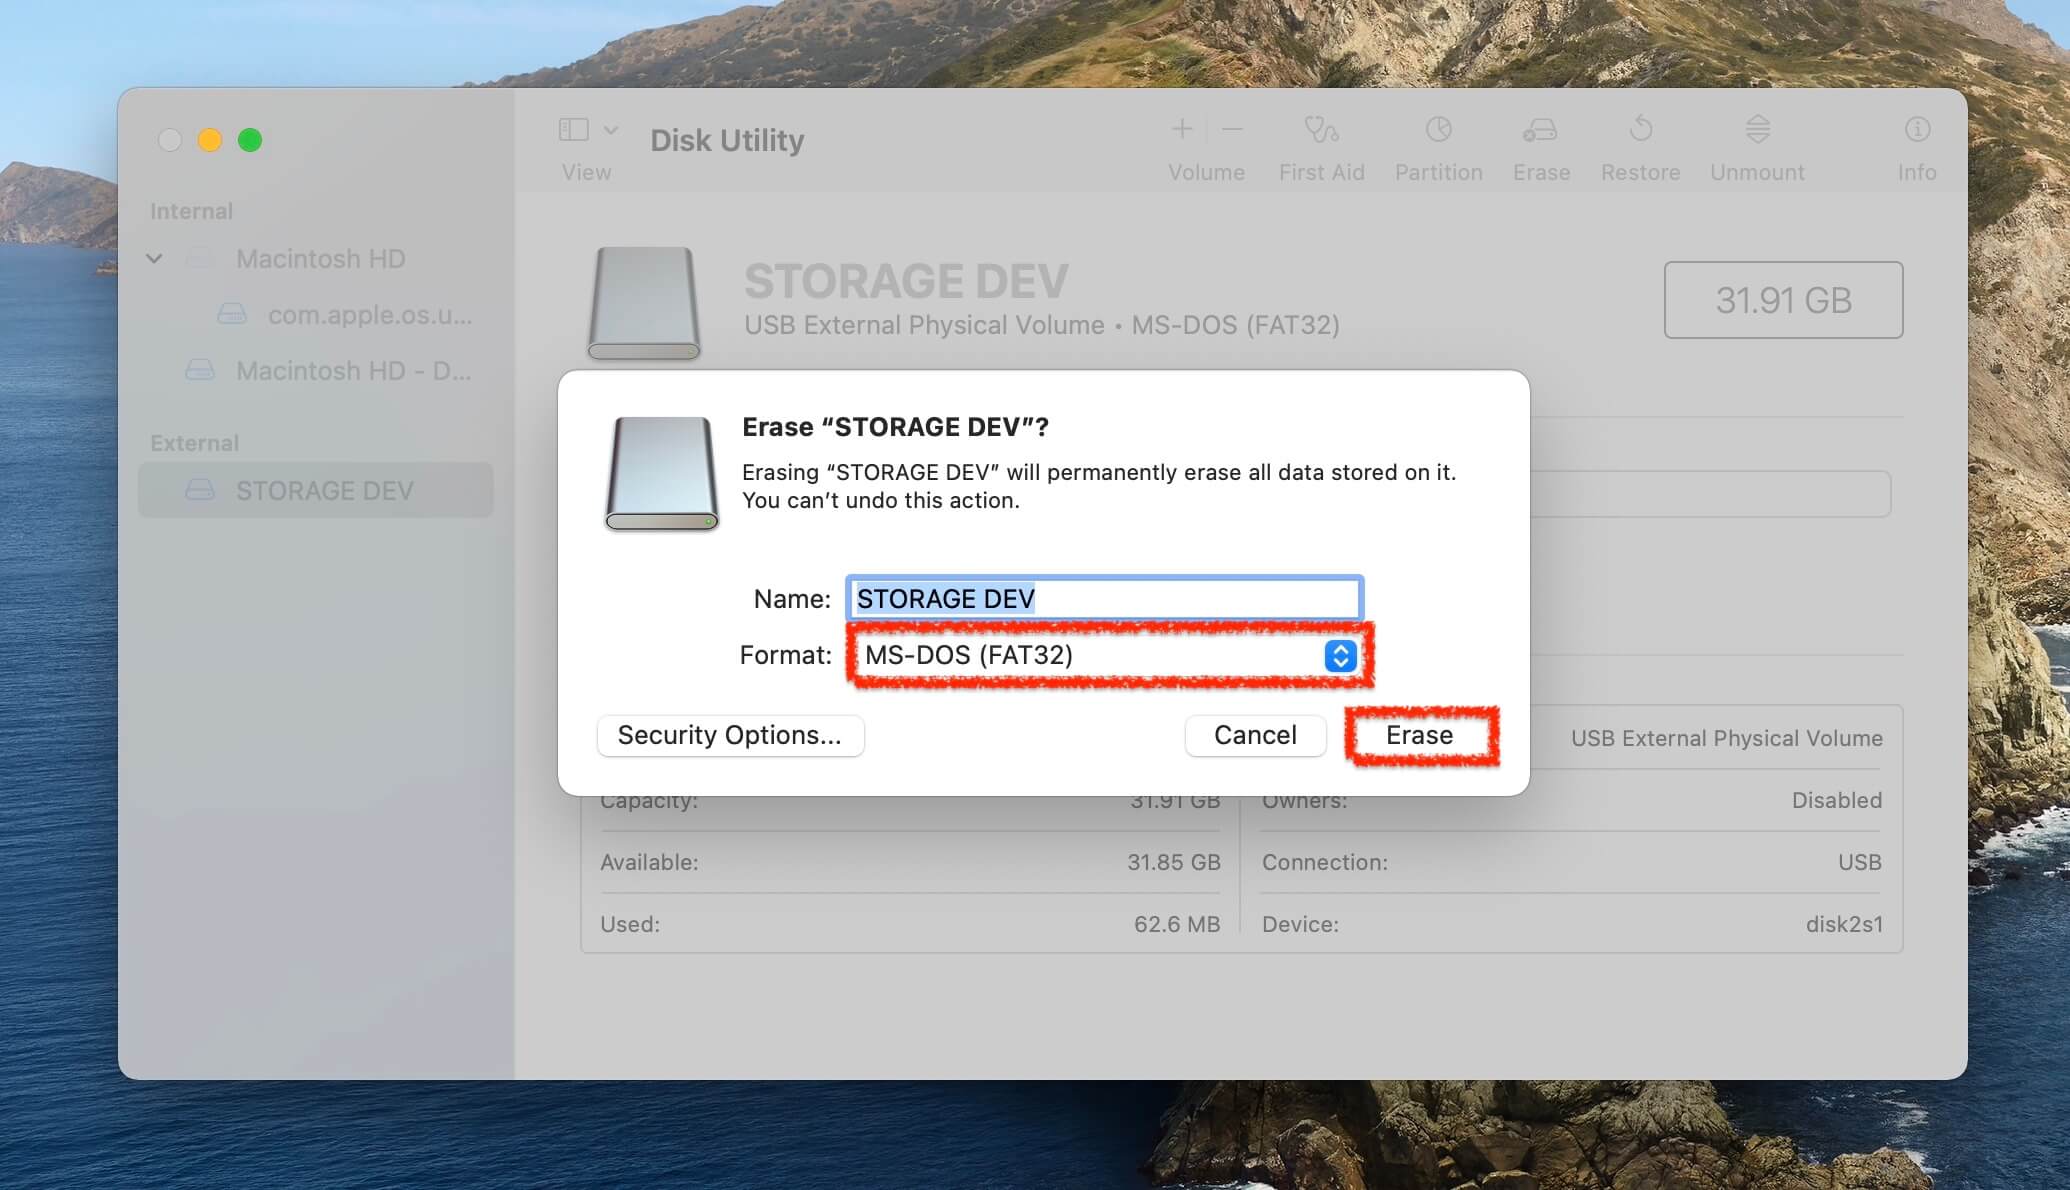
- Launch Disk Utility. This can be done by pressing the keys COMMAND + SPACE and then type in Disk Utility. Select Disk Utility from the results. Another method is that you can go into your Applications folder, Utilities, and then launch it from there.
- Once within Disk Utility, select the storage device you want to format. Choose MS-DOT (FAT) and then click on Erase.
Keep in mind that FAT32 can’t work with USB drives over 32GBs. If you own a USB drive over 32GBs, you will need to use a different data format.
Now, if you’ve formatted a USB drive in the past and there was data on it that you didn’t want to lose, we can recover data from it and that’s what we will attempt below.
How to Recover Data From a Formatted USB Drive
If you formatted a USB drive and then realized that there was data that you wished that you would have saved, we can use Disk Drill to scan and attempt to recover the data on it.
Disk Drill allows us to recover data from our USB drive even after it has been formatted. It can scan the device and if there is any recoverable data, we can then choose what data to save. There are a lot of data recovery apps out there, but I love using Disk Drill for a couple of key features:
- 💽 It’s always updated to the current version of macOS. A new version of macOS named Ventura was just released and it’s already updated to run on it. Not to mention, it can also work with the new M1 and M2 Apple Silicon chips meaning that it can run on any Mac, even if you have a newer one.
- 📸 It comes with a Preview feature that allows you to view a file before you choose to recover it. This is useful to ensure that you’re recovering the correct file before you select the Recover option.
- 🙂 You can download, scan, and view all your data for free. You only must purchase the app once you’ve confirmed that Disk Drill was able to find your data. Some apps require you to purchase them first and then you can scan your device which would make them a waste of money if they can’t find your data in the first place which sometimes happens.
Let’s move on to recovering some data.
- Download and install Disk Drill onto your Mac.
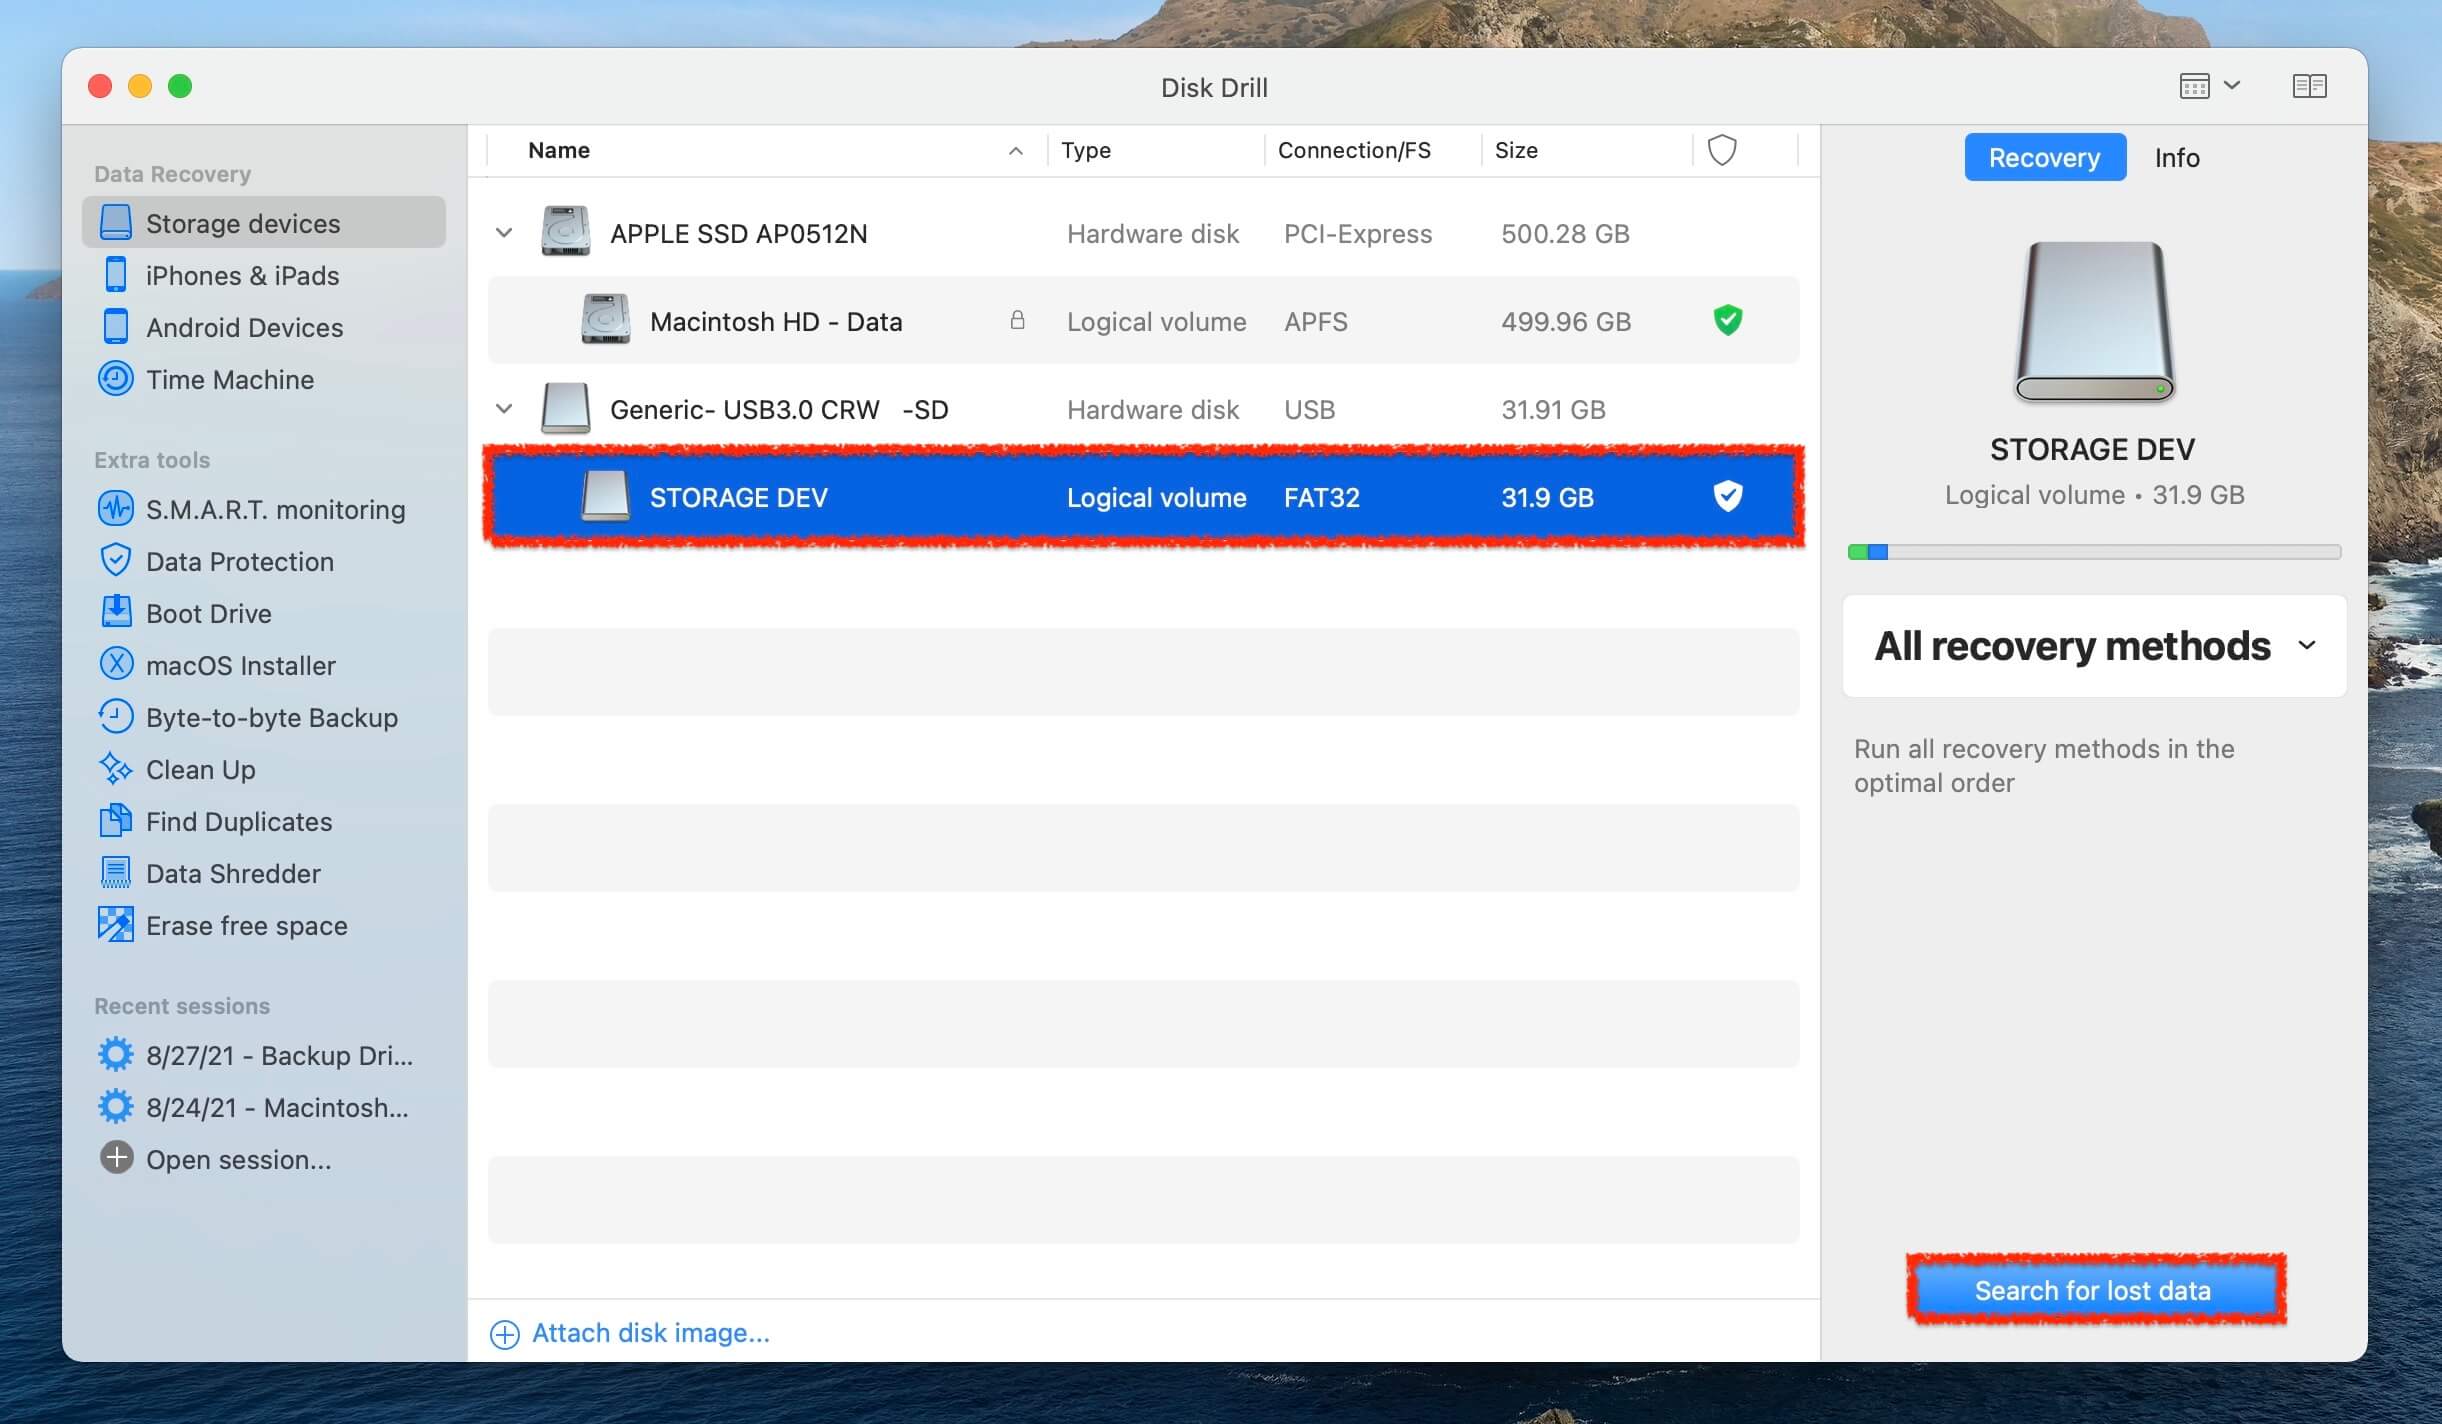
- Launch Disk Drill and then under Data Recovery select Storage devices. You can scan any internal or external storage device that is plugged into your Mac but in this article, we’re going to take a look at USB drives. Select your USB drive and then click on Search for lost data.
- Wait for the scan process to complete. This can take some time depending on the size of the drive, connection speed, disk fragmentation, and other factors.
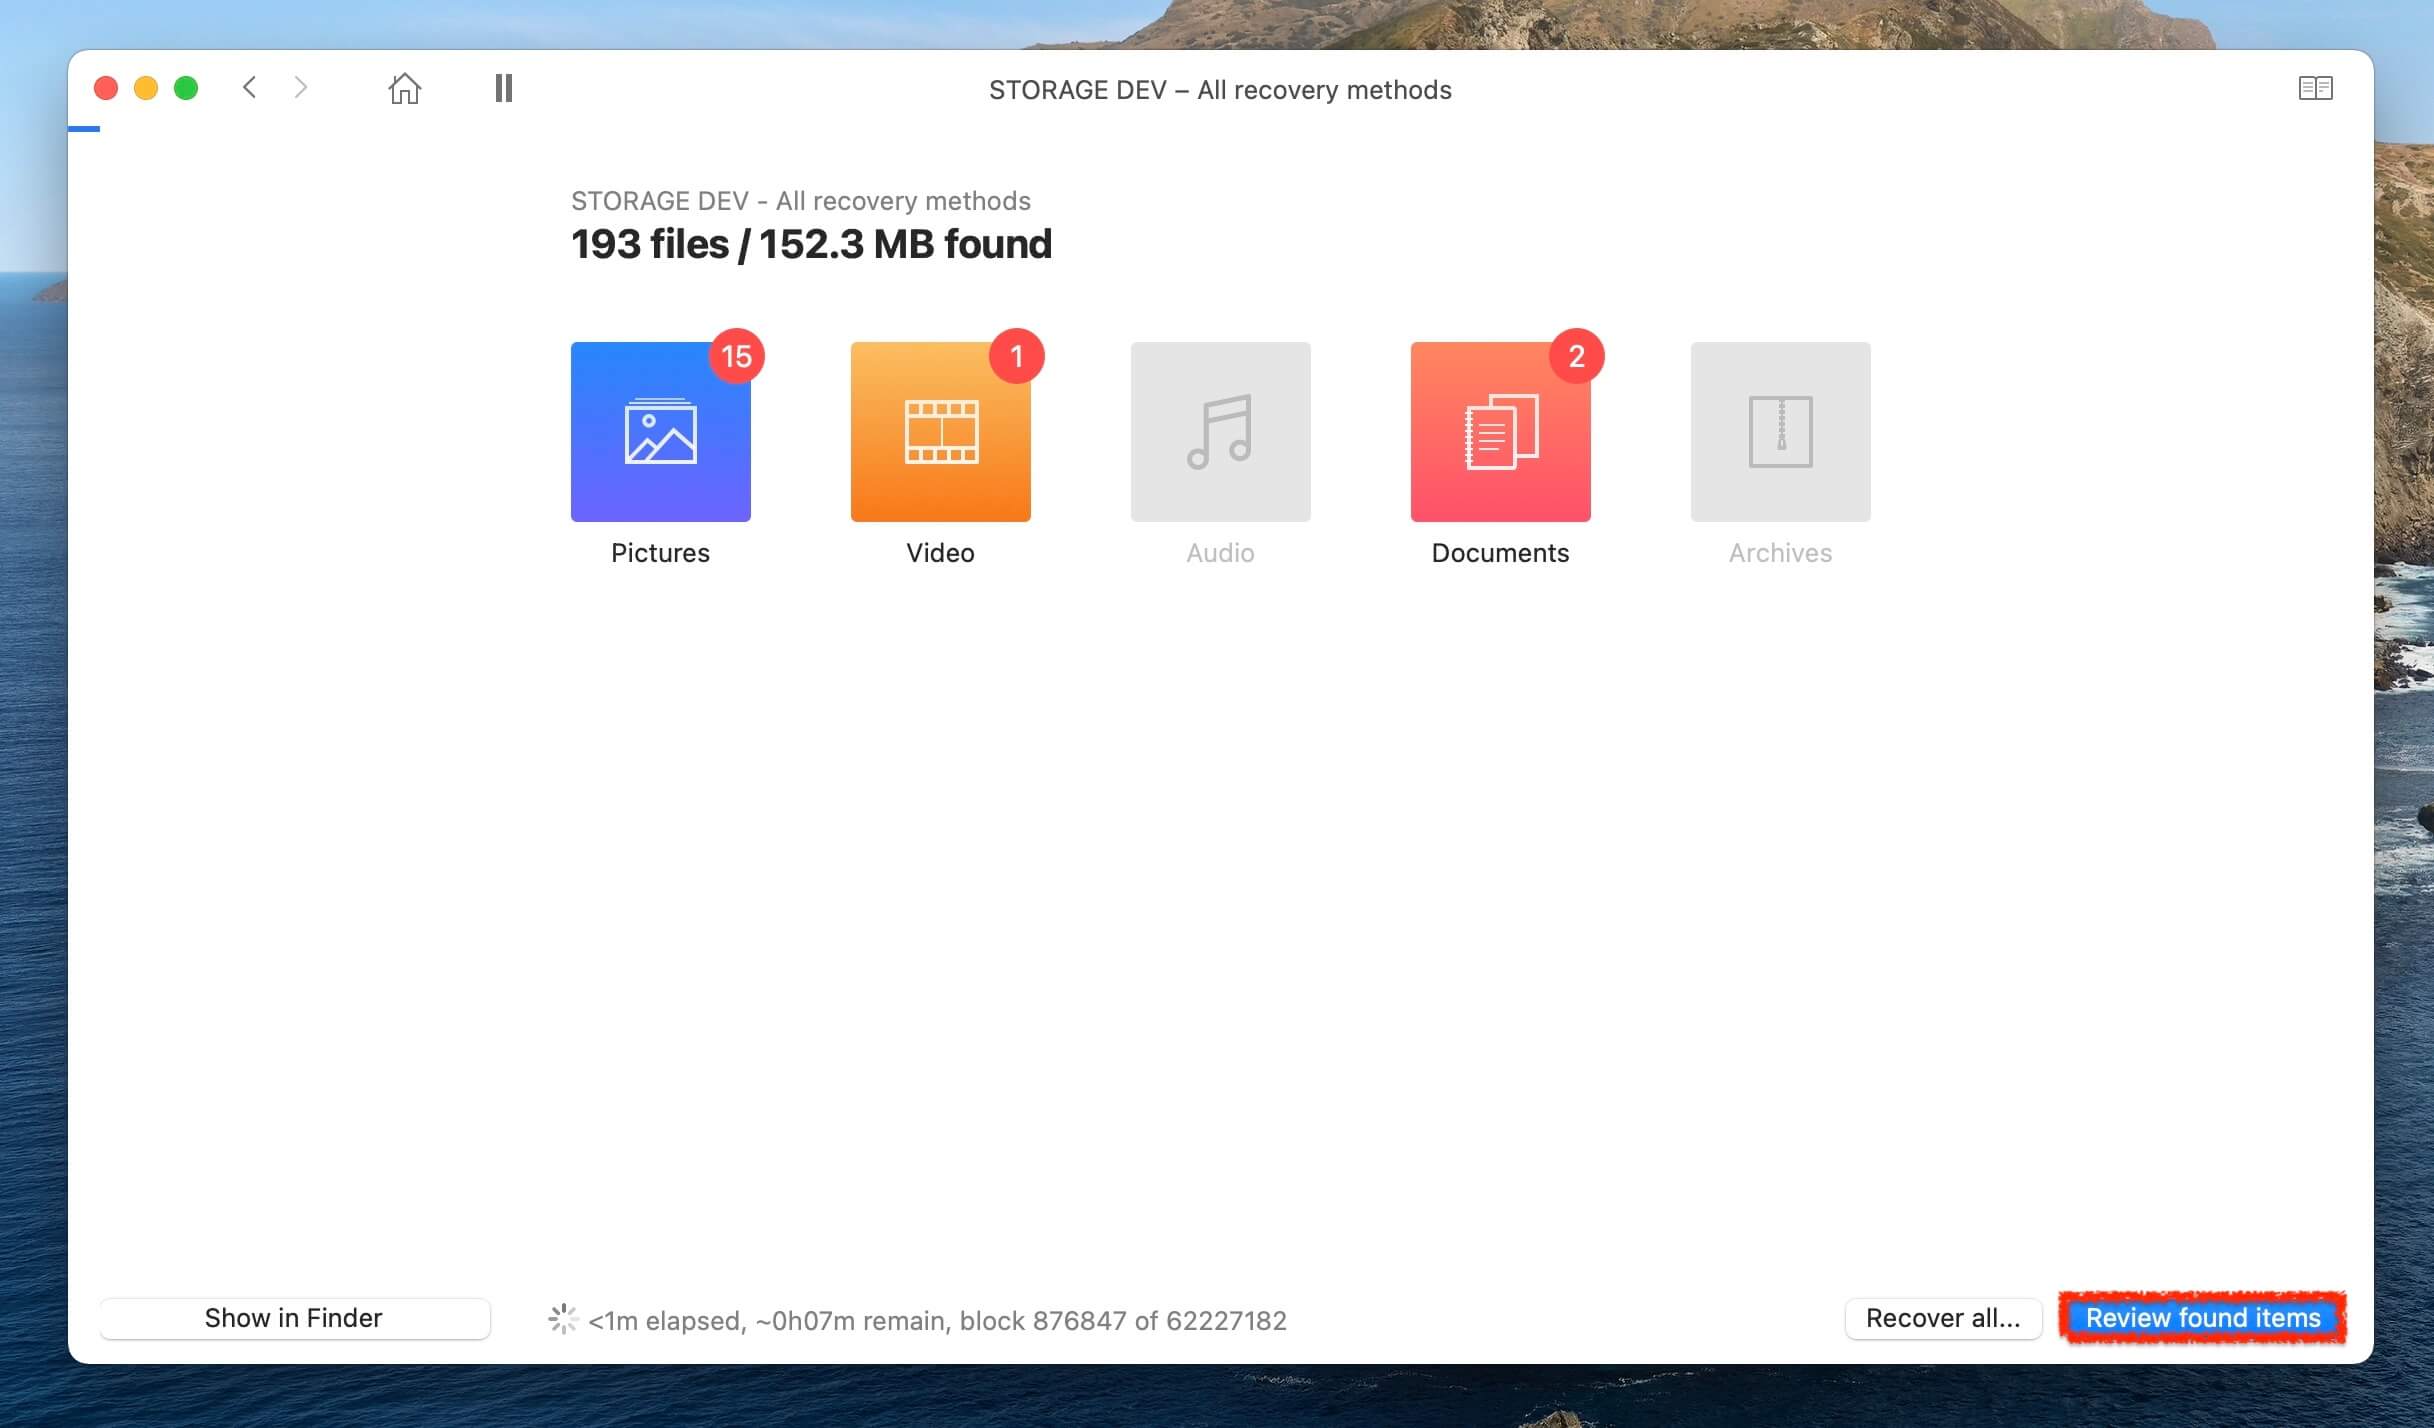
- Review what Disk Drill was able to recover. You can use the Preview feature to see the entire contents of the file before recovering it. Click the eye icon and an image will be displayed.
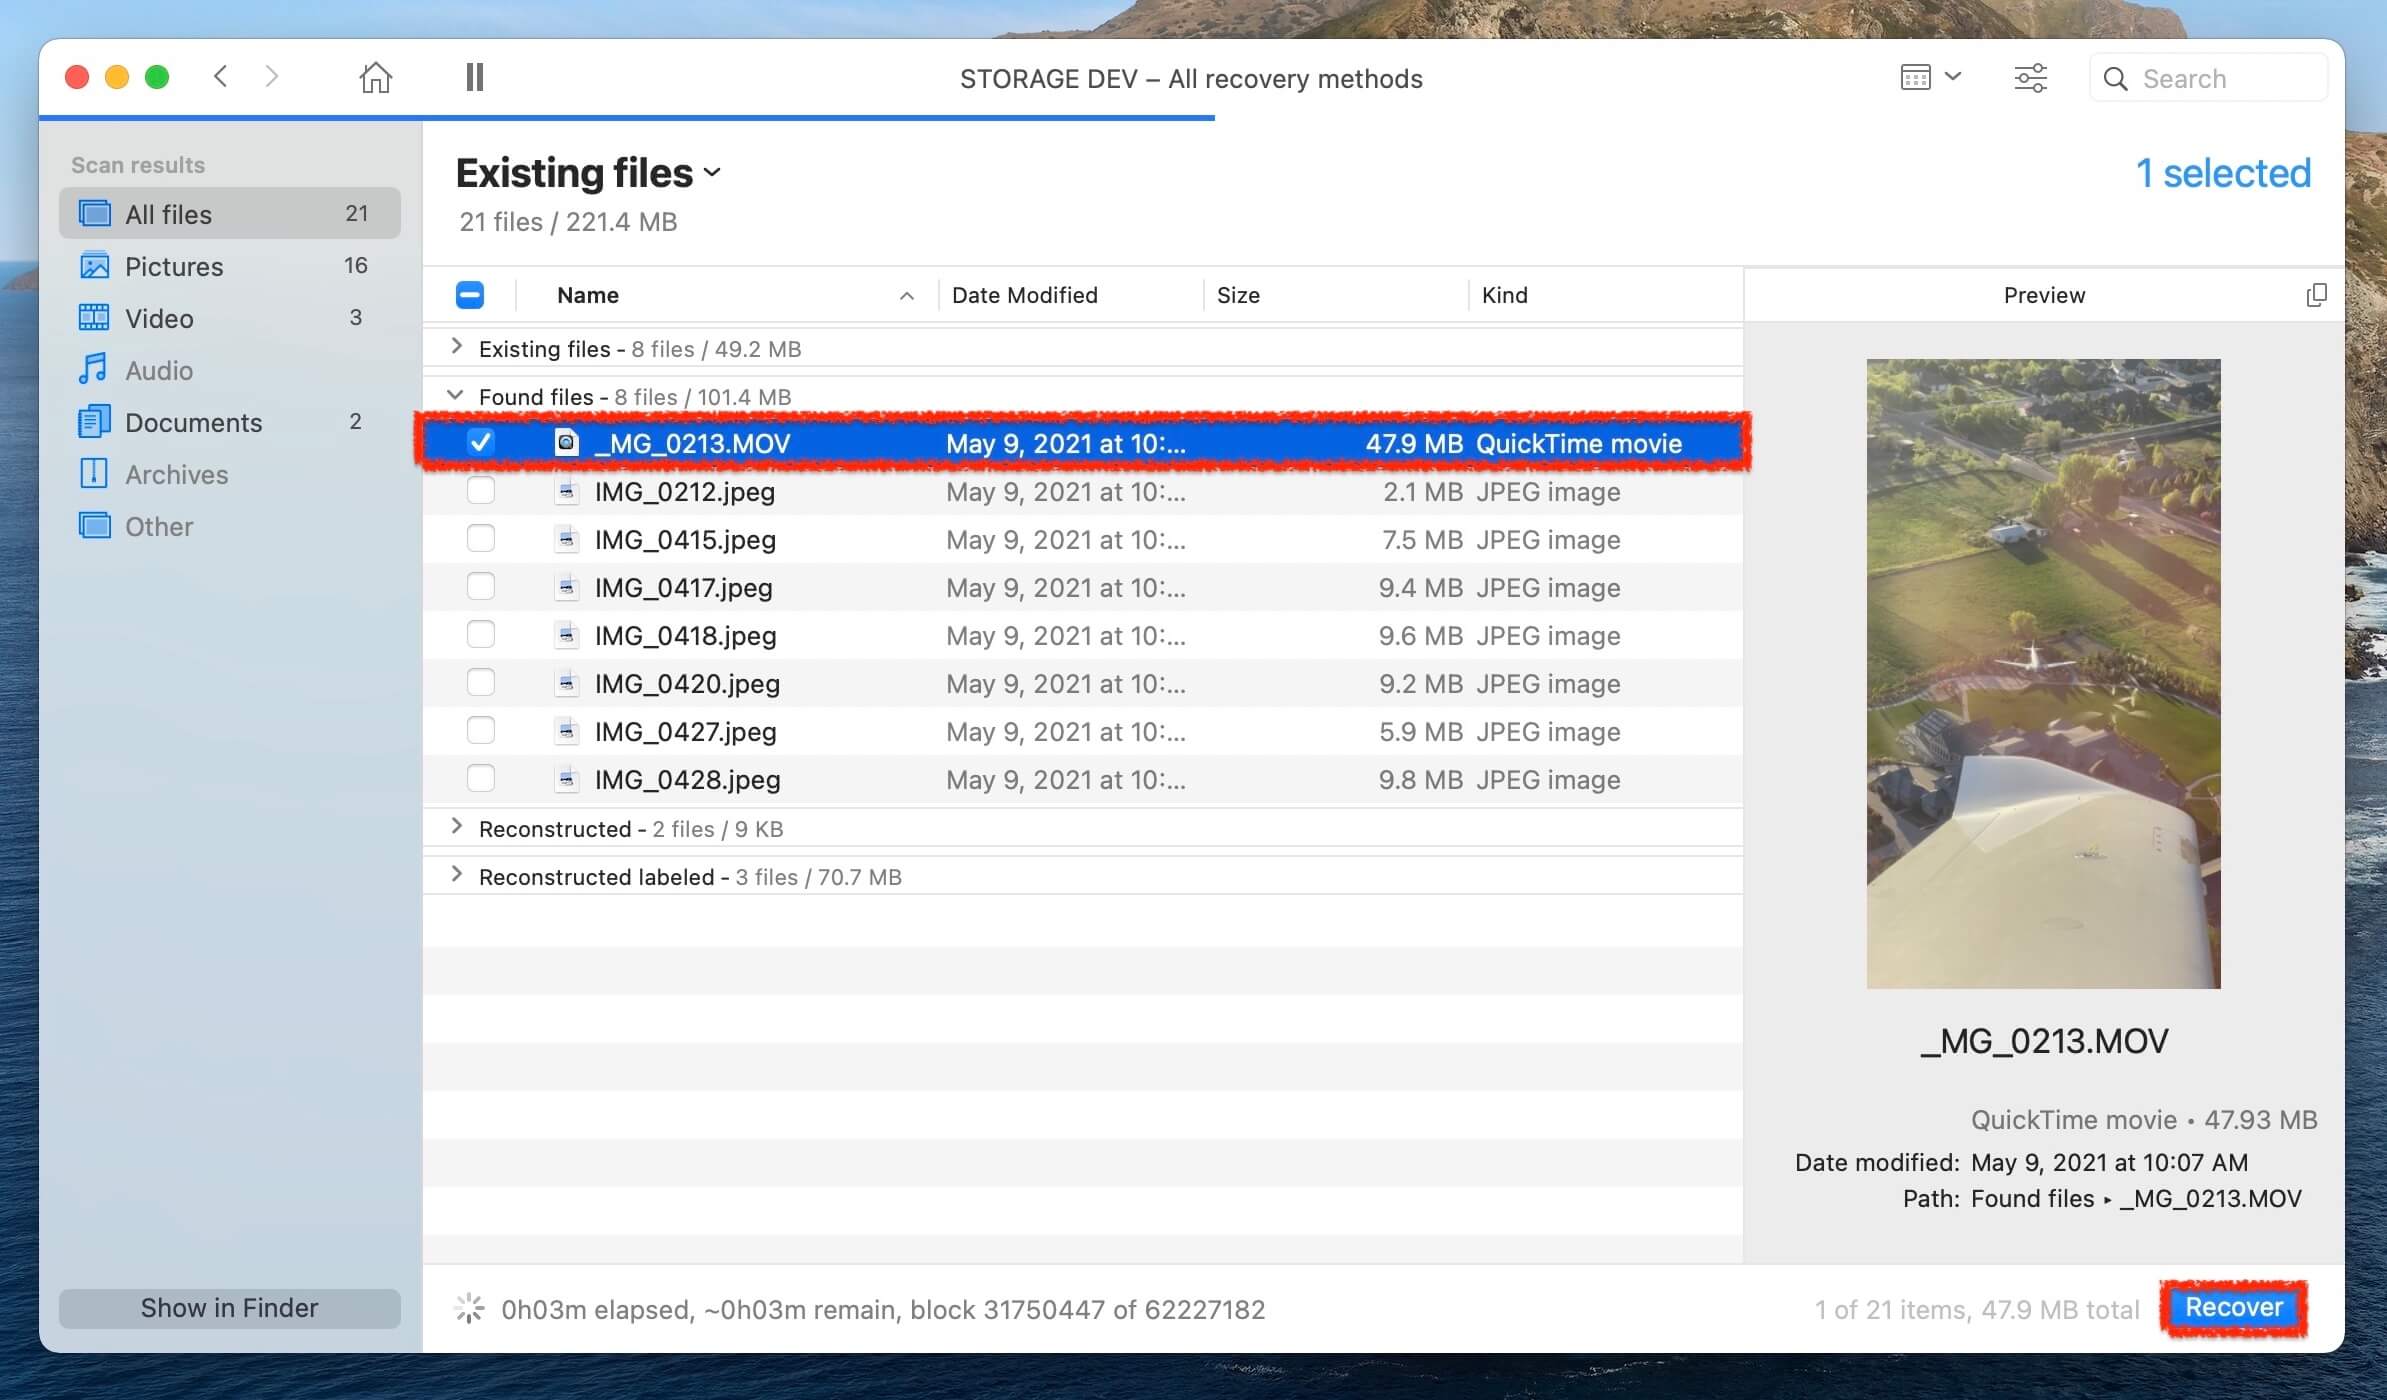
- Select the files that you would like to recover from your USB drive.
- Click on the blue Recover button and then you can recover the deleted files that were on your USB drive.

That’s all that there is to it!
It’s also important to know how to protect our USB drive so now we’re going to talk about three tips that will help you keep your data safe.
How to Protect Your FAT32 USB Drive
Now that we know how to both format a USB drive to FAT32 and recover data off it, let’s talk about how we can protect it.
👷🏻♀️ Store the USB Drive in a Safe Place When Not in Use
When you’re not using your USB drive, ensure that the drive is stored somewhere free from moisture and anything else that could be abrasive to it. This would be especially important if your USB drive has exposed pins which can make it easier to damage them.
💾 Back Up Your USB Drive to Your Mac or Another Device
Make a copy of the data on your USB drive and save it to a folder on your Desktop. The more places that your data is located the more redundant it will be.
🔌 Safely Eject the USB Drive When You’re Not Using It
When you’re done using your USB drive, safely eject it from your computer and store it somewhere safe. Leaving it constantly connected to your computer won’t protect it from power surges or if your computer experiences an electrical problem your USB drive could also suffer.
It’s quite easy to safely eject your USB drive from your Mac.
- Launch Finder.
- Find the USB Drive on the left-hand side and then safely eject it.
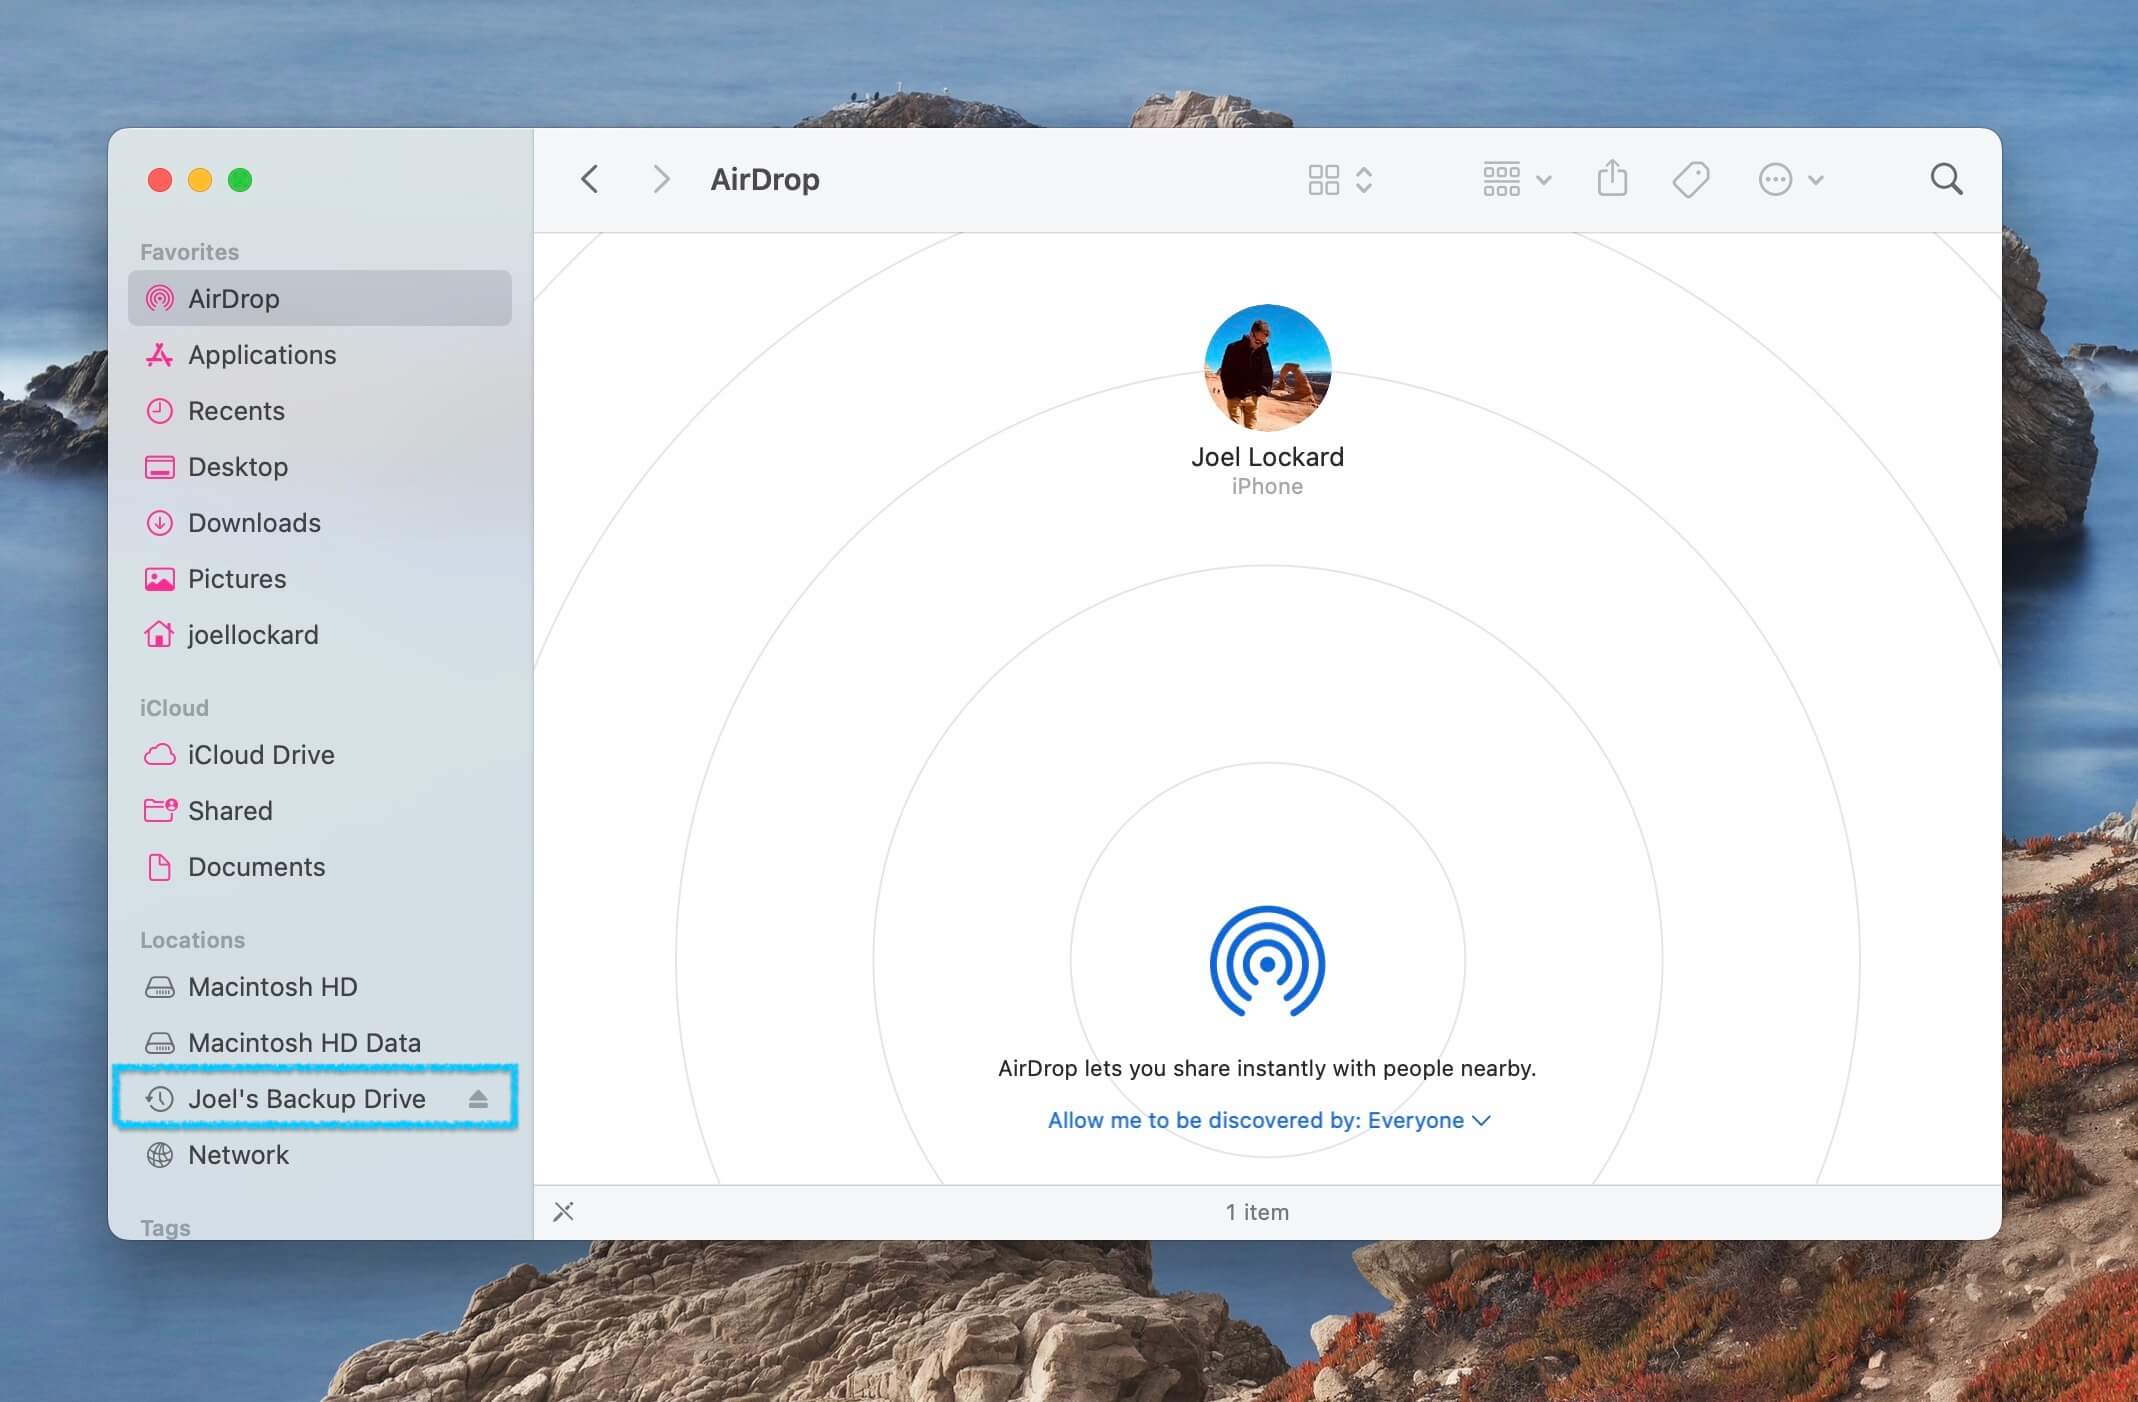
This also makes sure that the USB drive can finish the current task that it’s working on before disconnecting itself.
Conclusion
USB drives are small, convenient, affordable, and can make storing data on a device simple and secure. Using them in our everyday lives is a nice convenience as we then always have access to our data in a device that can fit into our pocket.
Now, you have the knowledge to format your USB drive to FAT32, recover data if needed, and the expertise to protect the USB drive.


FAQ
Yes, it can. We can do this by using the Terminal.
- Plug your USB drive into your Mac.
- Launch the Terminal.
- Type in diskutil list to display the list of all your internal and external storage devices.
- Find the path for your external disk. It should be something like /dev/disk3 where the disk number will change based on how many storage devices that you’re Mac is using.
- Type in sudo diskutil eraseDisk FAT32 MBRFormat /dev/disk3 where the “disk3” will change based on which number your USB drive is.
Yes, you can. This can be accomplished by using Disk Utility which is a free tool that comes installed on your Mac as part of macOS. Keep in mind that you will lose all the data on the device and to format the USB drive it has to be below 32GBs in size.
- Plug in your USB drive.
- Launch Disk Utility.
- Select your USB drive.
- Click on Erase and select FAT32 as the file format type.
- Wait for it to format.
The simple answer is that FAT32 is better for transferring smaller files from one device to another such as on a USB drive. exFAT is better for large file types. When it comes to using a USB drive, I would recommend that you use FAT32.
If you’re trying to format to FAT32 and it won’t work the most likely issue is that the USB drive is over 32GBs in size which then you can’t use FAT32. The USB drive could also be damaged. I would recommend trying to plug the USB drive into another computer and see if it works.