After the disaster that was the Windows 10 1809 update, which was released in October 2018 and erased the documents, photos, and music folders of some users, Microsoft managed to publish another file-eating update.
Called KB4532693, this seemingly innocent update was released on February 11, 2020, and many Windows users who have installed it lost important documents, pictures, files, and personal settings.
“I guess this latest update happened last night. I switch on this evening and all my personal settings are deleted. No bookmarks in Firefox or Chrome. I don’t want Bing or Internet Explorer. Wallpaper removed. Screen resolution shot. This is what I found in the first few minutes. What else have you managed to break?” – wrote a user with the handle PaulHiggins3 on Microsoft’s user forum.
Of course, this is not what you expect when updating your Windows 10 system. Most updates are expected to be installed with little or no negative impact on the user. Even if you did not have problems after updating your system, the problem emphasizes the fact that operating system upgrades and updates can pose a risk to your data.
Let’s take look at what exactly seems to have happened and how you can use data recovery software to restore files deleted by this Windows 10 update.
Ways to Recover Your Lost Data after Windows 10 Update

1. Recover Files Using Backup
Best practices would have you take a backup of your system before any OS update. Even minor upgrades can have serious unintended consequences and larger updates should always be treated carefully. Taking a backup of your machine before an update is a step that you shouldn’t skip. It might save you a lot of time if things go wrong.
For this reason, it is often recommended to have automatic updates turned off so you can perform them after your data is adequately protected.
We all know that best practices are not always followed. You might have assumed that all would be well and initiated the Windows 10 update on your computer. Now you are faced with the prospect of trying to recover a bunch of deleted files.
2. Recover Files Using Data Recovery Software
If you have been subject to this, or any other data loss scenario on your Windows machine, data recovery software may help you recover your lost files. Here are the steps to follow to attempt to recover your data.
As soon as you realize that you have missing files, stop using the affected drive as much as possible. Though the files appear to be deleted since they are not currently visible to your operating system, they probably have only been logically removed from your computer.
The files still physically exist on the storage device. This potentially allows the files to be recovered by data recovery software. Continued use of the drive exposes those storage locations that have been logically deleted to be reused by the system. Once new data is written to those locations, you will not be able to restore the original files.
Using Disk Drill Tool to Recover the Lost Files on Windows 10
Use a USB drive to download and install Disk Drill and run it from that drive. This is also to avoid having the application saved or installed over some of the files you want to recover. These steps will greatly reduce the possibility that your files will be overwritten by your operating system.
To recover deleted files after Windows 10 Update:
Step 1. Download Disk Drill data recovery software for Windows and install it on the recommended USB drive.

Step 2. Launch Disk Drill.
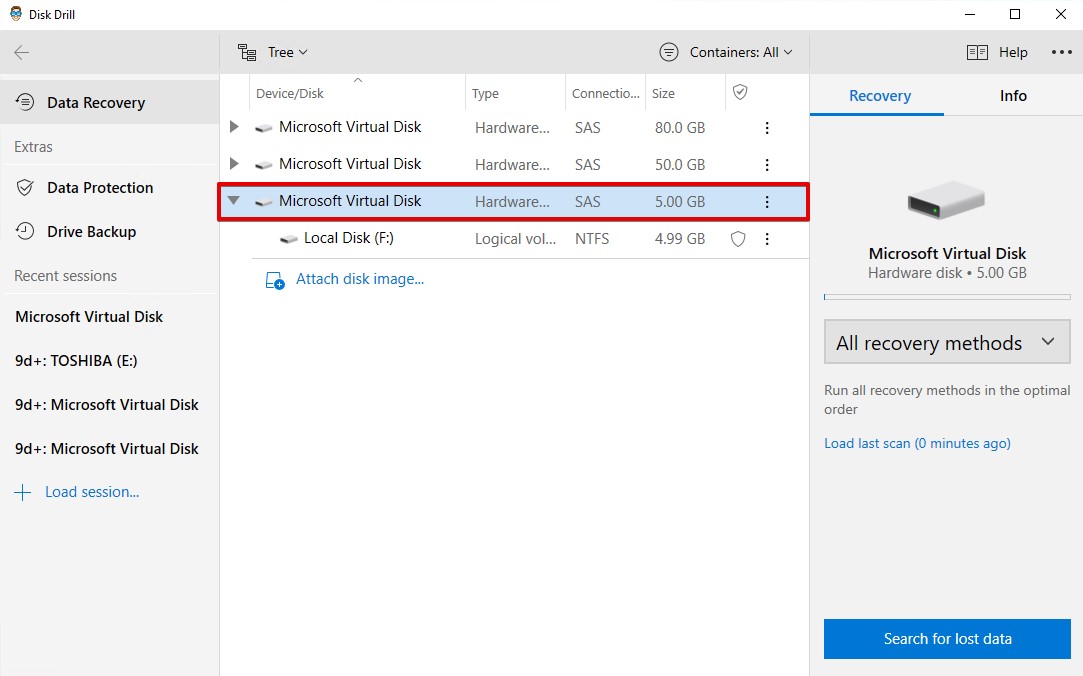
Step 3. Select the disk or partition where the lost files were located. In the context of this article, it is supposed to be your system drive with the original redirected folder.
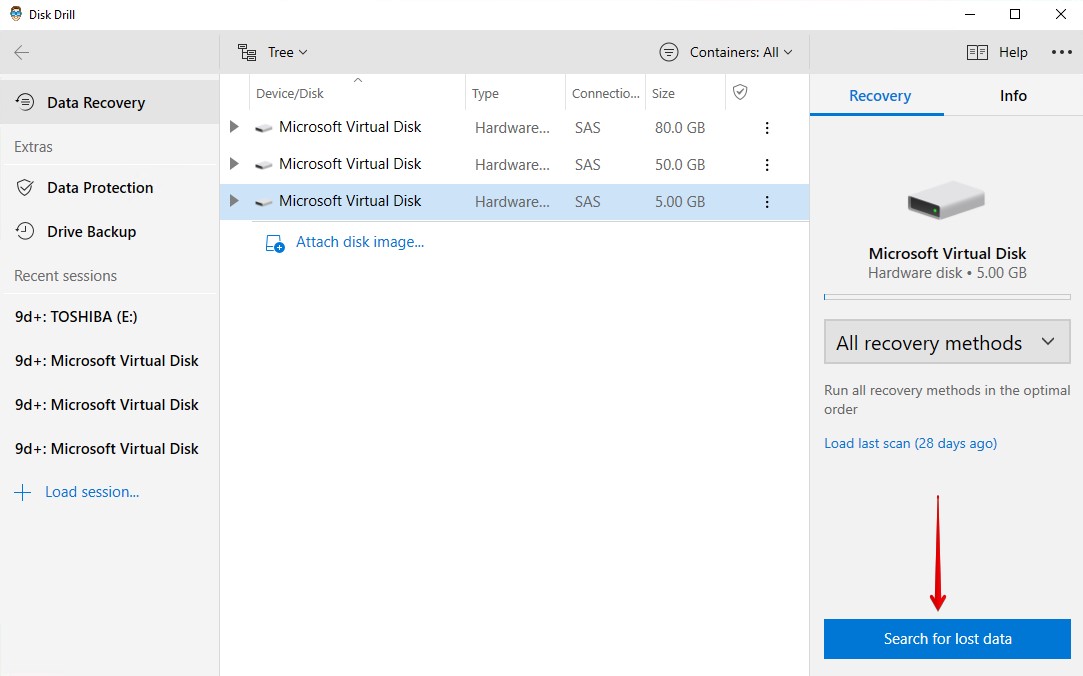
Step 4. Click on the “Search for lost data” button to initiate the application’s scanning process. You will be presented with a list of files that the application can find and that are potentially recoverable.
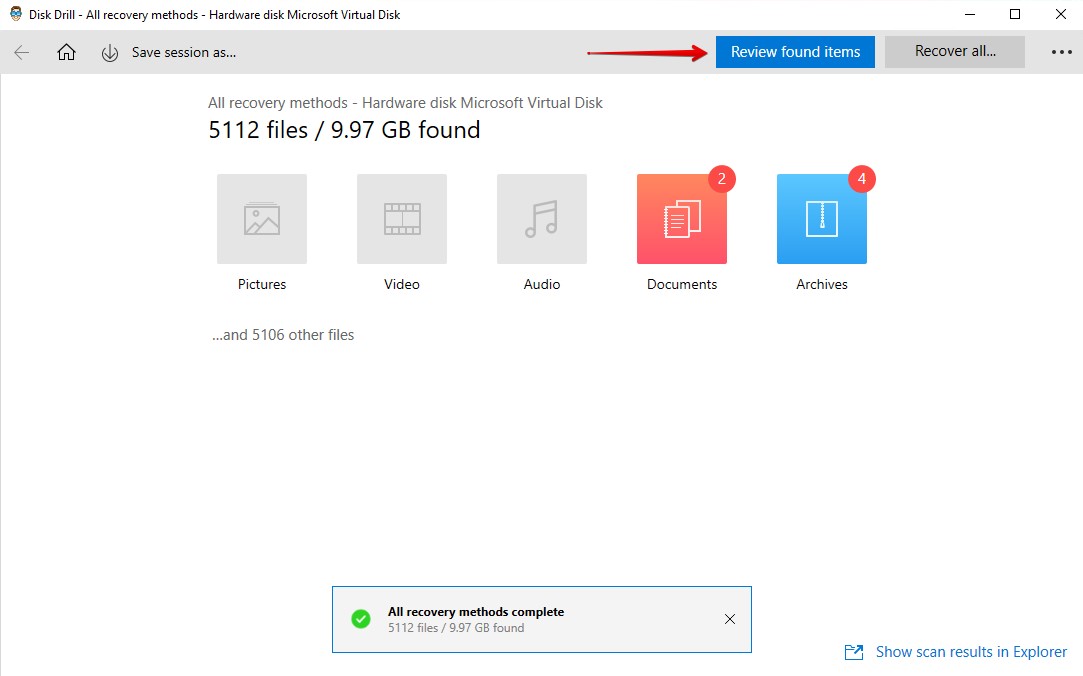
Step 5. Click Review found items once the scan has complete to see a full list of the data that Disk Drill discovered.
Step 6. Select the files that you would like to recover and a location at which to store them. Do not use the original location or drive as you might overwrite the files during the recovery process.
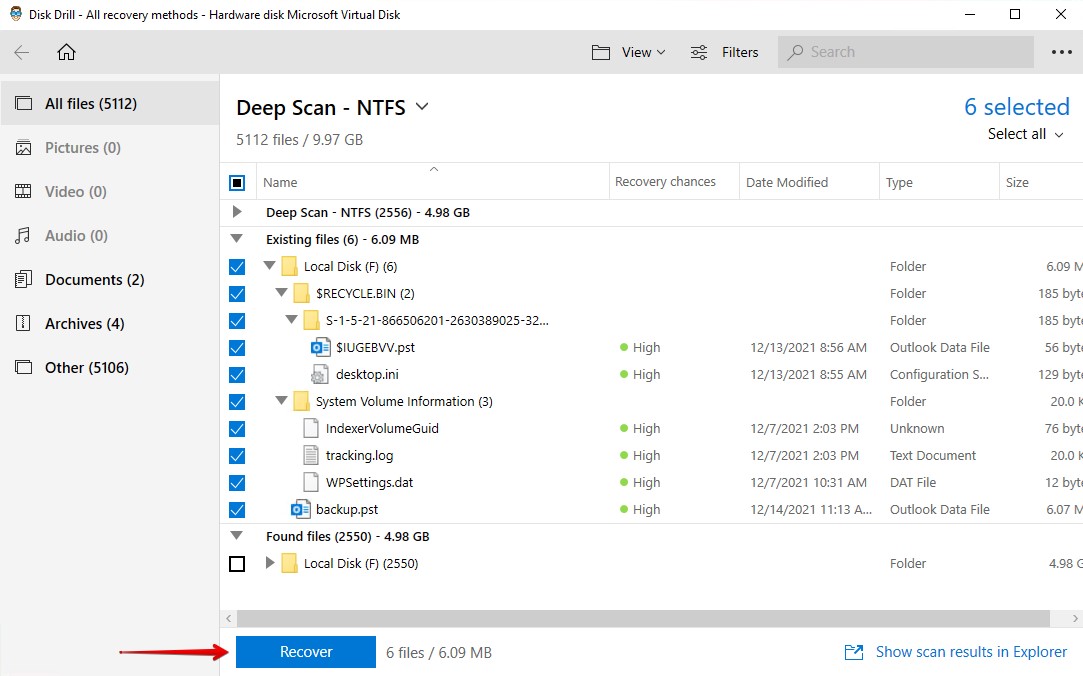
Disk Drill employs powerful scanning algorithms to recover and reconstruct your deleted files. Deep scanning technology scours your disk sector-by-sector and gives you the best chance of restoring your files.
Disk Drill offers you a risk-free data recovery and protection application for Windows 10. The application is available as a free download and can be used to recover up to 500MB of data without spending a cent. If you find that there is more data that needs to be recovered you can easily upgrade to a fully licensed version with no limits on the amount of data that can be recovered.
You can also use the app to preview all of the files that can be recovered before purchasing the software. In addition to its data recovery functions, the software offers advanced data protection features that help prevent future data loss. It might be just what you need to recover from a faulty Windows 10 system update.
3. Sign Out of the Temporary Profile
Following an update, Windows may log you into a temporary profile instead of your main one. Temporary profiles look like a normal user account, but any changes you make will not be saved once you sign out. You can find out if you’re signed in to a temporary profile using the below steps.
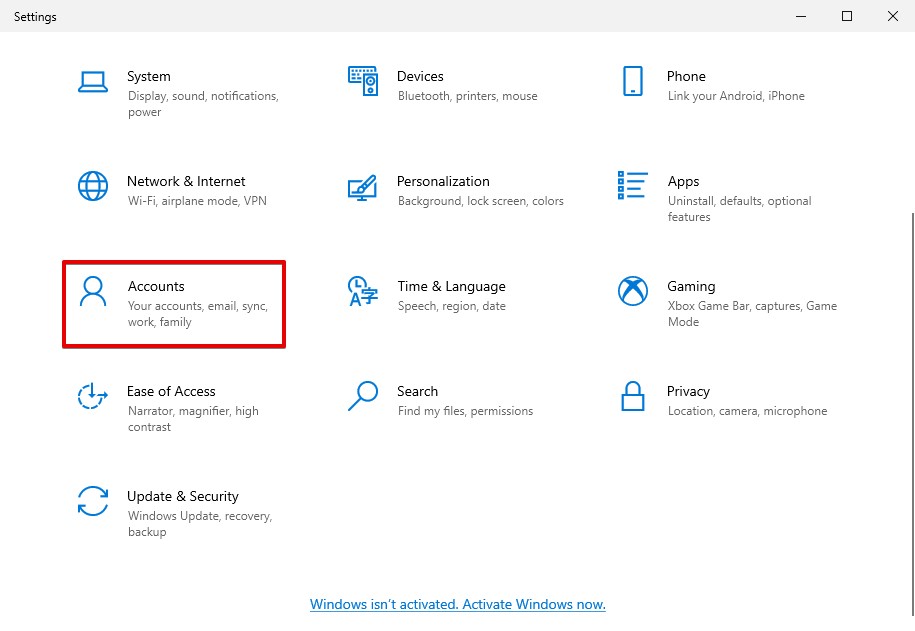
Step 1. Right-click Start and select Settings.

Step 2. Click Accounts.
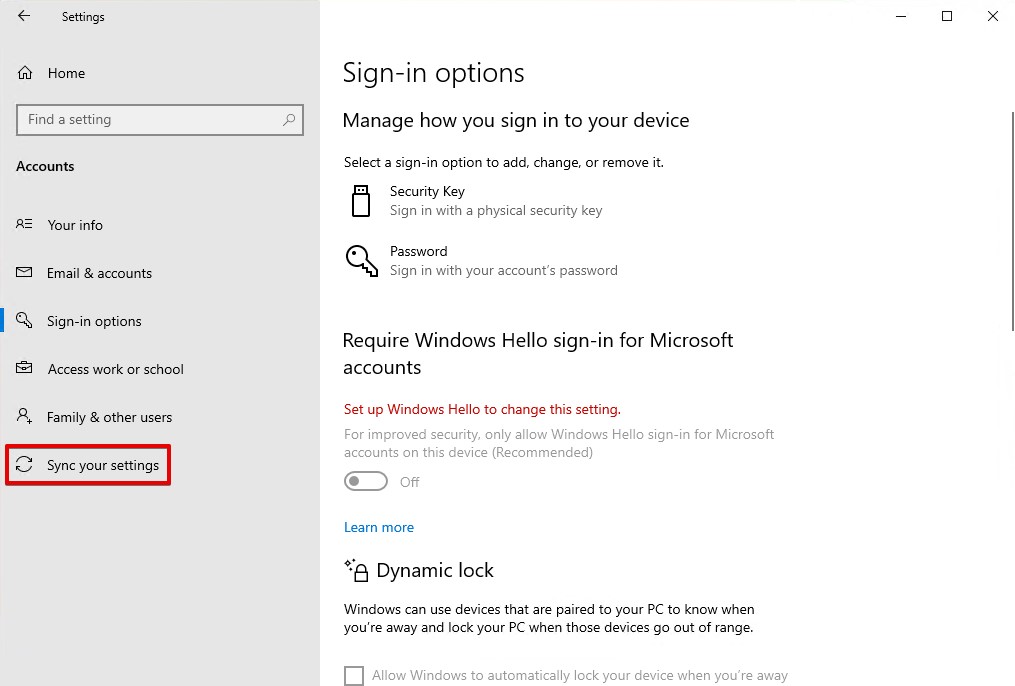
Step 3. Click Sync your settings.
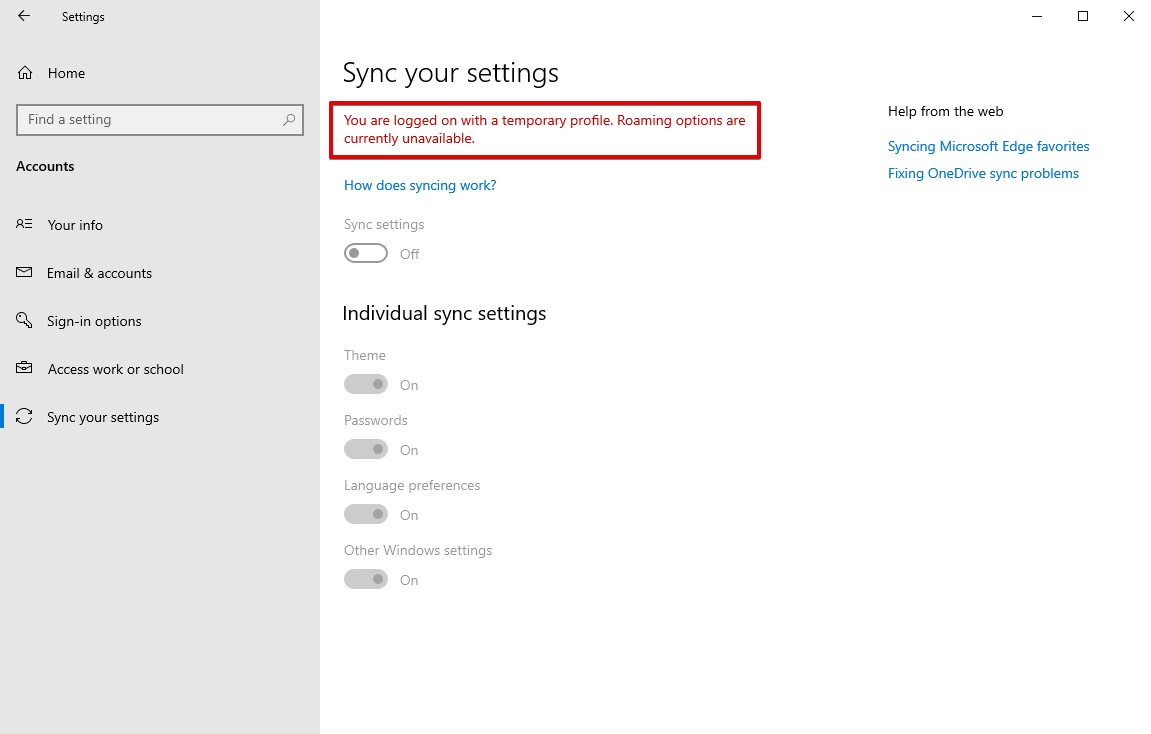
Step 4. Confirm if you’re using a temporary profile. If you are, the message “You are logged on with a temporary profile. Roaming options are currently unavailable” will be present at the top.
Step 5. Restart your computer and sign in to your main profile.
Once signed in to your main profile, all of your data should be restored. If not, move on to the next solution.
4. Recover the Administrator Account
Upon updating your operating system, you may be prompted to create a Microsoft account during this process. What might not be obvious is the fact that this new account won’t carry over the files from your local account. Therefore, when you sign in, it will appear that all of your data is missing.
To fix this, you can simply restore access to the built-in administrator account that you were likely using. When you regain access, you can move your data across to the newly created Microsoft user account.
Step 1. Press CTRL + S on your keyboard and search Computer Management. Open the first result.
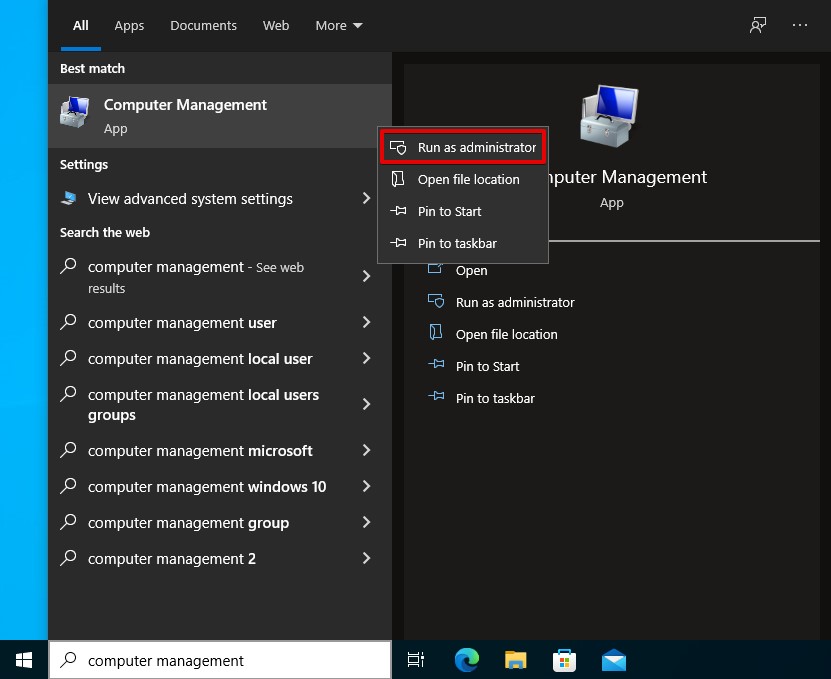
Step 2. In the left panel, go to Computer Management > Local Users and Groups > Users. You will see a list of the accounts associated with your computer.

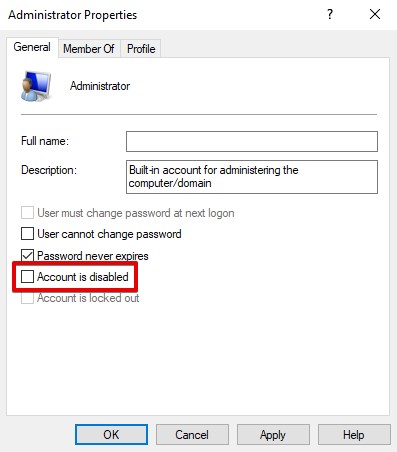
Step 3. Open the Administrator account by double-clicking it. Then, make sure the Account is disabled option is unticked. Click Apply, then OK.
Step 4. Sign out of your Microsoft account, then sign in to the Administrator user account.
Upon logging in to the Administrator account, all of your data should be visible. Take this time to move all of your data across to the new account you created.
Problems With File Redirection
Microsoft has identified three related scenarios in which a user could potentially experience data loss. They all involve the redirection of known Windows folders such as Desktop, Documents, Camera Roll, and Pictures from their original location to a new one by enabling Known Folder Redirection (KFR).
The data loss issue seems to have been introduced when Microsoft addressed a bug found in testing the update prior to the October 2018 release. That anomaly resulted in an empty, extra copy of Known Folders on a machine after the update. While fixing this problem, the code Microsoft used may have caused this new and more damaging problem.
Now, instead of having duplicate copies of folders, the problem is that some folders that you expect to be available are gone. Under certain circumstances, the original locations that are specified to be redirected by KFR can be deleted.
Here are the conditions that Microsoft indicates are responsible for a possible data loss situation:
- Using KFR to redirect to a different drive.
For instance, this might happen if you were redirecting files in the
c:\users\username\documents folder to D:\documents.
After the update,
c:\users\username\documents can be deleted leaving only those files in D:\documents. - Using KFR to redirect to a different folder on OneDrive.
When setting up KFR with OneDrive you can move the old files. If you did not move them, during the October update they would have been deleted. - Employing the Auto Save feature with KFR in early versions of the OneDrive client.
Older versions of the software did not move the old files when the Auto Save feature was enabled. The result was that during the Windows 10 update, they were deleted from the computer.
If your system was configured in any of these ways, you may have data loss issues when you perform this update. Microsoft has indicated that the issues that caused the problem have been addressed before restarting the rollout. Hopefully, this is the case and no other unexpected data loss scenarios rear their ugly heads. We would suggest that you proceed with caution if you employ KFR on your computer.
FAQ
On February 11, 2020, Microsoft released a buggy Windows 10 update, KB4532693, which caused files to randomly disappear from certain users’ desktops. The issue took Microsoft some time to fix, and many users had to recover their data using data recovery software.
Windows 10 can create a full system backup that you can use to restore your operating system to an earlier state:
- Open Settings and go to Update and Security.
- Click Backup and select the “Go to Backup and Restore (Windows 7)” option.
- Click Create a system image and follow the backup wizard.
If you are unlucky enough to encounter data loss when upgrading to Windows 10, and you don’t have a backup of your data to restore from, you can try recovering your data using a data recovery tool like Disk Drill. Using Disk Drill, you can scan your drive for recoverable data and restore it to a folder of your choice.
Follow these steps to recover your lost data following a Windows 10 update using Disk Drill.
- Download and install Disk Drill to your computer. Open it.
- Select your drive, then click Search for lost data.
- When the scan is complete, click Review found data.
- Review the found data and mark what files you want to recover with a tick. Click Recover when ready.
Select a folder for recovery. Make sure it resides on a separate physical partition so it doesn’t corrupt your data during recovery. Click OK.
No Windows 10 is supposed to delete your files. In the past, however, users have encountered data loss as a result of updating their Windows version, specifically the Windows 10 October 2018 Update (version 1809).
Before downloading and installing updates, make a backup of your data first to ensure you can bounce back if the update fails.
The Windows 11 upgrade, as it is designed, will not delete your data (unless you perform a clean install). However, you should always prepare for the possibility of something going wrong. If something interrupts the upgrade process, such as a power or hardware failure, your data could become corrupted or lost. Therefore, make sure you back up your data before upgrading.