Kodi is a free and open-source media player. It has been around since 2002 and was known as the Xbox Media Center being renamed in 2014. It allows the user to access streaming media content such as music and videos.
Kodi offers a way to store the content and watch it around your home. The media player works on all major operating systems and is compatible with hundreds of electronic devices.
How to Install Exodus on Kodi
We are going to talk about 3 different methods that you can use when putting Exodus on Kodi:
Kodi and Add-ons Like Exodus
Kodi does not offer native access to any media content. It can access content that you have stored locally or on a network drive. Another option is to use third-party add-ons that allow you to access various types of media content.

Exodus is one of Kodi’s more popular add-ons. It can greatly increase the ability of your Kodi system to access movies and TV shows. We will talk more about the potential pitfalls of Exodus and other add-ons later in this article. For now, let’s concentrate on installing Exodus on Kodi.
Initial Steps to Add Exodus to Kodi
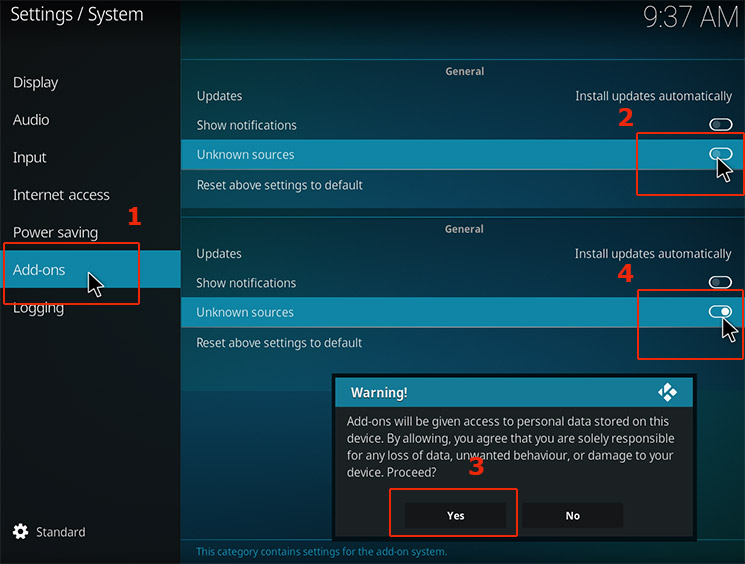
Before you can install Exodus you must confirm your Kodi settings so you can download and view content from unknown sources. To do this follow these steps:
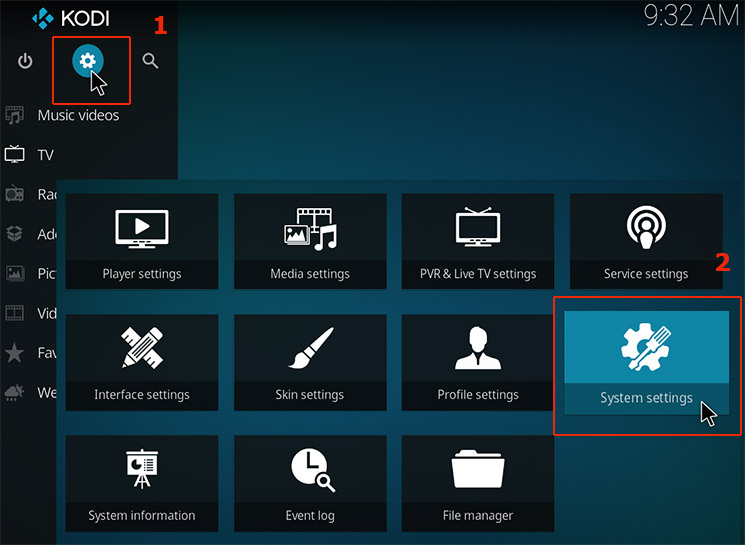
- Open Kodi, click “Settings” > “System settings”.

- Click the Add-ons button. Select Yes on the button next to Unknown Sources. You can now install add-ons like Exodus to expand the capabilities of your Kodi.
You may also wish to consider the use of a VPN if you are going to install Exodus on your Kodi. Depending on your geographic location you may be subject to copyright restrictions regarding the content that is available through Exodus. While it is intended to be used in a legal manner, you may need to protect yourself when accessing content through Exodus.
Method 1: Install Exodus on Kodi with the Lazy repository
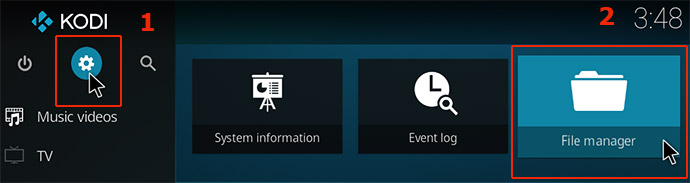
- Open your Kodi and click the gear icon to access its Settings.
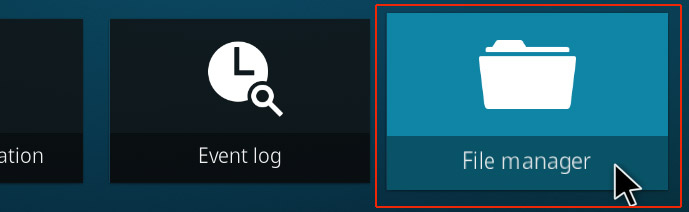
- Click on File manager.
- Double Click Add Source and then select None.
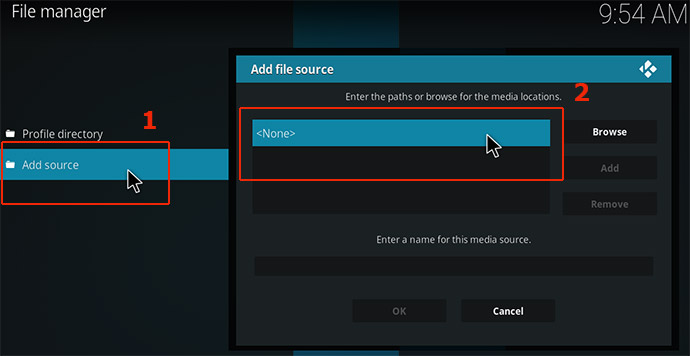
- Insert the URL http://lazykodi.com/ into your Kodi and click OK.
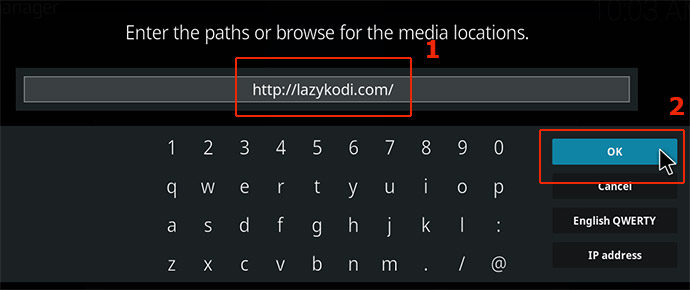
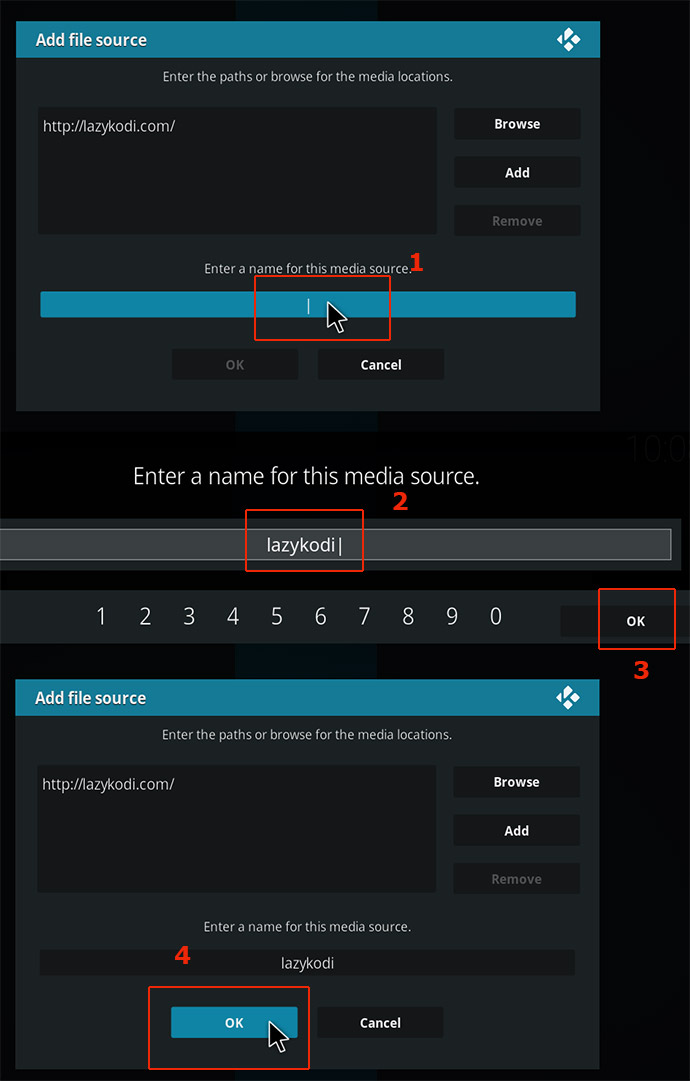
- Enter the name of your choice to save the source and click OK twice. The name must contain a part of the URL path.
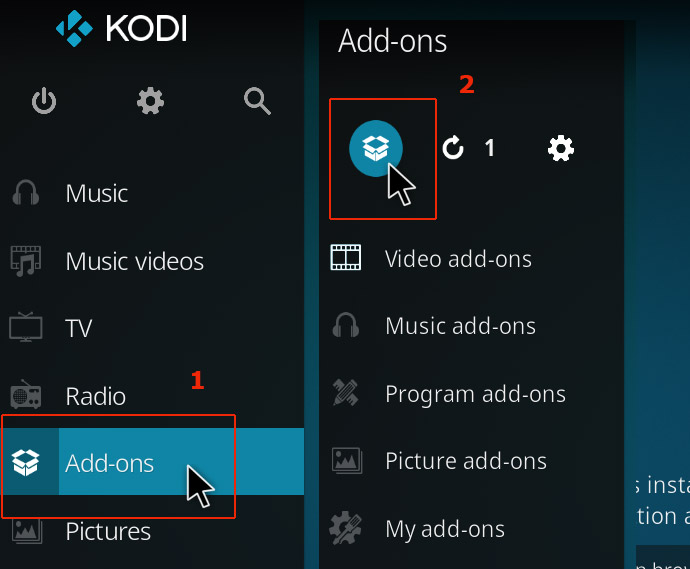
- On the Kodi Main Menu, click Add-ons and then the Package icon in the upper left of the Add-ons panel.
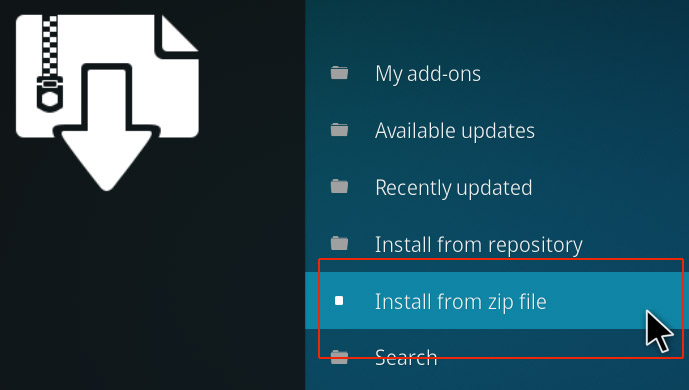
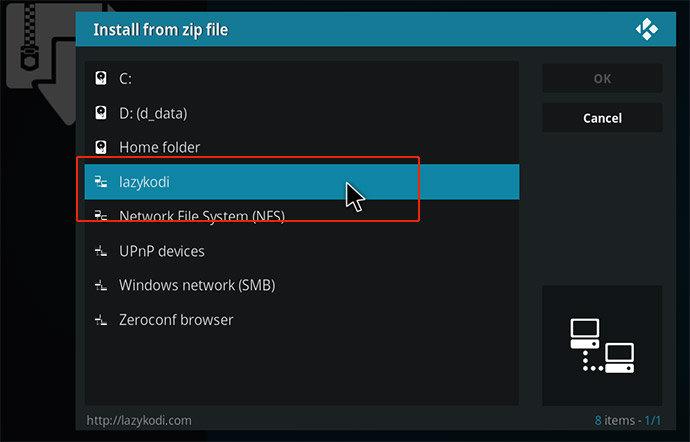
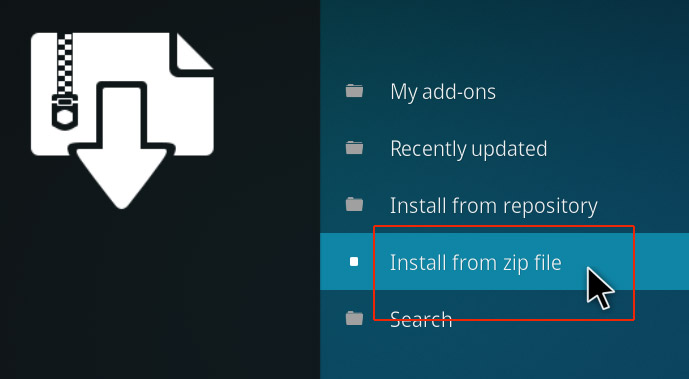
- Choose “Install from zip file”.
- Select the name of the repository you just named and saved.
- Click Zips and then click KODIBAE.zip.

- Wait until you receive a notification in the upper right corner showing you the repository to install.

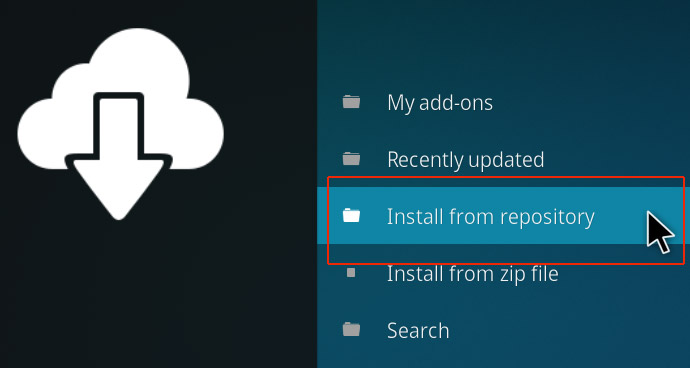
- Click “Install from repository”.
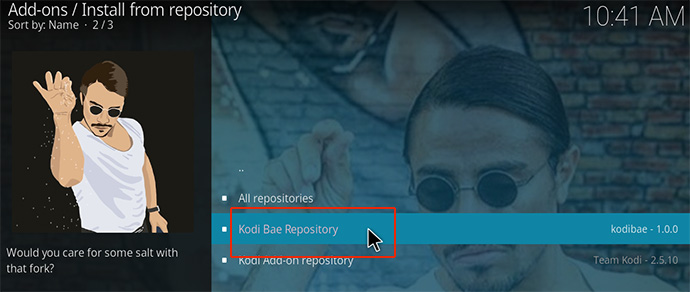
- Click Kodi Bae Repository.
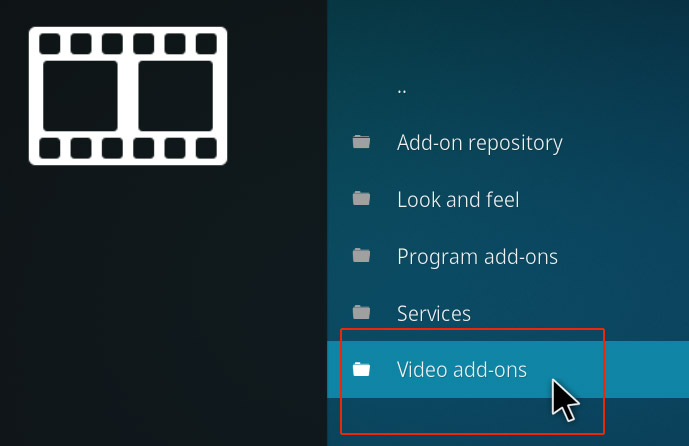
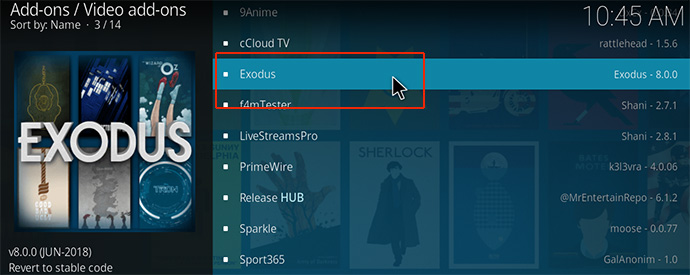
- Select Video add-ons.
- Click on Exodus.
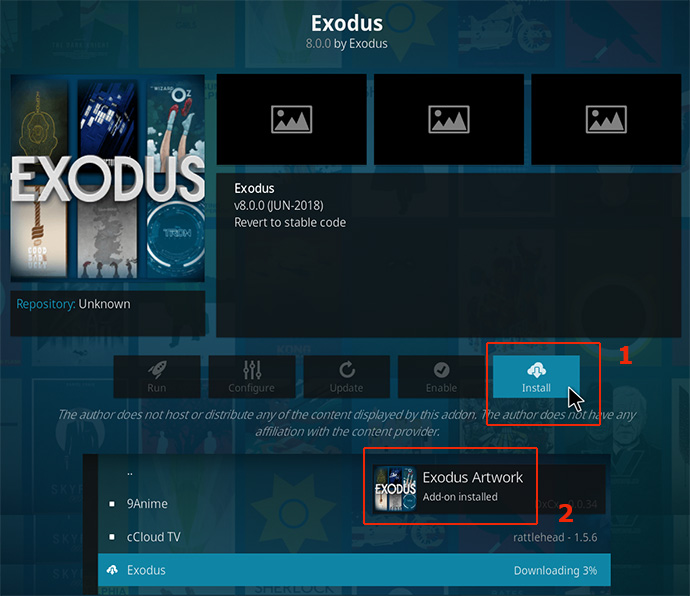
- Click on Install and wait to be notified that the add-on has been installed.
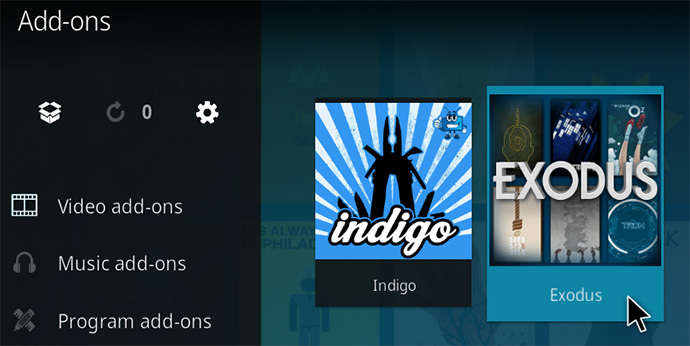
- Access Exodus by going to your Kodi homepage and accessing Add-ons > Video add-ons > Exodus.
Method 2: Install Exodus on Kodi with the All Eyez on Me repository
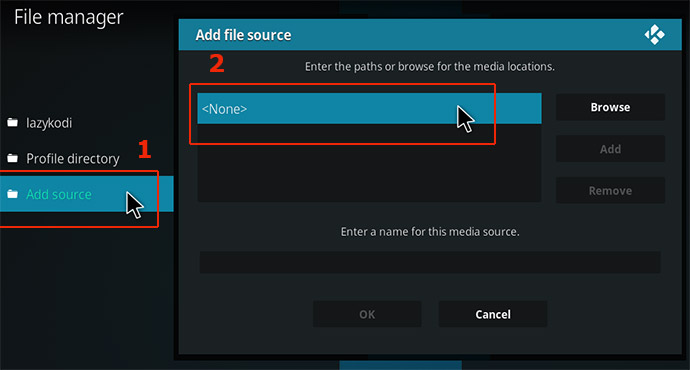
- Open Kodi and select Setting and then File manager.
- Double click Add Source and then click on None.
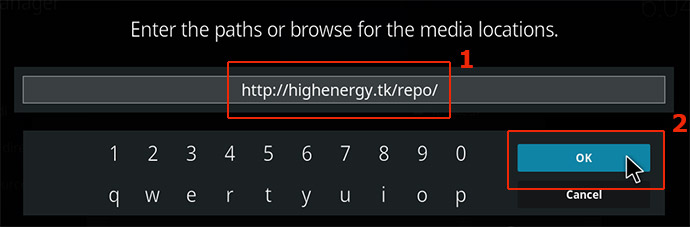
- Type or copy and paste the URL http://highenergy.tk/repo/ in this field and click OK.
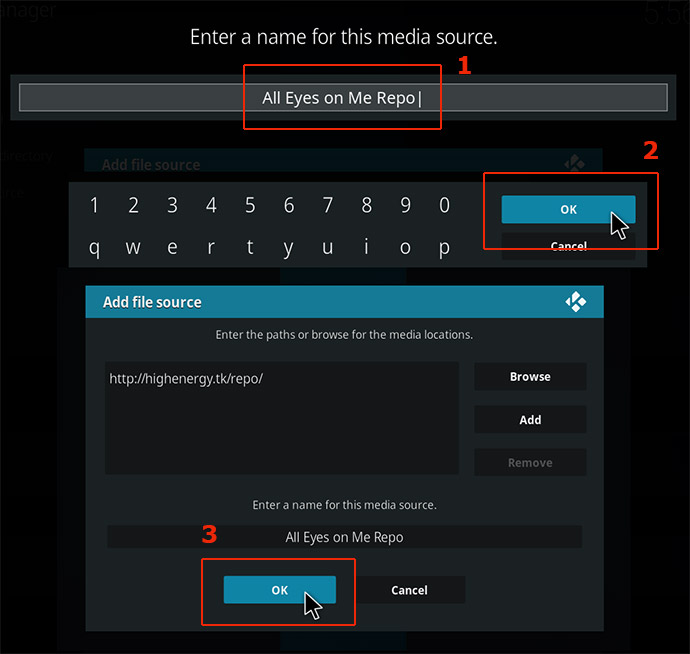
- Name the repository All Eyes on Me Repo and click OK twice to save the repository. You will see a notification when installation is complete.
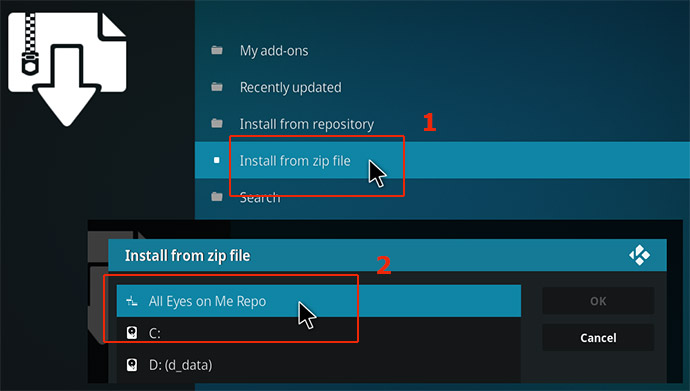
- On the Kodi Main Menu, click Add-ons and then the Package icon in the upper left of the Add-ons panel.
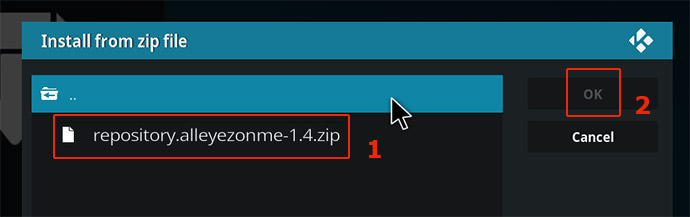
- Go to Install from zip file > All Eyez on Me Repo.
- Click on repository .alleyezonme-1.4.zip. You will see a notification when it is installed.
- On the same screen, click Install from repository. Then click All Eyez on Me repository.
- Click on the video add-ons option.
- Select Exodus to install the add-on.
- Click the Install button and in a few seconds the package should be downloaded and installed. You will get a notification when it is done.
- You are now ready to use Exodus on your Kodi.
Method 3: Install Exodus on Kodi with the Kodi Bae repository
- Download the Kodi Bae Repository Zip file.
- Open Kodi, click Add-ons, then click the Package icon at the upper left corner
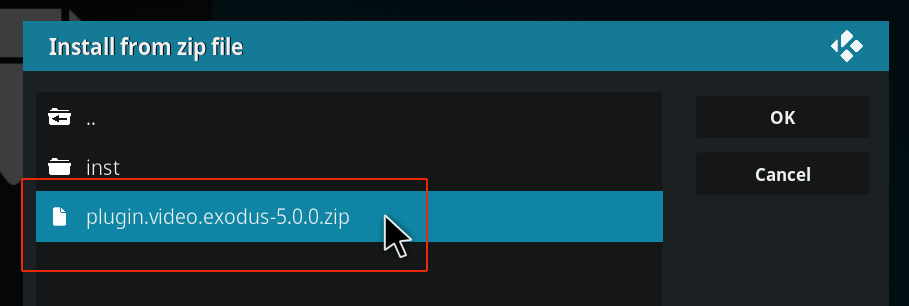
- Select the Install from zip file option.
- Choose the file you just downloaded which should be named plugin.video.exodus-xxx.zip.
- Shortly the upload and installation will complete and you will be notified that the Exodus add-on is installed.
- Now you can use the Exodus add-on with your Kodi.
Using Third-Party Add-ons With Kodi
The use of third-party add-ons like Exodus to access potentially copyrighted materials can be considered illegal in certain countries such as the UK, USA, Germany, and Australia. If you choose to use Exodus without a VPN in these areas you may be subject to legal ramifications. Caution is advised.
Another potential issue when using add-ons from unknown sources is the possibility that the download may contain malware or other malicious code.
Exodus itself was used to inject code into users’ systems that turned them into a DDOS botnet. The offending code has been rolled back and Exodus is currently considered safe, but the episode highlights the risks associated with using this type of software.