
If you’ve lost a file, time is of the essence. As new information is saved to a hard drive, flash drive or memory card, old information gets overwritten. So do not use the drive or disk that has the lost file on it at all, until you have completed the Disk Drill scanning and recovery process.
If you didn’t realize that your file was lost right away, don’t panic — there is still a chance your file can be recovered (you can learn more about the variables that impact file recovery here). The scanning features of Disk Drill Basic are free, so it’s always worth checking to see if it is still there.
Before You Start: Essential Data Recovery Tips
- Install Disk Drill: If you haven’t installed Disk Drill yet, refer to our How to Install Disk Drill tutorial. Download Disk Drill data recovery app Download now
- Connect Your Device: If the deleted files you wish to recover are on an external device, such as a flash drive or camera, connect it to your Mac or PC now.
- Quit Applications: Quit all applications that you currently have running on your computer, especially ones that may be trying to access the disk you are trying to recover from (i.e. Time Machine, File History, iCloud, OneDrive etc.).
- For Mac Internal Hard Drives: If you need to recover files from your Mac’s internal hard drive, proceed to How to Recover Files From Your Mac Internal Hard Drive.
✋ We strongly suggest you shut down the Mac you need to recover files from and perform recovery from another Mac if possible.
- Check for Data Protection: If you have Recovery Vault and/or Guaranteed Recovery enabled on the volume you need to recover files from, proceed to How to Use Recovery Vault and Guaranteed Recovery.
- Review FAQs: Review our Scanning FAQs document for frequently asked questions about scanning and recovery.
- Check File Type: If you have a specific file type that you need recovered, check What File Types Can Disk Drill Recover? to see if your file type is supported.
Launch Disk Drill for macOS or Windows
- Open Disk Drill (Mac & Windows):
- macOS: Open Finder → Applications, then double-click Disk Drill. You can also press Command-Space, type “Disk Drill”, and press Return.
- Windows: Click Start, type Disk Drill, and select the app. You can also find it under All apps.

 💡 Tip: Pin Disk Drill for quick access:
- macOS: Drag Disk Drill from the Applications folder to the Dock, or right-click the icon in the Dock while the app is open and choose Options → Keep in Dock.
- Windows: Right-click Disk Drill in the Start menu and select Pin to taskbar (or Pin to Start).
- If this is your first time launching Disk Drill, the setup steps differ by platform:
- macOS: See the Disk Drill for Mac installation guide to get the app installed and ready to scan.
- Windows: See the Disk Drill for Windows setup guide for download and installation instructions.
💡 Portable Mode (macOS): Disk Drill for macOS can also run in Portable Mode – no installation required. This is useful when you want to avoid writing new data to the same drive you’re trying to recover files from. - Want more technical details? If you’d like a deeper dive, our Knowledge Base has step‑by‑step guides and advanced tips. Start here:
- Scanning FAQs — learn how scan types work, what to expect, and best practices for data recovery.
- Can I recover a specific file with Disk Drill? — techniques to target an exact file name, type, or location.


Scan Your Drive for Lost or Deleted Files
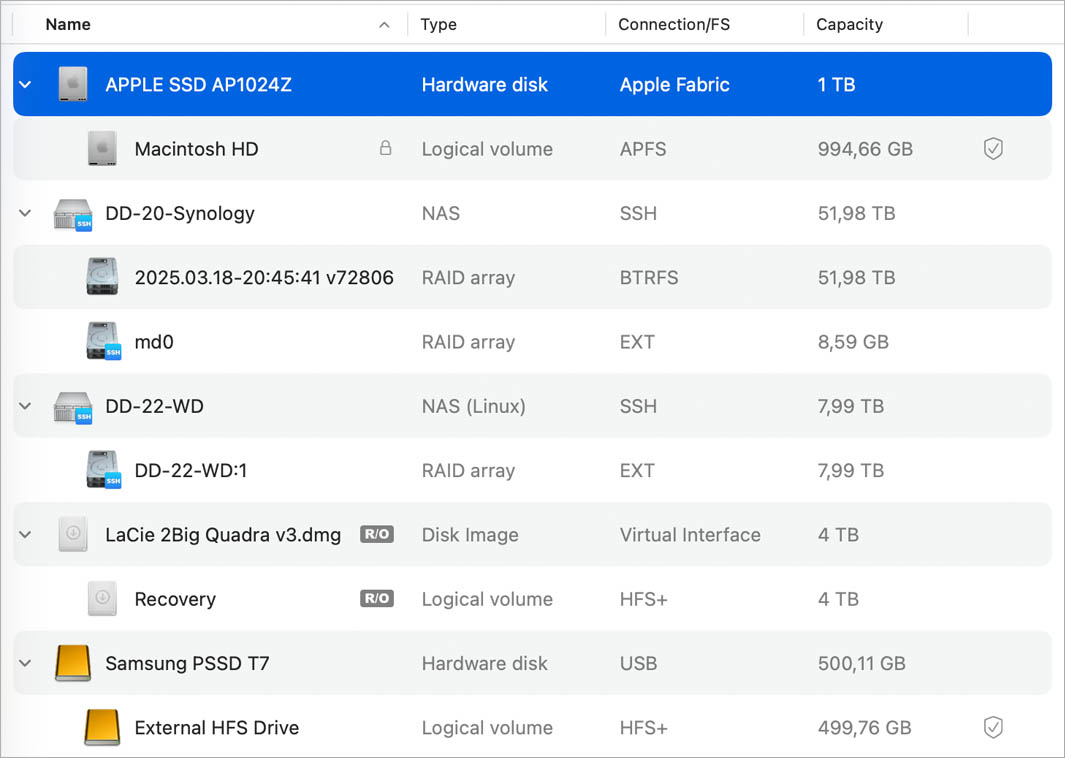
- In the main Disk Drill window you will see a list of drives and devices that can be scanned.
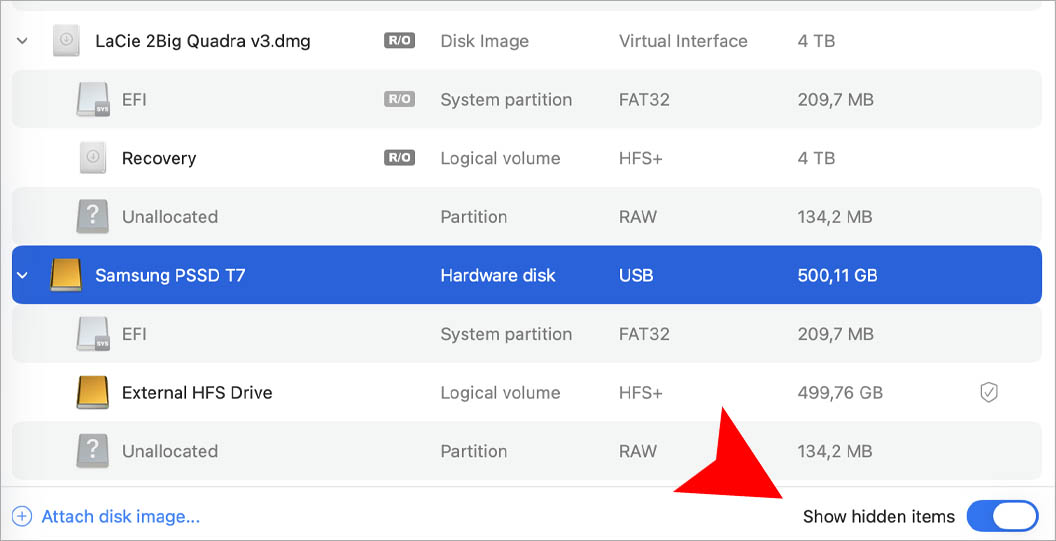
- Can’t find your device? If the drive or device you want to scan isn’t showing up in Disk Drill, enable Show hidden items (bottom‑right corner of the app window) to reveal hidden devices.
- Click on the name of the drive that you wish to recover your deleted files from. If your drive has partitions, clicking on the drive name will reveal each of its separate partitions.
💡 Tip: We recommend scanning the whole drive for the best results.
- Before Disk Drill commences a scan, it will check whether it is possible to put the scanned partition in read-only mode. If it is possible, you will see a padlock icon next to the name of this partition. This ensures no other apps can access the disk during the scan and recovery process, and subsequently overwrite any potentially recoverable data.
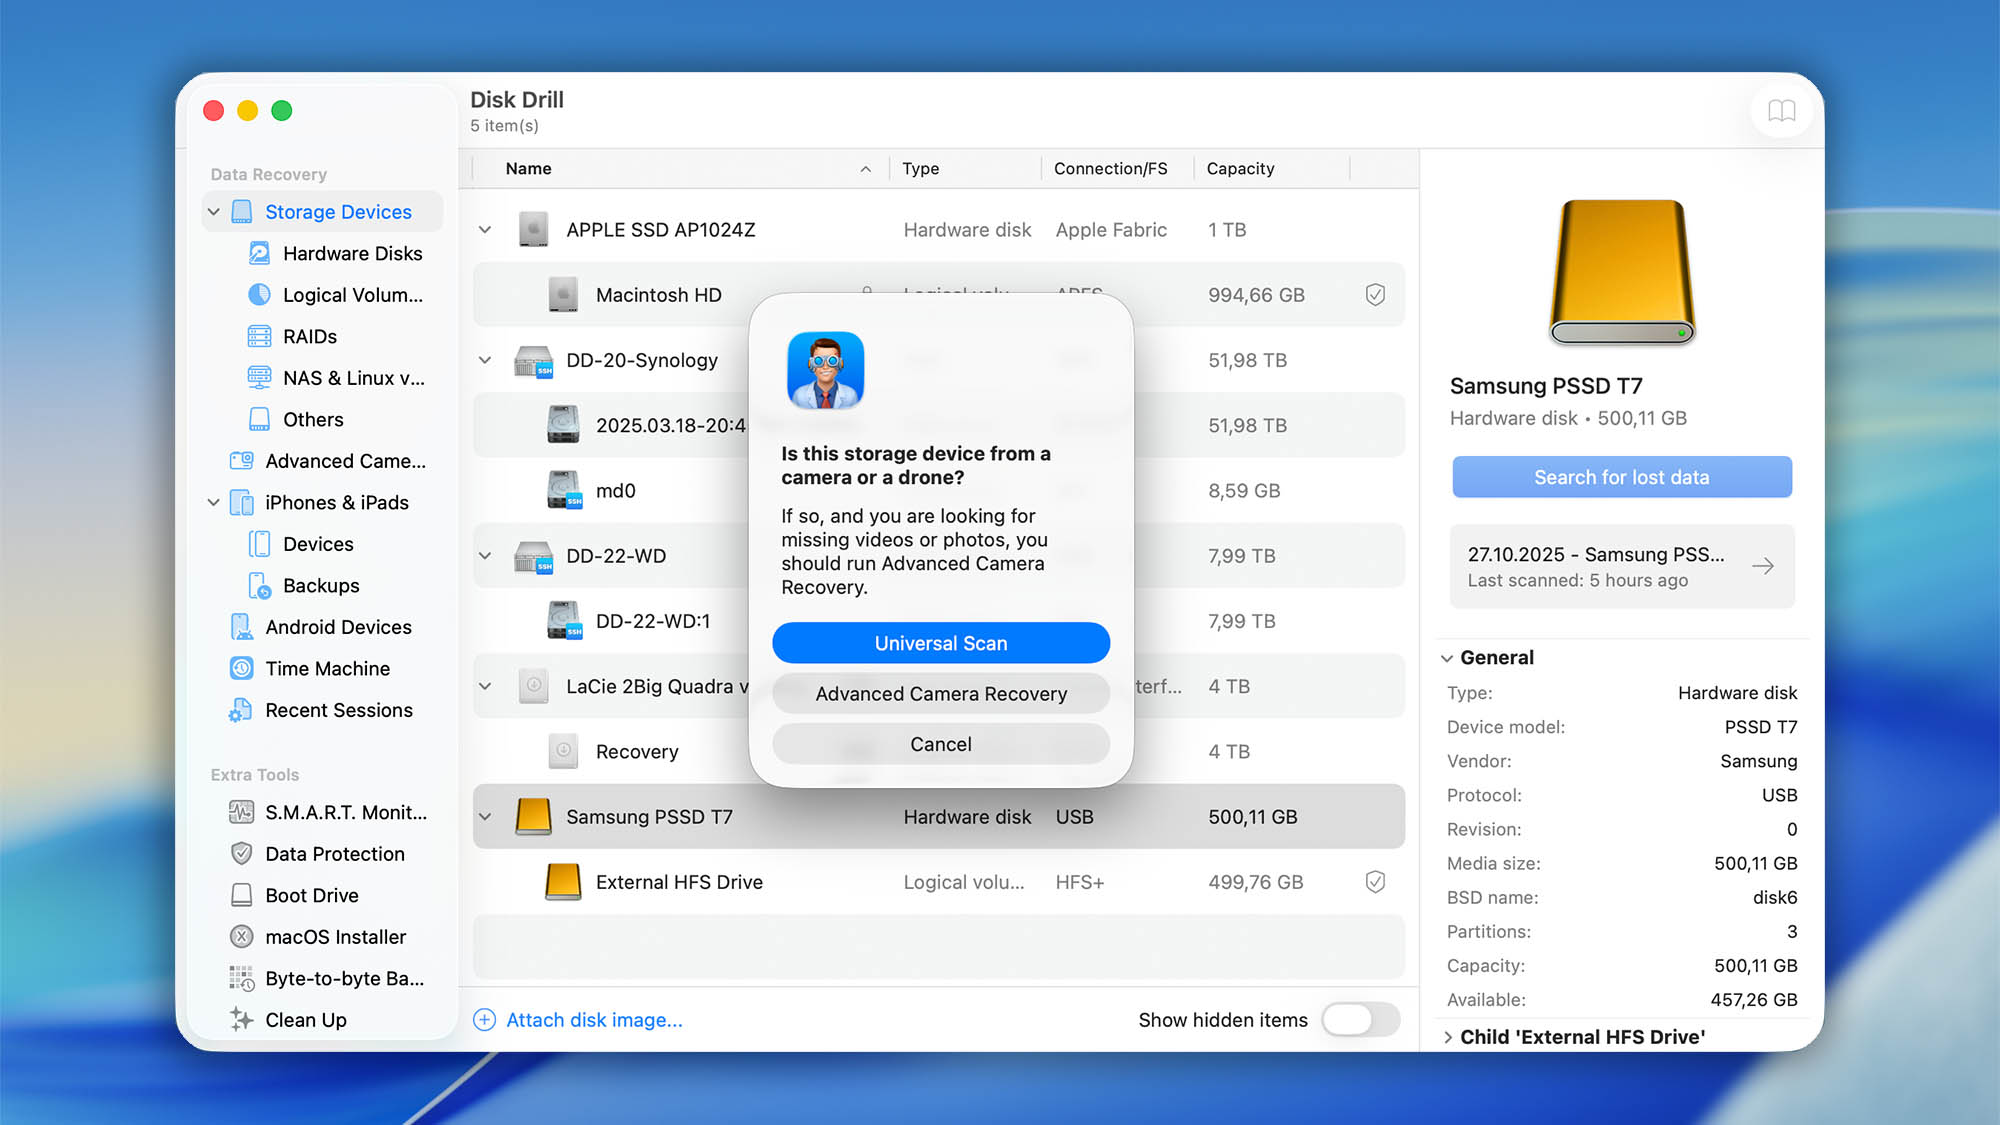
- Click Search for lost data in the right panel. When the dialog opens, pick one of the following:
- Universal Scan — Recommended for most drives. Runs Disk Drill’s full set of recovery methods in one pass to find recently deleted files, lost partitions, and files recoverable by signature.
- Advanced Camera Scan — Optimized for cameras and SD/microSD cards. Targets RAW photo and video formats for a faster, media‑focused recovery.
- Wait for Disk Drill to finish scanning. If you have a large hard drive or disk, this can take hours (or even days). Starting with Disk Drill 4 there is no need to wait till the scan is over to preview or restore the recoverable files. If no files are found, refer to Troubleshooting Scan Results.
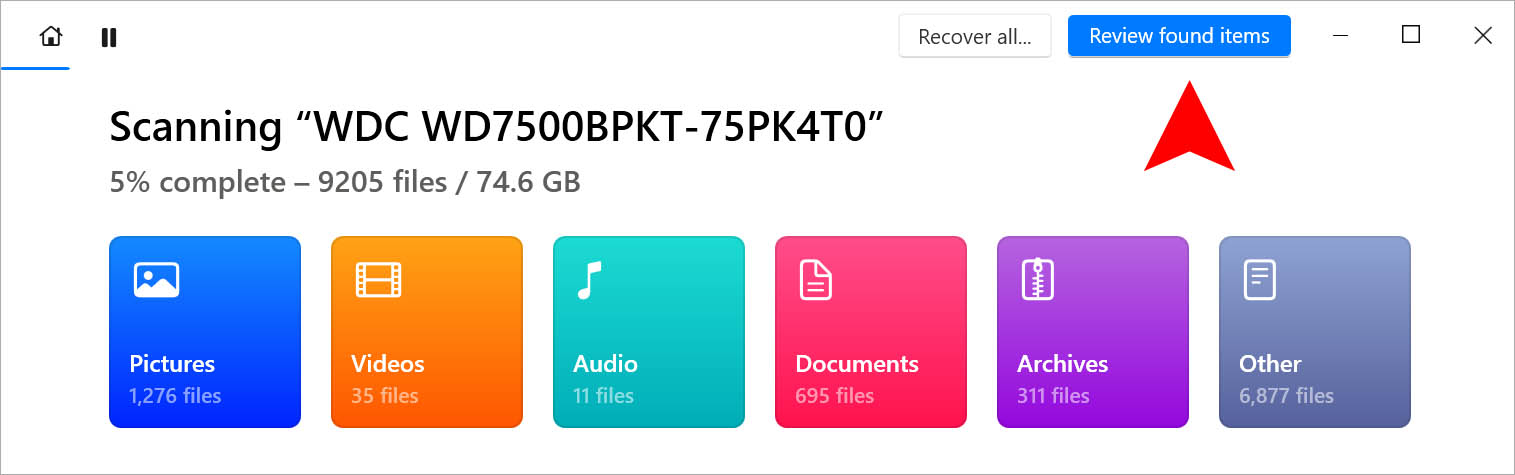
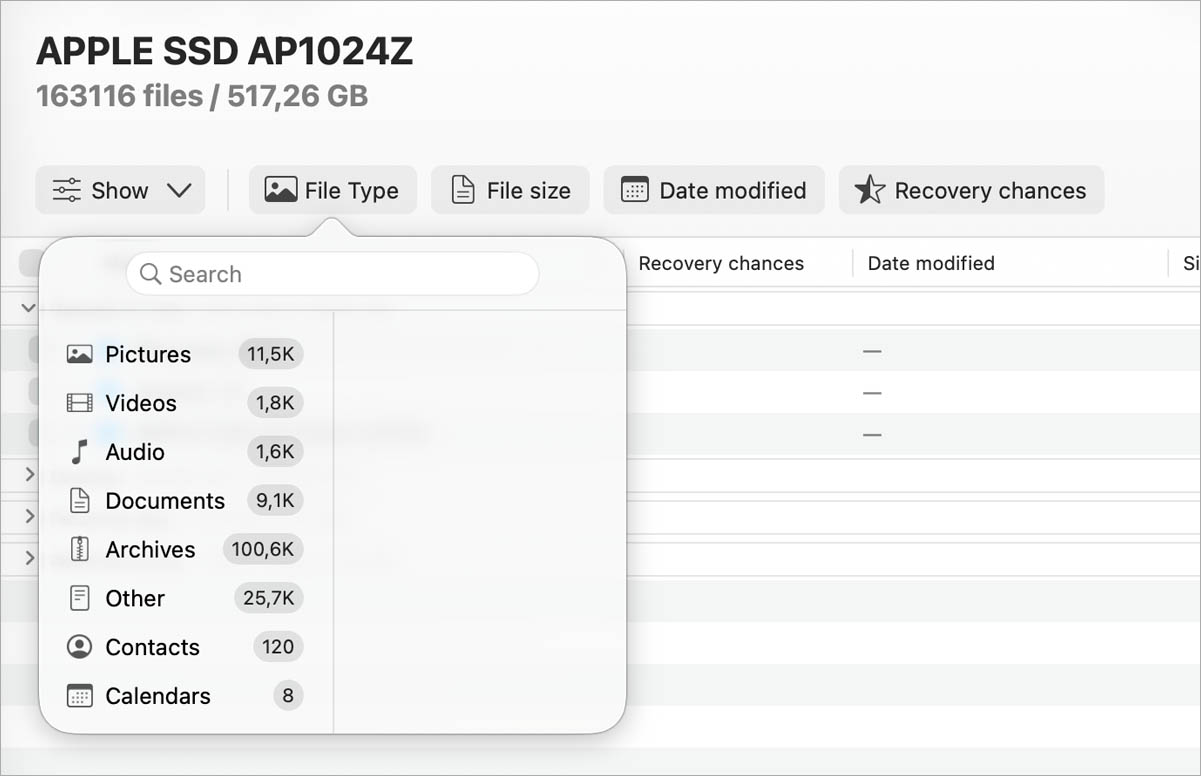
- Filter the results as needed by keyword, file type, file size and date. Go to Scanning FAQs for more information on filtering.


Preview and Verify Recoverable Files
You will want to preview the files in Disk Drill before deciding to upgrade to Disk Drill PRO. Previewing is the only way to make sure the file is actually recoverable.
Disk Drill has three preview options, you can use either of them as you find it convenient:
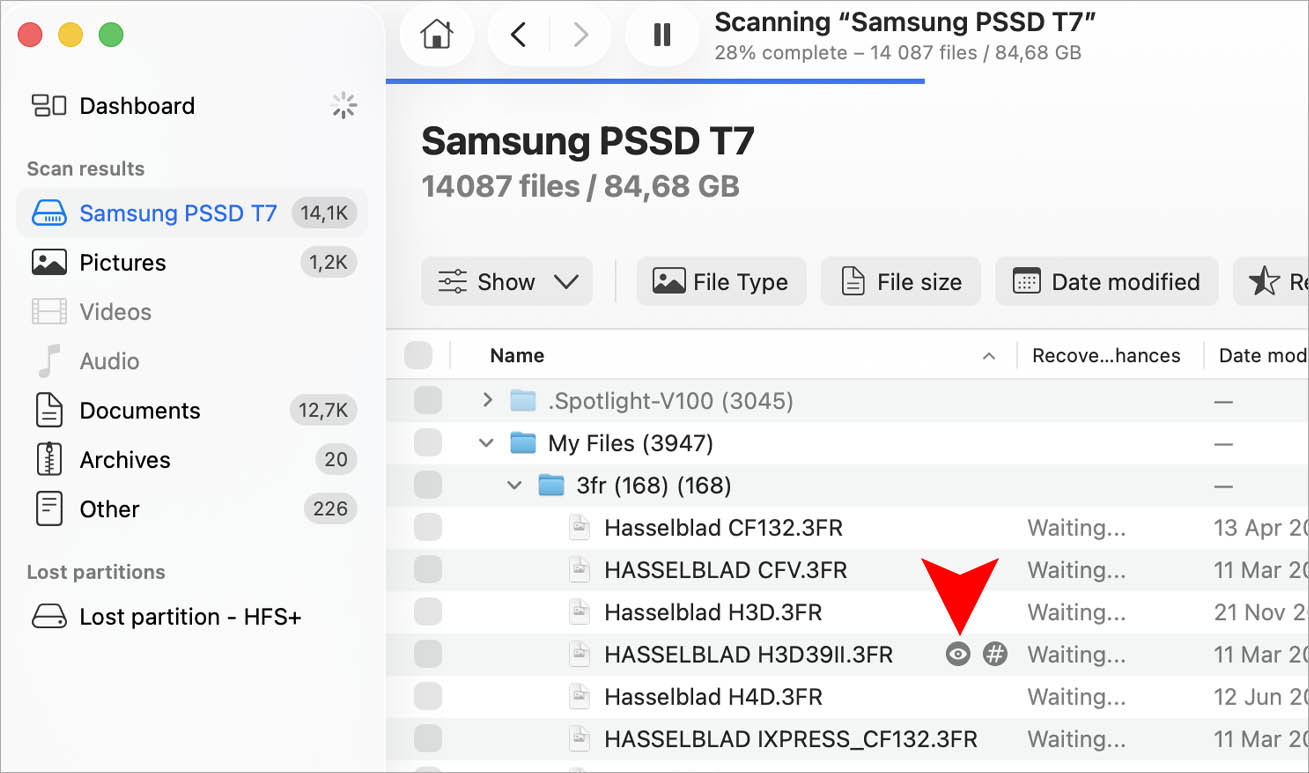
- Whenever you hover the mouse cursor over a file name in the list of file results the “eye” icon appears to the right of the name of the file. Click it to see an enlarged preview.
- When you click a file in the list of recoverable results, you can see its preview in a designated panel in the right section of the Disk Drill window along with some additional info.
- Another preview option is Hex view, which will allow you to view the underlying binary code of any file. Click the Hex button (hash tag # icon) to the right of the file name to view.


After a brief pause, a view of the file in question should appear. There are three possibilities for the preview:
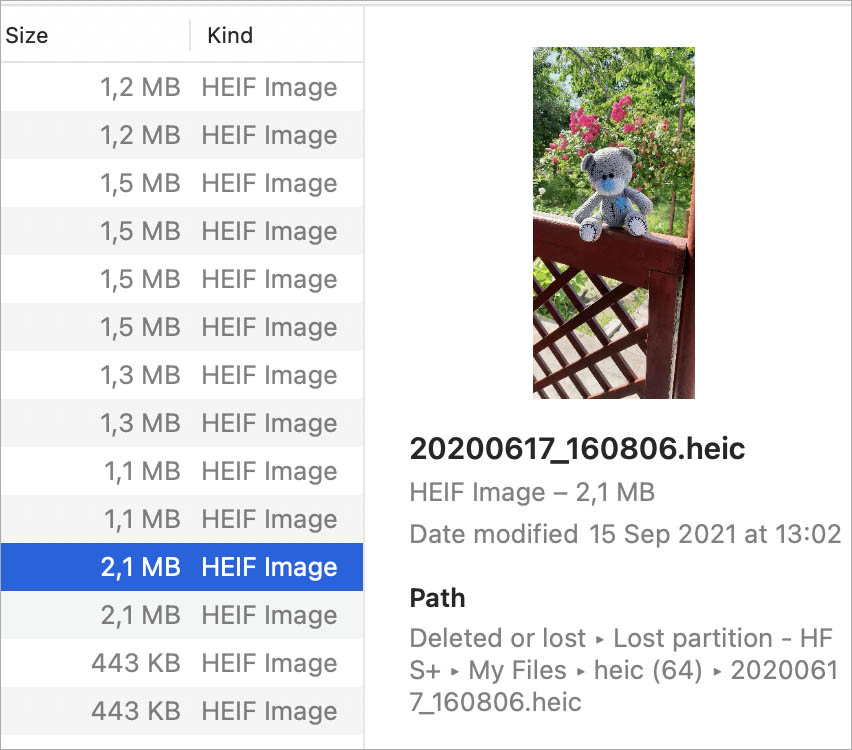
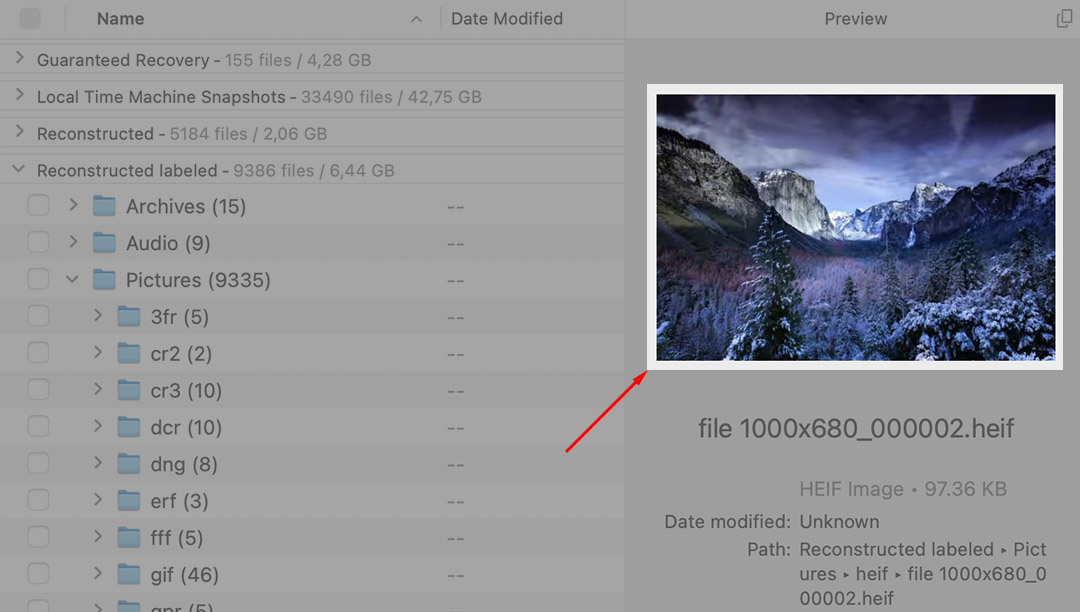
#1 Preview Looks good
If the file looks as you expect it to, this is good news! The file should be recoverable.
⚠️ Important! Be sure to preview the entire file — view all the pages of a document, listen to the whole audio file, or watch the entire video file. Sometimes the beginning looks good, but other parts are lost or corrupted.
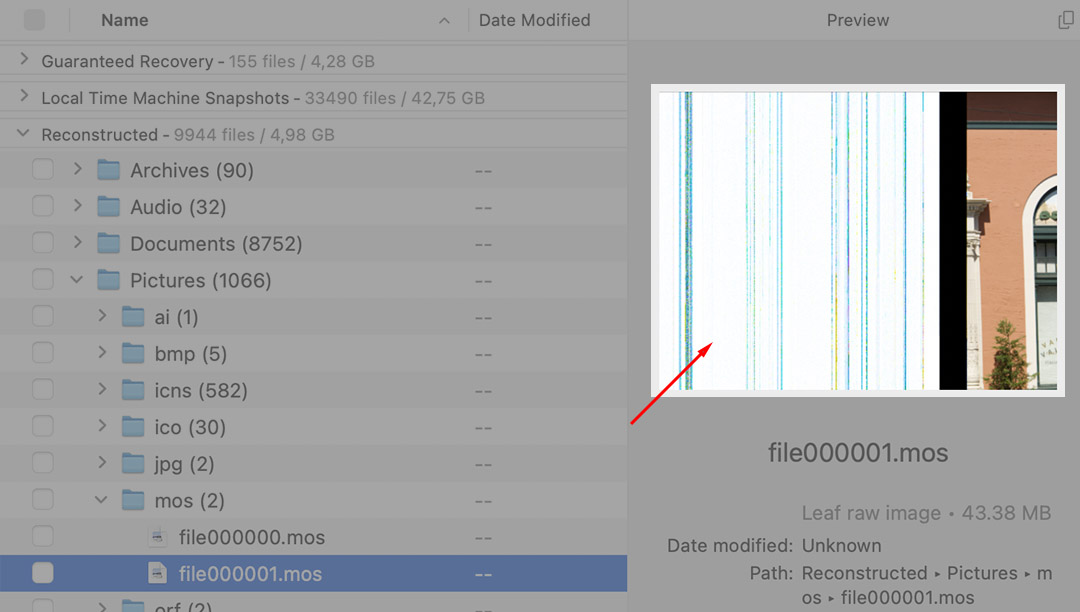
#2 File Preview Is Corrupted or Incomplete
If the preview is black or appears garbled (with strange characters or symbols) or the audio/video is scratchy or only part of it plays, then it probably isn’t recoverable. You might be able to get some bits and pieces of it, but it won’t be perfect. If you recover it, you may not be able to open it at all.
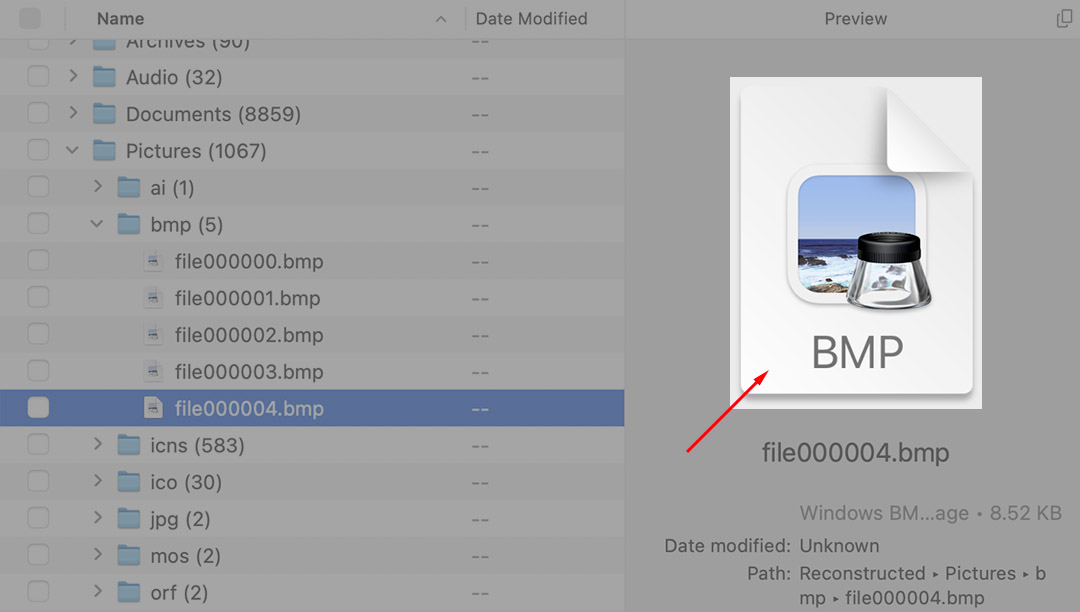
#3 No Preview Appears
Disk Drill uses your operating system’s built-in preview engine-Quick Look on macOS and Preview Handlers on Windows. If you only see basic info (file name, date, size) instead of a real preview, your OS may be missing the right plugin/codec.
#3.1 Quick test:
- macOS: Select a healthy (non-lost) file of the same type in Finder and press Space to open Quick Look.
- Windows: In File Explorer, turn on View → Show → Preview pane, then select a healthy file of the same type.
#3.2 Compare the results:
- Looks the same as in Disk Drill (no real preview): Your system likely needs a plugin/codec for that file type.
- Healthy file previews fine, but the recovered file doesn’t: The recovered file is likely corrupted.
#3.3 How to add preview support:
- macOS: Install a Quick Look plugin for the file type (see QuickLookPlugins.com).
- Windows: Install a codec/handler such as K-Lite Codec Pack or Microsoft’s Raw Image Extension for camera RAW formats.
After installing, restart Disk Drill (and, if needed, your computer) and try previewing again.
There are a few file types that do not have plugins. If you cannot find a plugin, then you will have to decide if you want to gamble and upgrade to Disk Drill PRO to find out if it’s recoverable.
💡 Note: Disk Drill PRO does not require you to use Quick Look. Once you upgrade you can preview files with their native applications.
When It`s Time to Upgrade to Disk Drill PRO?