Prerequisite: This guide assumes you’ve upgraded from Disk Drill Basic to Disk Drill PRO.
Before You Begin
- Connect the device you’re recovering from: If the deleted files are on an external device (USB flash drive, SD card, camera, or external HDD/SSD), connect it now.
- Close any apps that might write to the drive:
- macOS: Time Machine, Photos, iCloud Drive, Dropbox, Google Drive, etc.
- Windows: File History/Windows Backup, Photos app, OneDrive, Dropbox, Google Drive, antivirus or disk utilities, etc.
- Recovering from your internal/system drive? If you need to recover files from your Mac’s internal hard drive, proceed to How to Recover Files From Your Mac Internal Hard Drive.
⚠️ Important: If the lost data is on your internal drive, minimize use of that computer. When possible, shut it down and perform the recovery from another Mac/PC or boot from a separate drive. This helps prevent overwriting the deleted data.
- Have a safe destination ready. Prepare a different disk or partition with enough free space to save recovered files. Never recover to the same drive you’re scanning.
- Using Disk Drill’s data protection? If Data Protection (e.g., Recovery Vault in Windows or Guaranteed Recovery in macOS) is enabled on the affected volume, go to How to Use Recovery Vault and Guaranteed Recovery for the fastest restore path.
- New to scanning? Review our Scanning FAQs and Troubleshooting Scan Results articles to understand scan types, timelines, and best practices.
- Confirm file‑type support: If you need a specific format (for example, .docx, .jpg, .mp4), check What File Types Can Disk Drill Recover?
Download Disk Drill data recovery app
Download now
Scan for Lost Files
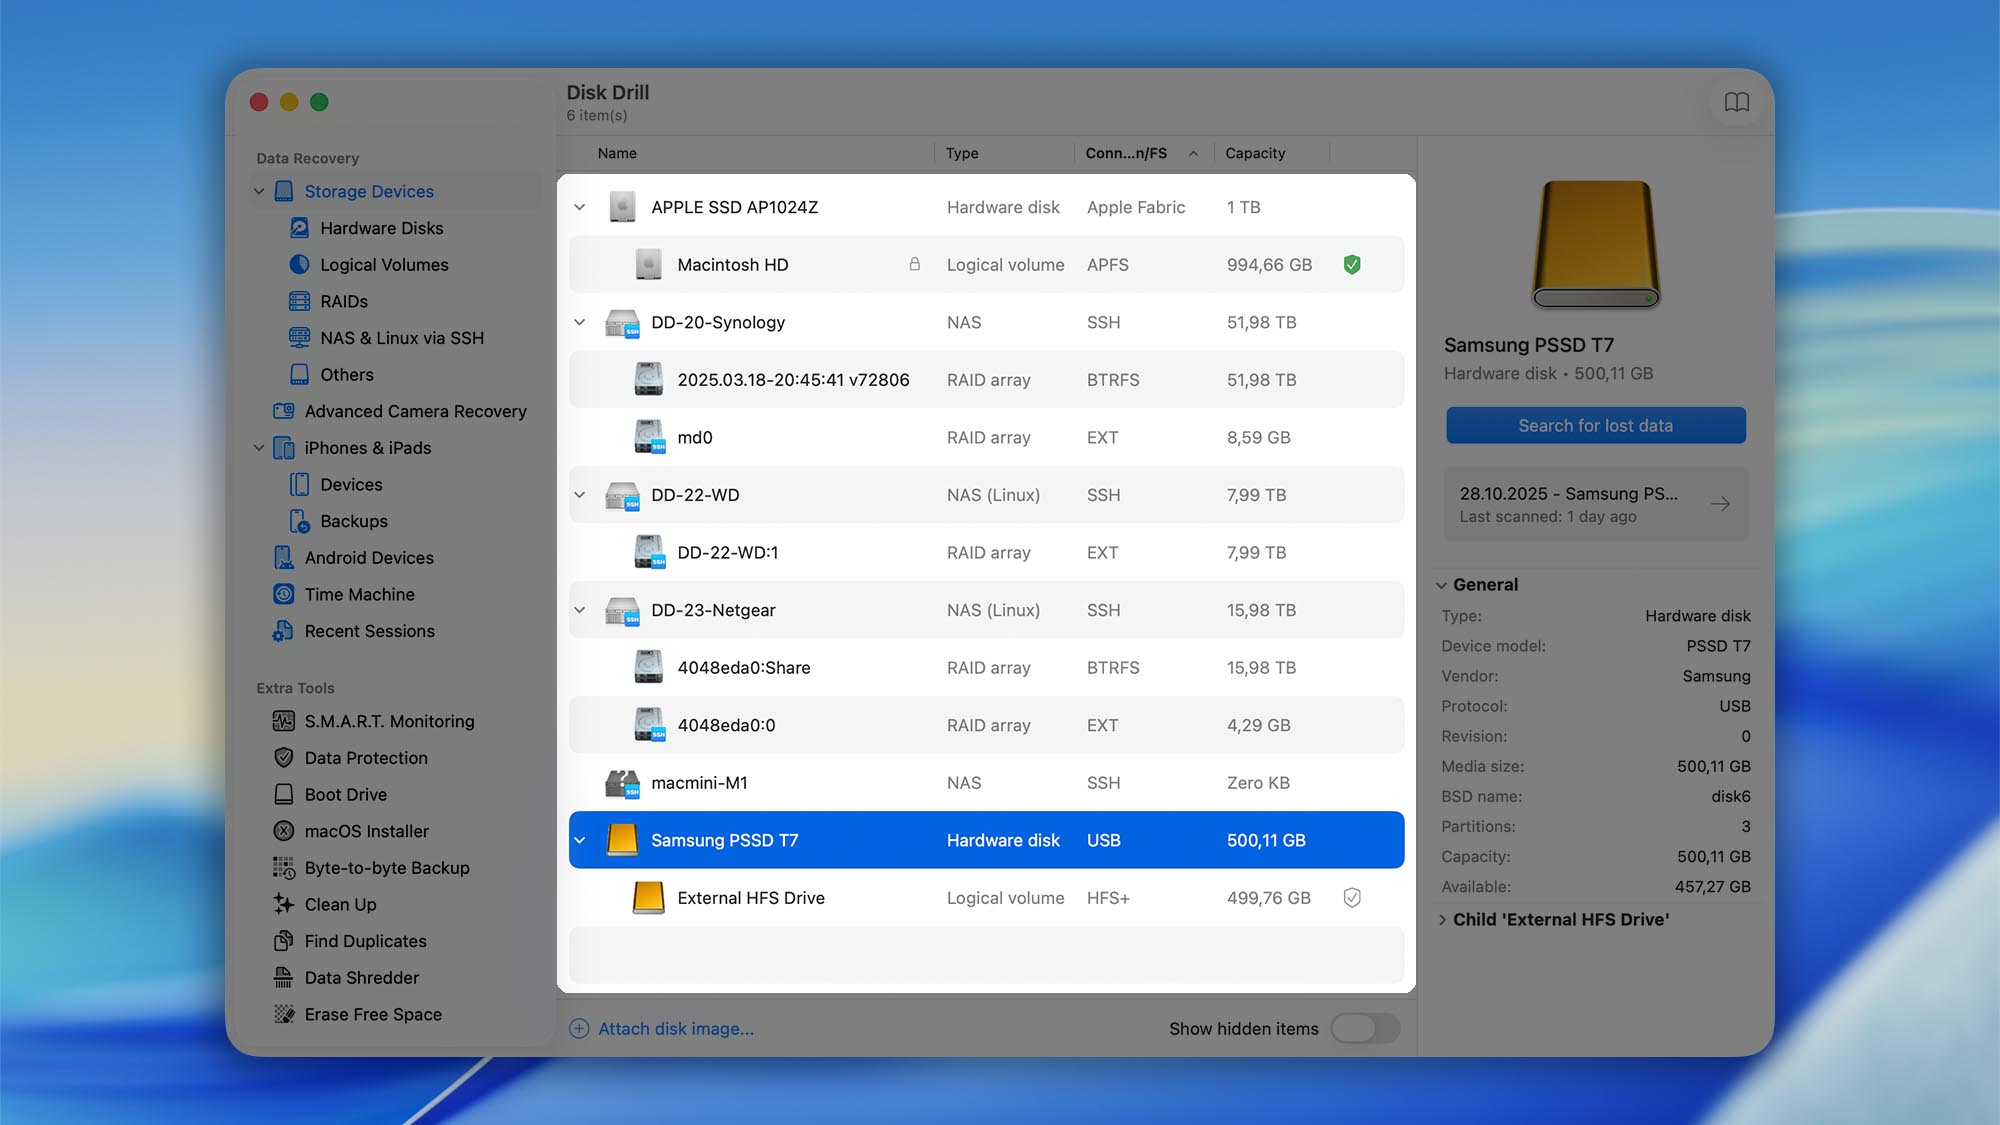
- Launch Disk Drill.
- Select the drive or device. In the device list, click the disk that contains your deleted files. If it has multiple partitions/volumes, expand the drive to choose the correct one if needed. Don’t see the right volume? See Scanning FAQs.


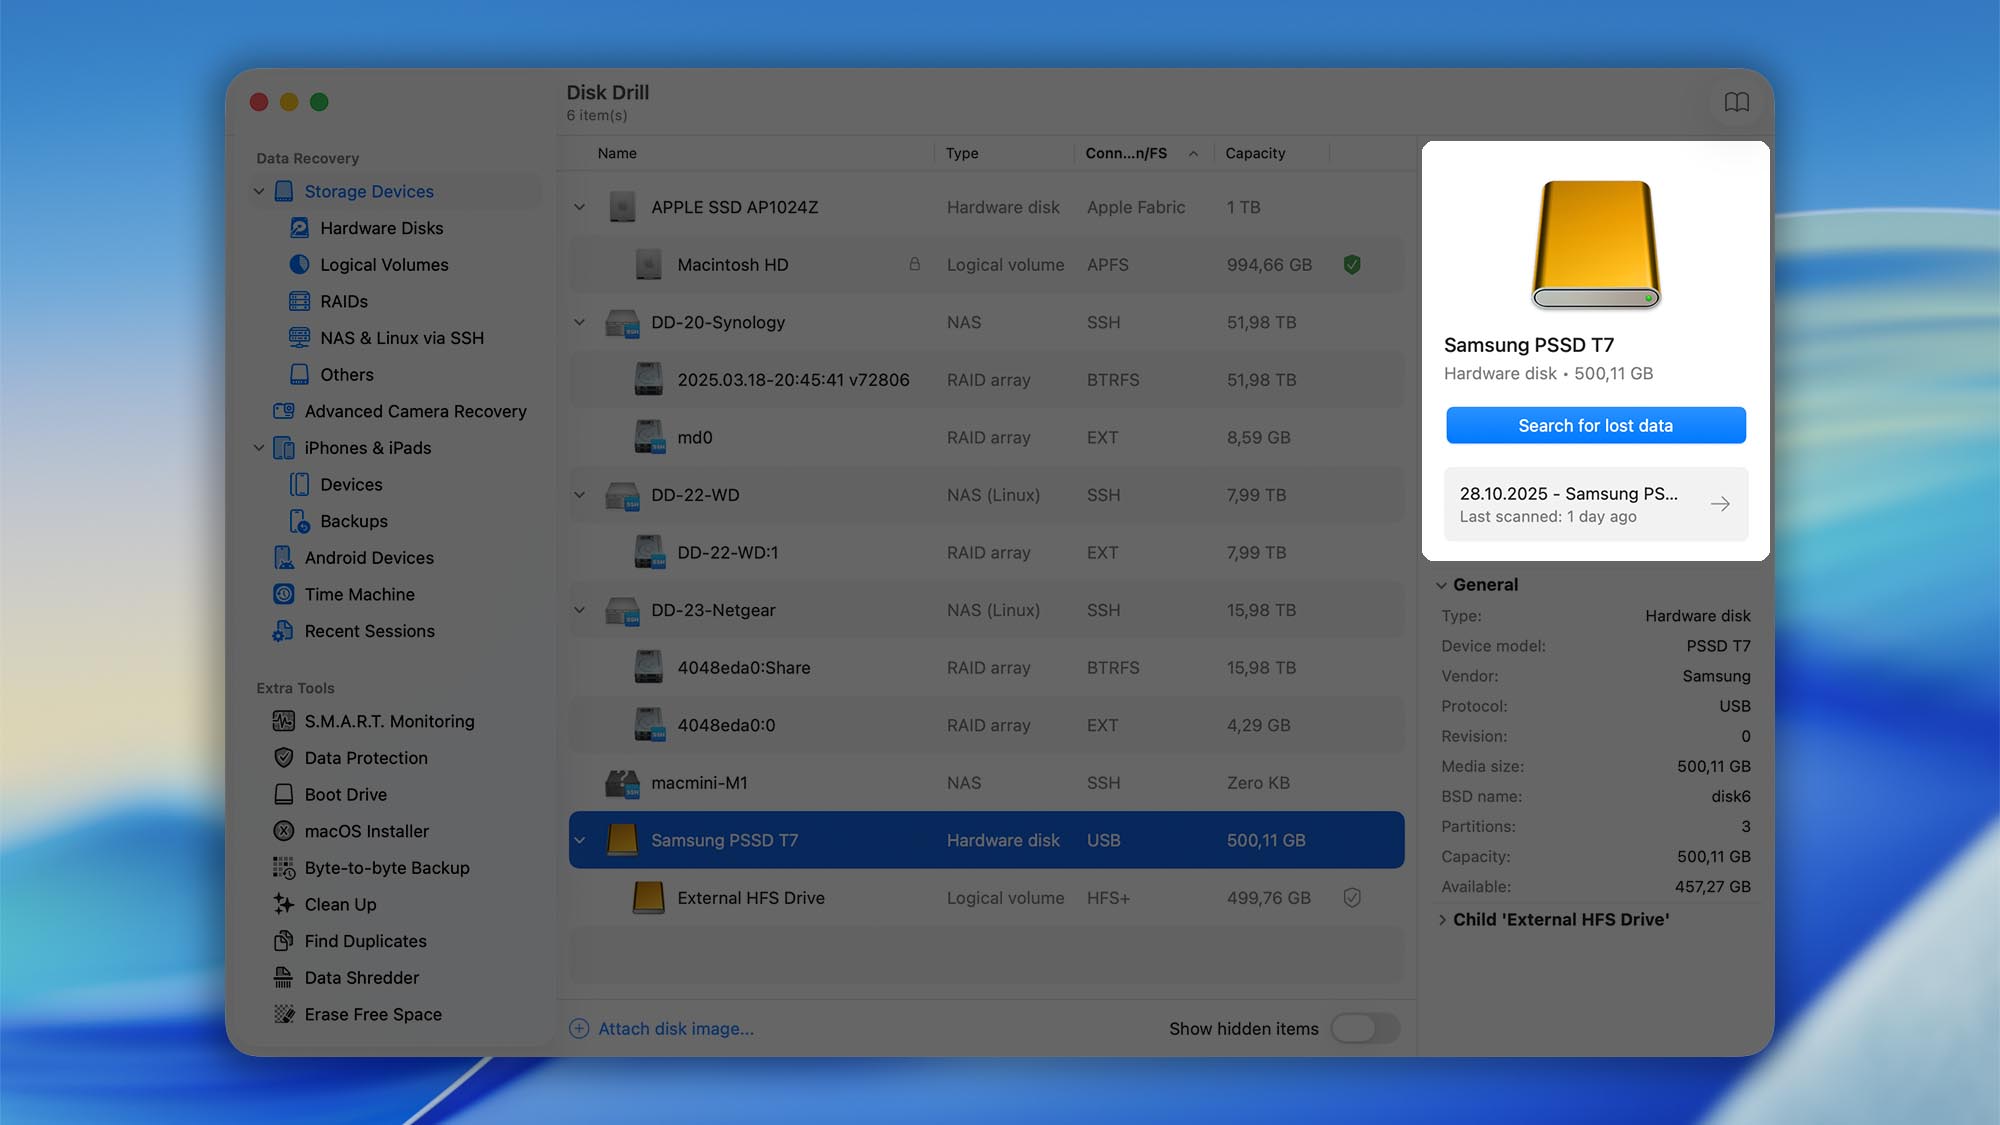
- Start the scan. Click “Search for lost data”. As the scan begins, Disk Drill will attempt to remount the selected volume as read‑only (where supported) to minimize write activity during recovery.
⚠️ This protection does not apply to the system/boot drive and may not be available on all configurations.
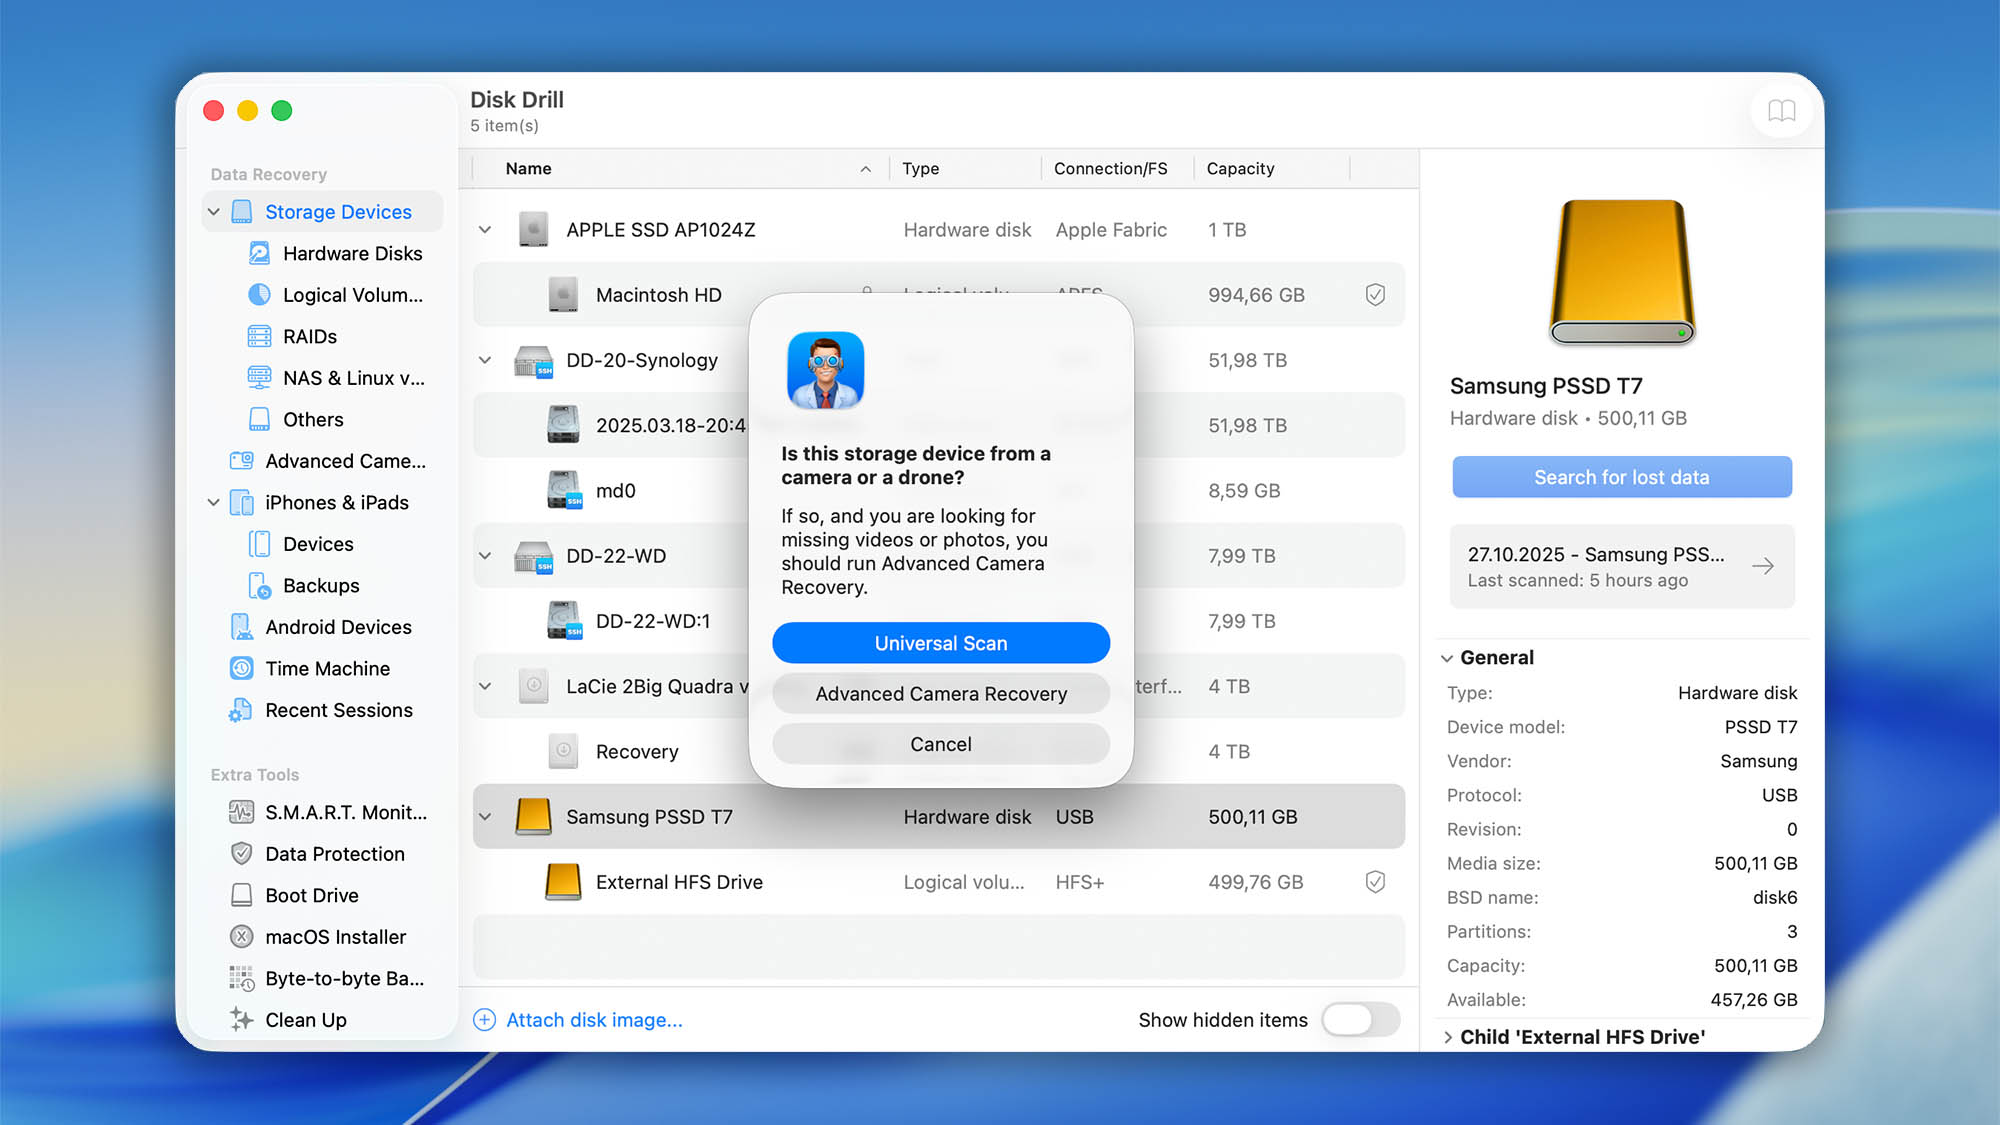
- Choose the scan method.
- Universal Scan: A comprehensive, all‑purpose scan for most drives and scenarios (internal, external, USB, SD, HDD/SSD).
- Advanced Camera Recovery: Optimized for camera cards and cameras (SD/CF/XQD, etc.) to reconstruct photos and videos, including many RAW formats. Best when a camera or SD card was formatted or files disappeared from a shoot.
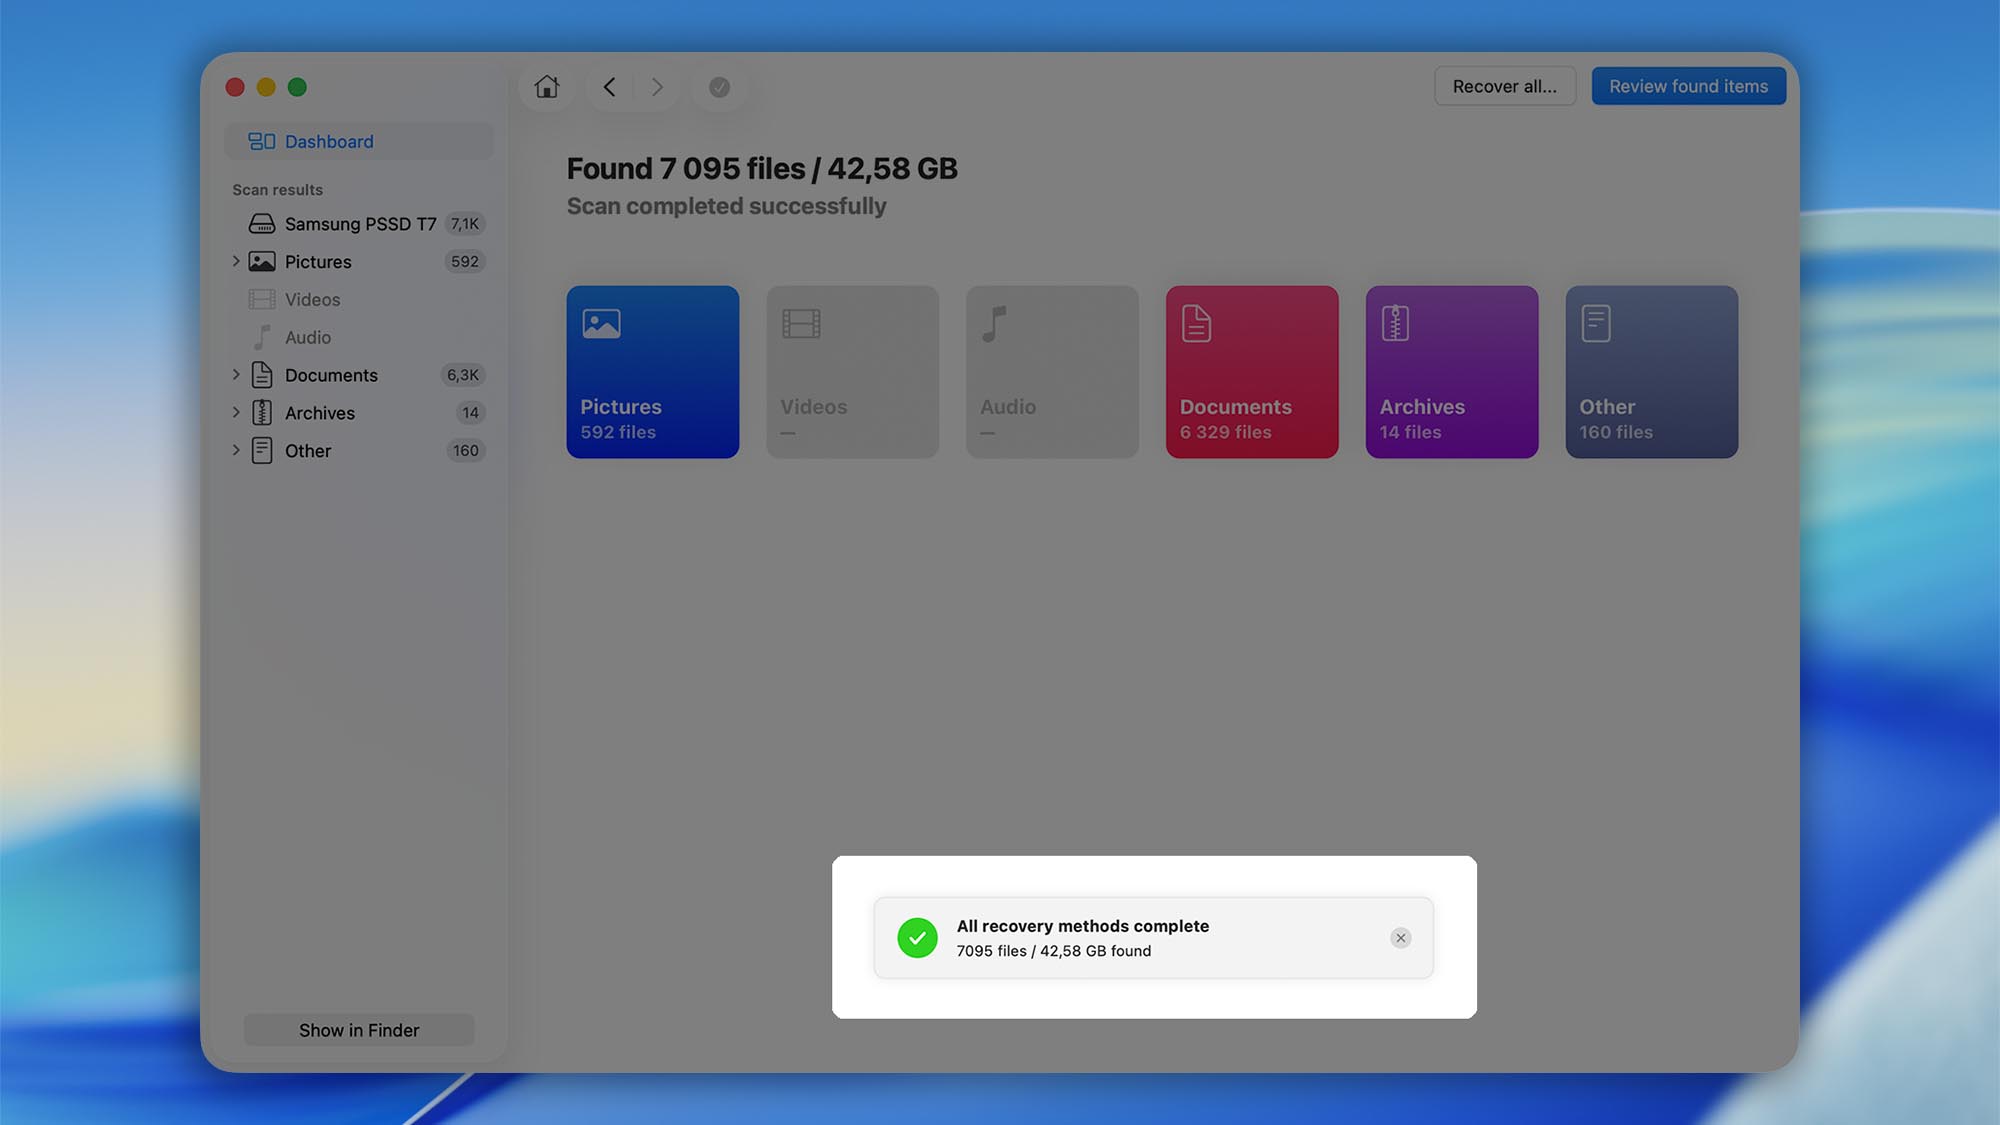
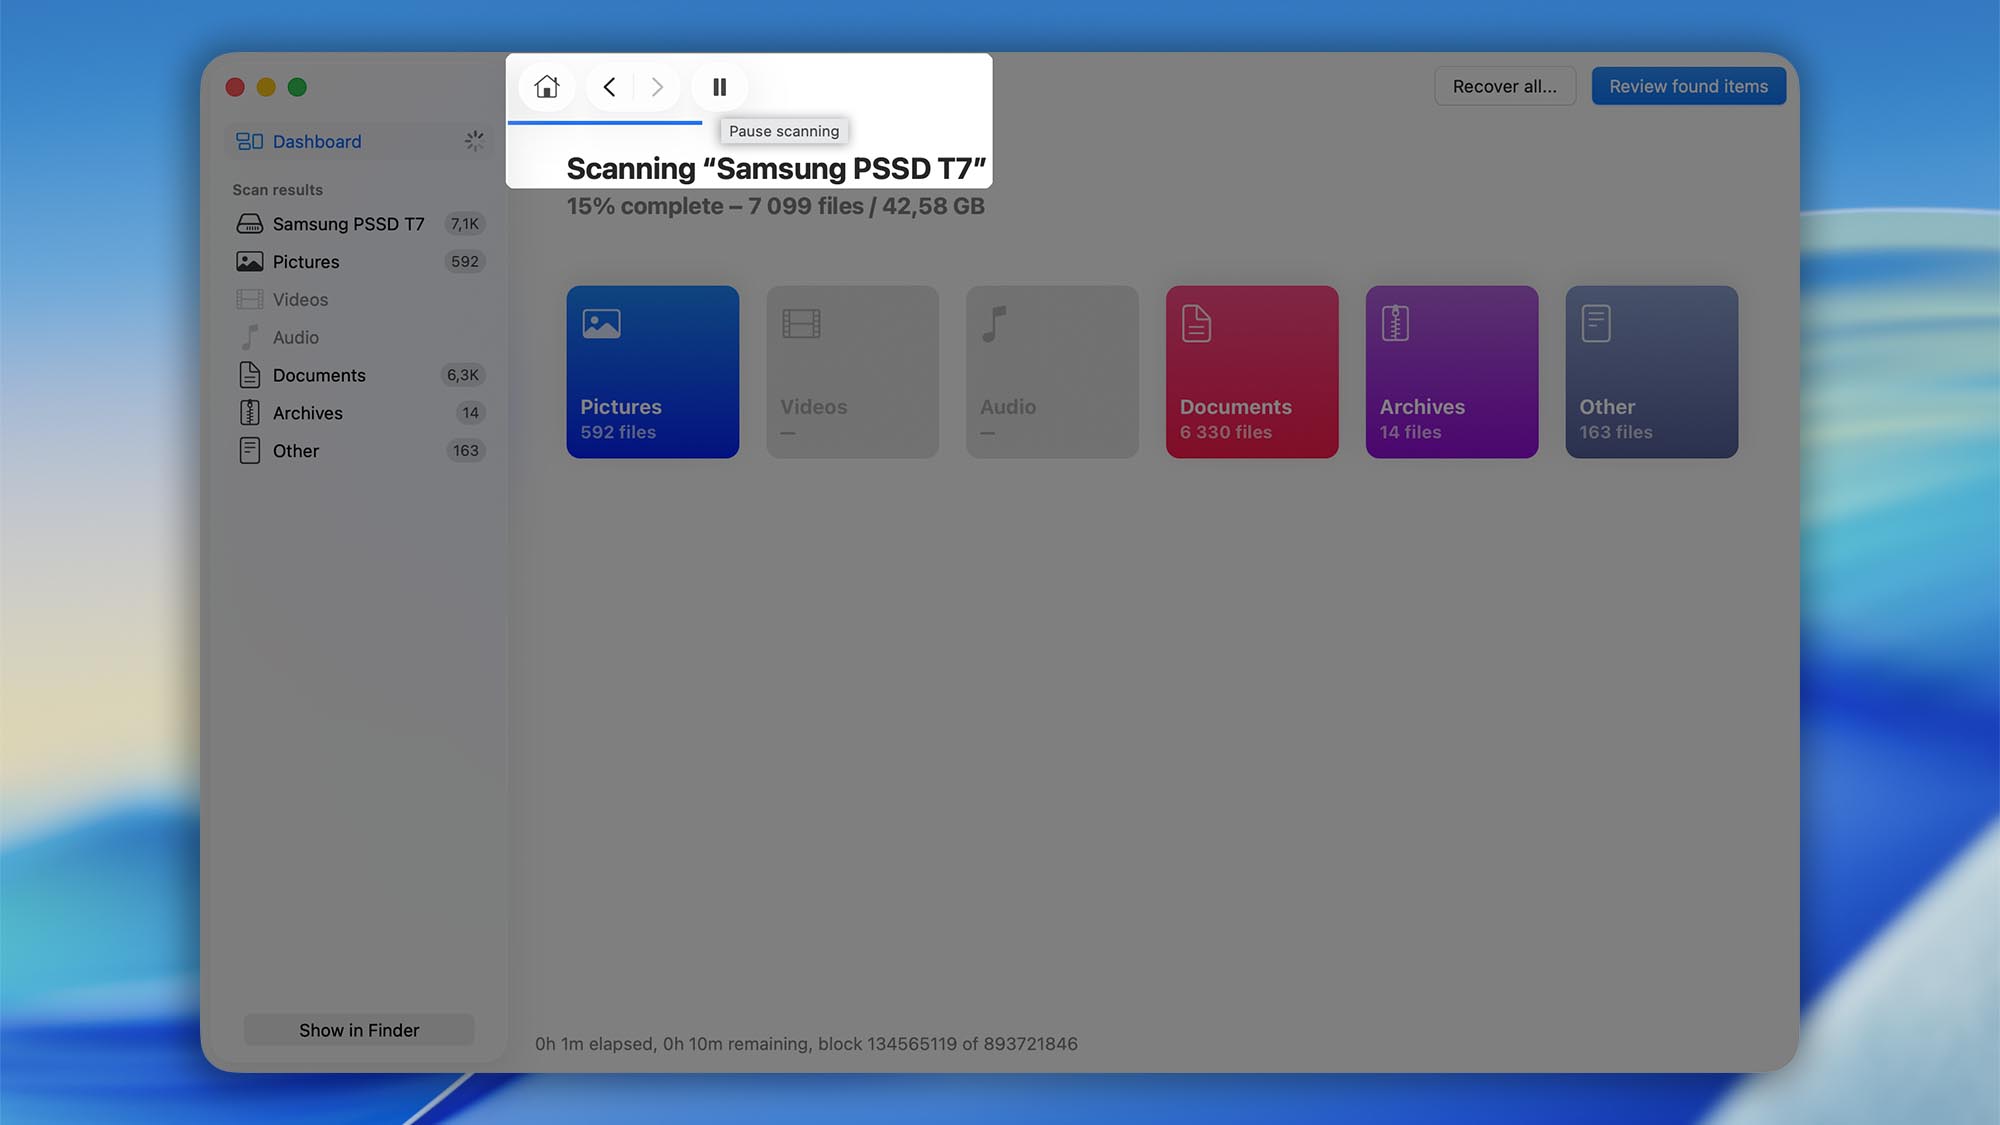
- Let the scan finish. Scanning time varies by drive size and condition—large or failing disks can take hours (and in extreme cases, days). You can view scan results in real time as Disk Drill finds files. When the scan is complete, Disk Drill displays the full list of discovered files.
- Pause, resume, or stop if needed. Use the Pause/Stop control next to the progress bar to temporarily Pause and Resume later.
- To stop and return to the previous screen, click Cancel/Stop.
- Auto‑save: Your scan state is saved automatically.
- Save a copy: Click Save to export the scan session to another disk, so you can pick up later without re‑scanning.
 💡 Best results: Allow the scan to run uninterrupted whenever possible. Full, uninterrupted scans tend to produce the most complete recovery results.
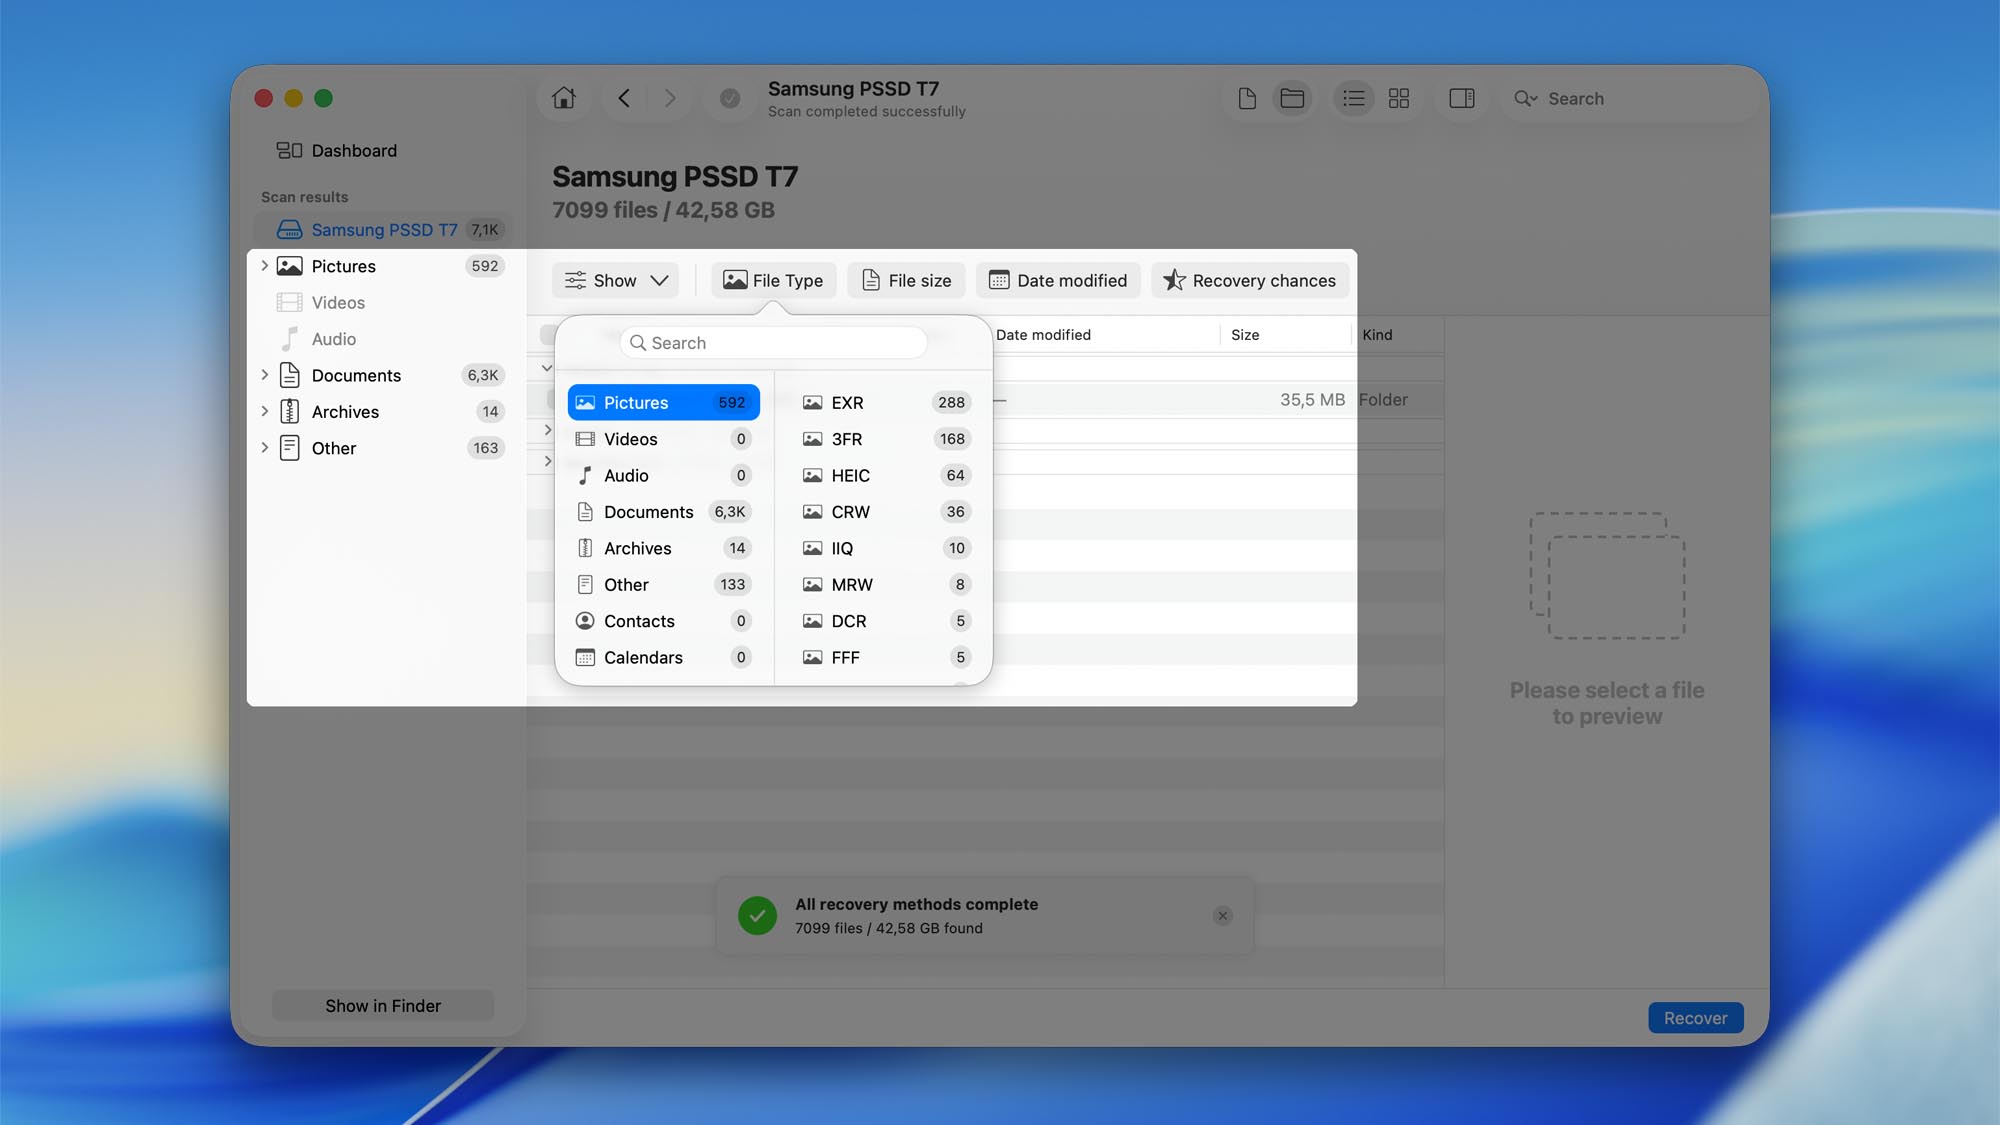
 - Filter the results. Use the built‑in filters to narrow down what you need by filename keyword, file type (Documents, Photos, Video, Audio, Archives), size, and date. Can’t find what you’re looking for? See How do I find a specific lost item in Disk Drill once the scan is over?.


File Recovery Option 1: Mount and Browse Found Items (PRO)
Once the scan completes, Disk Drill PRO lets you mount the found items as a read-only virtual disk. This makes reviewing and opening files much easier—you can browse them in your operating system’s native file manager and open them with their usual apps (no special viewers or plug‑ins required).
ℹ️ Good to know: file systems & cross‑platform drives
- FAT32 is legacy and not journaled, with a 4 GB per‑file limit—not ideal for modern workflows.
- exFAT is widely supported by macOS and Windows and avoids the 4 GB limit, but it’s also non‑journaled, so unexpected power loss or unplugging can increase corruption risk. On macOS, you may see auxiliary “._” files on FAT/exFAT—these are normal metadata sidecars.
- For primary drives, use the native file systems: APFS (or HFS+ Journaled on older Macs) on macOS, and NTFS or ReFS on Windows. Reserve exFAT mainly for temporary, cross-platform transfers.
- Mount the results. In Disk Drill PRO, choose Mount found items as disk (wording may vary slightly by version). The mount is read‑only for safety.
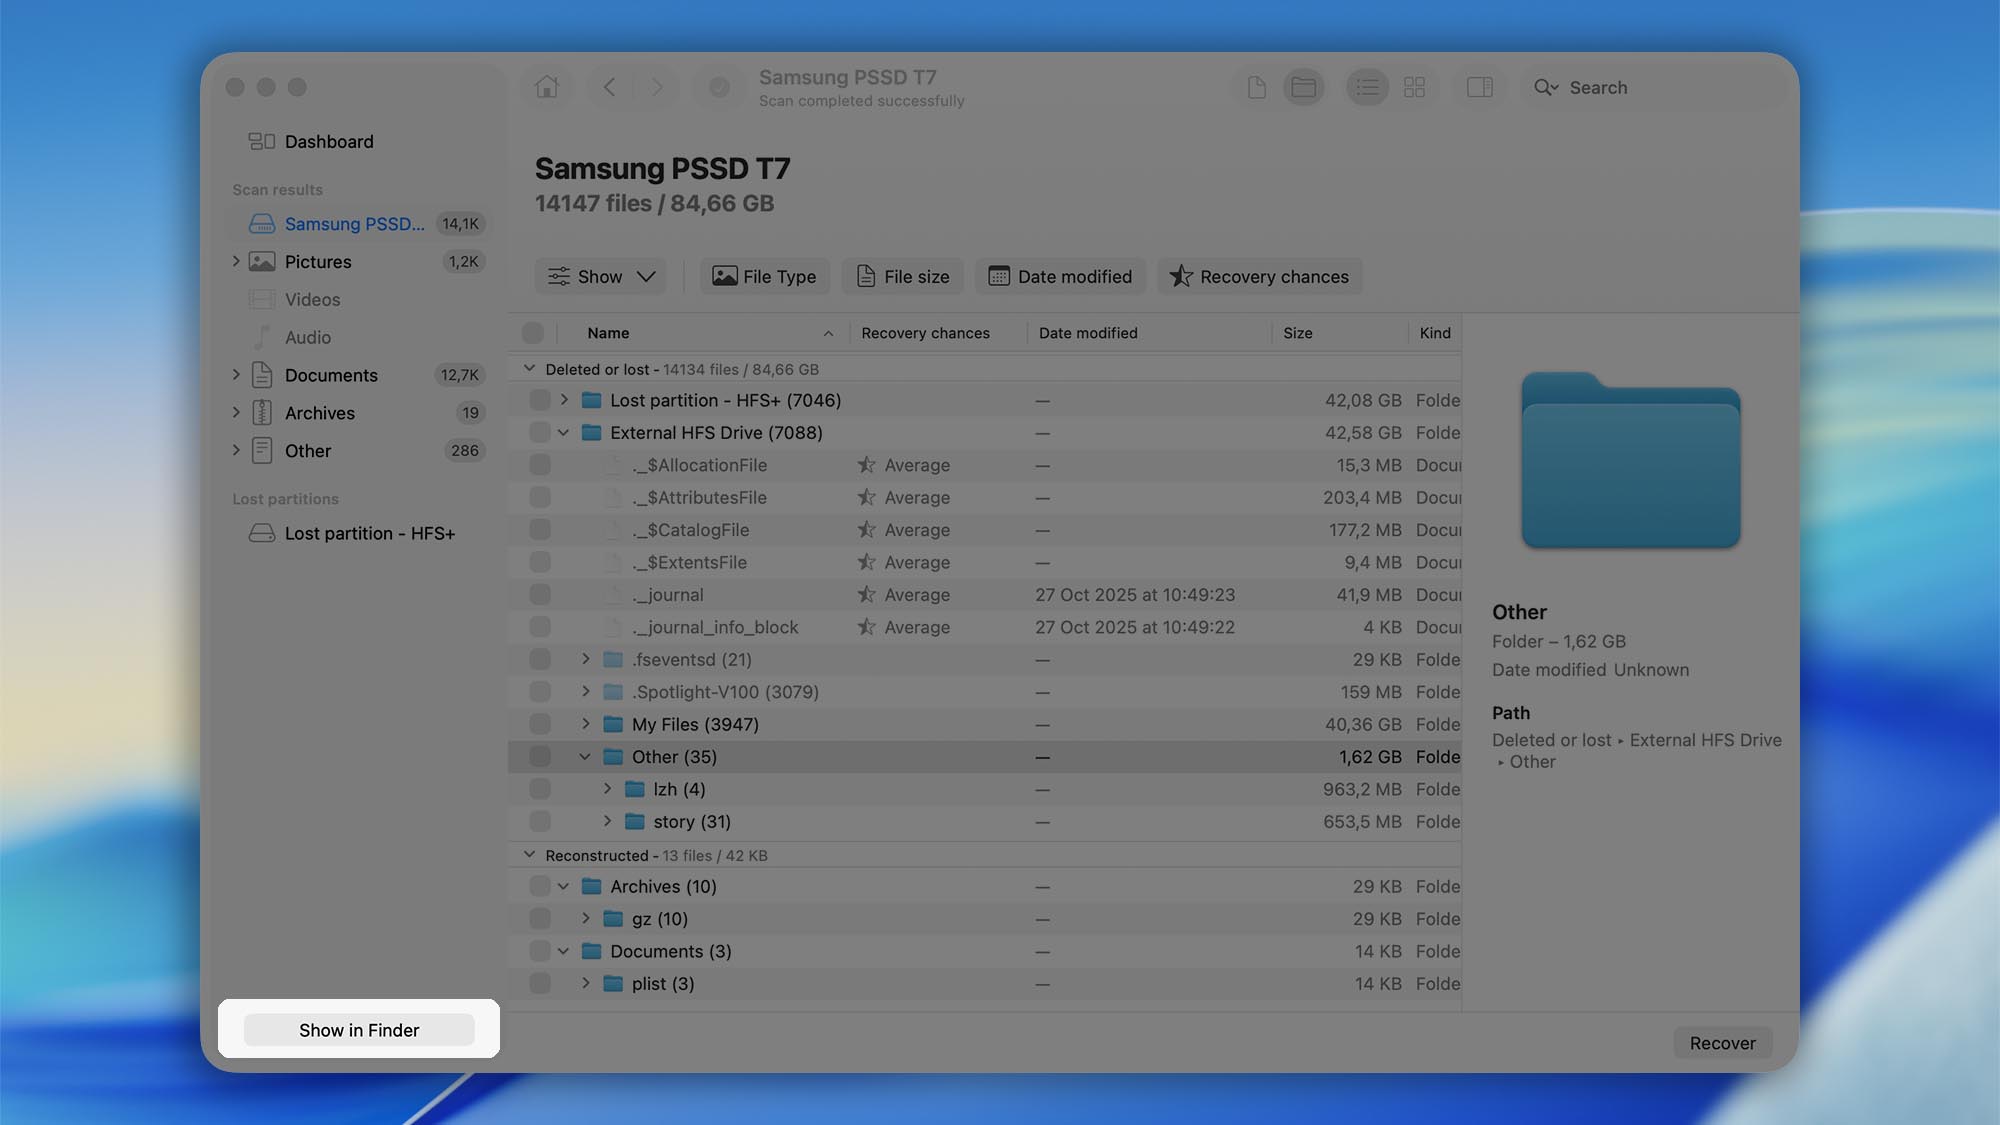
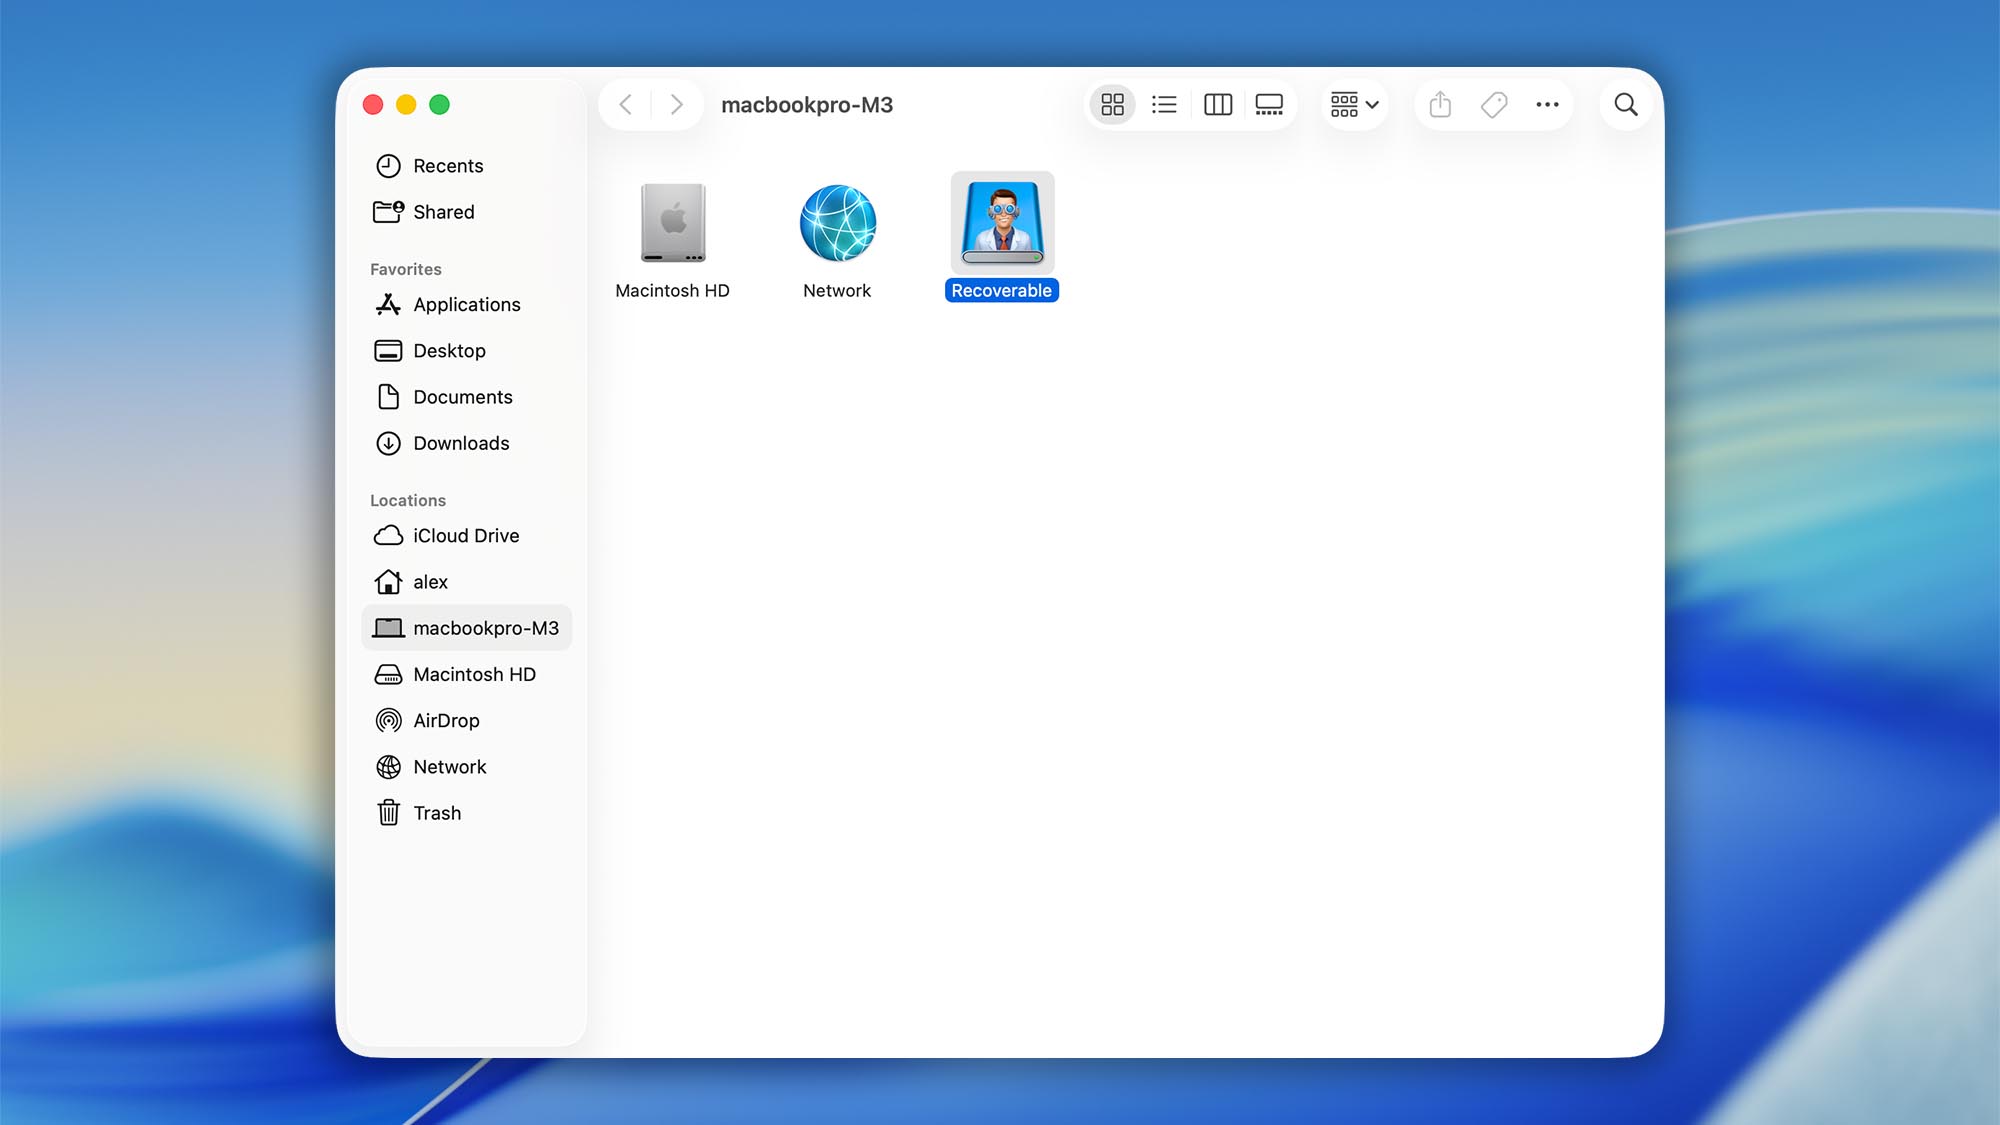
- Find the mounted disk.
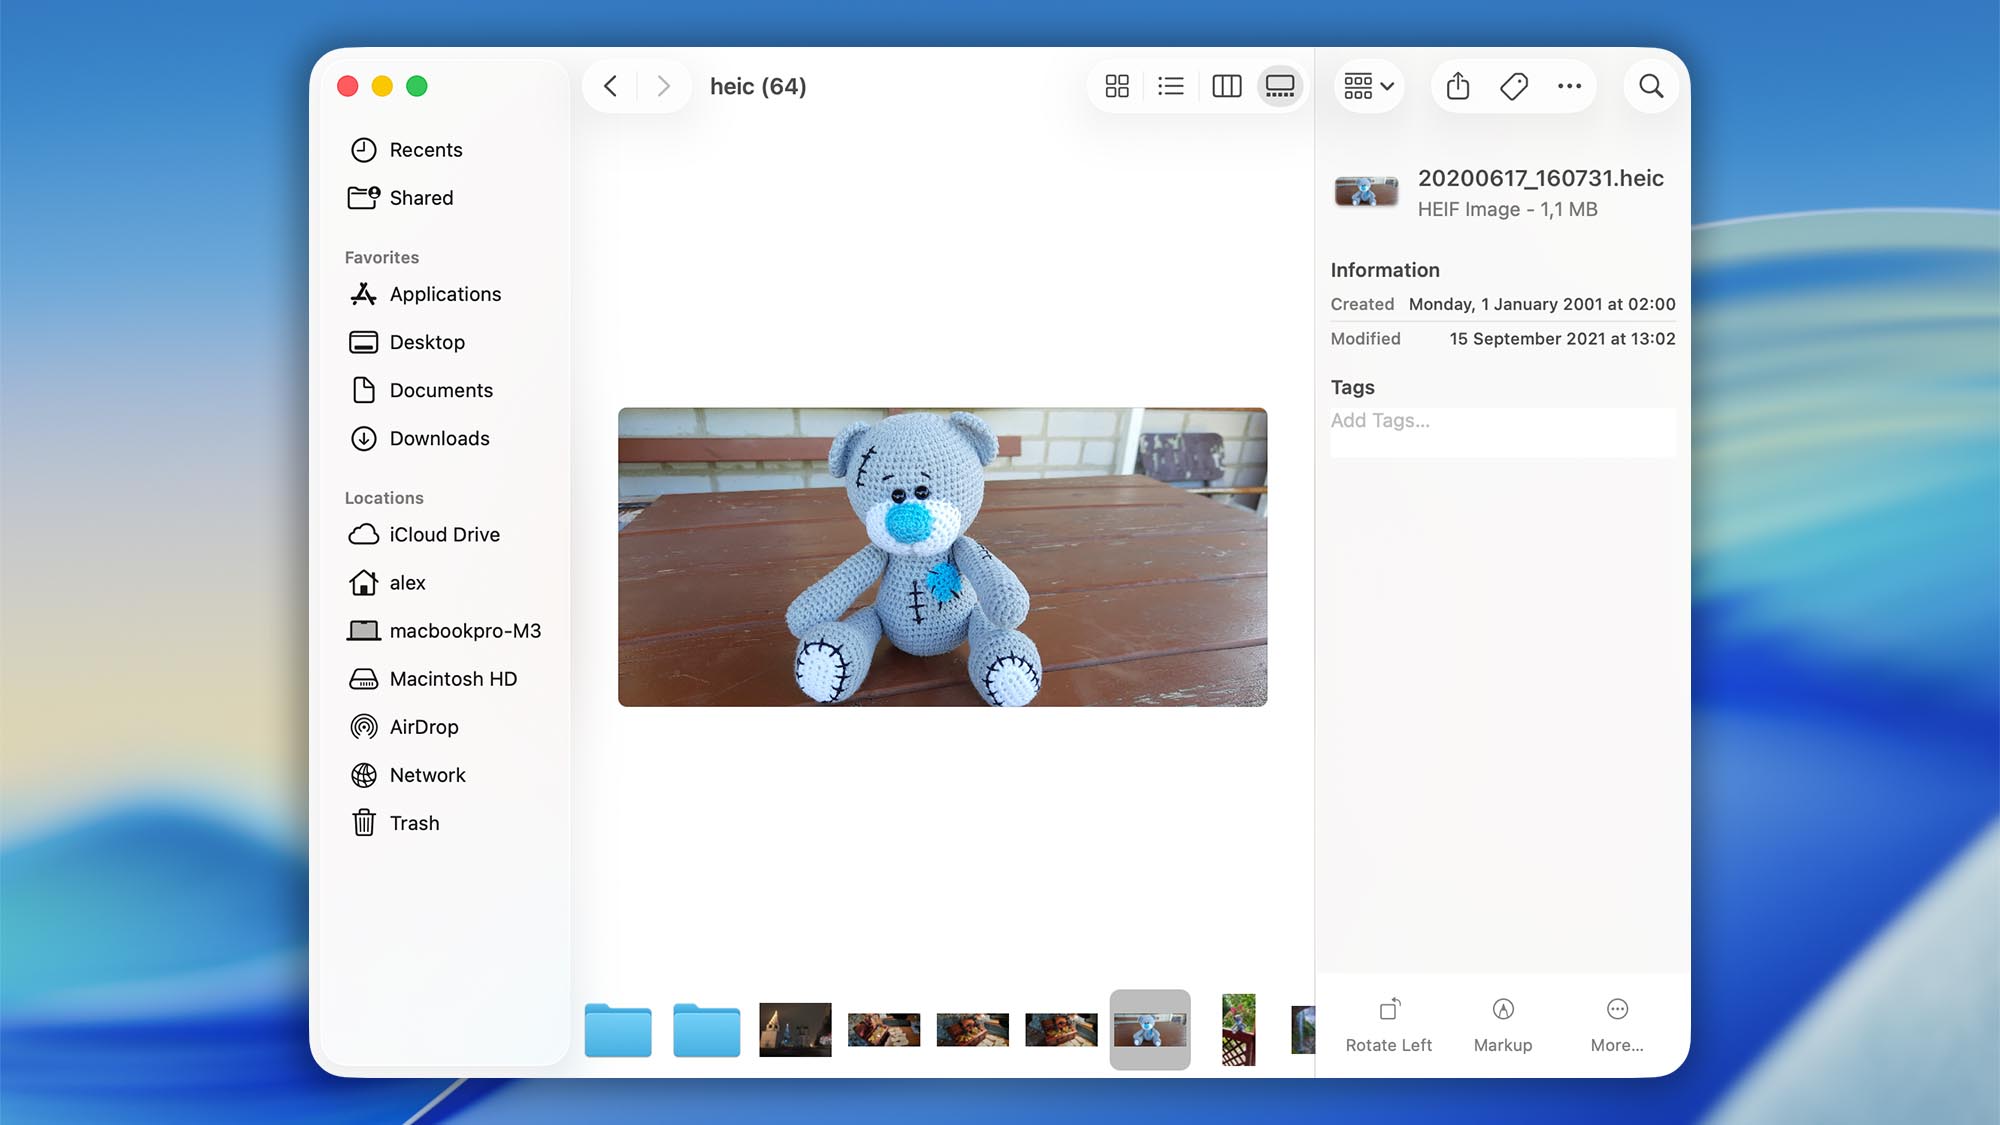
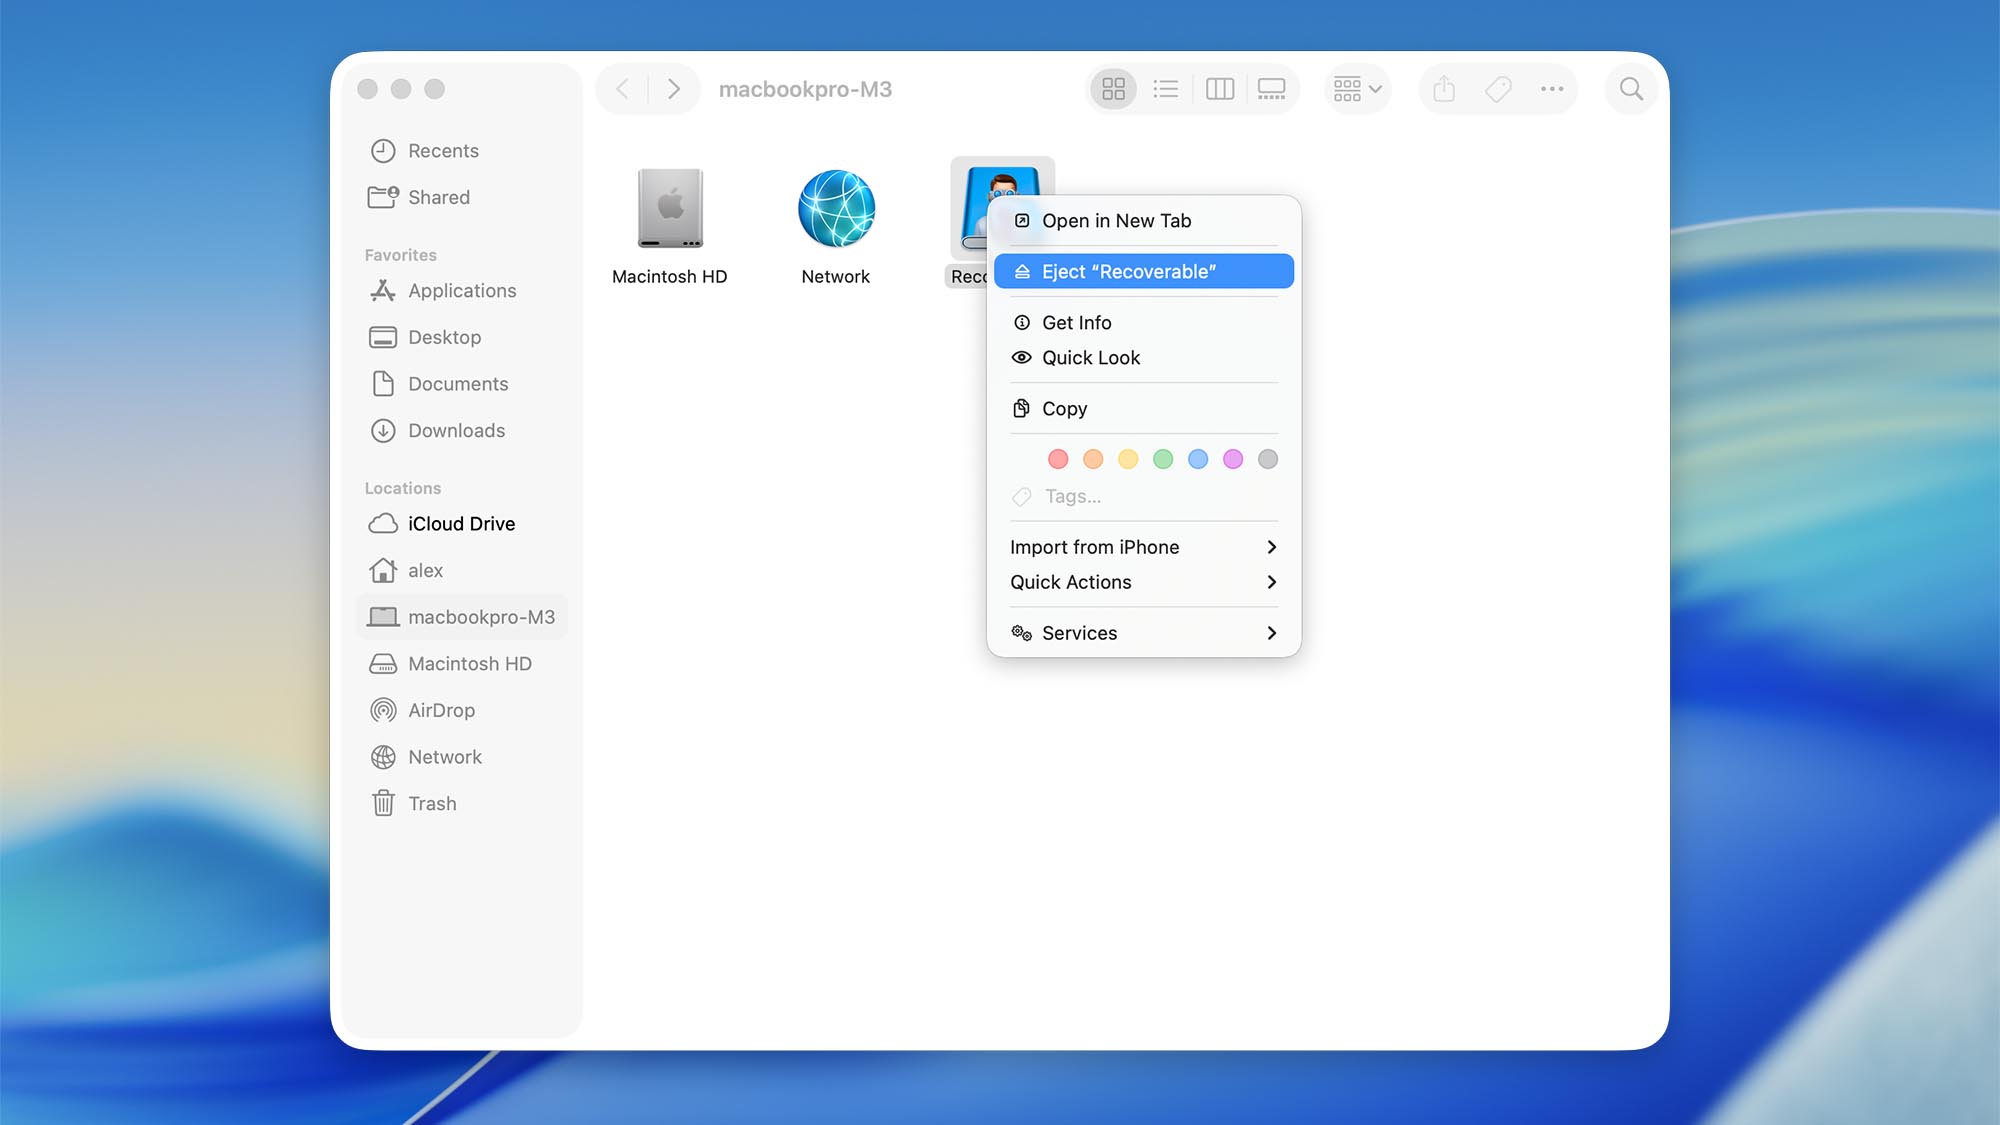
- macOS: The disk appears under Locations in Finder (and often on the Desktop).
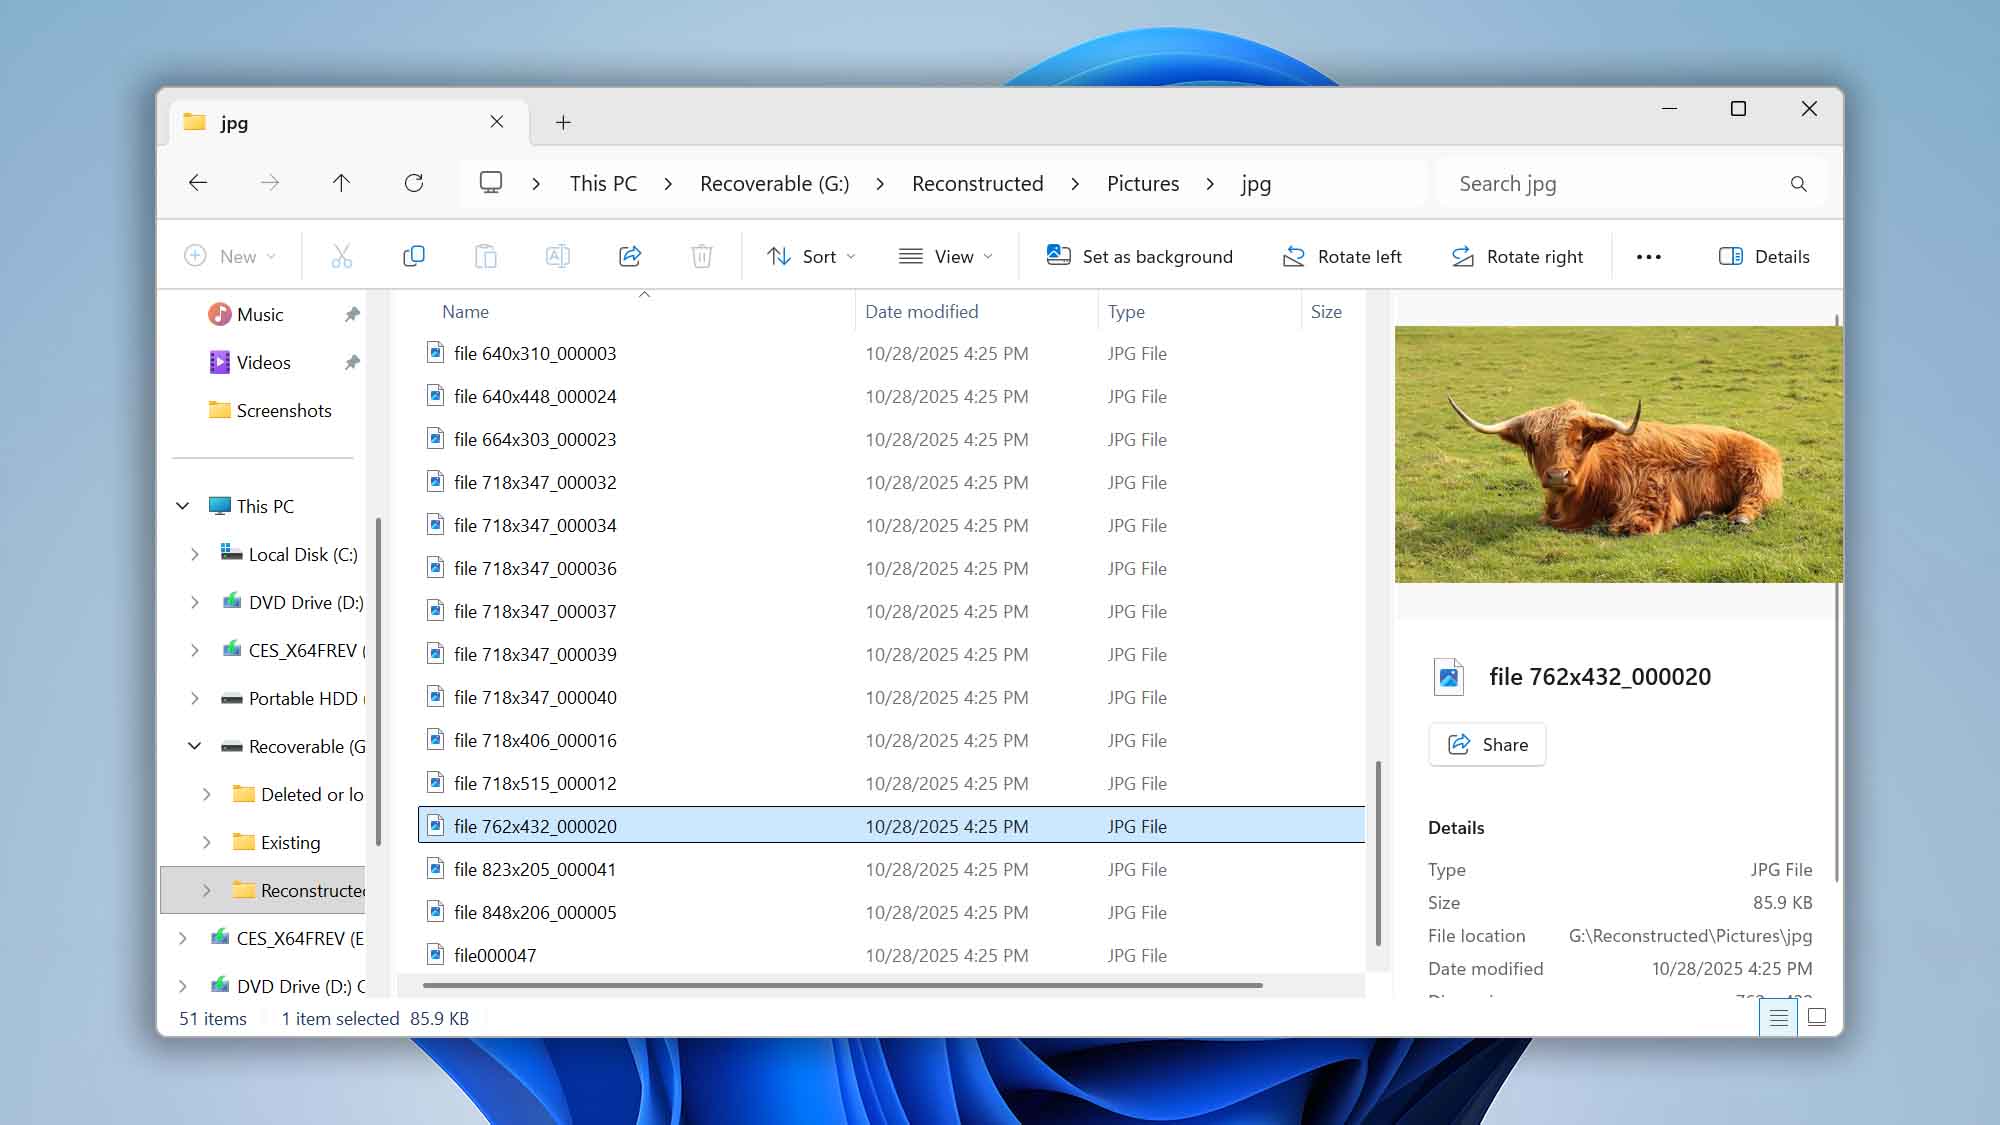
- Windows: The disk appears in File Explorer as a new drive letter under This PC.
- Browse and preview. Open the mounted disk to sort, preview, and open files with their native applications.
- Choose a safe destination and save (recover). Drag the files or folders you want from the mounted disk to a different drive or partition with enough free space.
⚠️ Important: Never save recovered data back to the same drive you’re recovering from. Writing to that drive can overwrite still-recoverable data and reduce your chances of a successful recovery.
- Verify your files. Open the copied files in their new location to confirm they transferred and open correctly.
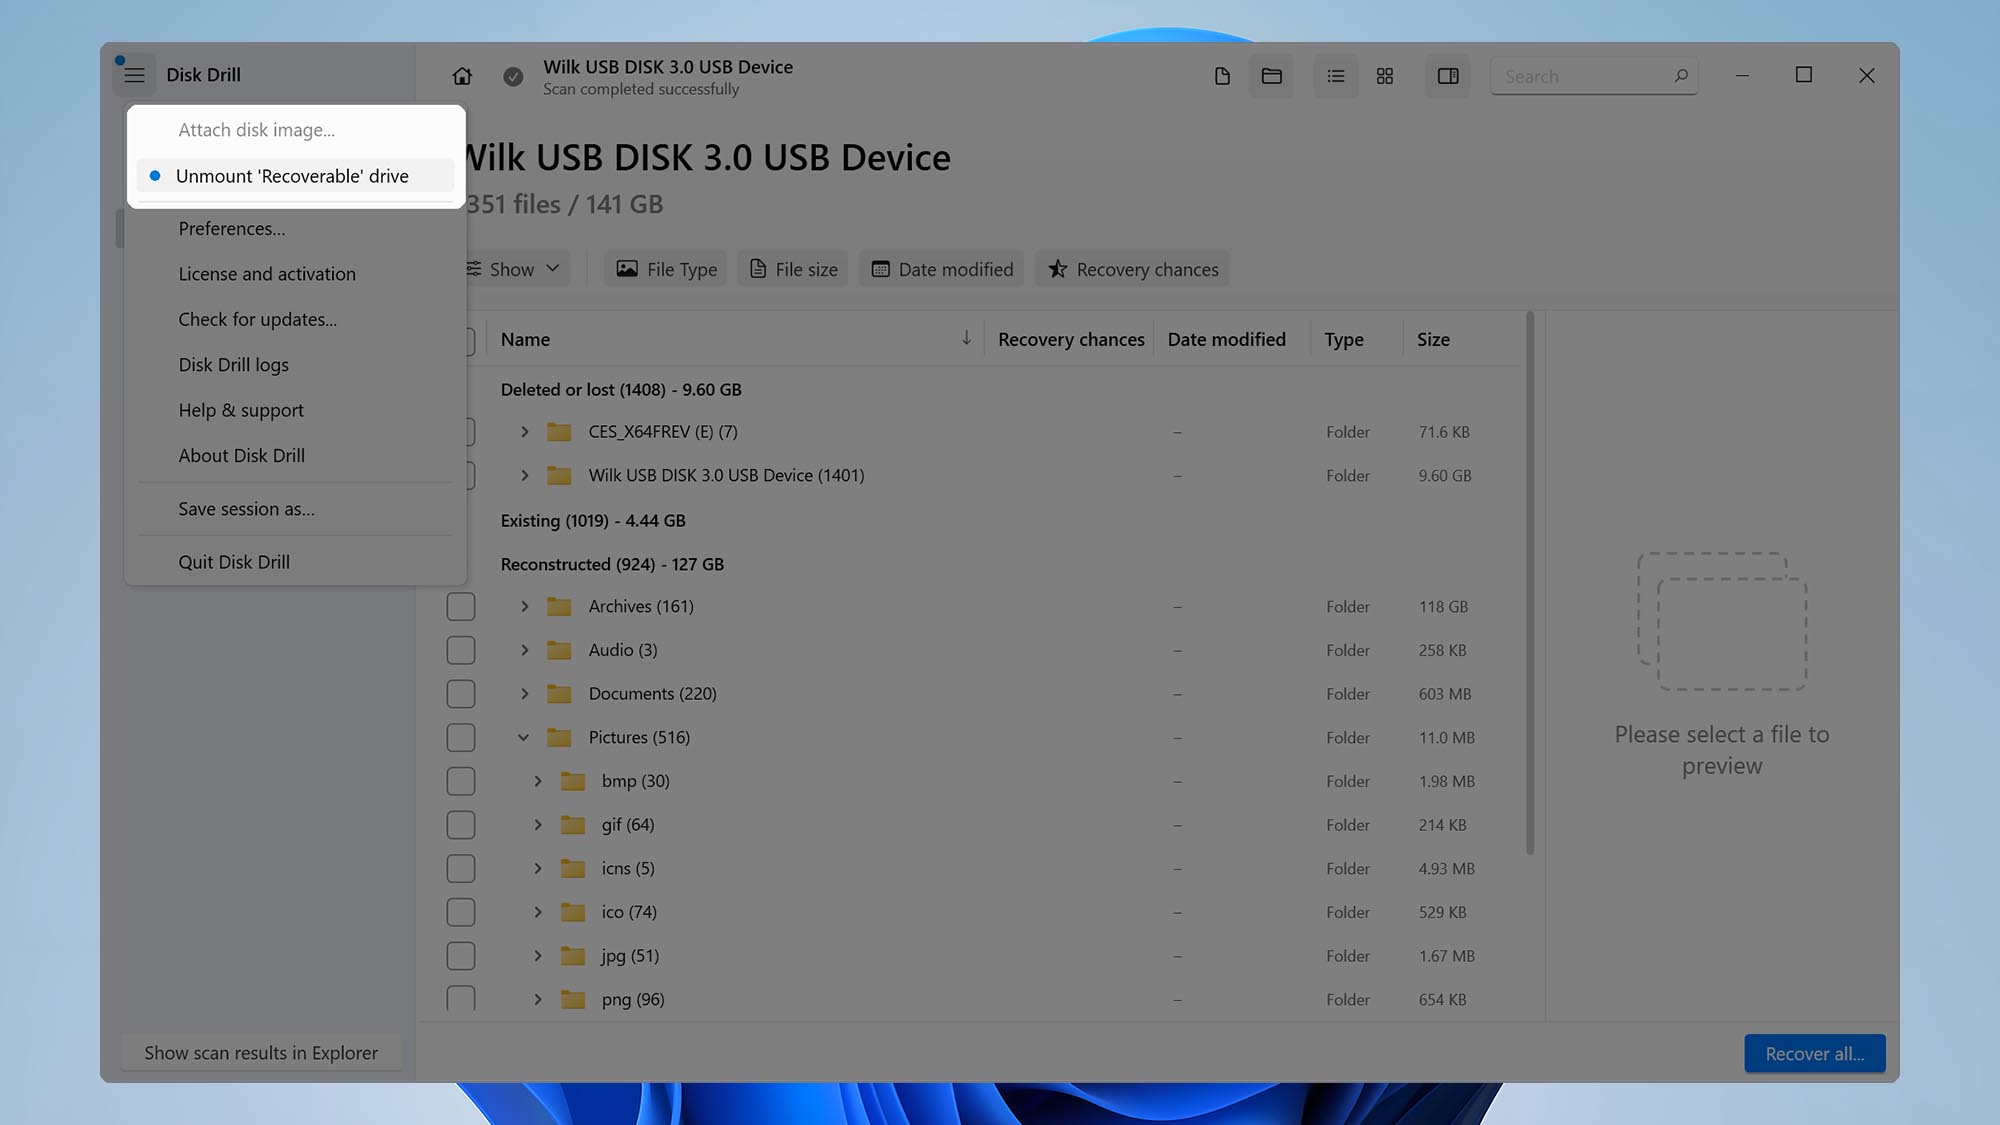
- Eject/unmount when you’re done. In Disk Drill (Windows version), eject the mounted virtual disk. It will also unmount automatically when you leave the scan results and return to the main screen. Mac users can also eject it in Finder.


File Recovery Option 2: Recover Selected Files Using the Disk Drill Interface
If you don’t want to mount the scan results as a disk, you can recover selected files directly from Disk Drill.
- Select the items to recover. Check the box next to each file or folder you want to retrieve.
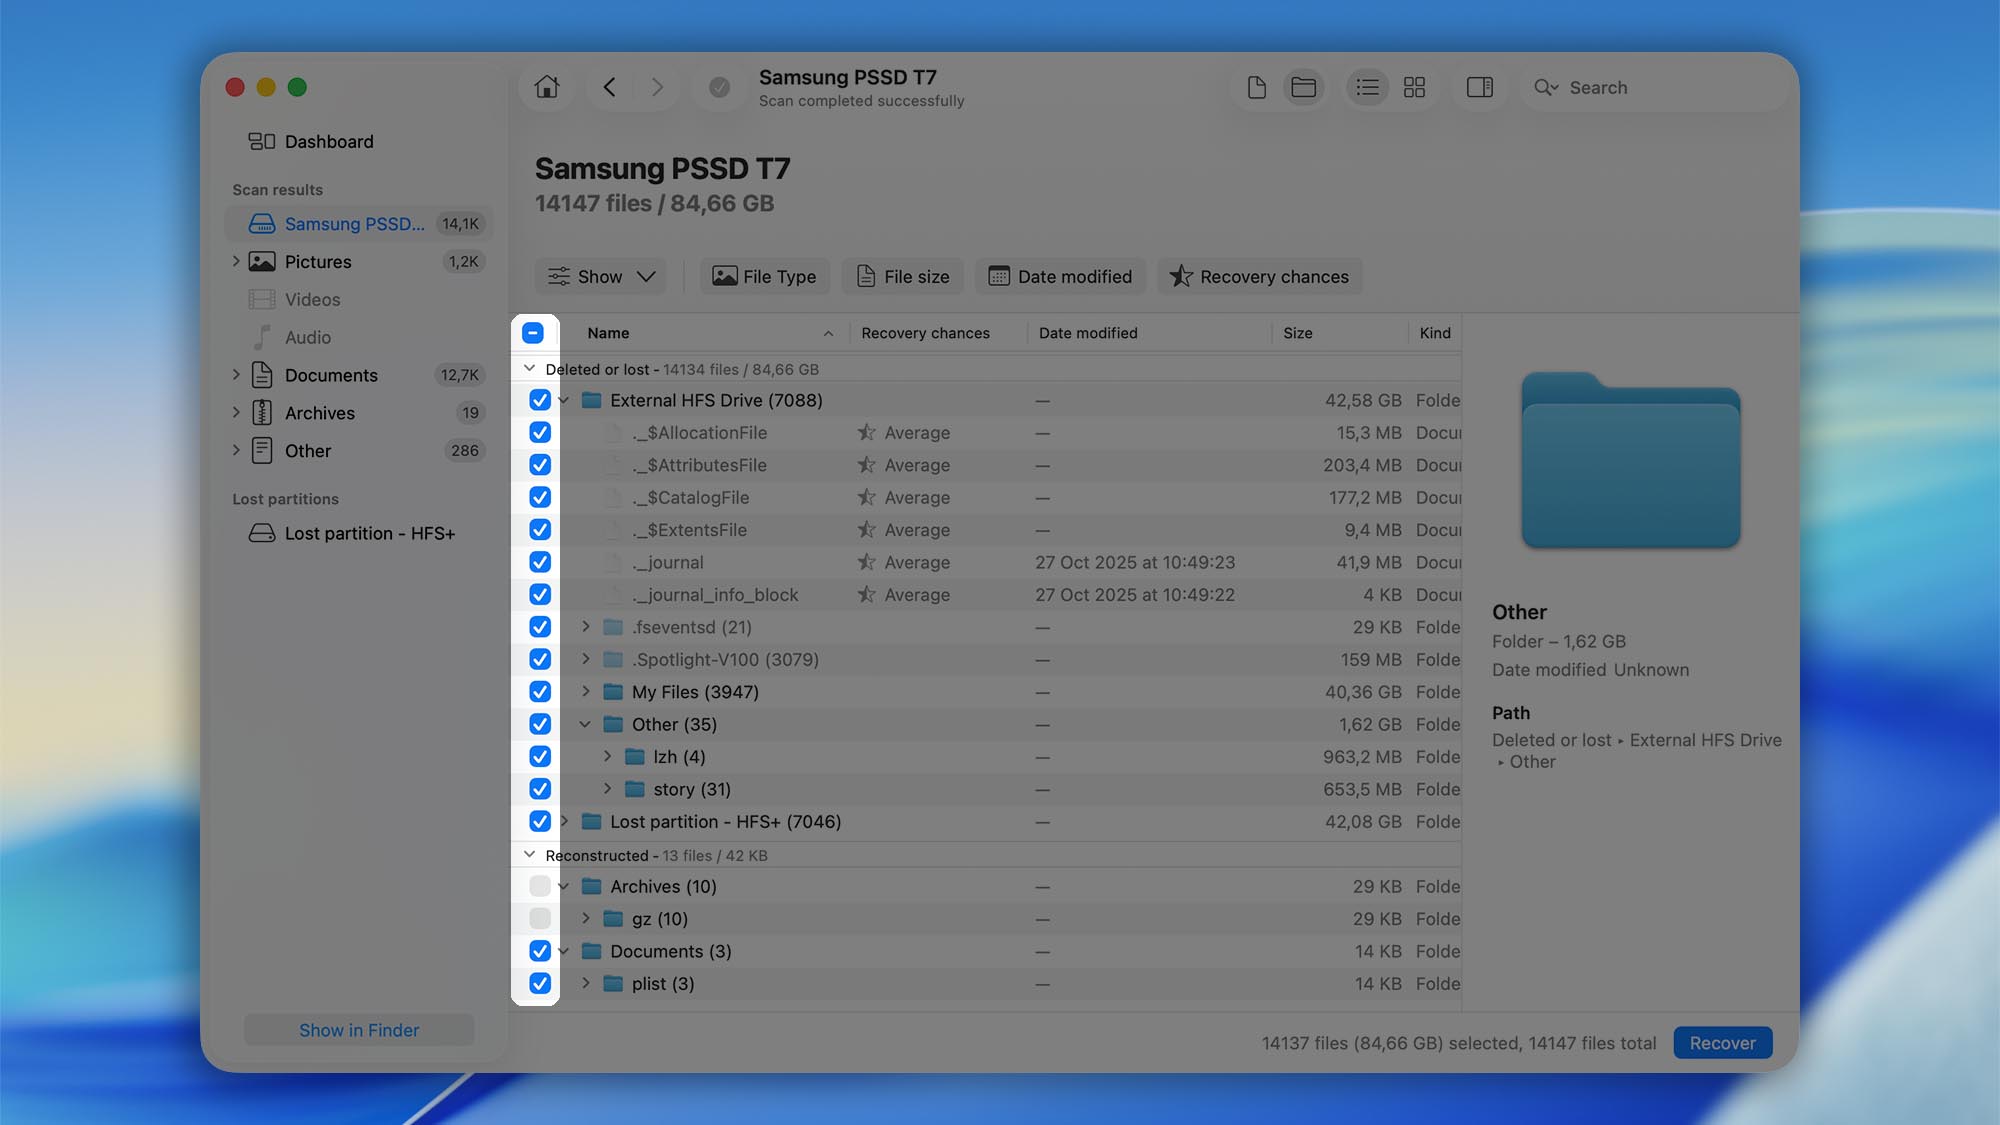
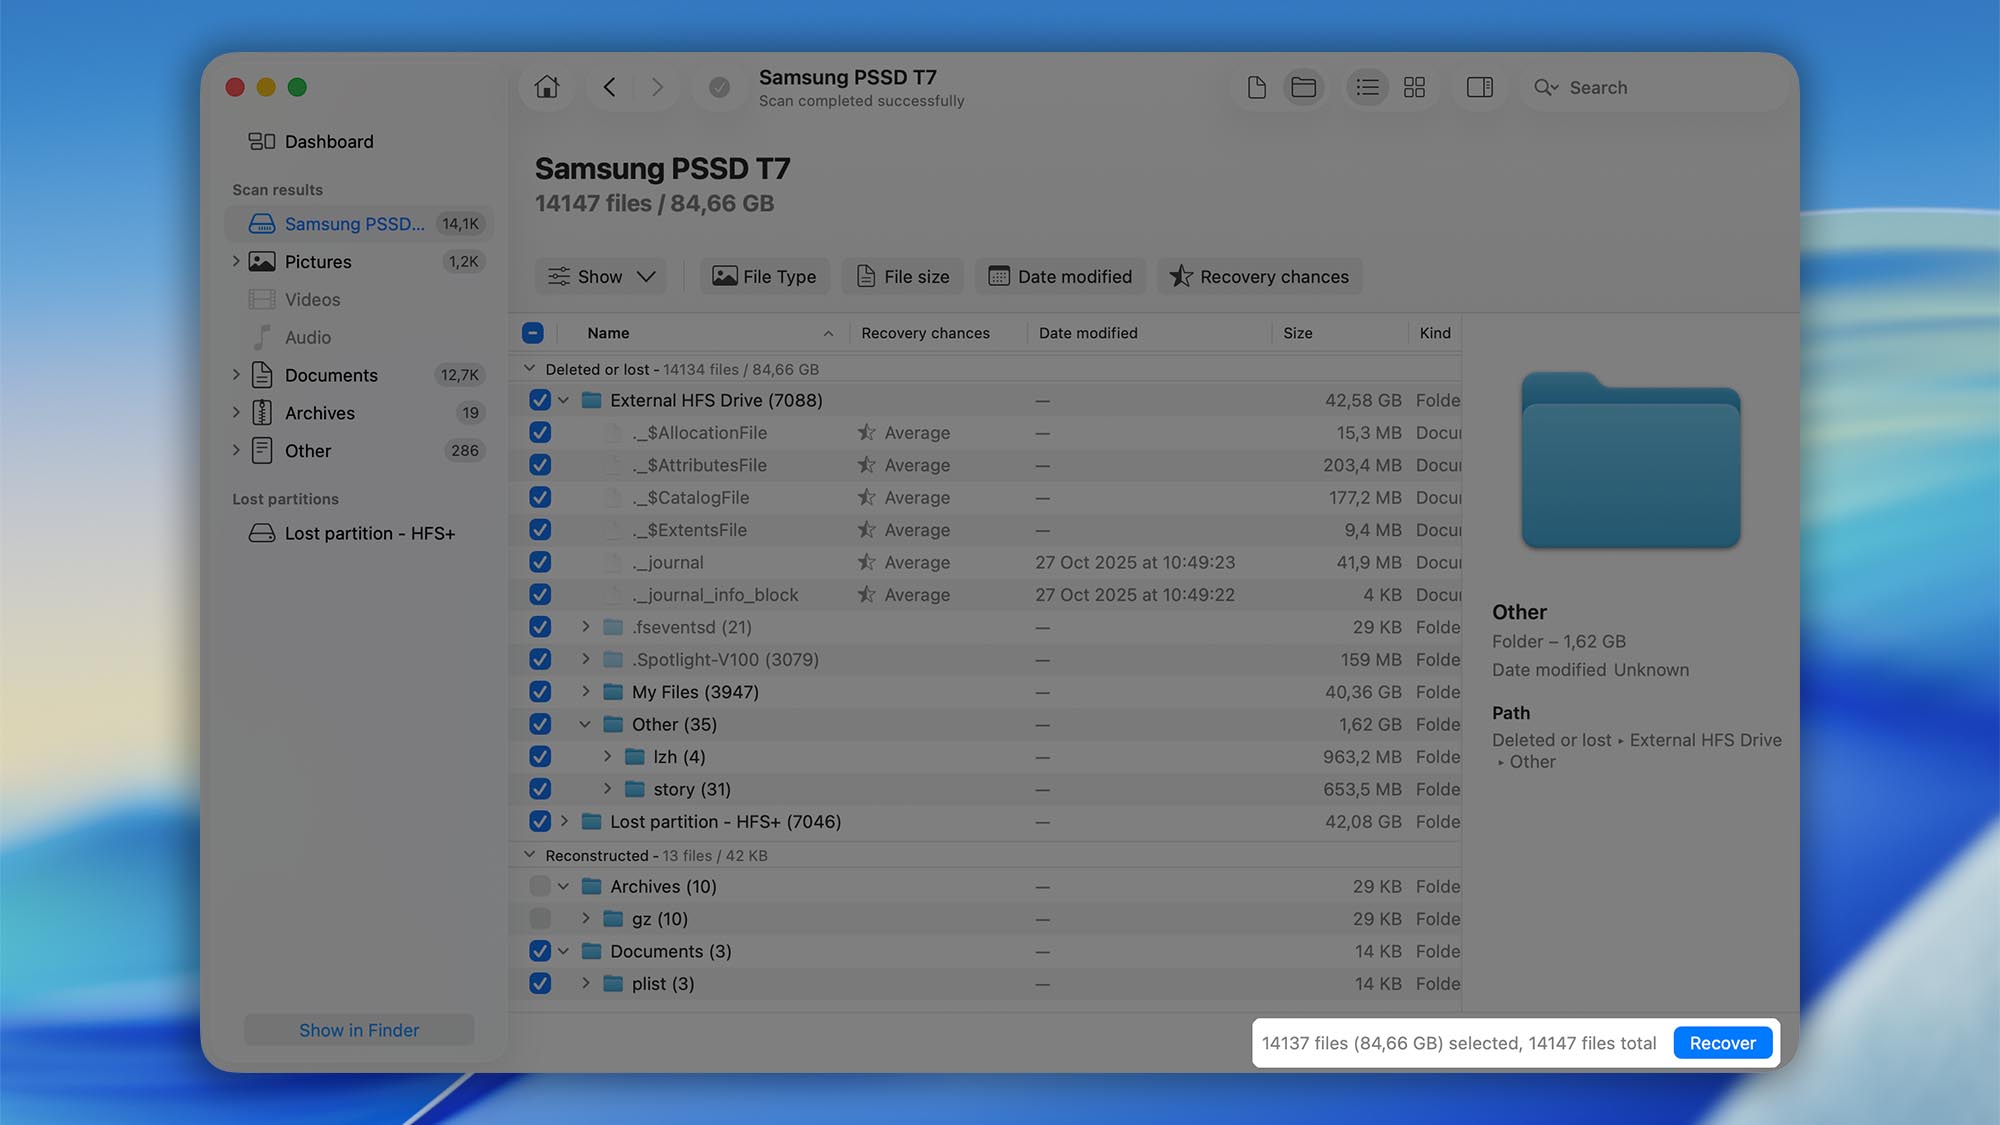
- Click Recover. Click Recover in the lower-right corner of the window.
- Choose a safe destination. Pick a different drive or partition with enough free space for the recovered files.
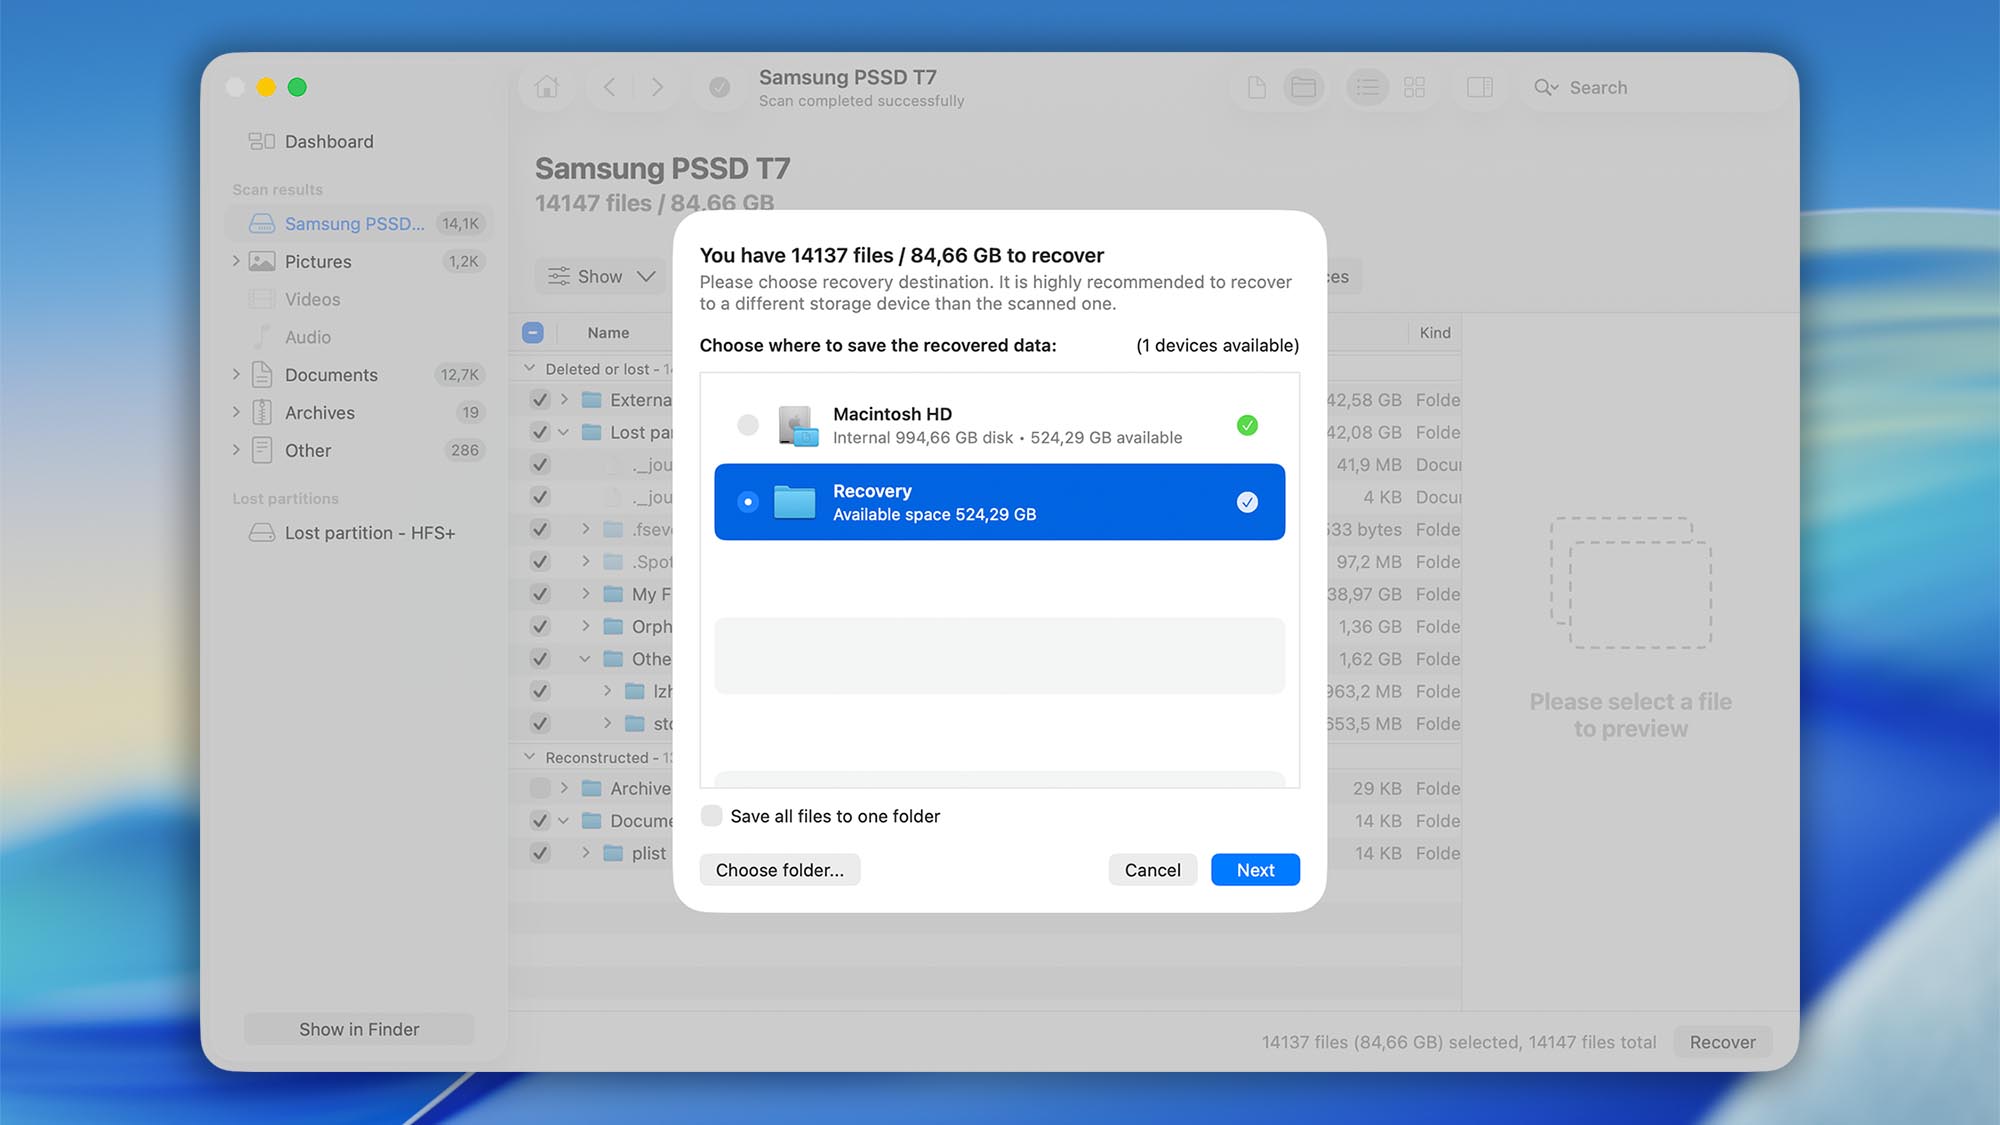 ⚠️ Important: Never save recovered data to the same drive you’re recovering from. Writing to that drive can overwrite remaining deleted data and reduce your chances of a successful recovery.
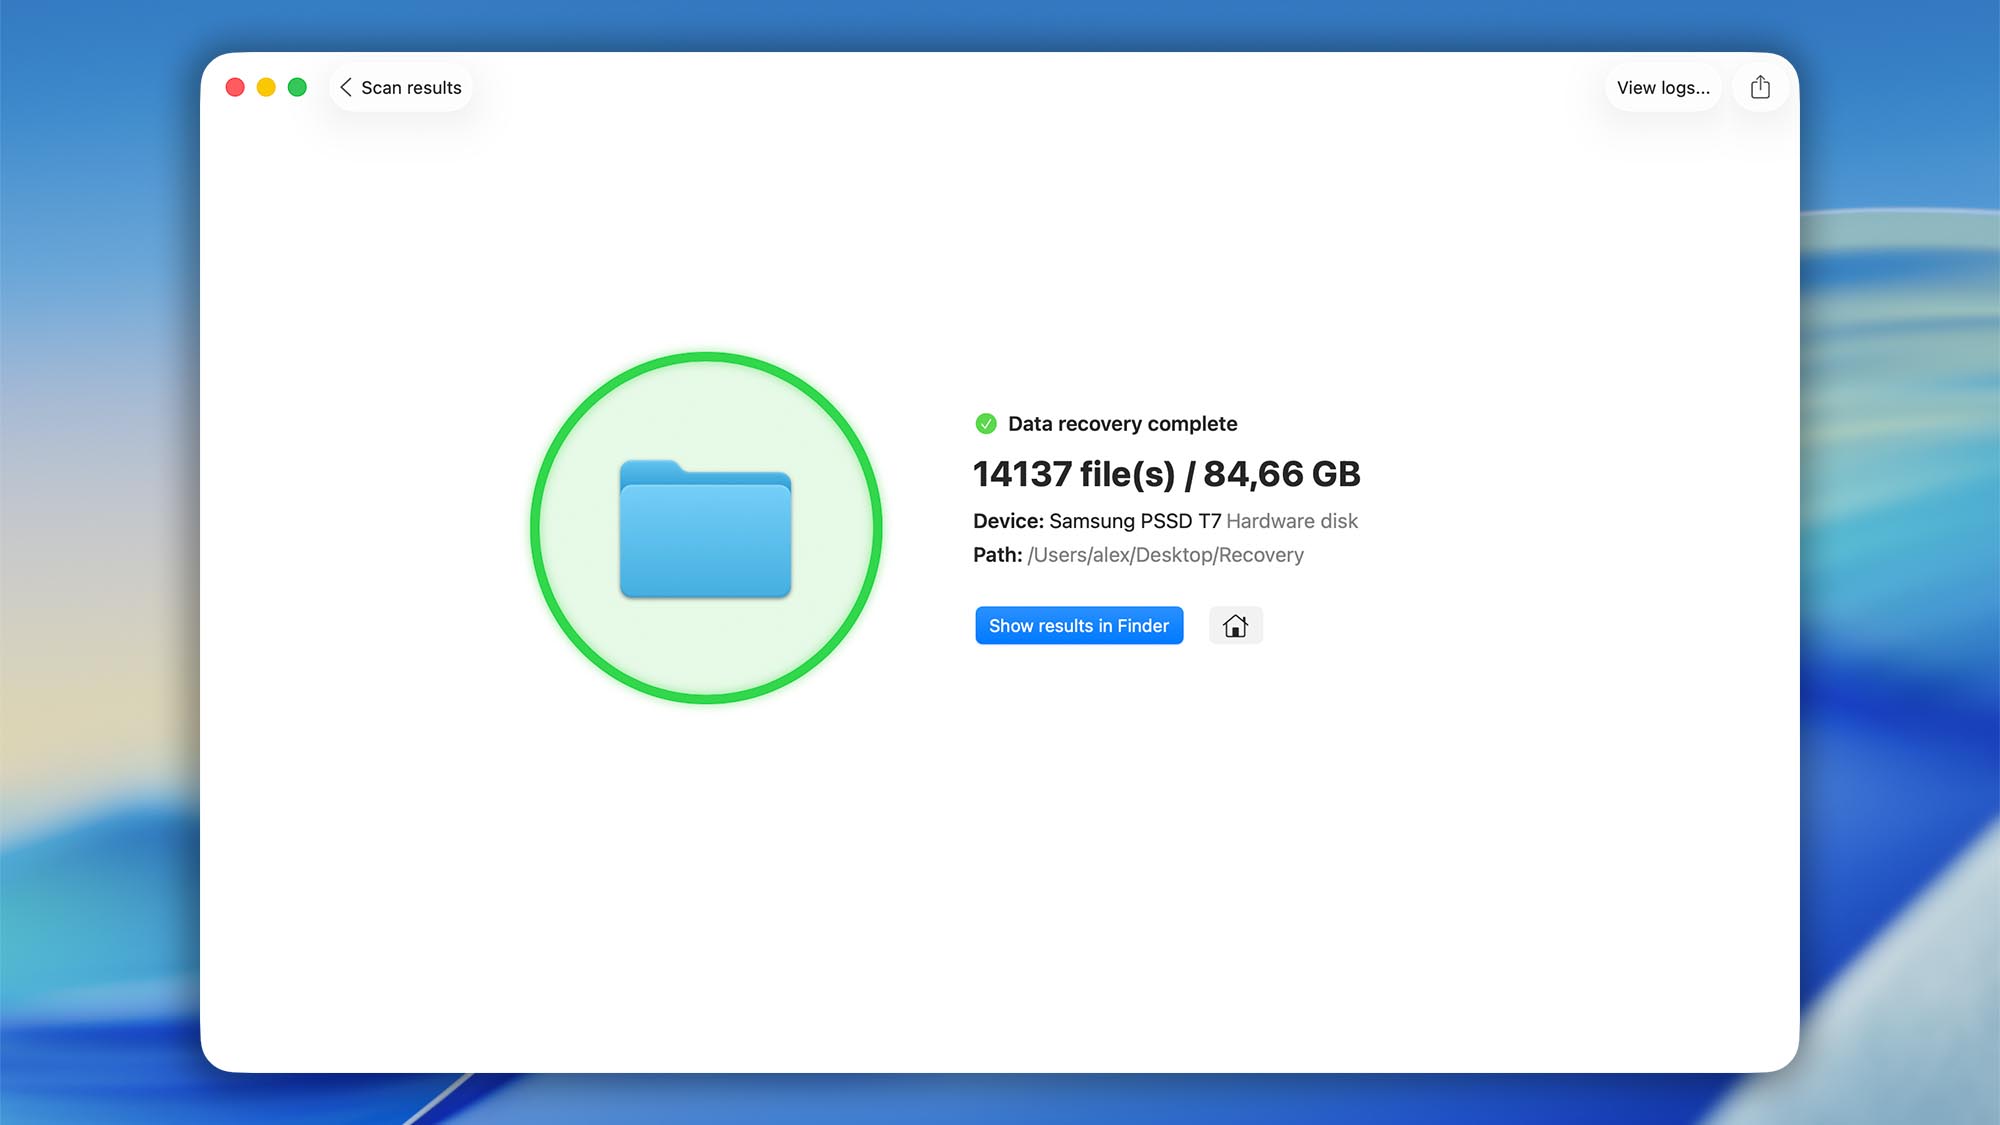
 - Finish and verify. Disk Drill will show Finished when the process completes. Open your destination folder in Finder (macOS) or File Explorer (Windows) and launch the files with their native apps to confirm they work.


.updated: October 30, 2025 author: