If you’ve ever experienced data loss from a Network-Attached Storage (NAS) device, you know just how stressful it can be. Whether it’s accidental deletion, hardware failure, or file corruption, losing data from a NAS can mean downtime and significant headaches. Luckily, recovering data from NAS devices is possible—and one of the most powerful tools you can use is Disk Drill.
This guide explains exactly what NAS is, the technical details about NAS storage, and how Disk Drill can help you recover your lost NAS data effectively.
What Is NAS and How Does It Work?
Network-Attached Storage (NAS) is essentially a dedicated file storage device that connects to your network. Unlike traditional external hard drives that connect directly to your computer, NAS systems connect through Ethernet or Wi-Fi, making them accessible to multiple users simultaneously. Businesses and home users commonly use NAS for:
- Centralized file sharing
- Data backups
- Media streaming
- Cloud storage alternatives
NAS devices often run their own operating systems, typically based on Linux variants, and usually store data in a RAID (Redundant Array of Independent Disks) configuration, including RAID 0, RAID 1, RAID 5, RAID 6, or RAID 10, to improve redundancy, performance, and reliability.
Can You Recover Data from NAS Using Disk Drill?
Yes, it’s possible to recover data from NAS using Disk Drill, provided certain conditions are met. Disk Drill is a robust data recovery software capable of scanning and restoring deleted or lost files from many storage systems, including NAS devices. Here’s how it works:
Step 1. Enable SSH on NAS for Data Recovery with Disk Drill
Before you can recover data from your NAS using Disk Drill, you may need to enable SSH (Secure Shell) on the device.
SSH is a network protocol that allows you to securely access and control a device over an encrypted connection. In the context of NAS devices, SSH provides remote command-line access to the NAS operating system. This is especially useful when performing data recovery tasks because it allows you to:
- Access the NAS’s internal file system.
- Execute commands to check disk health or stop running services that might interfere with recovery.
- Verify RAID configuration or collect technical details about connected drives.
Every NAS brand places the SSH enable option in different sections of its control panel. Here are the common locations for the most popular vendors:
- Log in to your Asustor NAS admin panel using your default web browser.
- Navigate to Services → Terminal.
- Check Enable SSH service and Enable SFTP service to allow secure access and file transfer.
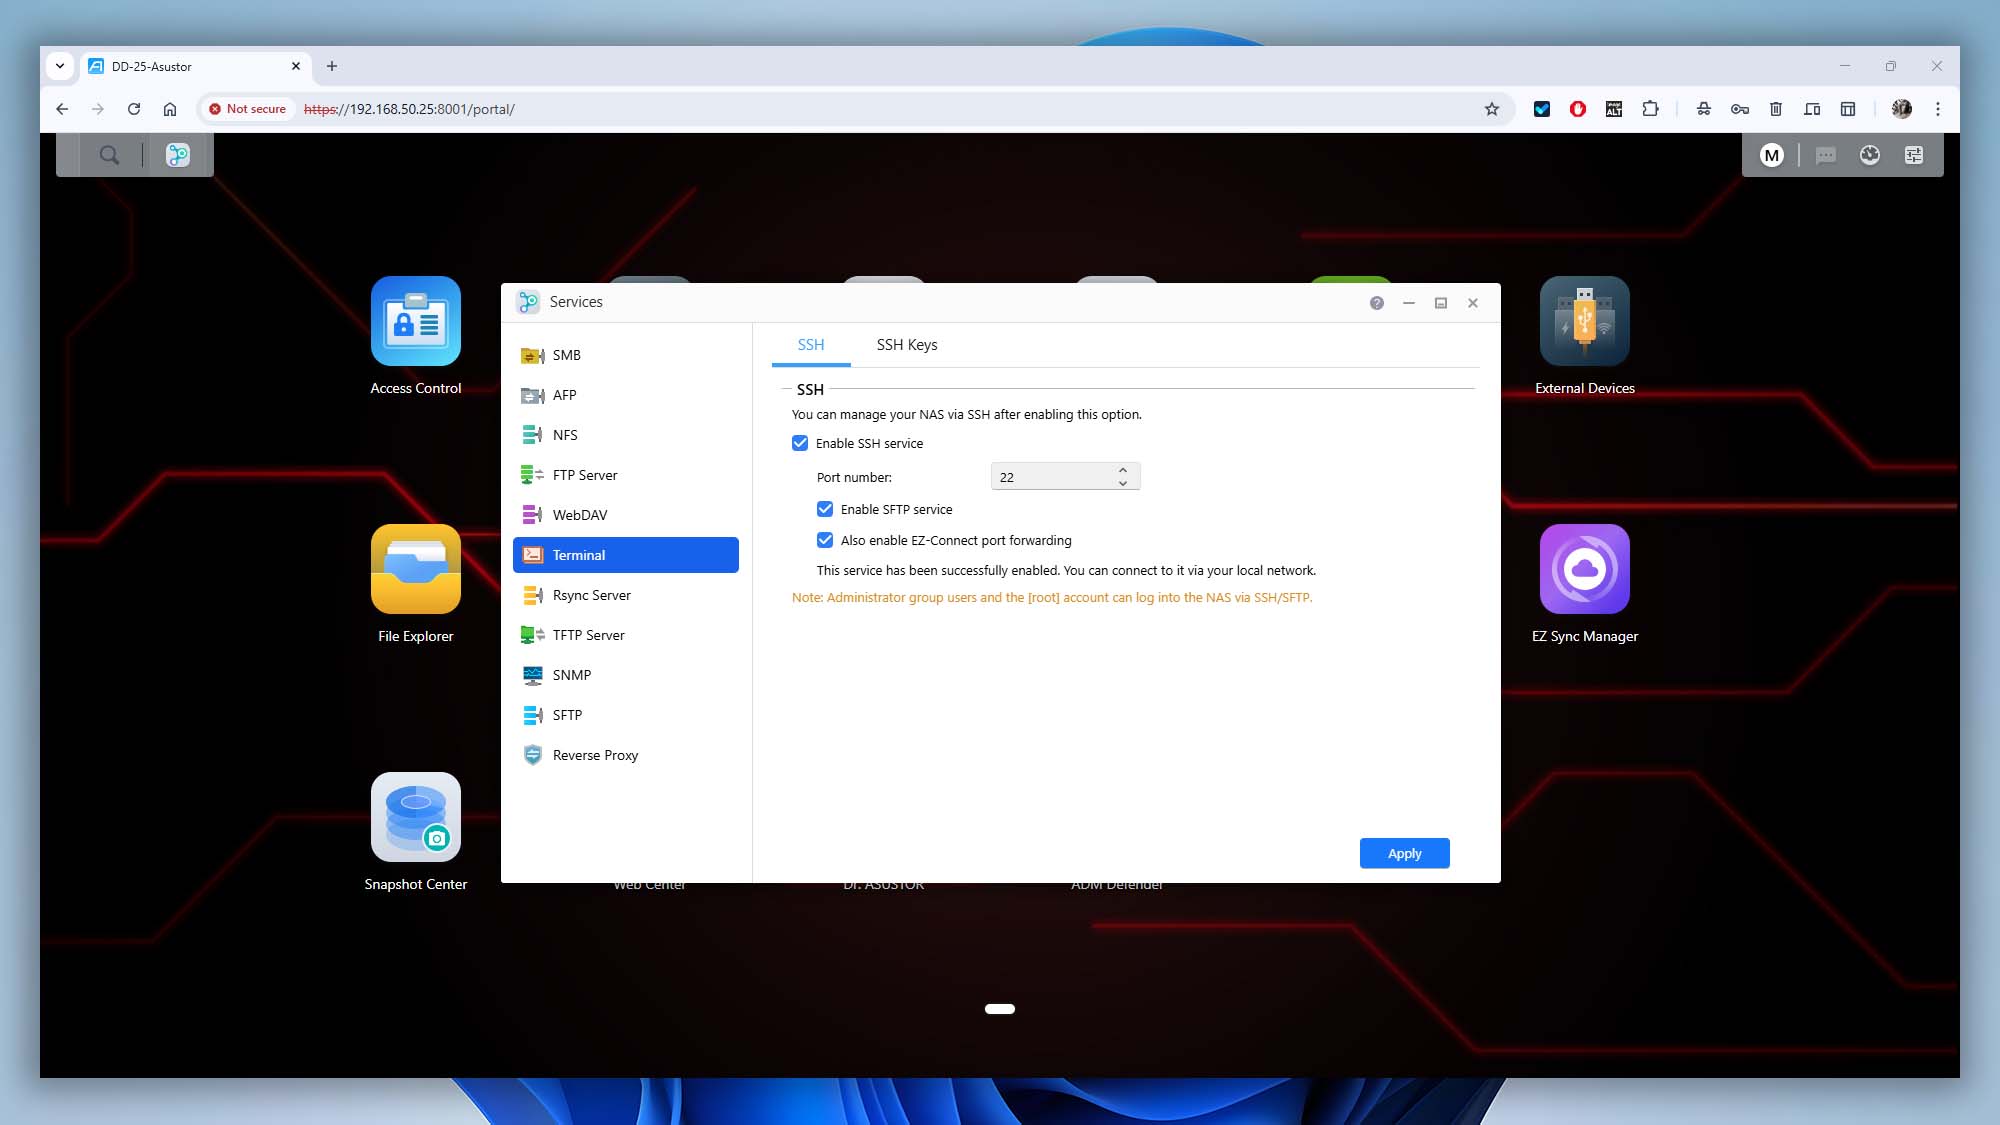
- Click Apply to save your changes.
Follow the instructions provided in the online guide to install Debian and enable SSH on your Buffalo NAS: Install Debian on Buffalo NAS (Community Guide).
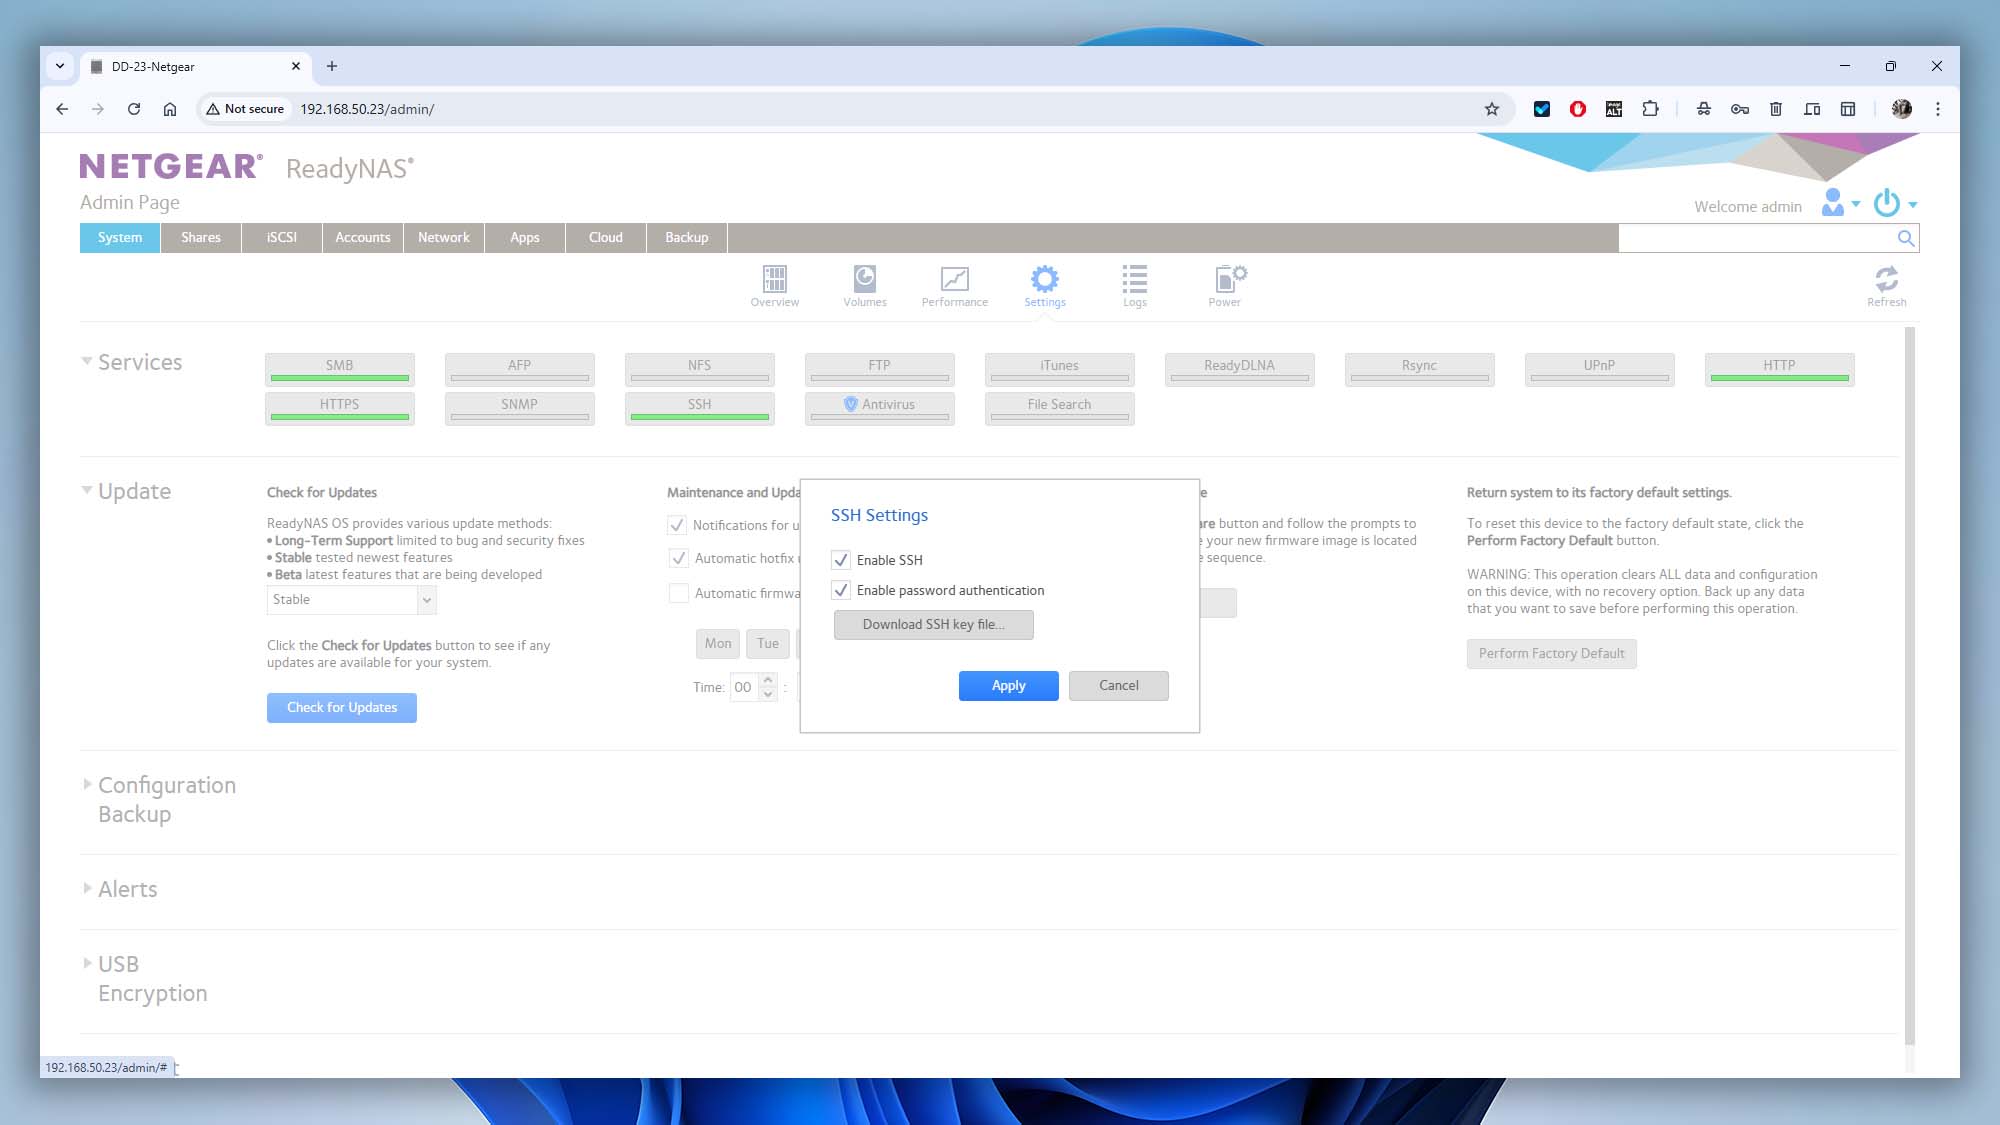
- Log in to your Netgear NAS admin panel using your default web browser.
- Navigate to Settings → Services.
- Toggle the SSH button to turn it ON.
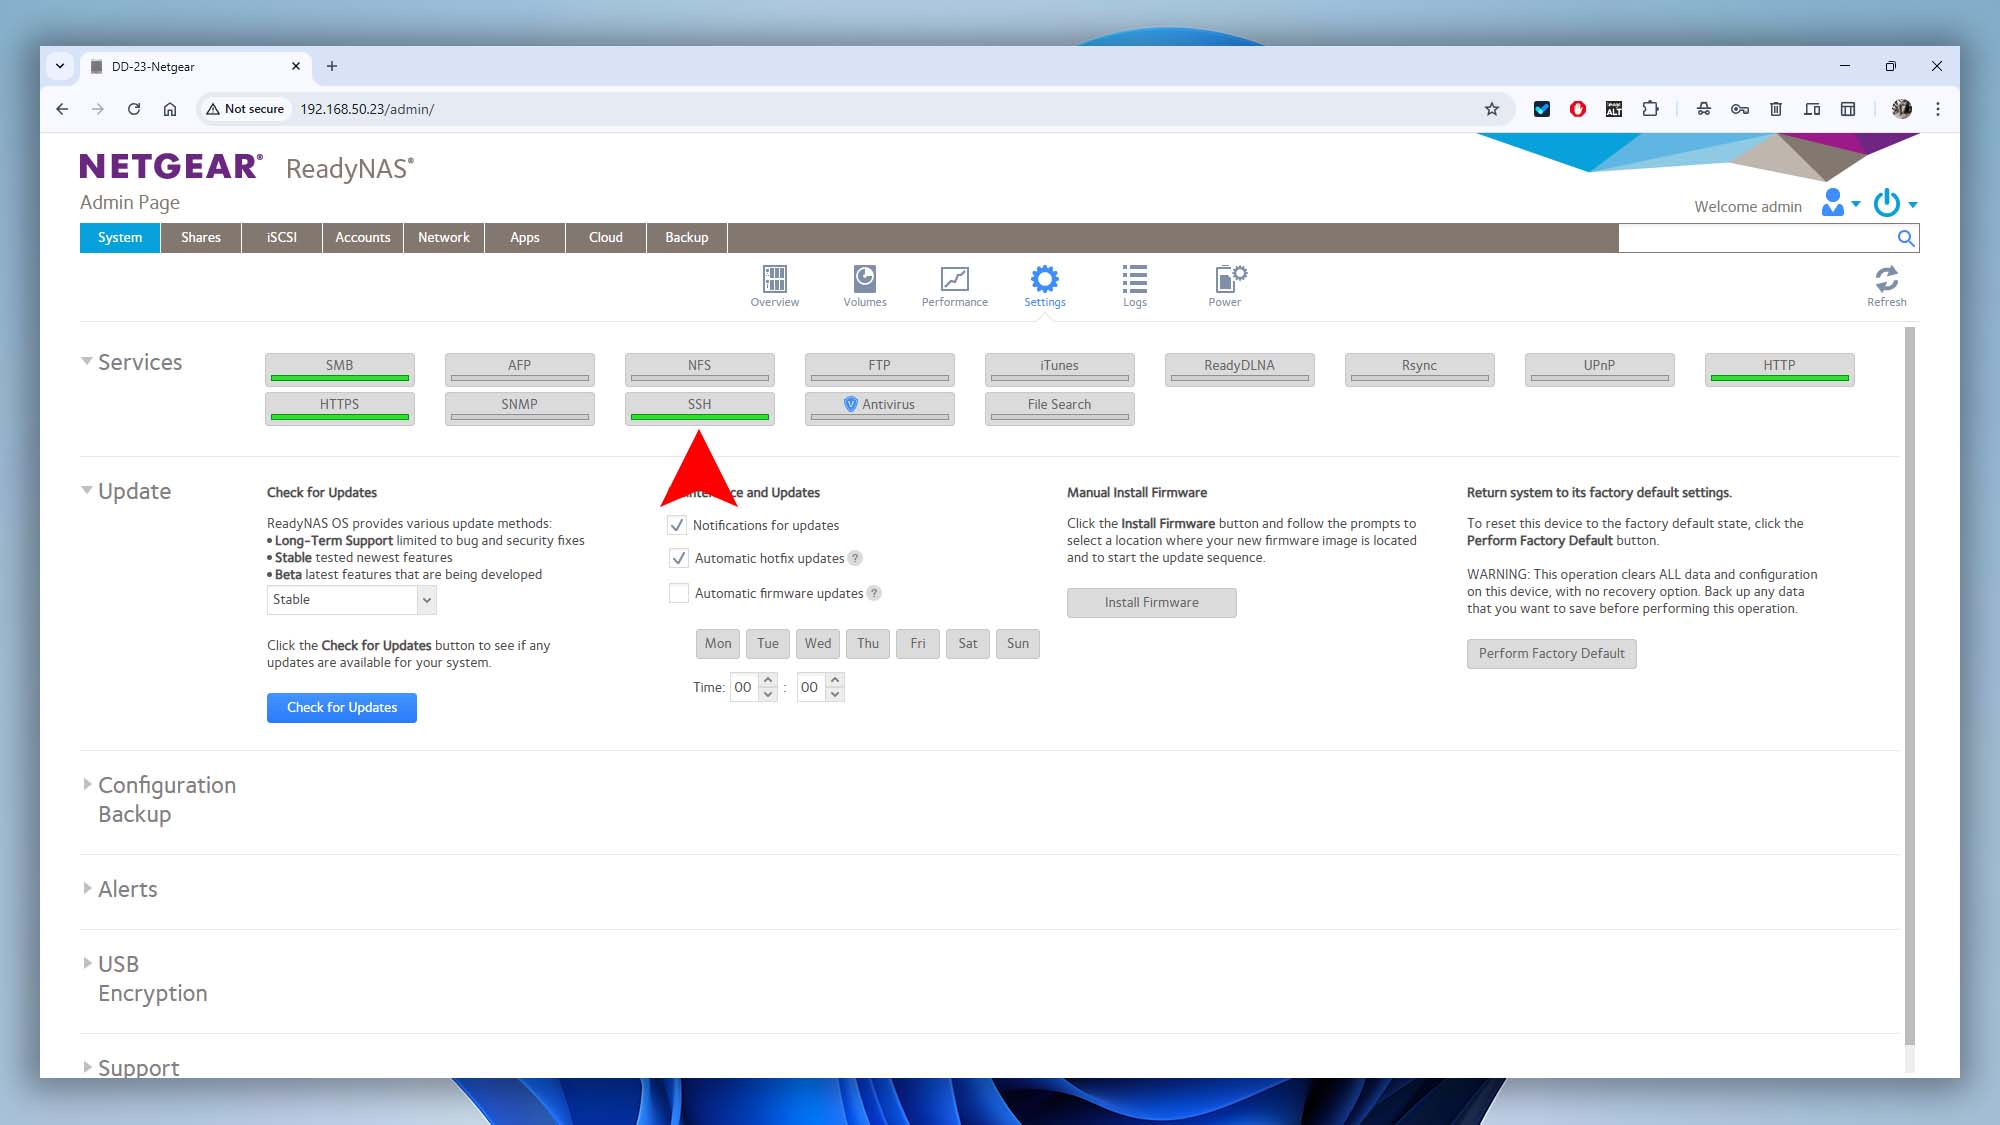
- Check Enable SSH and Enable Password Authentication to allow secure access.
- Click Apply to save the changes.
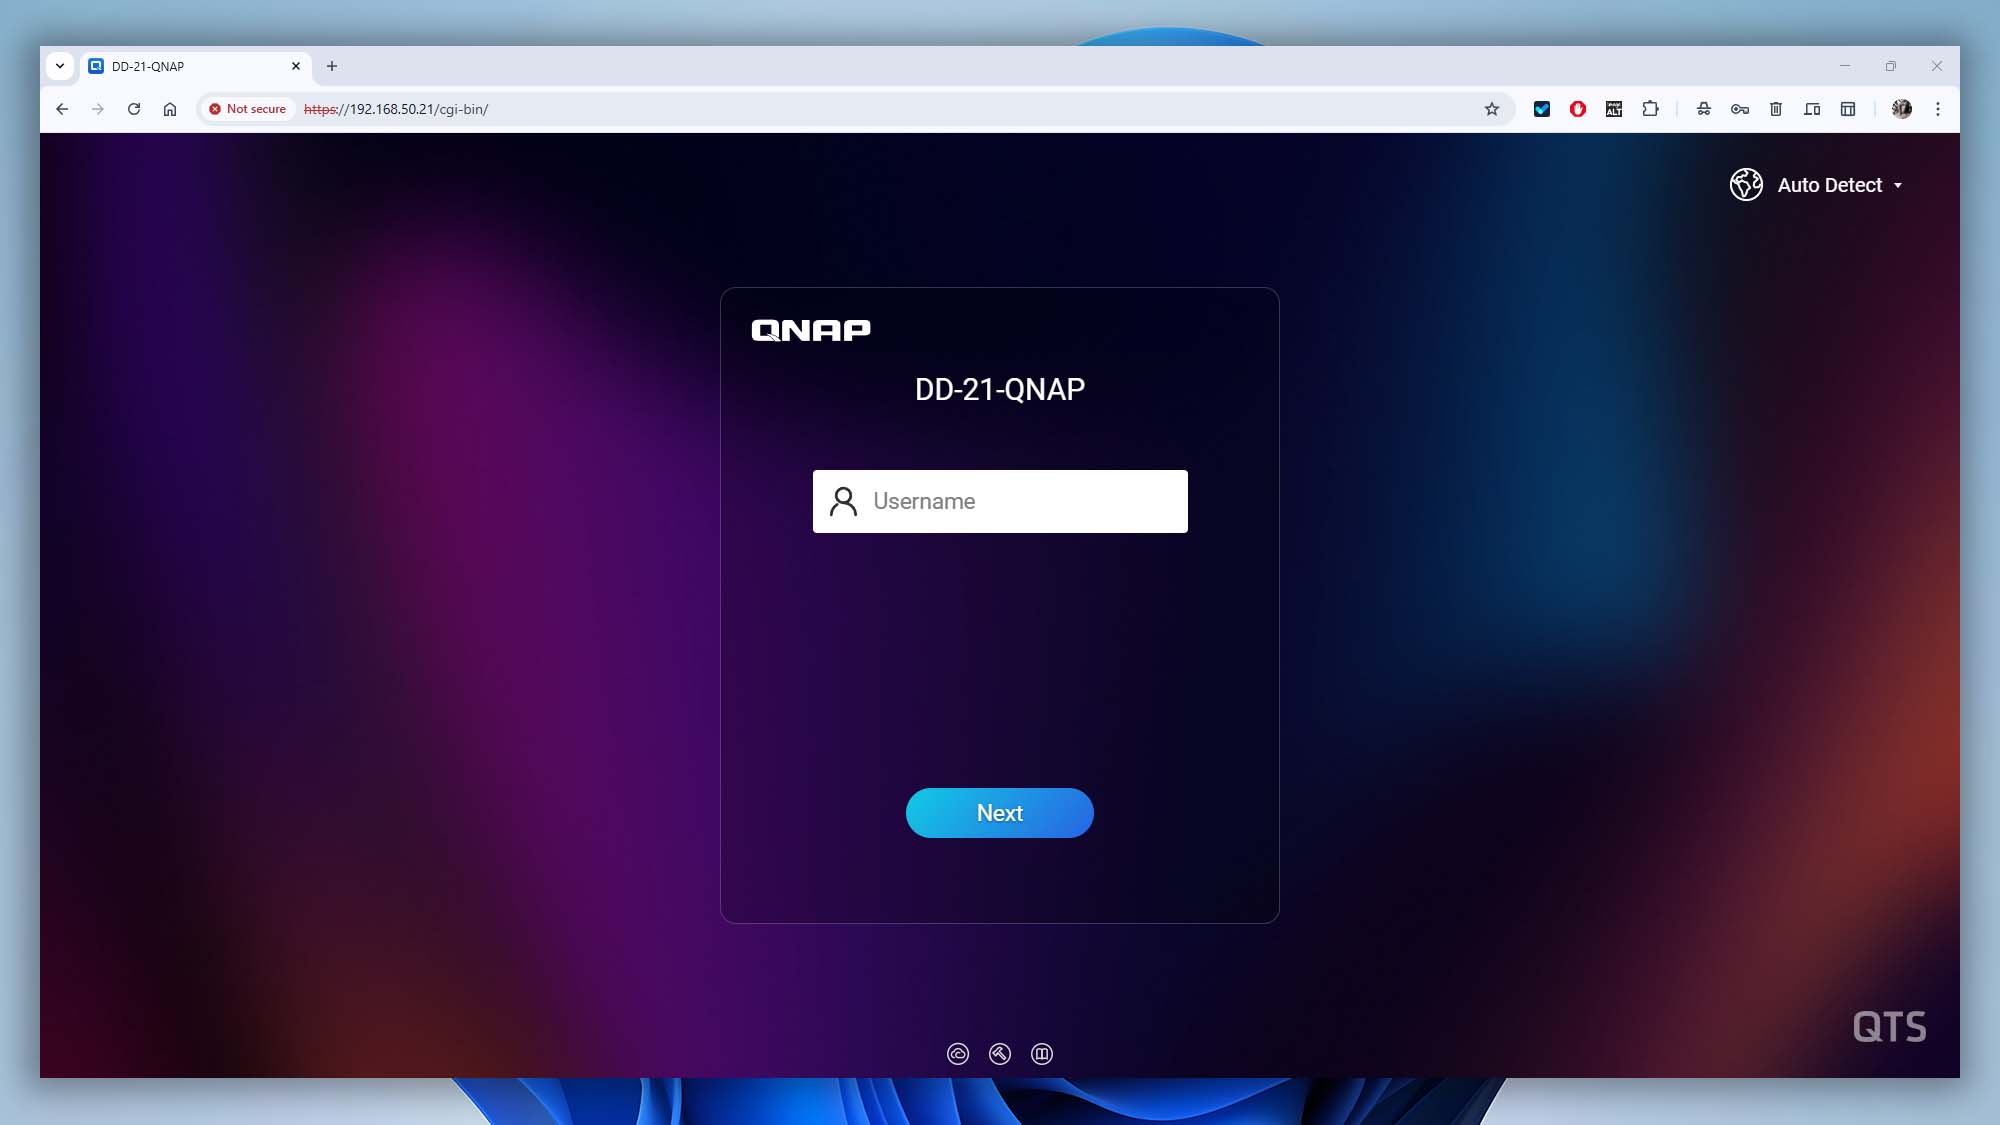
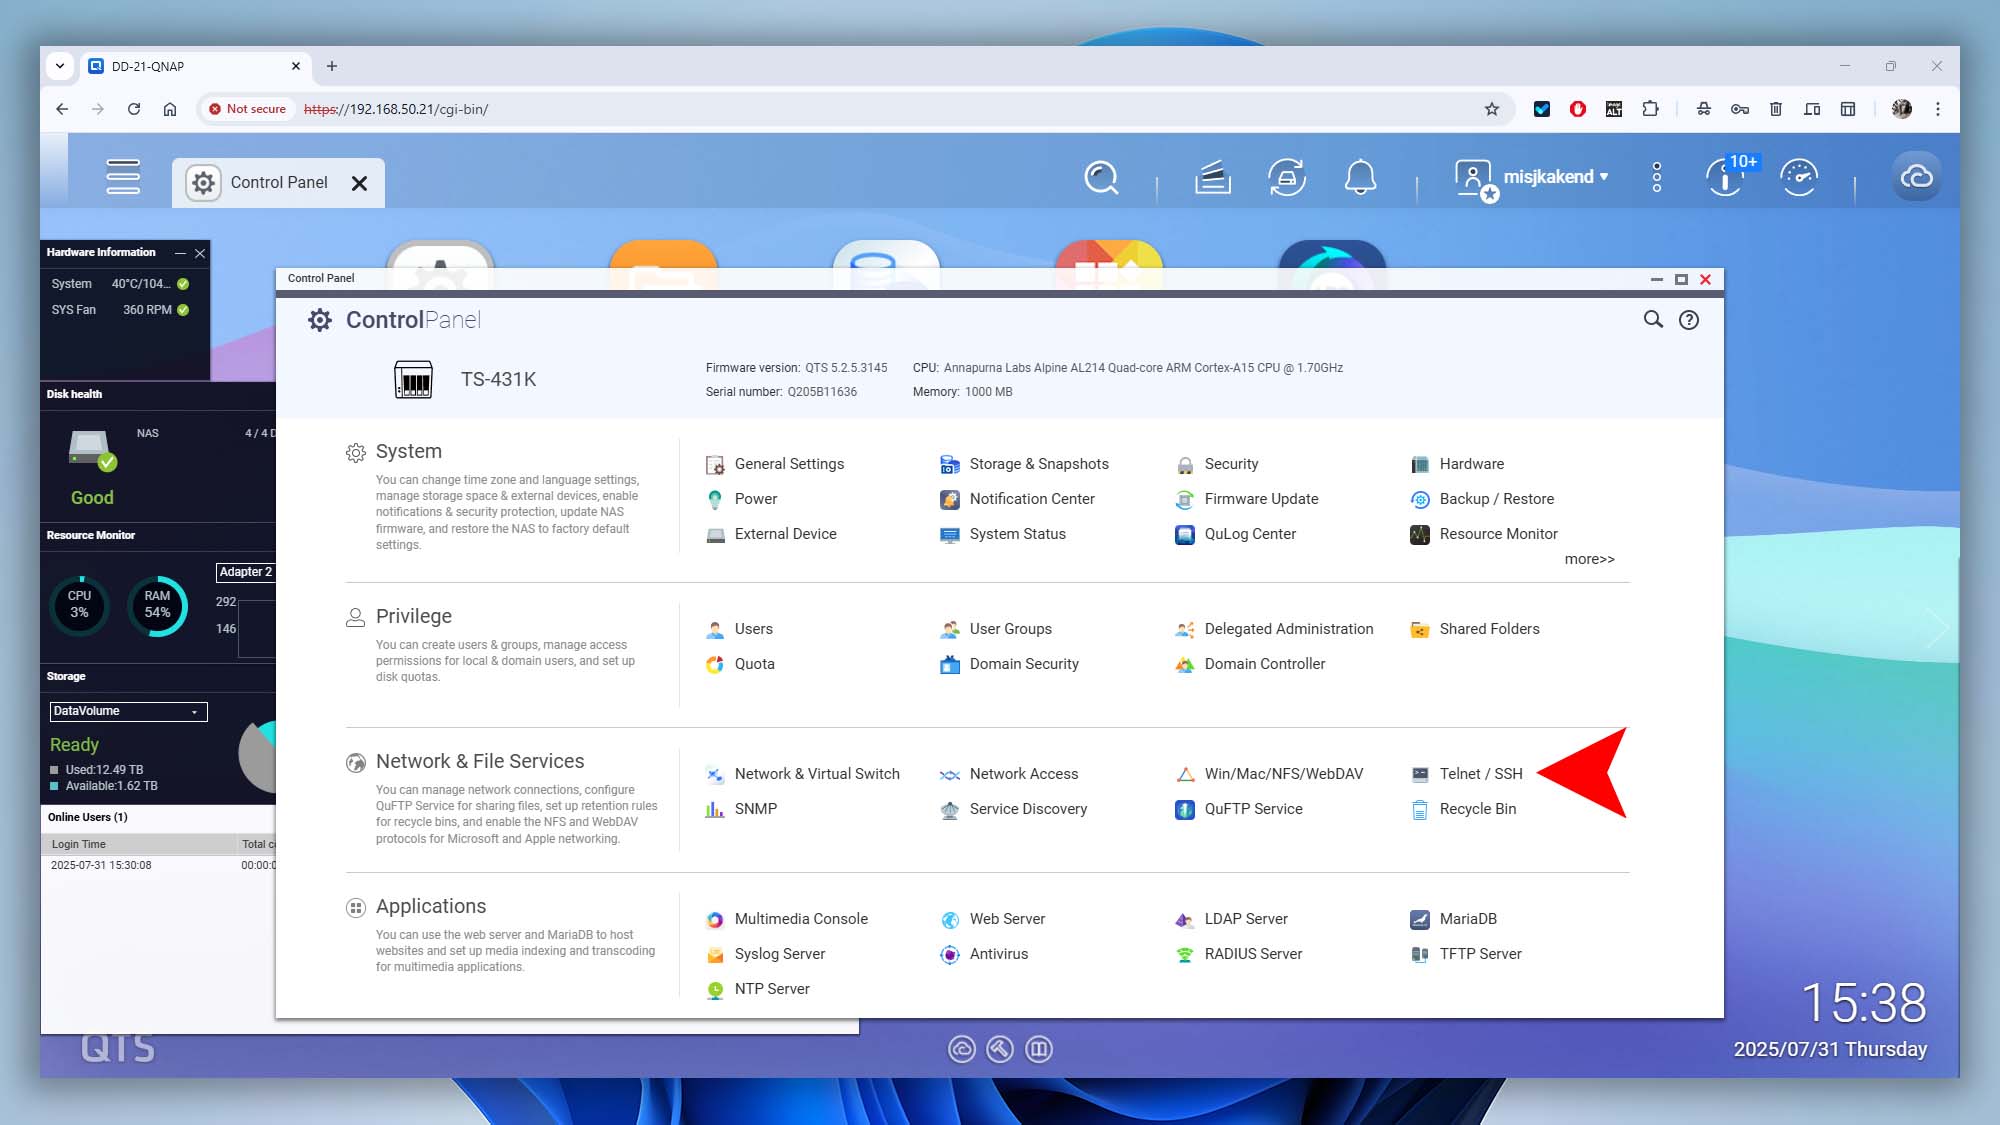
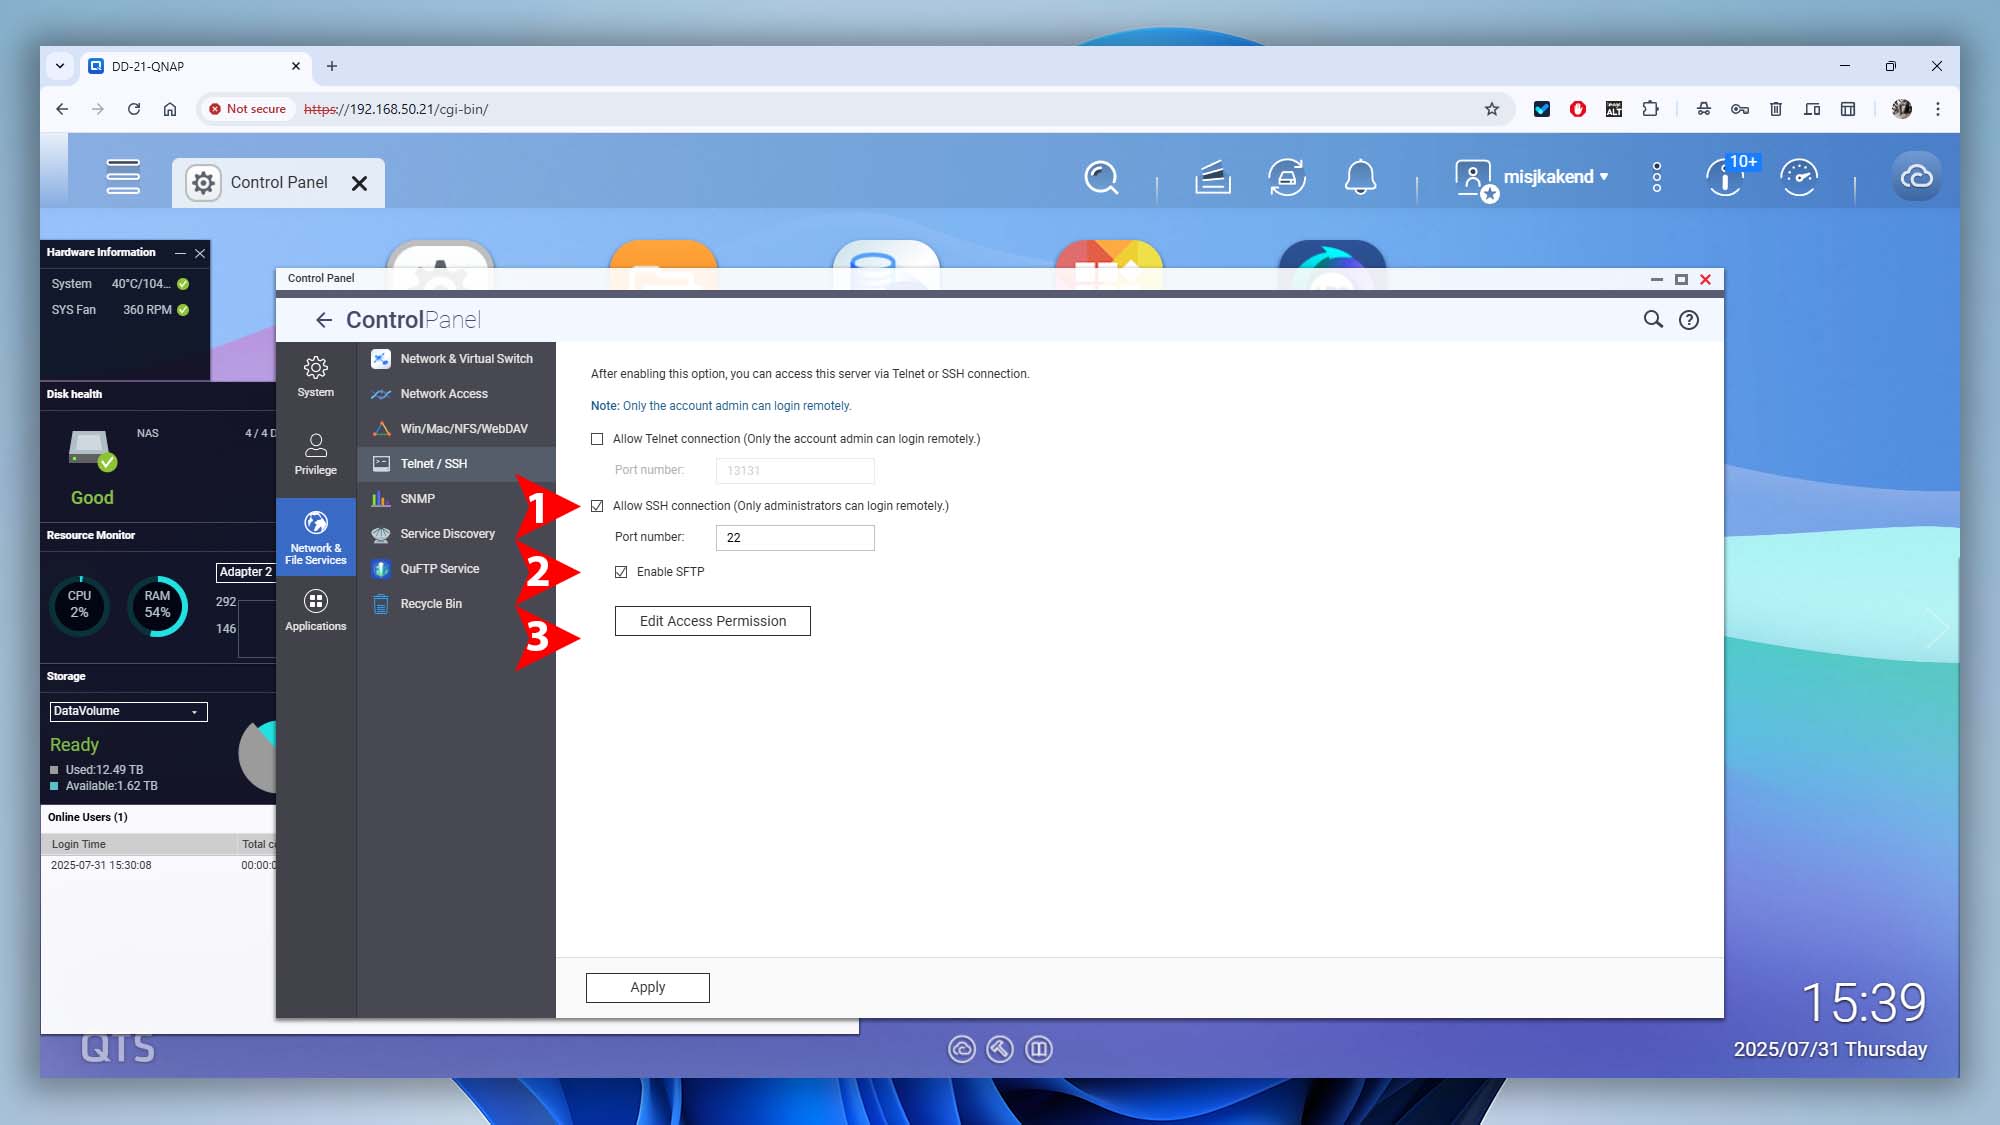
- Log in to your QNAP admin panel using your default web browser.
- Go to Control Panel → Telnet / SSH.
- Check Allow SSH connection (Only administrators can login remotely.) to enable SSH access.
- Enable SFTP to allow secure file transfers over the same SSH connection.
- Click Edit Access Permissions and select the users who are allowed to connect via SSH.
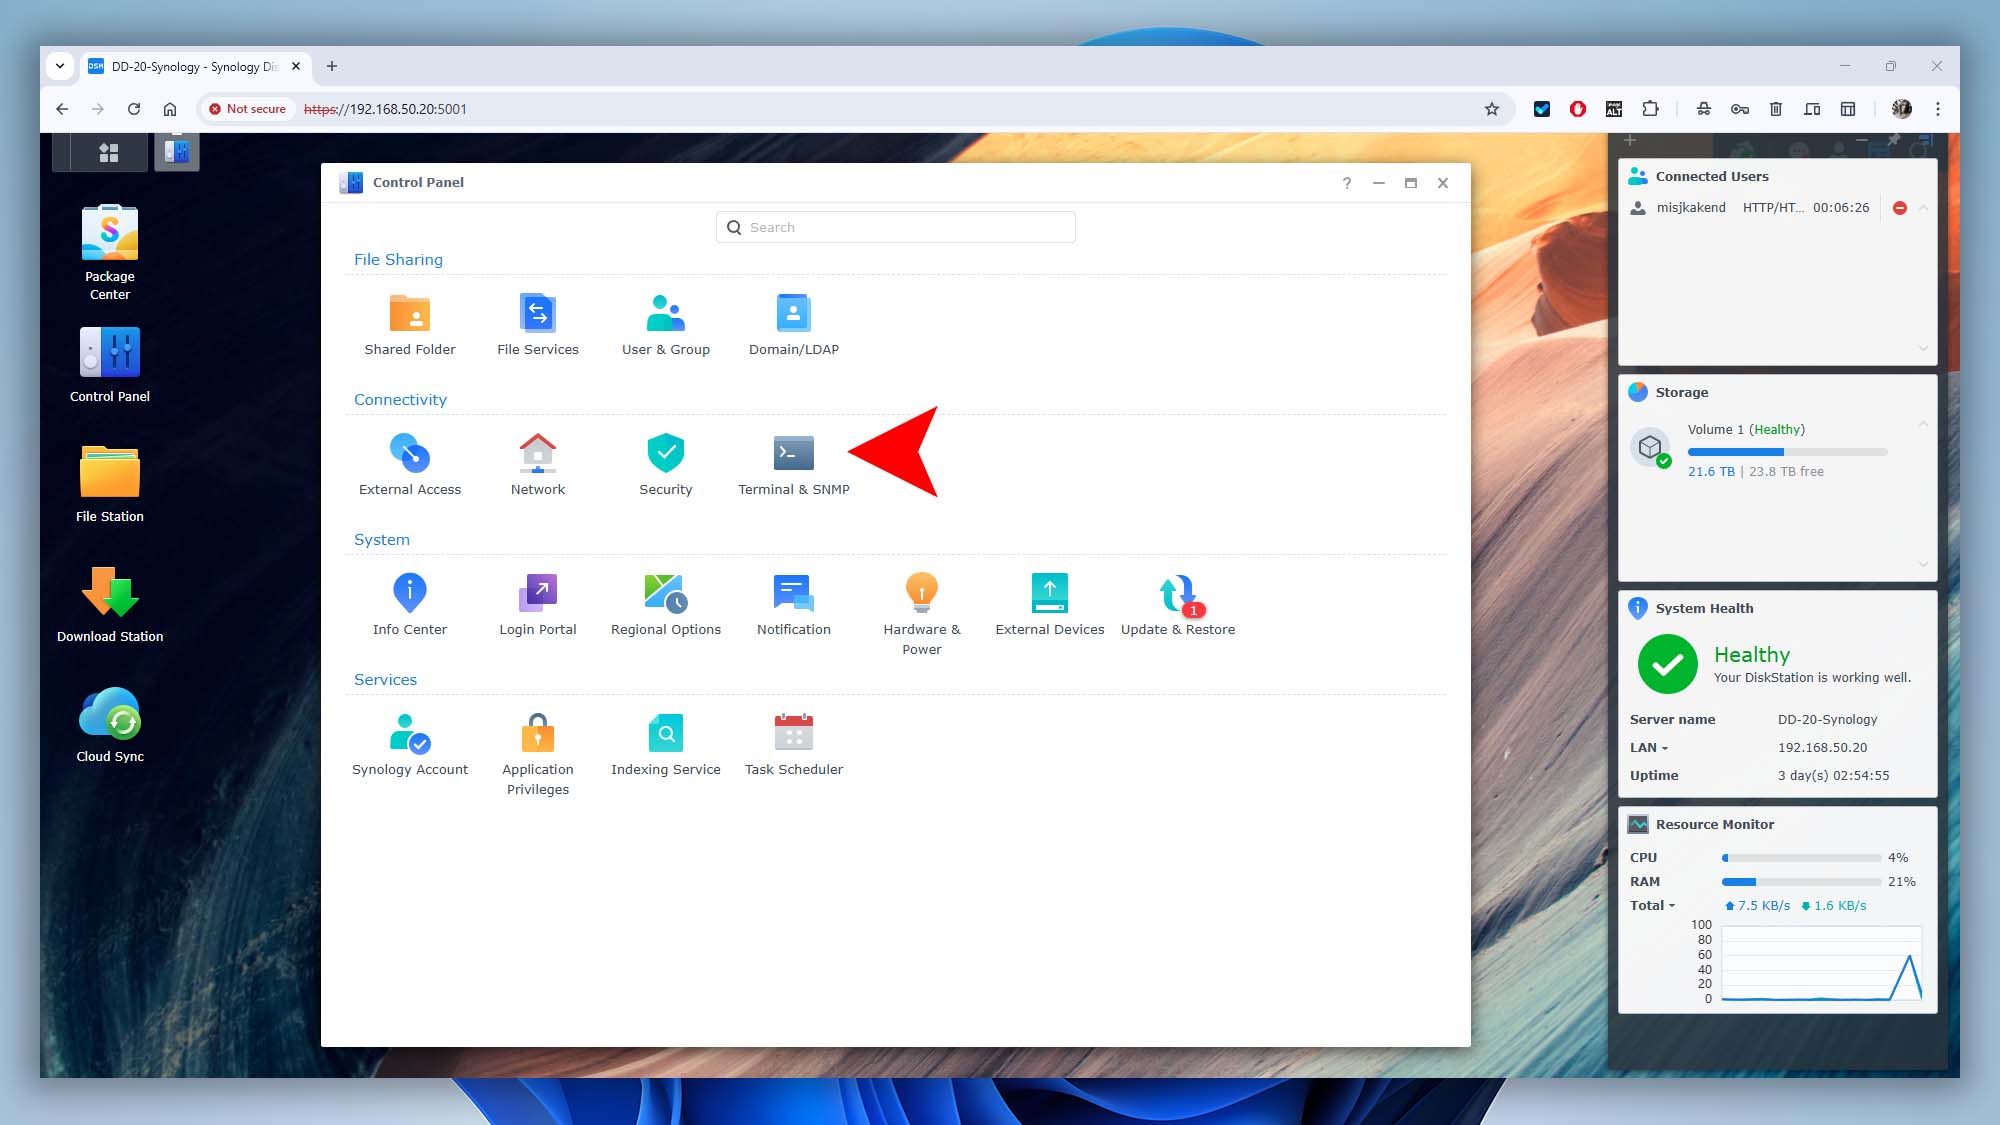
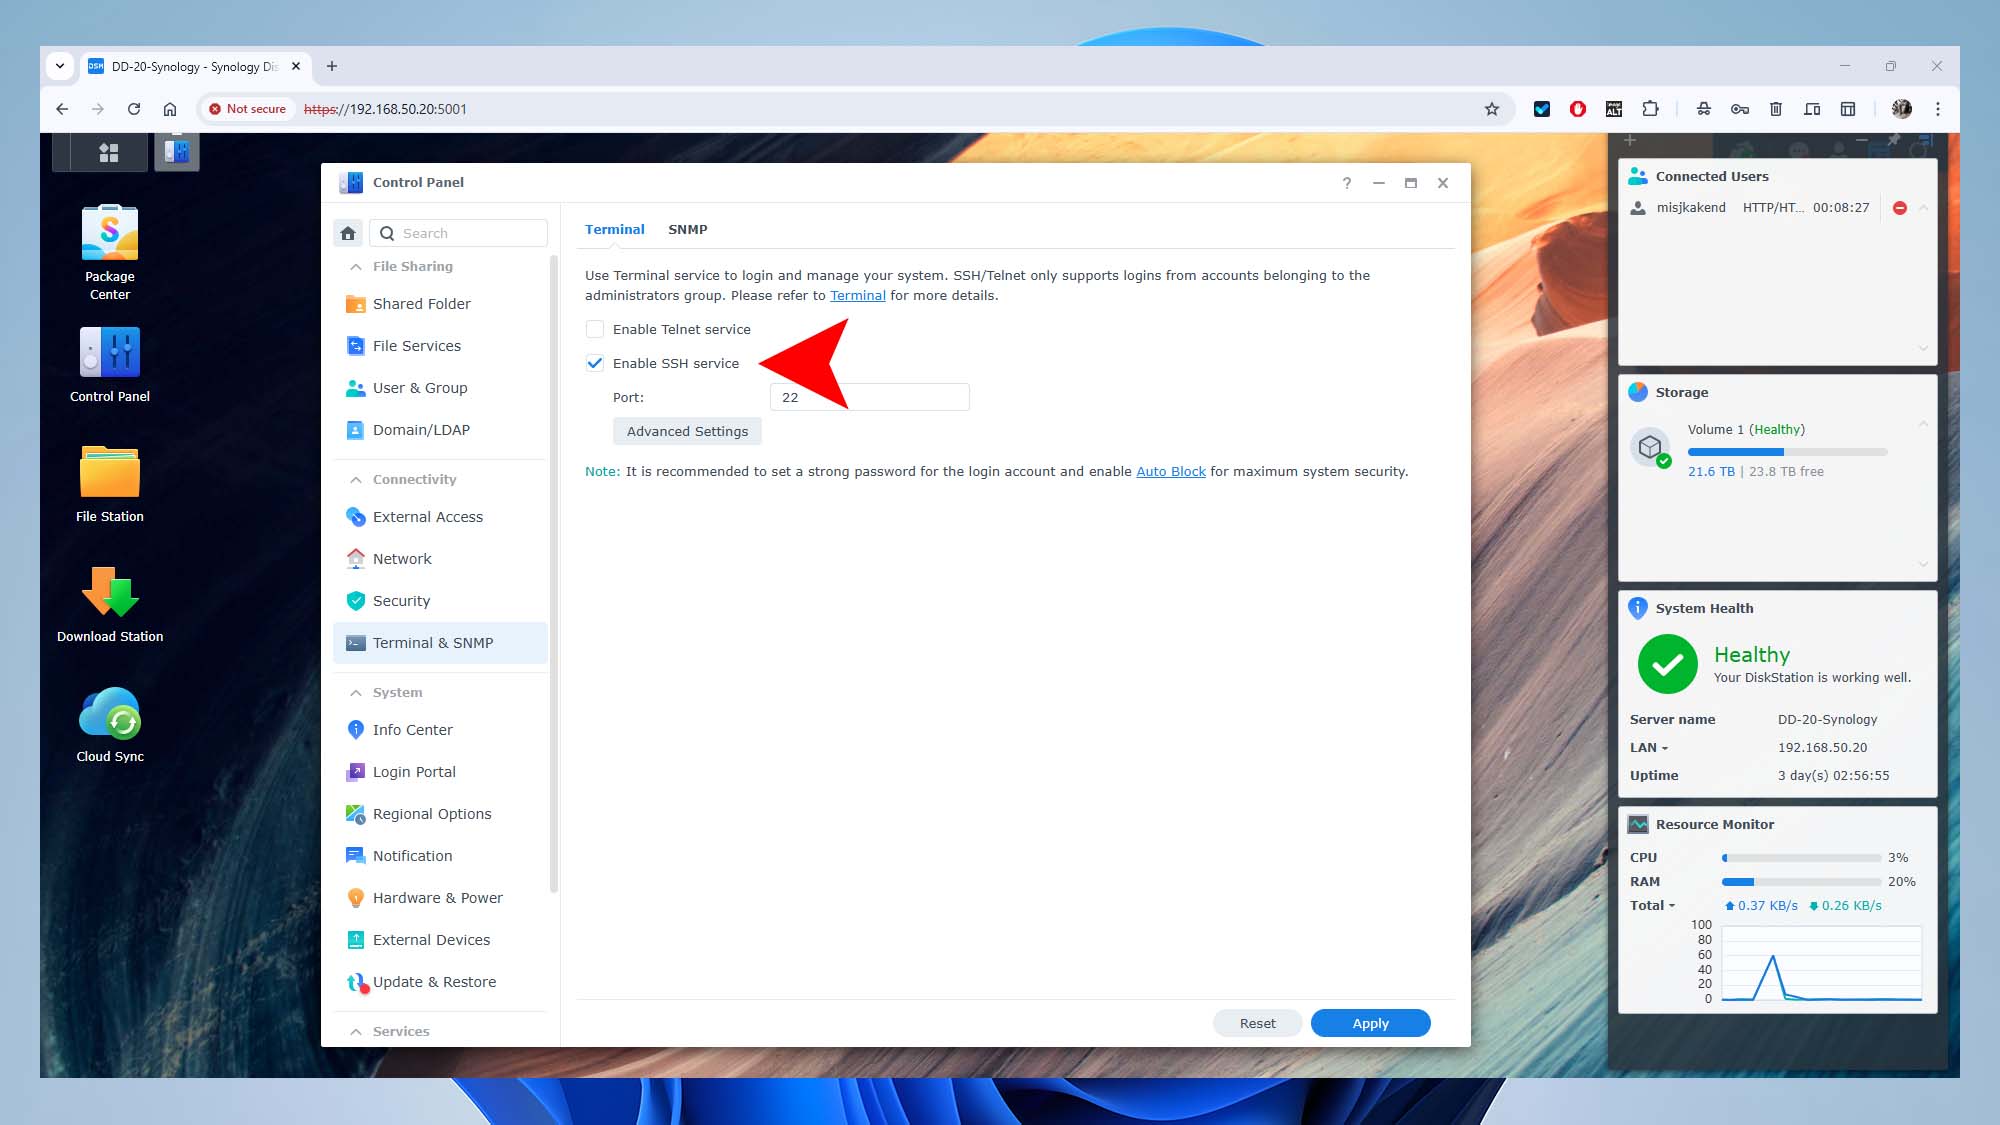
- Log in to your Synology admin panel using your default web browser.
- Go to Control Panel → Terminal & SNMP.
- Check the box for Enable SSH service and apply the changes.
- Log in to your TerraMaster NAS admin panel using your default web browser.
- Navigate to Control Panel → Terminal & SNMP → Telnet / SSH.
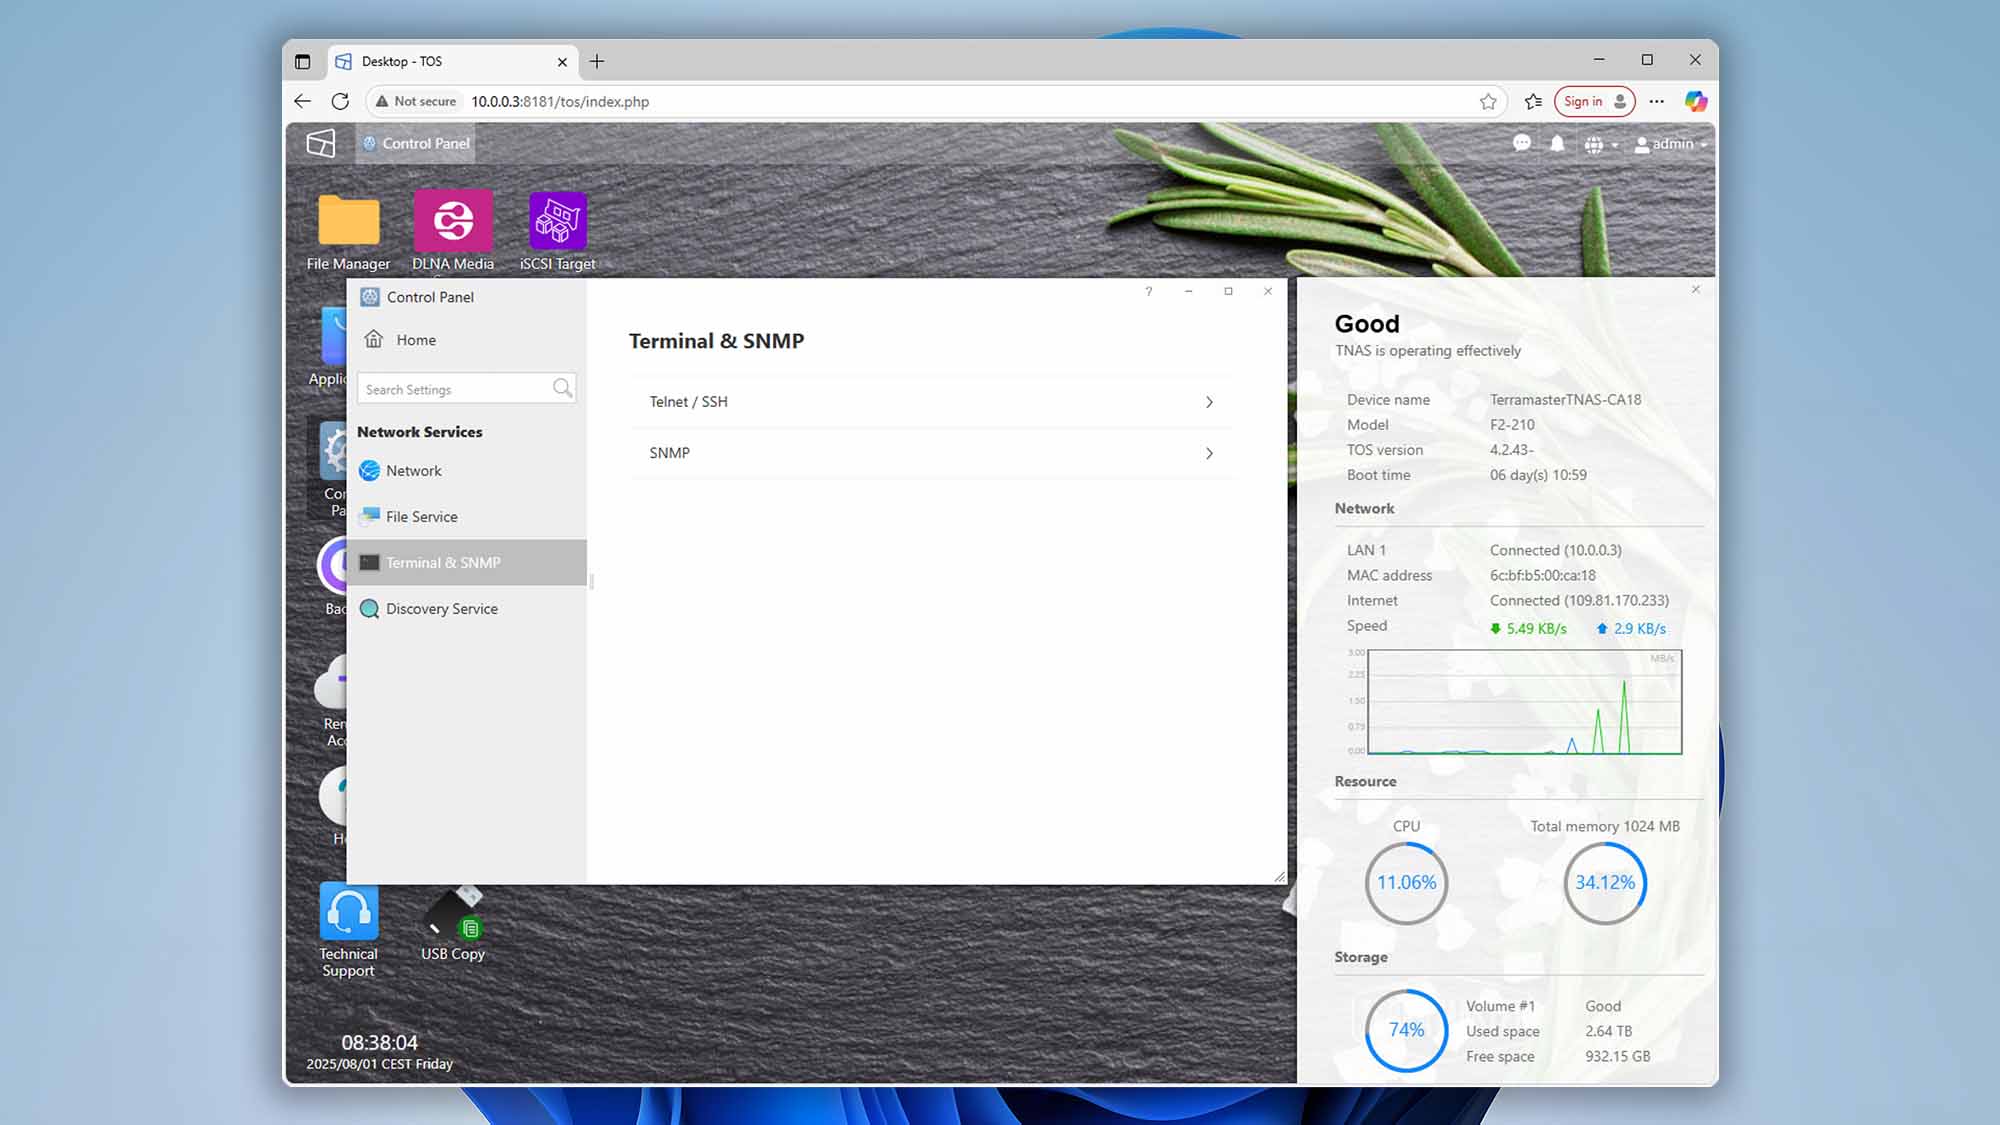
- Check Allow SSH Access to enable remote connections.
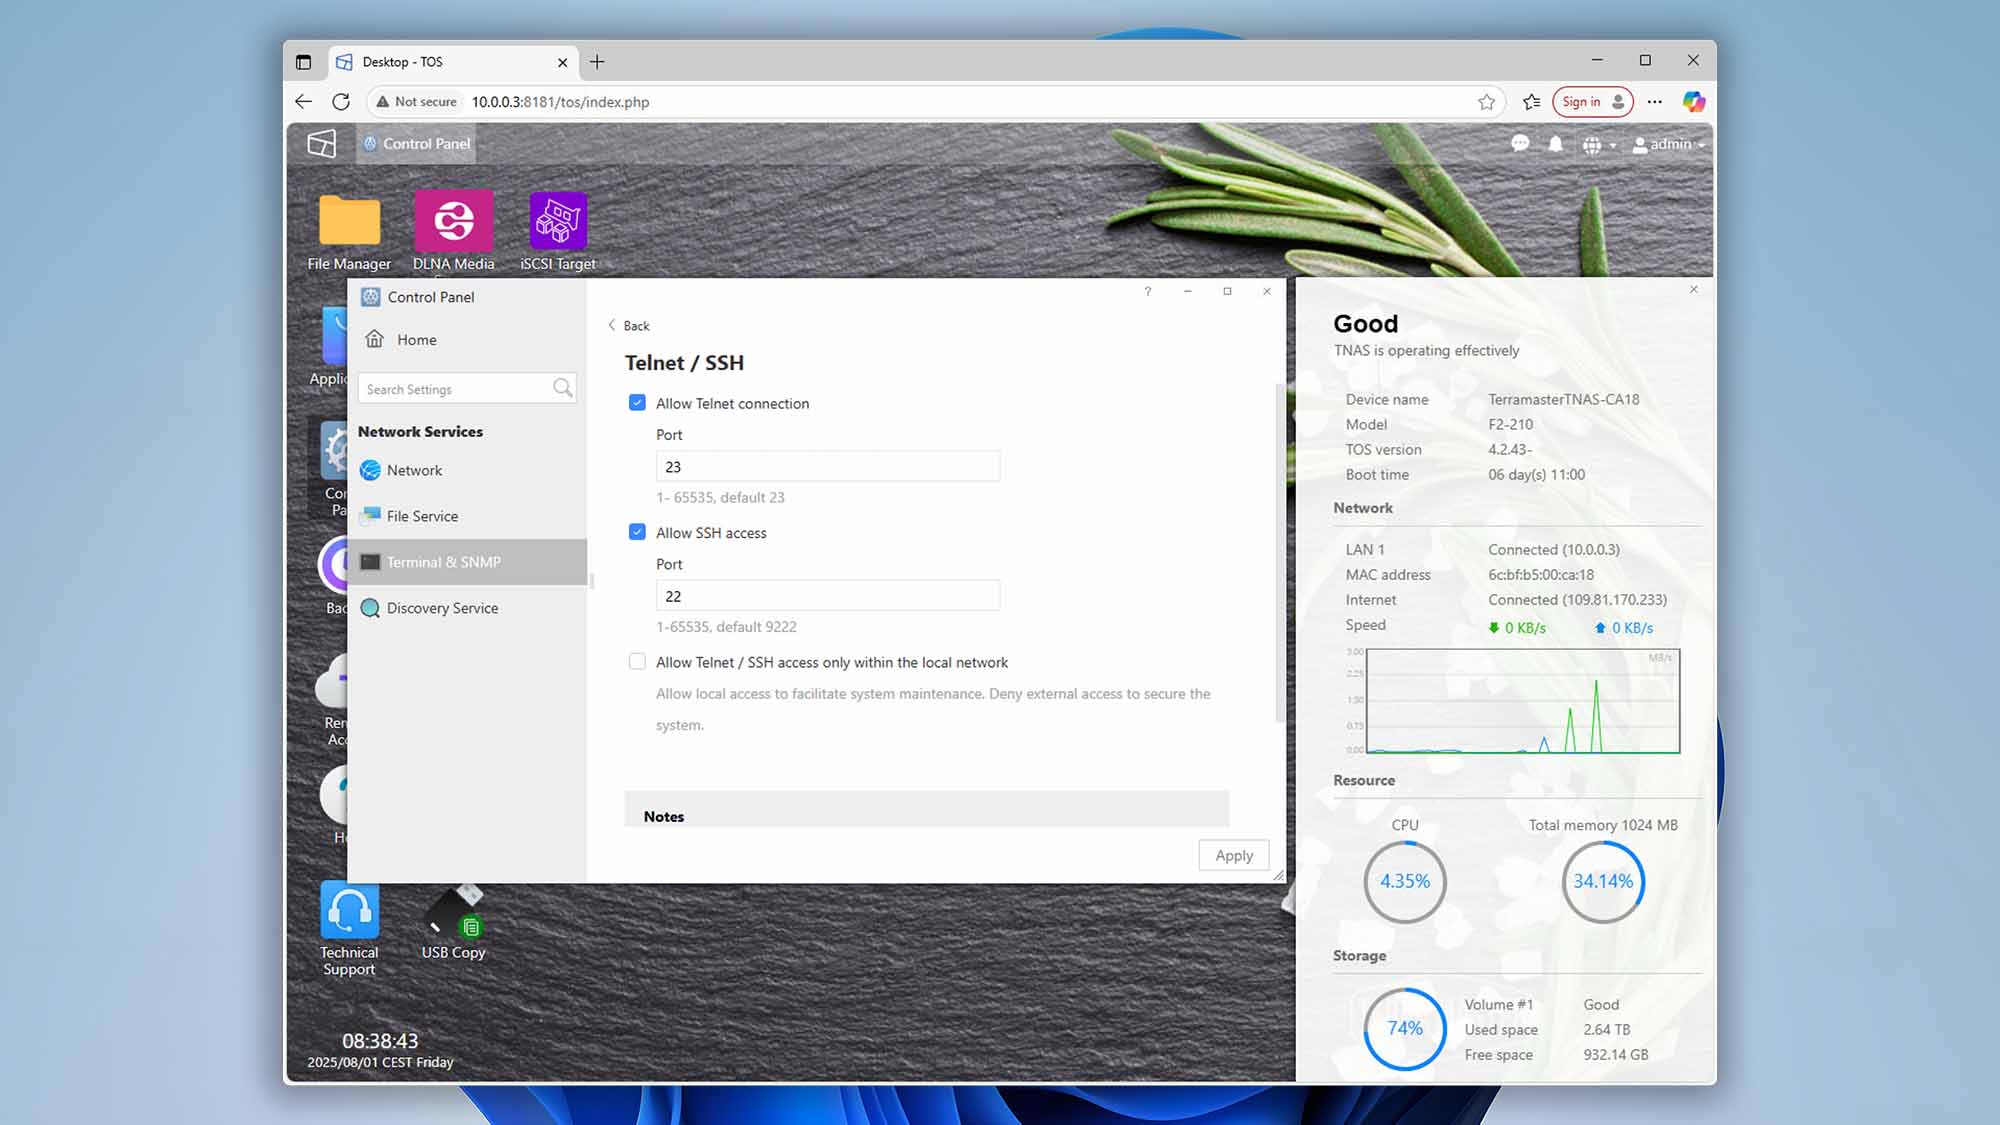
- Click Apply to save the changes.
- Open your default web browser and log in to your UGREEN NASync Series admin panel.
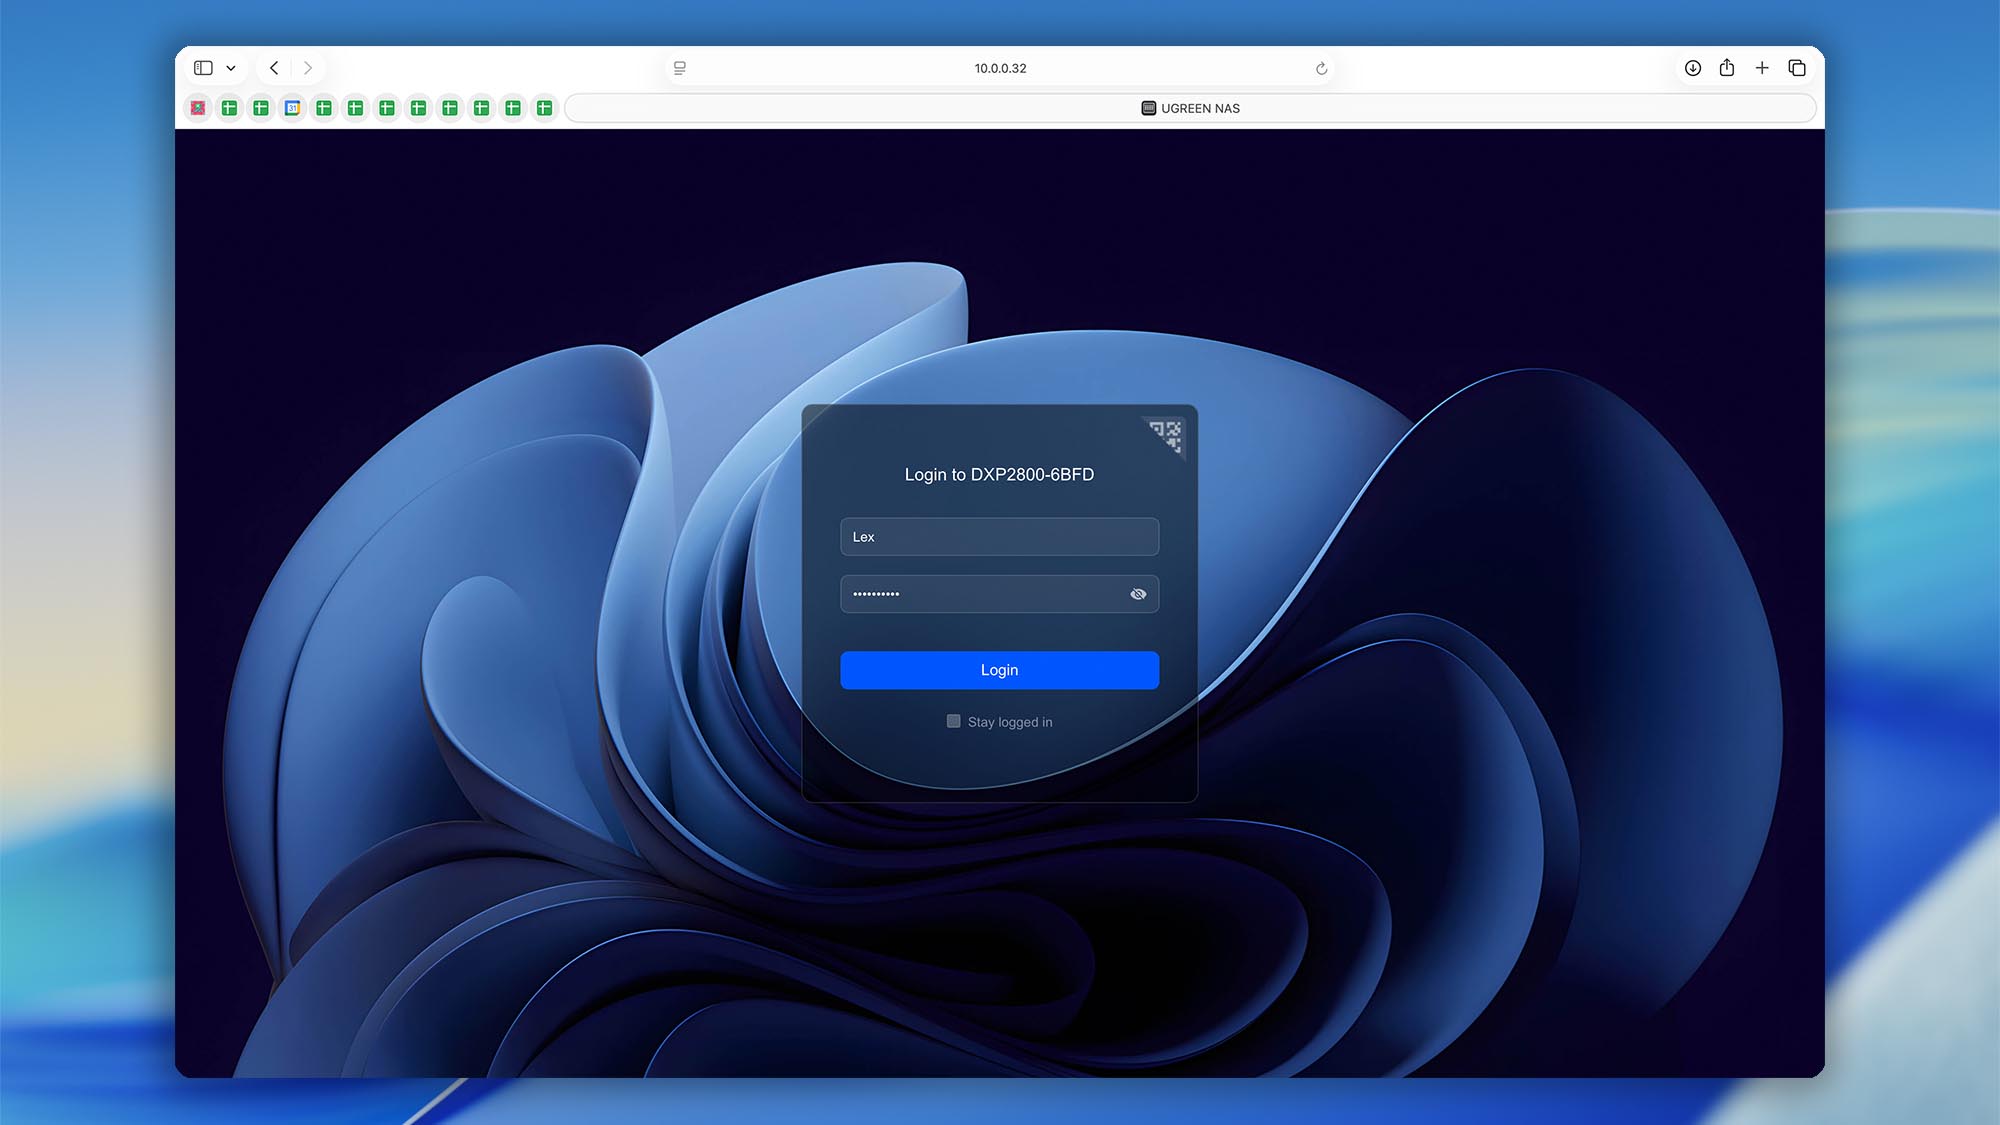
- Go to Control Panel → Terminal.
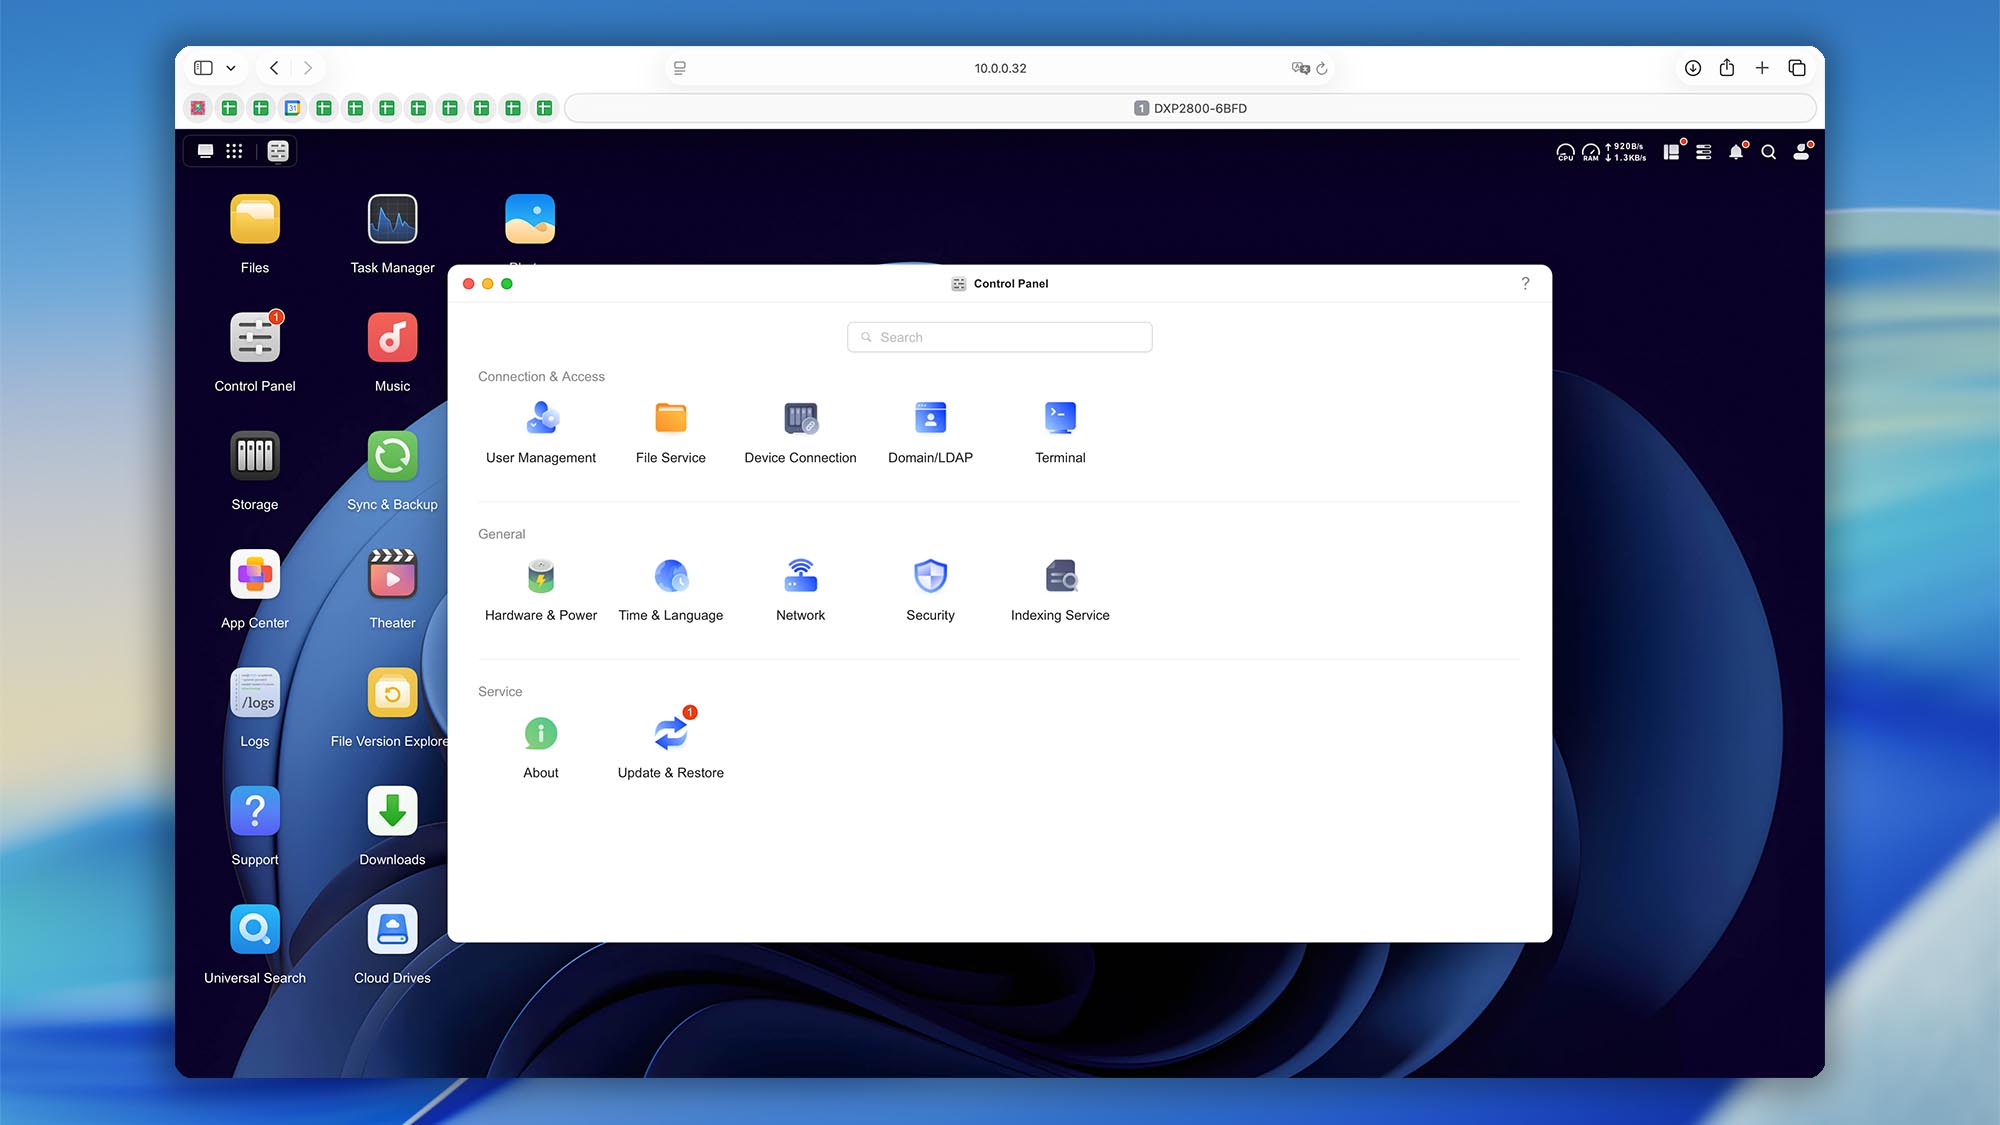
- Check SSH – Enable to allow secure remote (command‑line) connections to your NAS.

- Temporarily set the “Shut down automatically” option to “Never” so your NAS doesn’t close the SSH connection during the data recovery scan. Remember to turn your preferred setting back on after the scan is finished.

- (Optional but recommended for faster file access) Open Advanced settings and enable SFTP for a faster, encrypted file transfer connection.

- Click Save and Apply to confirm and activate your changes.
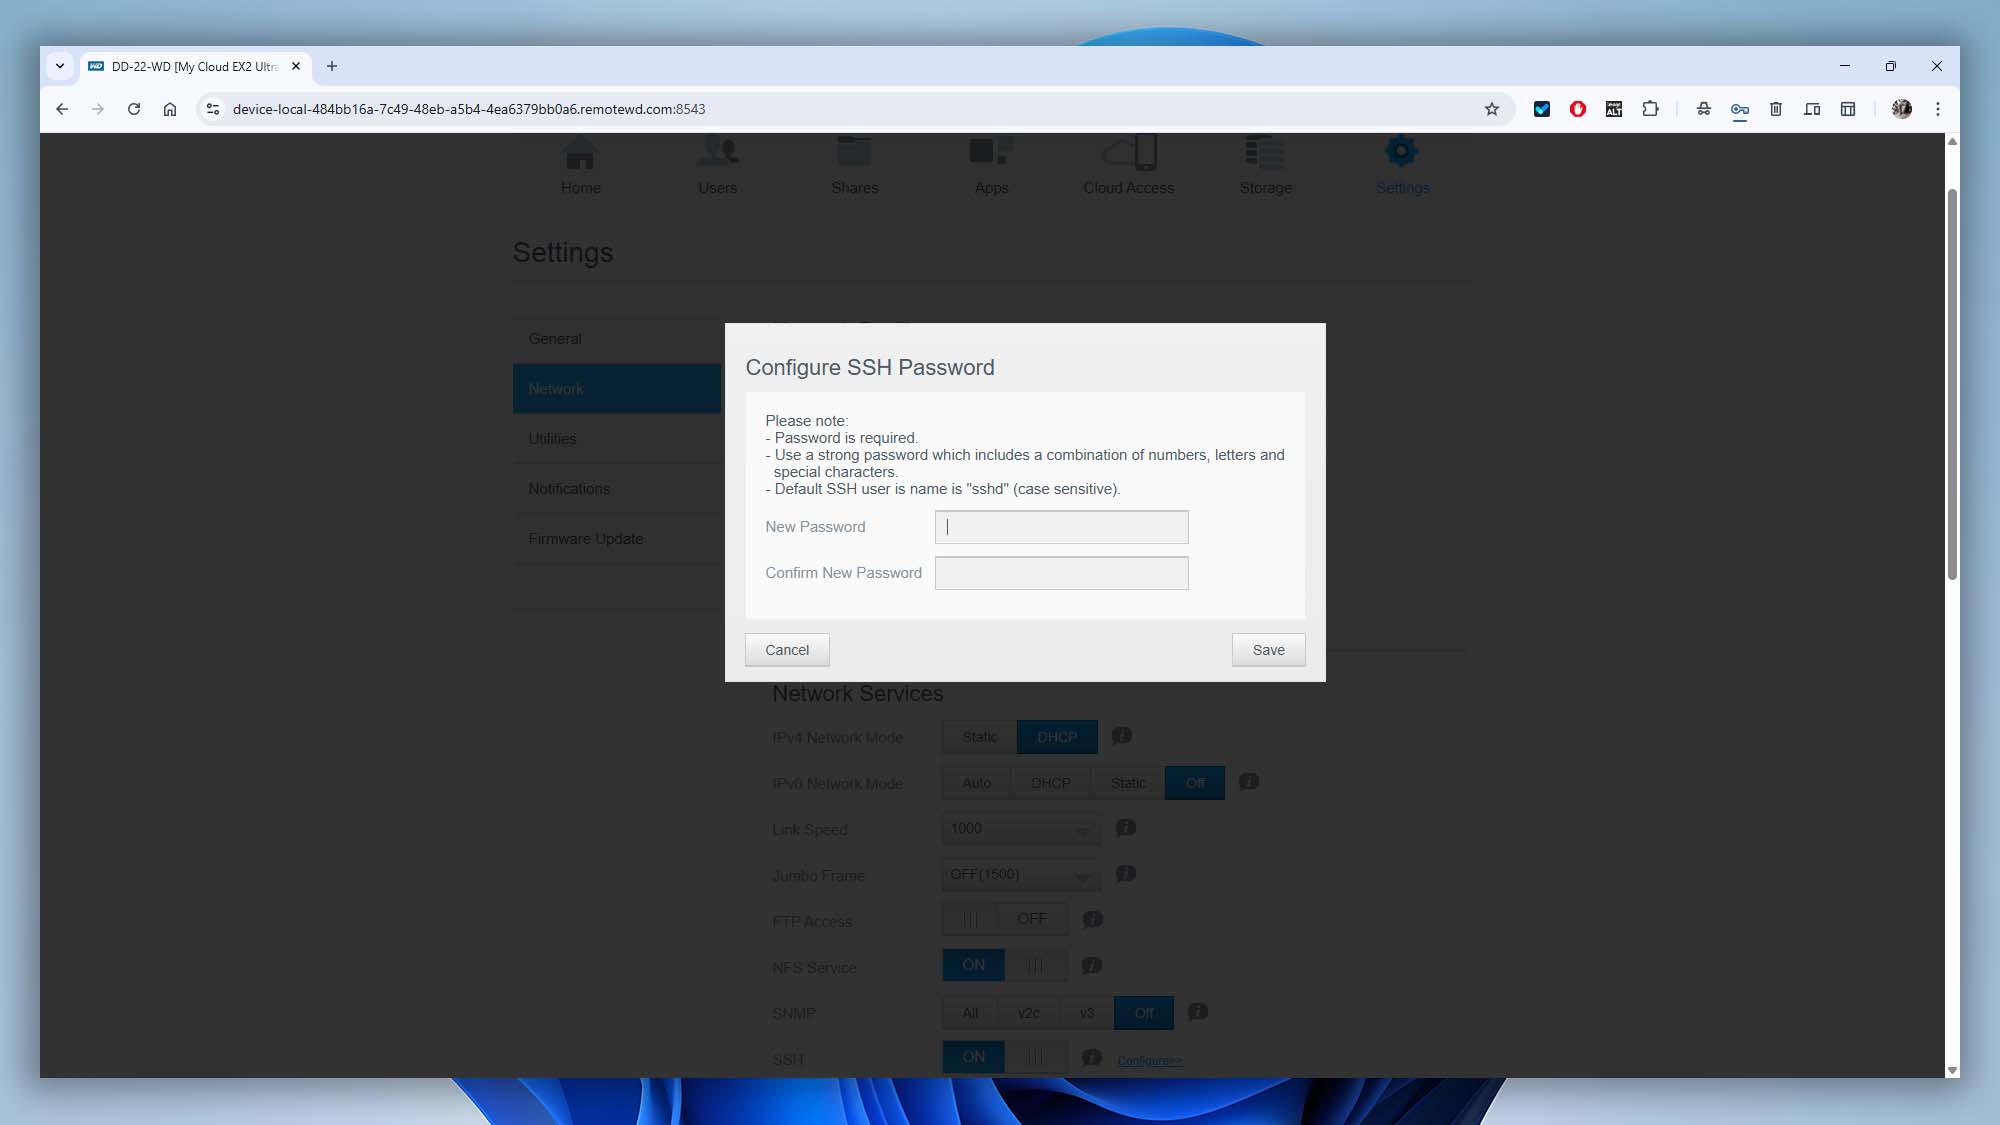
- Log in to your WD My Cloud admin panel using your default web browser.

- Navigate to Settings → Network → SSH.
- Toggle the SSH switch to ON to enable the service.

- Click Configure and set a secure password for your SSH connection.
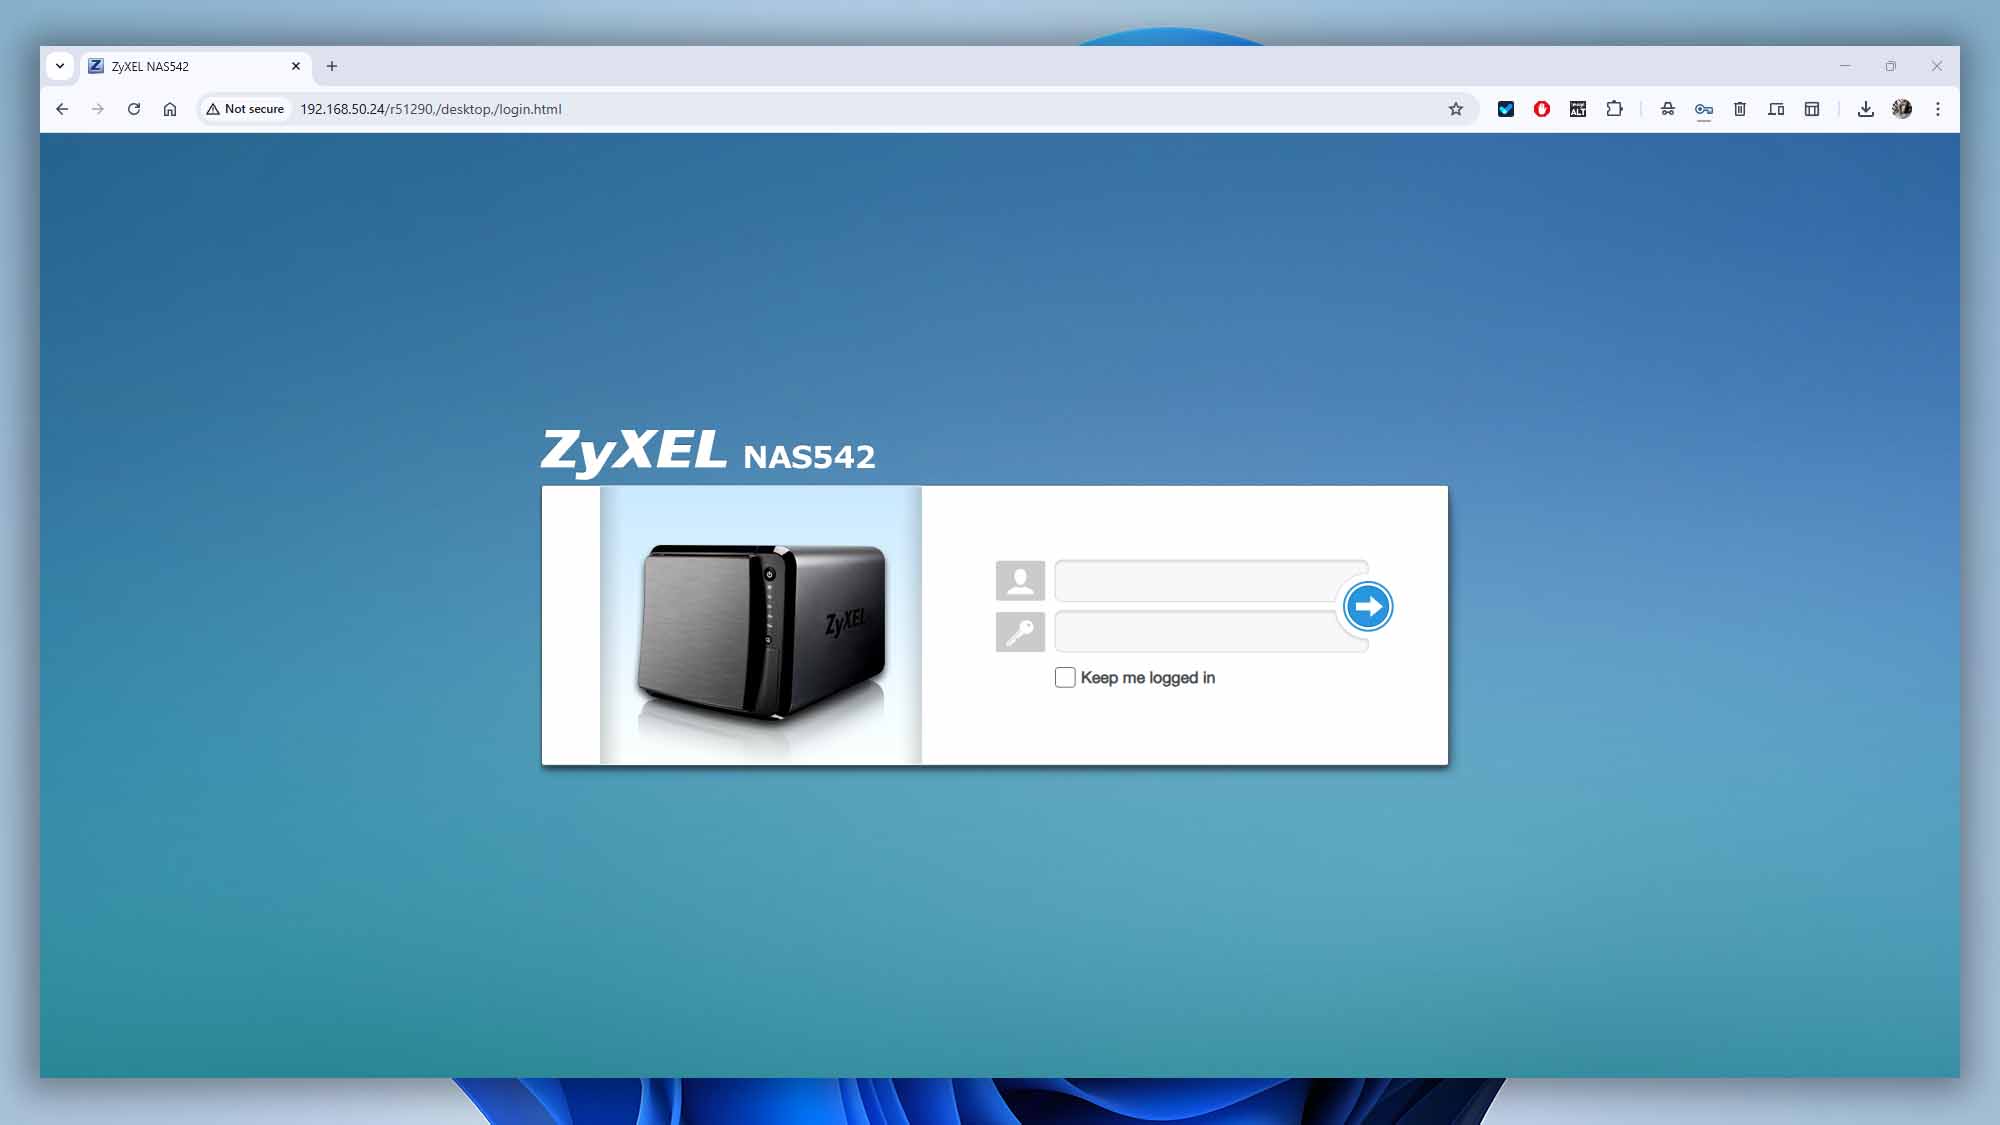
- Log in to your Zyxel NAS admin panel using your default web browser.
- Navigate to Control Panel → Terminal.
- Check Enable SSH Service to allow secure remote connections.
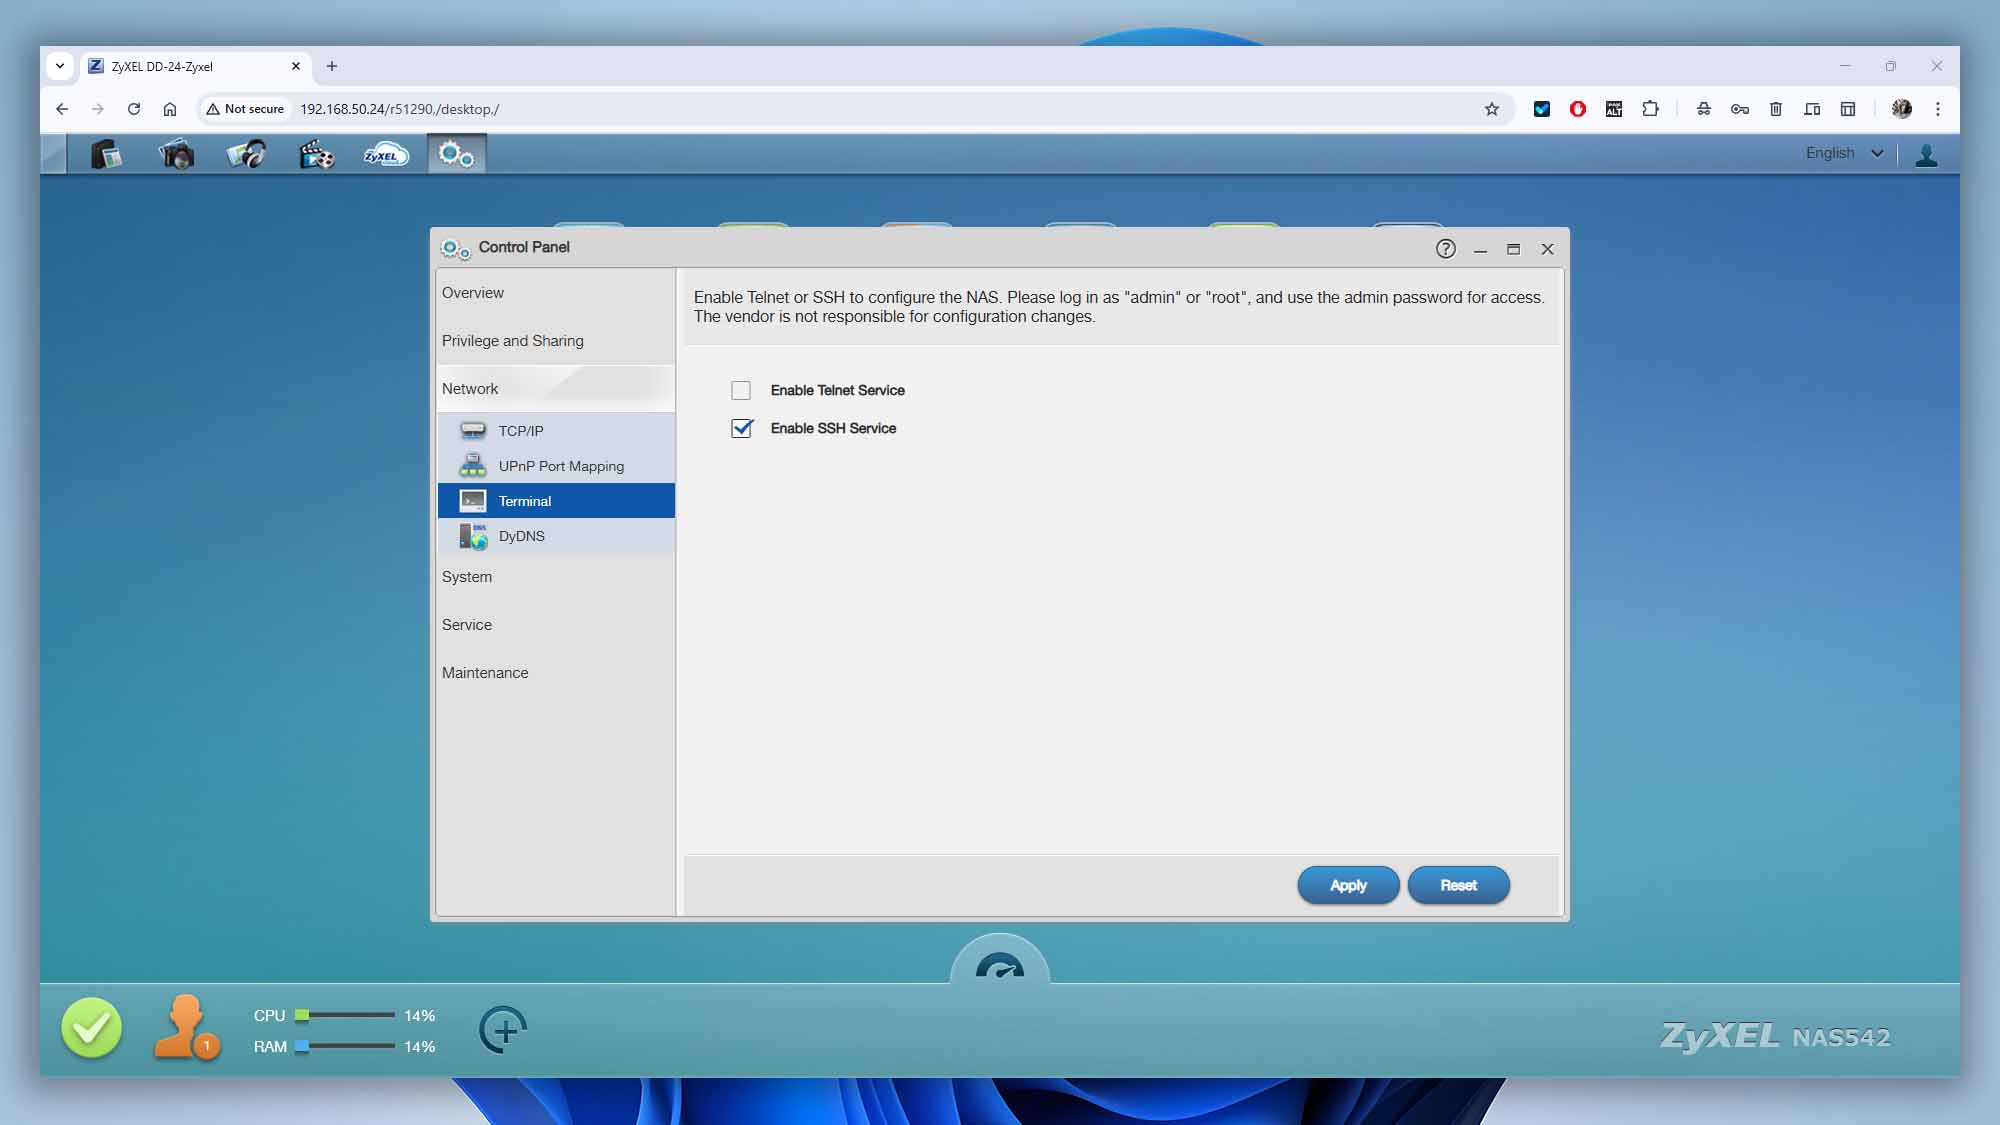
- Click Apply to save your changes.
If you still cannot locate this setting, check your NAS vendor’s documentation or contact their support team for precise instructions.
Step 2. Locating and Connecting Your NAS to Disk Drill
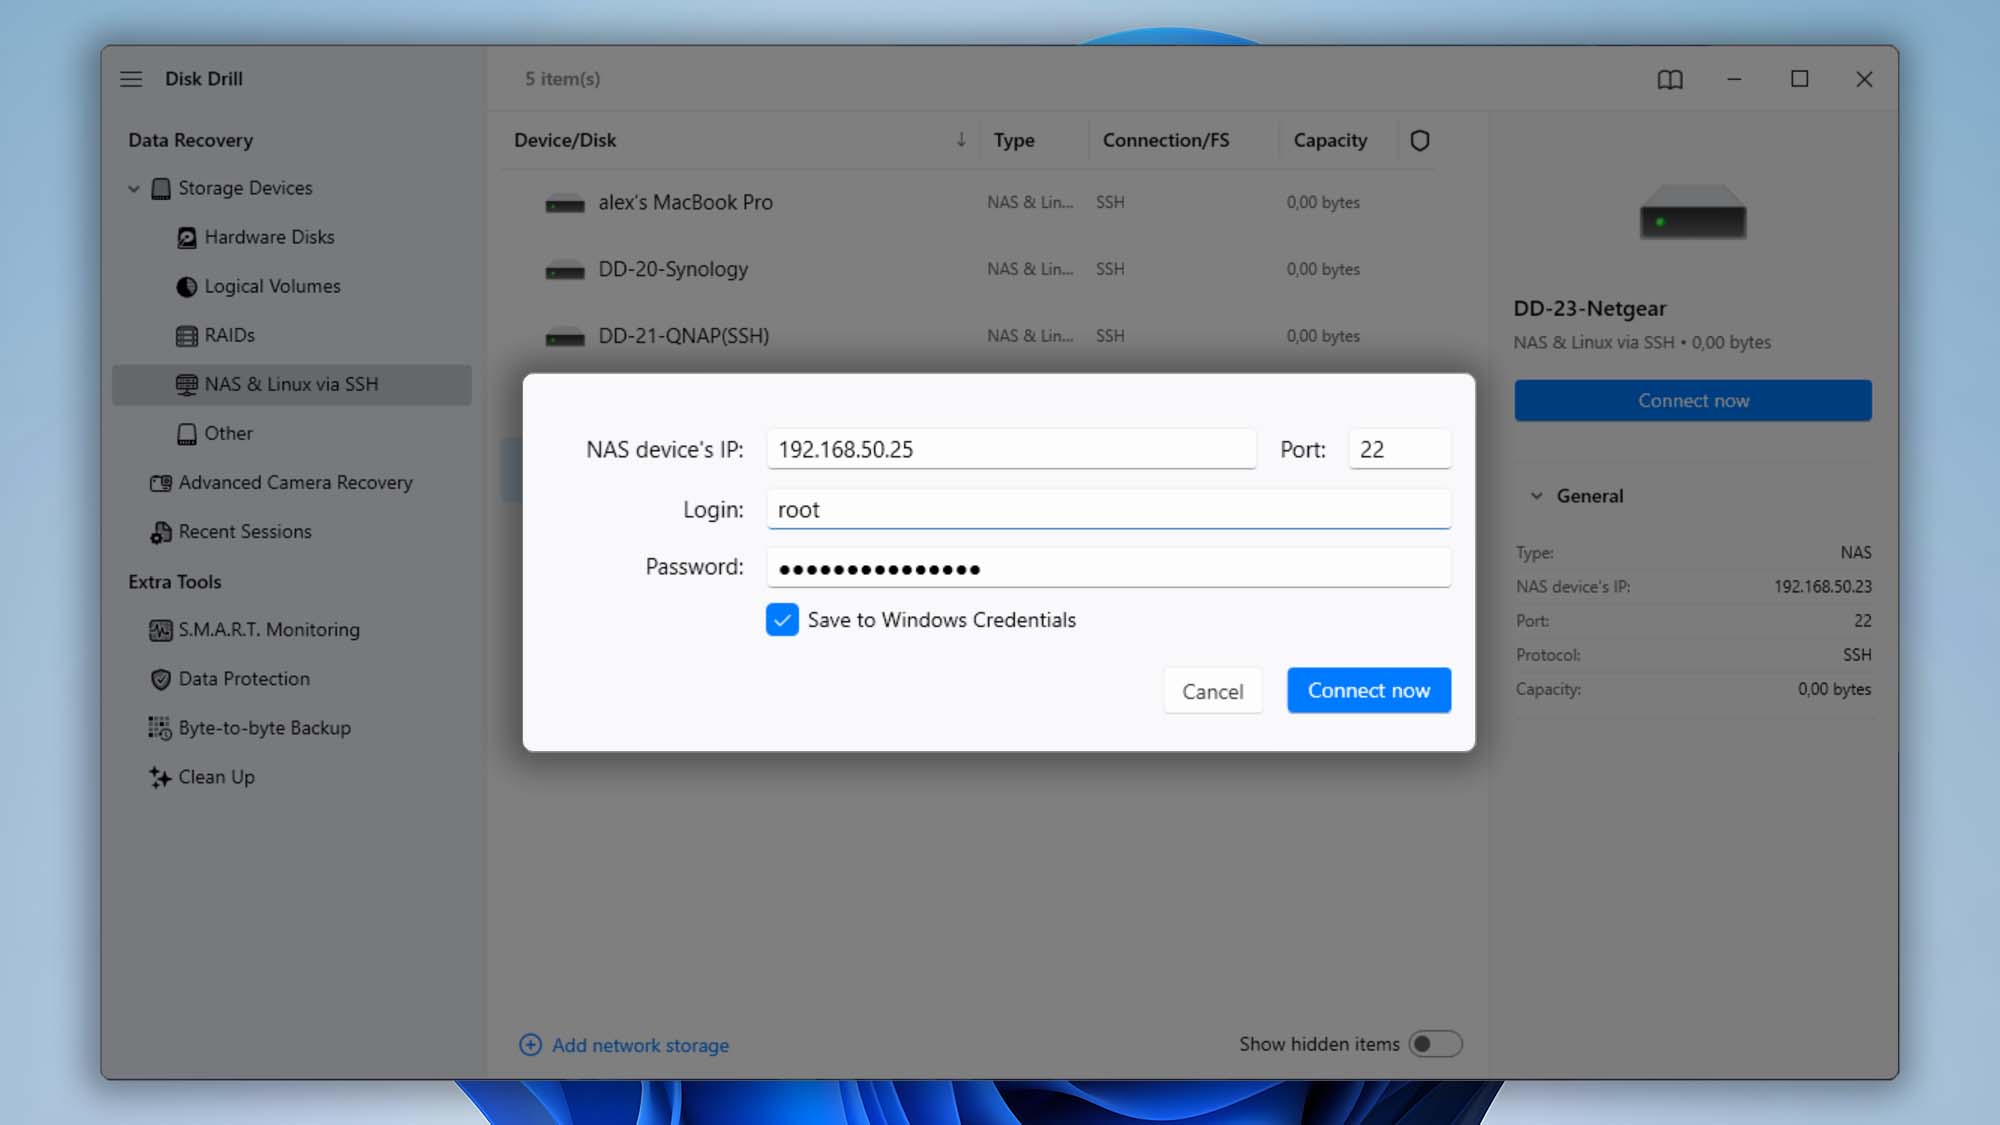
Disk Drill supports an automatic scanning feature to quickly locate NAS devices with SSH enabled on your local network. To begin, launch Disk Drill and navigate to the “NAS & Linux via SSH” section in the left-side panel. All automatically detected NAS devices will appear here. Simply select the device you need, click the “Connect Now” button, and provide your admin credentials.


If your NAS device doesn’t appear automatically, follow these steps:
- Click the “Add network storage” button at the bottom of the Disk Drill window.
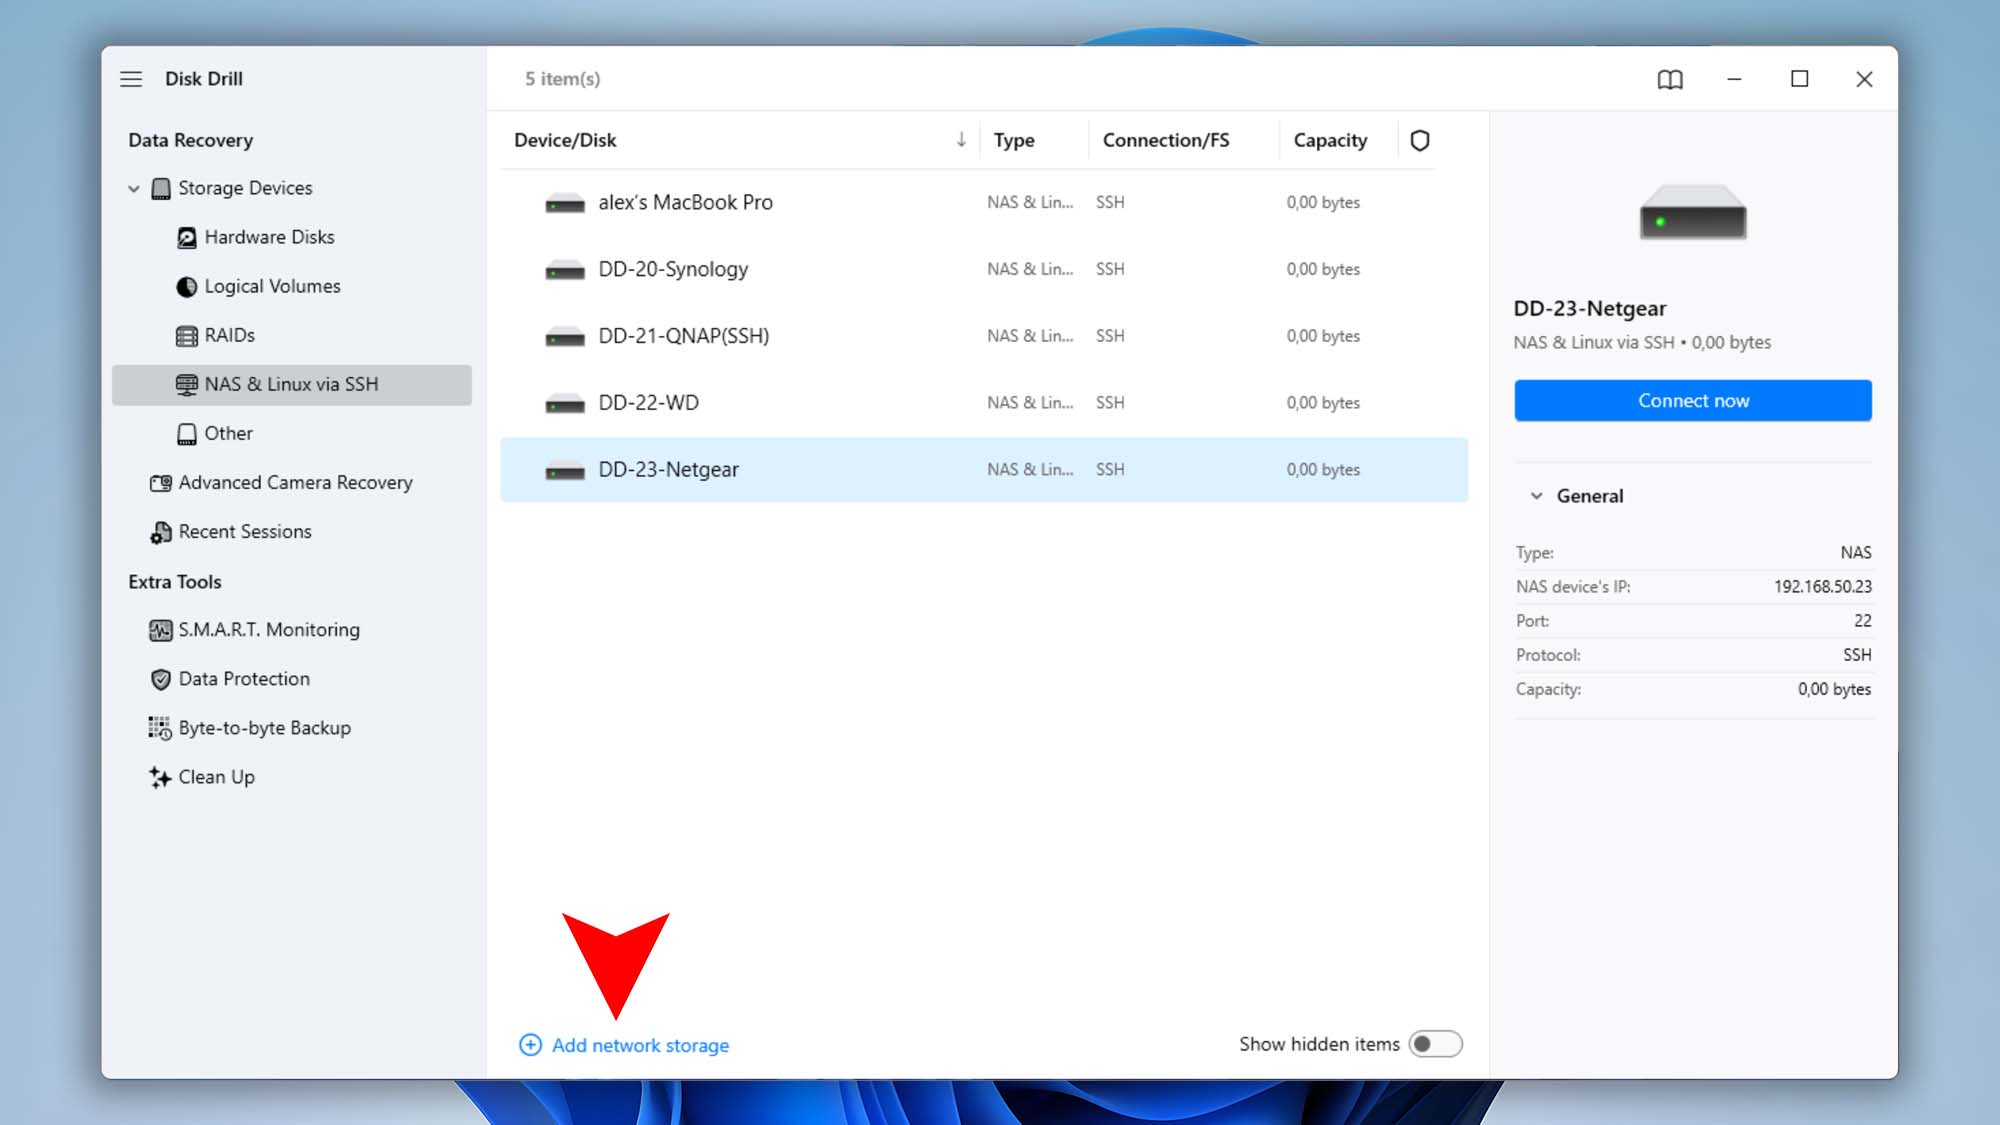


- Enter your NAS device’s IP address and specify the port number if it’s different from the default (typically port 22).
- Provide the SSH login credentials for an administrator account authorized to access the device.
💡 Tip: Disk Drill offers a convenient feature to securely remember your login credentials. Simply check the option “Save to Windows Credentials” on Windows or “Save to Keychain” on macOS. Disk Drill will securely store your login information within your operating system, so you won’t need to re-enter your credentials each time.


Step 3. Selecting the NAS RAID Storage to Scan with Disk Drill
As mentioned earlier, most NAS devices use RAID storage configurations. After successfully establishing an SSH connection, Disk Drill automatically detects your NAS device’s RAID configuration and presents it as a single storage device.
Typically, Disk Drill will display the RAID storage using the system-assigned name, which may not be particularly user-friendly. Carefully review the displayed storage devices and look for the RAID array labeled with the appropriate file system (such as EXT4, EXT3, BTRFS, etc.).
Once you’ve identified the correct RAID array, select it, and begin the scanning process by clicking the “Search for lost data” button.


Step 4. Scanning, Previewing, and Restoring Your NAS Data
While Disk Drill scans your NAS storage, you can instantly preview and even recover files it has already found. There’s no need to wait until the entire scanning process completes—simply select the files you need and restore them immediately. This feature lets you save valuable time and regain access to your lost data faster.


Common Reasons for NAS Data Loss
Despite their reliability, NAS devices are still susceptible to data loss for reasons including:
- ❌ Accidental File Deletion: Human error is one of the most common reasons.
- 😔 Hardware Failures: Hard drive failures or RAID controller malfunctions.
- 🔌 Power Outages or Surges: Unexpected shutdowns may cause file system corruption.
- 🧱 RAID Rebuilding Errors: Errors during the rebuilding process of RAID arrays can result in significant data loss.
- 🦠 Malware and Ransomware Attacks: NAS systems can be targeted by cyberattacks leading to data encryption or corruption.
Tips for Effective NAS Data Recovery with Disk Drill
- Never recover files to the same NAS drives you’re recovering from—doing so can overwrite existing data.
- Always perform recovery using the latest version of Disk Drill to ensure compatibility with various NAS file systems and RAID types.
- In complex RAID recovery scenarios, document the original RAID configuration (order of disks, RAID type, block size) before attempting recovery.
FAQ
If you’re unable to connect Disk Drill to your NAS device, consider checking the following:
- SSH Settings: Ensure the SSH service is enabled on your NAS. Verify that the correct SSH port (typically port
22) is being used. - Account Privileges: Confirm your account has sufficient permissions for SSH login. Some NAS devices restrict SSH access to specific users or administrator-level accounts.
- NAS Compatibility: Not all NAS models support SSH connections out of the box. Certain brands, such as WD and Buffalo, often ship without SSH enabled or don’t support it at all unless custom firmware is installed.
Additionally, some NAS devices only permit SSH logins using predefined usernames (e.g., root, admin, or sshd). For more details about SSH compatibility and login specifics for your NAS model, please refer to your vendor’s official documentation.
If your “NAS” is actually a WD My Cloud Home, it’s not a traditional NAS. By design, many staple features are not supported, including SSH access, WebDAV, FTP, DLNA/Twonky, iSCSI, user/group management, static IP configuration, and SMB service controls. That’s why common how‑tos for standard NAS boxes don’t work on My Cloud Home out of the box. See Western Digital’s official list of Unsupported Product Features on My Cloud Home for the full rundown.
What to do instead:
- Official method: How to Access WD My Cloud Using SSH (Secure Shell).
- Unofficial method: Install Debian and OpenMediaVault on a WD My Cloud Home.
If your NAS RAID configuration is damaged or corrupted, follow these recommended steps:
- Power off your NAS device and carefully detach each drive.
- Clearly label each drive according to its position within the RAID array to preserve the correct disk order.
- Connect drives to your computer using a USB docking station or SATA-to-USB adapter.
- Launch Disk Drill, which includes a built-in automatic RAID reconstruction tool to detect and rebuild the RAID array virtually. Learn more about Disk Drill’s RAID reconstruction here.
If Disk Drill’s automatic RAID reconstruction does not successfully rebuild your RAID array, consider using specialized professional software capable of manual RAID reconstruction. Currently, our Disk Drill development team is actively working to add manual RAID rebuilding functionality to our toolkit.
Disk Drill currently supports deep scanning for the following NAS file systems:
- BTRFS
- EXT2 / EXT3 / EXT4
We are actively working on adding XFS support in upcoming updates.
If your NAS uses a different file system or one that Disk Drill does not yet support, please reach out to our support team and let us know which file system you need. Your feedback helps us prioritize future updates.