They may not be quite as popular as TIFF or RAW images, but photography enthusiasts and Pentax camera owners are likely familiar with PEF files and how important they can be whether it’s for work or a hobby. That’s what makes it extra disheartening when you lose some vital photos to accidental deletion or a failing storage medium.
Fear not, however, as deleted or compromised files aren’t necessarily gone for good and can be retrieved in certain ways. In this guide, we’ll give you a better idea as to what PEF files are and how you can recover them in case they go missing.
What Is a PEF File?
PEF stands for Pentax Electronic Format and it’s the proprietary file format for photos taken by Pentax digital cameras. For those unaware, the first Pentax camera was introduced way back in 1957 and has since maintained an excellent reputation in the photography scene for developing quality products.
The PEF format offers completely unedited images with zero compression, giving picture-takers access to high-quality, totally raw information taken by a Pentax camera. These files include a whole lot of image data that can prove too overwhelming for the basic image editors that are built into most operating systems, so you’ll likely end up having to install a third-party image editing solution to process PEF files.
How To Recover Deleted PEF Files
If you have some accidentally deleted PEF files on your hands, there are various ways you could go about recovering them. Keep in mind, however, that some of these methods require you to have set up certain tools before the files were lost in the first place. Here are some of the best techniques to get those files back:
How To Recover PEF Files With Software
The most viable method to get back lost or erased PEF files is often through the use of one of the leading data recovery programs in the market. Disk Drill has consistently proven itself to be a cut above the rest for a plethora of reasons, including its simple yet intuitive user interface, exceptional recovery capabilities, ability to stop and resume scans, and other nifty extra features.
Plus, it has a free version that can help you retrieve some of your files without spending a dime. Follow the instructions below and you’ll be rescuing your PEF files using Disk Drill in just a few clicks.
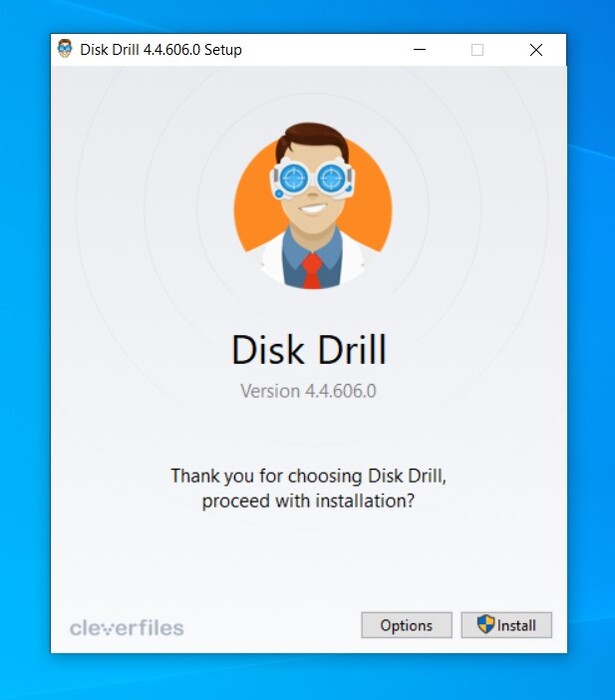
- Navigate to the official Disk Drill website and download the installation file for the free version.
- Launch the setup file and follow the on-screen instructions until the program is successfully installed.
- Fire up the Disk Drill app, choose the storage medium where your PEF files were last located, and click the Search for lost data button to begin the scanning process.
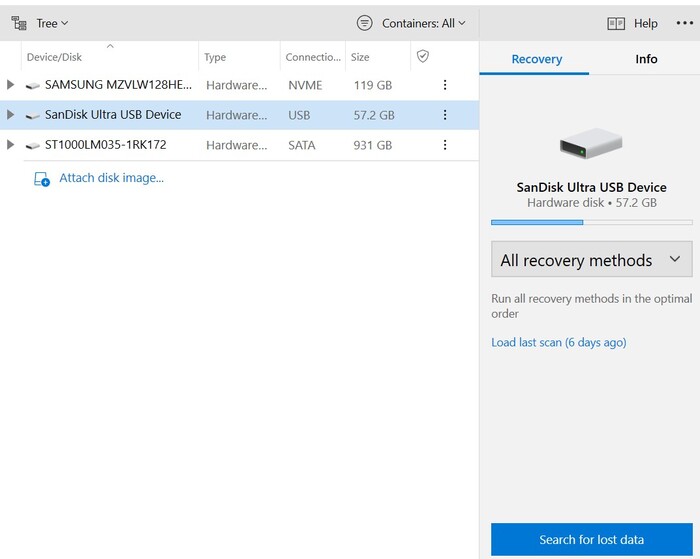
- The length of time the process takes depends mostly on the size and read capabilities of your storage medium. You can still head to the results section while the scan is ongoing by clicking on any of the category icons. This takes you to a Windows Explorer-style view where you can sift through all your recoverable files.
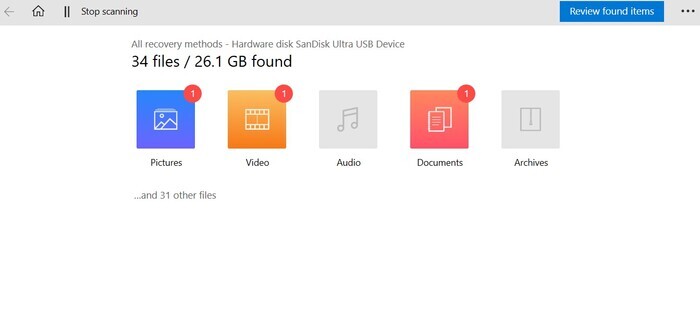
- When you get to the results page, your PEF files should appear in the Pictures category. Make sure you uncollapse the Found Files header and navigate to the folder those files were last in which is where the files should appear.
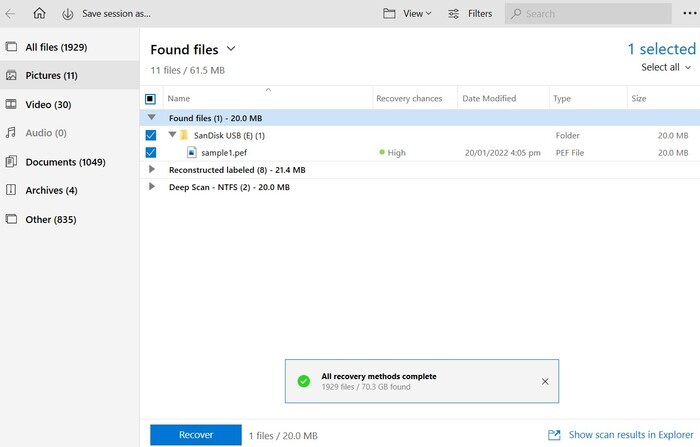
- Check the box next to the file you want to retrieve then hit the Recover button on the bottom-left side of the window. You’ll get a pop-up asking you to select the drive where you want to save the recovered information. This has to be a different storage medium than the one you’re recovering files from, or else you might end up with overwriting problems.
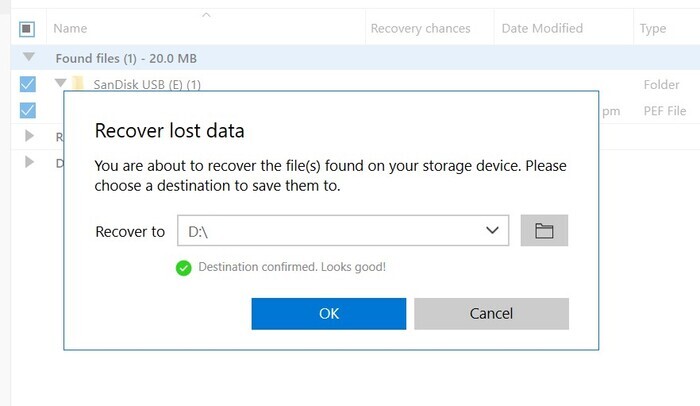
- Once you’re all set, click the OK button and Disk Drill will start the recovery process. This usually doesn’t take more than a minute depending on the size of the files you’re trying to recover and you’ll be given the option to Show recovered data in Explorer after it’s all done. Choosing that option takes you directly to your rescued files.

Recover PEF Files from Windows Recycle Bin or Mac Trash
Windows Recycle Bin
It’s worth noting that this method only works if you’ve deleted your PEF files using the Delete button or dragged them to the Recycle Bin icon. If you used the Shift + Delete command, then you should use the previous technique instead. Here’s how you can get your files back from your Recycle Bin:
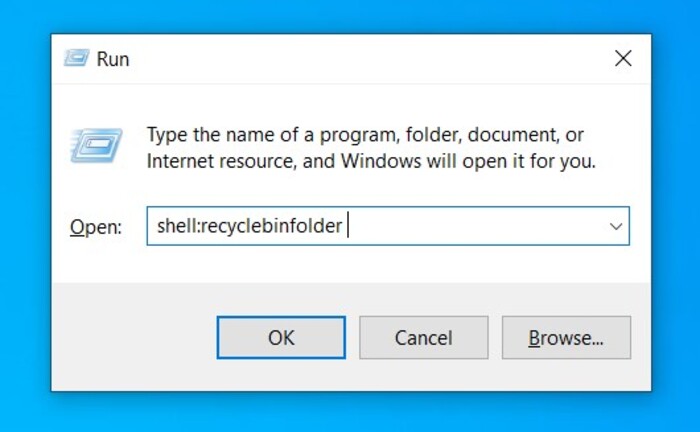
- There are two ways to access your Recycle Bin. You can usually find it on the desktop unless you purposely removed or hid it from there. Or you can pull up the Run command window by pressing Windows + R, type out “shell:recyclebinfolder “, then hit Enter.
- If you see your files in the Recycle Bin, highlight the ones you want to recover, then right-click it and select Restore.
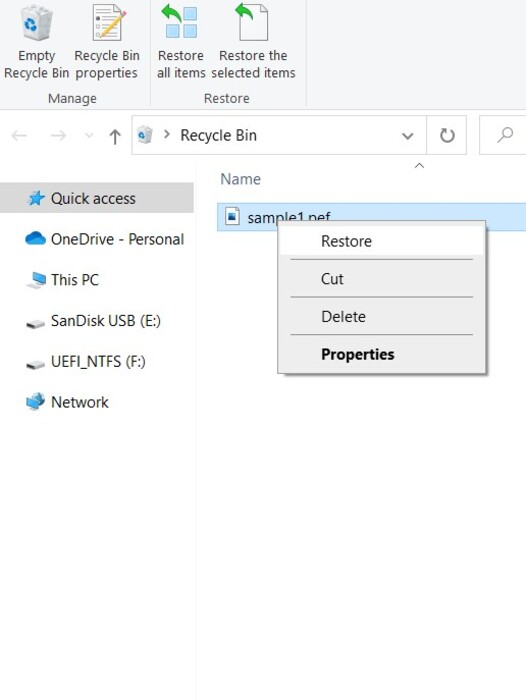
- Your PEF files should be returned to the location they were last in before you deleted them.
Mac Trash
Unlike Windows operating systems, any files you delete on a Mac machine get temporarily sent to the Trash until you empty it out manually or you set it up to permanently delete files after a set amount of time. To retrieve files that are in the Trash, just follow these steps:
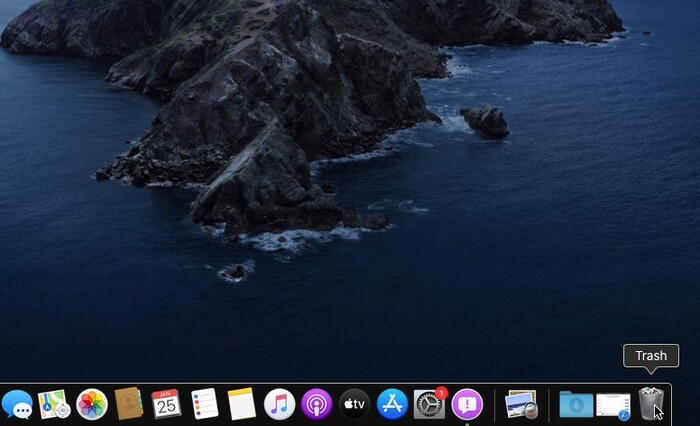
- Locate the Trash icon on your dock and click it.
- If you find your PEF files here, select the ones you want to recover then right-click and choose Put Back.
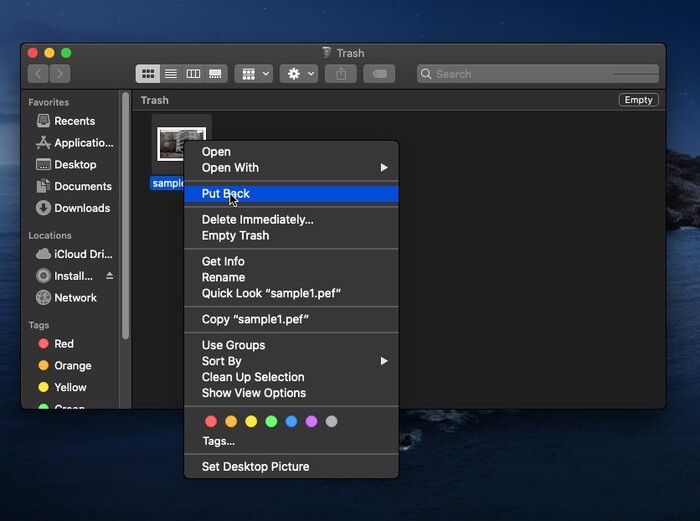
- Your files will be restored to the folder they were last in before being deleted.
Restore from File History
Starting with Windows 8, Microsoft introduced a feature called File History that allows you to backup various versions of files from specified locations on your machine, then restore it should the need arises. Keep in mind that this feature has to be switched on if you plan on using it to recover lost data and you’ll need to have a second storage medium for it to work.
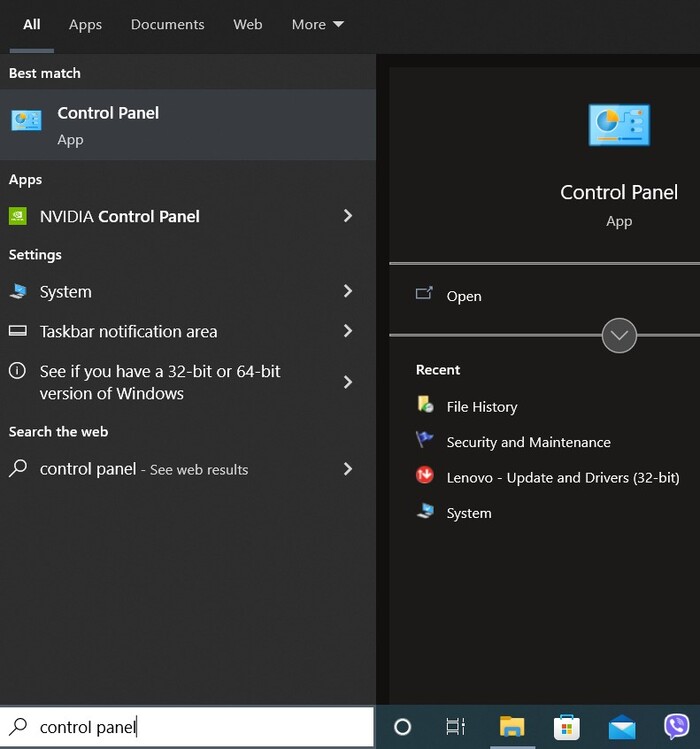
- Pull up your search tool, type in “Control Panel” and select the top result.
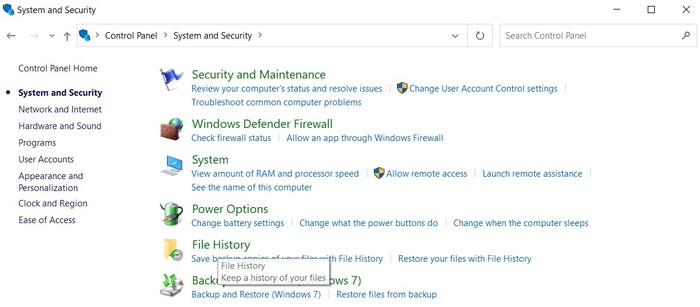
- Head to System and Security > File History.
- Select Restore personal files from the left pane.
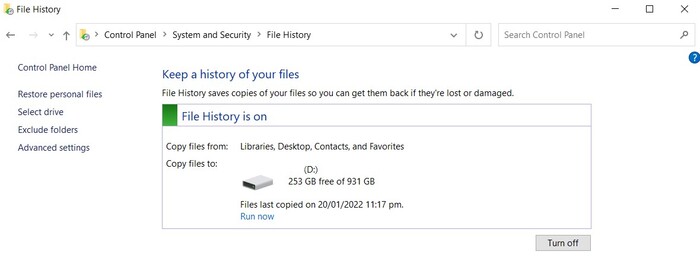
- Find the folder where your PEF files were last in.
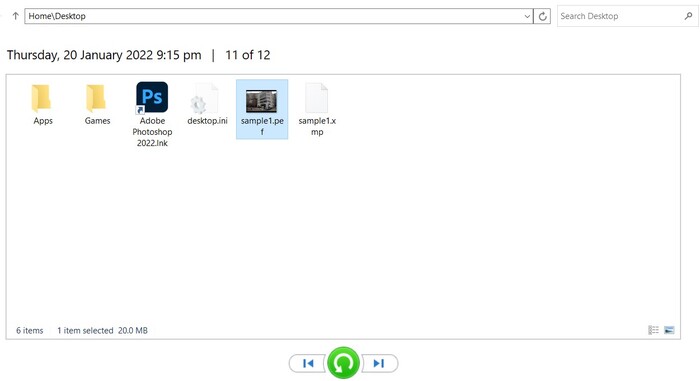
- Select the files you want to retrieve and click the green arrow on the bottom of the window to return them to their last location.
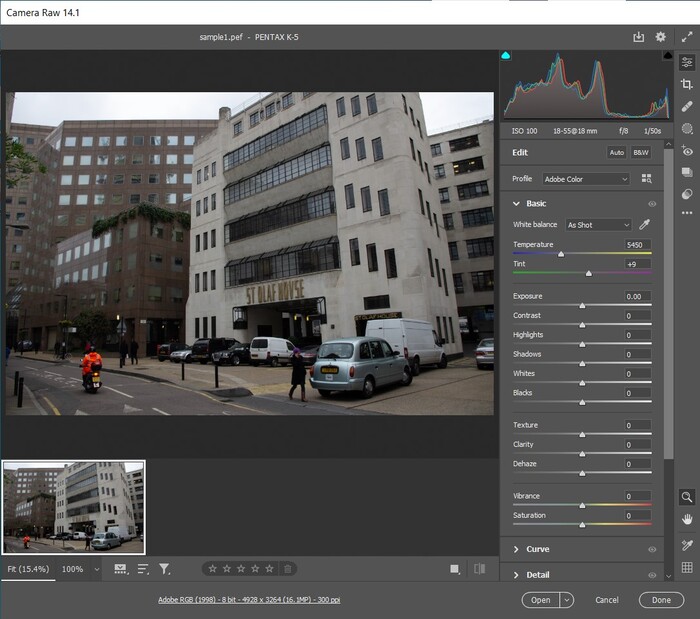
How To Open PEF Files On Windows and Mac
Most modern Mac and Windows operating systems shouldn’t have any trouble accessing PEF files since they should be equipped with built-in image openers that are compatible with the file extension.
However, if you want to make meaningful edits to an image format of this caliber, you’ll want a more powerful graphics editor like Adobe Photoshop which has versions for both Mac and Windows. Here’s hope you can open PEF files with Photoshop 2022 (older versions work in a similar manner as well):
- Launch Adobe Photoshop 2022.

- Click File on the top-left concern of the window and select Open.
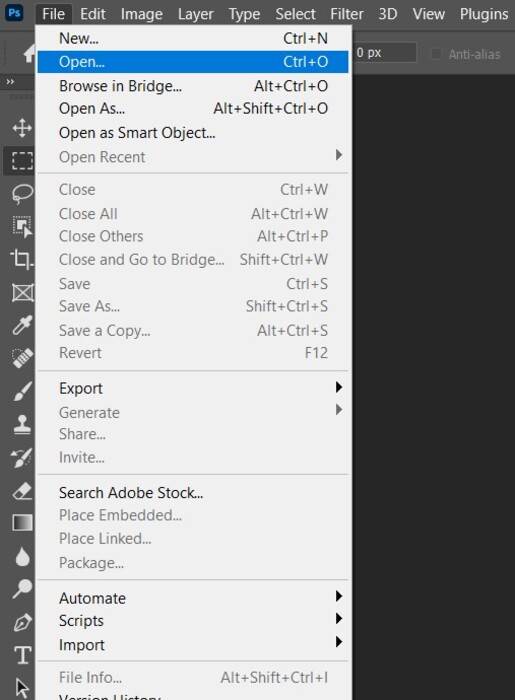
- Navigate to where your PEF file is and then double-click it to open.
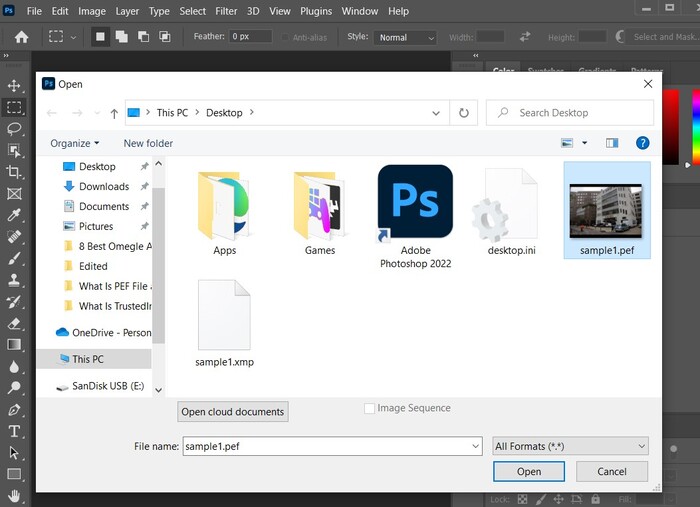
- Give it a few seconds to load and the image should appear on a separate window.
Other Programs That Can Open PEF Files
Adobe Photoshop certainly is a powerhouse of a tool, but there are other programs available that can open and edit PEF files. Here are some of the more common ones:
- PENTAX PHOTO Browser 3 and PENTAX PHOTO Laboratory 3 (Only available if you own a Pentax device)
- Windows Live Photo Gallery (Windows)
- Corel Aftershot (Windows & Mac)
- Apple Preview (Mac)
- ACD Systems ACDSee (Windows & Mac)
Tips To Avoid PEF File Loss
While there are certainly quite a few reliable methods to regain deleted or compromised PEF files, there’s always a slim chance that the information might not be recoverable. That’s why, at the end of the day, preventing your data from being lost in the first place is always the best policy. Below are a few tips that you should always keep in mind to avoid data loss:
- Routinely schedule backups: It’s common for users to continuously postpone creating a backup for their important files thinking they can always just do it another day. But if you have essentials for work or personal keeping that you absolutely cannot lose, then you definitely should back up your files regularly so you have a copy in case things go awry. For example, you could abruptly lose power after you forgot to save your files on another medium, causing the originals to disappear without a backup.
- Protect yourself from malware: Malware is dangerous software often hidden within malicious websites. They piggyback onto machines that visit these sites without proper protection and can cause serious damage, such as data loss and complete system failure. Always make sure you have top-notch anti-malware software installed on your computer to prevent this.
- Keep leisure and work separate: The more programs you install and remove from your computer and the more you use it for various activities, the more likely it is that your operating system becomes unstable. This could lead to files being corrupted or unsaved information being lost, which is why you should have a machine that’s devoted solely to working.