


Lost your Desktop files? This happens way more often than you think, to a lot of people, and there are several possible reasons why. To help users with the confusion, we wanted to put together a guide that covered all bases at once.
After researching dozens of user stories and testing out different solutions, we managed to determine the most effective and straightforward methods for recovering Desktop files. Whether they’ve been hidden, misplaced, or accidentally deleted, this guide will help you get them back.
Desktop File Recovery Basics (First Steps)
Before jumping straight into more complex data recovery solutions, let’s briefly cover the most basic troubleshooting steps first. They are simple fixes that resolved a surprising number of cases we found during our research, and they can save you a lot of time and effort if your files weren’t actually permanently deleted.
1. Check the Recycle Bin
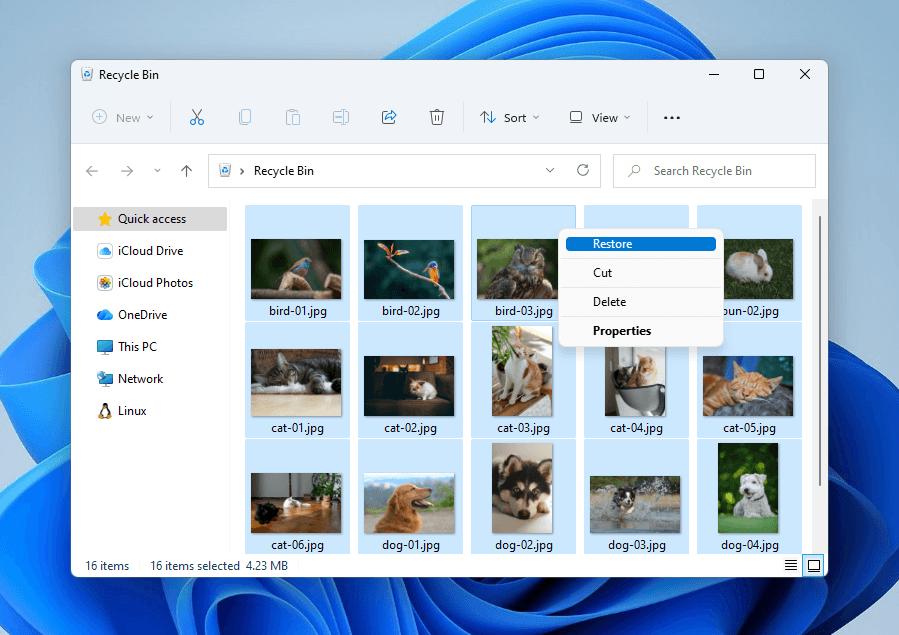
We know it’s an obvious solution to most of you, but if you actually did end up with a deleted Desktop file by mistake, checking the Recycle Bin is the first logical step. Here’s a quick refresher on how to restore files from the bin:
- Locate the Recycle Bin icon on your Desktop and double-click it to open the folder.

- Check if your files are present. If you find them, click on an individual file or folder, or click-drag your mouse to select multiple items. Then, right-click your selection and choose Restore.
2. Look for Files in Another Windows User Profile
The Desktop folder disappearing into another user profile’s directory is surprisingly common, and it can be caused by several different reasons. During Windows updates, your system may log you into a temporary account due to a bug. Or, you may have been using another user profile when you created the Desktop files.
So, before trying to “recover” your Desktop files, check other user directories first. Fortunately, you don’t need to log in to that user’s profile–you can access the directory through File Explorer.
- Open File Explorer.
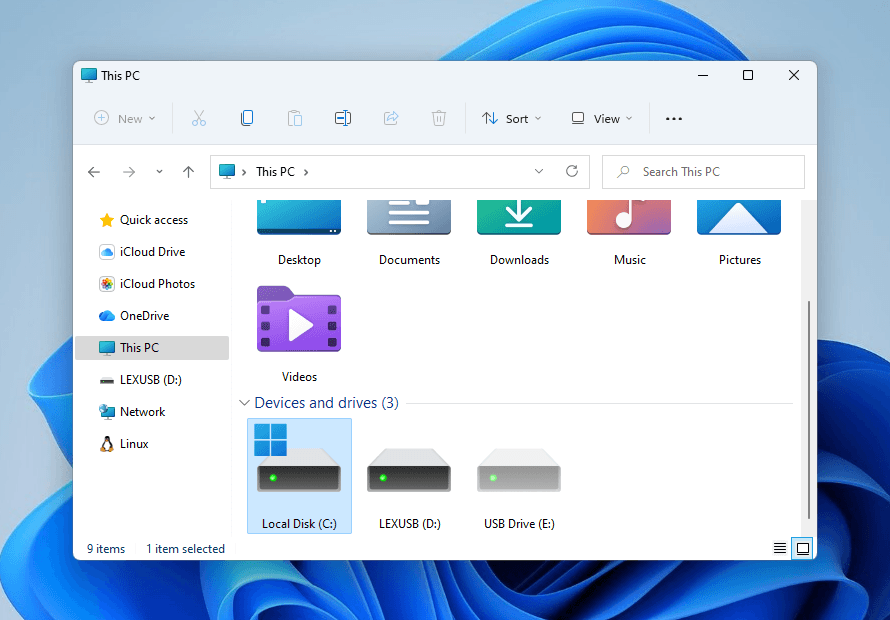
- Navigate to This PC and locate your system drive–usually, it’s Local Disk C:. Double-click it to open the directory.
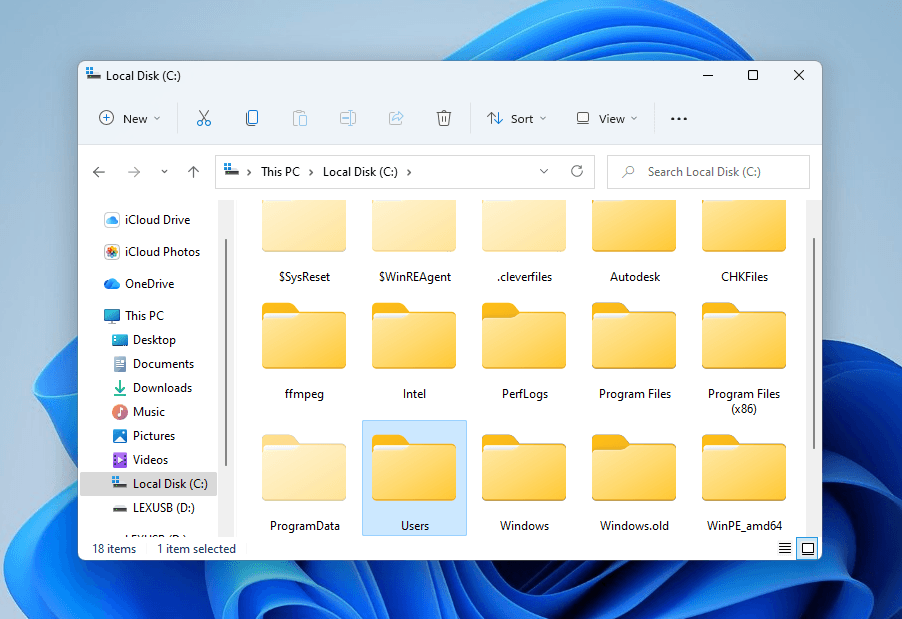
- In your drive’s root directory, locate and open the Users folder.
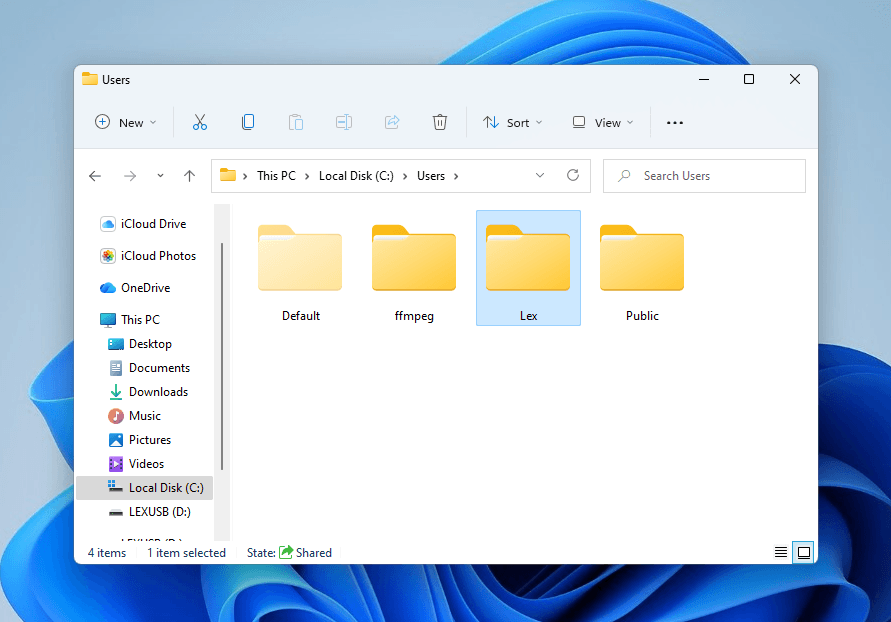
- Inside each User folder, you’ll find the Desktop folders for the assigned user. If your files aren’t in yours, look in the other folders (with the owner’s permission).
3. Search Your PC for the Missing Folder or File
If your Desktop data is not in the Recycle Bin or in other user profile directories, it might still exist elsewhere. You may have accidentally dragged and dropped it to another location without noticing, especially if you use a sensitive touchpad device.
No matter where your files or folders are on your drive, as long as they haven’t been deleted, you can find them using the Windows Search tool.
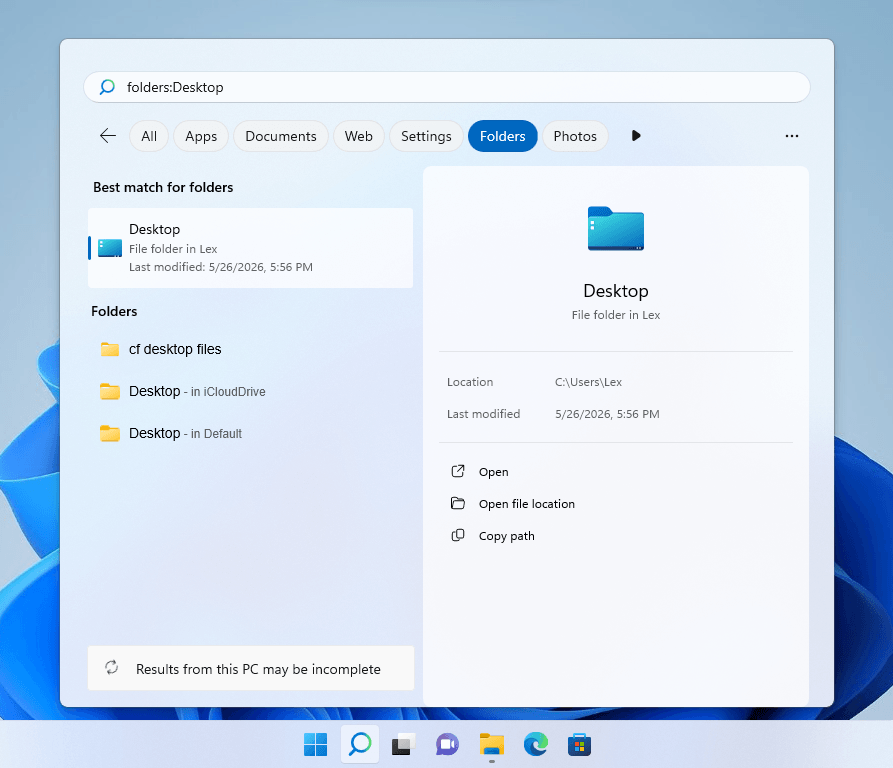
- Open the Windows Search tool by pressing the Windows key + S key or clicking the search field in the Start menu or taskbar.
- In the search field, type folders:Desktop, then check the folders that appear in the left pane. Alternatively, if you want to restore specific files, you can type file names, extensions, and other applicable queries.
4. Make Sure Desktop Files Are Not Hidden
While not as common, there are scenarios where your Desktop files have the Hidden attribute enabled; this causes them to completely disappear from File Explorer when hidden files are disabled from view (which is the default setting).
Using File Explorer’s settings, you can easily view any hidden files in your Desktop folder and disable their Hidden attribute.
- Open File Explorer.
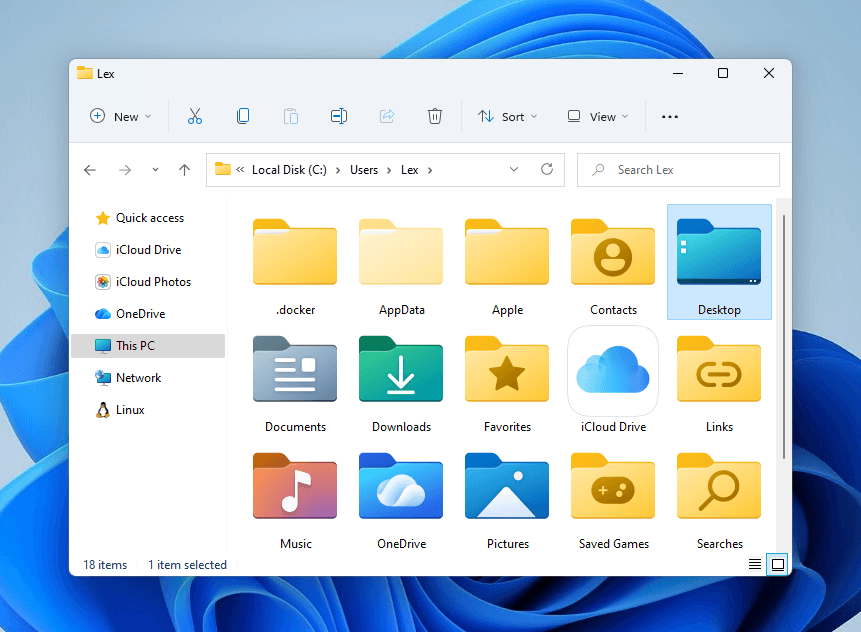
- Navigate to This PC > Local Disk C: (usually) > Users. Open your user folder, then open Desktop. If your Desktop is synced to OneDrive, try checking Local Disk C: > Users > your user folder > OneDrive > Desktop as well.
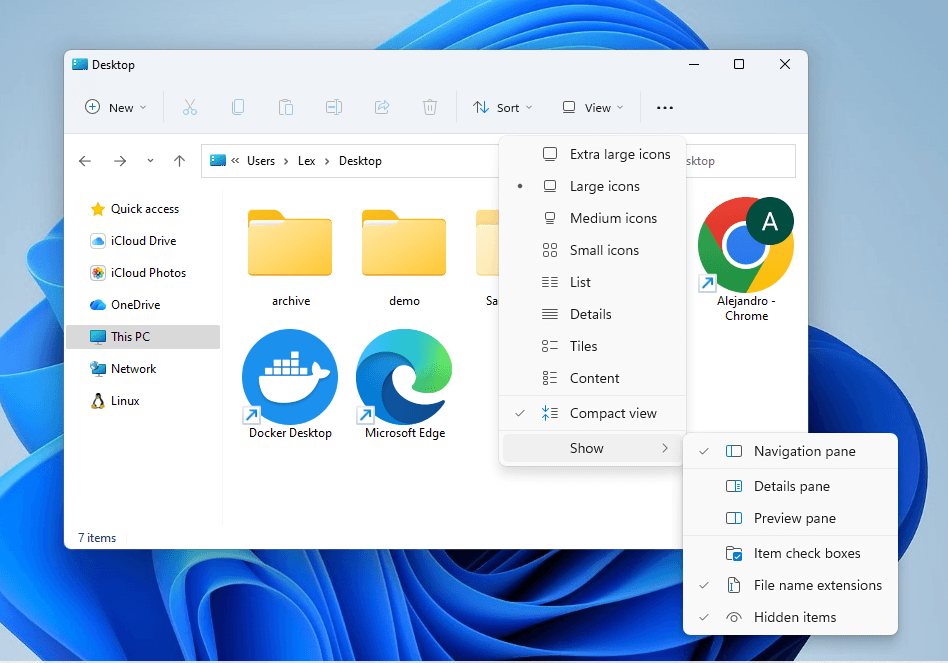
- On the menu bar, click View > Show, then make sure Hidden items is enabled. If your files were hidden, they should appear with a slightly faded icon and file name.
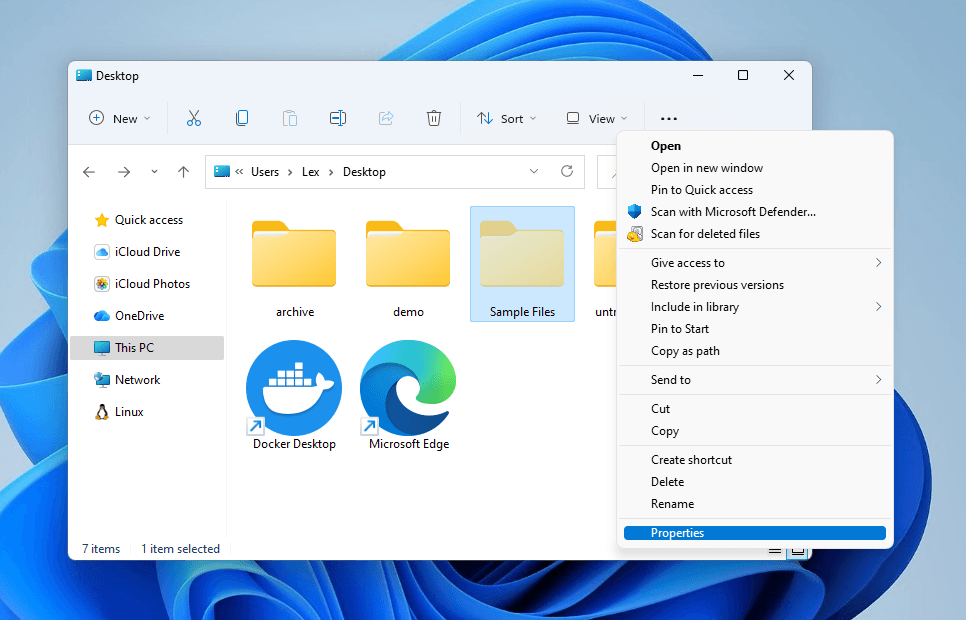
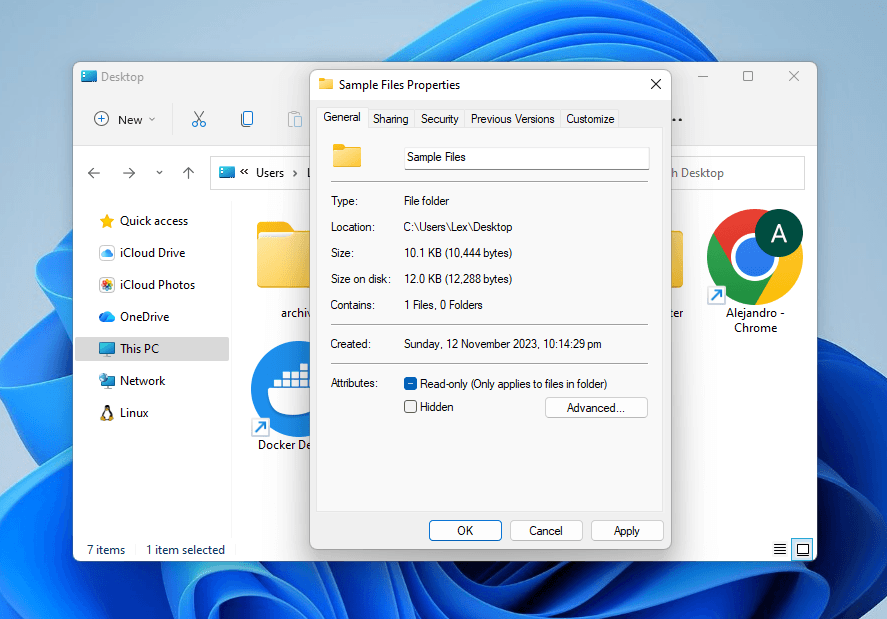
- If you desire to unhide your files, select the files and hit right-click. From the context menu, select Show more options > Properties.
- Disable the Hidden setting, then click Apply.
How to Recover Deleted Files From Desktop
Once you’re positive that your Desktop files have been permanently deleted, the next course of action is data recovery. There are a few options; most of them require that you either created a backup or synced OneDrive before the files were deleted.
If neither scenario is true, proceed immediately to Method 1, where we cover how to restore a Desktop folder (or how to recover deleted files from Desktop) using data recovery software. It’s the only way to restore data without any backup copies, and it’s best done as soon as possible after your files were lost.
Method 1: Use Software to Recover Deleted Desktop Files
In most scenarios, most users won’t have a backup or luck out with OneDrive’s sync timing. Without existing copies of your files that Windows can restore, you’ll need to use data recovery software to scan your drive for the physical data of your Desktop files.
For this guide, we’ll be using Disk Drill. It’s one of the best Windows data recovery tools for this particular scenario, because it excels at restoring recently deleted data with its original folder structure intact (making it easier to find specific directories). It also supports almost all common file types and project documents, covering most of what typically gets dumped on your Desktop.
You can download Disk Drill and scan your drive for free, and you can preview as many files as you want–which can help you determine which files are recoverable. You also get 100 MB worth of free data recovery, which should be more than enough for a few documents, audio files, and even small video clips.
Here’s how to restore a deleted folder from the Desktop or deleted Desktop files using Disk Drill:
- We recommend installing Disk Drill, as well as saving the recovered data, on a different partition, a separate internal storage device, or an external storage device. This prevents overwriting your files’ data, in case they were deleted. So for this step, connect an external storage device to your PC if you need to.
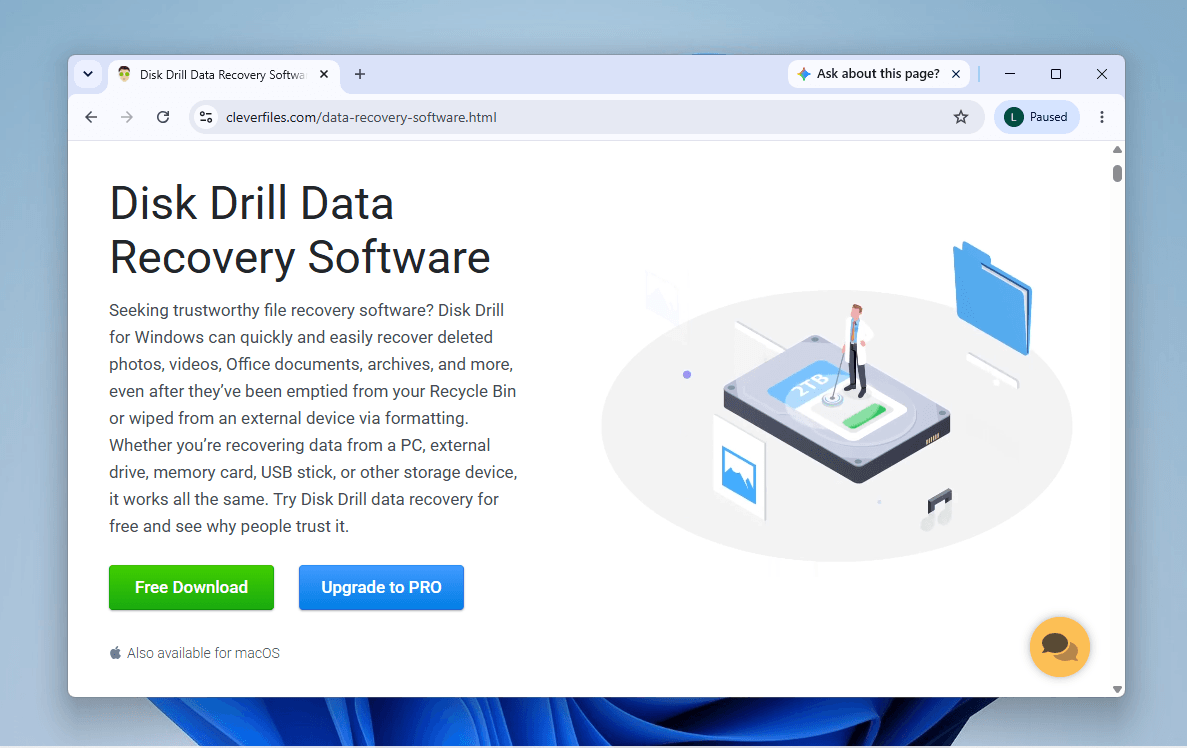
- Download Disk Drill’s installer to the non-system drive from step 1 (you can change the default downloads folder in most browsers).
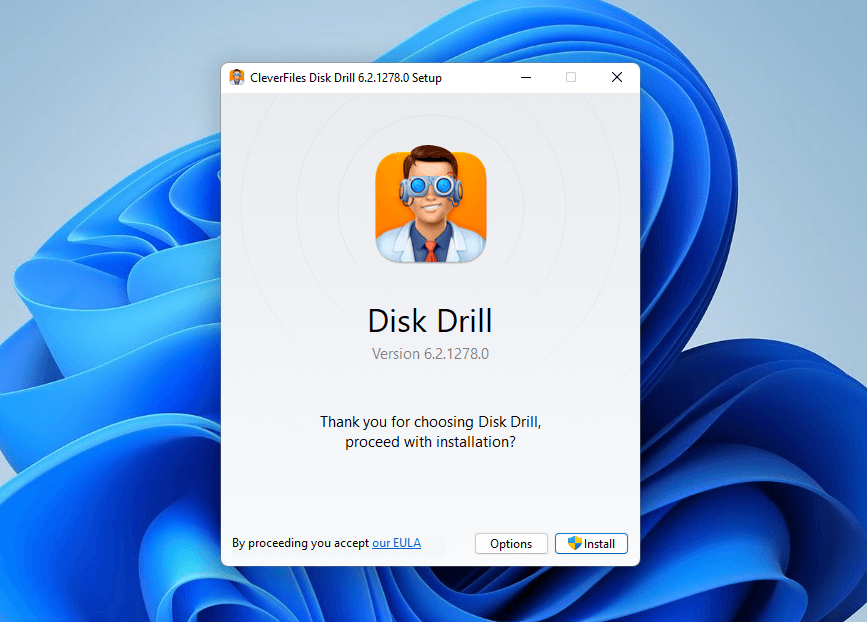
- Run the launcher and click Options.
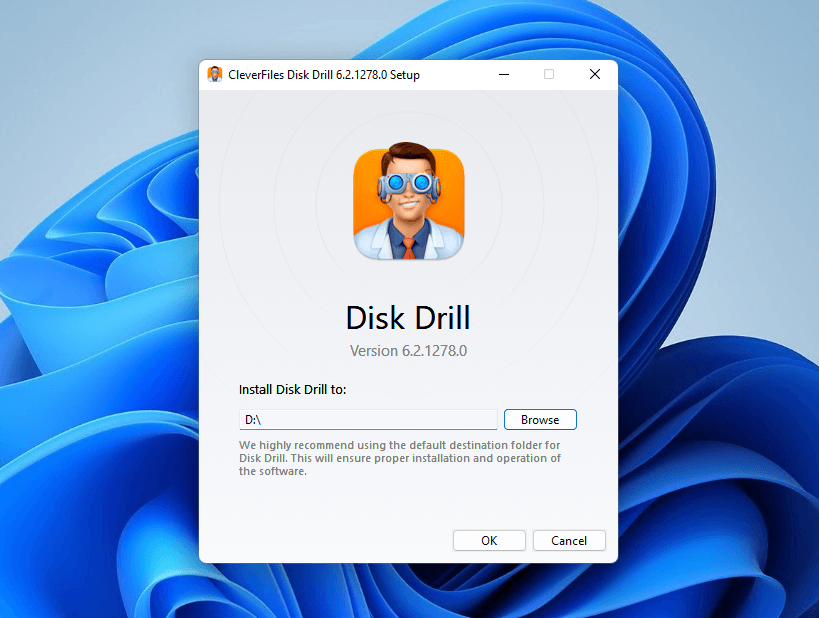
- Use the Browse button to select your non-system drive as the installation folder. Then, click Apply and follow the rest of the wizard’s instructions.
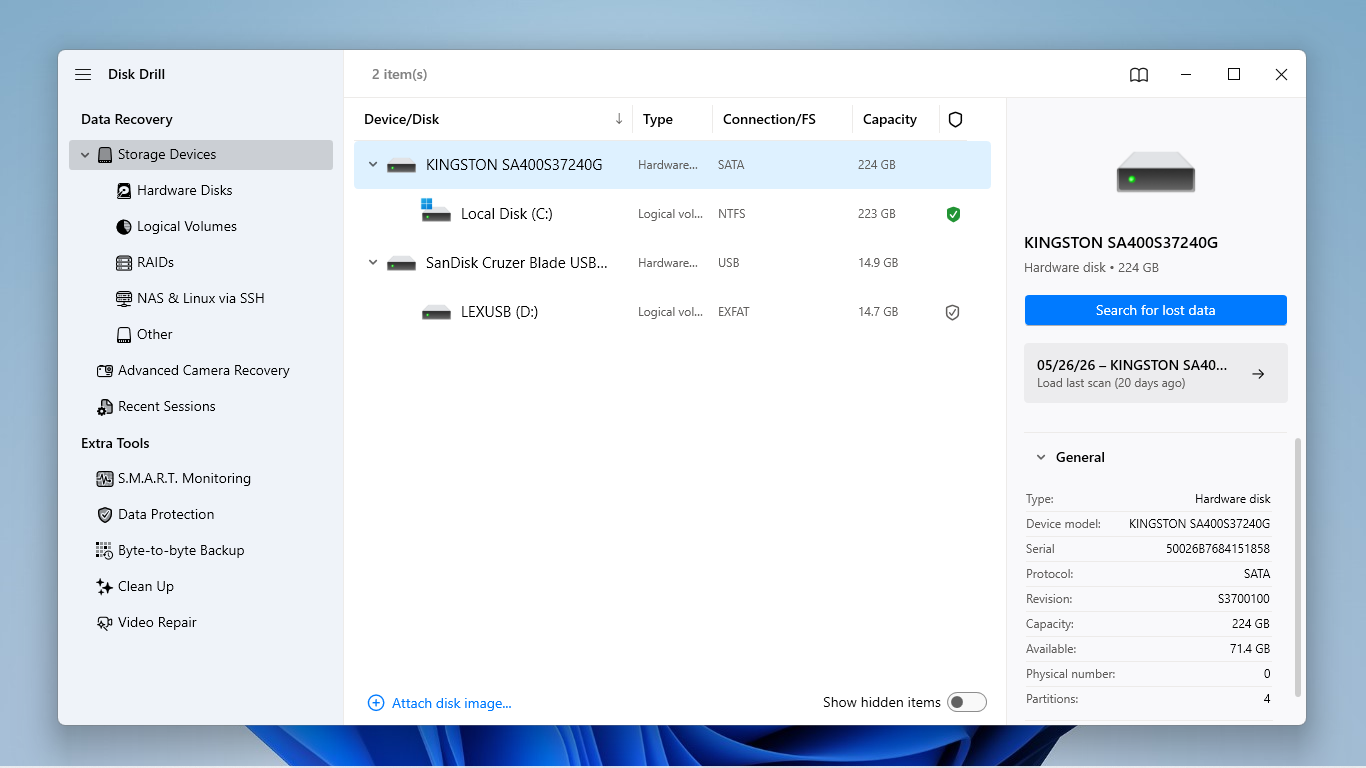
- After installing Disk Drill, launch it from your drive. In the main menu, select your system drive, then click Search for lost data.
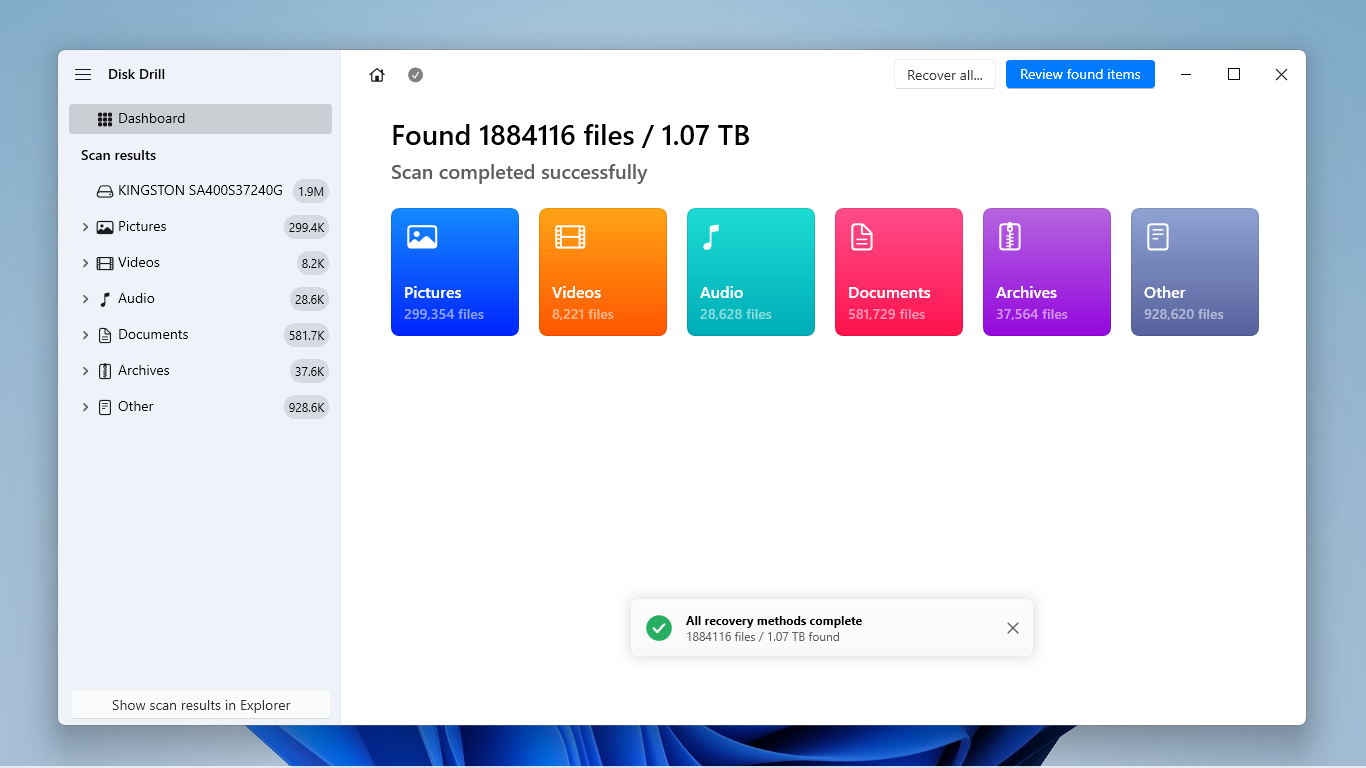
- We recommend waiting for Disk Drill to completely finish scanning your drive. Then, click Review found items.
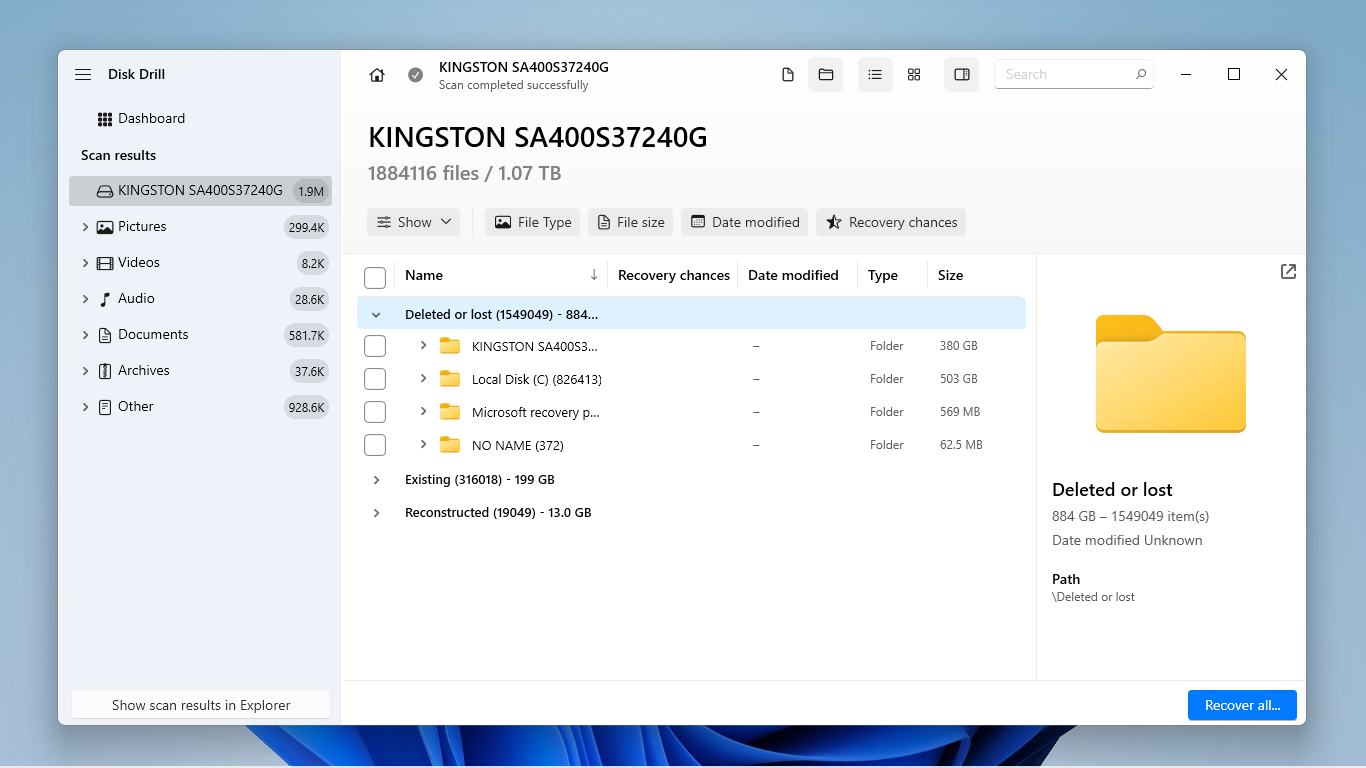
- Expand the Deleted or lost tab for now, which preserves your drive’s original folder structure. This allows you to traverse the same directory path as you would in File Explorer. You can also use the search bar and the filters in the left sidebar to find your folder or its specific contents faster.
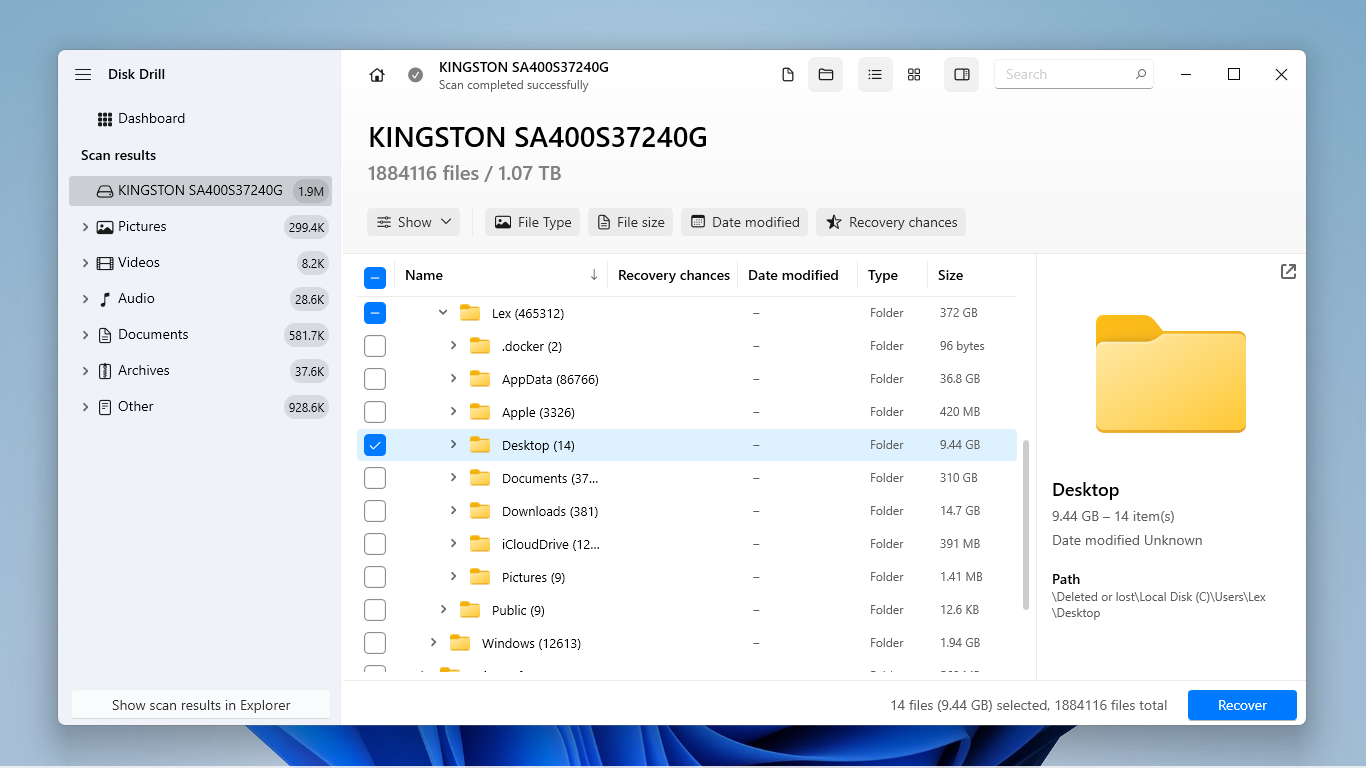
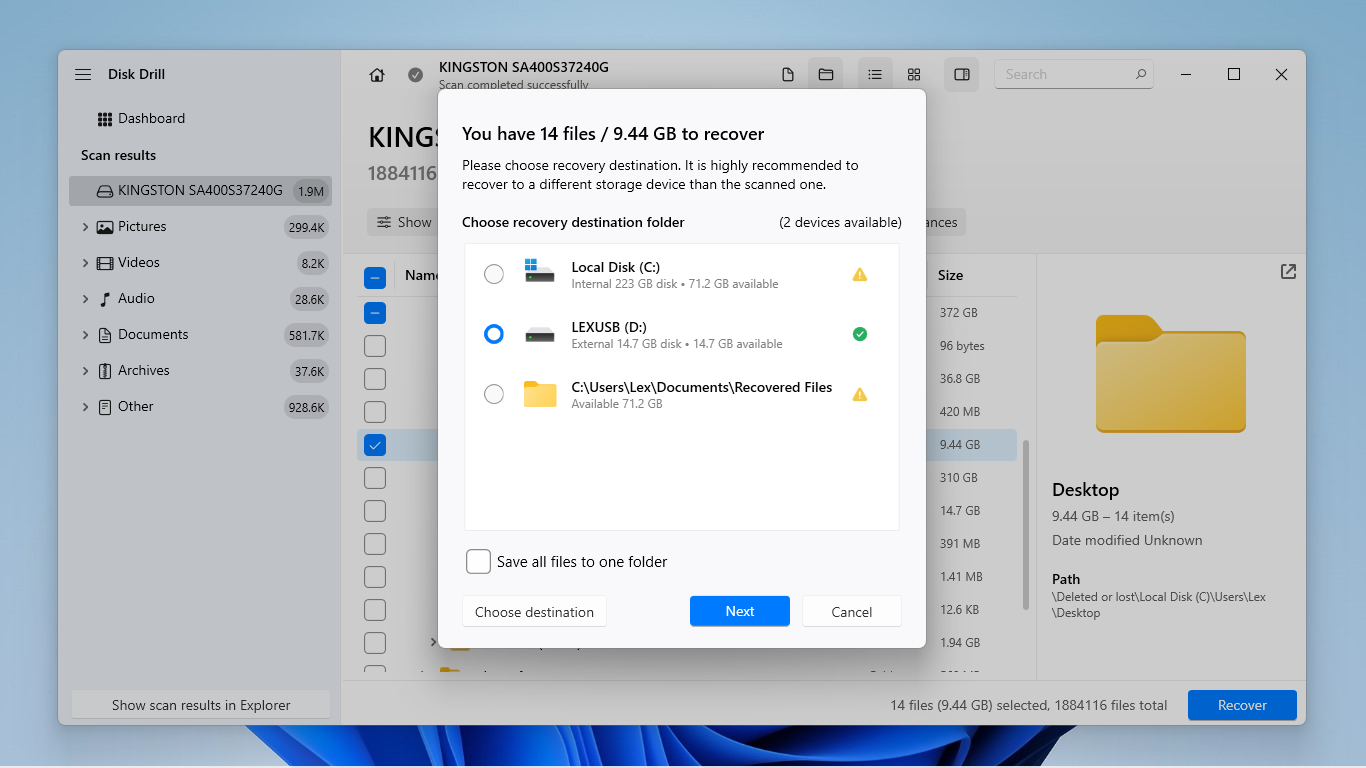
- Once you find your Desktop folder, we recommend clicking each of its contents once to display their file previews–this helps you verify that your data is actually recoverable. Then, click the checkbox beside your Desktop folder (or the specific files you want to restore), and click the Recover button.
- Finally, select your non-system drive (from step 1) as the destination for the recovered files to avoid overwriting your data. Then, click Next to proceed with recovery.
Method 2: Restore Deleted Desktop Folder From File History
File History is a built-in backup feature on Windows. Once enabled, it continuously saves your main user directories by default, including your Desktop folder, Documents folder, etc. As long as you used the feature before deleting your Desktop, you can “roll back” your directories to a previous version. We’ll demonstrate how to use this tool in the guide below:
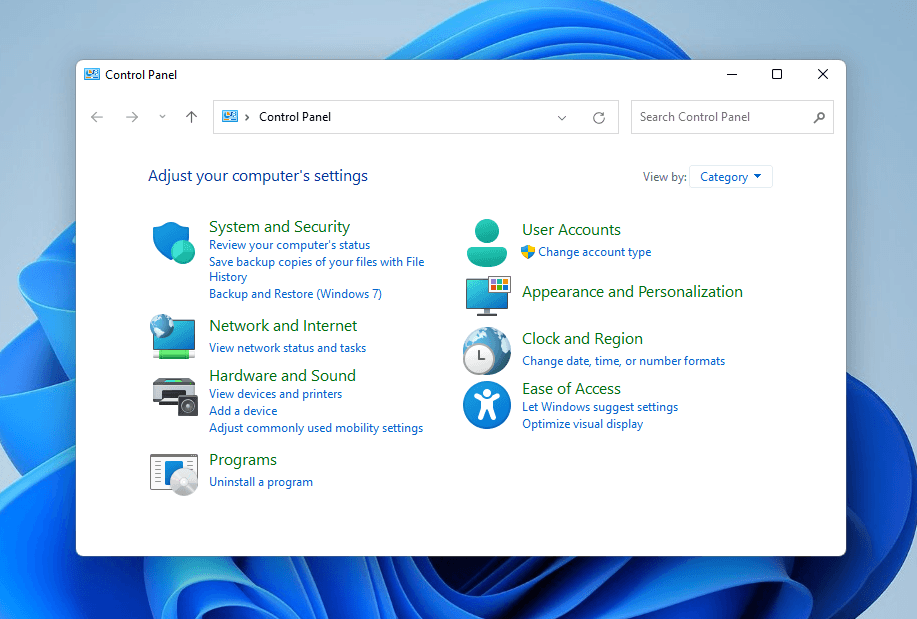
- Open Control Panel.
- From Control Panel’s main menu, select System and Security.
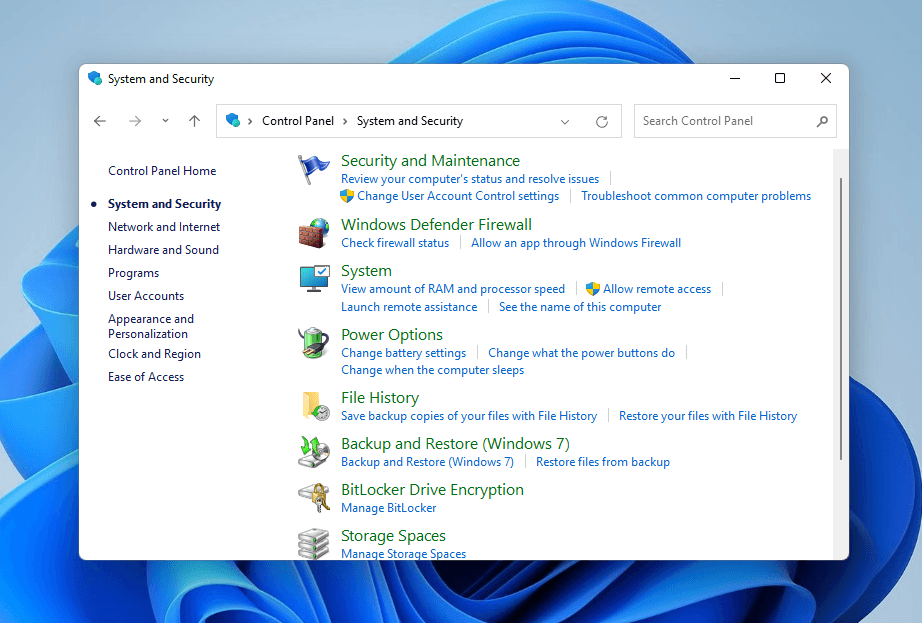
- Select File History.
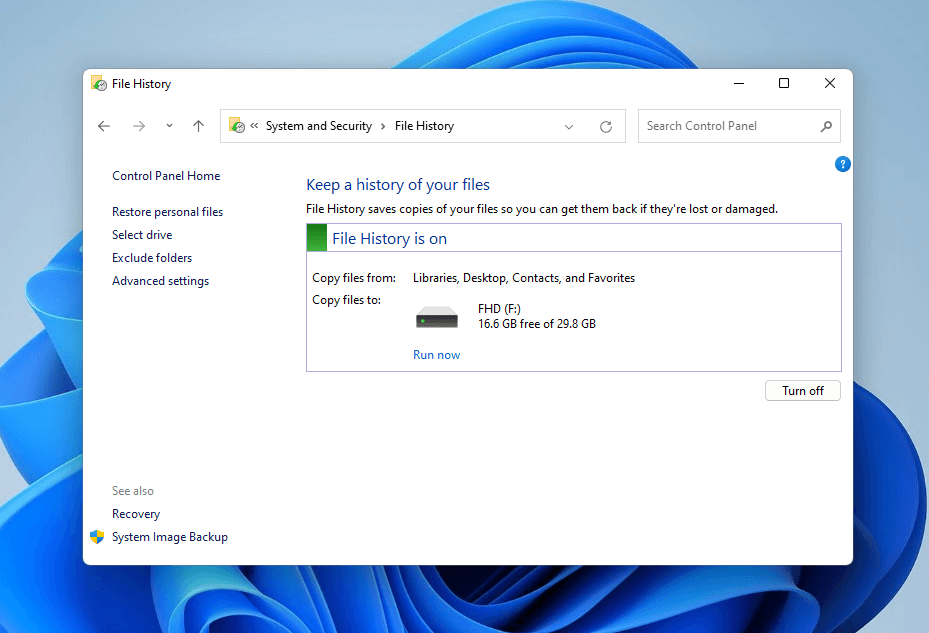
- In the left sidebar of the File History menu, select Restore personal files.
- A new interface should appear. Use it to locate your Desktop folder. Then, click the arrow buttons at the bottom of the window to view previous versions of your Desktop folder. Once you find the version that contains your missing files, select that Desktop folder and right-click the green restore button at the bottom of the window, and choose Restore to.
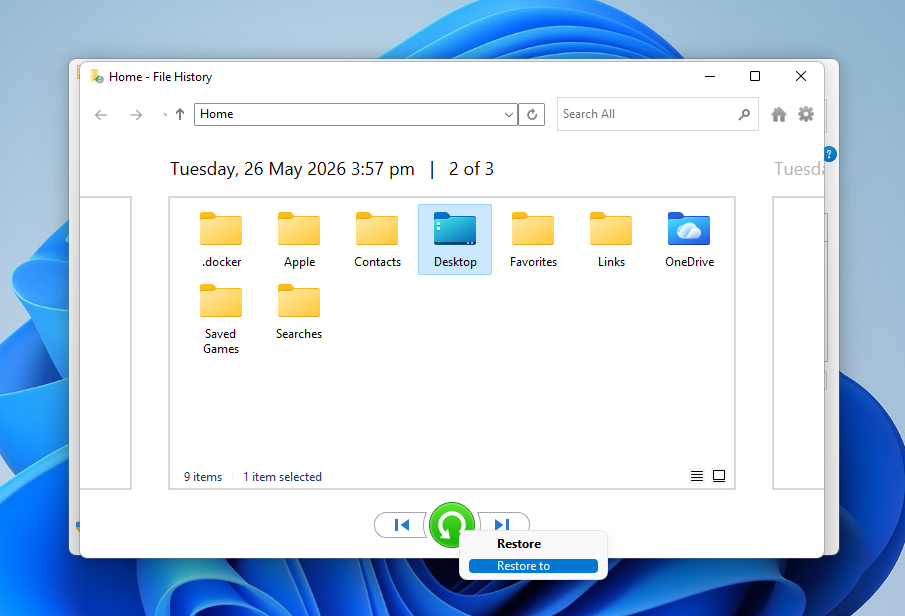
- Choose a location to save your restored files.
Method 3: Restore Desktop Folder From Windows Backup
Windows Backup or Backup and Restore (Windows 7) is another type of backup tool. It creates an image of your data, which is an exact copy of your entire disk in its current state. As long as you created the backup before deleting your Desktop folder, you should be able to get your files back. We’ll show you how it works.
- Open Control Panel.
- Select System and Security.
- In the System and Security window, find and select Backup and Restore (Windows 7).
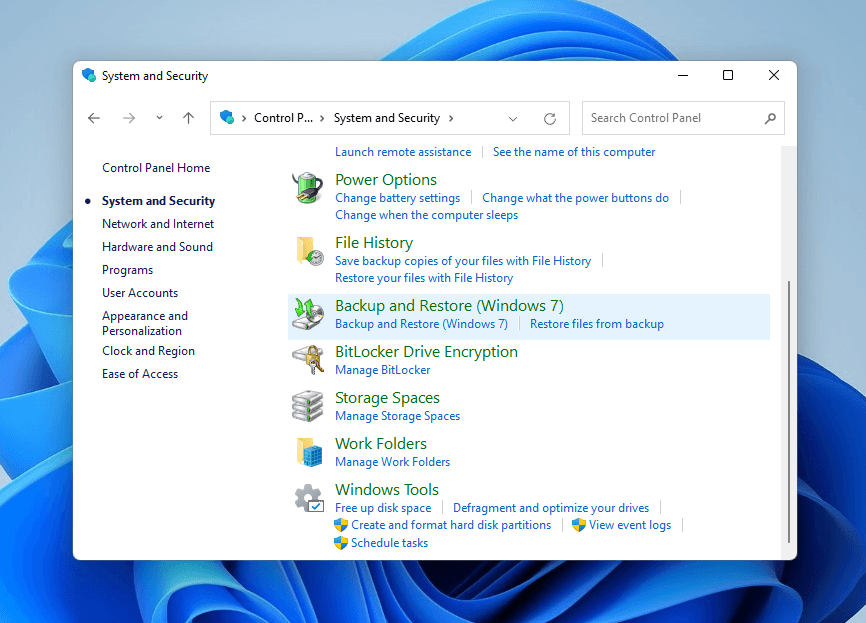
- Scroll down to the bottom of the window. Then, click the Restore my files button.
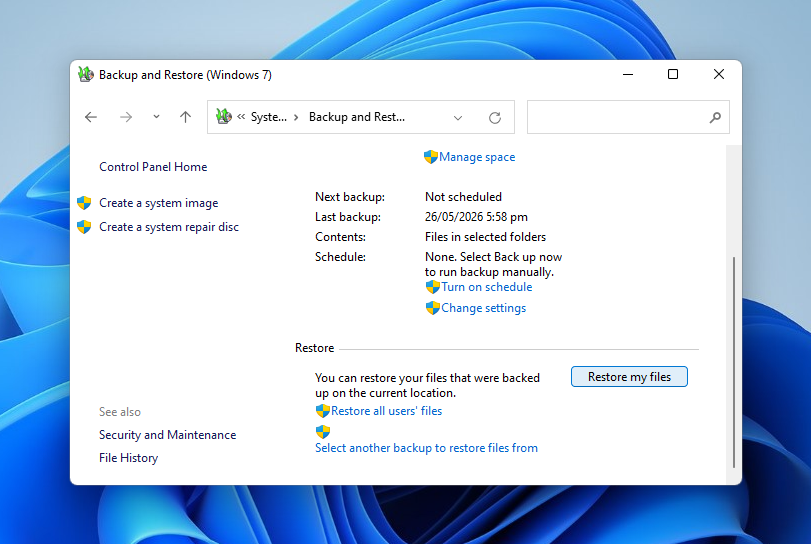
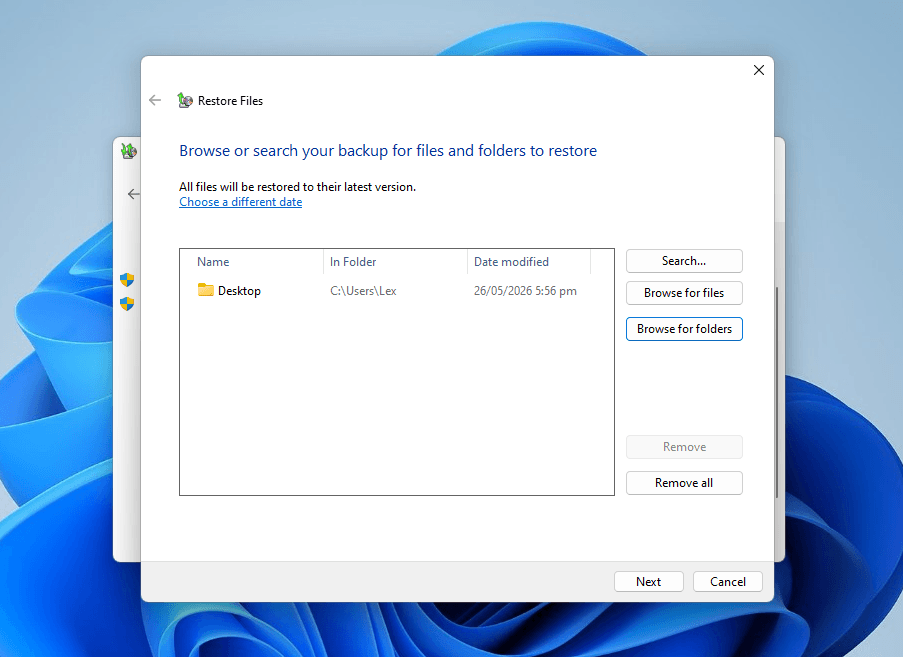
- In the new window, click Browse for folders and add your Documents folder to the list. Then, click Next.
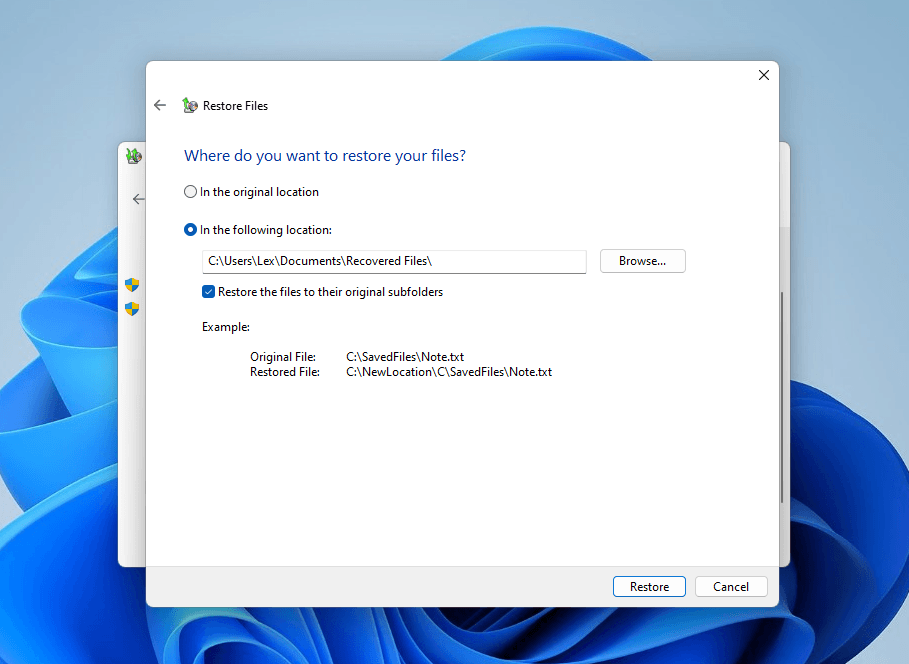
- Choose the In the following location setting, then click the Browse button to choose a location for Windows to save the recovered Desktop folder. Finally, click Restore.
Method 4: Recover Desktop Files From OneDrive
OneDrive is Microsoft’s cloud storage and synchronization service. If you enabled OneDrive sync for your Desktop folder, that means it has a copy uploaded to the cloud that you can access via a web browser.
Another common and related scenario we encountered during our research was users finding that their Desktop files disappeared after enabling OneDrive’s sync feature. In this case, OneDrive likely detected that you’re running low on storage, and it deleted the local copies of your Desktop files to free up space. You can access the cloud copies via OneDrive, which we’ll demonstrate below.
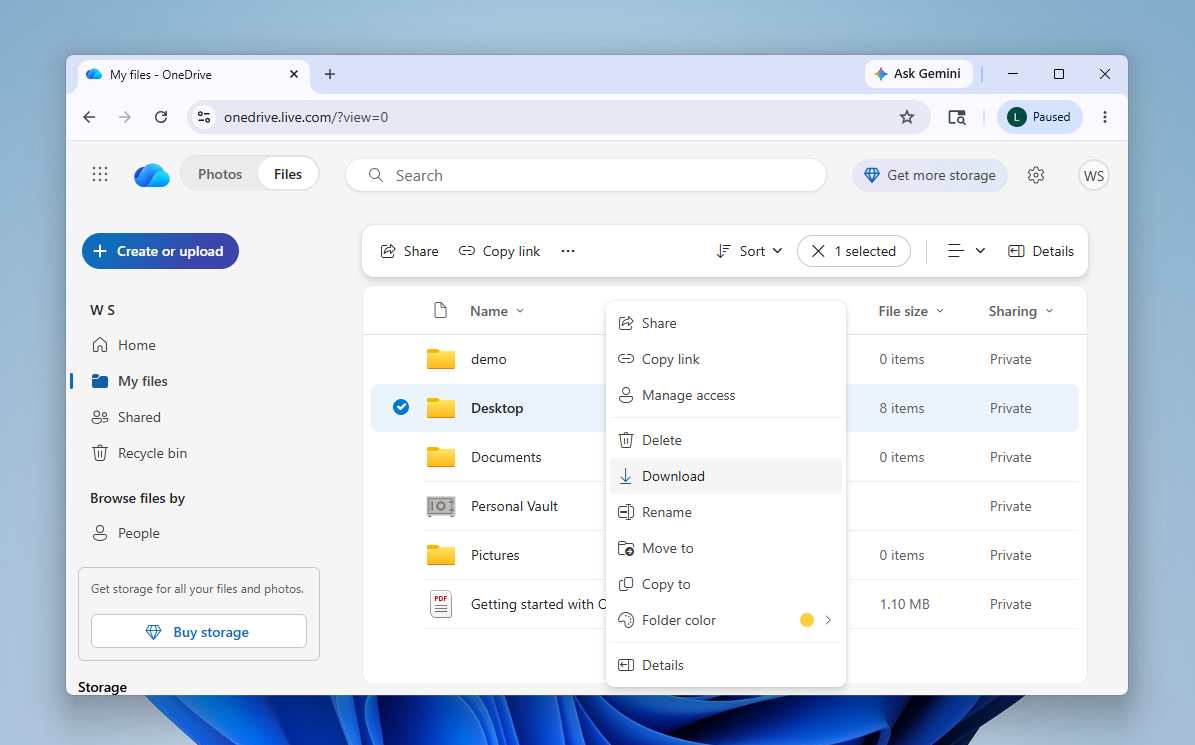
- Open a browser and log in to onedrive.live.com.
- In the left sidebar, select Recycle bin. If you see your Desktop folder in the right pane, select it and click the Restore button. You can also check the My files location in case your Desktop files were locally deleted by OneDrive.
Recovery Recap
We’ll end this guide with a brief recap you can use as a reference when you start restoring your data. You can click on the links to quickly jump to the appropriate section.
- You accidentally deleted a folder on your Desktop, or you accidentally deleted a Desktop folder–check the Recycle Bin.
- Your files aren’t in the Recycle Bin? Try restoring local backups like File History or Backup and Restore. You can also check OneDrive for synced files. Just note that these solutions only work if you backed up or synced your files before deleting them.
- If you don’t have any backups or OneDrive copies, use data recovery software to scan your drive directly (we used Disk Drill for our guide).
- Not sure if your Desktop files were actually deleted? Try looking for them in another user profile or scanning your PC with the Windows Search tool.
- In some cases, your Desktop files might be hidden; you can change File Explorer’s hide settings, then try searching for your data again.
FAQ
Successfully bringing back a deleted Desktop folder depends on a host of different factors; to cover every scenario, do the following steps:
- Check the Recycle Bin.
- If your Desktop folder is not in the Recycle Bin, see if it’s in onedrive.live.com > My files.
- Restore any backups that saved your Desktop folder, such as File History or Backup and Restore (Windows 7) in Control Panel.
- If none of the above steps work, you’ll need to use data recovery software like Disk Drill to scan your drive for your Desktop folder’s data folder and restore it.
To recover desktop files after a Windows system update, try one of the following methods:
- Check if you have a Windows.old folder in File Explorer > This PC > Local Disk C:.
- Log in to onedrive.live.com and navigate to My files. If your Desktop was saved in your OneDrive, it should appear. You can also check OneDrive’s own Recycle bin folder for any deleted files.
- Restore backups like File History or Backup and Restore (Windows 7), but they require that you backed up your Desktop folder before it was deleted.
- Use data recovery software like Disk Drill to scan your system disk and restore your Desktop folder and its contents.
The Recycle Bin has a storage threshold. If one or some of your files are larger than the threshold (e.g., a game installer), or the Recycle Bin was close to full when your Desktop folder was deleted, those files might have skipped the bin altogether. You can either restore a backup you created before you deleted your Desktop folder, or you can use data recovery software to restore your folder.
