The macOS operating system provides users with several ways how to zoom in and out on hard-to-read text and small images. Even if you’re already familiar with one or two ways how to zoom out and in on a Mac, we’re convinced that this article will teach you something new and help you get more out of your Mac.
Zooming Using the Trackpad
If you own a Magic Trackpad or have a Mac with a built-in Multi-Touch Trackpad, you can tap, swipe, pinch, or spread one or more fingers to perform useful actions.
The Magic Trackpad was announced in 2010 as an alternative to the computer mouse for people who prefer controlling the cursor with fingers rather than by moving the entire hand. The second generation of the Magic Trackpad was released in 2015.
The Magic Trackpad is a good solution for people who own older Macs that don’t come with a built-in Multi-Touch Trackpad, which can be found only in the following models:
- MacBook Air (Original)
- MacBook Air (Late 2008)
- MacBook Air (Mid 2009)
- MacBook Pro (15-inch Early 2008)
- MacBook Pro (17-inch, Early 2008)
- MacBook Air (Late 2010) and later
- MacBook (Late 2009) and later
- MacBook Pro (Late 2008) and later
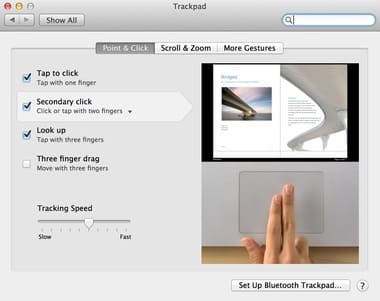
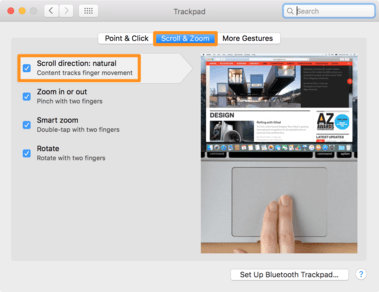
To zoom on Mac computers using the trackpad, gesture support must be turned on. Although gesture support should be turned on by default, it’s a good idea to verify that it really is by clicking on Apple menu and selecting System Preferences. There, click on the Trackpad option and check the settings.
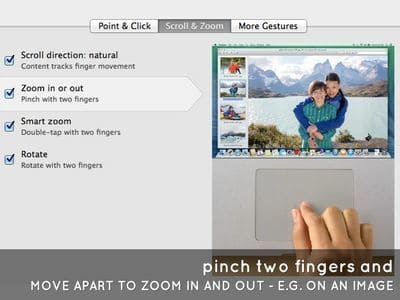
With gesture support activated, open a web page, a picture, or a document and place two fingers on your Mac’s trackpad. To zoom in, Mac users can push their fingers away from each other, and they can move their fingers close to each other to zoom out. Both the zoom in and the zoom out gesture can be repeated for additional zooming. It’s also possible to zoom in and out by double tapping the trackpad with two fingers.
Other useful trackpad gestures include:
- Secondary click: Click or tap with two fingers.
- Scroll: Slide two fingers up or down to scroll.
- Rotate: Move two fingers around each other to rotate a photo or other item.
- Swipe between pages: Swipe left or right with two fingers to show the previous or next page.
- Show desktop: Spread your thumb and three fingers apart to show your desktop.
- App Exposé: Swipe down with four fingers to see all windows of the app you’re using.
To discover morde trackpad gestures, visit this page on Apple’s support website.
Zooming Using the Keyboard
To zoom in and out, Mac users can also use a handy keyboard shortcut, which works in most applications that support zooming, including web- pages, photos, and documents:
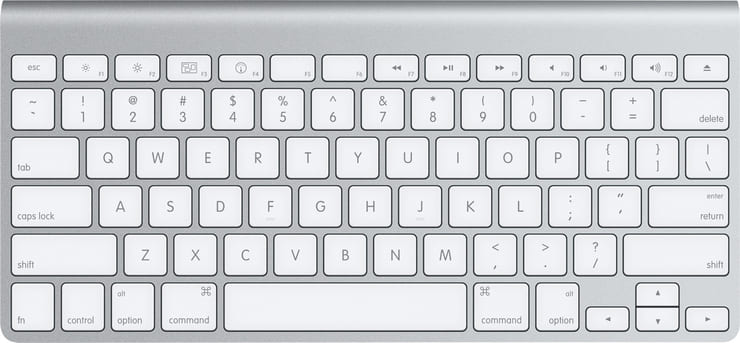
- While in an application that supports zooming, hold down the command key and press + to zoom in.
- To zoom out, hold down the command key and press -.
If you keep holding either + or -, you will continue zooming in or out respectively, which saves you from having to tap repeatedly on either key.
Besides zooming, you can do many other things by pressing various key combinations, including saving files, selecting items, printing, searching, or switching between apps. If you would like to find out all the different key combinations your Mac computer supports, visit the official support page.
Zooming Using the Screen Zoom Feature
If you’re having trouble using macOS because menu items are too small to read and checkboxes too tiny to accurately click on, then you should consider enabling the Screen Zoom feature, which makes it possible to zoom screen on Mac computers.
Screen Zoom is an accessibility feature intended for people with vision problems, and it’s located in System Preferences, under Accessibility.
- Click on the Apple icon and select System Preferences.
- Click on the Accessibility option.
- Select Zoom from the list of options on the left.
- Click on the “Use keyboard shortcuts to zoom” checkbox. This will enable the following four shortcuts:
- Option + Command + 8 (Zoom in or out of a fixed magnification level)
- Option + Command (Zoom in)
- Option + Command + – (Zoom out)
- Option + Command + \ (Enable/Disable image smoothing)
Located below the “Use keyboard shortcuts to zoom” checkbox is another checkbox titled “Smooth images”. If you click on it, zoomed images will appear smoother, but you will pay for the extra smoothness with a slight performance penalty. Unless you have a very old Mac, it’s very unlikely that you will notice performance degradation at all, so don’t be afraid to turn the option on if you don’t like looking at jagged edges.
While you have the Screen Zoom window open, notice the “More Options…” button in the bottom right corner. Click on this button to set the “Maximum Zoom” and “Minimum Zoom” values by clicking and dragging the two corresponding sliders. You can also change the screen movement settings, which affect how the zoomed-in screen image moves in relation to the cursor. The three available options are “Continuously with pointer”, “Only when the pointer reaches an edge”, and “So the pointer is at or near the center of the screen”.
Click OK to save your settings. Now it’s time to test the Screen Zoom feature to determine whether it’s necessary to further tweak the settings to achieve optimal results. Simply press the Option + Command to zoom in and Option + Command + – to zoom out.
As you can see, to zoom screen, Mac users can choose between several different methods, each being suitable for different users. While it might take you a while to remember all the different shortcuts and trackpad gestures your Mac computer supports, you’ll see how it all starts feeling very natural after you spend a few days with a shortcut cheat sheet by your side.