To launch the recovery process in Disk Drill, perform the following:
1. Start Disk Drill by going to your Applications folder and double-clicking on the Disk Drill icon.
2. On the main screen, you will see a list of the drives and devices available to be scanned. If the device you wish to scan is not shown, look on the bottom-left of the screen and click show them below to reveal any hidden items.
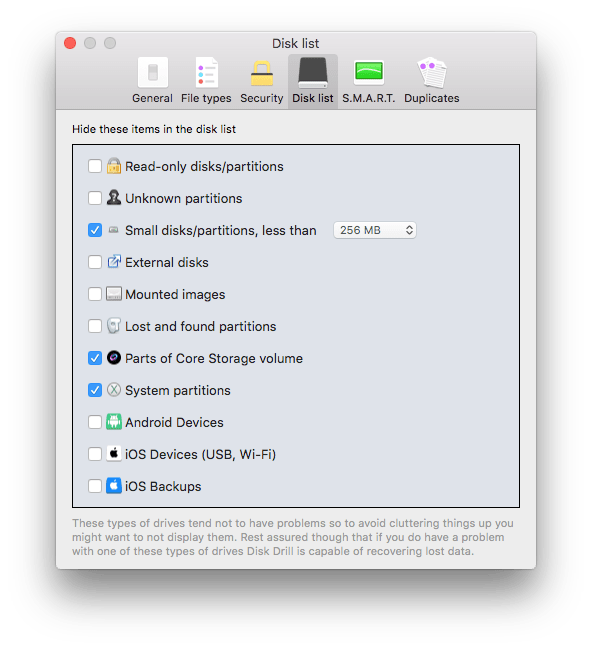
Note that you can exclude certain storage devices or partitions from scanning by choosing Disk Drill > Preferences > Disk list tab:
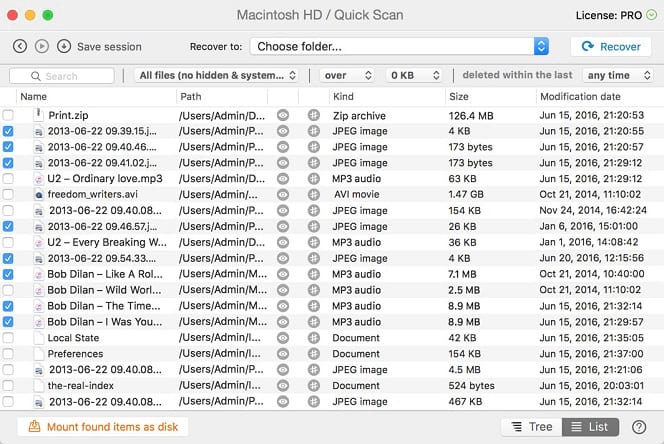
3. Click Recover (or Continue if you already run scanning previously, but suspended it) next to the target drive or device and wait until the scanning is complete. Alternatively, you can right-click the drive and select either Deep Scan or Quick Scan. The difference between them is that Quick Scan can recover files only with intact metadata while Deep Scan can help you recover deleted files on your Mac when all other methods fail.
However, Deep Scan cannot recover the metadata itself, so original file names are lost, and they will have a generic name like file567.doc, or if Disk Drill can retrieve some meta-info, it might be named according to its file type, such 1920×1200.jpg for a photo file.
Note also that you can save a scanning session and continue it later if don’t want to wait.
4. Once the scanning is complete, click the Mount found items as disk button on the bottom-left below the scan results. This will open a new Finder window showing a new virtual disk called Recoverable. You can navigate this disk as usual and copy or delete all recovered data just as normal files.
5. Drag the files/folders you wish to save from the mounted disk to the location of your choice (but make sure that this location should is not the same drive as the one you recovered the files from).
6. Open the files again in the new location to ensure they transferred properly.
7. Eject the mounted disk by clicking Unmount virtual disk in the bottom left corner.
Alternatively, you can simply select all scanning results and click Recover in the upper right corner instead of loading data to the virtual drive, but it is not recommended since you will not be able to check whether all found files are recovered properly.
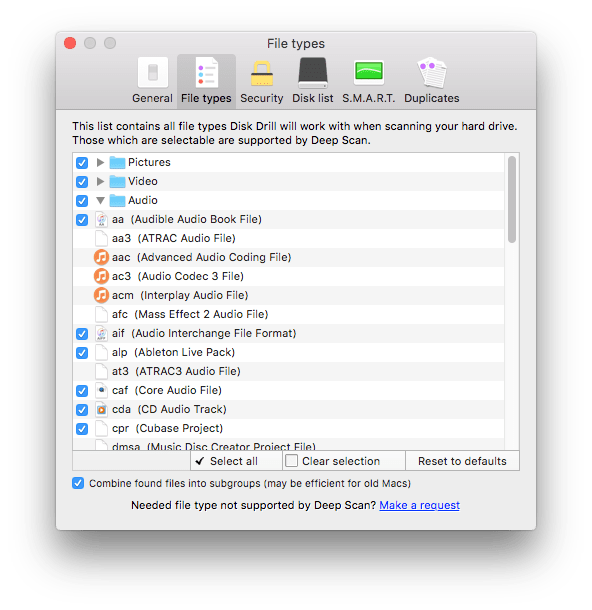
You can set up file types that Disk Drill will try to recover on the selected hard drive on the Disk Drill > Preferences > File types tab:
Note that if your Mac freezes during the recovery process, give it some time. Only in case of a deep freeze, that may take place due to hardware issue with a disk controller, simply restart your Mac and continue the recovery. Disk Drill usually makes checkpoints and can reload them after failures or freezes. If this is the case, try to make a disk image first and then run recovery from this image rather than directly from your hard drive.
Note also that you can instruct Disk Drill to ignore original structure of folders for recovered items on the Disk Drill > Preferences > General tab.
For more information about scanning algorithms and possible issues, please refer to our Scanning FAQs.