This tutorial covers macOS Catalina through Ventura. If you’re on macOS 14 Sonoma or later, follow our updated steps to grant Disk Drill Full Disk Access and allow App Background Activity.
What Is macOS Full Disk Access?
macOS Full Disk Access is a special system permission introduced in macOS Catalina to protect your data and privacy. When an app requests Full Disk Access, it’s asking to read and write to locations that are normally off-limits—including Mail, Messages, Time Machine backups, and certain system folders. Granting this permission ensures that trusted utilities (like backup software, data recovery tools, antivirus tools, or system cleaners) can function properly without compromising Apple’s sandboxing model.
Why Full Disk Access Permission Matters
- 🛡️ Enhanced Security. By default, macOS limits app access to your most sensitive files. Full Disk Access creates a clear gatekeeper: you decide which apps deserve that trust.
- 🔓 Low-Level Disk Access for Data Recovery. Full Disk Access enables recovery tools to scan every byte on your disk—essential for rebuilding lost files, recovering corrupted partitions, and digging deep into raw data.
- 🗃️ Reliable Backups & Restores. Backup apps such as Carbon Copy Cloner or Time Machine alternatives need Full Disk Access to copy or restore every file, including protected system data.
- 🔎 Comprehensive Scans. Antivirus and malware-removal tools require permission to scan mail, system caches, and other hidden directories.
- 📜 Automation & Scripting. Scripts or automation utilities (e.g., Keyboard Maestro) often need broad access to manage files across your drive.
How to Enable Full Disk Access for Disk Drill on macOS Catalina-Ventura
Since Apple expanded its security protections in recent macOS releases, granting macOS Full Disk Access is now required for Disk Drill to read your storage devices and perform deep data recovery. Rest assured, this change doesn’t alter how Disk Drill handles your files—we never collect, transmit, or store your personal data, and we continue to uphold our Privacy Policy in full.
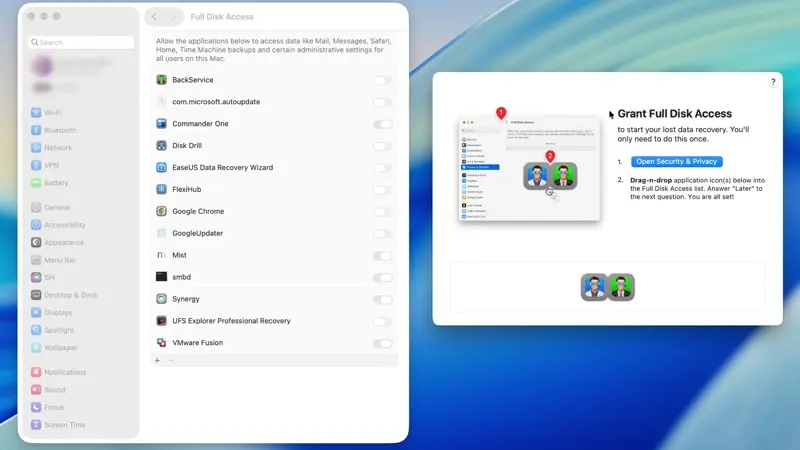
When you launch Disk Drill for the first time, you’ll see a clear, step-by-step dialog prompting you to grant Full Disk Access. Simply follow the on-screen instructions—this is a one-time setup that ensures Disk Drill can access your drives for deep data recovery.
- Launch Disk Drill & Authenticate. When you first open Disk Drill, macOS will prompt you for your administrator password. This one-time step is standard for any app requesting low-level disk access.
- Open the Full Disk Access Settings. In the “Grant Full Disk Access” dialog, click Open Security & Privacy.

- Add Disk Drill to Full Disk Access. In the Security & Privacy pane’s Full Disk Access tab, drag both Disk Drill icons (the main app and its helper) into the list, then authenticate by entering your administrator password.
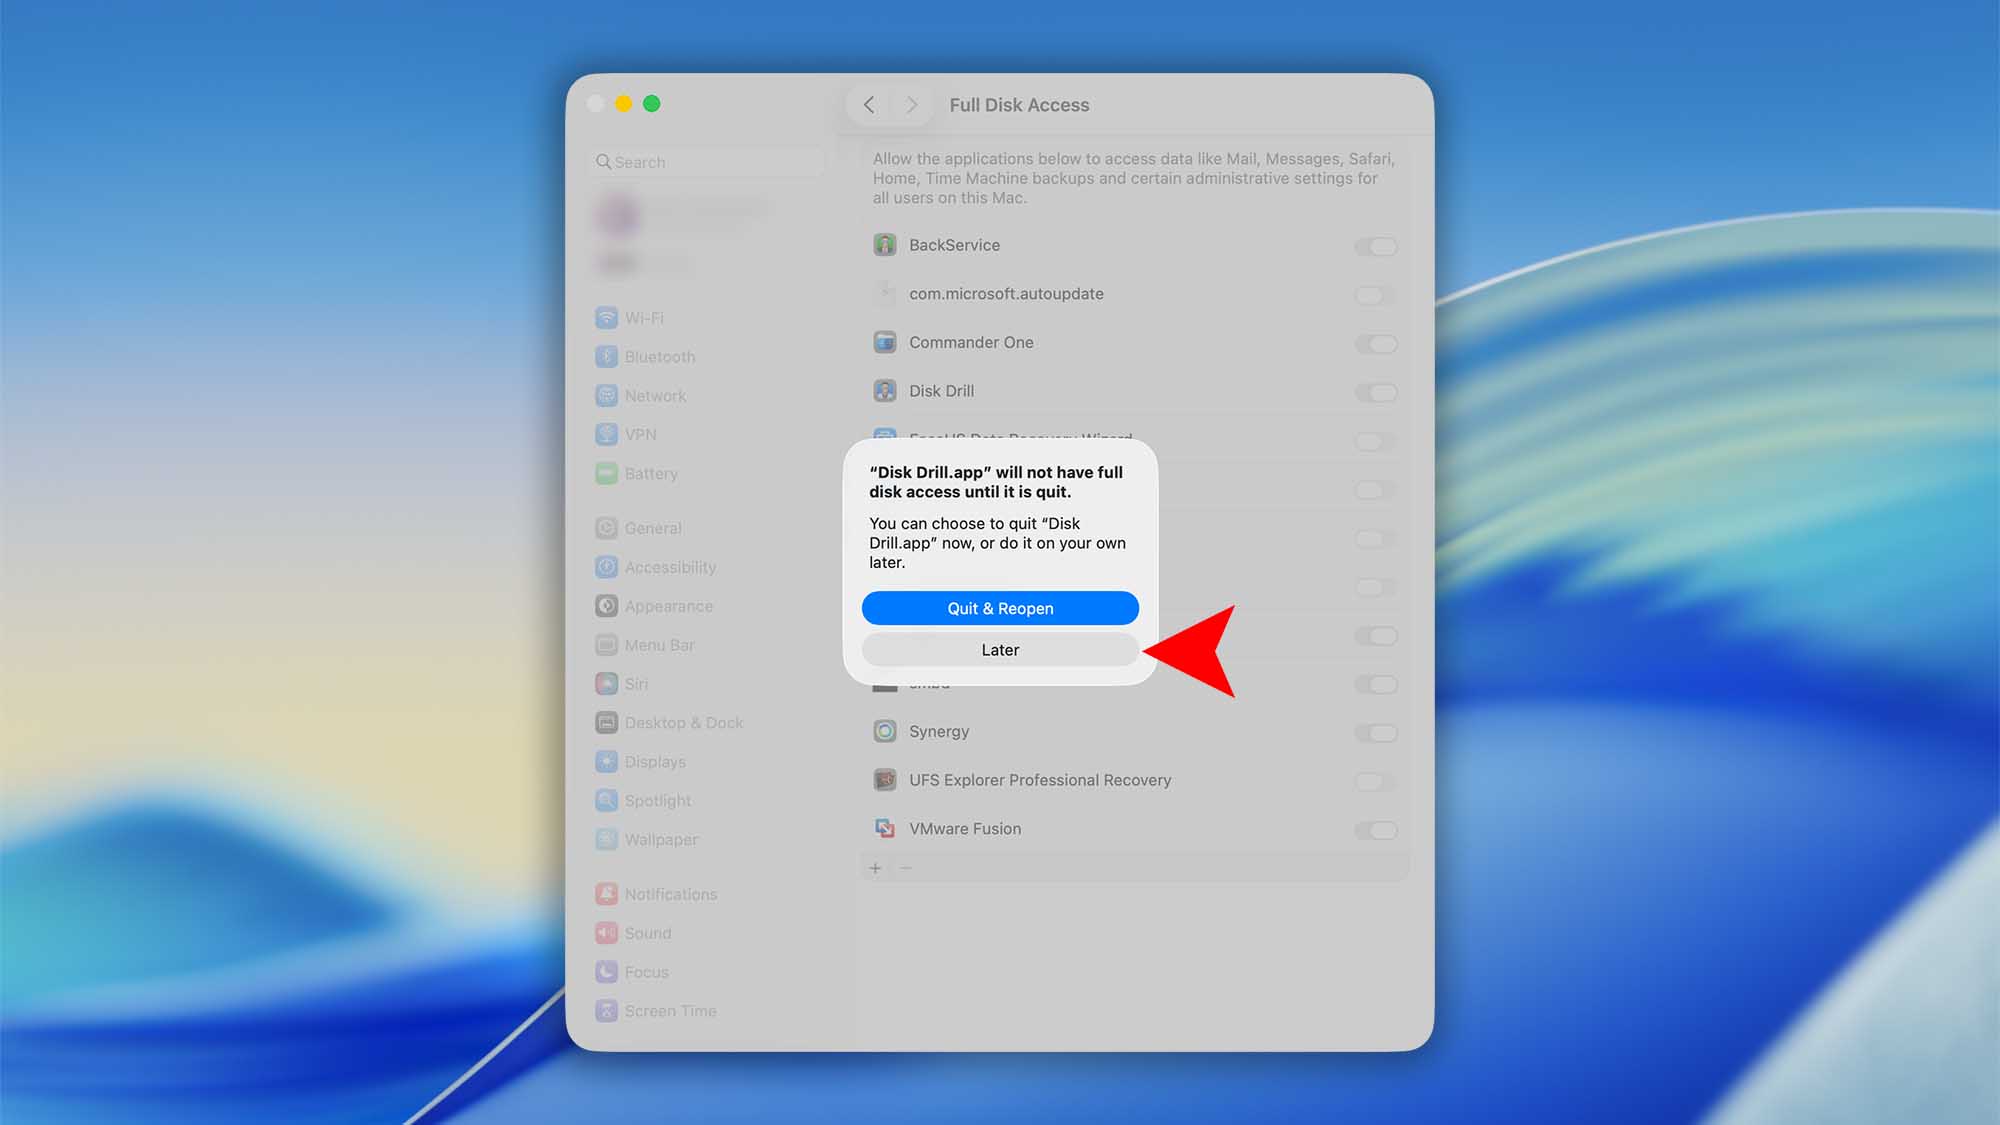
- Complete the Setup. Once you’ve completed these steps, Disk Drill will launch and display all your connected drives. In the macOS prompt asking you to quit and reopen Disk Drill, click Later.
Troubleshooting Common Full Disk Access Issues
- App Not Listed: If your app doesn’t appear in the list, drag its executable (inside the .app bundle) directly into the Full Disk Access panel.
tccutilReset: Run in Terminal
sudo tccutil reset All com.cleverfiles.DiskDrill
sudo tccutil reset All com.cleverfiles.cfbackd- Settings Grayed Out: Make sure you’ve unlocked the padlock and are logged in as an administrator.
Security Best Practices
- Grant Sparingly: Only enable Full Disk Access for apps you trust and that explicitly require it.
- Keep Software Updated: Out-of-date apps with Full Disk Access can be attack vectors.
- Review Regularly: Periodically audit your Full Disk Access list—remove any apps you no longer use or need.