Depending on your version of Windows, you can quickly uninstall Disk Drill for Windows using one of the simple methods below. We’re sorry to see you go—hopefully, you’re just moving your copy of Disk Drill to another computer!
How to Uninstall Disk Drill for Windows 10 and 11
Uninstalling Disk Drill for Windows is quick and easy. Here are three simple methods to completely remove Disk Drill from your Windows 10 or 11 PC.
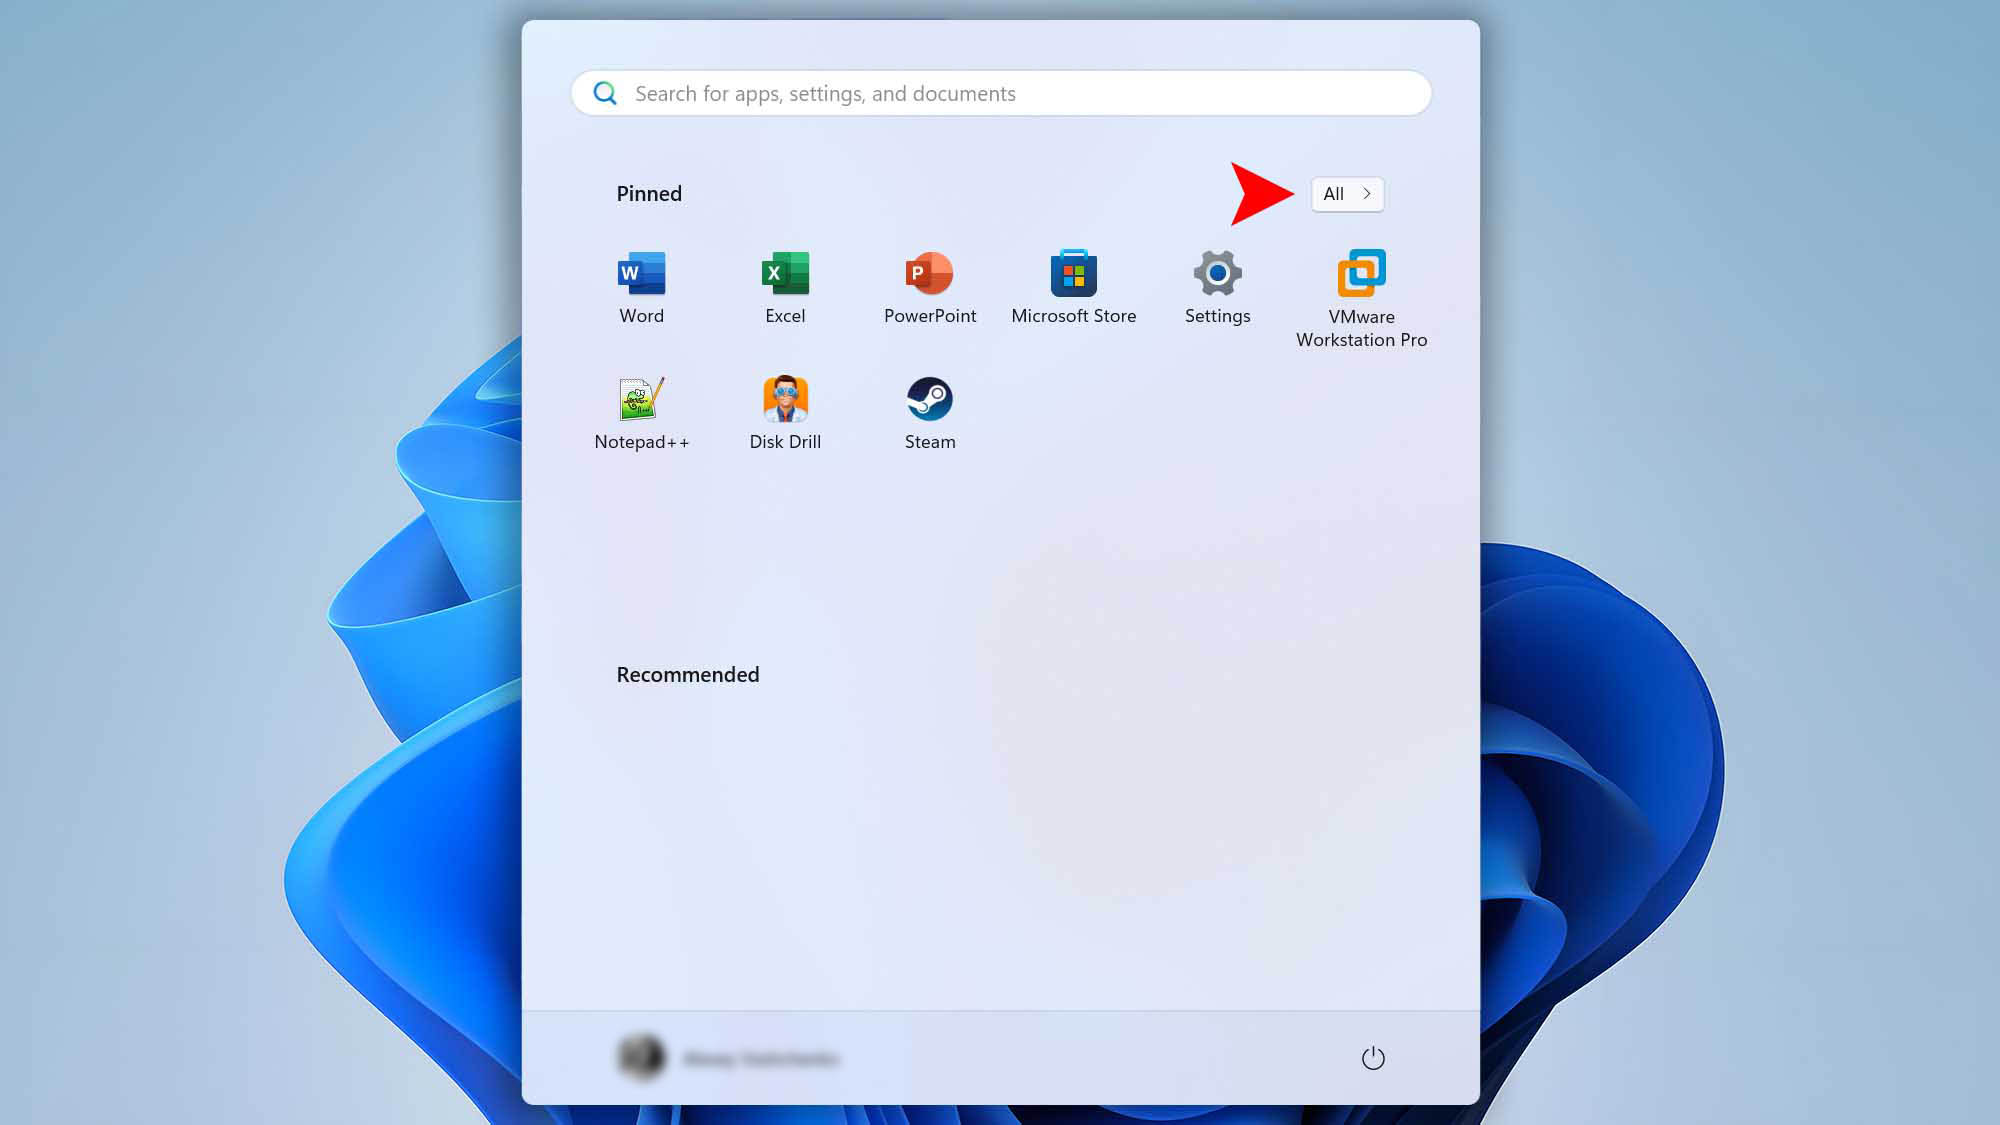
Method 1: Uninstall from the Start Menu
- Click on the Start menu and navigate to All (Windows 11 only).
- Locate CleverFiles Disk Drill (x64).
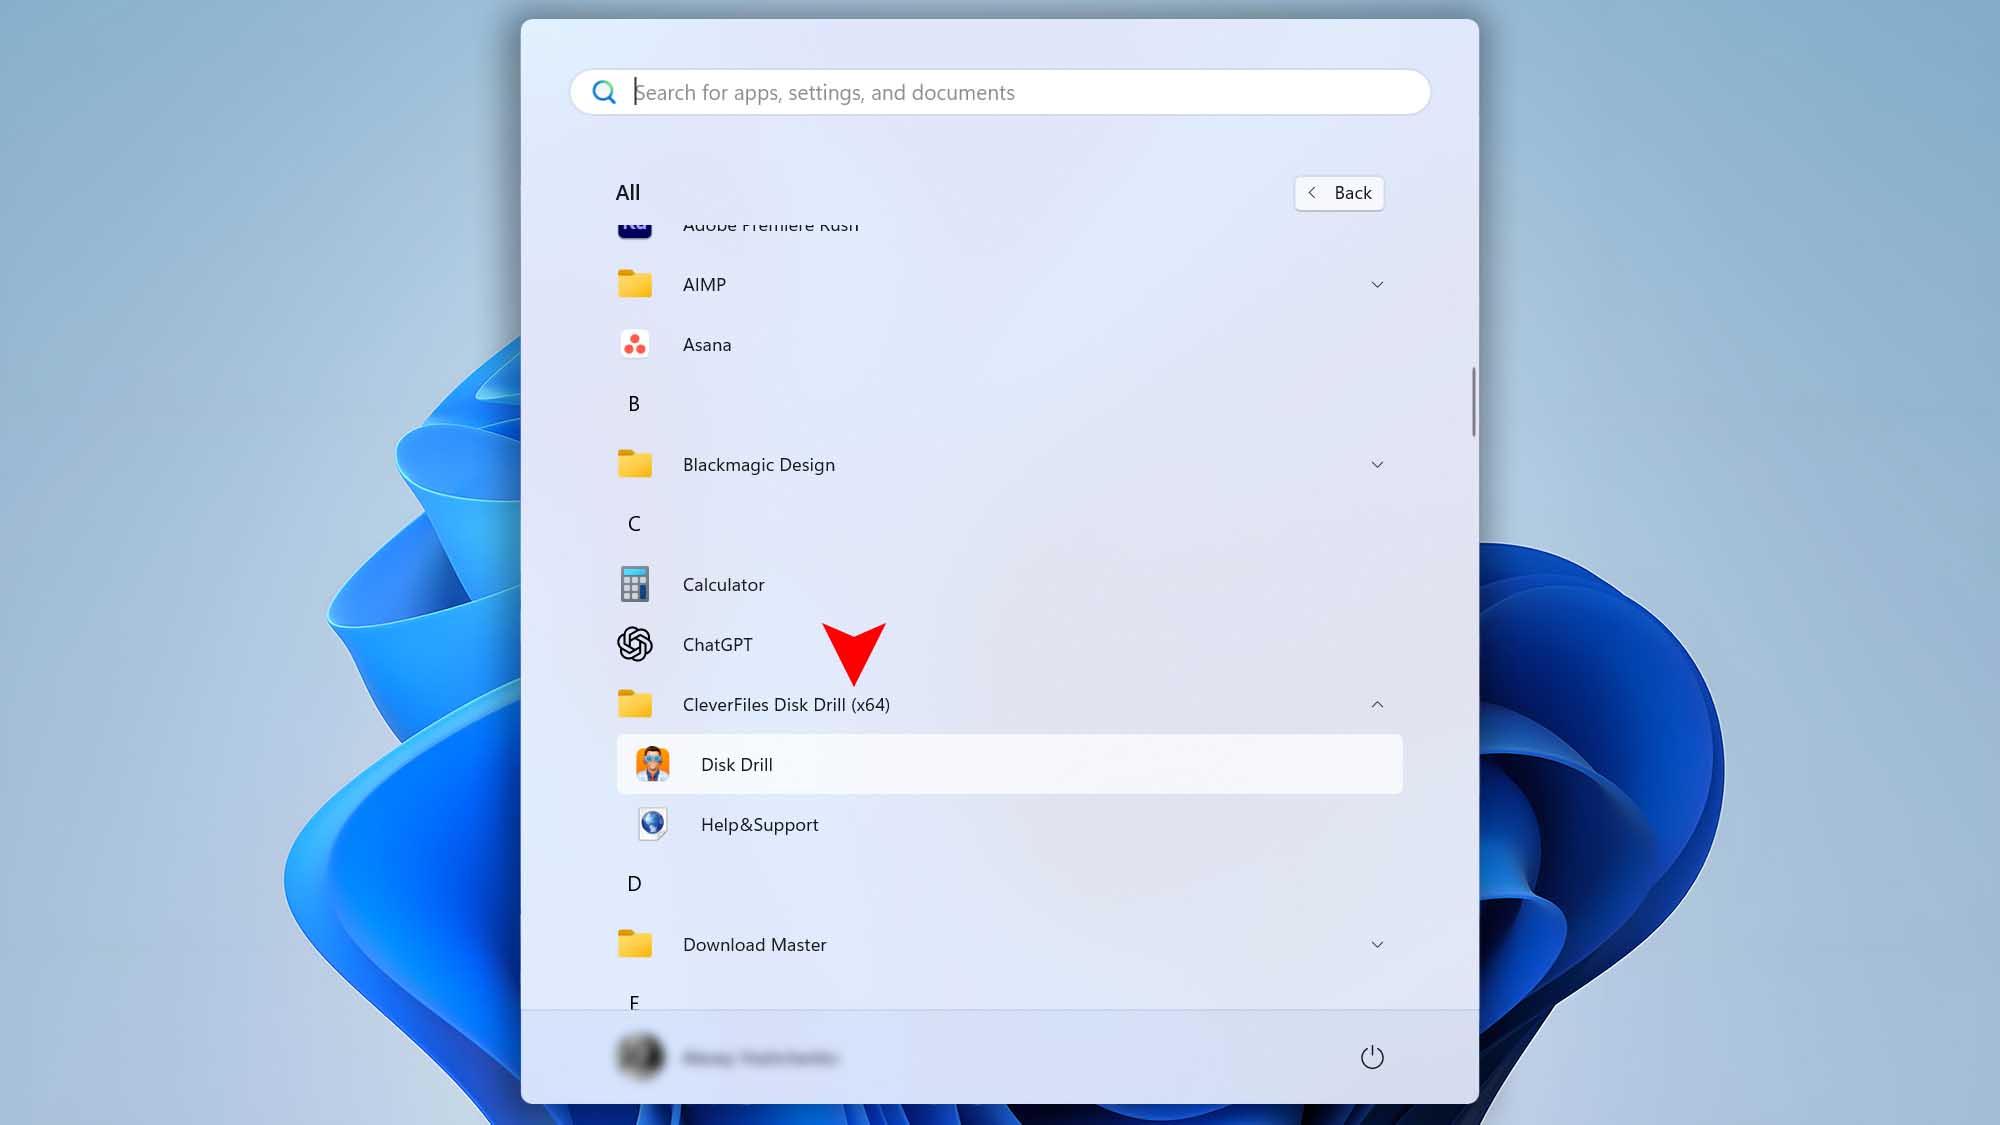


- Right-click on it and select Uninstall.
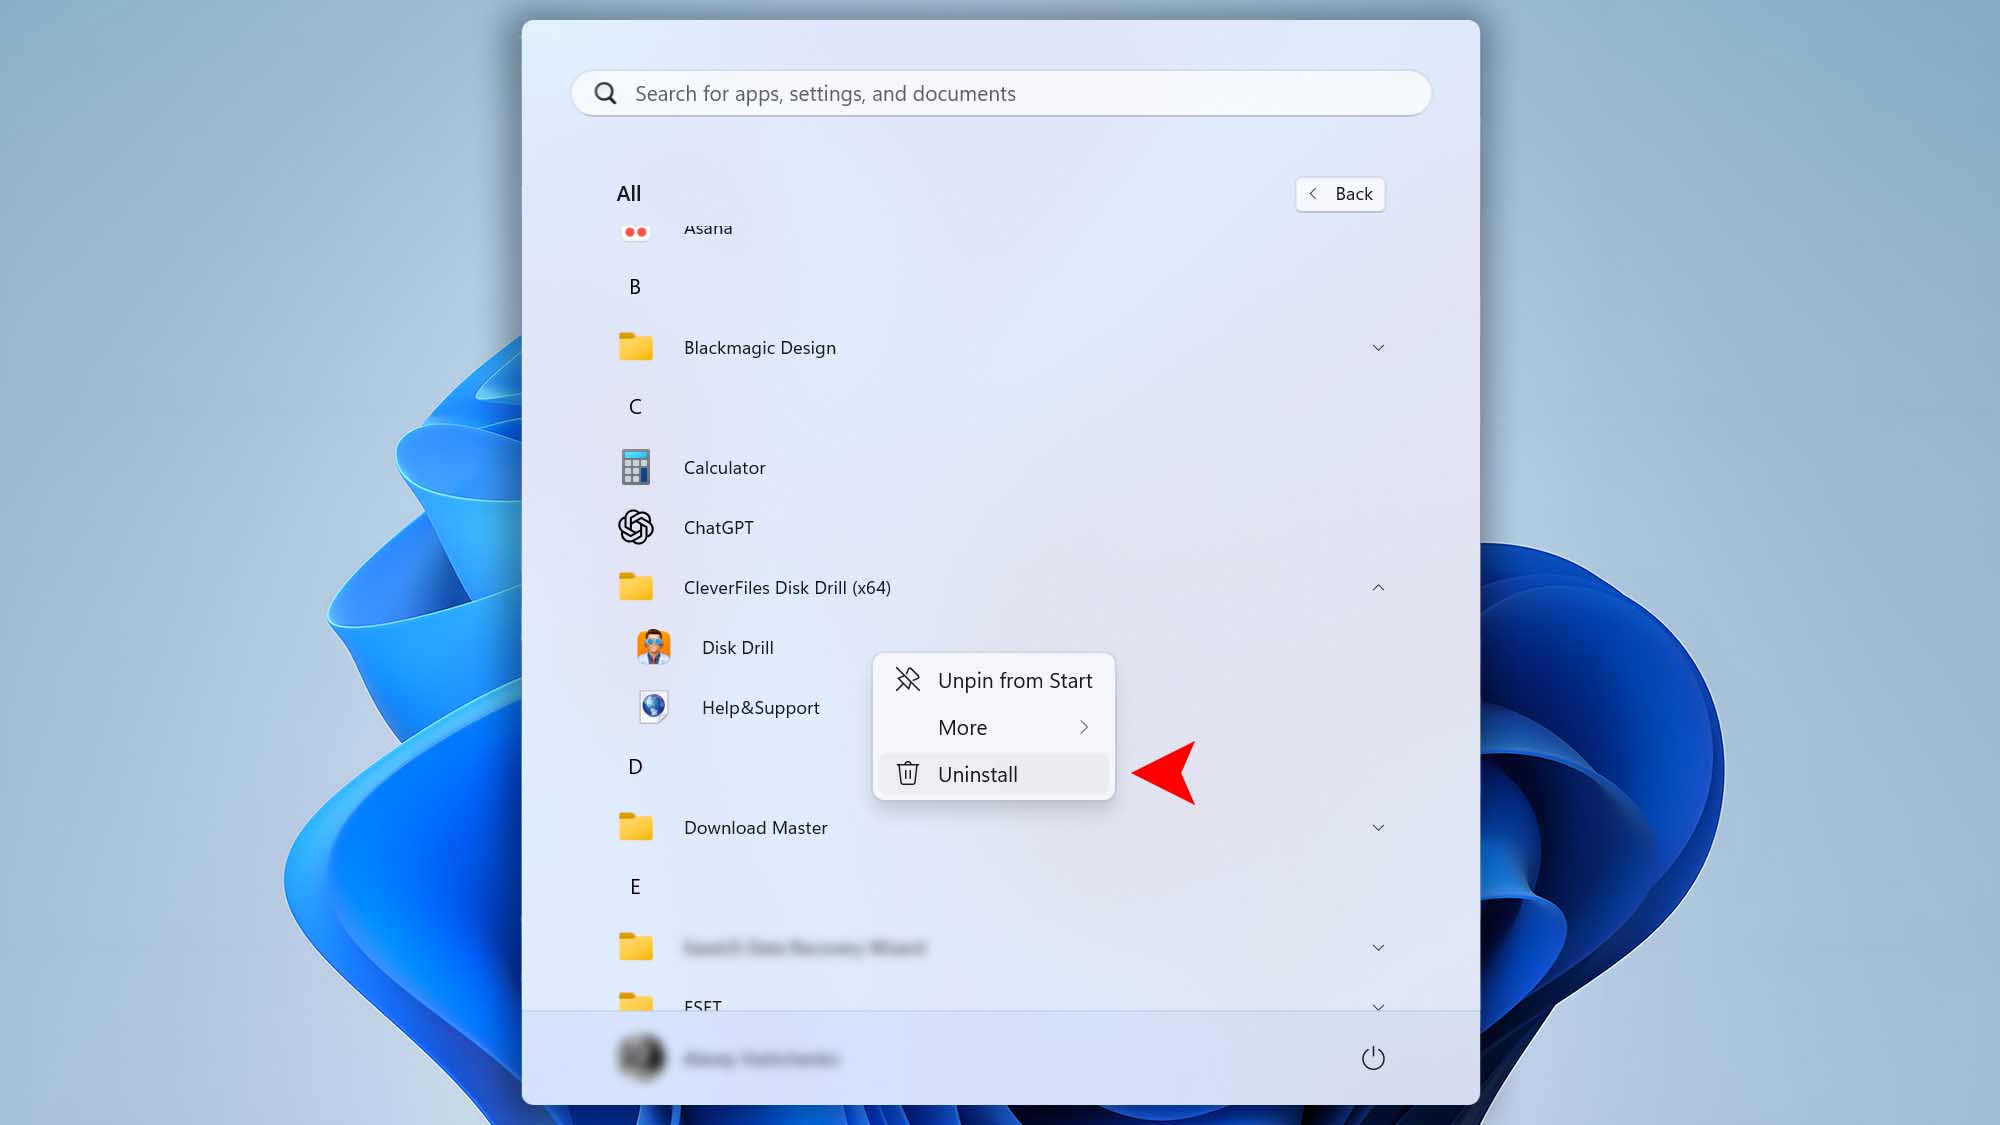
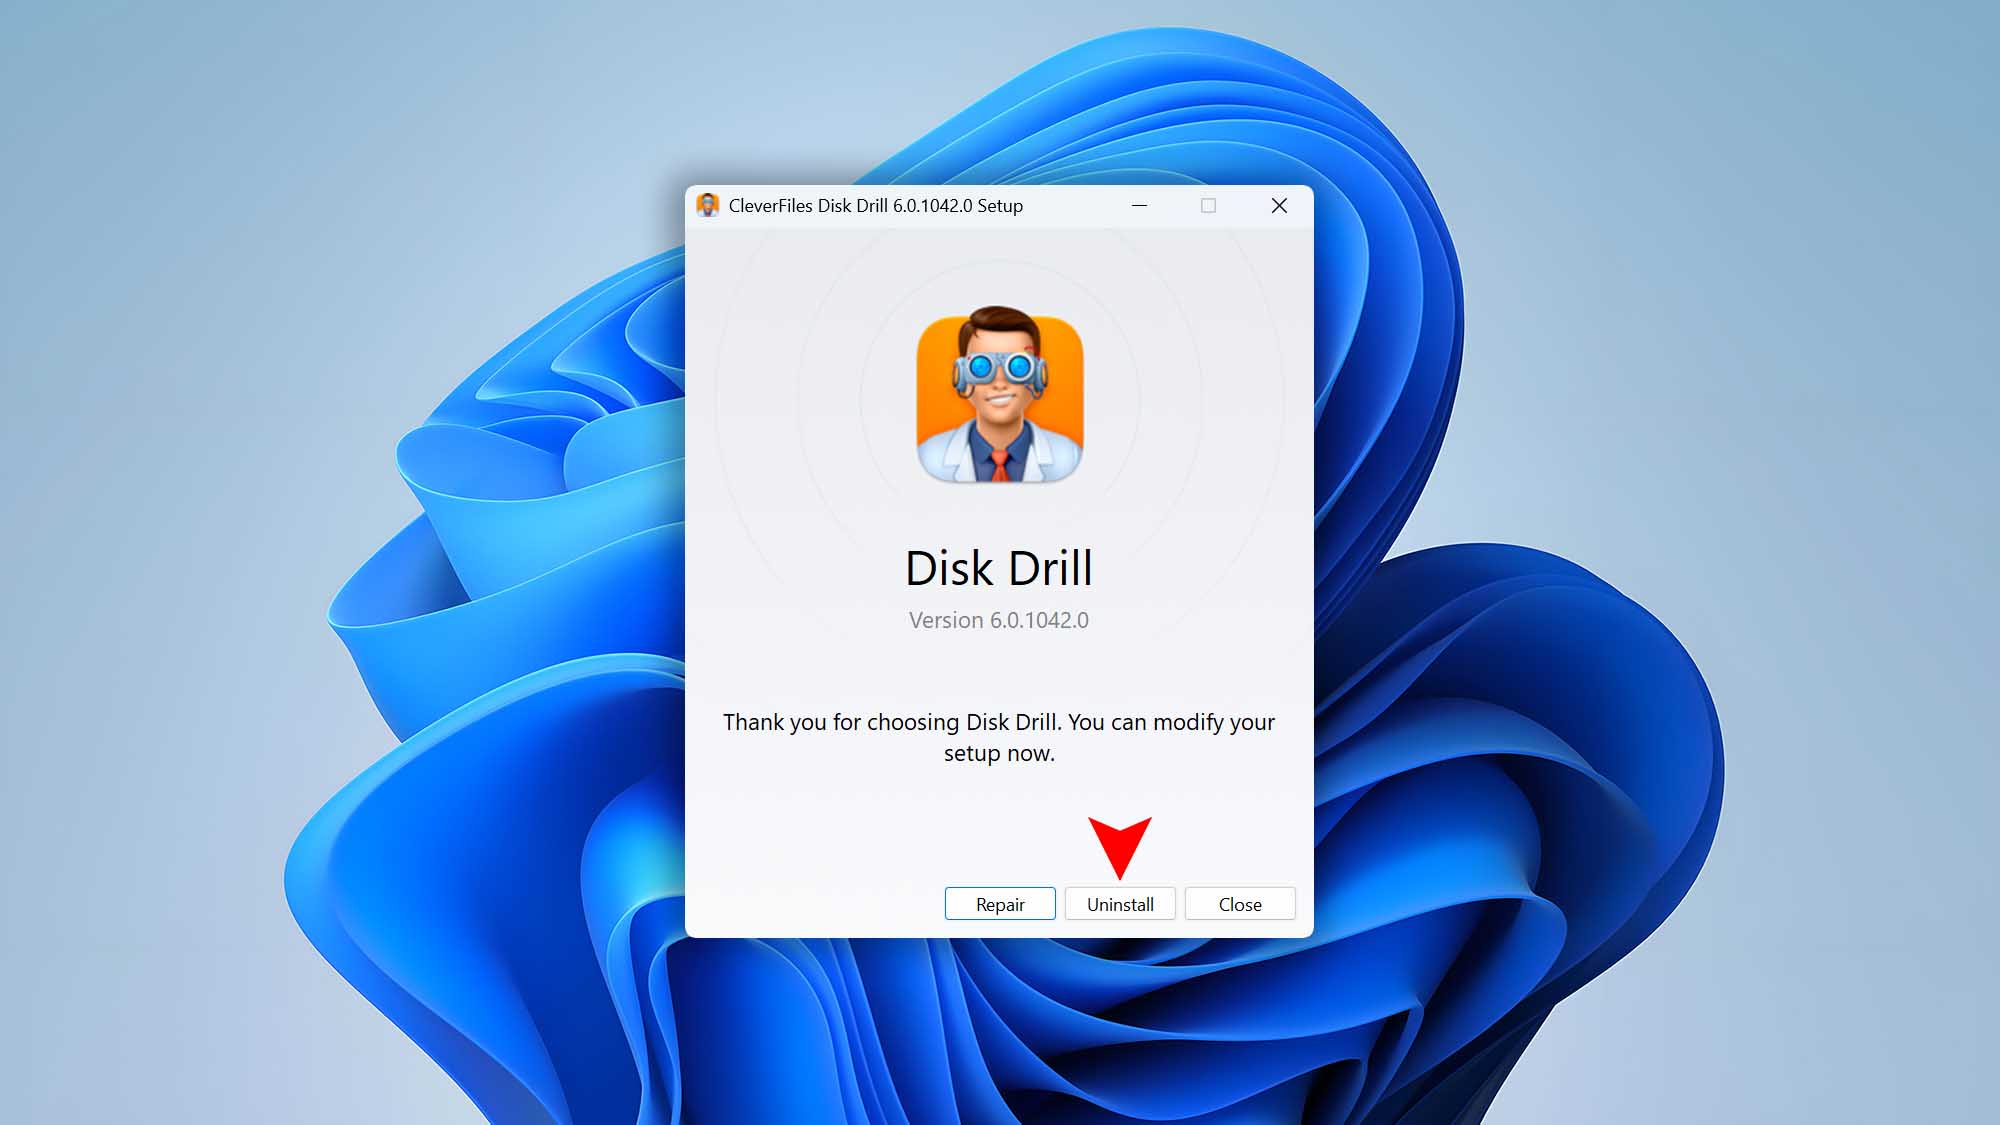
- The Installed apps window will open. Find Disk Drill again, select it, and click Uninstall.
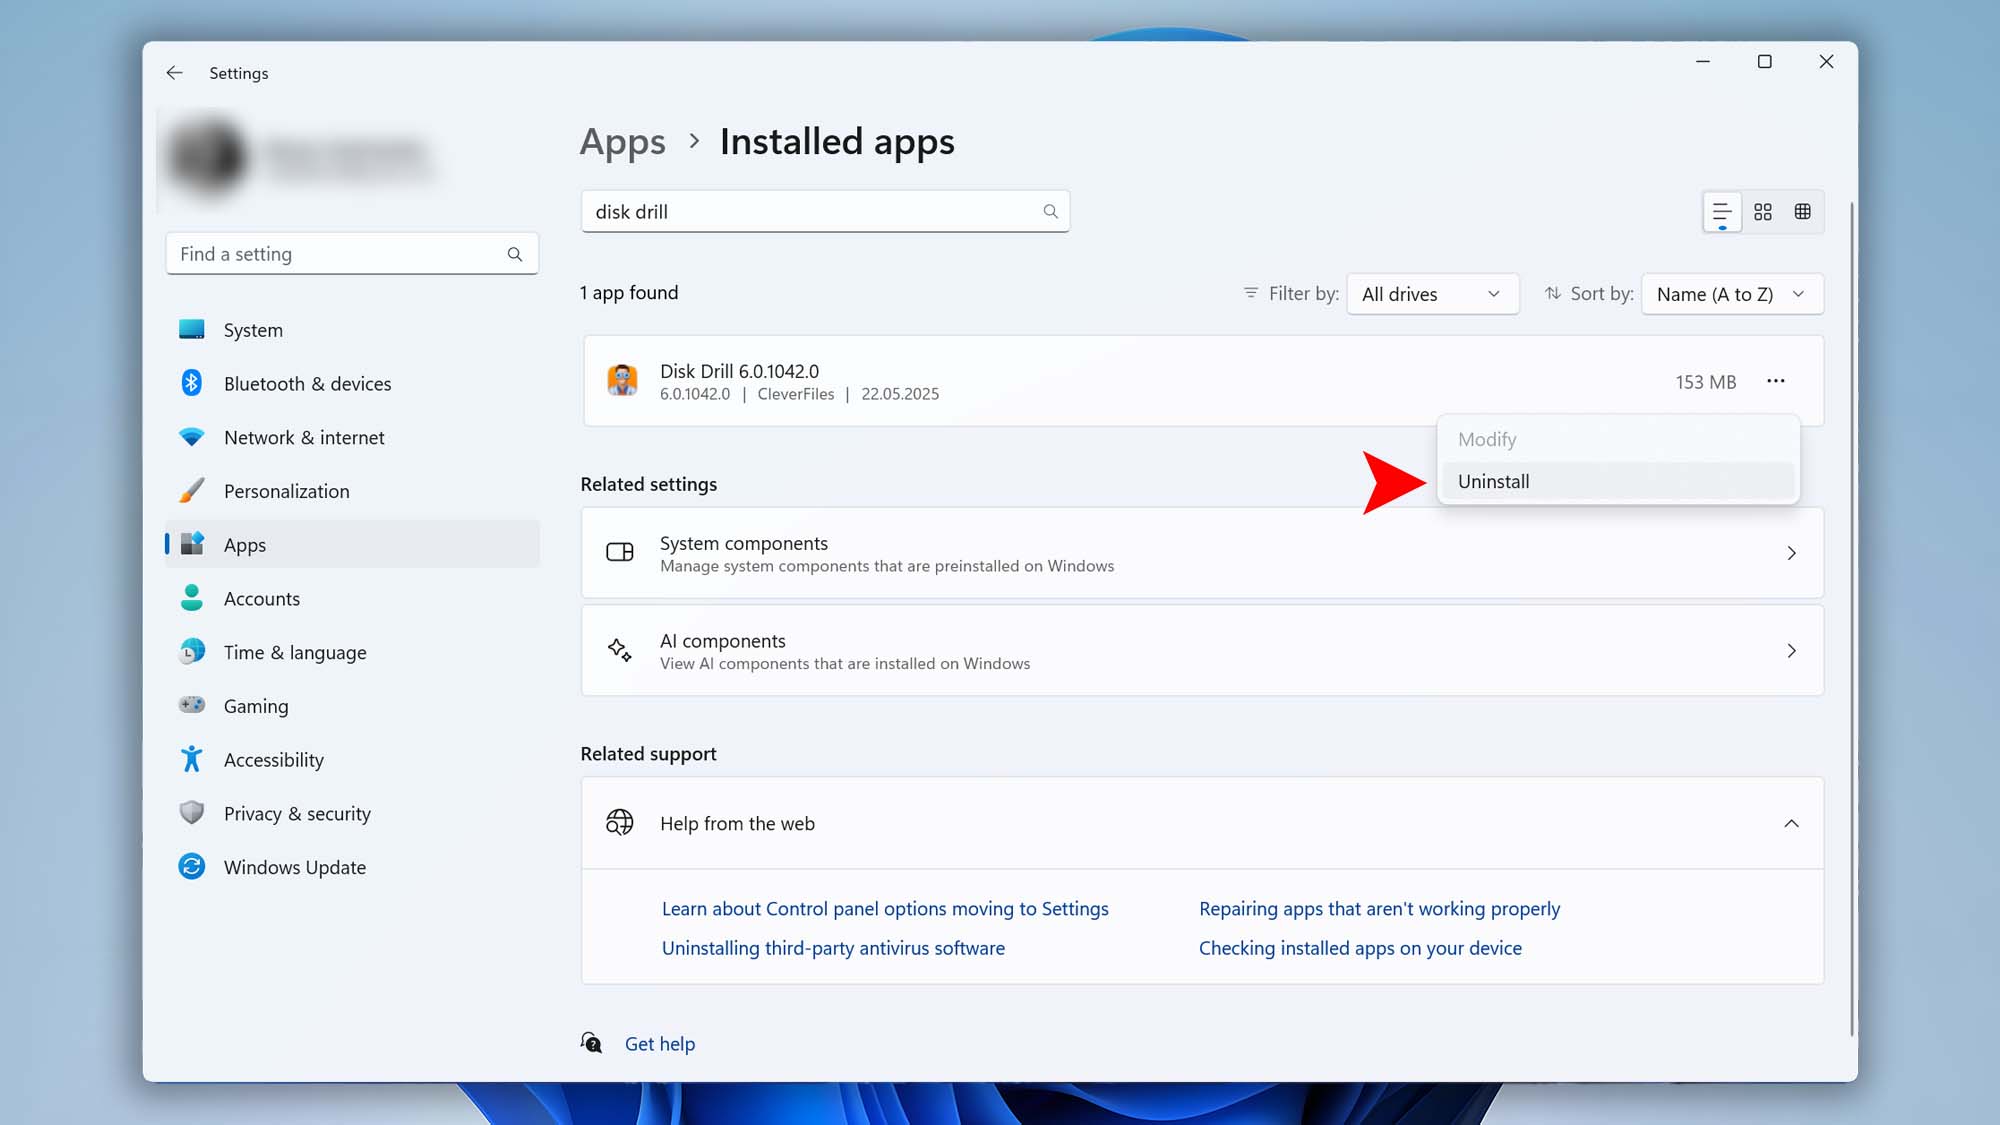
- Confirm the action in the pop-up window by clicking Yes.
- Follow the brief uninstallation wizard instructions to complete the process.


Method 2: Uninstall via the Settings Menu
If you can’t find Disk Drill in the Start menu, you can uninstall it using the Settings menu:
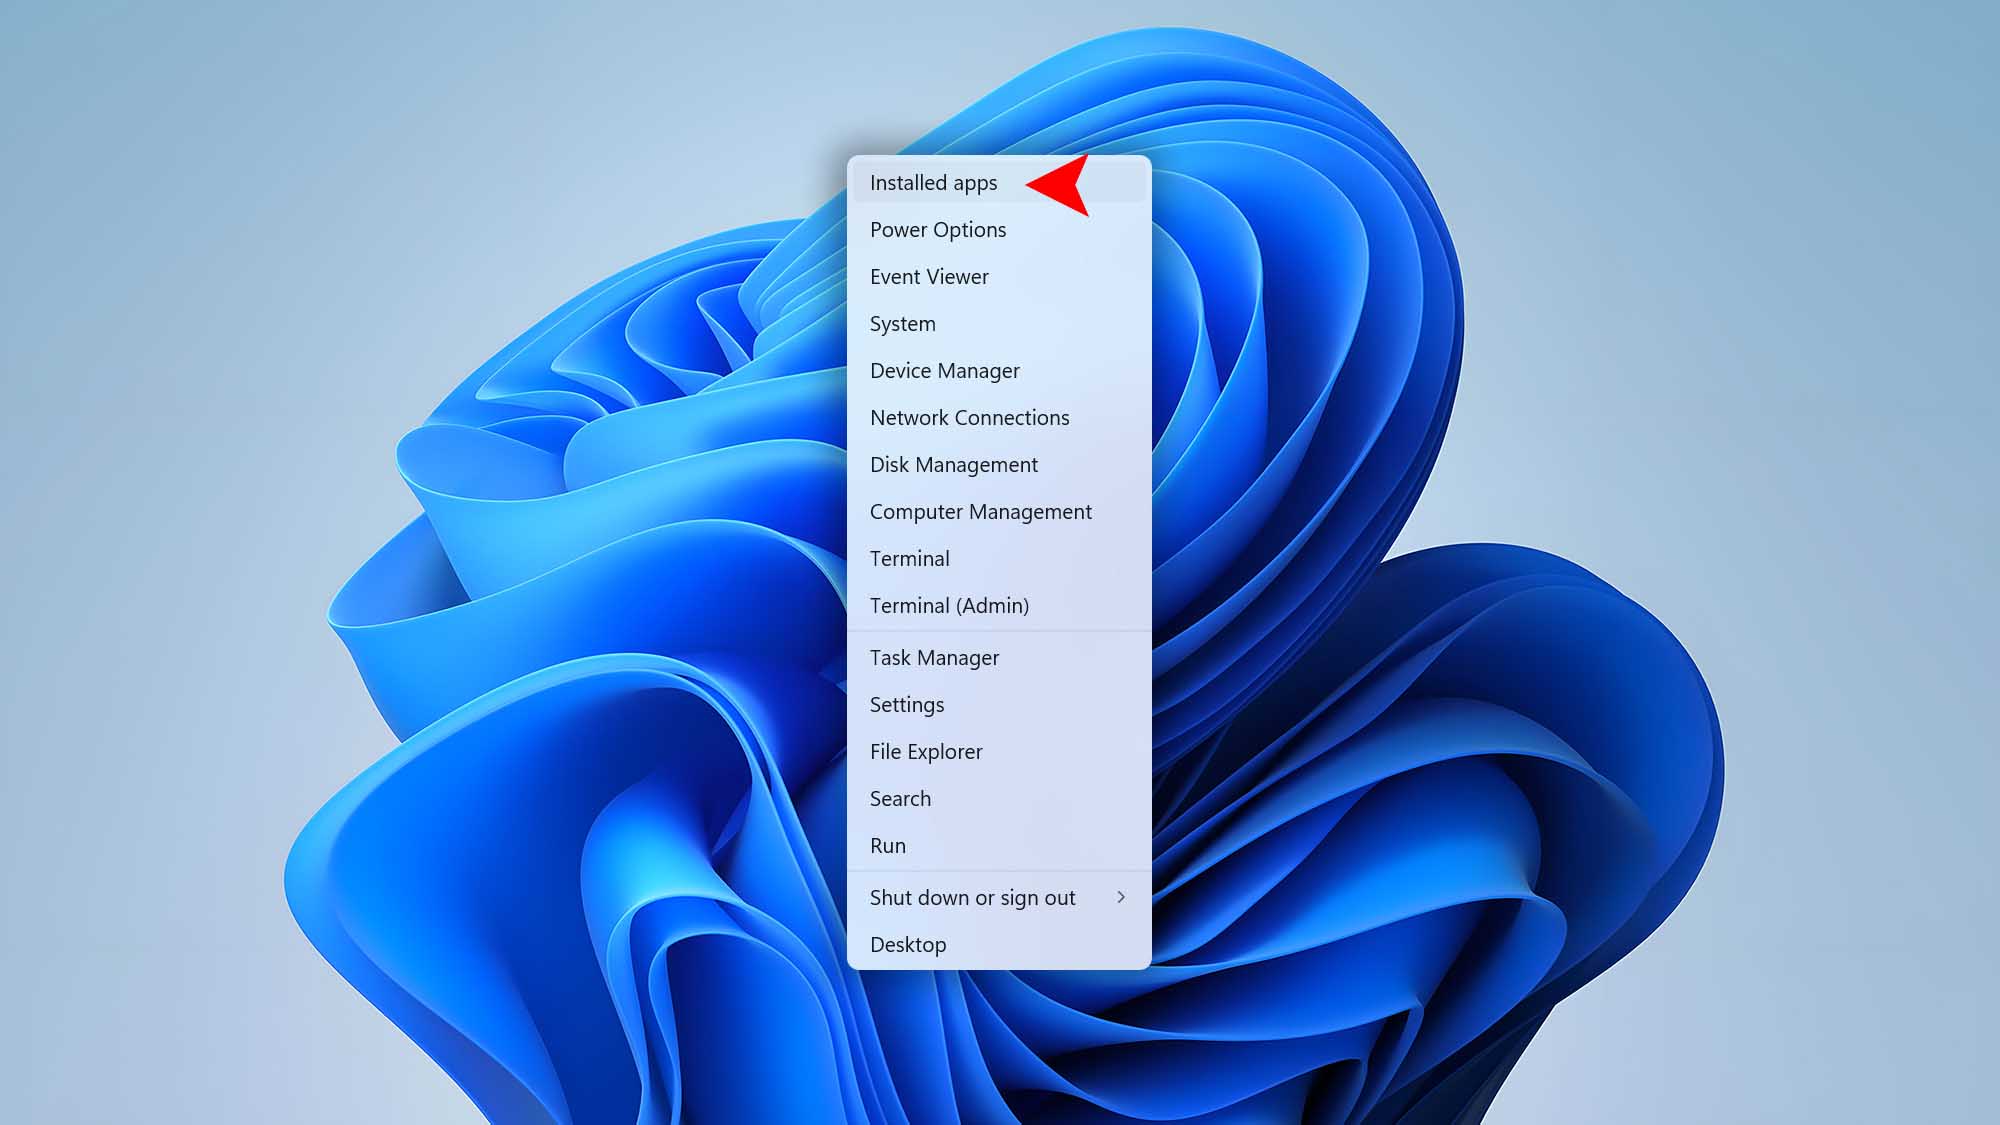
- Right-click the Start button and choose Installed Apps (Windows 11) or Apps and Features (Windows 10).
- Scroll or search to locate Disk Drill.
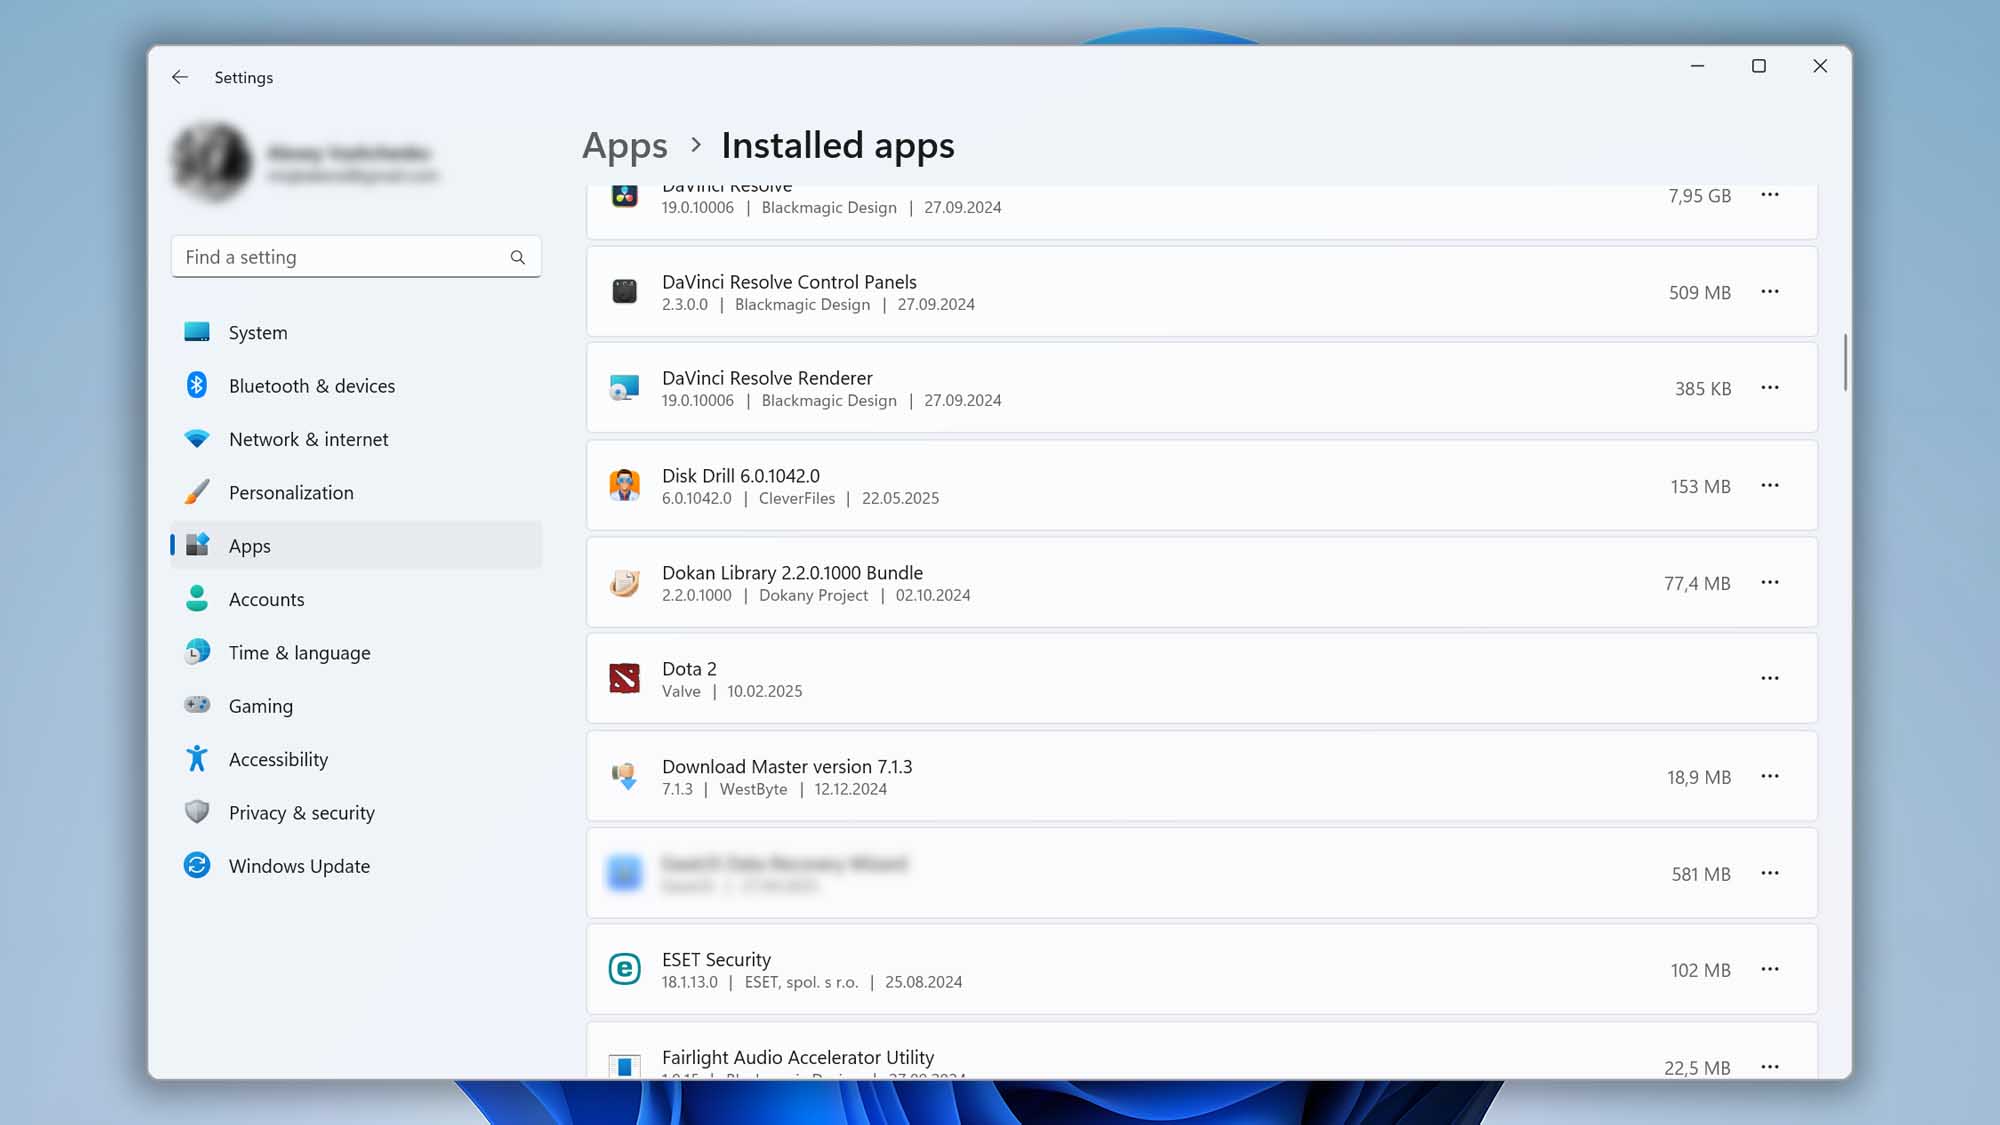
- Click on Disk Drill and select Uninstall.
- Confirm your choice by clicking Yes in the pop-up confirmation window.
- Follow the instructions of the quick uninstallation wizard to finish.


Method 3: Uninstall Using Classic Control Panel
Alternatively, you can remove Disk Drill using the Control Panel:
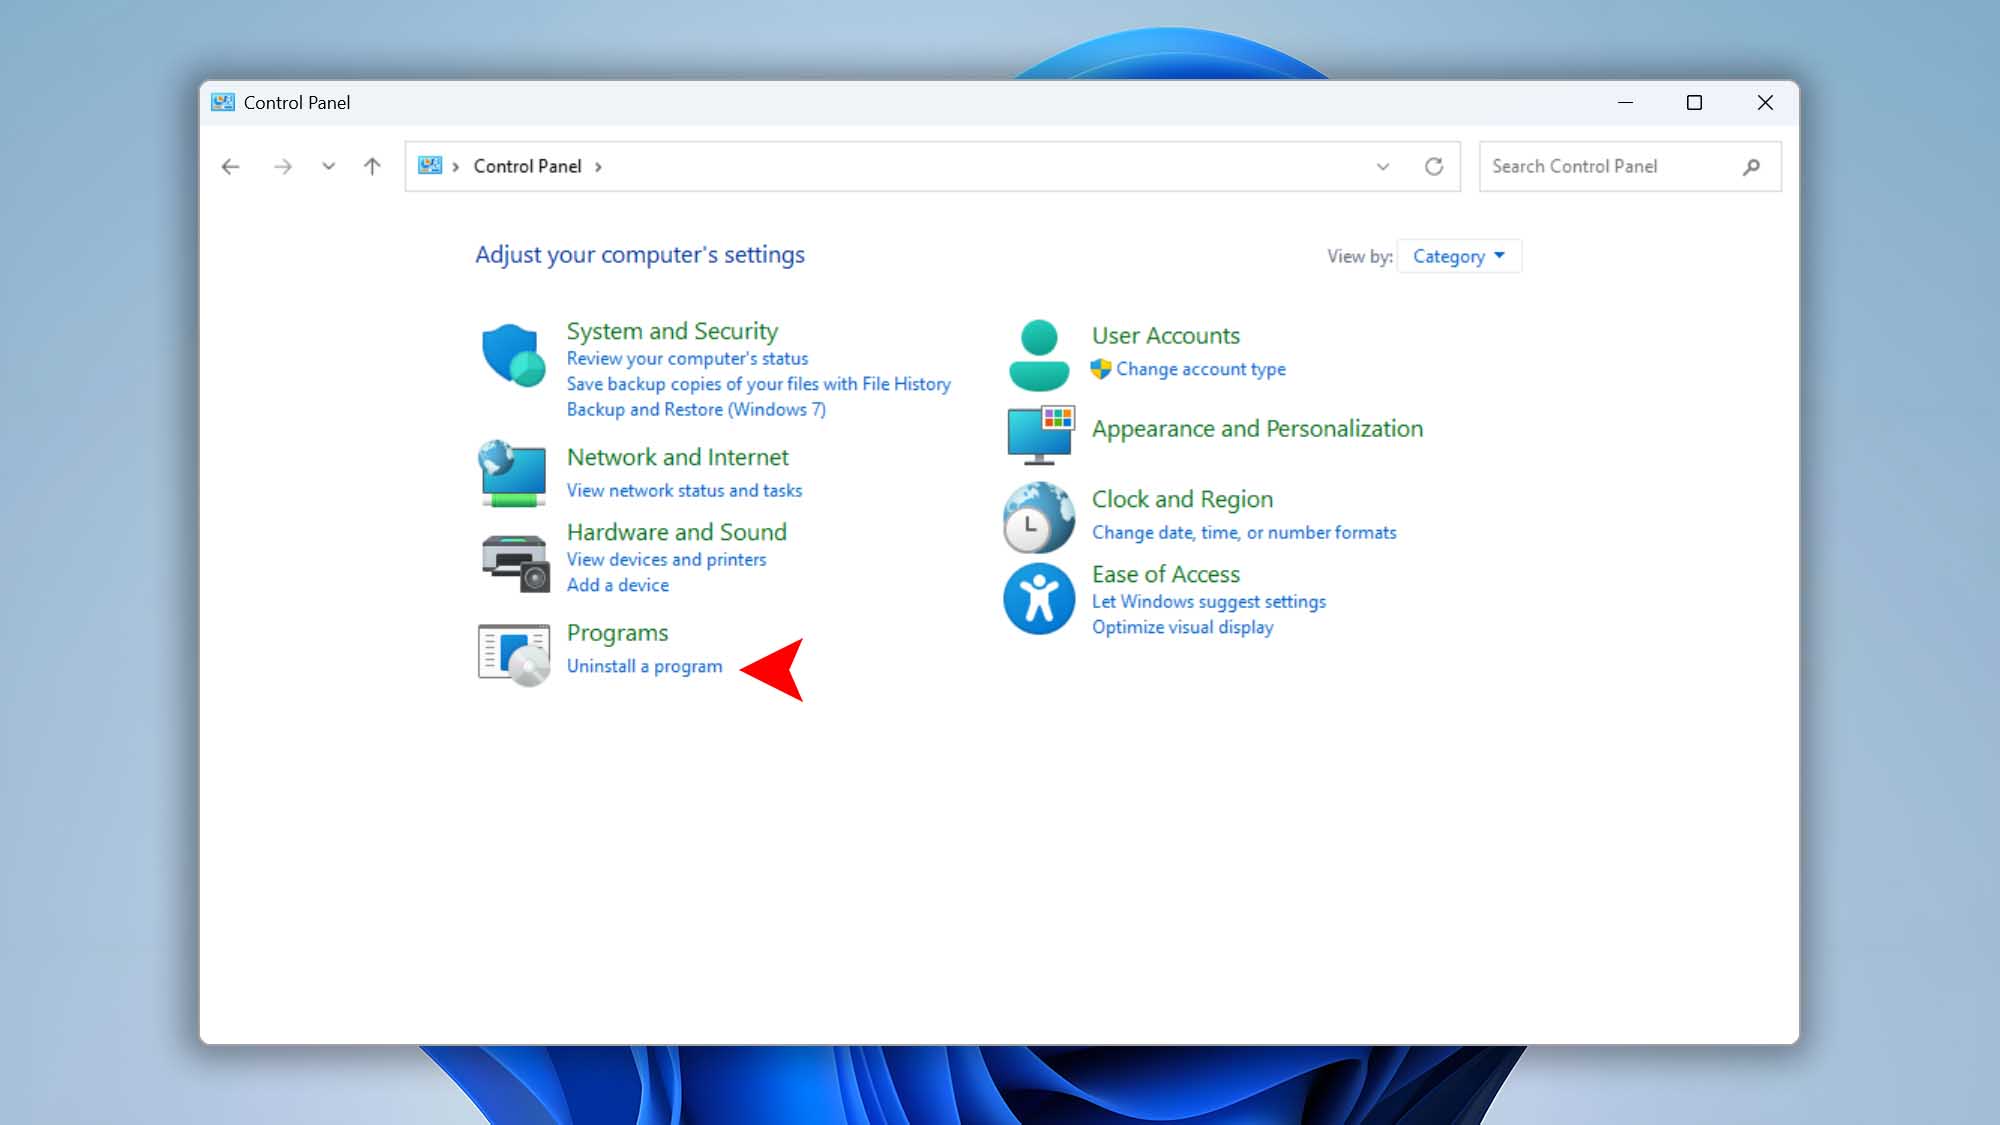
- Click the Search field left to Start button, type Control Panel, and click Open.

- Navigate to Programs and Features. (If your Control Panel displays categories, click Uninstall a Program under Programs.)
- Find and select Disk Drill from the list of installed programs.
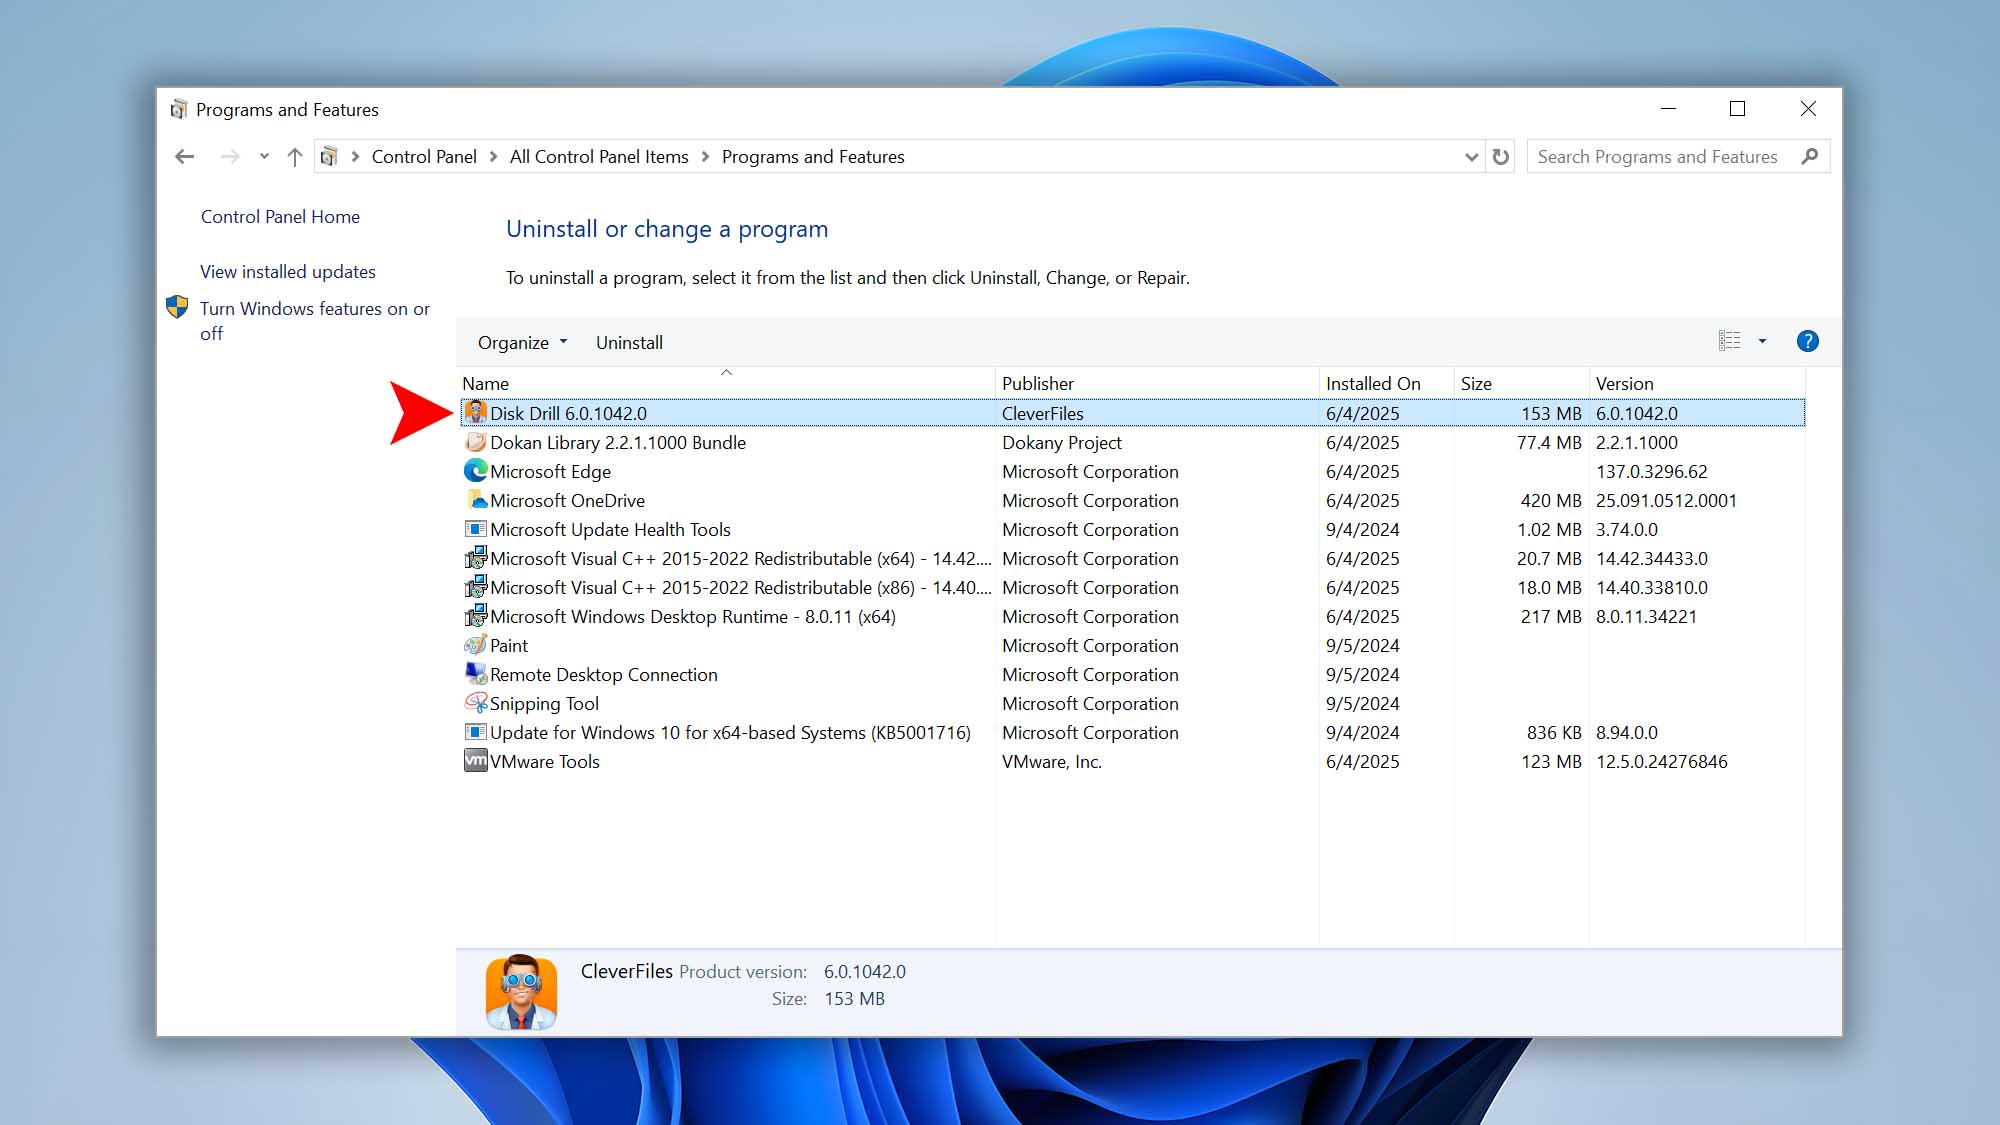
- Click Uninstall, and confirm your decision by clicking Yes in the pop-up window.
- Follow the simple prompts of the uninstallation wizard to finalize the removal.


.updated: June 4, 2025 author: