.max files usually contain three-dimensional (3D) scenes and images. They are primarily used to create video games, animations, and 3D pictures. They usually come from the Autodesk 3DS Max graphics program, but there are other applications that save in their format.
You can recover lost .max files whether you deleted them intentionally or accidentally. In some cases, you can even retrieve unsaved files.
In the following piece, we’ll share all the information you need to understand .max files and to recovery .max files you’ve lost.
What is .max filetype?
.max files are used primarily for 3D images, including video game graphics, film special effects, and architectural schematics. They contain highly complex visual imagery.
.max files primarily come from the Autodesk 3DS Max graphics program, which is professional-grade software used by the video-game, architectural, television, and film industries. Autodesk 3ds Max gives users access to visual textures, animations, wireframes, lighting and shading effects, and pretty much everything else needed to create high-level 3D imagery.
The old name for 3DS Max was 3D Studio Max. It has been on the market since 1990. The name may have changed, but even in its oldest form, 3D Studio Max used .max-extension files.
.max files contain sophisticated graphical imagery of many kinds. They are also sometimes for things such as encryption and document-conversion data. The various types of .max files are discussed in the Programs That Open .max Files section below.
How to Recover .max Files
The manner in which you recover lost or corrupted .max files depends on the manner in which you lost them:
Files that have been lost or corrupted can be recovered with software (see section, How to Recover .max Files with Software)
Files that have simply been sent to the recycle or trash bin can usually be retrieved from those locations (see section, Recover .max Files from Windows Recycle Bin or Mac Trash)
Files that haven’t been saved properly or have been written over can sometimes be restored from your recent files folder (see section, Restore from a Recent Files folder).
How to Recover .max Files with Software
Disk Drill is free software that can help users get back their lost, deleted, or corrupted files so that they can resume their business. Disk Drill can do this because your files are rarely completely lost, even if they may seem to be.
Deleted and lost files don’t cease to exist. They are put in a different kind of storage than active files, but they are still in your device. Over time, new data (meaning new stuff that you save) can write over deleted files so much that they essentially become irretrievable. Before that happens, though, the files are still actually there. They can be recovered.
Disk Drill works on both Apple and Windows operating systems. It’s the most thorough data recovery solution on the market.
One. The first step to get back your data is to download Disk Drill. The software is completely free up to 500 MB of recovered data.

Two. If the .max files you want to retrieve are on a device different from the one you’ve downloaded Disk Drill to, you’ll need a way to transfer the files over. You can usually do this using a flash drive, cloud service, or some other storage device.
Three. Open the Disk Drill application either by double-clicking or by right-clicking and selecting “open.”
Four. Disk Drill will ask if you’d like the application to make changes to your computer. This is really just asking if you’d like to use the software. Click “yes.”
Five. In the middle of the Disk Drill interface, you’ll see the names of various devices. They may have names that you don’t recognize, but everything on that list already existed in your computer before you downloaded Disk Drill. Select whichever location you want to recover files from.
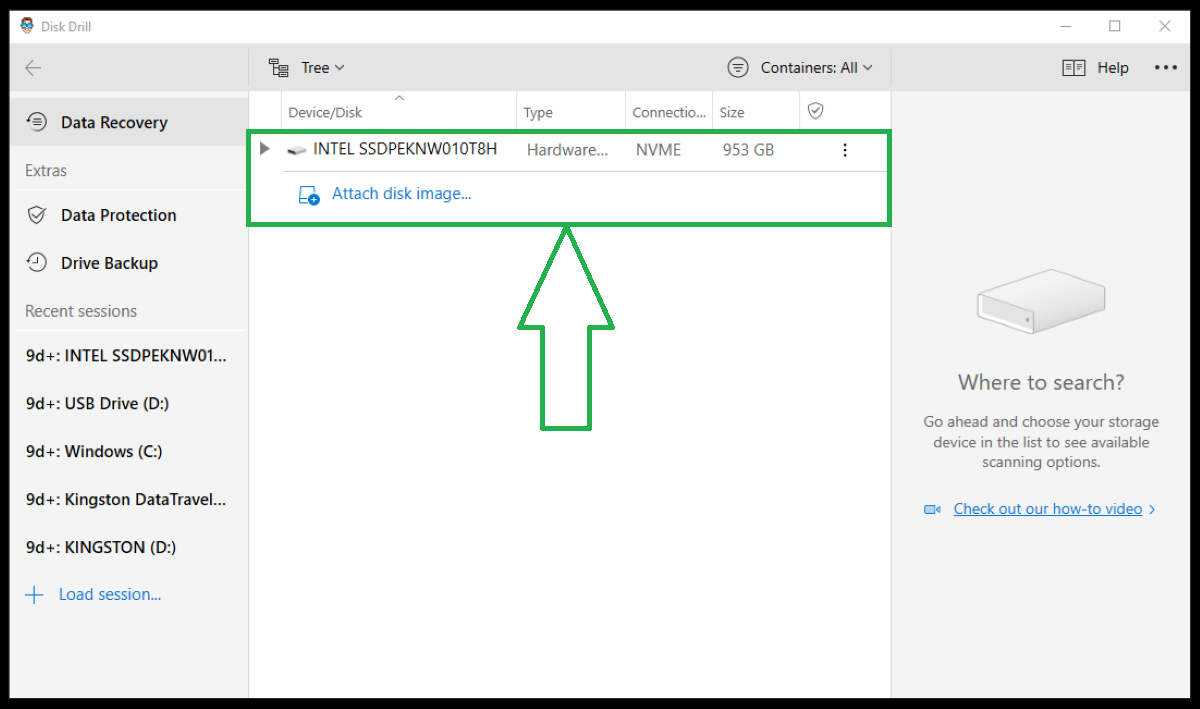
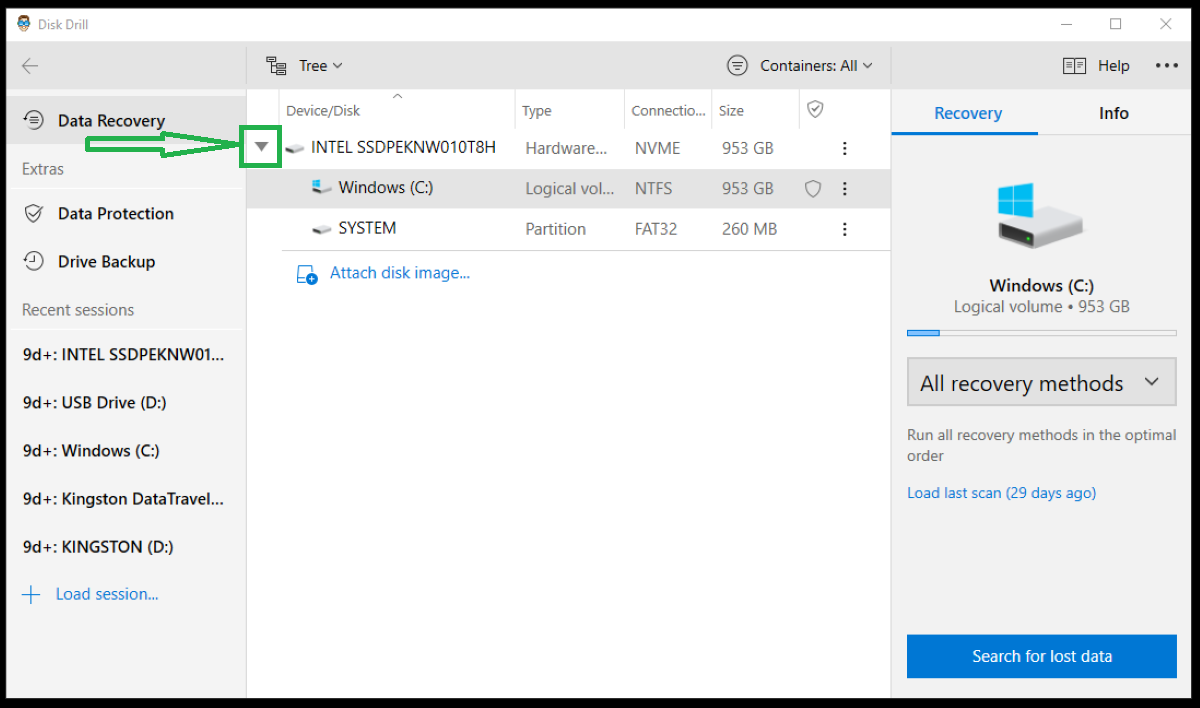
Gray arrows to the left of some devices can be clicked to produce a dropdown menu. In that menu, you can further refine your selection to subsections within the device.
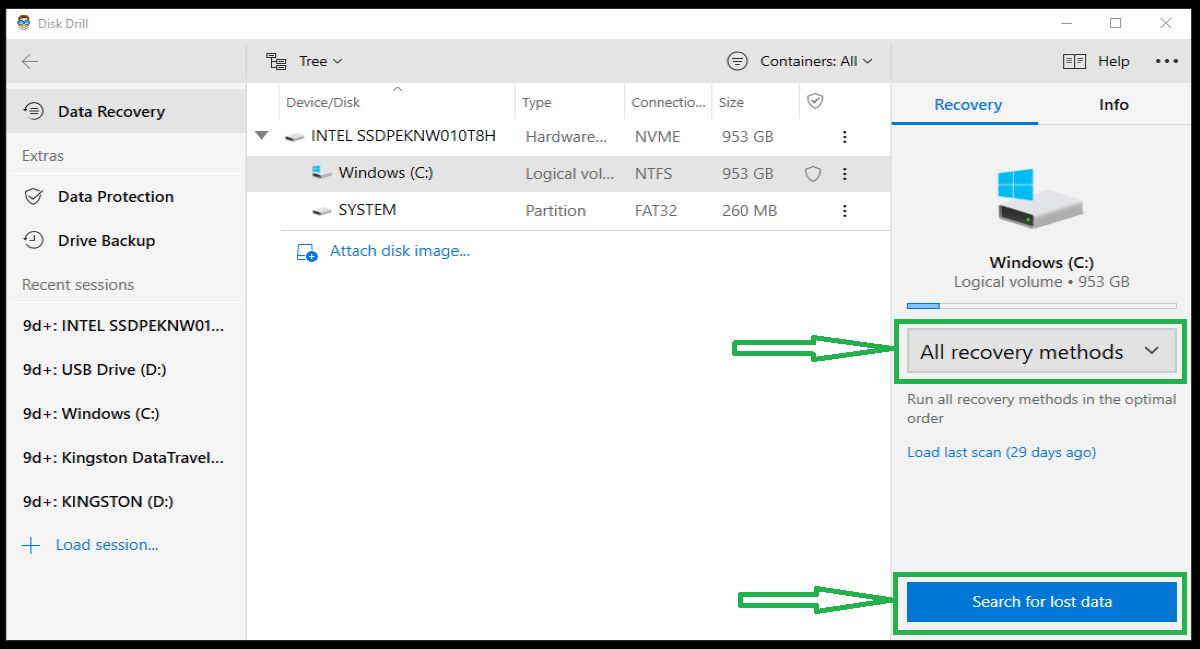
Six. Click the button that reads “All recovery methods.” Other options are available, and you can see these by looking at the button’s dropdown, but the basic “All recovery methods” will work fine for now.
Towards the bottom of the screen is a button that says, “Search for lost data.” Click this.
Disk Drill is going to start looking through all your files for ones it can save. The software is incredibly fast but also incredibly thorough, so the full search will take some time.
If Disk Drill finds what you want to recover and you don’t want to wait for it to finish, you can click “Review found items.” It will continue searching for other files, but you can get to work in the meantime. You can also choose to end the scan at any time by clicking on the upper left button.
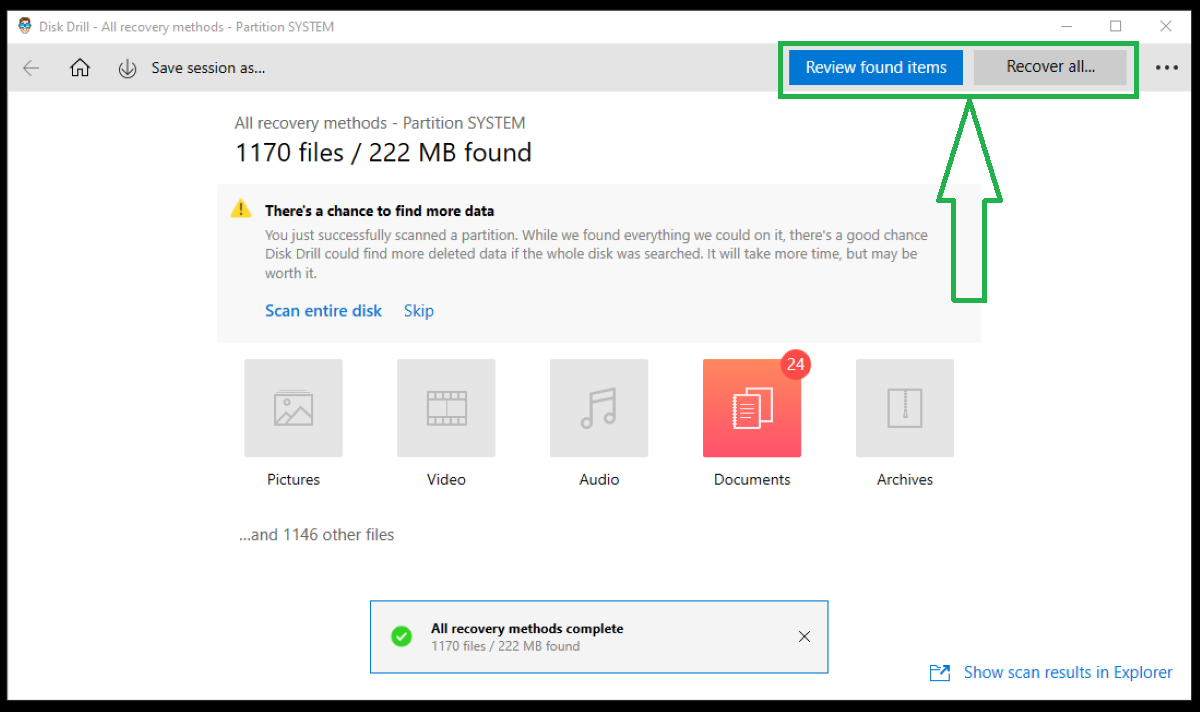
If you do elect to wait for the full scan to complete, you’ll get the option to “Recover All” in addition to “Review found items.”
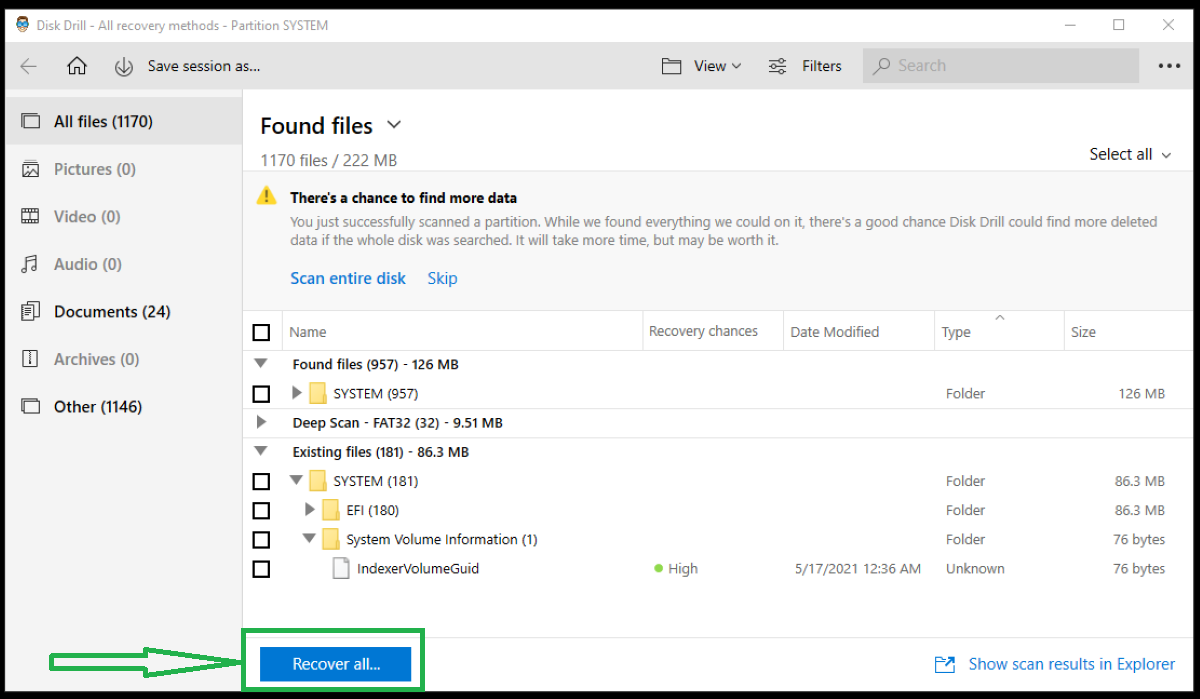
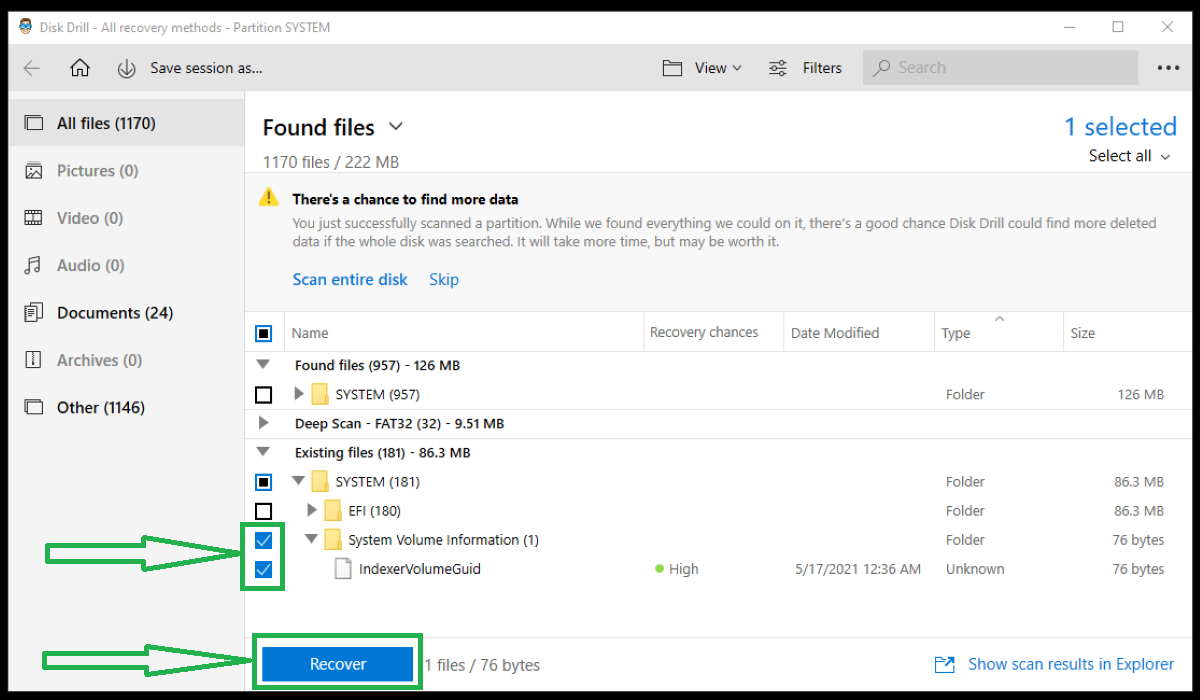
You can either select “Recover All,” or you can choose the specific files you want to recover. To select only specified files, click the checkboxes to the left of them and select “Recover.”
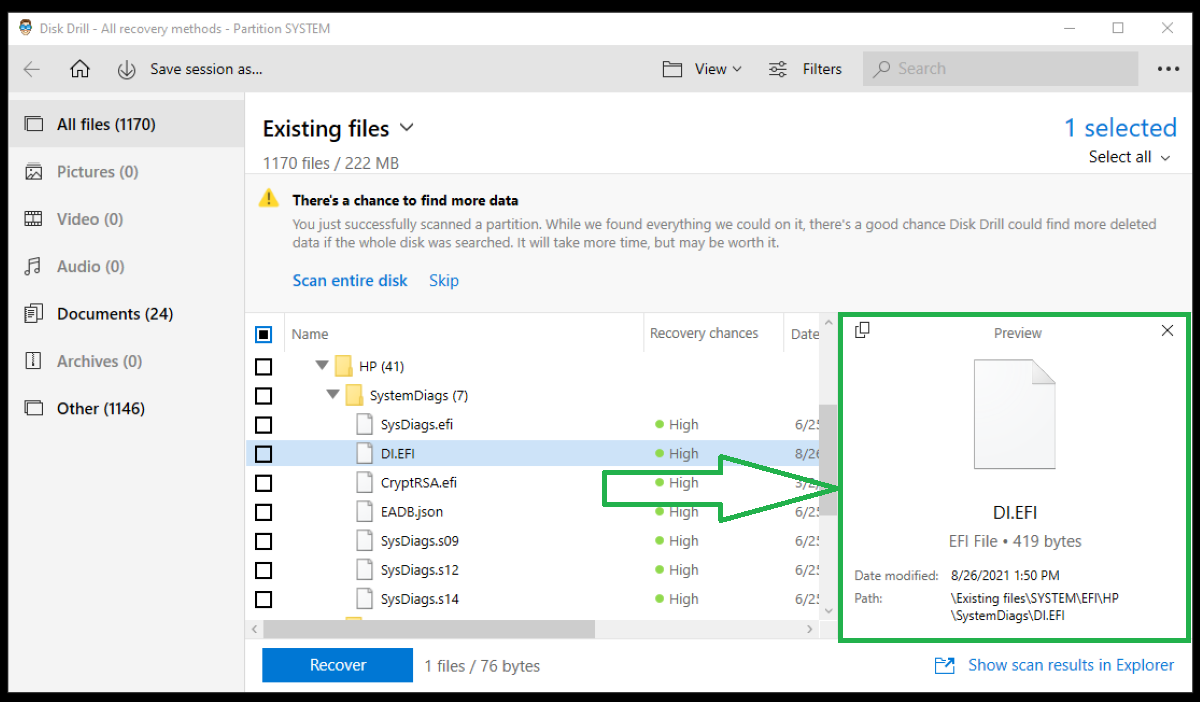
On the right of your screen, you’ll see a viewing pane. When you single-click on a file, the pane will show either a rendered image or a blank thumbnail. A rendered image is good. It means Disk Drill is very likely to recover your work. A blank thumbnail means that it might be beyond recovery.
Select “Recover.”
Seven. After Disk Drill recovers your files, it will need to save them. The software will ask you where it should do so. You can select any place that’s convenient for you. The file will be named DeepScan – Fat 32 or something similar.
Your data recovery is now complete, but Disk Drill will save your session so that you can quickly get back into it later by clicking on an item in the “Recent sessions.”
For any issues with Disk Drill, refer to the Disk Drill help center or troubleshooting page.
Recover .max Files from Windows Recycle Bin or Mac Trash
Recovering files from a Windows recycle bin or Mac trash is generally pretty easy. Both locations are temporary storage areas that hold your files intact.
For Windows
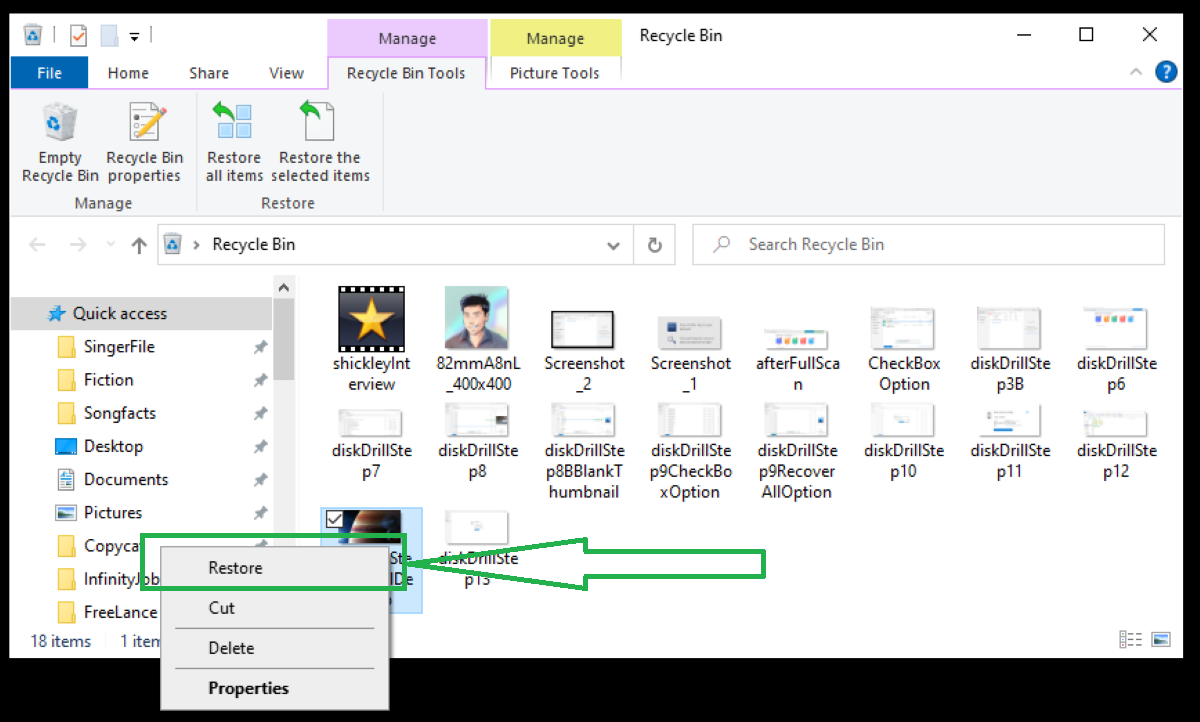
One. Double-click the recycle bin on your desktop. You can also right-click and select “open,” but both options do the same thing.
Two. Find the .max file(s) that you want to recover.
There are now two options. Right-click on the file and select “Restore.”
Or you can double-click on the file and select “Restore.”

The system will restore your .max files to their original locations.
For Mac
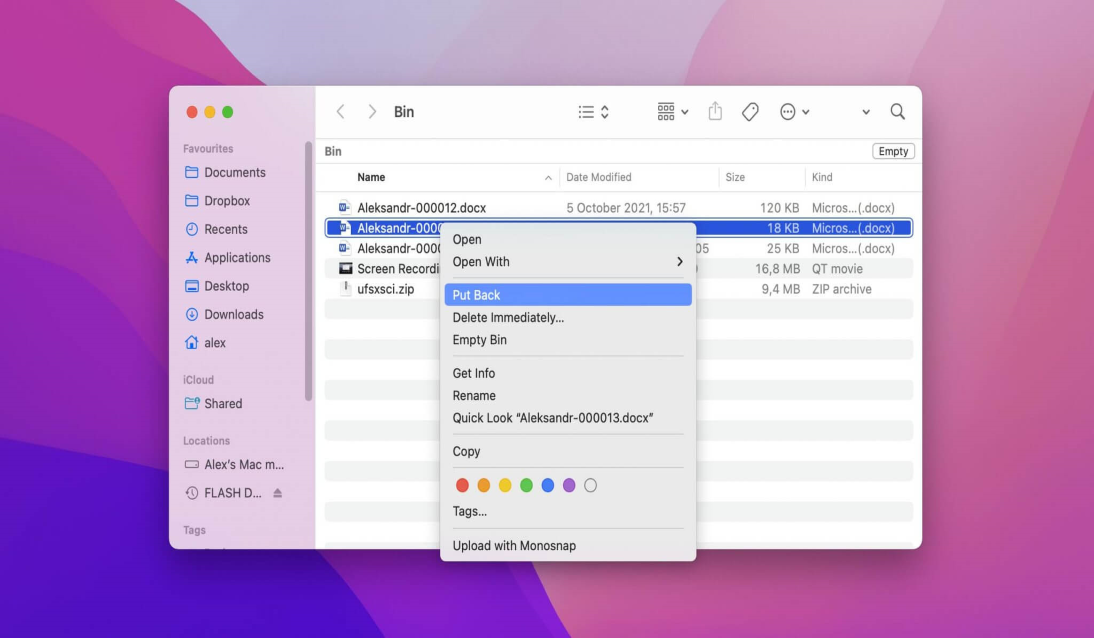
One. Click the Trash icon.
Two. Select the deleted files that you want to get back. Right-click or control-click on the desired file or files. A menu will drop down. Restore the files by selecting “Put Back.”
Restore from a Recent Files folder
Sometimes, getting a missing file back is as easy as going into your recent files folder.
One. Open your recent files by hitting “Windows + R.” This will open the Run dialogue. Type “recent” into the dialogue box. Hit “enter.”
Two. Click on the file you want to restore. In the dropdown menu, select “restore previous versions.”
If previous versions are available, they will appear in a window. Double-click to restore the file.
How to open .max files on Mac and Windows
.max files are a little different from the more common file types. Your computer is unlikely to have built-in options to open them. You’ll need to download the right software. Without it, your system will keep telling you that it can’t open the file.
Autodesk 3ds Max has discontinued service to macOS. The availability of the other programs for Mac computers varies.
Programs that Open .max Files
Not all .max files are the same. You’ll need to know the origin of your .max file to know the best software to open it.
Autodesk 3DS Max
Autodesk 3ds Max is a premier graphics program used by professionals to make video games, movie and TV effects, and architectural schematics. It is the most common source of .max files.
Paperport
This document-management software converts paper documents to digital form and saves images in .max format.
PS2 Save Builder
Save Builder can make changes to PS2 video games. The saved game files are stored in .max files.
Creative Writer
Creative Writer word-processing software has been discontinued, but it saves files in .max format.
7-Zip
7-Zip is a file management program created by Igor Pavlov. It can unpack ZIP archives that have been encoded with .max files.
Max
Created by Cycling ’74, the Max programming language is used to create music software and music samples. Files written in Max source have the .max extension (sometimes the .maxpat extension).
Maximizer
Maximizer is the name of both the product and the producer. It provides various marketing and sales tools. Some of its data is stored as .max files.
Cryptomailer
This product by TheGreenBow compresses files into singular, encrypted containers. It’s primarily used for the purpose of encrypting email attachments. Data that’s been encrypted by Cryptomailer is saved in .max format.
OrCAD
This suit of circuit-board design and creation tool comes from Cadence. Its Designer component saves in the .max file extension.
OmniPage
Created by Nuance, OmniPage software is sued to process scanned documents. It saves image and text layers, layout settings, and some other data in .max files.
Tips to Avoid .max File Loss
You can get lost .max files back, but the best course of action is to avoid losing them altogether.
- 💽Back your .max files up. Both macOS and Windows have data backup options. Use them. They will store your files in a secondary location that should survive whatever happens to cause file loss in the primary location. If something goes missing from your primary device, you can get it from your backup location.
- 🔌Get an uninterruptable power supply. Power surges and outages are frequent causes of lost data. Mitigate this threat by using an uninterruptable power supply, which is basically a secondary power source that will give your machine juice when the main power source fails.
- ❤️Only use devices and software you trust: Using unknown devices or software is a good way of introducing viruses and malware to your devices. Only use things that come from people you trust or providers with strong reputations.
- 🖱️Save often: It’s easy to become so embroiled in your work that you forget to save but doing so increases the chances of data loss. If something happens in the middle of your work and you forgot to save it, then all that work can disappear. Save often. It may be annoying, but in the long run it can save you from a lot of headaches.