Ever wondered why a Mac has no Print Screen key? So, how do you take a screenshot on a Mac? There are other ways to do it. Although initially, it may look difficult, it is not. Here is how to take a screenshot on a Mac. Just carefully follow the steps.
1. Take a Screenshot of Your Whole Screen
- Press ⌘ + Shift + 3 at the same time
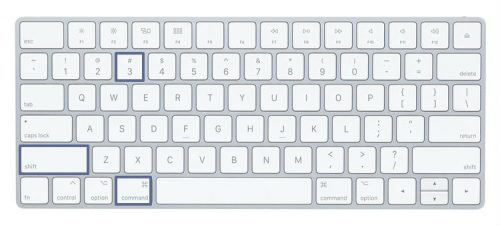
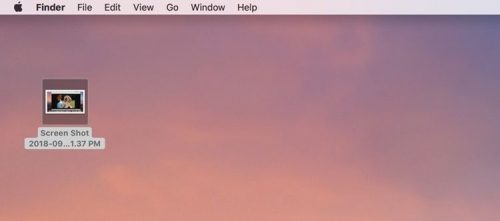
- Find the screenshot on your desktop. It will be saved as a .png file.
2. Take a Screenshot of Part of Your Screen
- Press ⌘ + Shift + 4 at the same time. You will see that your pointer changes to a crosshair pointer.
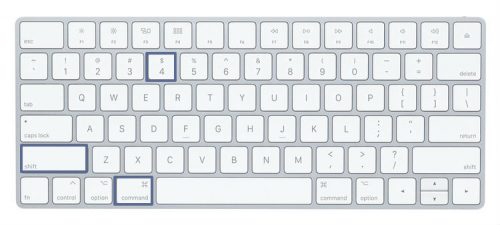
- Move the crosshair pointer to the initial point of your screenshot.

- Select an area by dragging the crosshair pointer. While you are dragging, you can hold the Shift , Option or Spacebar to change the way the selection moves.
- Once you have selected the area, release your mouse or trackpad button. If you want to cancel the Mac OS X screenshot, just press esc key before you release the button.
- Find the screenshot on your desktop. It will be saved as a .png file.
3. Take a Screenshot of a Window
- Press ⌘ , Shift and 3 at the same time. You will see that your pointer changes to a crosshair pointer.
- Press Spacebar. You will now see that the pointer changes from a crosshair pointer to a camera pointer.
- Move your camera pointer to the window you want to screenshot on Mac.
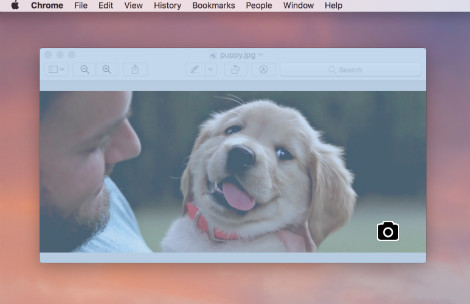
- Once you have selected the window, click your mouse or trackpad. If you want to cancel the screenshot, simply press esc key before you click.
- Find the screenshot on your desktop. It will be saved as a .png file.
Note: This procedure works with Finder windows and most windows applications.
4. Take a Screenshot of a Menu
- Click the menu to show its contents.
- Press ⌘ + Shift + 4 at the same time. You will see that your pointer changes to a crosshair pointer.
- Drag the crosshair pointer to select the menu.
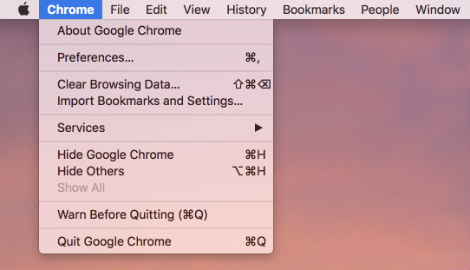
- Once you have selected the window, click your mouse or trackpad. If you want to cancel the screenshot, simply press esc key before you click.
- Find the screenshot on your desktop. It will be saved as a .png file.
5. Take a Screenshot of a Menu Without the Title
- Click the menu to show its contents.
- Press ⌘ + Shift + 3 at the same time. You will see that your pointer changes to a crosshair pointer.
- Press the Spacebar. You will now see that the pointer changes from a crosshair pointer to a camera pointer.
- Drag the camera pointer over the menu to highlight it.
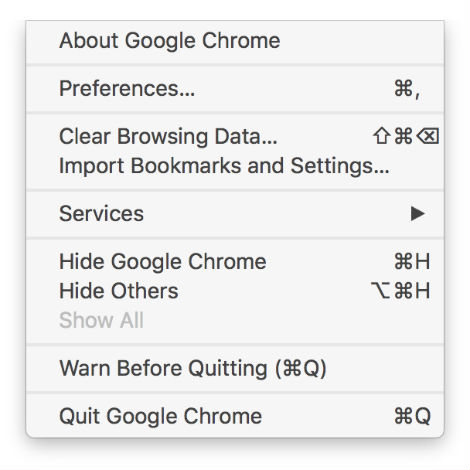
- Once you have selected the window, click your mouse or trackpad. If you want to cancel the screenshot, simply press esc key before you click.
- Find the screenshot on your desktop. It will be saved as a .png file.
Some Extra Points on How to Do a Screenshot on a Mac
- These processes are valid for all of Apple operating system versions namely, Leopard, Snow Leopard, Lion, Mountain Lion, Mavericks, Yosemite, El Capitan and macOS High Sierra.
- Some applications may not let you take screenshots of their windows.
- You can open your screenshots with Preview or any image-viewing application.
- If you want to save your screenshot to the clipboard, instead of a file on your desktop, simply use the Shift + Command + Control + 3 combination.
- On versions 10.6 and later, screenshots will be saved as “Screenshot name date at time.png”.
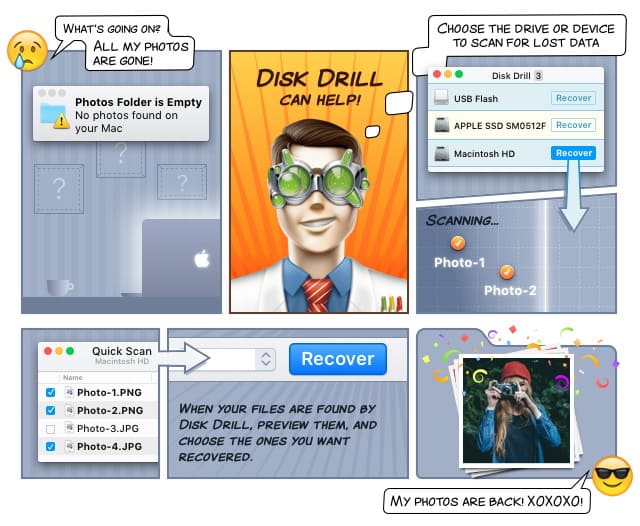
Recovering Lost Screenshots
If, how to screenshot on a Mac wasn’t easy, then don’t worry if any of your screenshots have been lost. Disk Drill by Cleverfiles is a data recovery app that is even easier to use, and is available for free download.