Believe it or not, your Mac is hiding things from you. Nothing bad! Just some files that are chosen to be hidden by default.
In this article, we’re going to take a look at why there are hidden files, what kind of things would be hidden on your Mac, and how to unhide them.
Why Are There Hidden Files on My Mac?
By default, there are many hidden files on your Mac and there is a good reason behind it. Most of the files that are hidden have to do with system functions or they contain important data that helps your computer operate. It could also be something that has to do with important settings.
You can also hide a file on purpose if you don’t want someone to see it and this file would be hidden away with the other ones on your Mac.
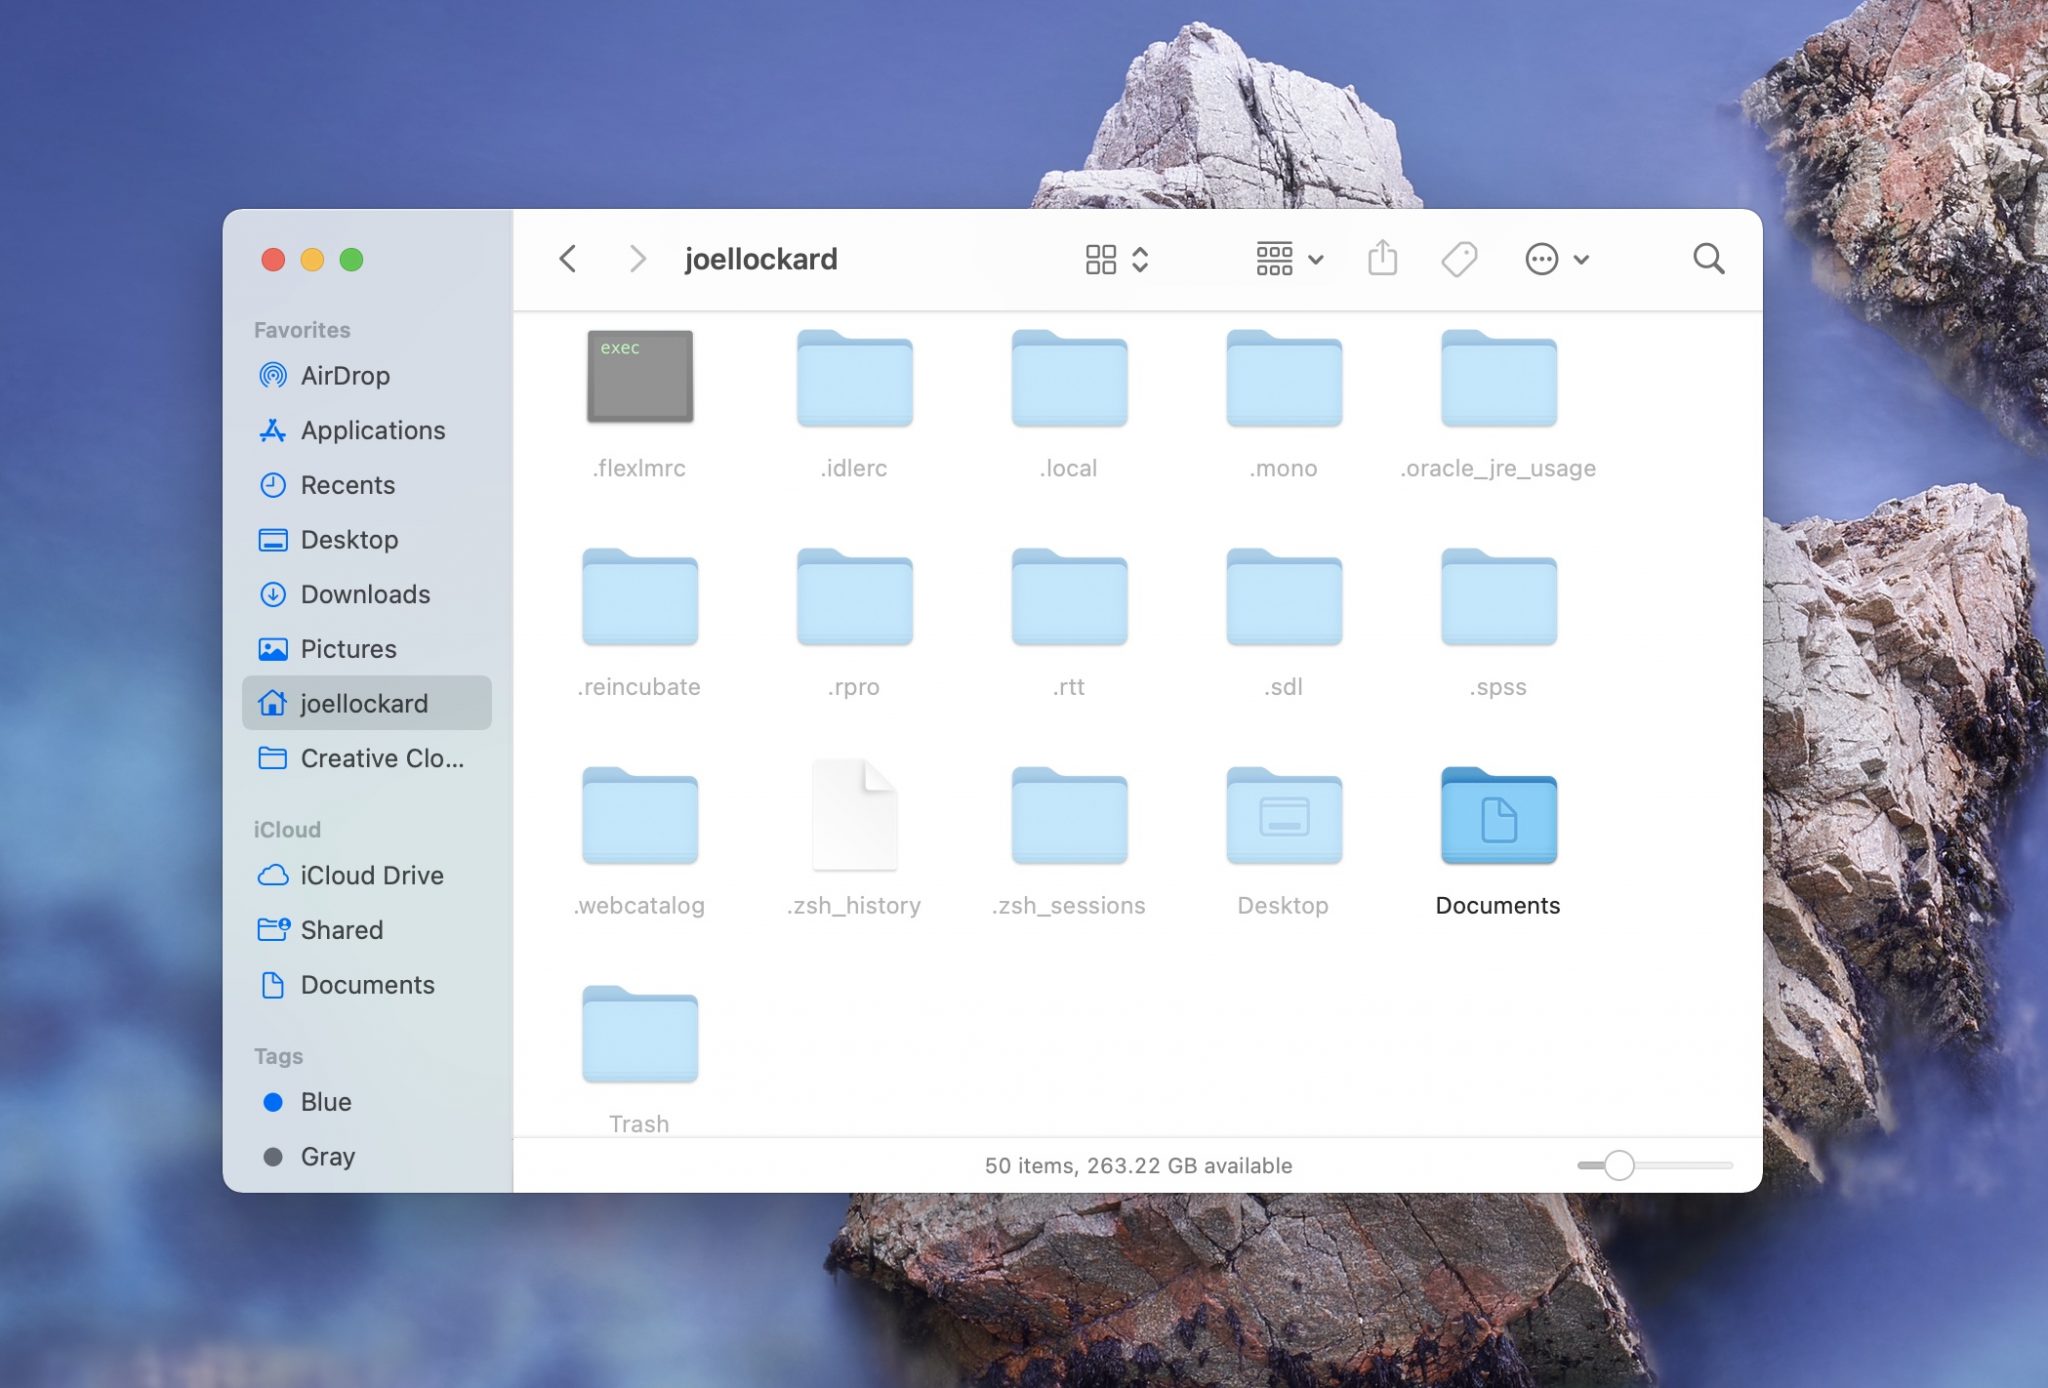
Hidden files and folders will appear opaque when you unhide them and that is how you can distinguish if they’re hidden or not. You can see that in the screenshot below, the only file or folder that isn’t a hidden one is the Documents folder for example.
Let’s take a look at how to show your hidden files and folders if you’re using Finder.
How to Show Hidden Files While in Finder
If you’re in a Finder window and want to display the hidden files and folders that are located there, we can use a simple key command to toggle them either visible or not visible, it’s actually quite simple!
- Navigate to a Finder window and then press the keys Command + Shift + . and then you will be able to see the hidden files and folders. If you’re not seeing any right away, it could be the location on your Mac simply doesn’t have anything that is hidden there and you will have to check another location.
You will notice that they appear slightly different as they have more of an opaque look to the Finder window and they aren’t as bold, they will appear more transparent to help you differentiate between the two.
A popular folder that you may want to view on your Mac would be the Library folder. Let’s talk about what is in the Library folder and how to find it.
How to Find Your Library Folder on Your Mac
The Library folder on your Mac is hidden by default and for good reasons too. Most of the time, you won’t need to go into it but there might be some cases where you decide to or you may just be curious! Either way is fine!
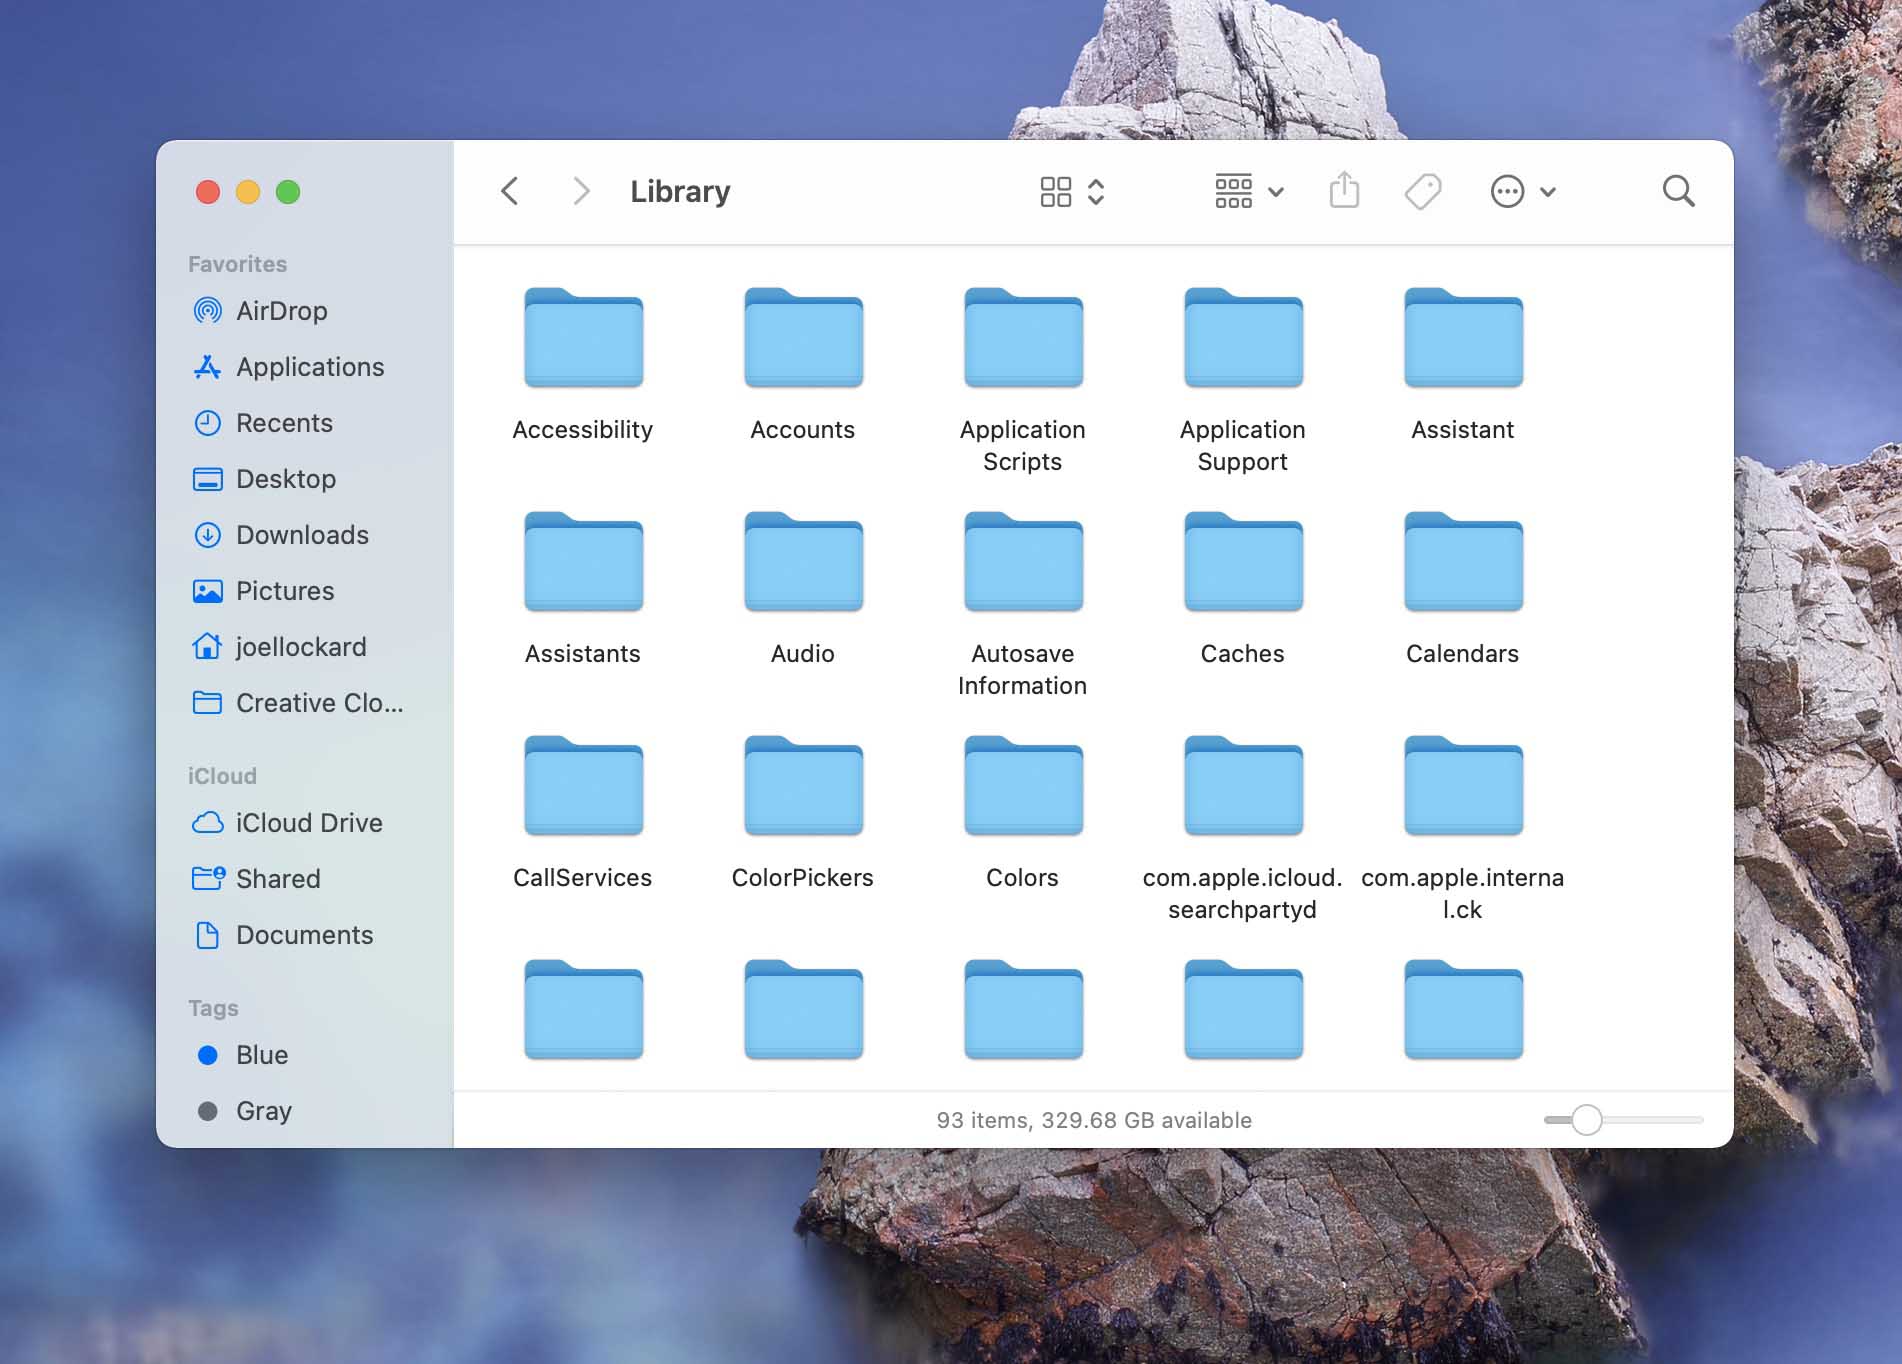
The Library folder on your Mac stores important information in relation to:
- Account settings
- Application support data
- Preference Files
- Containers
- Application Scripts
- Caches
- Cookies
- Fonts
If you’re wanting to go into these files on your Mac and make changes, then you first have to find and locate your Library folder.
- Launch Finder and open a new window by clicking on the Finder icon on your Dock.
- Once you have launched Finder, look under Favorites and find your Mac username. Click on it and once inside the folder press the keys Command + Shift + “.”. Alternatively, you can open a new Finder window and then navigate to Go in the navbar section and then hold the Option key to display the Library as a selectable option.
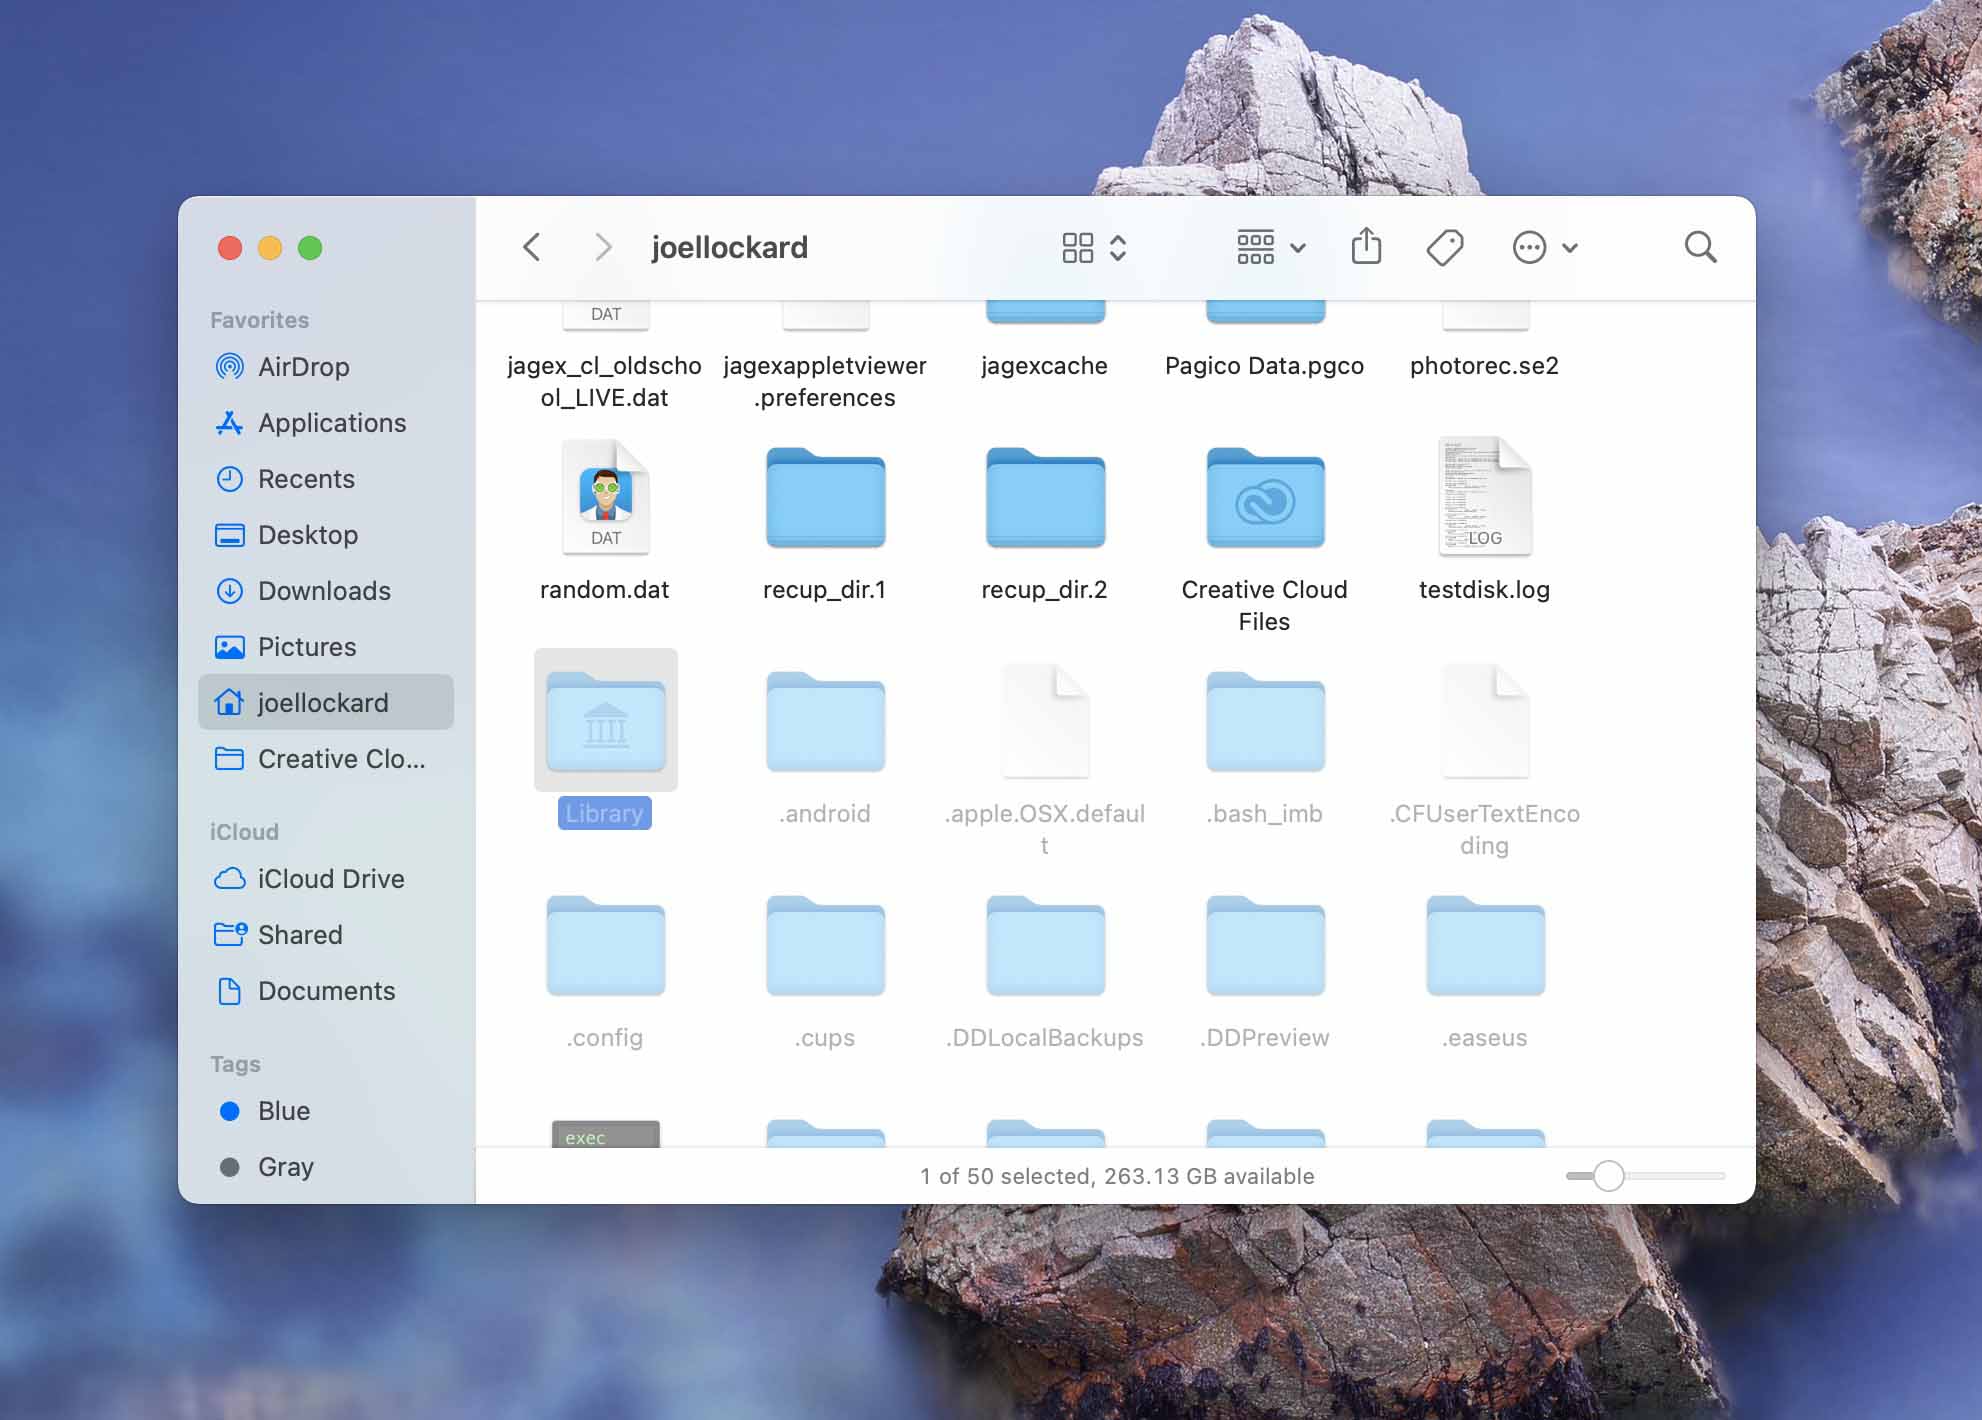
- Click on the Library folder option. It might take you a moment to find it since it will be opaque and not bold like the rest of the files and folders on your Mac.
You can now view the contents of your Library folder or if you wanted to make changes you can do that as well.
Now, let’s take a look at how to make hidden files and folders visible by using the Terminal. This is a more tech-savvy method, but it does the same thing as using the key command!
How to Show Hidden Files by Using the Terminal
The Terminal is a very powerful text-based application that we have on our Mac. The great thing about the Terminal is that it allows you to gain access to direct controls over your Mac by using text. There isn’t a graphical user interface (GUI) which can make it seem overwhelming at first, but it’s actually quite simple.
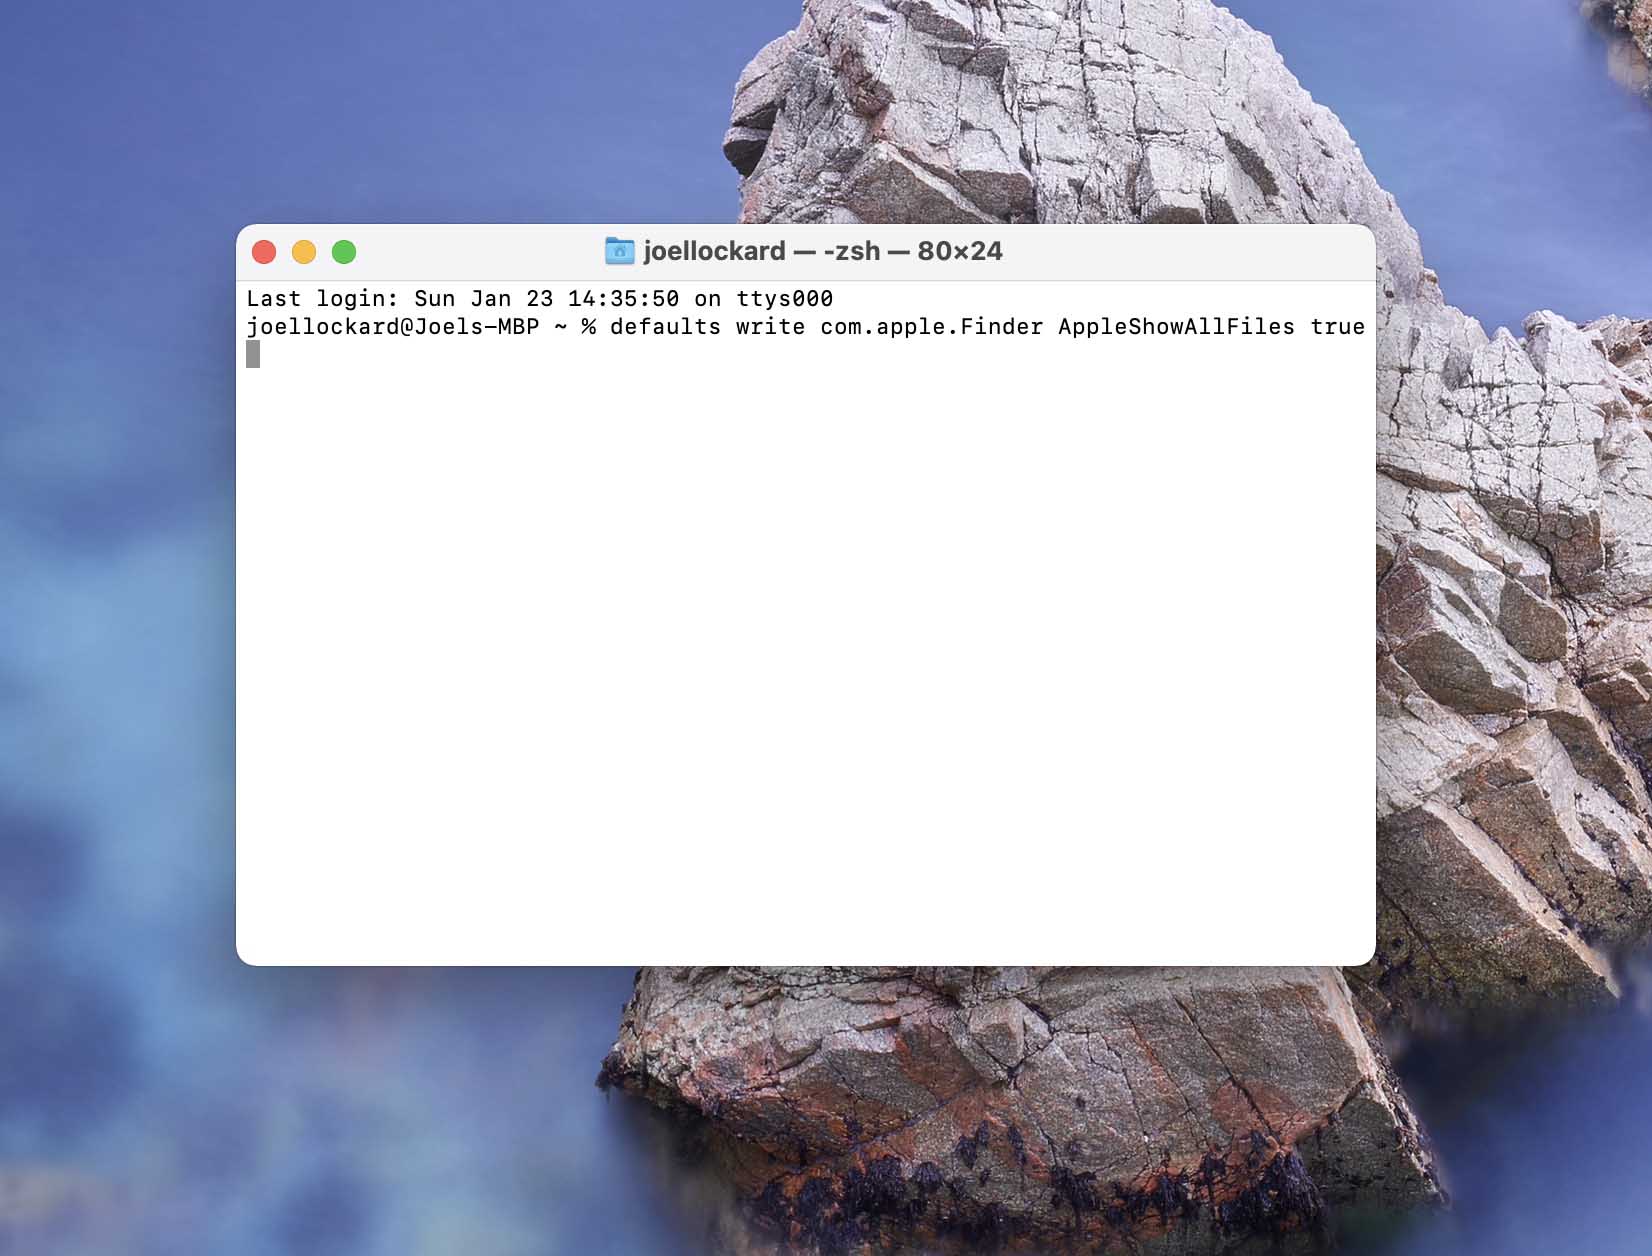
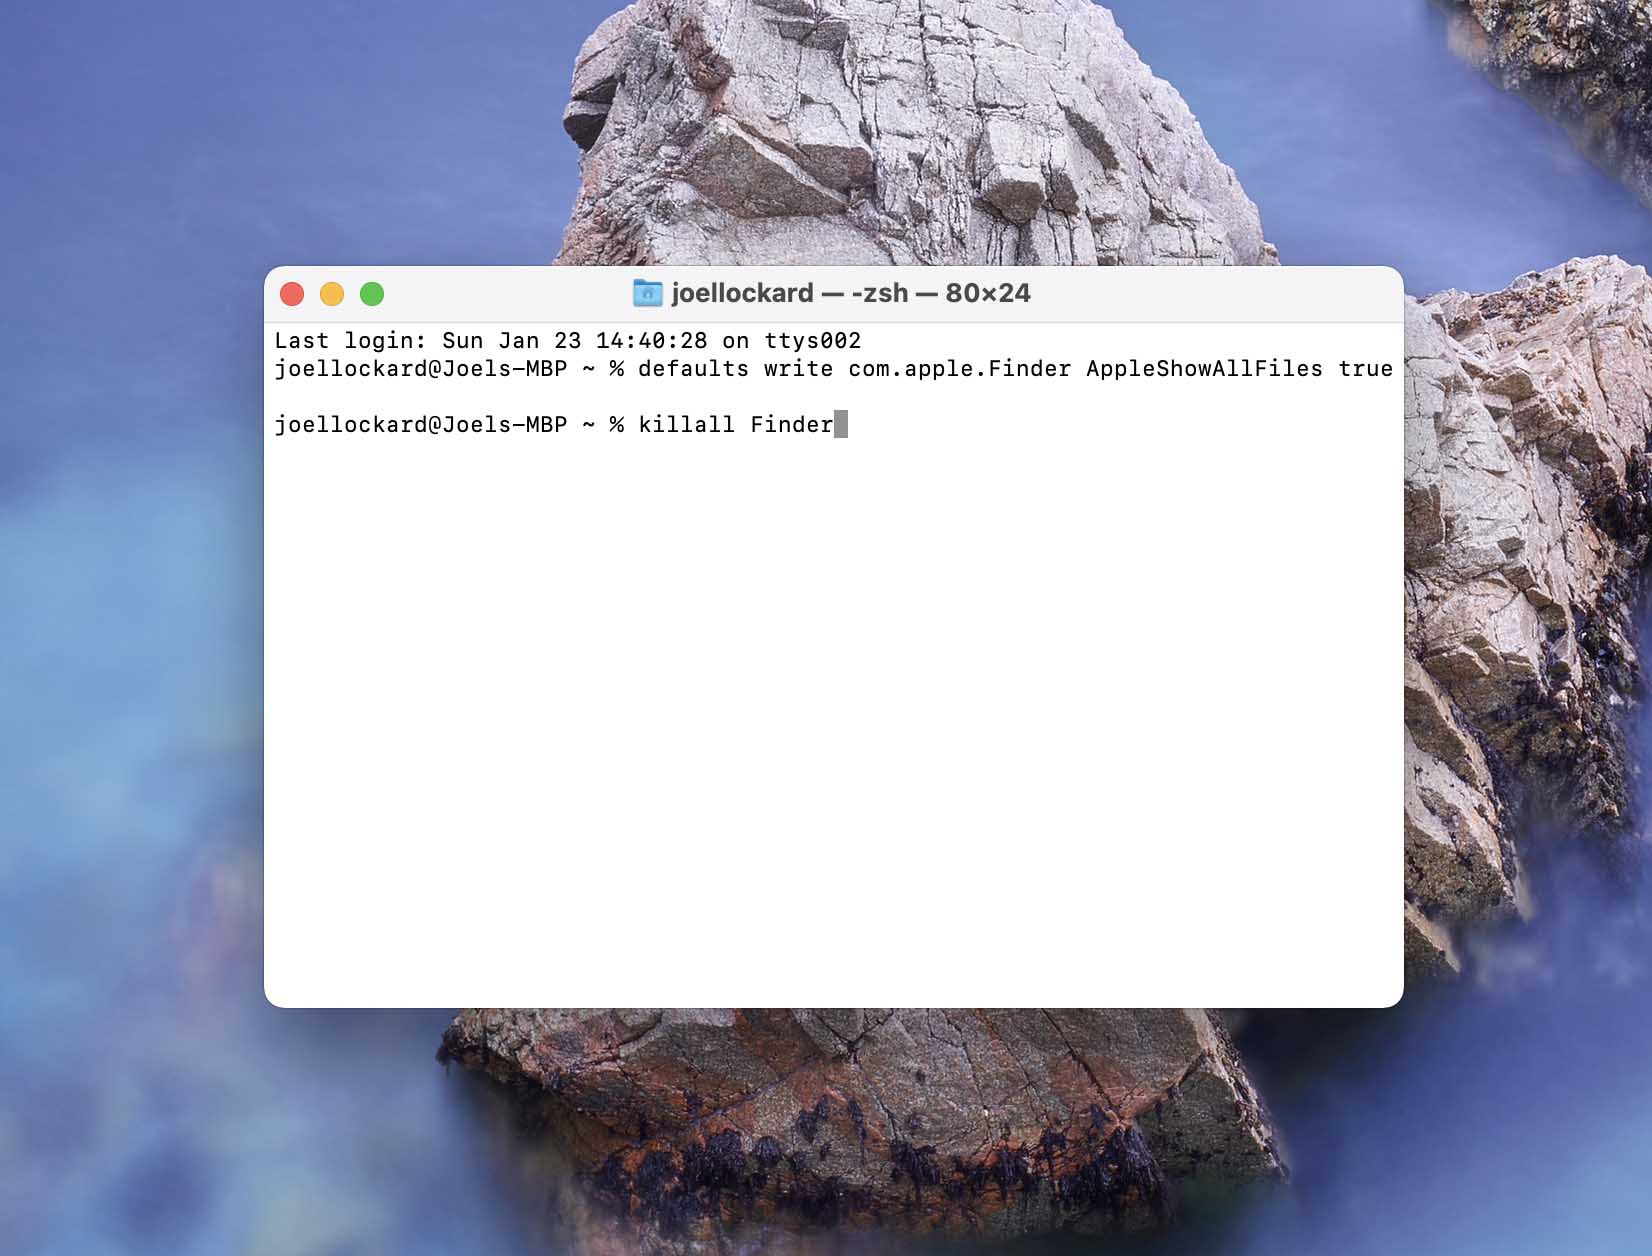
- Launch the Terminal.
- Once you’ve launched the Terminal, type in the text defaults write com.apple.Finder AppleShowAllFiles true and then press the return key. This will change the settings to true for showing hidden files and folders on your Mac.
- After you’ve typed in that command, type in killall Finder and then press the return key. This command will force Finder to restart and then launch again so that the change can take effect.
Now, when you use Finder all of your hidden files and folders should now be visible to you. You can check this by going to either your Desktop as there usually are hidden files there that should now be visible to you.
How to Recover Deleted Hidden Files Using Disk Drill
If you’re looking for a hidden file and can’t find it, there could be a chance that you’ve deleted it. If you think that is the case, we can use Disk Drill to try and recover the deleted hidden file.
It can find files and recover them even if you’ve already emptied the trash on your Mac, it’s a very powerful tool.
When using Disk Drill, it’s free to scan your Mac and look for the recovered file. It won’t cost you anything unless you choose to recover the hidden file which I will walk through below for you, it’s actually quite easy to do.
- Let’s download and install Disk Drill to get started.
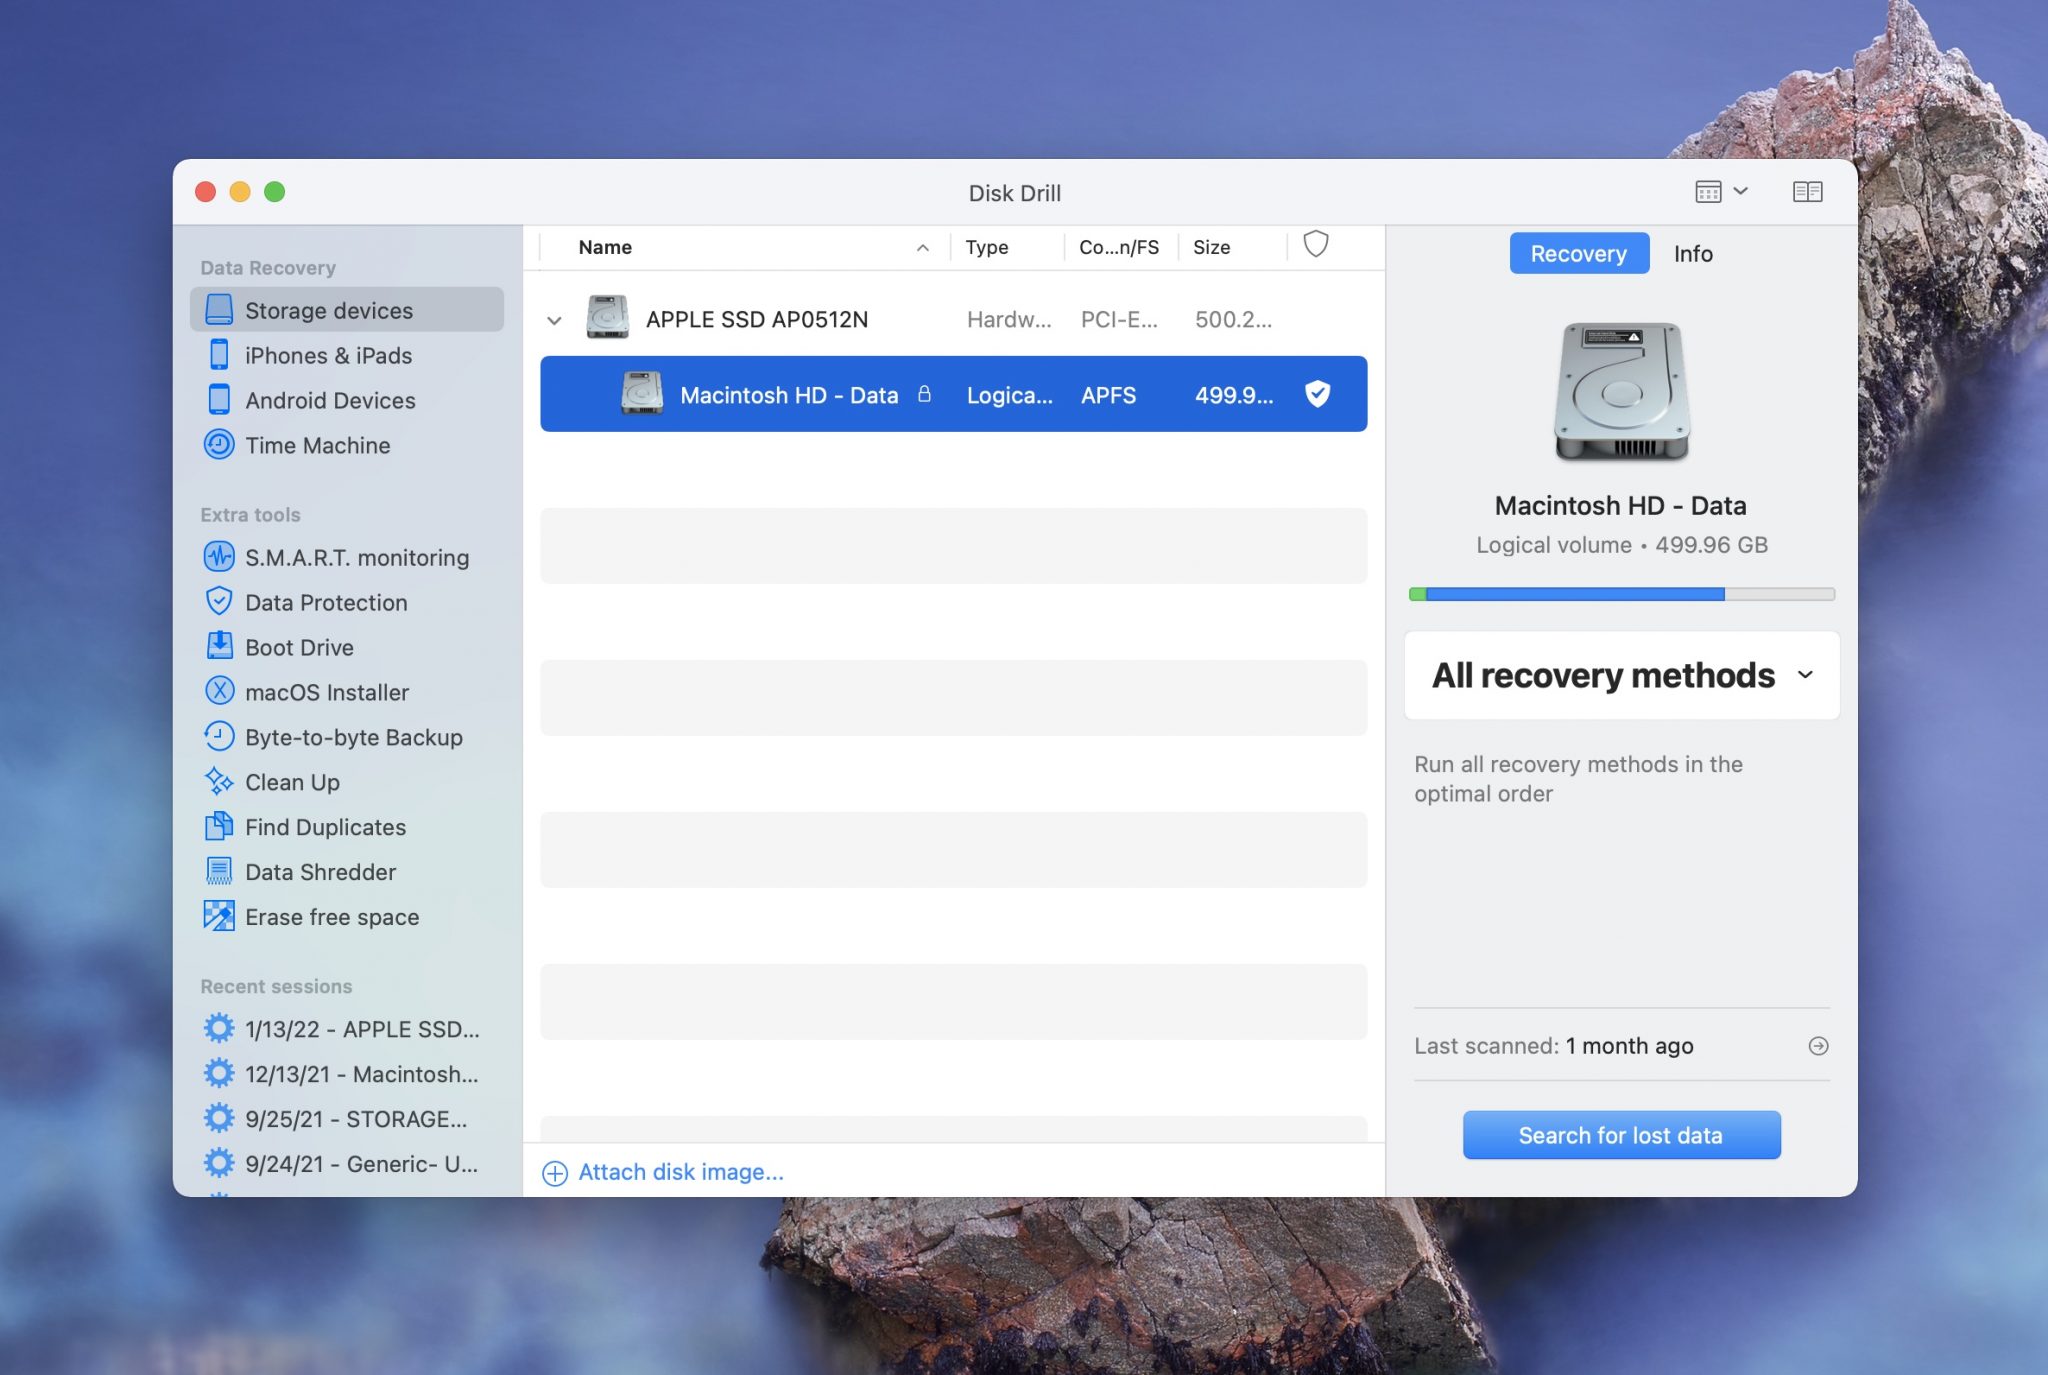
- Once Disk Drill has been downloaded and installed, we want to select which storage device we want to scan for the deleted hidden file.
- In my example, I’m going to scan the internal hard drive on my Mac and walk you through how to find and recover a file. Once you’ve selected the device that you want to scan, click on Search for lost data and the process will begin.
- The scan process will then start. Depending on how much data you have will determine how long it takes for the process to complete.
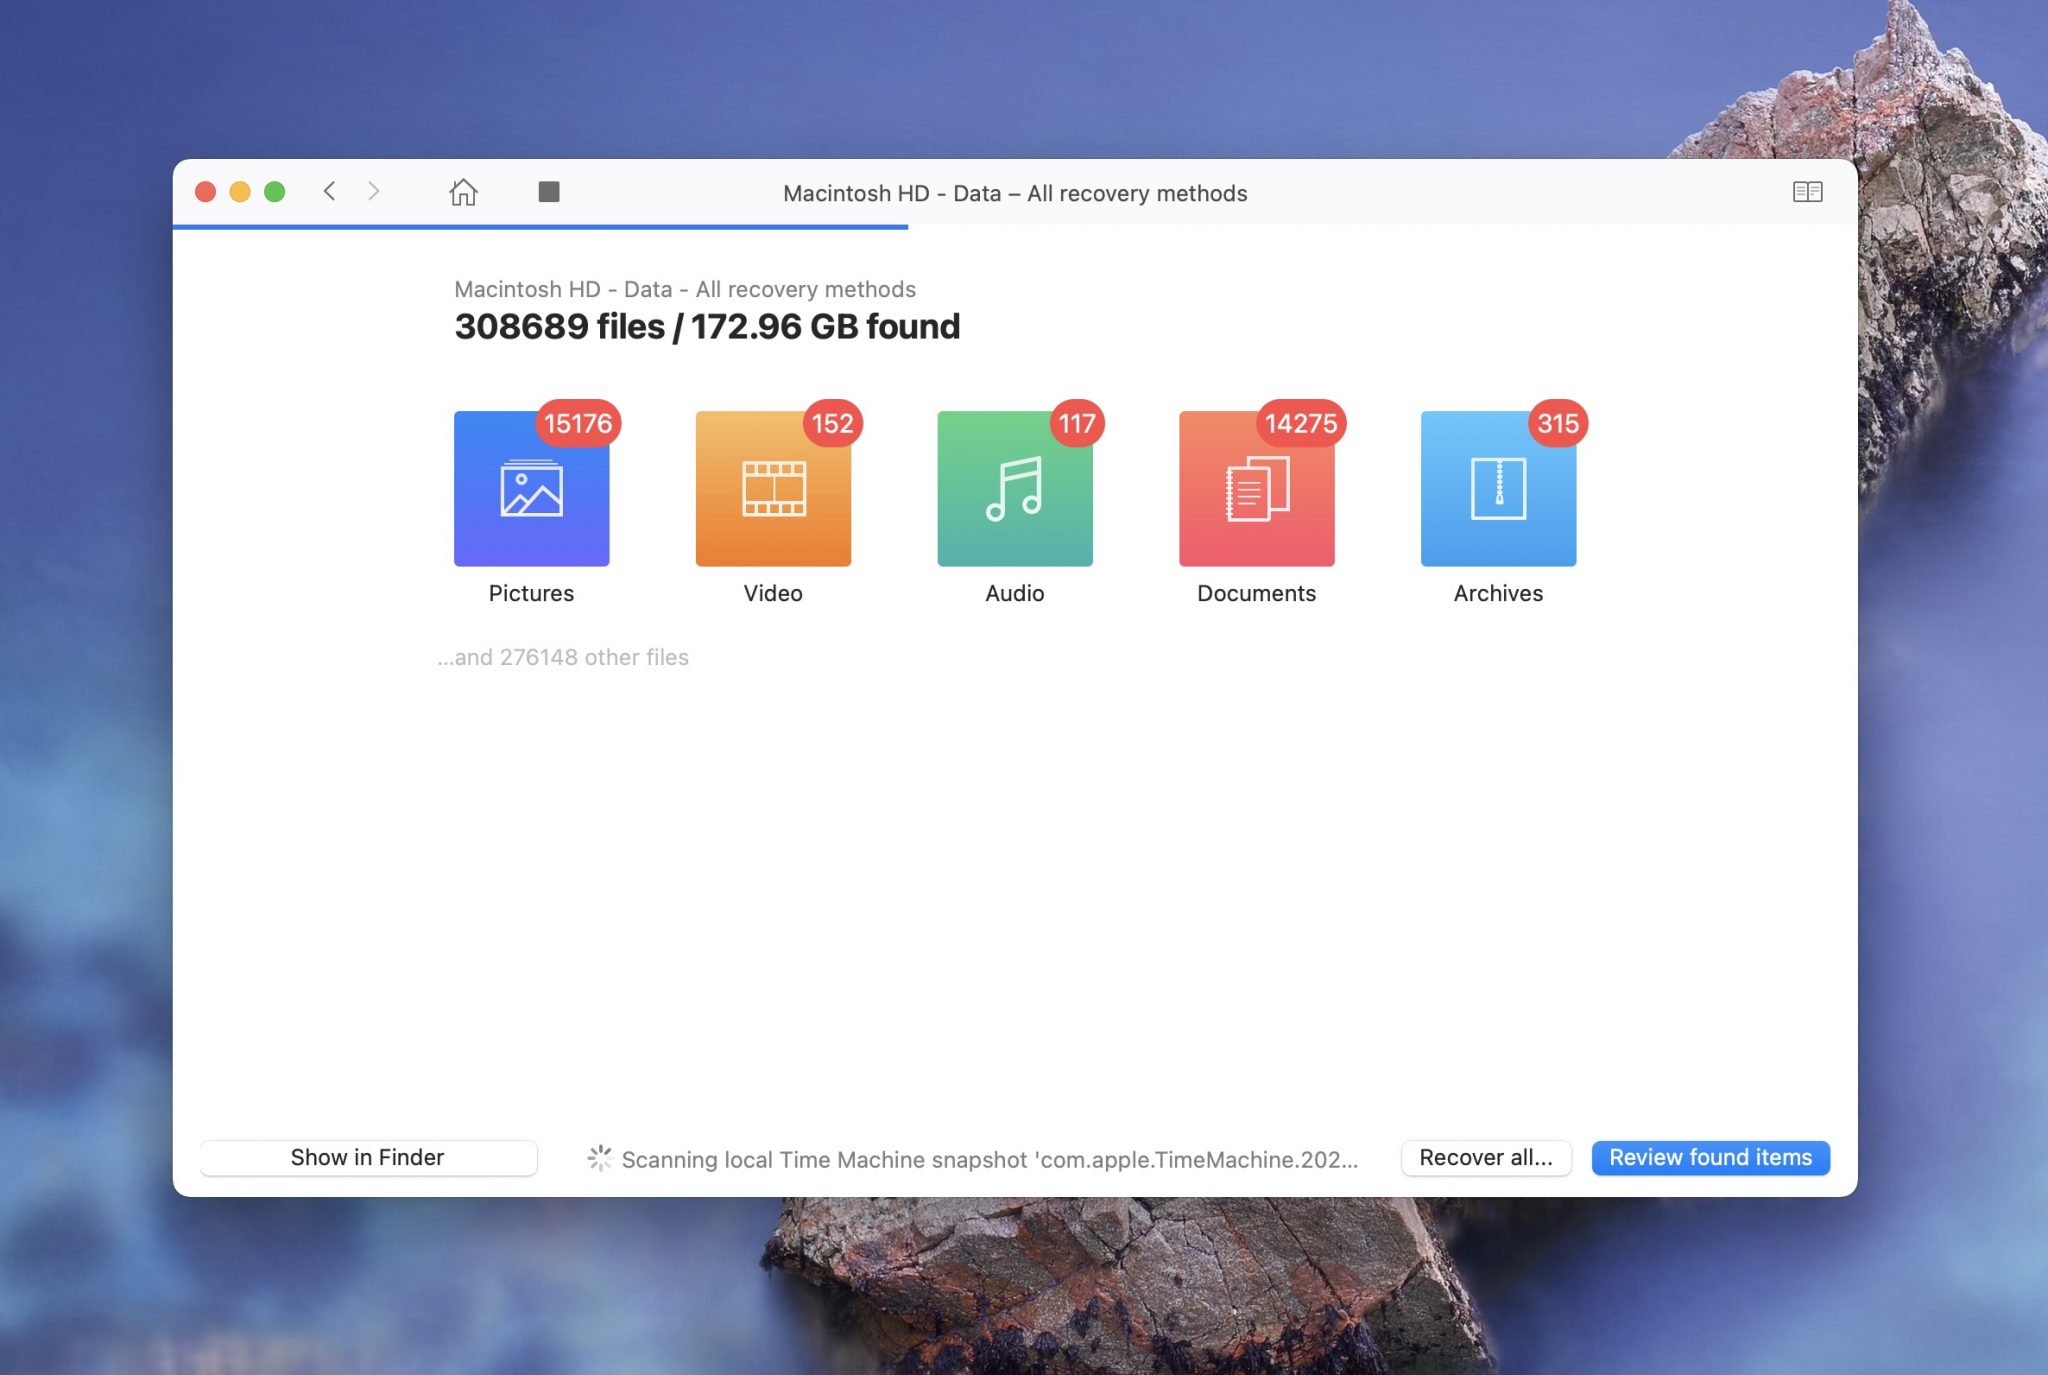
- Once the scan process has been completed, we can now look at what Disk Drill was able to find and recover. Disk Drill utilizes a preview function that allows you to view what you’re recovering if the file supports it.
- I clicked on the upper right-hand corner of Disk Drill and typed in Trash as I find that most of the time if I were to lose a file, it would be one that I had in the Trash, and then it got deleted once I emptied it. I then expanded the Trash and you can see that I’m able to view all of the files that Disk Drill was able to recover.
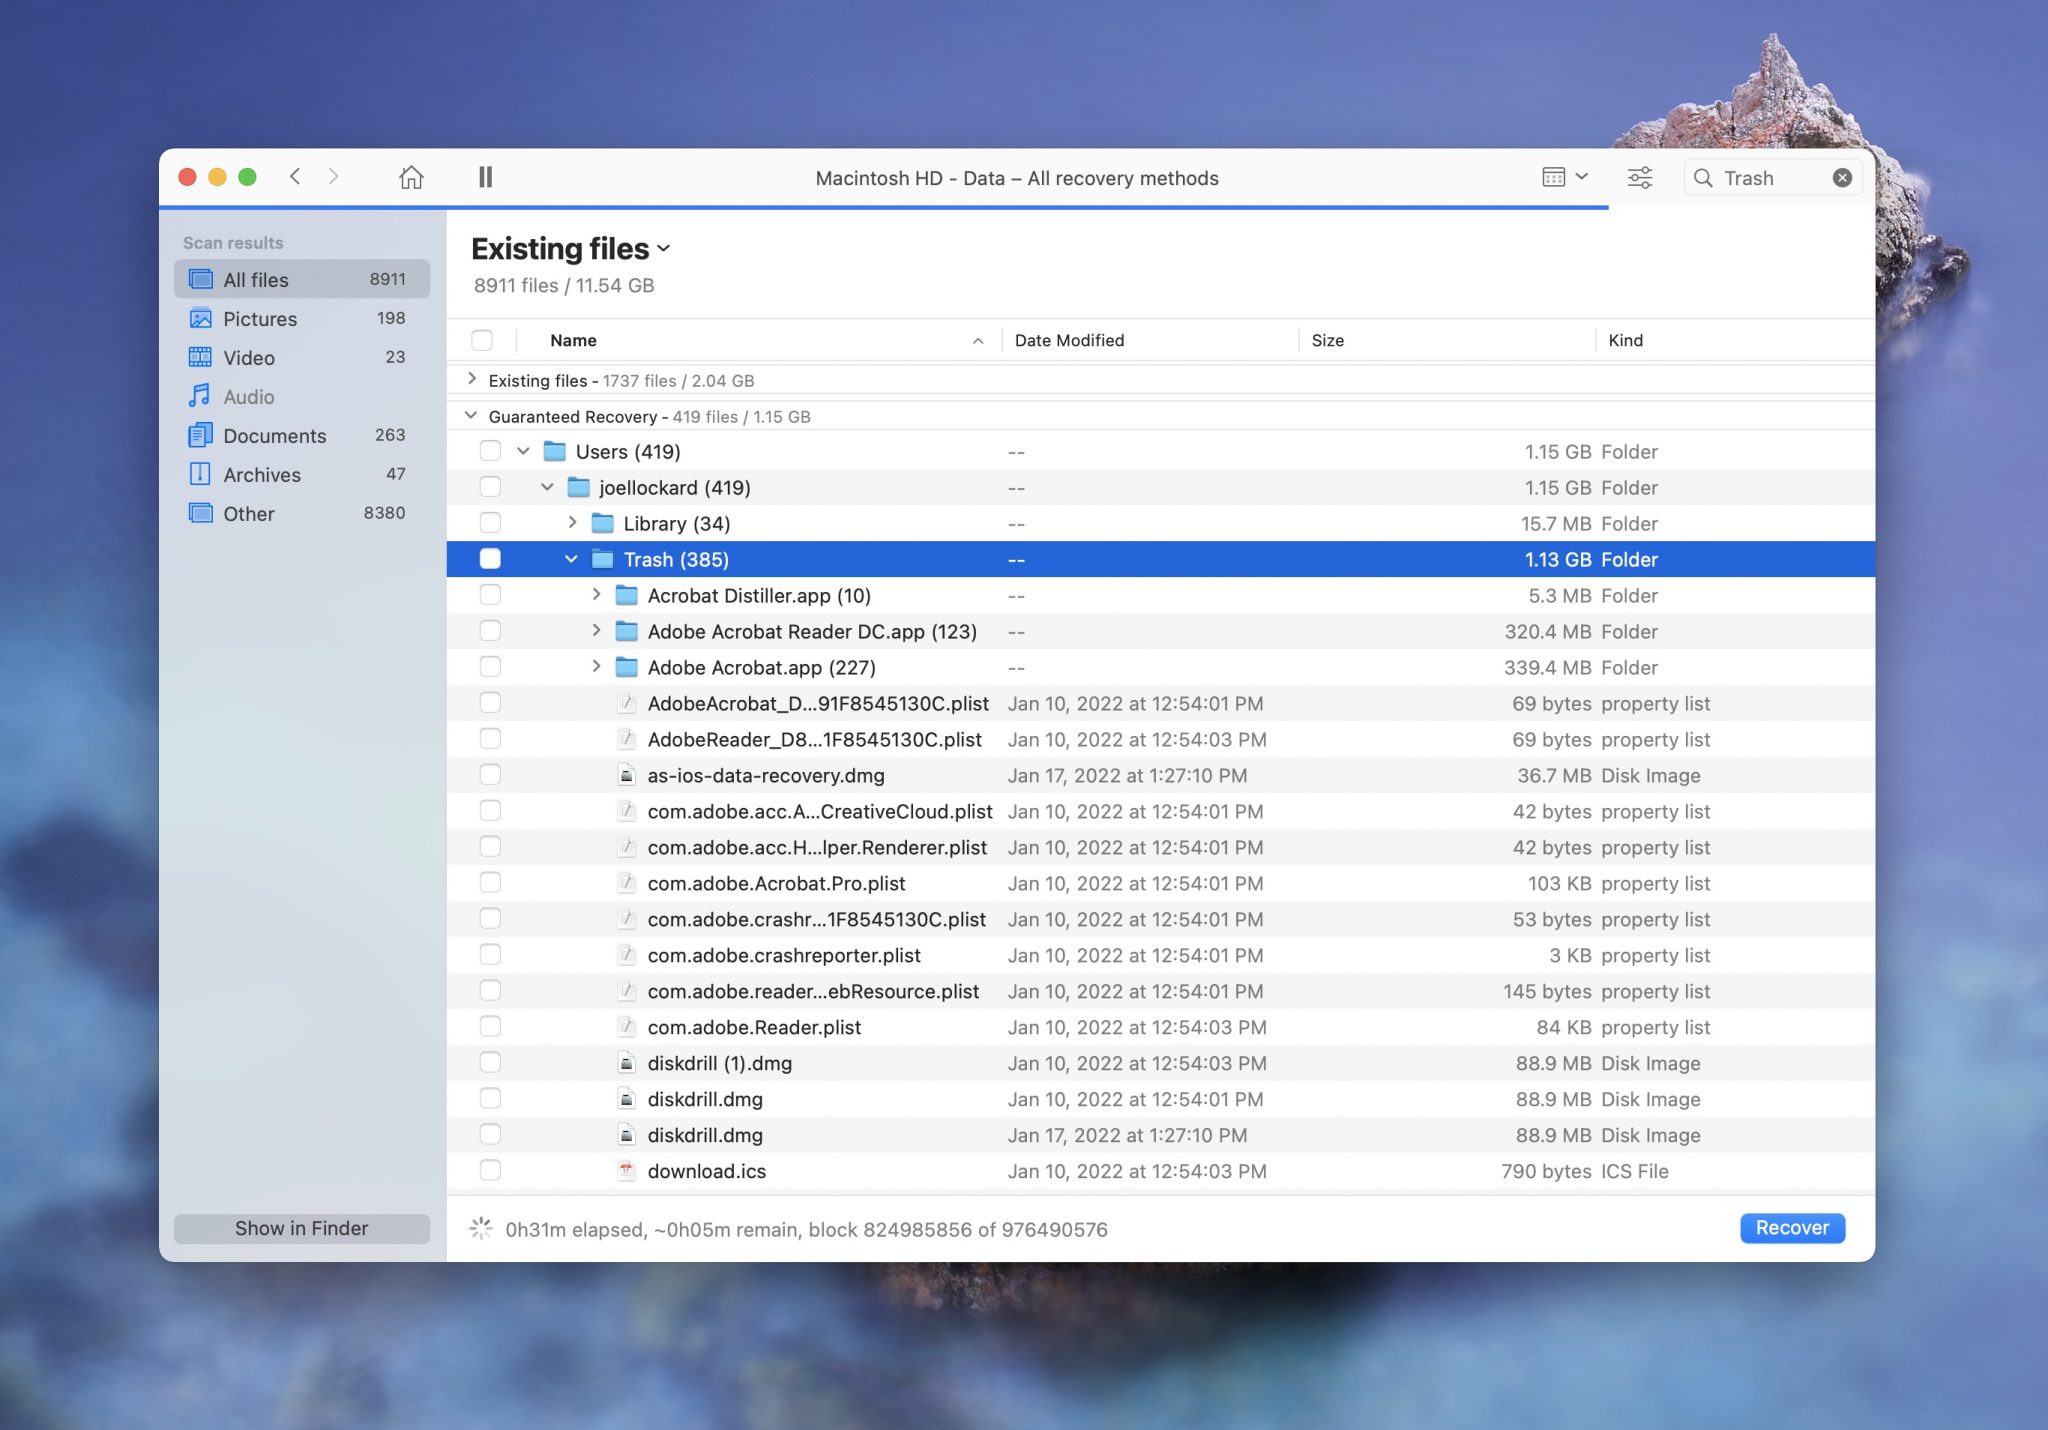
- Look through the files that you would like to recover and check the box to then select them for recovery. You can preview them by clicking on the eye icon once you hover over a file.
- I first clicked on the eye icon to preview the file that I want to recover and when I previewed it, a separate window opened up showing me what the file was. In my example, I’ve selected a Disk Drill image for recovery.
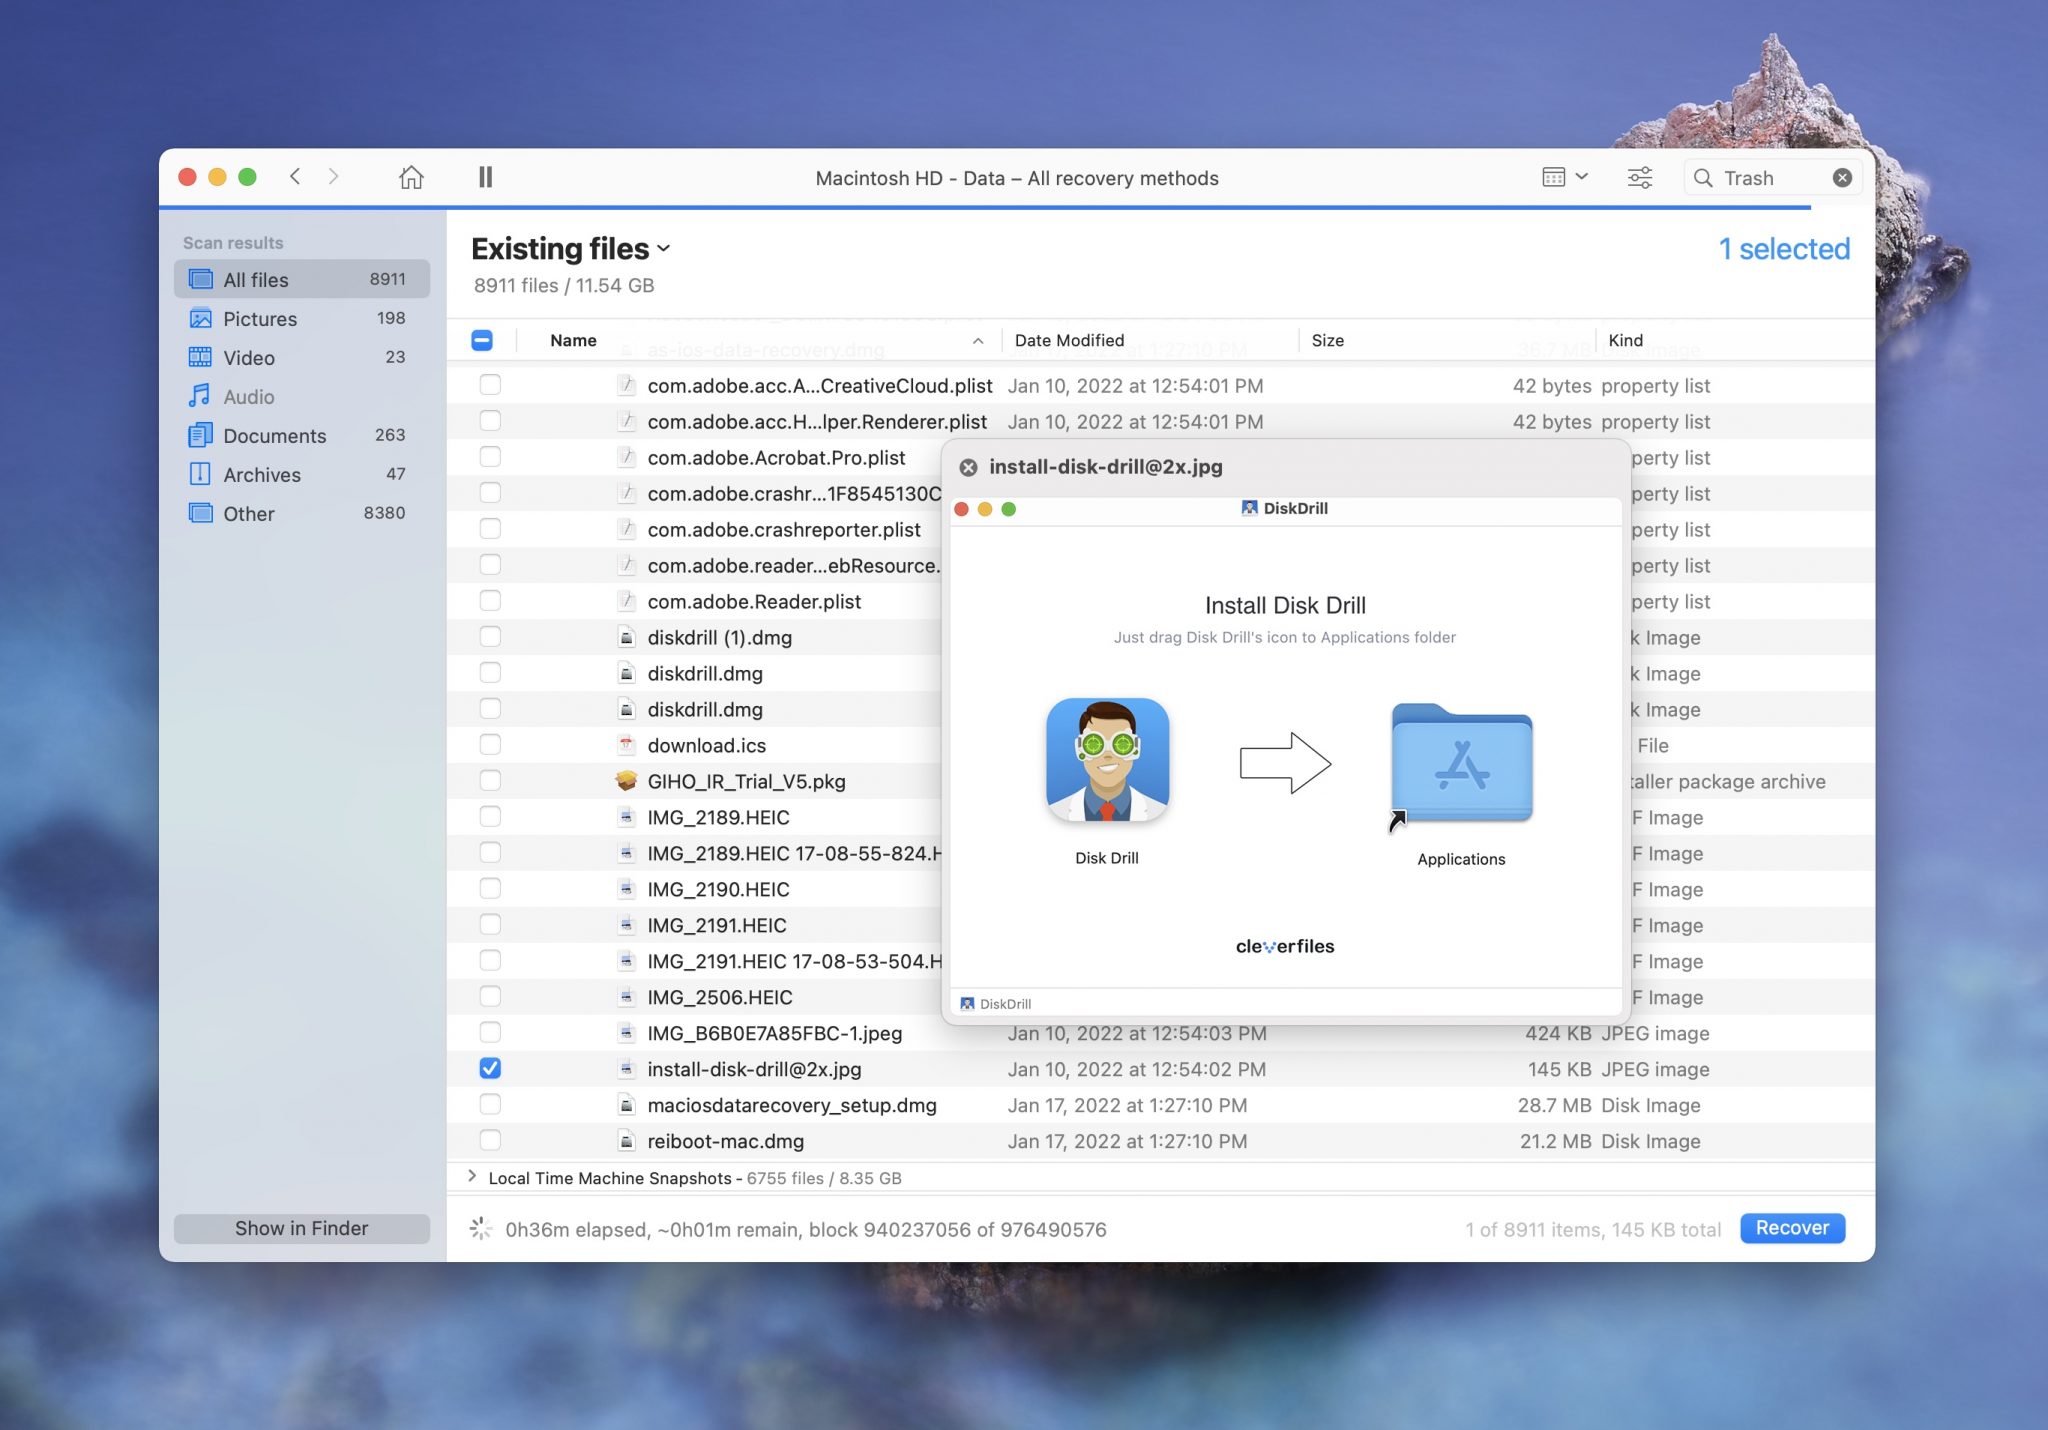
- Once you’ve found all of the files that you would like to recover, click on the blue Recover button in the lower right-hand corner of the screen.

That’s it! You have now recovered hidden files that you might have deleted on your Mac. You can use Disk Drill to recover any files that you may have accidentally deleted, it doesn’t just have to be ones that are hidden.
It’s a really powerful tool that everyone should know about as you never know when you might delete something and then decide that you want it back.
Leave Hidden Files to the Automatic Cleanup
While some Mac users may find that going into their hidden files and cleaning them up manually is something that allows them to get a few gigabytes of space back, most of the time it’s not necessary to do so. We can leave them be, or we can use something more beneficial like Disk Drill’s Clean Up feature.
- Download and install Disk Drill.
- After installing Disk Drill, we want to launch the app and go to the Clean Up option on the left-hand side within the navbar.
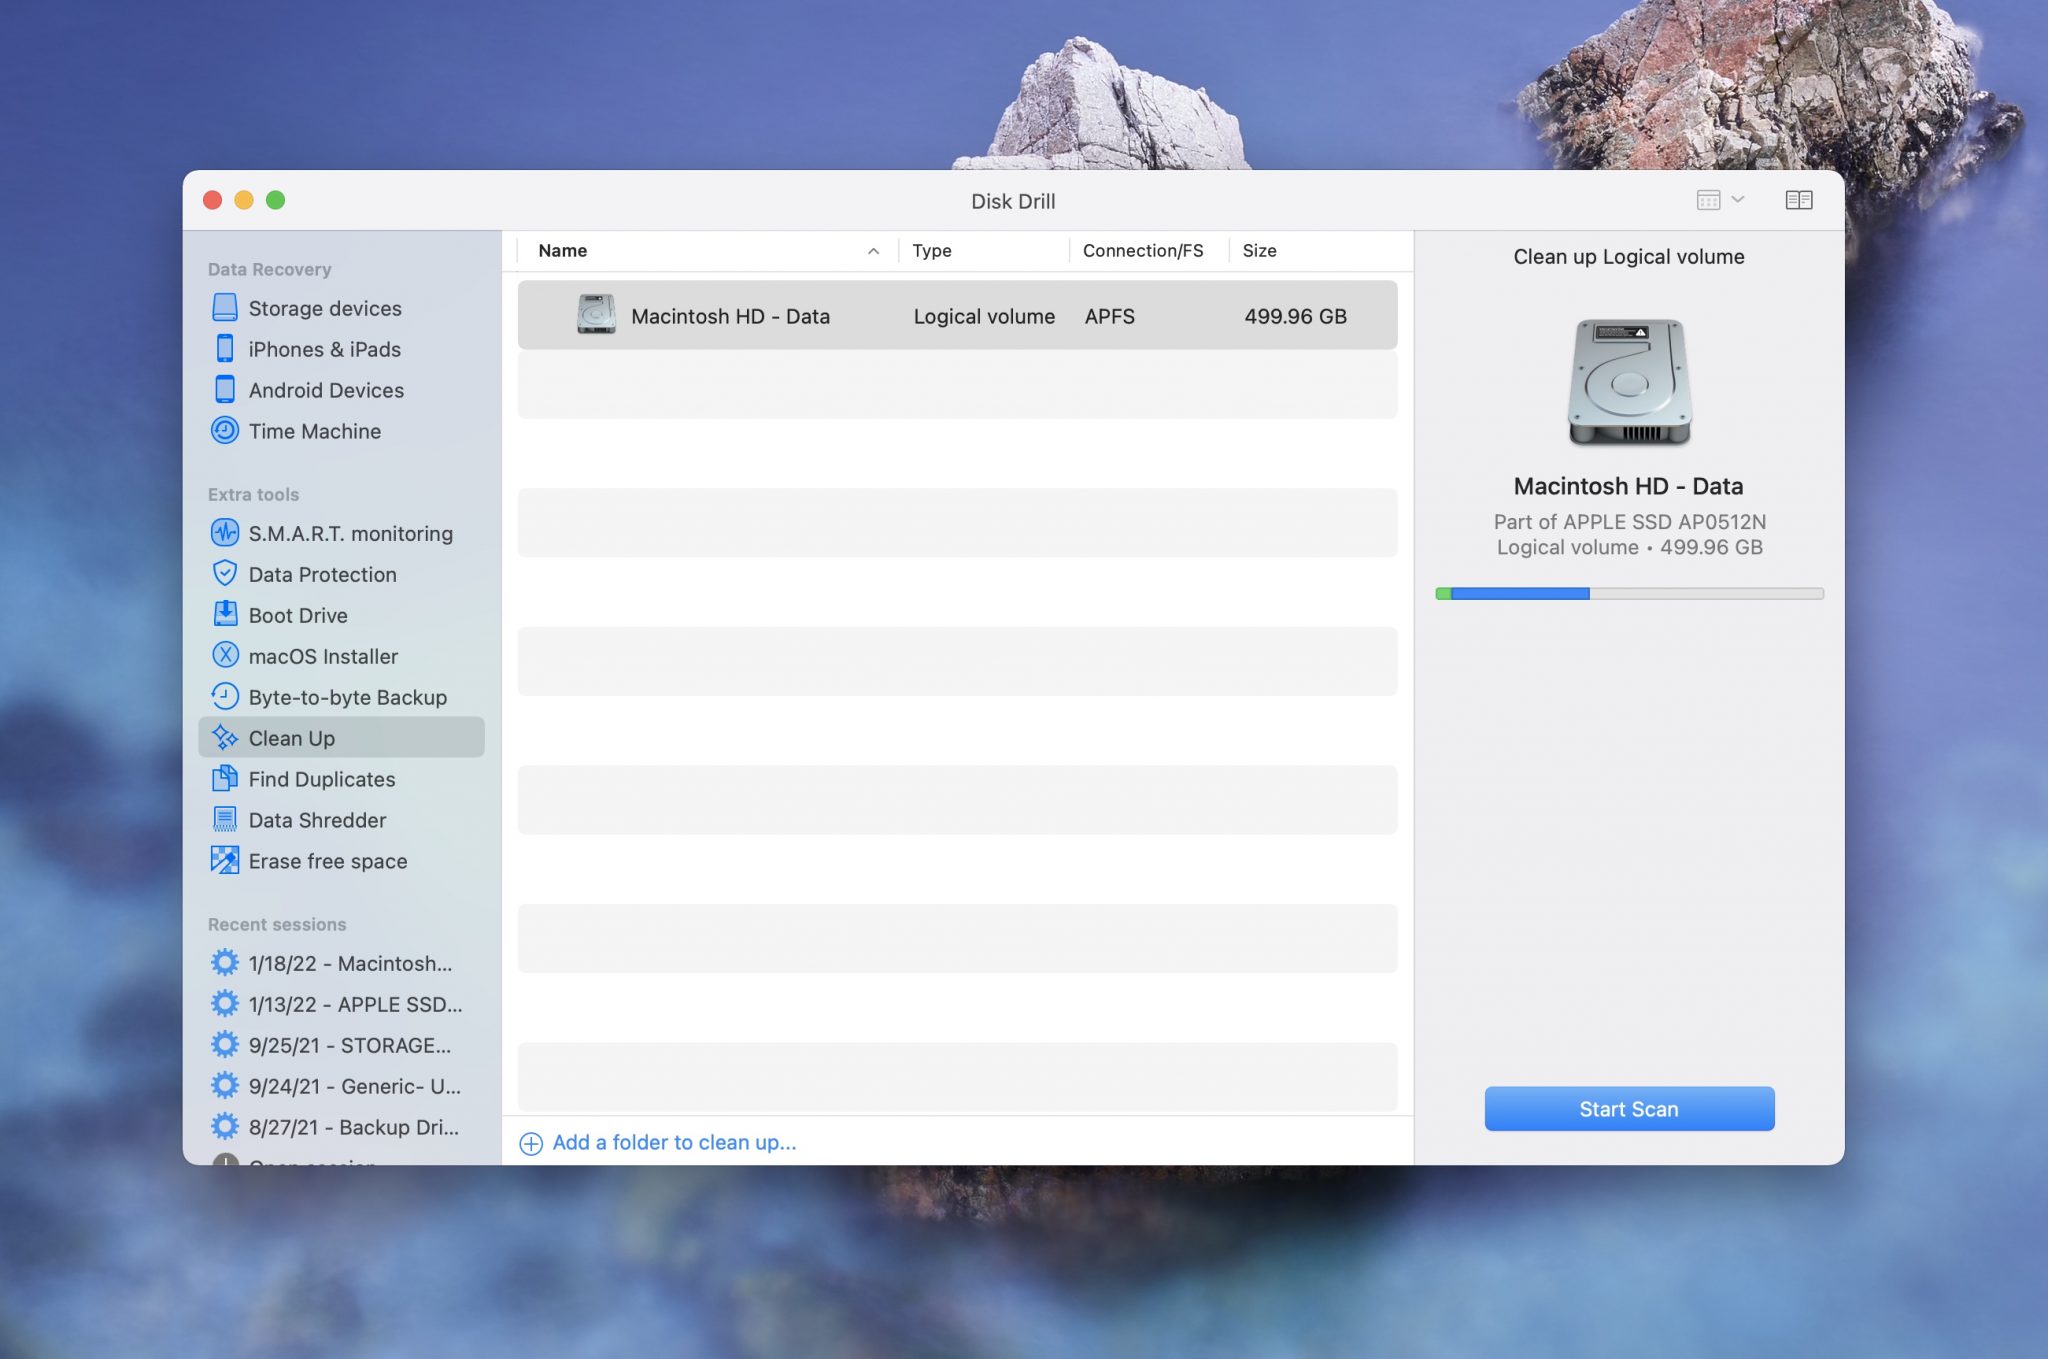
- Once you’ve found the Clean Up feature, select the storage device that you would like to scan and click on Start Scan. I choose to scan the internal hard drive inside of my Mac. However, you can scan any storage device that you would like. This could be something like an extra hard drive.
- Wait for the scan process to complete. It didn’t take a lot of time for me but this will depend on how much data you have on your Mac.
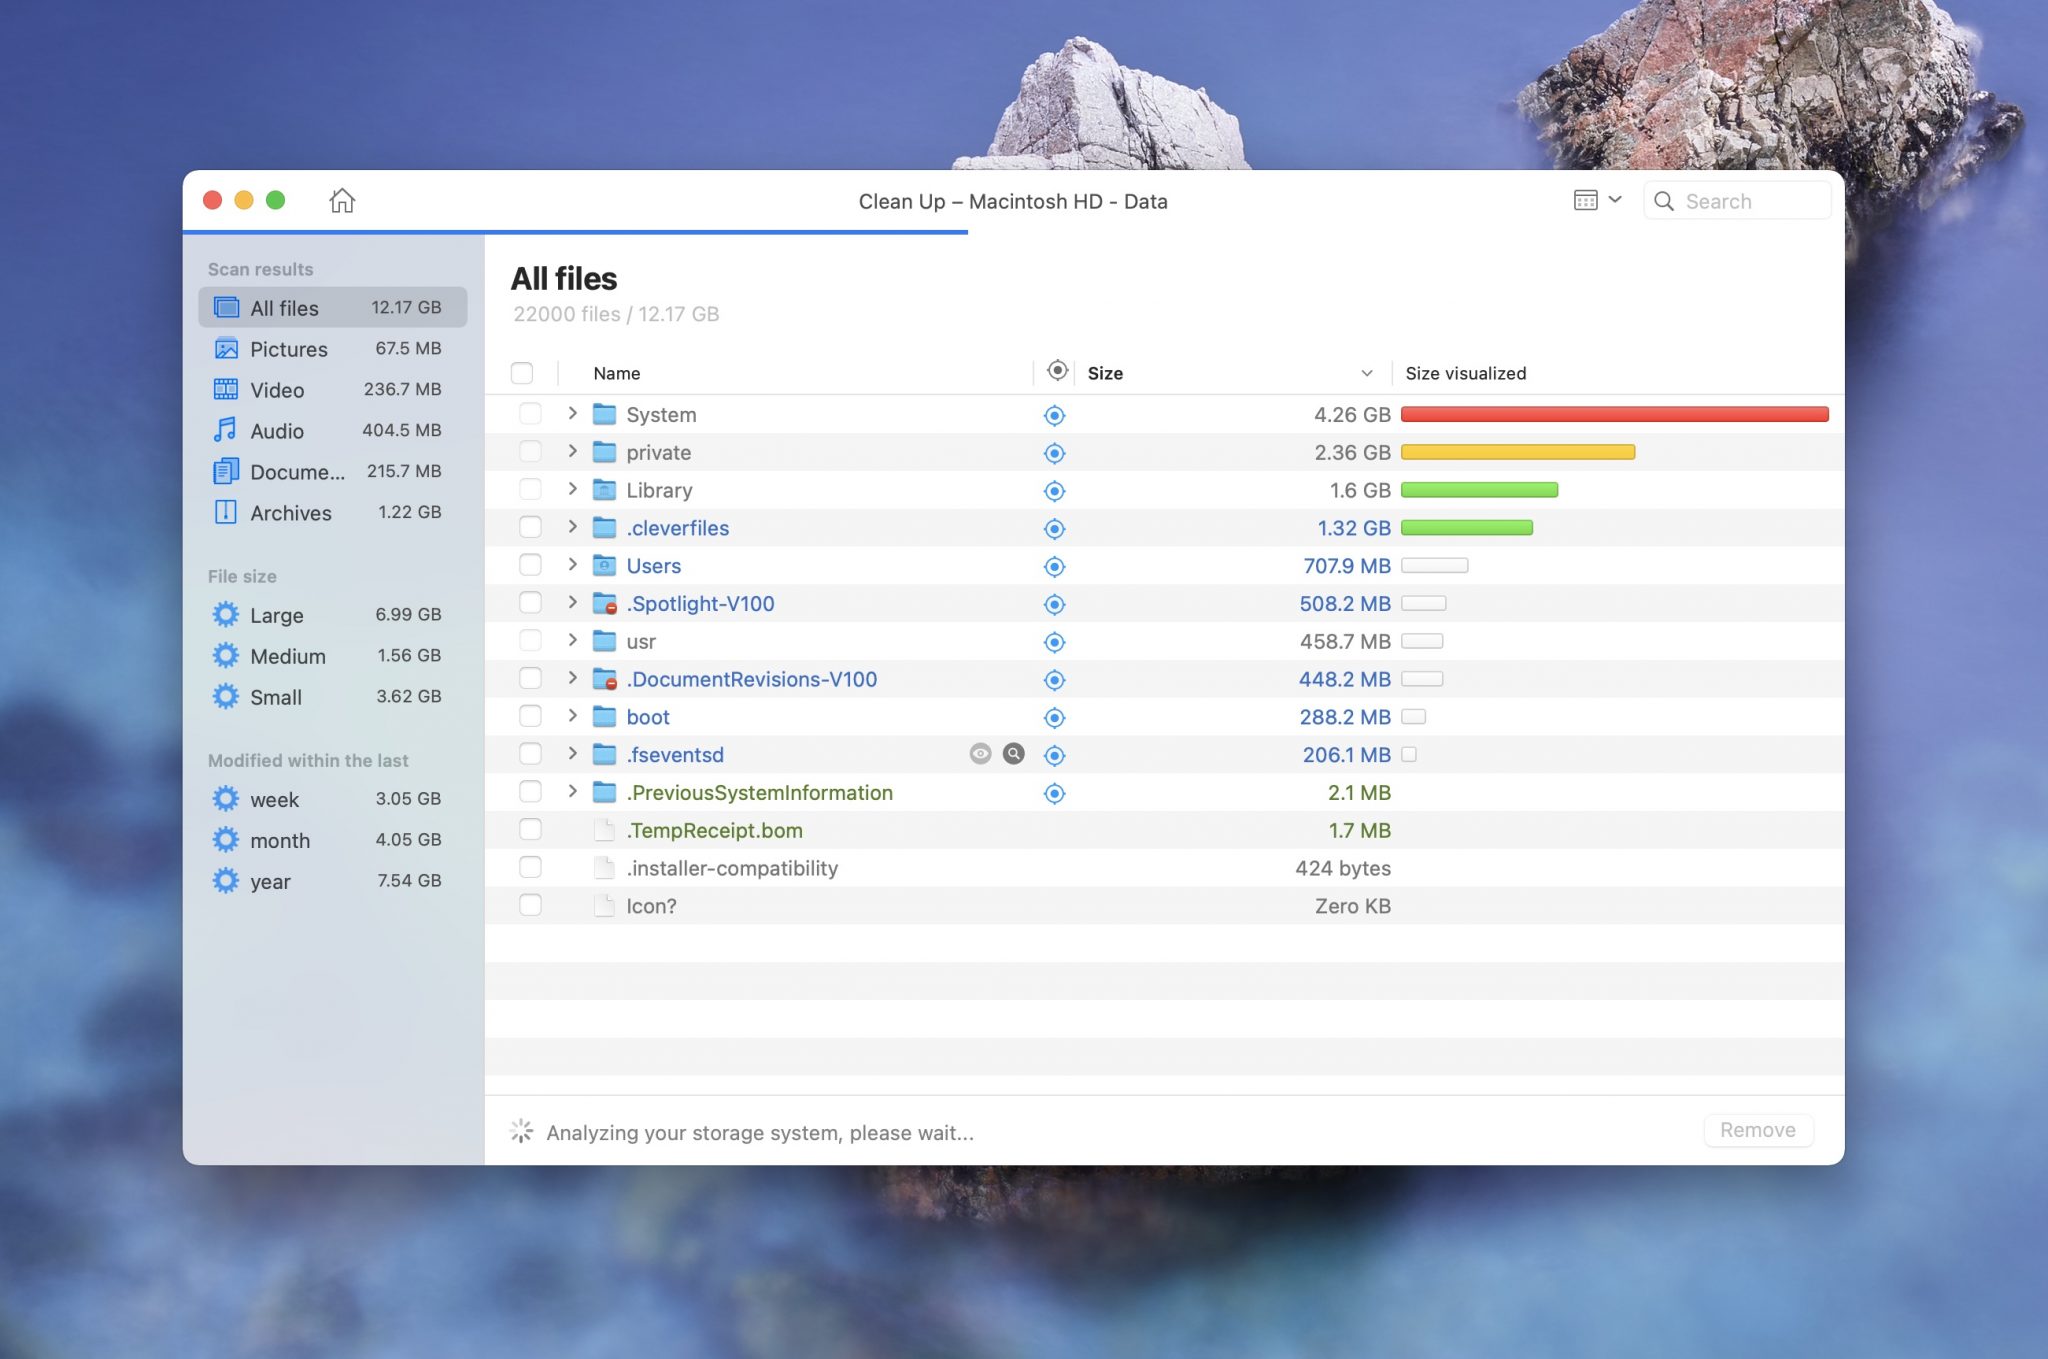
- Once the scan is done, you will then be able to view everything that Disk Drill thinks you might want to clean up. This is super handy as it shows the files that are using the most data on your hard drive.
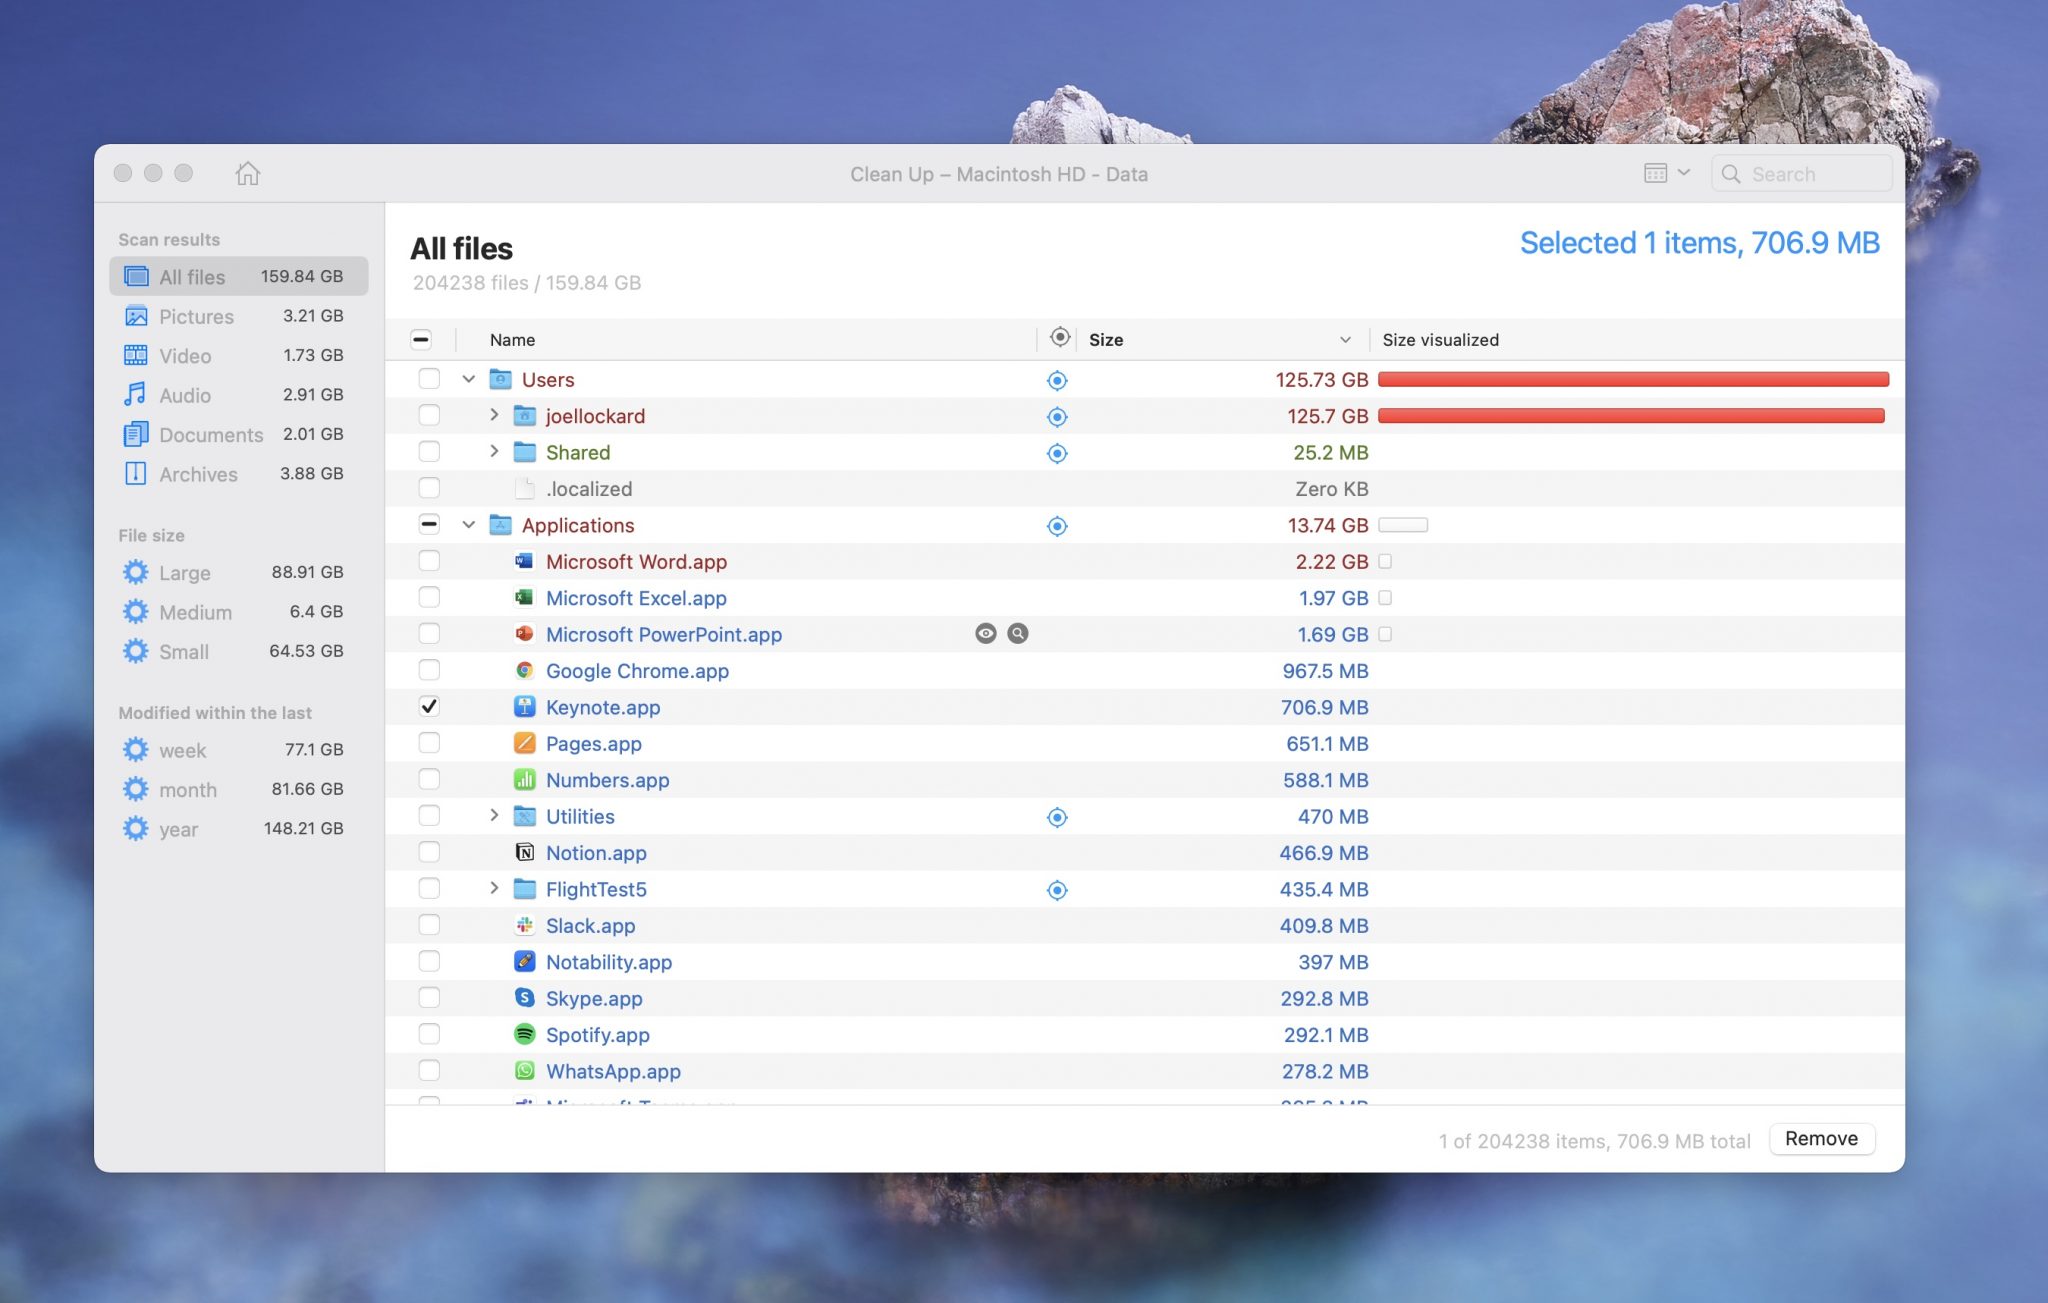
That’s it! The nice thing about Disk Drill is that you don’t have to go through viewing hidden folders or anything of that sort as it will show you what is taking up space on your Mac.
Conclusion
Knowing more about how hidden files work will make you a more educated Mac user. Even if you don’t have any specific reason to work with hidden files and it’s merely for your own curiosity, you’re still learning in the process.
Disk Drill also showed us that if we lose a hidden file or any file for that matter, we can recover it and get it back onto our Mac. Chances are at some point you may delete something and then realize that you wish that you hadn’t.


FAQ
- Showing hidden files on your Mac and be done by pressing the keys Command + Shift + “.”. This will toggle on and off your hidden files on your Mac. Remember that you can identify hidden files by looking for files and folders that are opaque.
If you’re wanting to be able to see every file that is on your Mac you can do this by choosing to show hidden files. Simply press the keys Command + Shift + “.”. Now, every file on your Mac will be visible to you. Keep in mind though that files are normally hidden for a reason such as they contain important system-level functions and I wouldn’t recommend making changes to them unless you know what you’re doing.
Showing hidden albums on your Mac is actually quite easy.
- Launch the Photos app on your Mac.
- Go up to the View navbar section at the upper left-hand corner of your screen. Click on it to expand the possible settings.
- Once the list has been expanded, you will want to go halfway down the list and click on Show Hidden Photo Album.
That’s all there is to it, now any hidden photo albums in your Photos app will now be visible. To view your albums, go to the navbar on the left-hand side and look under albums for the specific one that you want to take a look at, and then click on it to view the photos that are in it.