If you have multiple partitions on your hard drive, nothing will scare you more than booting up your computer and finding that one partition has seemingly disappeared. What used to be a partition full of files, is now unallocated space that can’t be accessed.
This can happen for a multitude of reasons, reasons that we’ll take a closer look at in this article. While it may be easy to start freaking out, you must know that there are options available for recovering both the files on the partition, and in some cases, the entire partition itself.
What Is an Unallocated Partition?
Partitions are segments of a hard drive that have been logically separated to organize the data stored on it. A single drive can have multiple partitions. When you look at your drive and see unallocated space, this references space on the hard drive that hasn’t yet been allocated to a partition.
Unallocated space cannot store files or programs, and is basically useless to the operating system unless the space is used to create a new partition or is added to an existing partition to extend it.
Reasons Behind Unallocated Partitions
A brand new hard drive will come without any partitions. When you install it, you will need to create at least one partition as part of the operating system installation process. Any space that isn’t dedicated to a partition will remain as unallocated space.
However, unallocated space can appear as a result of something else. Here are a few common reasons why there may be unallocated space on your hard drive:
- ❌ Lost or deleted partition – If a partition has been deleted, corrupted, or lost for one reason or another, the partition will be converted to unallocated space, also known as an unallocated partition.
- 🦠 Malware of virus attack – Viruses can be designed to specifically target the partitions of your hard drive. If a virus has deleted your partition, the partition that was once there may appear as unallocated data.
- ⛔ Hardware failure – Hard drives are susceptible to failure. If the hard drive has failed at some point, the partition could have become lost as a result.
- 🔌 Unexpected power failure – If your computer lost power during a write process to the drive, it could cause some data to become corrupted and the partition deleted.
How to Recover Data from an Unallocated Space
No matter what causes your partition to disappear, there are various methods you can use to recover the data that was lost.
Restore from a backup
If you’ve created a backup of the volume that was lost, you can use this backup to easily restore the files that were lost. Restoring from backups is probably the most effective way of getting back all the files that were lost with the most success.
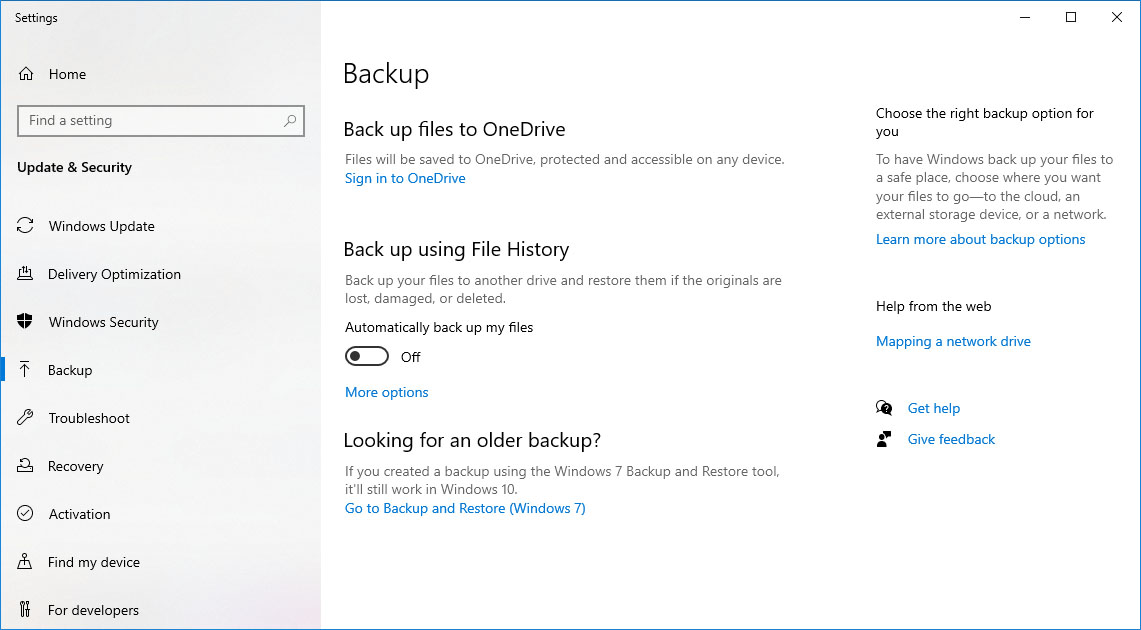
If you don’t have a backup, then you will need to move onto the next solution to recover your files.
Using recovery software
Your next best option for recovering data from a recently unallocated partition is through the use of data recovery software. There are numerous data recovery solutions on the internet, and for this solution, we’re going to be using Disk Drill.
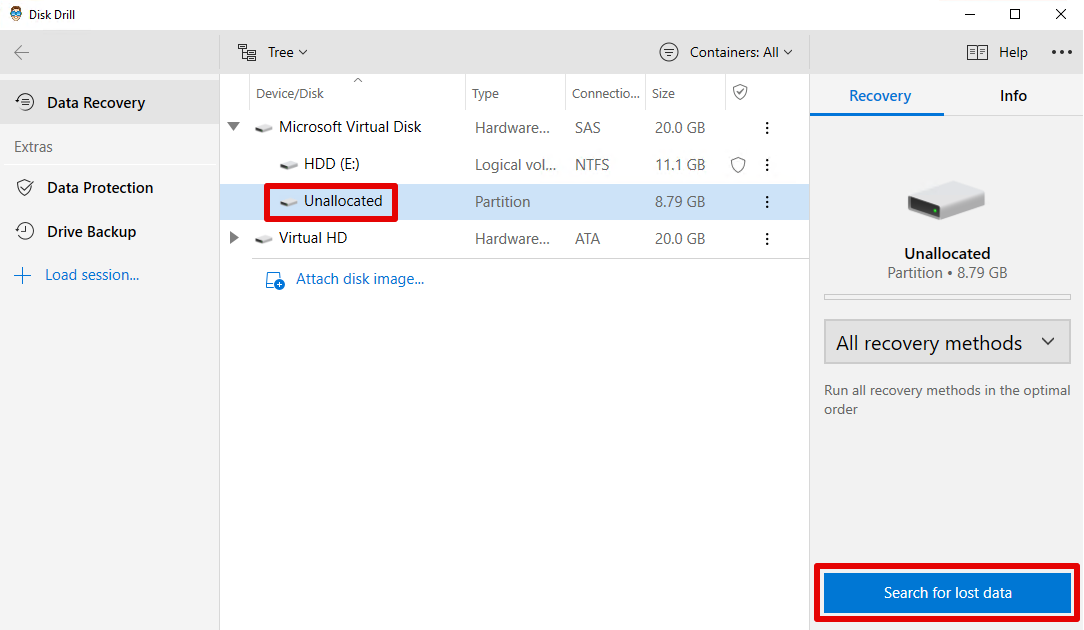
- Download and install Disk Drill. Open it.
- On the opening screen, select the unallocated space that used to be your partition. Click Search for lost data.
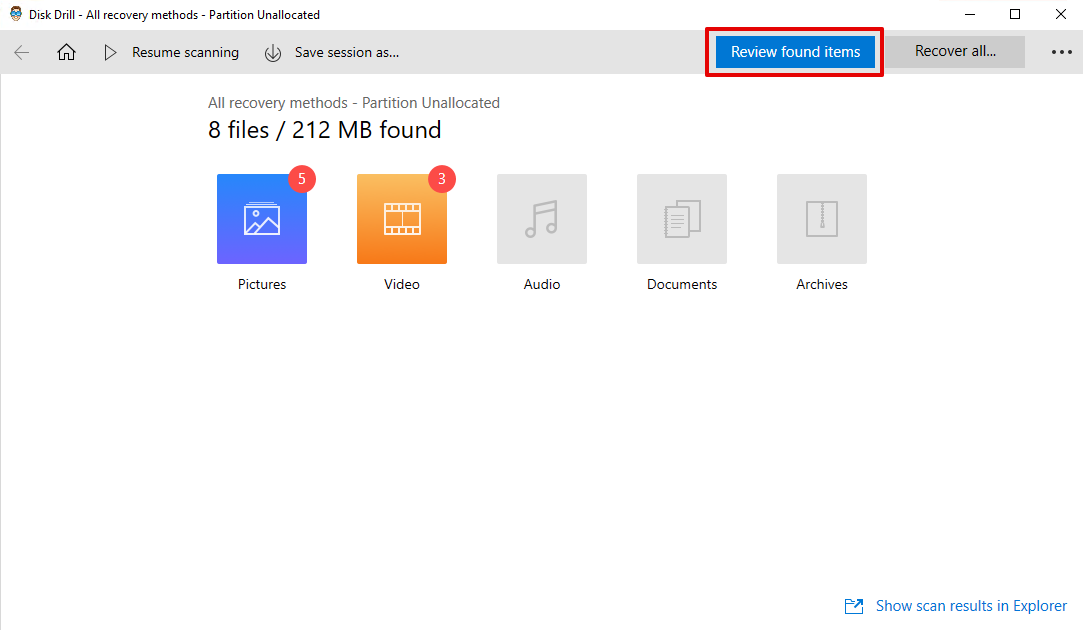
- When the scan has finished, click on Review found items.
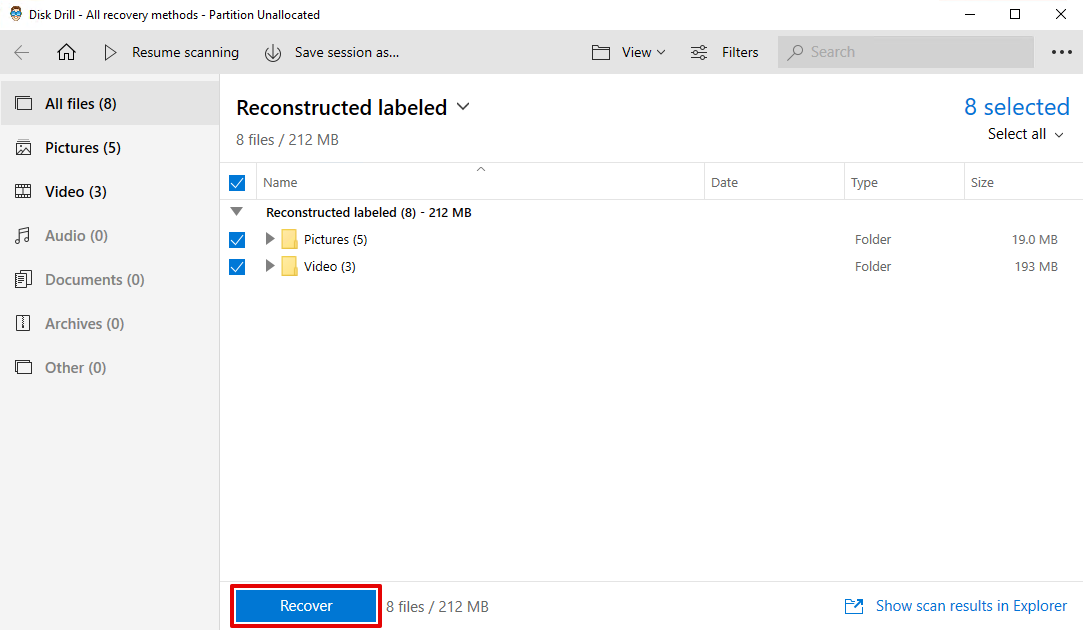
- Select the files you want to recover by checking their checkbox. Click Recover.
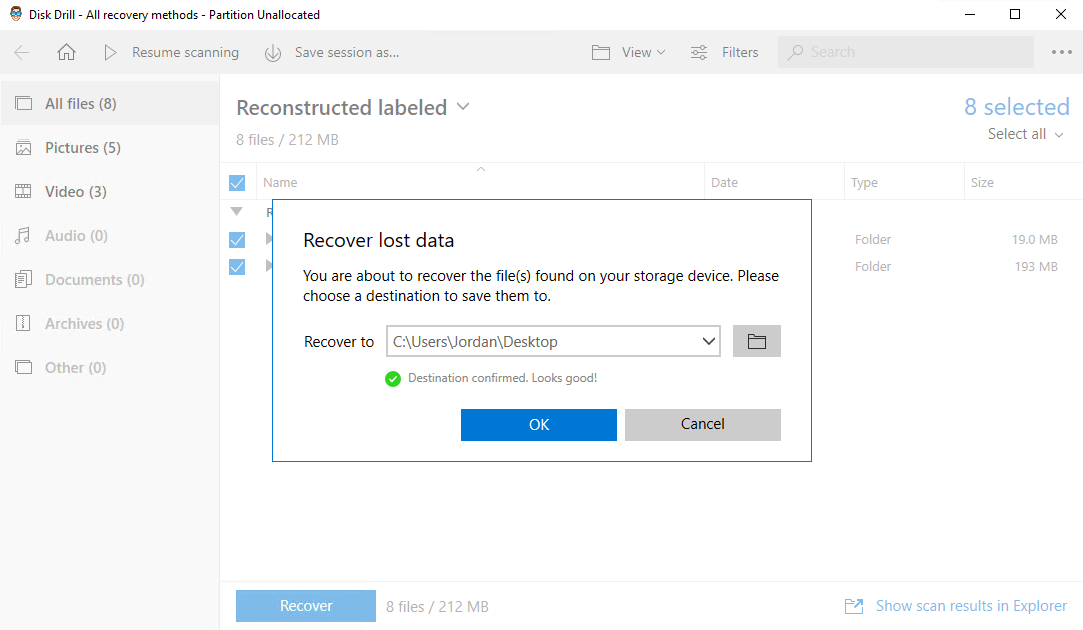
- Choose a location to recover the files to. Click OK.
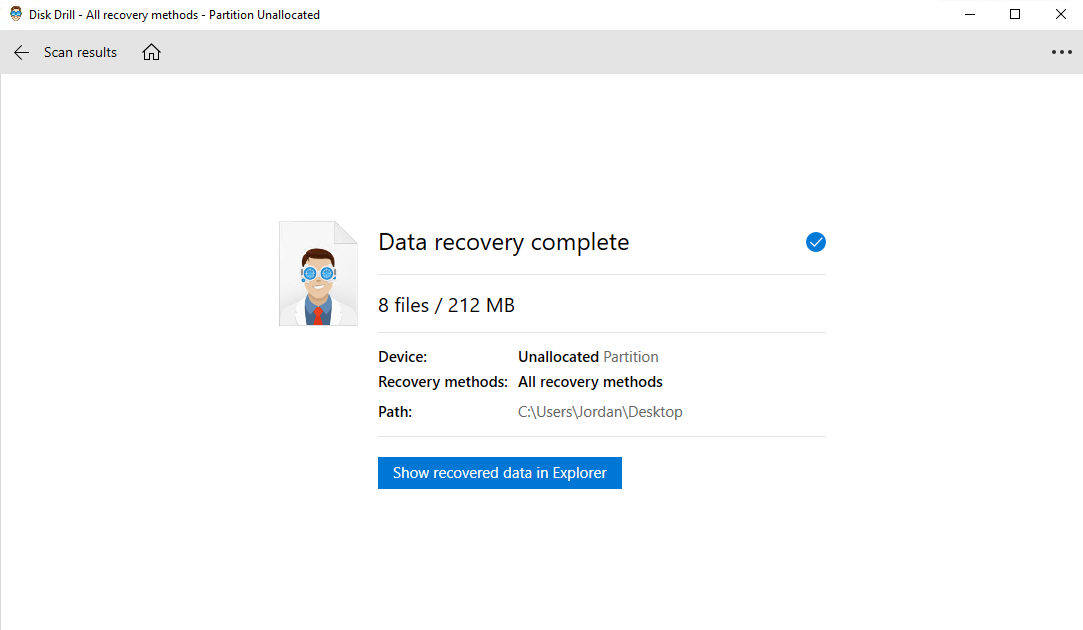
- When file recovery is complete, you can view your recovered files by clicking Show recovered data in Explorer.
Using a recovery service
If none of the previous methods worked for you, or if you’re not particularly confident performing the steps necessary, then you might be better off using a professional recovery service.
Recovery companies employ the services data recovery specialists that you can send your faulty drive to. Their job is to recover your data using commercial-grade tools and solutions to give you peace of mind.
While this method may take the longest since you need to send your drive away, it will have the highest success rate as you’re leaving the recovery part to the professionals.
How to Fix an Unallocated Hard Drive
If your partition has disappeared from your drive, you can create a new one after successfully recovering the data that was on the last one.
Delete the old volume using DiskPart
CMD, the command-line tool native to Windows, can work wonders in repairing a hard drive that recently lost a partition. Sometimes the volume may need to be manually deleted. Using the diskpart command, you can delete the old partition so that you can create a new one.
- Right-click on your Start button and select Run. Type diskpart and press Enter. If Windows asks you to give permission, click Yes.
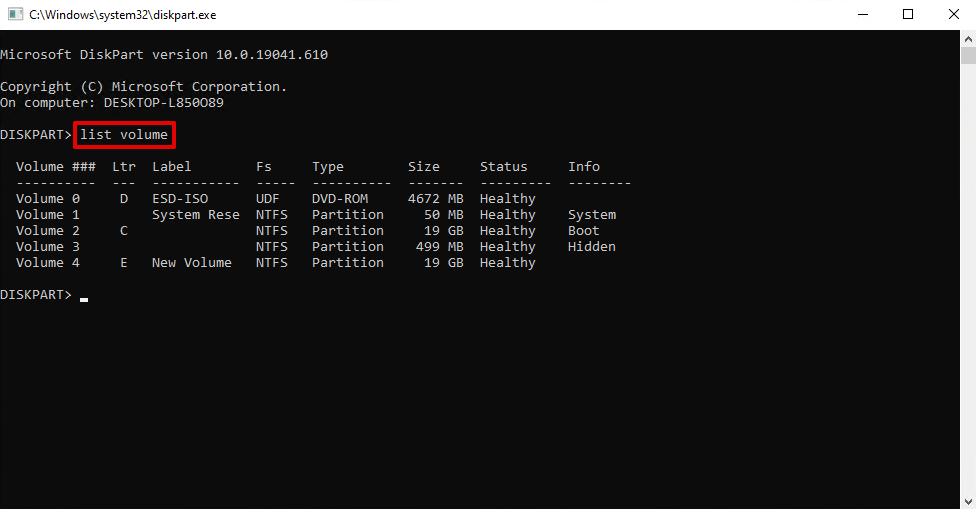
- In the new Diskpart window that opened, type list volume and press Enter.
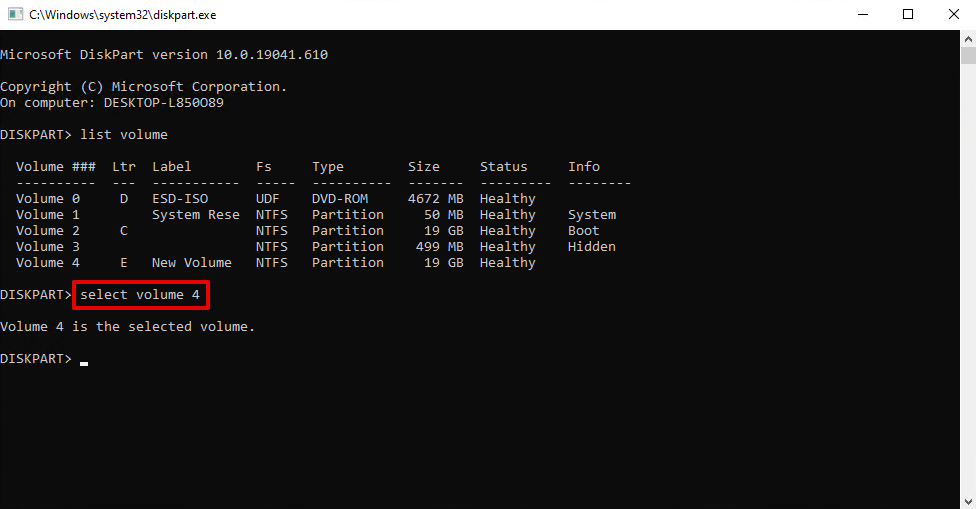
- Type select volume <number>. For the number, enter the volume number that was lost. Press Enter.
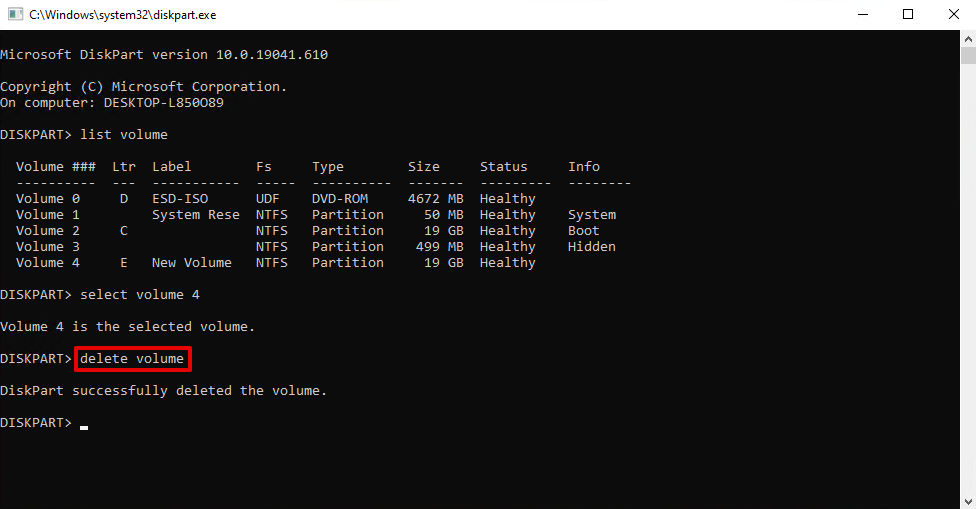
- Type delete volume and press Enter. This will erase the volume.
When you’ve finished deleting the old volume, you can move onto creating a new volume to replace it with the next set of steps.
Create a new partition with Disk Management
Disk Management allows you to manage the hard drives in your computer, as well as external drives. We’ll be using Disk Management to create a new partition to replace the one that was lost.
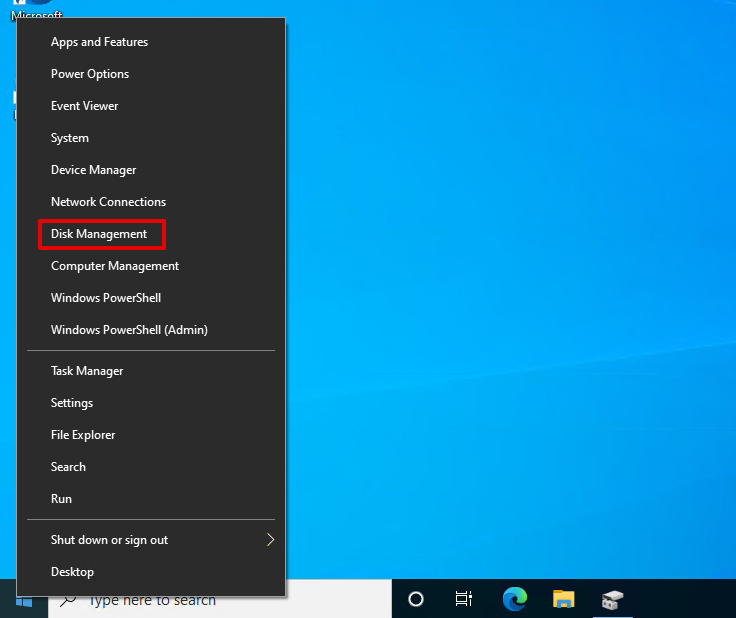
- Right-click the Start Button and click Disk Management.

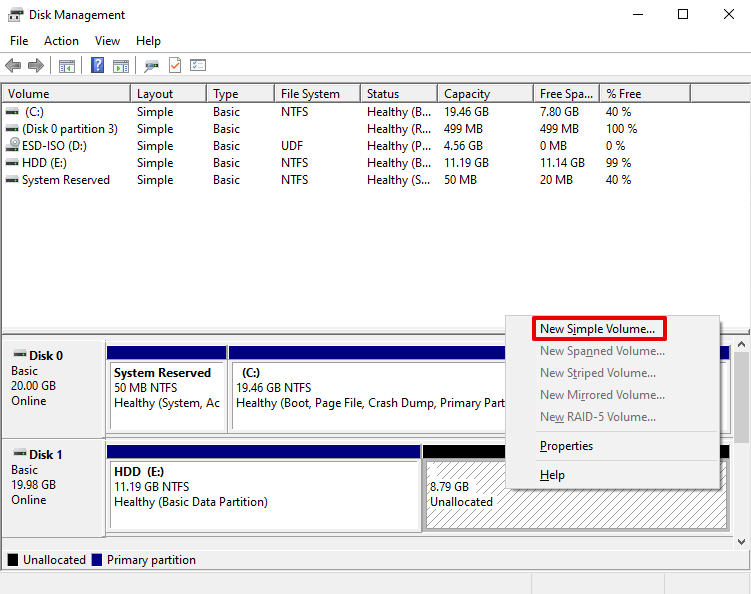
- Right-click the unallocated volume. Click New Simple Volume.
- When the New Simple Volume Wizard opens, click Next.
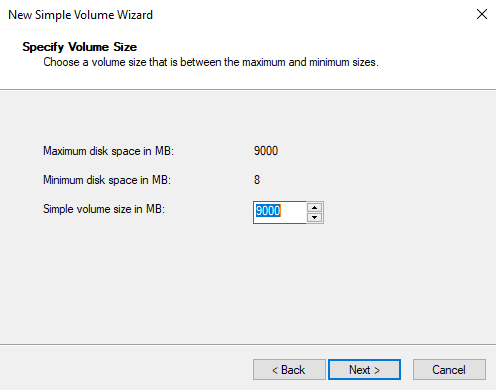
- Specify a size for the new partition. Click Next.
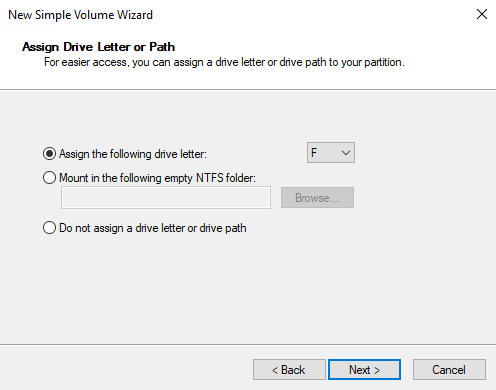
- Choose a drive letter, then click Next.
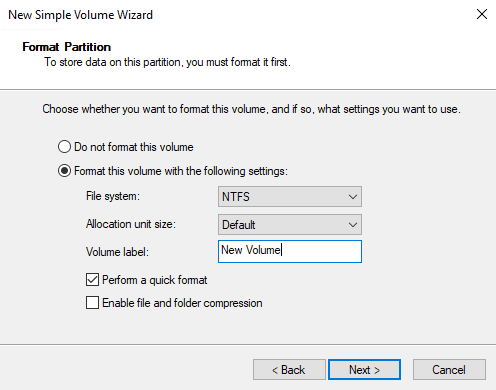
- Specify a volume label, and leave everything else as default. Click Next.
- On the final screen, click Finish.
After the final step, the new volume will appear in Disk Management. You can also access it in Windows Explorer and begin moving files to it.
Update your drivers
To ensure your hardware components are performing at their best, you need to keep them updated with the latest firmware. If the drivers for your hard drive are outdated, this can cause partitions to become lost. If you update your drivers, your partition may become visible and usable again.
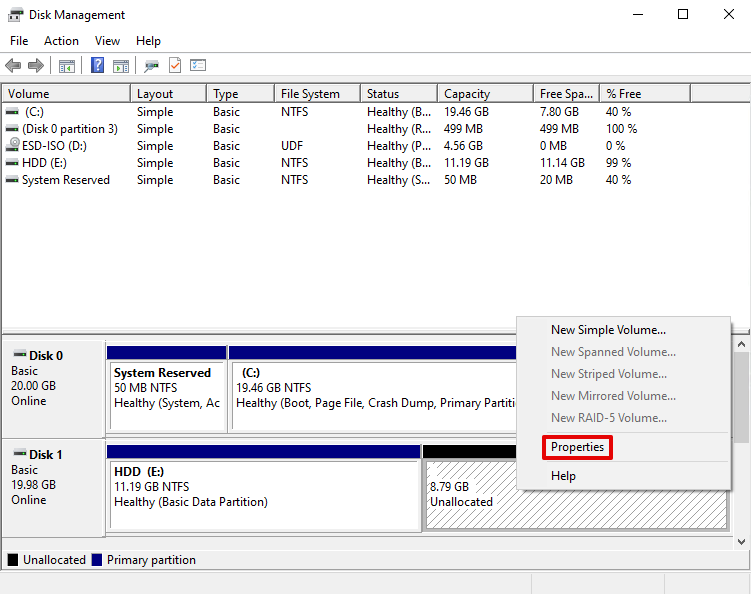
- Right-click the Start button and click Disk Management.
- At the bottom of the window, right-click the unallocated volume. Click Properties.
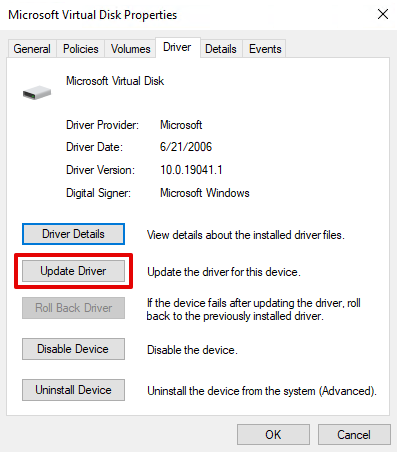
- Click on the Driver tab, then Update Driver.
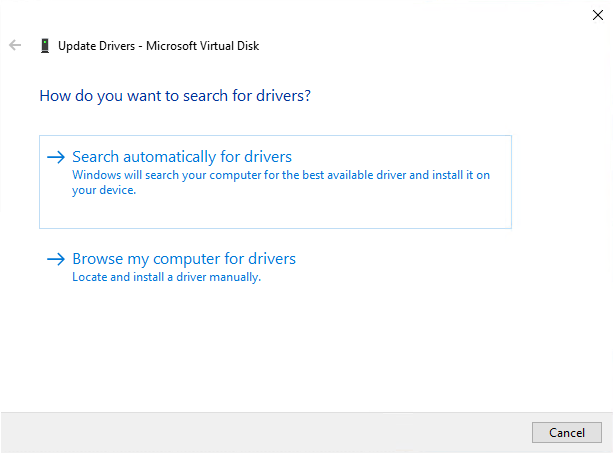
- Click Search automatically for drivers. Windows will then search for the most up-to-date drivers associated with your hard drive and install them.
- Restart your computer.
If this hasn’t worked for you, try going back to the same window from Step 3 and clicking Uninstall Device then Uninstall. Restart your computer, and Windows will download the drivers again.
Tips to Maximize the Success Rate of Unallocated Recovery Partition
Data recovery can be made a lot easier with a few simple steps. Some of these steps can be performed immediately, while others are more for protecting your data in the long-run.
- 🛑 Stop using the disk – Even though unallocated portions of the hard drive aren’t used to store files by the operating system, it’s a good idea to stop writing anything to the disk at the risk of overwriting any data that needs to be recovered.
- 🙅♀️ Don’t create a new partition – If you create a new partition over the partition that was lost, you run the risk of losing the data that was already saved to the disk. Because of this, you shouldn’t create a new partition until you’ve recovered the files from the partition that was lost.
- ⛔ Don’t extend existing partitions – Much like creating a new partition, extending an existing partition can lead to the existing data being overwritten. Until you’ve recovered the lost or deleted data, don’t extend any of your existing partitions.
- 🗂️ Backup existing files – Backing up is the key to a successful recovery. If you take the time to regularly backup your files, you can bounce back almost immediately in the event of catastrophic data loss. If you have a handful of files, consider using cloud-based solutions like Google Drive or Dropbox. If you have a lot of large files, get an external hard drive that you can copy your files to. In the event that you’ve lost your partition, consider backing up your accessible important files immediately.
Conclusion
Even though losing a partition can be a scary moment, you can put your mind at ease by following the solutions outlined in this article. If done correctly, you can recover your files without much effort. Data recovery from a recently unallocated partition heavily depends on how long ago the partition was deleted and whether or not any new data was written to the drive.


FAQ
If you had data on the partition before it was changed to unallocated space, you can recover the data using Disk Drill, a reliable recovery tool.
- Download and install Disk Drill. Open it.
- On the opening screen, select the unallocated space that used to be your partition. Click Search for lost data.
- When the scan has finished, click on Review found items.
- Select the files you want to recover by checking their checkbox. Click Recover.
- Choose a location to recover the files to. Click OK.
- When file recovery is complete, you can view your recovered files by clicking Show recovered data in Explorer.
Before fixing the unallocated drive, you should first recover the files that were lost. After doing so, you can try updating the hard drive by following these steps:
- Right-click the Start button and click Disk Management.
- At the bottom of the window, right-click the unallocated volume. Click Properties.
- Click on the Driver tab, then Update Driver.
- Click Search automatically for drivers. Windows will then search for the most up-to-date drivers associated with your hard drive and install them.
- Restart your computer.
If this hasn’t worked for you, try going back to the same window from Step 3 and clicking Uninstall Device then Uninstall. Restart your computer, and Windows will download the drivers again.
If the unallocated partition is the result of another partition being deleted, you should first recover the data that was lost before attempting to fix the partition. Once you’ve recovered the data, you can either extend an existing partition, or create a brand new partition.
- Right-click the Start Button and click Disk Management.
- Right-click the unallocated volume. Click New Simple Volume.
- When the New Simple Volume Wizard opens, click Next.
- Specify a size for the new partition. Click Next.
- Choose a drive letter, then click Next.
- Specify a volume label, and leave everything else as default. Click Next.
- On the final screen, click Finish.
Space on your drive that isn’t assigned to a partition on your drive is referred to as unallocated space. If you view your disks in Disk Management, you will see what seems to look like a partition that shows how much unallocated space you have on that drive.
The inability to create new partitions from unallocated space is usually caused by the fact that you already have four primary (or three primary and one extended) partitions on your MBR drive. To fix this, you will need to convert your MBR disk to a GPT disk.
While you cannot extend unallocated space (since your operating system doesn’t recognize it as usable space, you can extend volumes with extended space to give them more storage.
- Right-click the Start button and click Disk Management.
- Right-click the volume you’d like to extend, then click Extend Volume.
- In the new window, click Next.
- Make sure that the disk with the unallocated space is in the Selected column. Press Next.
- Click Finish.