Adobe Photoshop allows you to edit photos and images. Photoshop is one of the best programs for graphic designers, photographers, and creative individuals.
![]()
Photo retouching and image editing can be a laborious process as hours of work can be tied up in that digital image. You don’t want to see your valuable time and the progress you have made on perfecting an image wasted due to circumstances beyond your control or an oversight on your part.
Let’s first take a look at if we can get the file back by using some of the built-in features of PhotoShop.
Why Does PhotoShop Crash in the First Place?
PhotoShop can crash just like any other app. Sometimes you may overload your Mac’s processor or run out of RAM and the application might crash. It might also be because you wanted to execute a command that the app doesn’t know how to handle.
Computers aren’t perfect and neither is software. It’s a continual and ongoing improvement to get apps as close to perfect as possible.
To prevent PhotoShop from crashing, I would recommend that you always run the most current version that you can for the operating system that you’re on.
Before updating macOS, ensure that if you purchased PhotoShop outright and aren’t on a subscription plan, that it will still work if you update macOS.
Let’s take a look at the best methods for recovering deleted, unsaved, or corrupted PhotoShop files on Mac.
How to Use the Open Recent Feature in PhotoShop
When engaged in editing photos or images there is always the possibility that you can be faced with the loss of unsaved files. This could simply be because the app crashes while you’re using it which is possible.
Understanding the Open Recent function in PhotoShop can help you recover your project and continue working on it with no or little loss to your data. This is a feature that works right away without you having to do anything.
- Launch PhotoShop.
- Once PhotoShop is the active app, go to File and then scroll down to Open Recent.
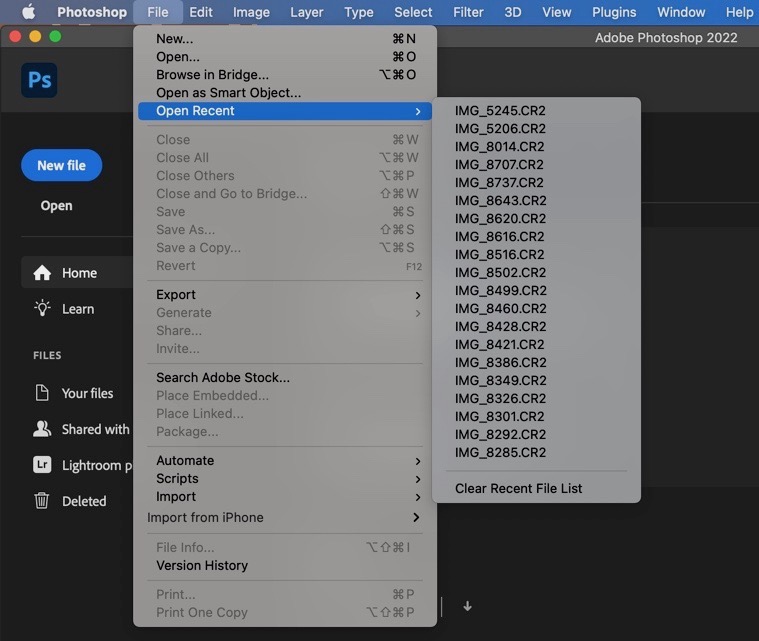
- Search through the list of recent projects that you’ve been working on and open the project that was unsaved.
If you can’t find the deleted, unsaved, or corrupted PhotoShop file there, let’s take a look at the PhotoShop’s AutoSave feature.
How to Use the AutoSave Feature in PhotoShop
AutoSave is a feature that is turned on by default when you use PhotoShop. There is no need to worry about setting it up ahead of time, but you can make changes to how often it saves your work. By default, it will save your work every 10 minutes which I think is frequent enough.
To get to the setting, follow the steps below.
- To set this option, navigate to Photoshop’s Preferences and then select File Handling.
- Check the box next to Automatically Save Recovery information and set the time interval that you will allow elapsing between saves.
The files that are automatically saved are stored in the folder ~/Library/Application Support/Adobe/Adobe Photoshop/AutoRecover. If you need to recover a file using this feature, simply follow the steps below.
- Navigate to this folder and see if the file is available.
- You should be able to click on the file and allow it to be opened with Photoshop where you can then resume your work.
If you didn’t have any success with the steps above, let’s take a look at other ways that we can recover the PhotoShop files on our Mac.
How to Recover Deleted Files From the Trash
The first place you should look when you discover that you are missing a Photoshop file is in your Mac’s Trash folder.
Steps to recover deleted Photoshop files from Trash:
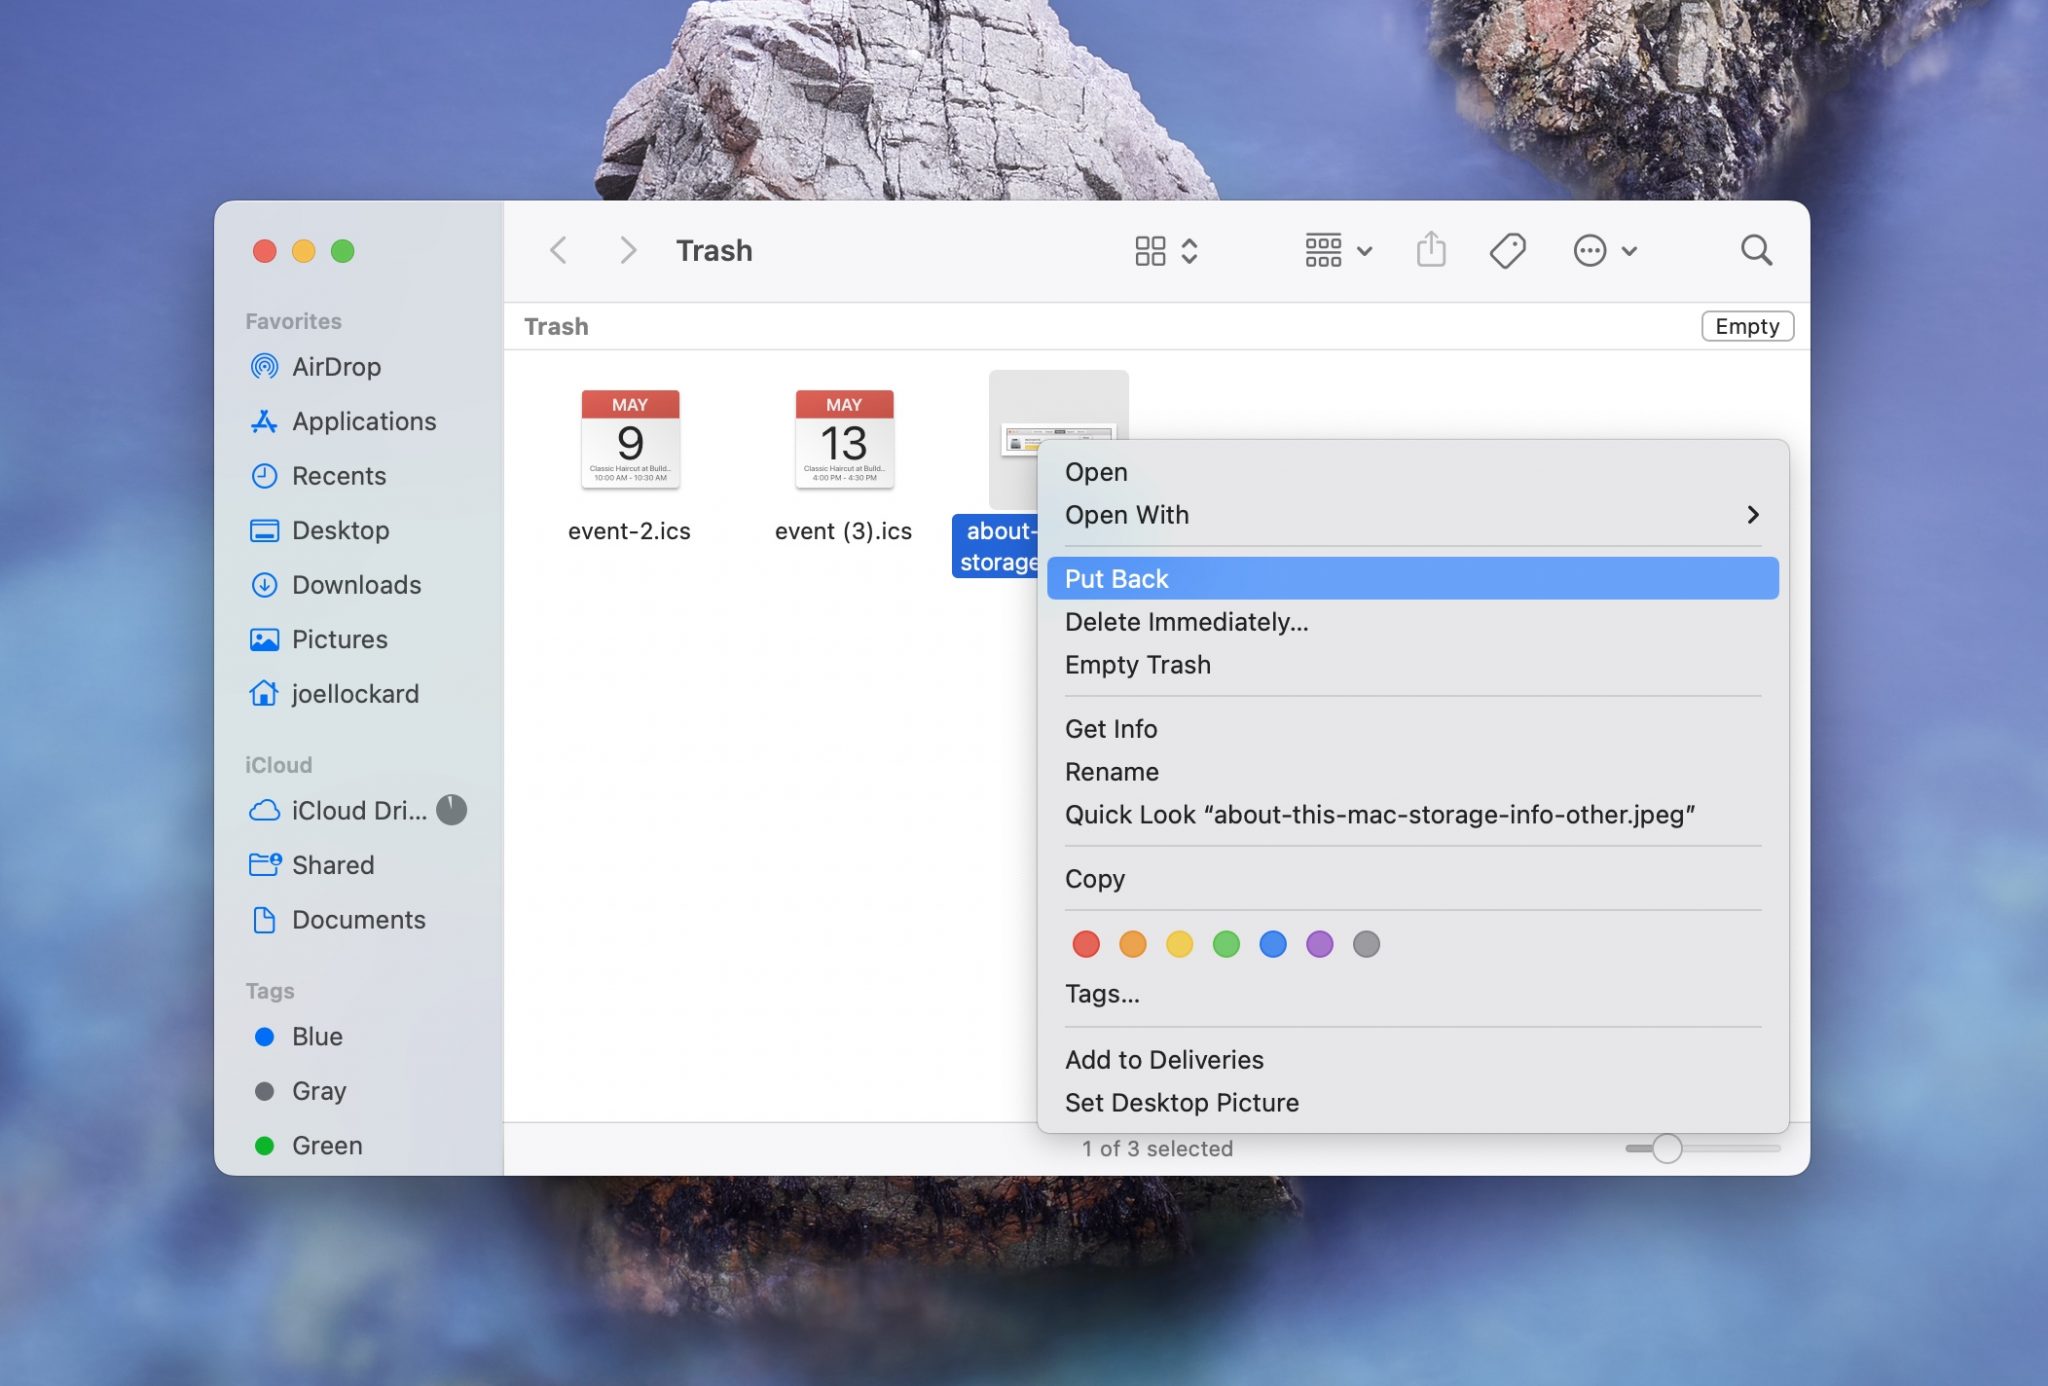
- Click on the Trash Bin icon in the lower right of your Mac’s screen to open the folder. Review the contents of the folder and identify the file you need to recover.
- Right-click on a file you wish to recover and select “Put Back” to return it to its original storage location.
I would always recommend checking the trash first because it’s the easiest step and is something that only takes a few seconds to check.
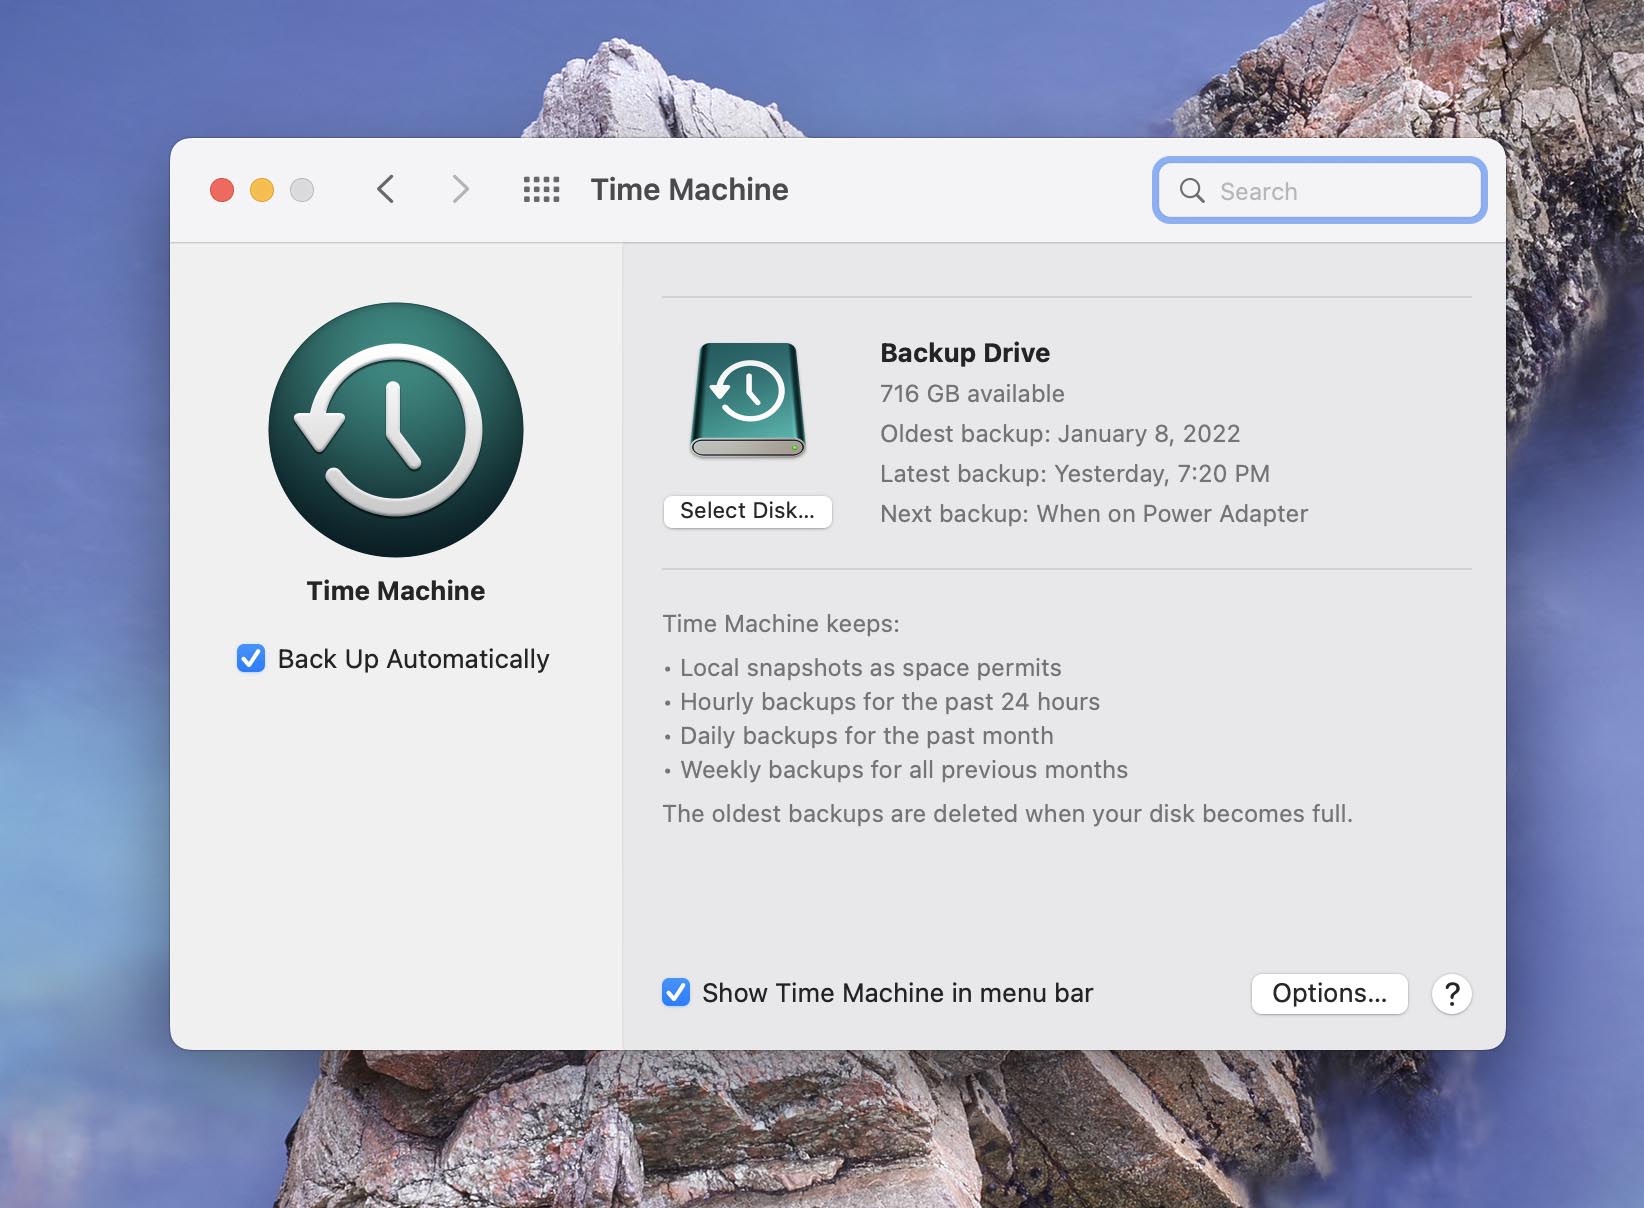
Recovering PhotoShop Files From a Time Machine Backup
Hopefully, you are in the practice of performing regular backups on your system. Based on the length of time since you last backed up your machine and when the lost file was created it may have been captured in a system backup.
If you use Time Machine to perform your backups, follow these simple steps to attempt a recovery.
- Attach the storage device containing the Time Machine backups to your computer.
- Click on the Time Machine icon on your Mac’s menu bar.
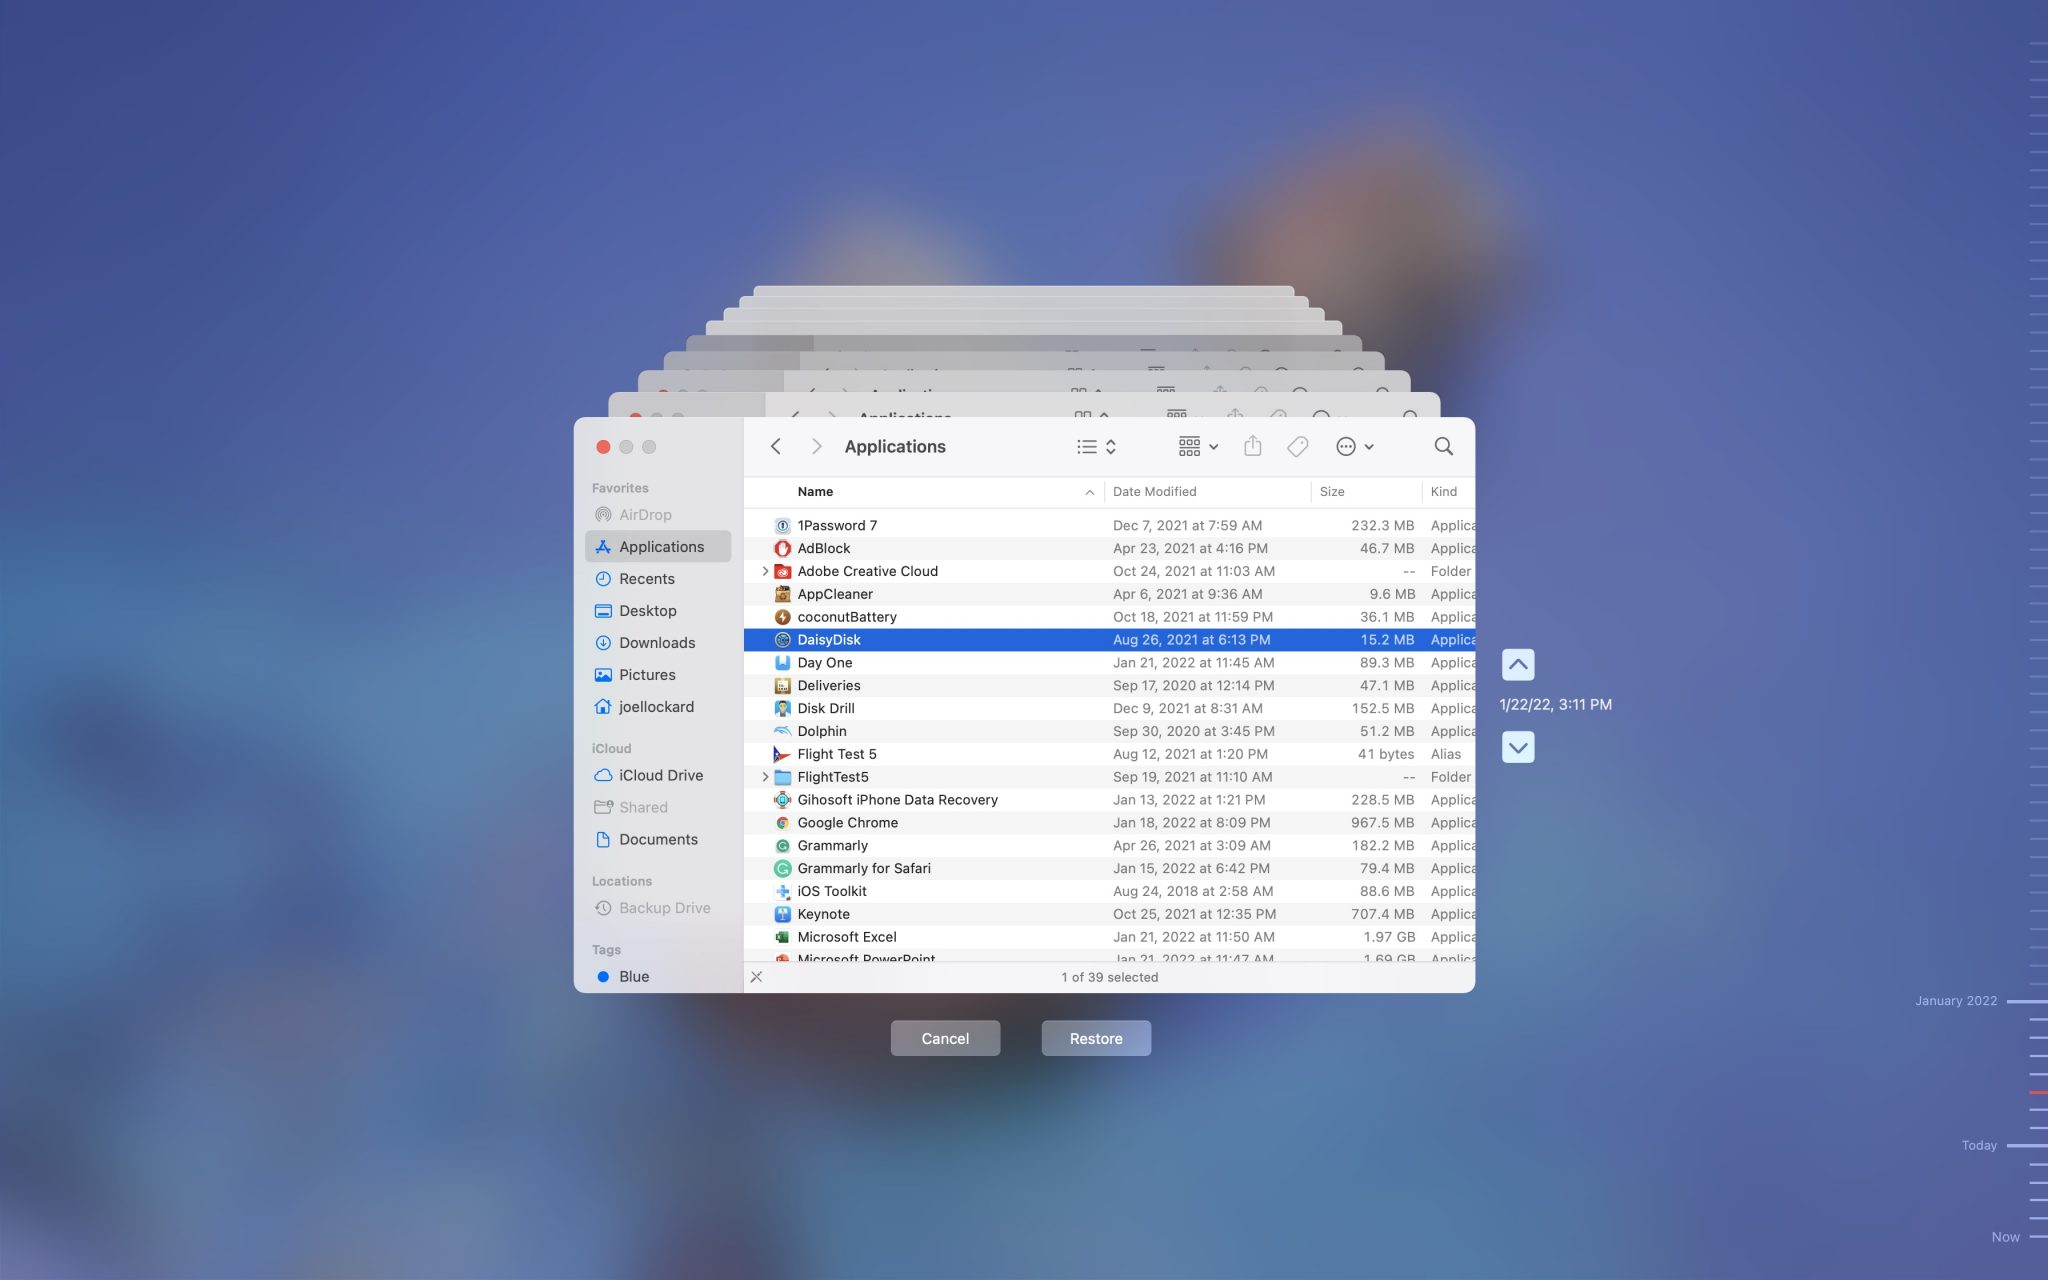
- Search through Time Machine for the files you want to recover. If found, select the files and click “Restore” to recover them to your computer.
I can’t recommend enough that you back up your Mac. No one thinks that data loss is going to happen to them and you can purchase an external hard drive for quite cheap these days.
If the above methods didn’t work for you, let’s take a look at how to use third-party data recovery software to get those PhotoShop files back onto our Mac.
Recover PhotoShop Files on a Mac Using Data Recovery Software
Disk Drill allows you to recover files on your Mac even after you’ve deleted them. It accomplishes this feat by employing powerful scanning algorithms that scavenge your storage media for files that have been logically but not physically deleted. It can reconstruct these files and perform a recovery, returning the files to their state prior to deletion.
You can use Disk Drill for free to obtain a list of the files that can be recovered before purchasing the Pro version of the tool.
- Download and install Disk Drill for free onto your Mac.
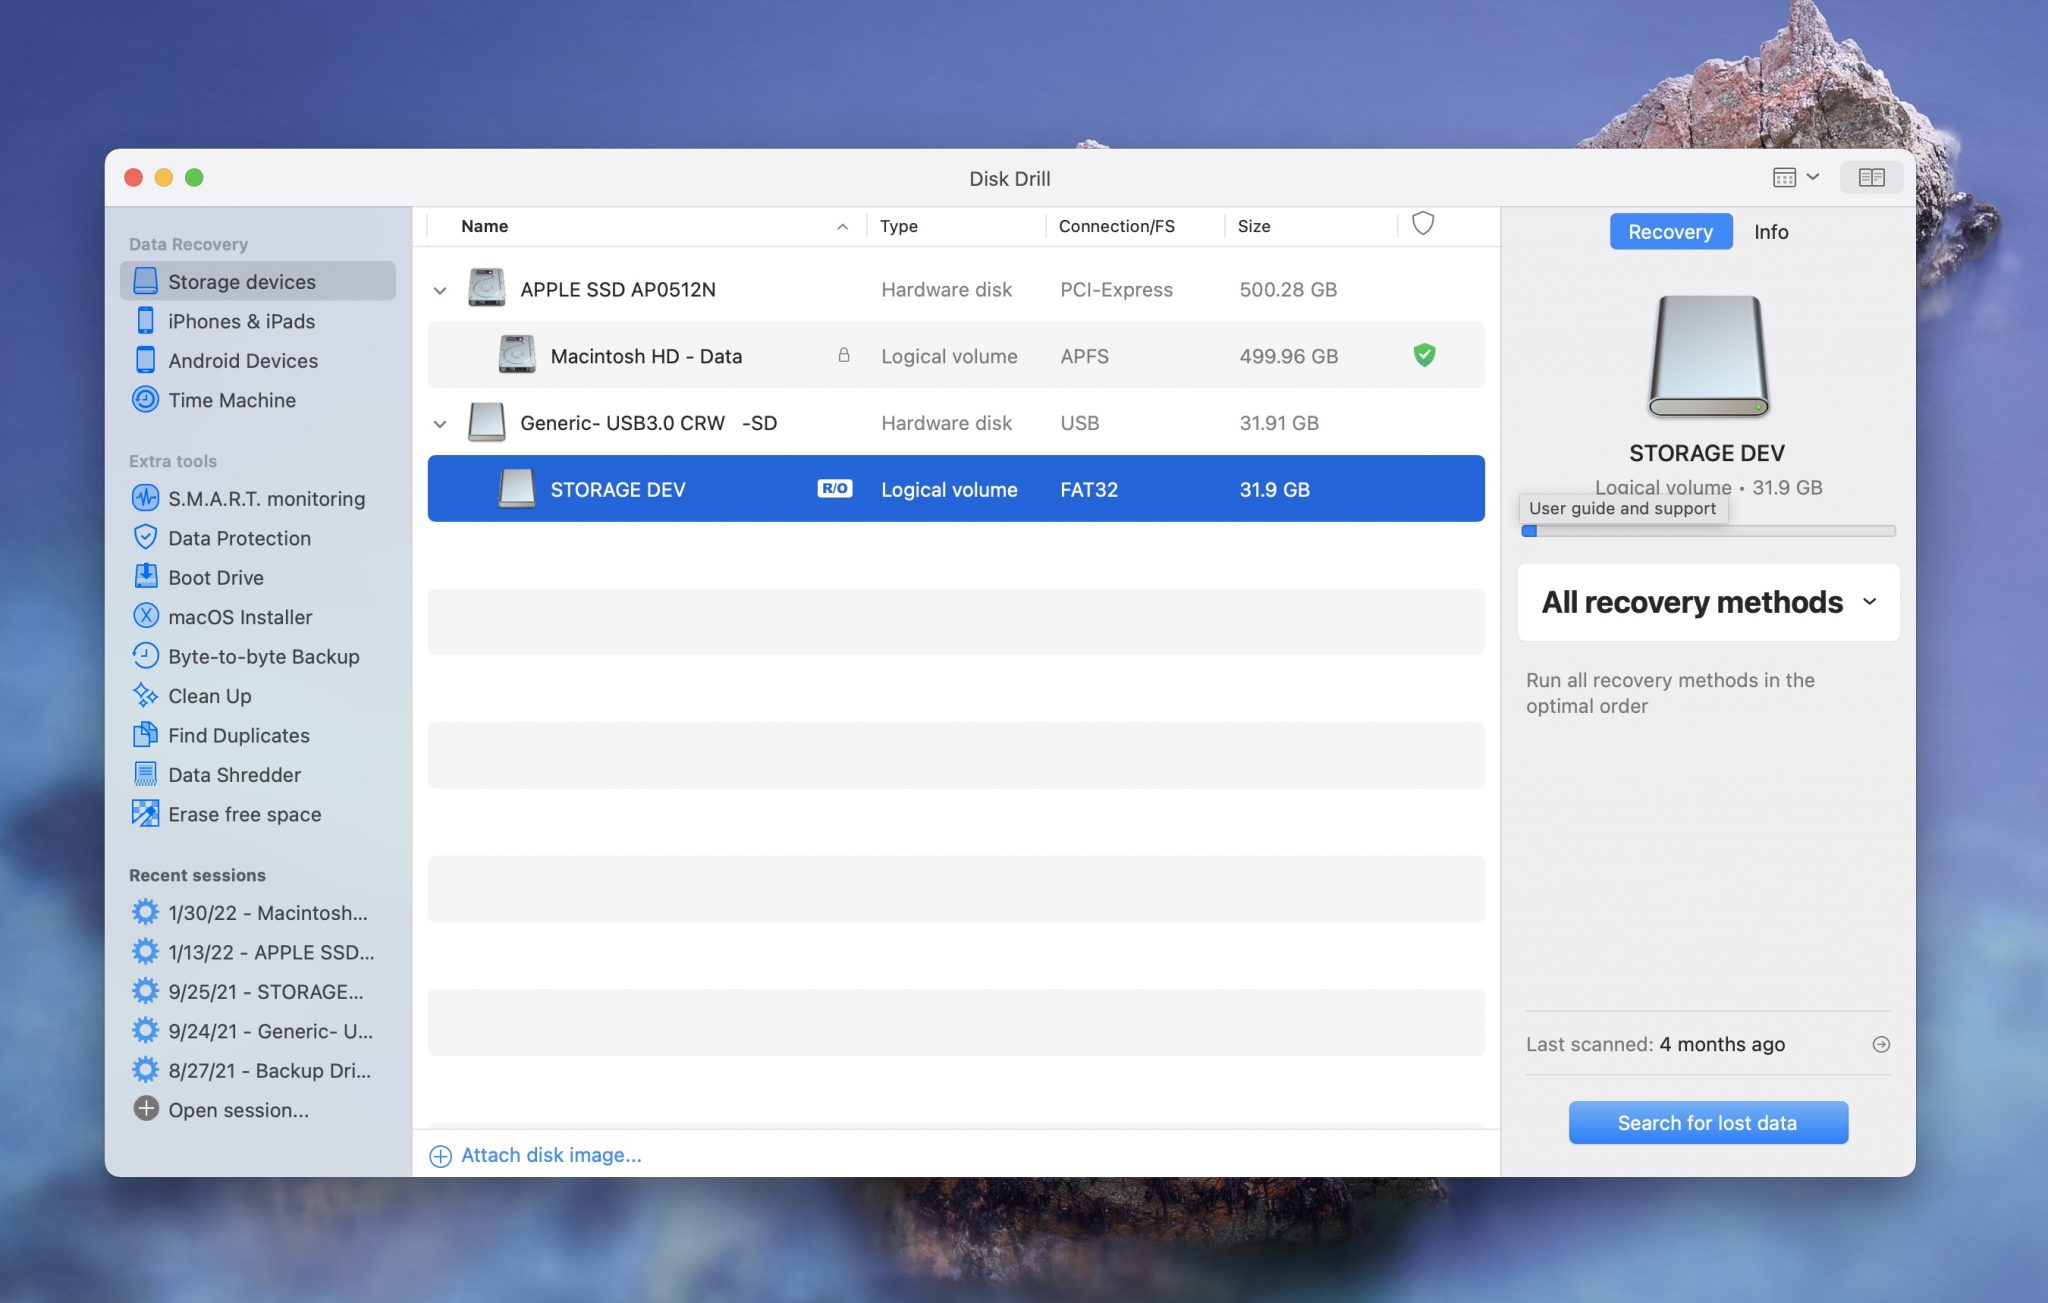
- Launch Disk Drill and select the storage device that you would like to recover deleted PhotoShop files from and click on Search for lost data.
- Wait for the scan process to complete.
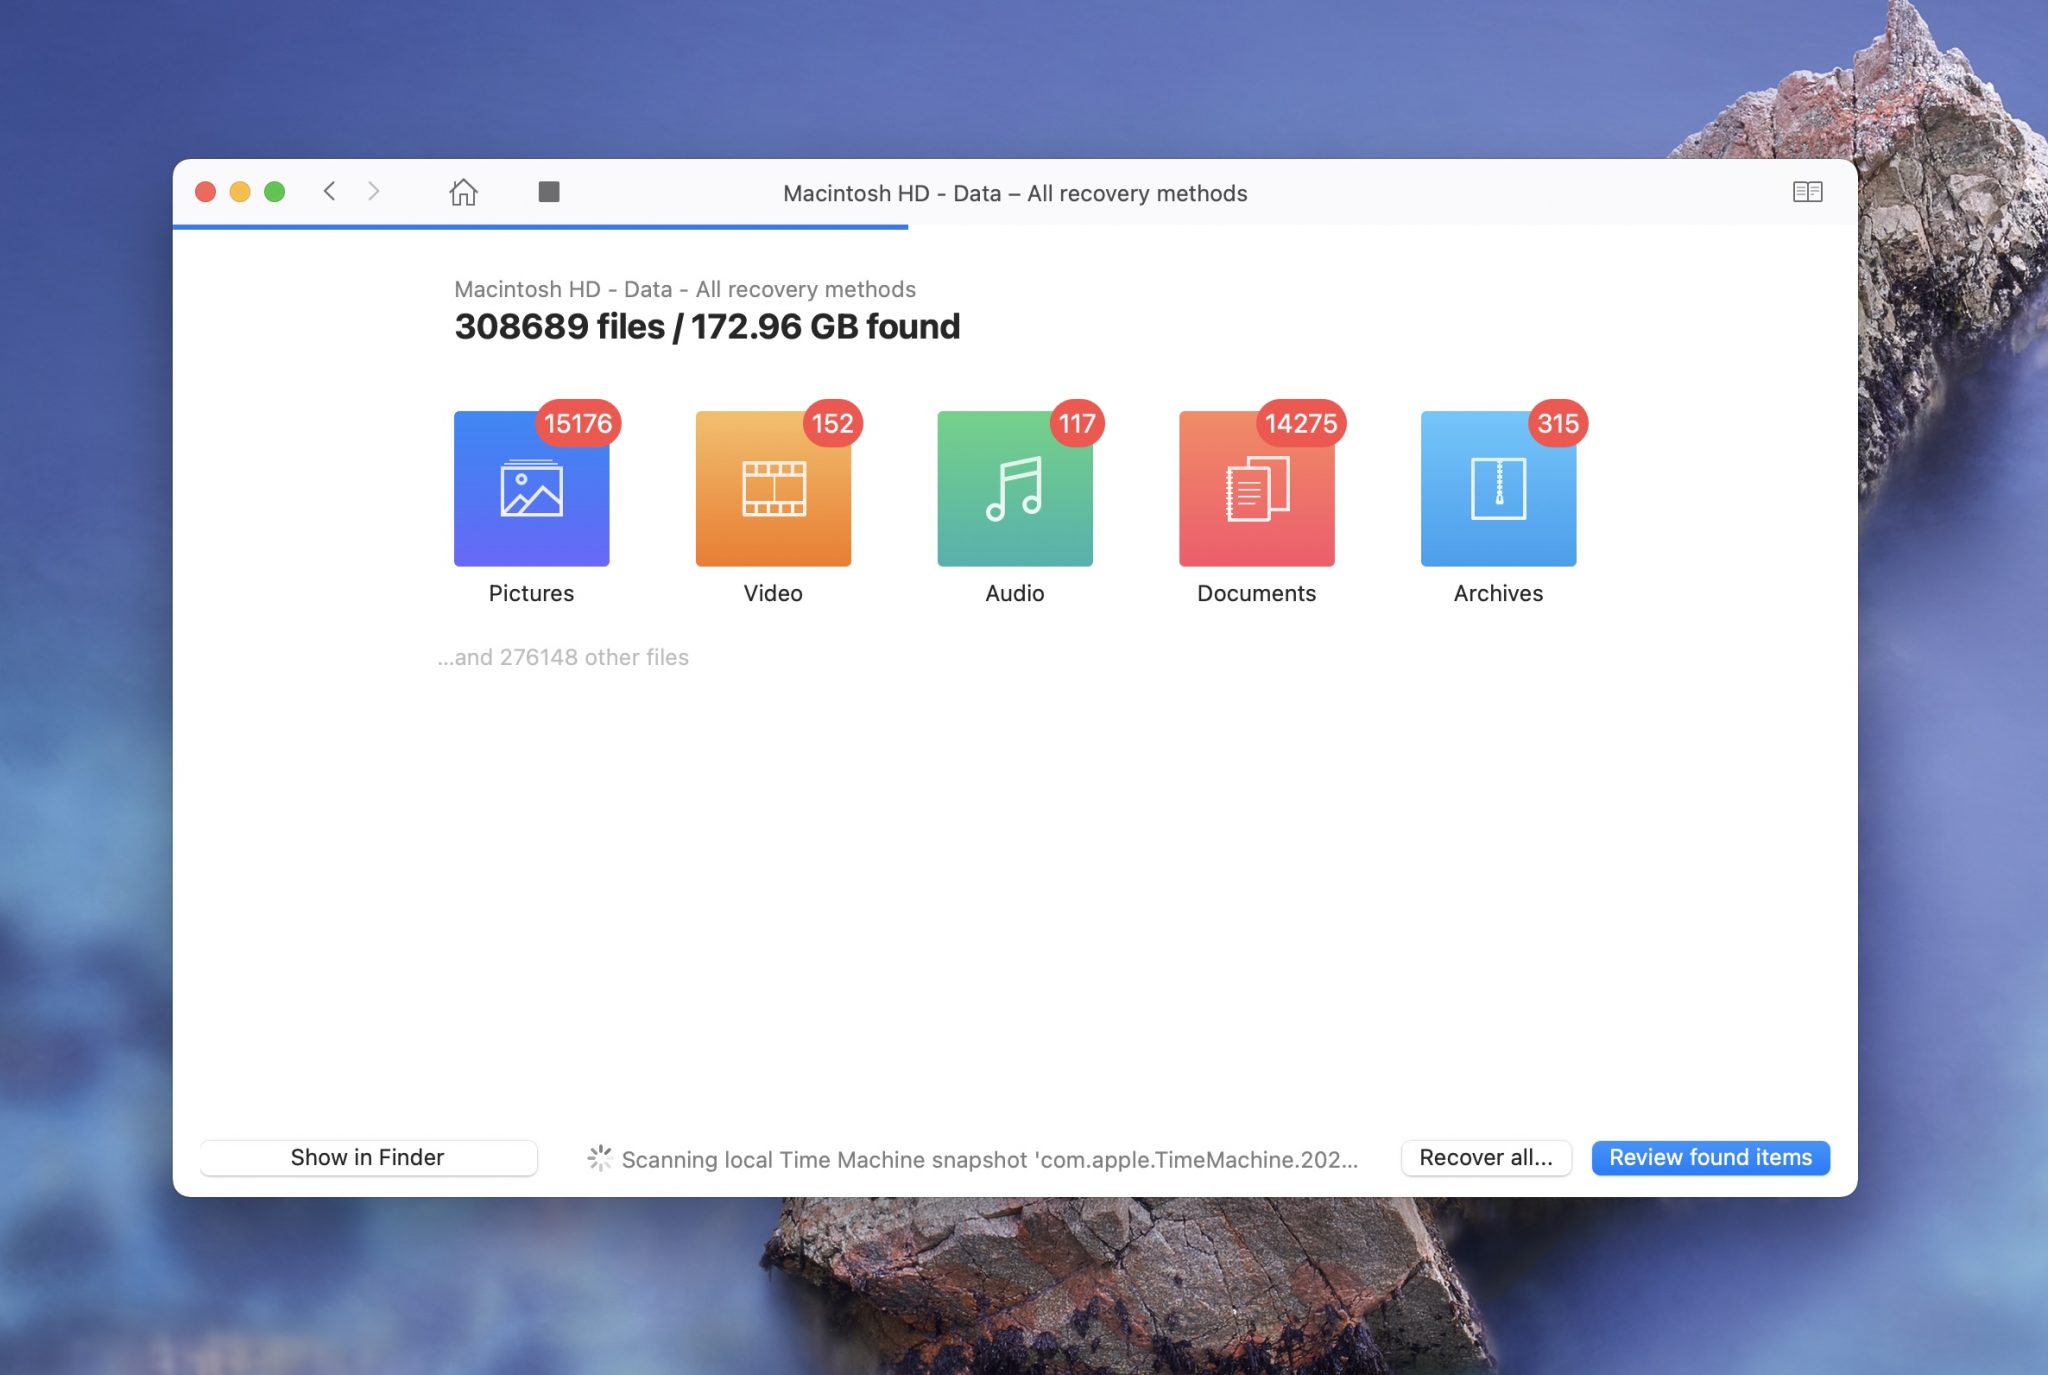
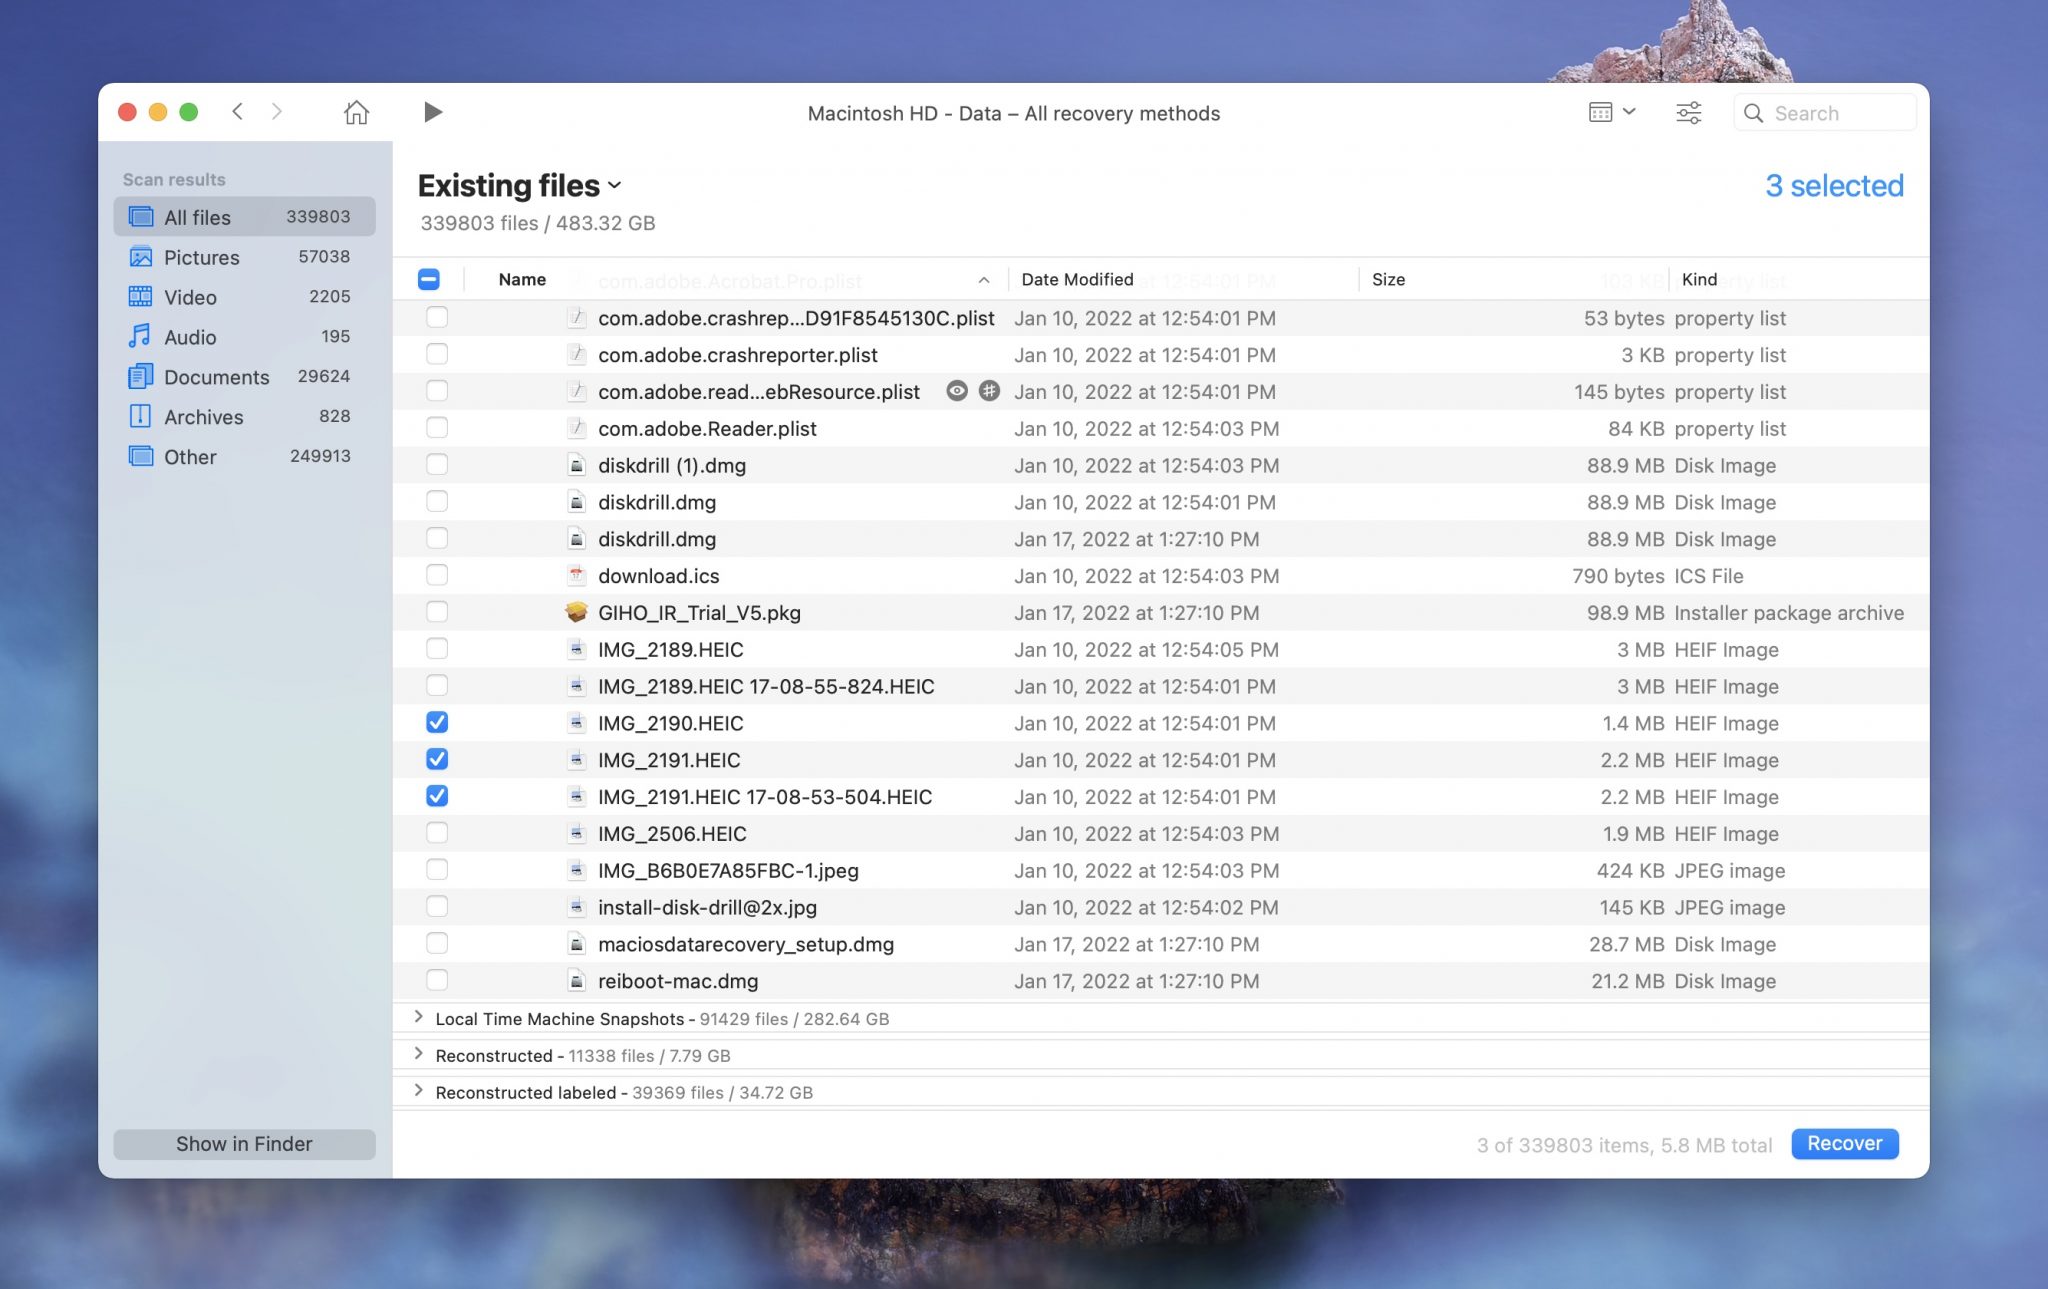
- Once the scan has been completed, review what Disk Drill was able to find. Disk Drill also has an awesome and powerful preview feature that you can use to inspect your files before recovering them.
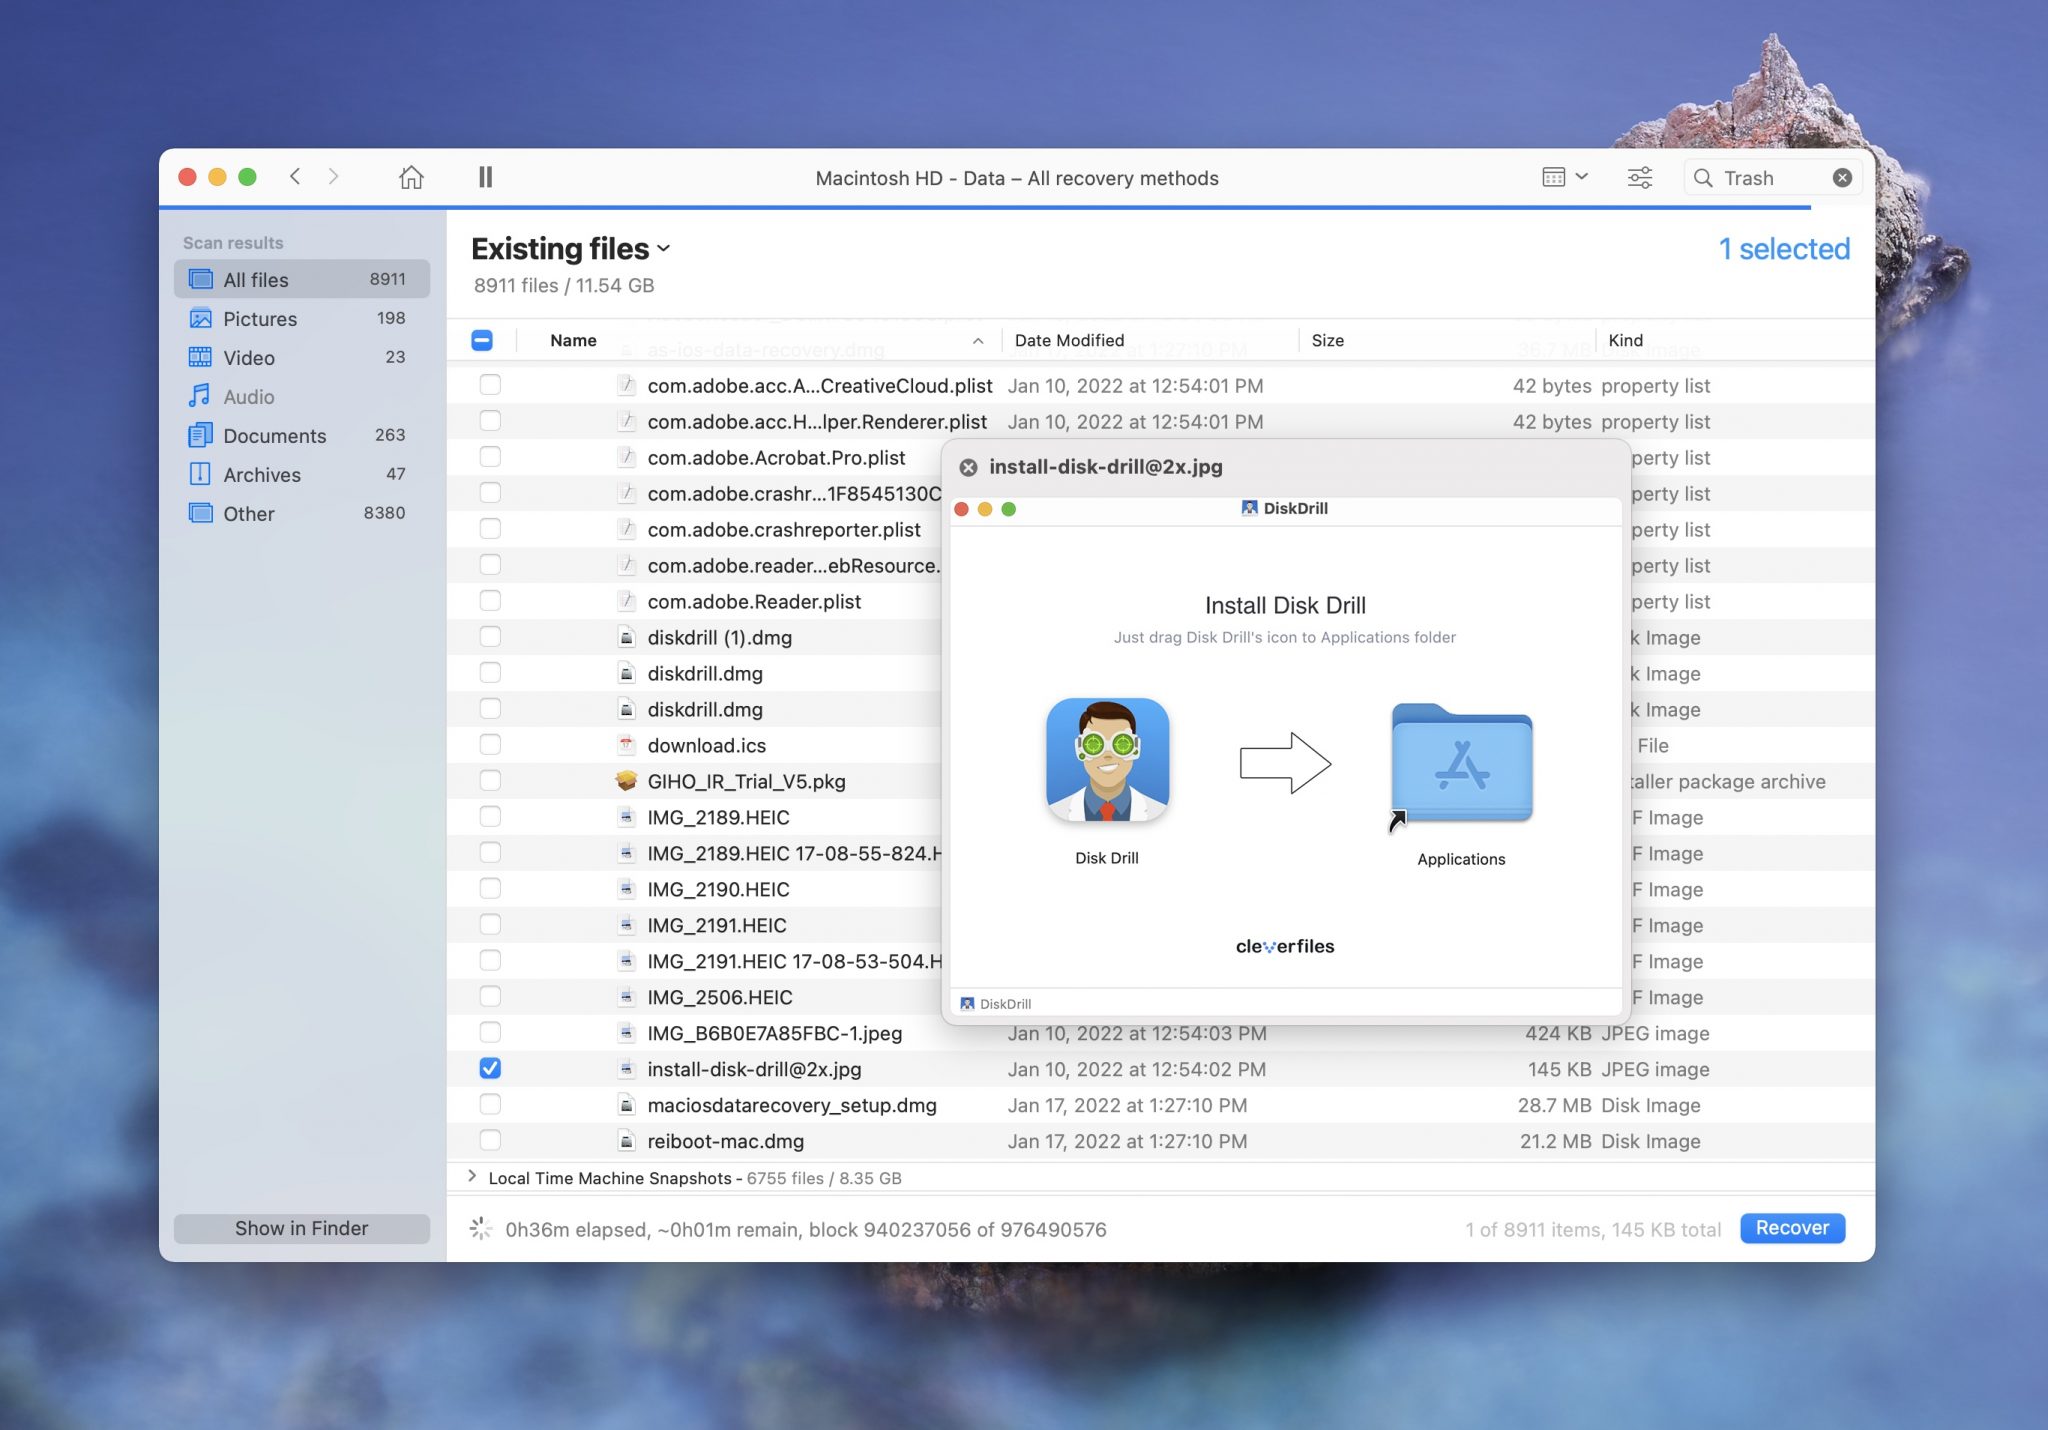
- Click on the blue Recover button to restore the unsaved or deleted PhotoShop files.

That’s it! Disk Drill has some of the best data recovery that there is, hands down. Not only does it offer amazing data recovery tools, but it can also do so many other things such as help you clean up and back up your Mac.
How to Prevent Losing Photoshop Files on Mac
The best way to prevent losing any file would be to use Time Machine to back up your Mac so that you can have your data in more than one place at a time.
Time Machine comes built right into macOS and it’s a free and powerful backup tool. I love Time Machine because it makes it simple and easy to keep the data on your Mac backed up and safe.
All you need to use Time Machine is your Mac and an external hard drive. You can purchase external hard drives for a pretty cheap price these days. Once you have an external hard drive, backing up is super easy.
- Plug the external hard drive into your Mac.
- Launch Time Machine which can be found within your System Preferences.
- Select the disk that you would like to back up to.
- Wait for the backup to complete.
- From here on out, all that you need to do is plug your external hard drive into your Mac here and there, and then it will back up using Time Machine. You don’t even have to prompt it or press a button, just plug in the external hard drive.
No one thinks that data loss is going to happen to them so it’s important to prepare for it and be ready just in case it does.
Conclusion
As you can see, there are a number of options available to you when you need to recover a lost, damaged, or unsaved Photoshop file on your Mac.
While some of the methods such as Open Recent and AutoSave are built right into the app, you may need to employ data recovery software such as Disk Drill to recover the fruits of your hard work. It is a better solution than starting over from scratch with the original image.


FAQ
The AutoRecover folder stores recovered files on your Mac and can be located by following this path: Library >Application Support> Adobe>Adobe Photoshop CC 2017> AutoRecover folder.
You can also use Disk Drill to recover files that you’ve been working on if you’re not seeing the file located in that folder. Using Disk Drill is simple and easy.
- Download and install Disk Drill onto your Mac.
- Launch Disk Drill.
- Select the storage device that you would like to scan for the lost file.
- Wait for the scan process to complete.
- Review the files that Disk Drill has been able to recover.
- Select the files that you would like to recover and then click on the blue Recover button.
Yes, you can! There are 2 ways that you can do this.
- AutoRecover: If you have AutoRecover up and running within PhotoShop than you and restore and continue working on the latest version of the file that was stored. You may not have the latest updates to what you were working on, but it’s better than starting from scratch.
- Time Machine: You can restore from a Time Machine backup if you have been backing up your Mac regularly. Simply plug in your backup external hard drive and then launch Time Machine where you can then restore the file back to the latest backup that is available.
If neither of these methods worked for you, it would be a good practice to set one if not both of them up for the future!
The AutoRecover Folder is located at Library >Application Support> Adobe>Adobe Photoshop CC 2017> AutoRecover folder.