Even with all of the cloud-based backup solutions from iCloud to Google Photos, sometimes photos still get erased or removed by accident. A single wrong tap on the screen can instantly remove a photo that means a world to you or wipe out your entire photo gallery.

In this article, we explain all possible ways how to recover deleted photos from iPhone to help you get back all-important photos no matter how bad the situation looks. If you’re lucky, you might be able to recover all deleted photos with a few taps, but we also explain how to use iPhone recovery software to recover photos many would consider unrecoverable.
The methods described in this article can be applied on all iPhone models including iPhone 14 and 14 Plus/Pro/Pro Max, iPhone 13/13 Mini/Pro/Pro Max, iPhone SE (3rd), 12/12 Pro Max, 11 Pro/Max, 11, XS, XS Max, XR, X, 8 Plus, 8, 7 Plus, 7, 6S Plus, 6S, 6 Plus, 6, 5S, 5c, 5, 4S and 4. All you need to do is follow our detailed step-by-step instructions as closely as possible.
Restore Deleted Pictures on iPhone with Photos App
 By default, pictures taken with the Camera application are saved to the Photos application. If a photo is deleted, it’s moved to the Recently Deleted folder, where it stays for some time, giving you a chance to restore it by following the steps below:
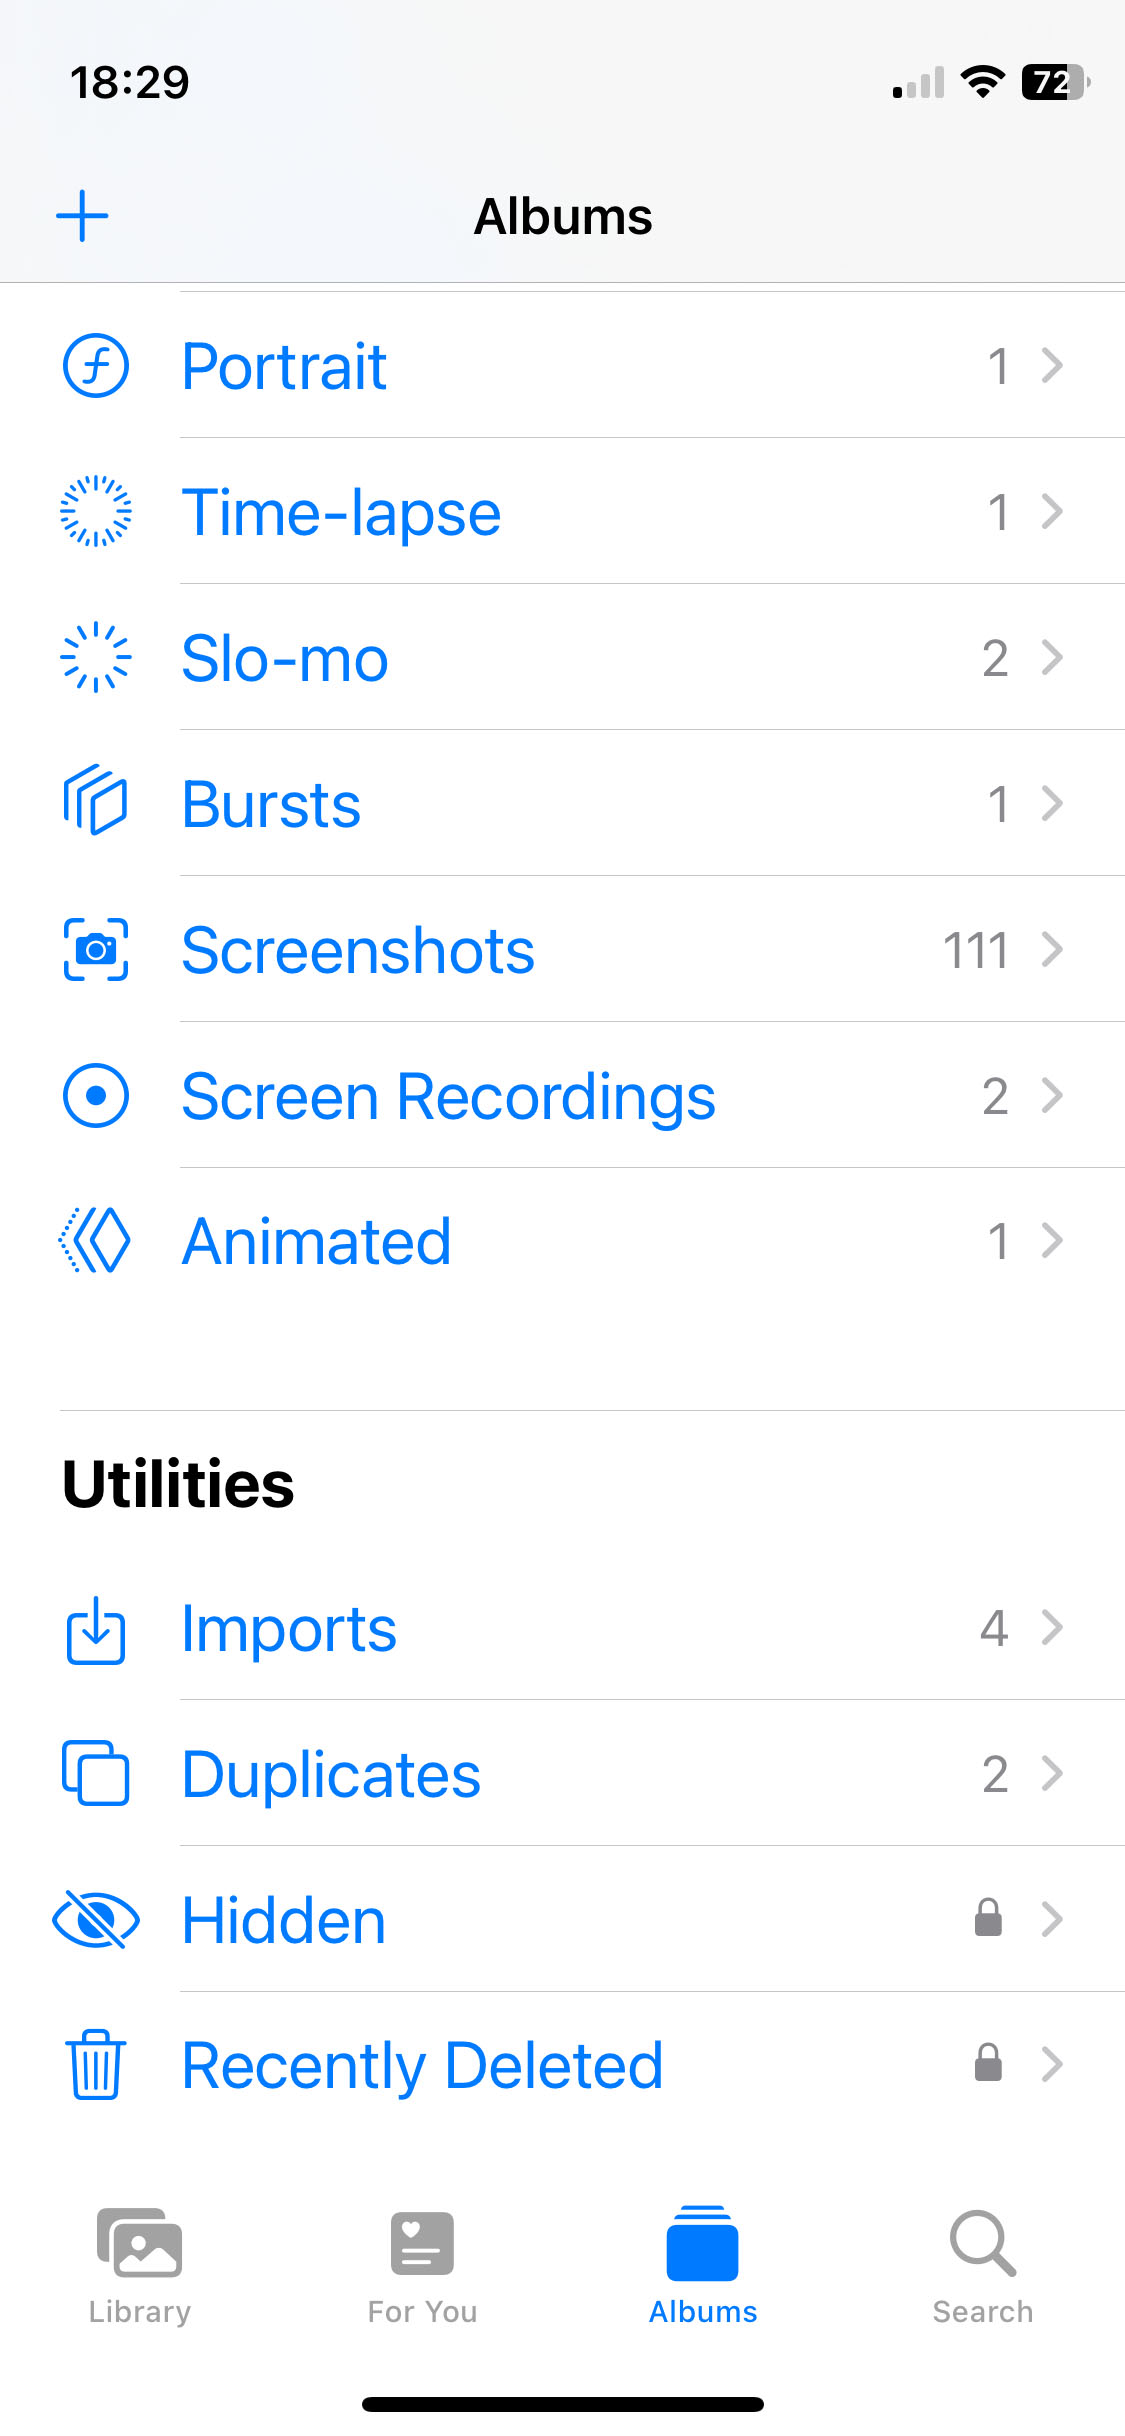
- Open the Photos app. It will display a list of albums.

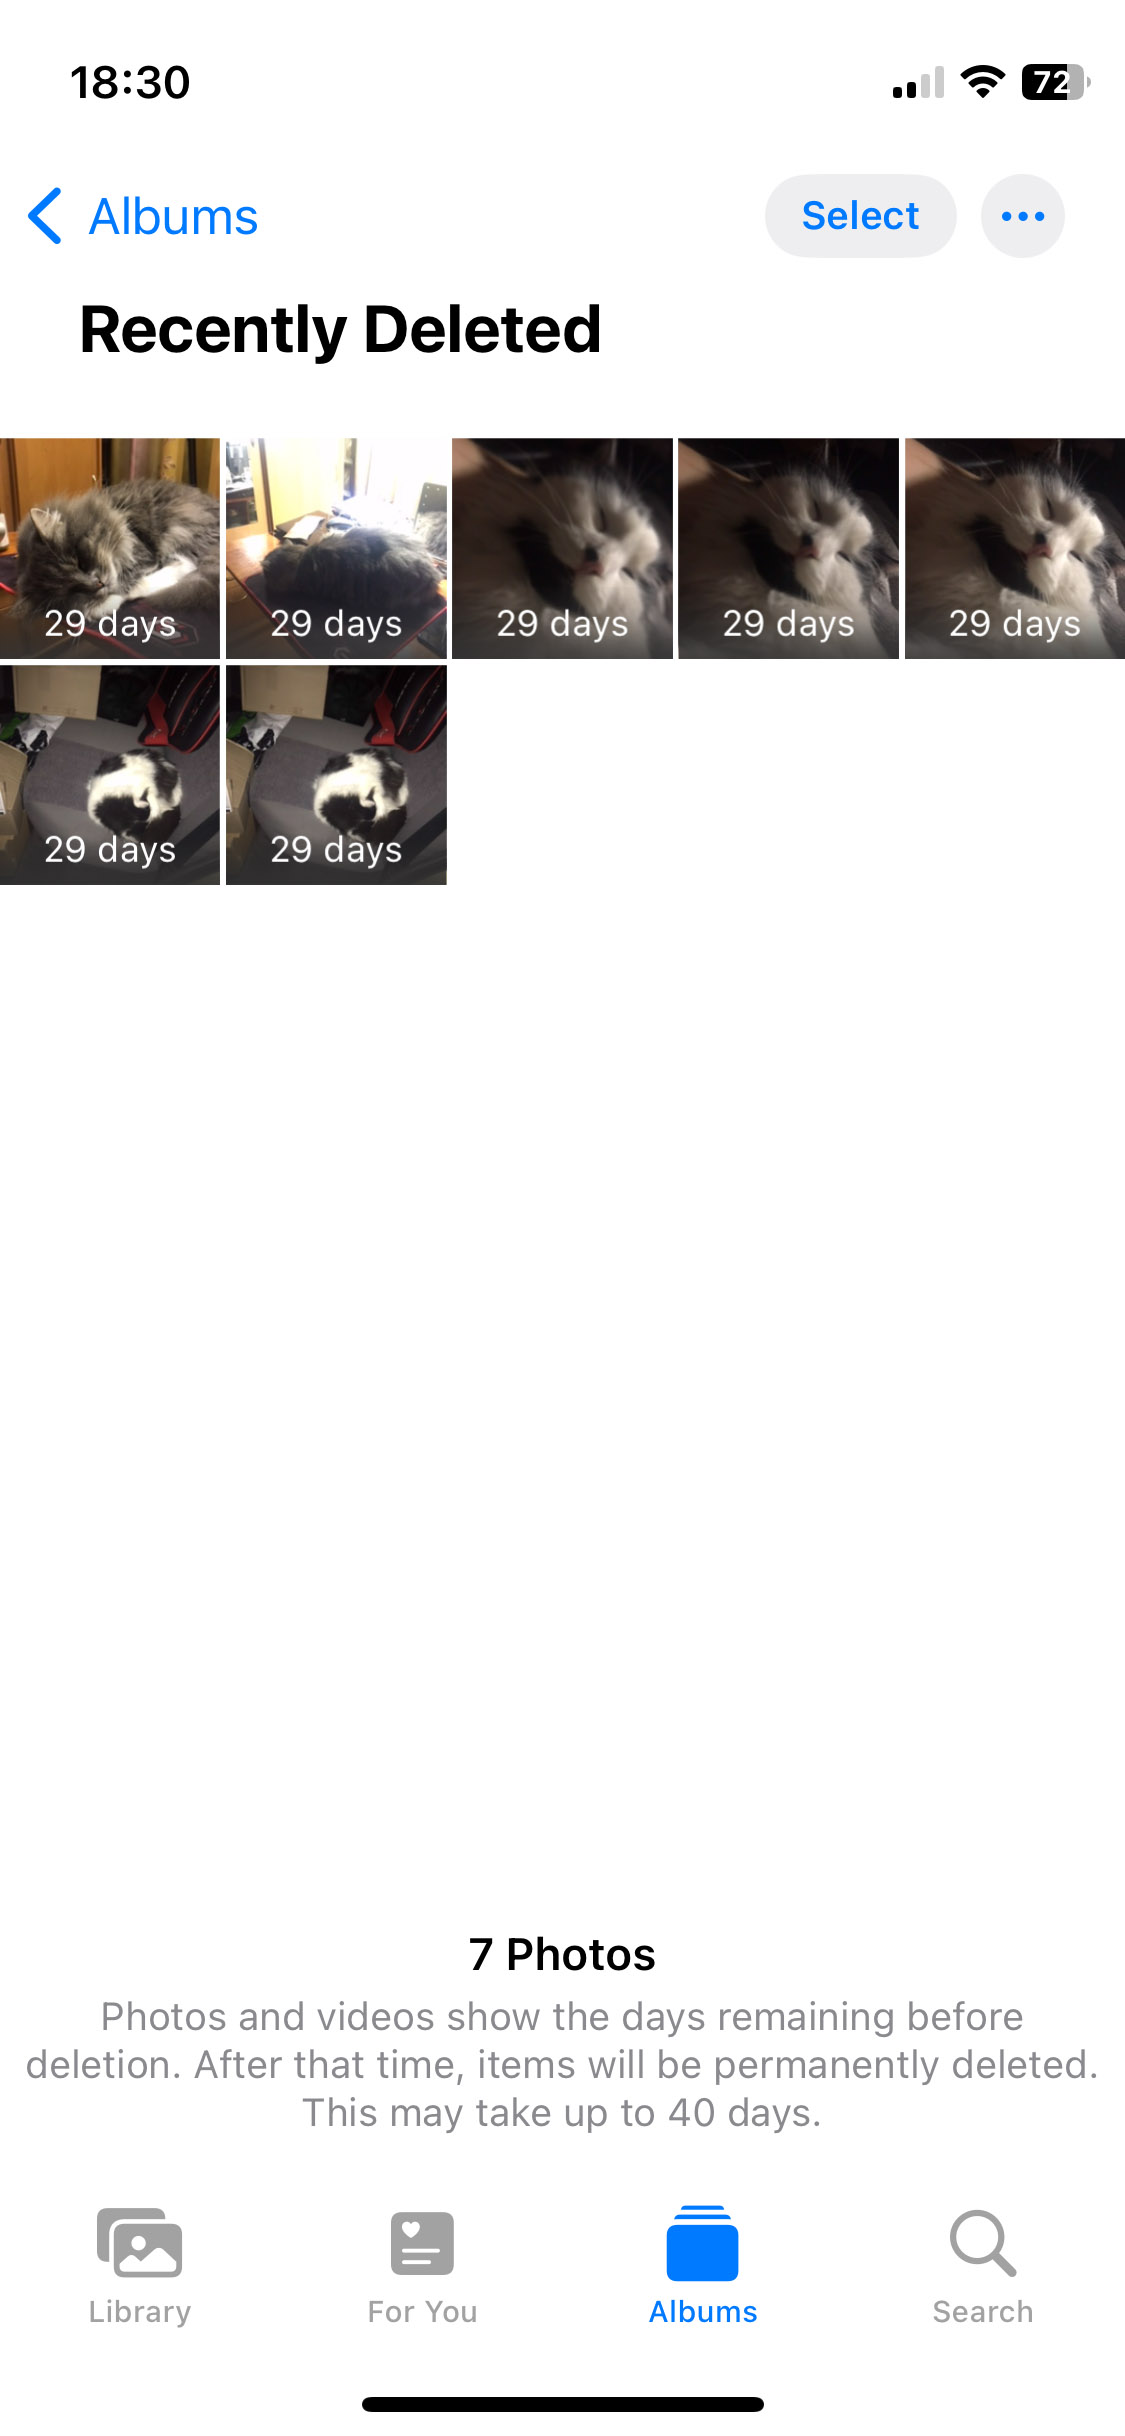
- Navigate down to “Utilities” and select the folder labeled “Recently Deleted.”. It will show the pictures that are scheduled for deletion and how much longer until they are removed permanently from the iPhone. According to Apple, deleted photos are saved in the “Recently Deleted” album for 30 days.
- (iOS 16 and later only) Unlock the Recently Deleted album using Face ID or Touch ID if asked to do so.
- Tap the Select button in the top-right corner.
- Tap the picture (or pictures) you want to recover, and then tap the circle with three dots inside located in the bottom-right corner.
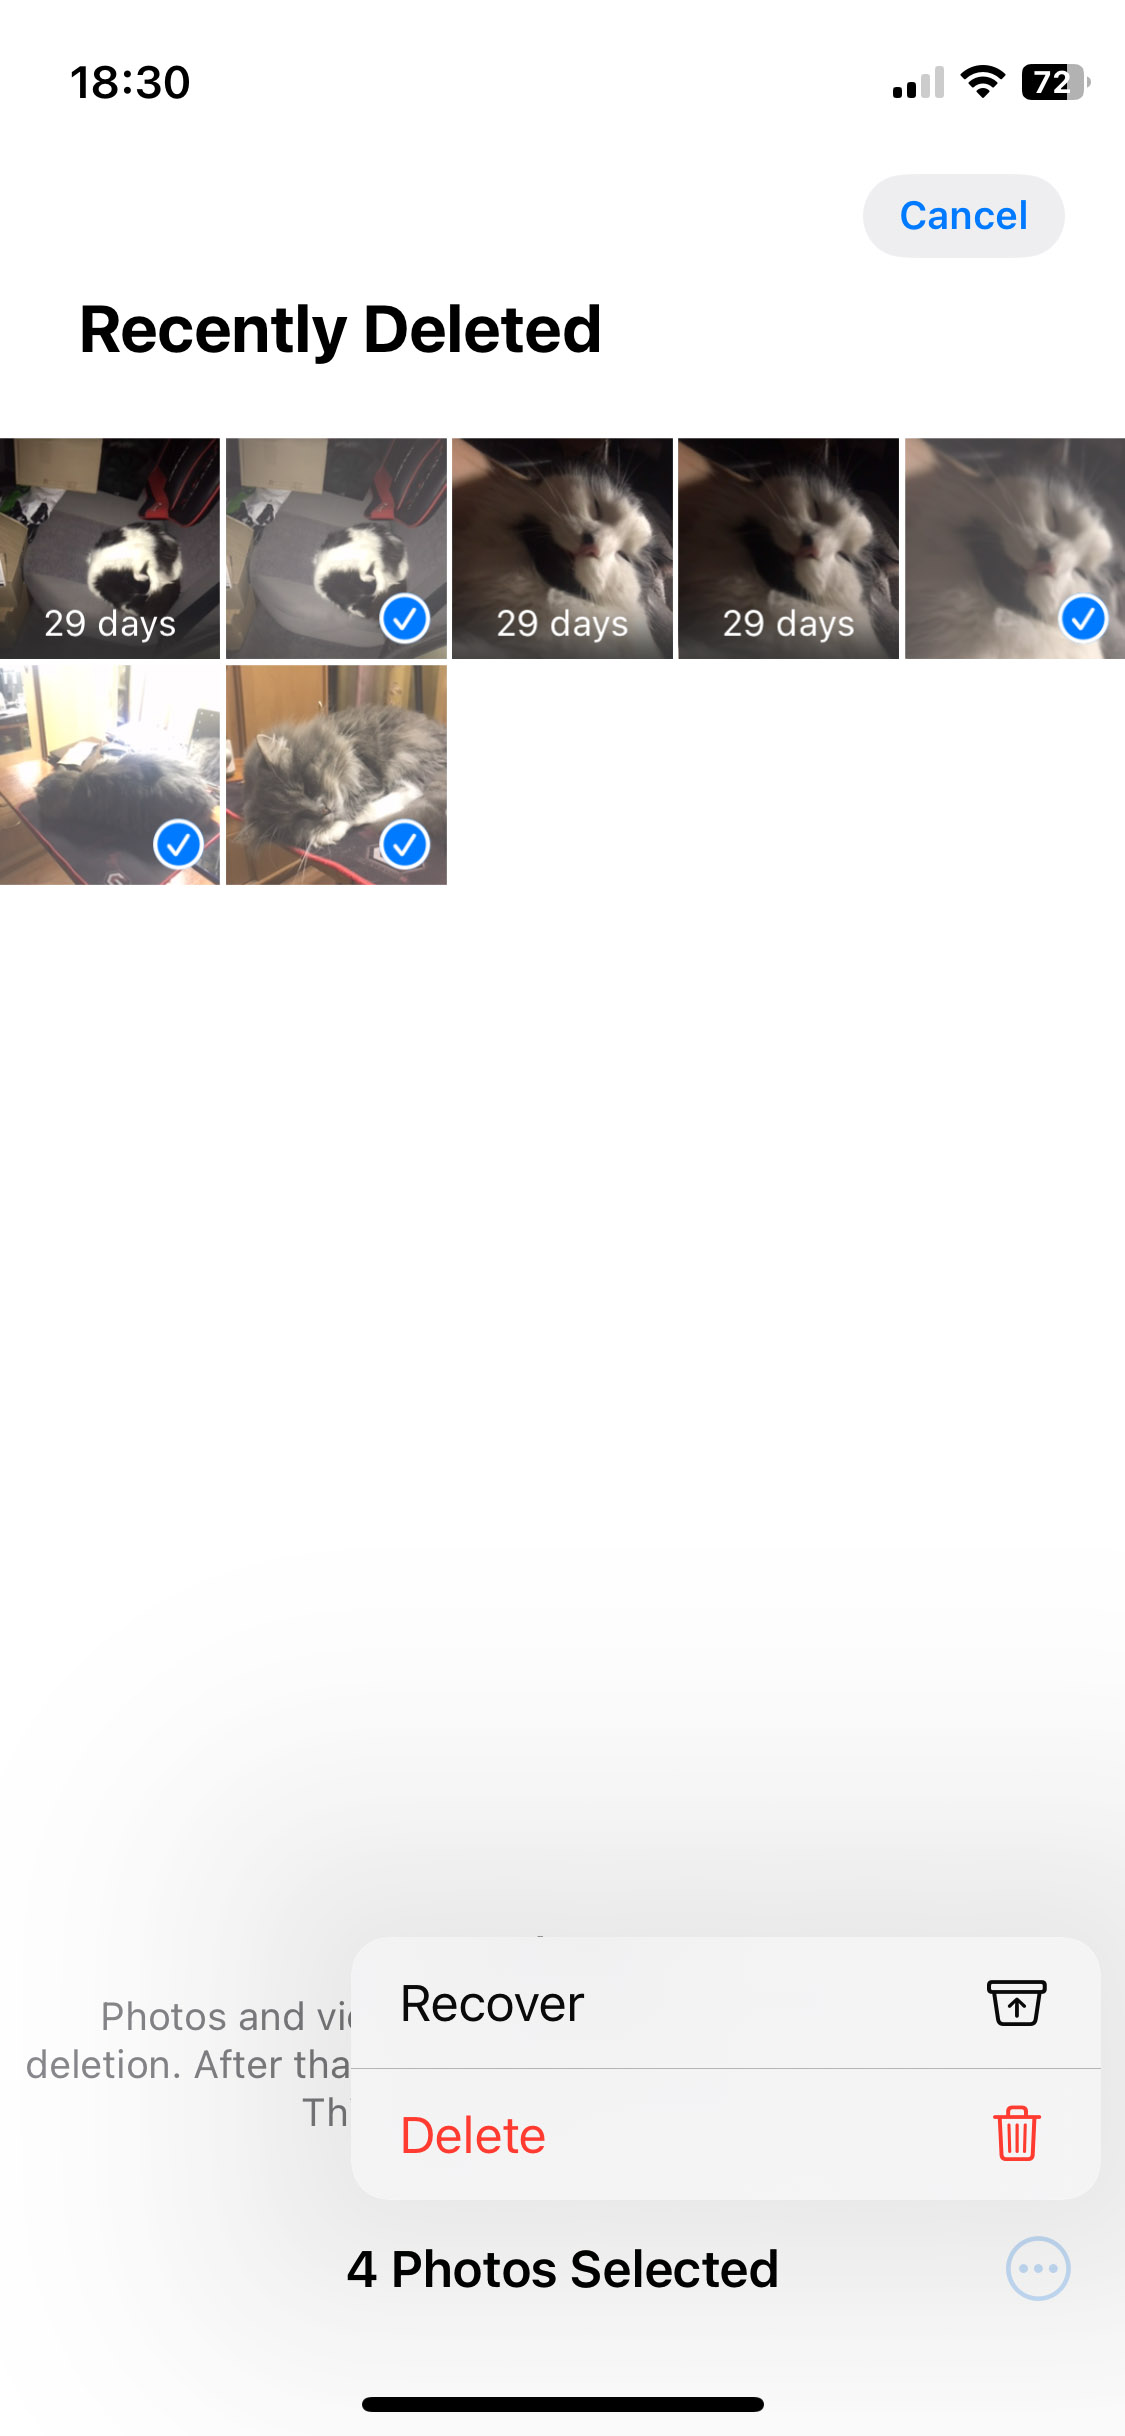
- Select the “Recover” option, and the photo will be restored.
Ways to Recover Deleted Photos from an iPhone Backup
Backups are your second-best option how to retrieve deleted photos on iPhone. Since there are several different ways how to backup photos on iPhone, we provide three different solutions, and it’s up to you to select the one works best for you.
When recovering deleted photos from iPhone with backups, pay attention to the age of your backups. Always use the most recent backup you have, but don’t delete all older backups. It’s always a good idea to have multiple backups just in case something goes wrong with the main backup.
Way 1. Recover Deleted Photos with Finder
![]() Since macOS Catalina, the Finder is in charge of iPhone backups and recoveries from them. If this is your first time recovering from an iPhone backup with Finder, you have nothing to worry about because Apple made the process completely painless.
Since macOS Catalina, the Finder is in charge of iPhone backups and recoveries from them. If this is your first time recovering from an iPhone backup with Finder, you have nothing to worry about because Apple made the process completely painless.
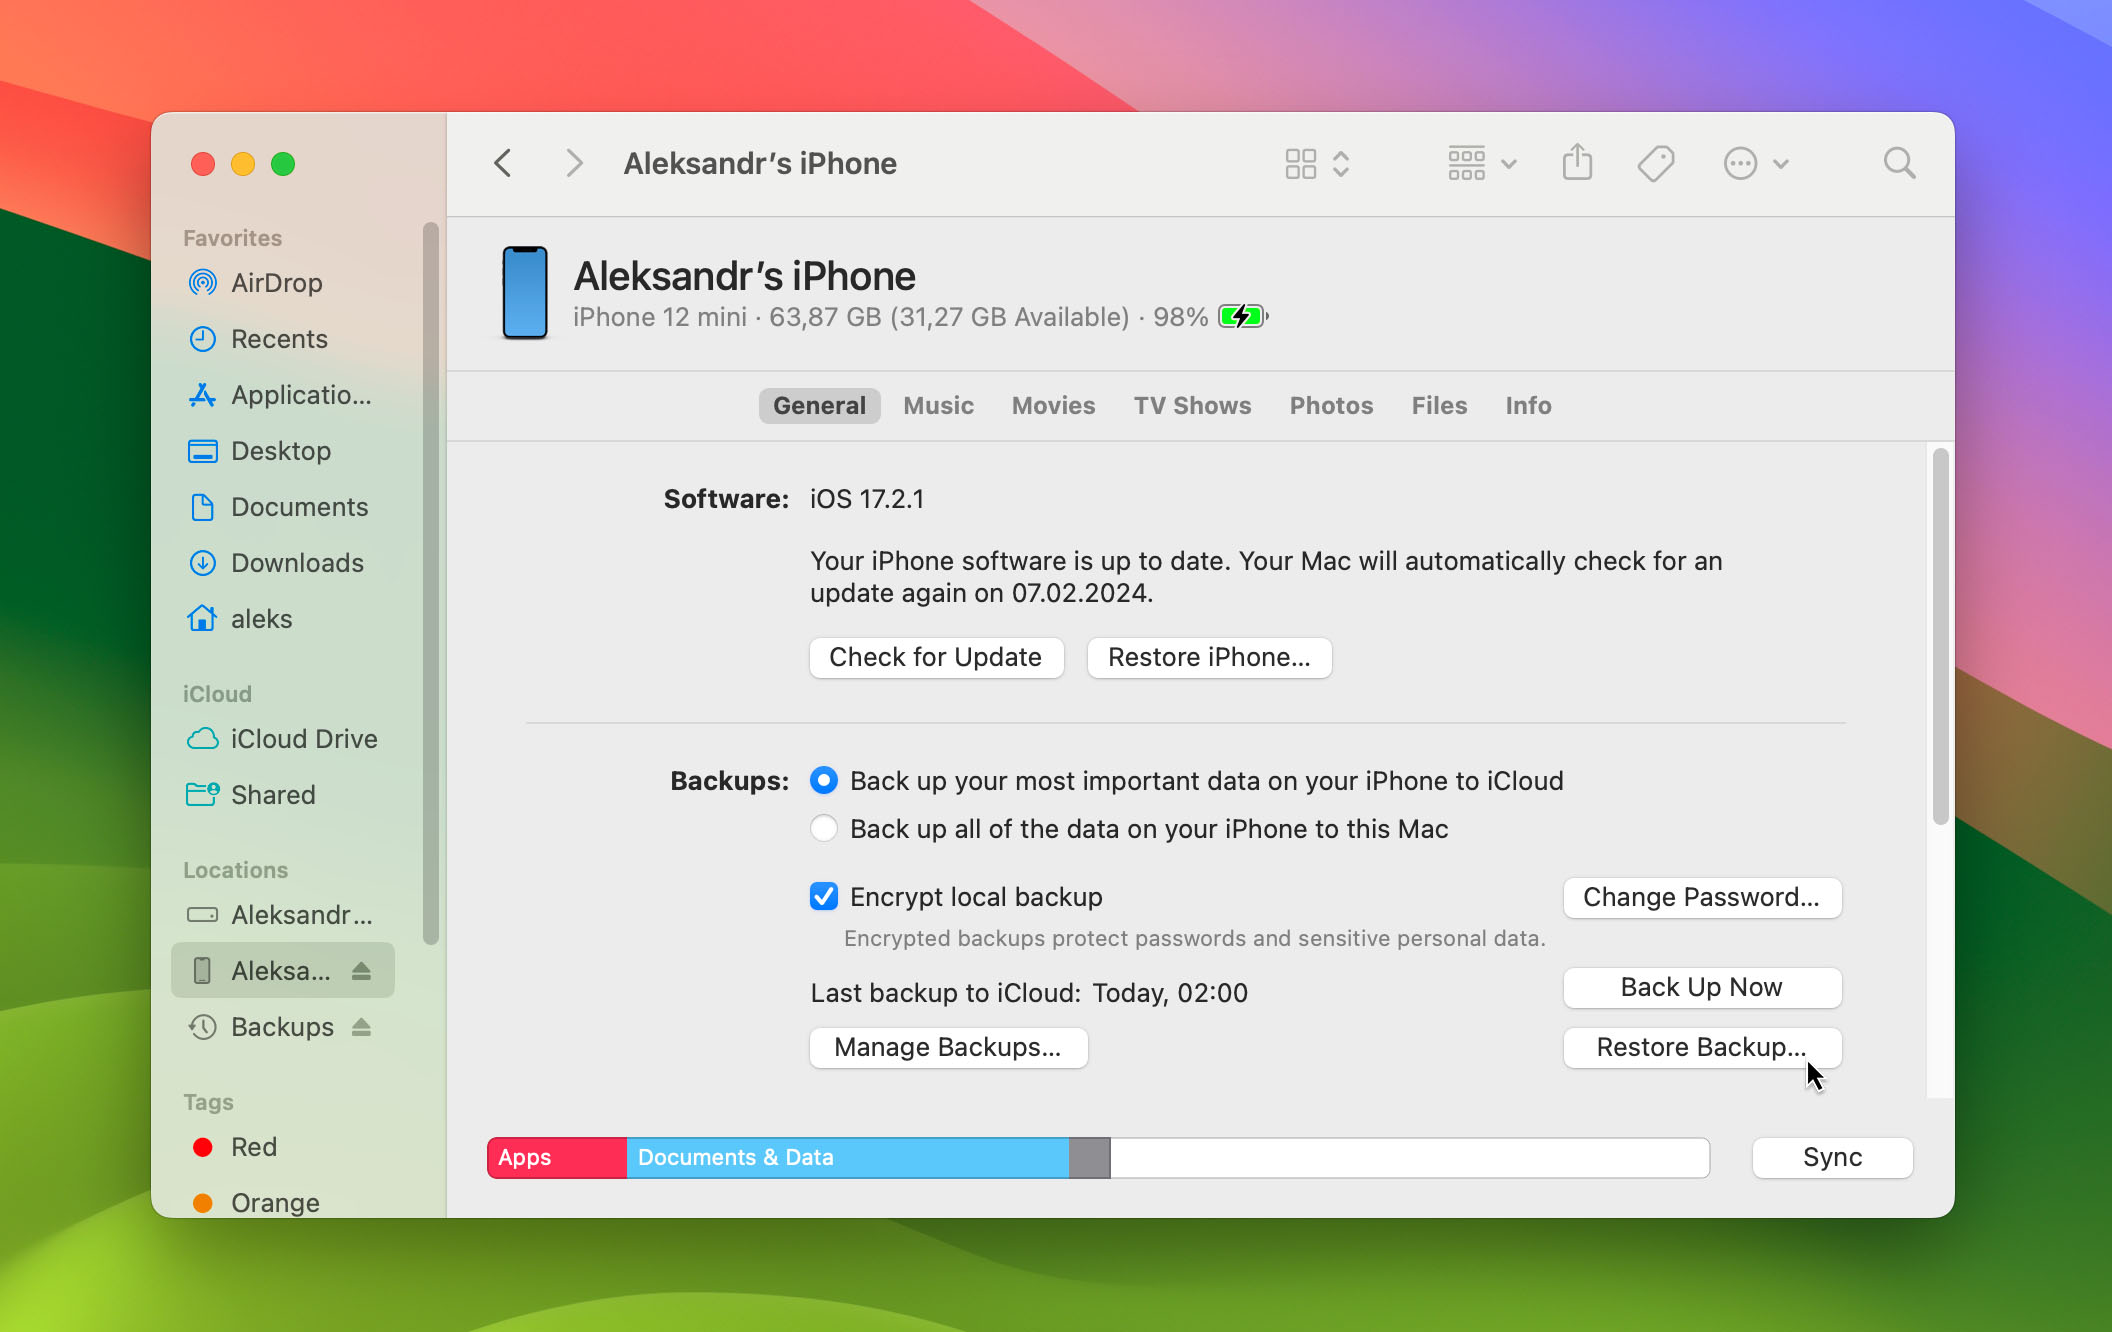
Follow these steps to recover lost photos with Finder:
Step 1. Launch Finder.
Step 2. Connect your iPhone to your computer.
Step 3. Select your iPhone from the list of locations on the left.
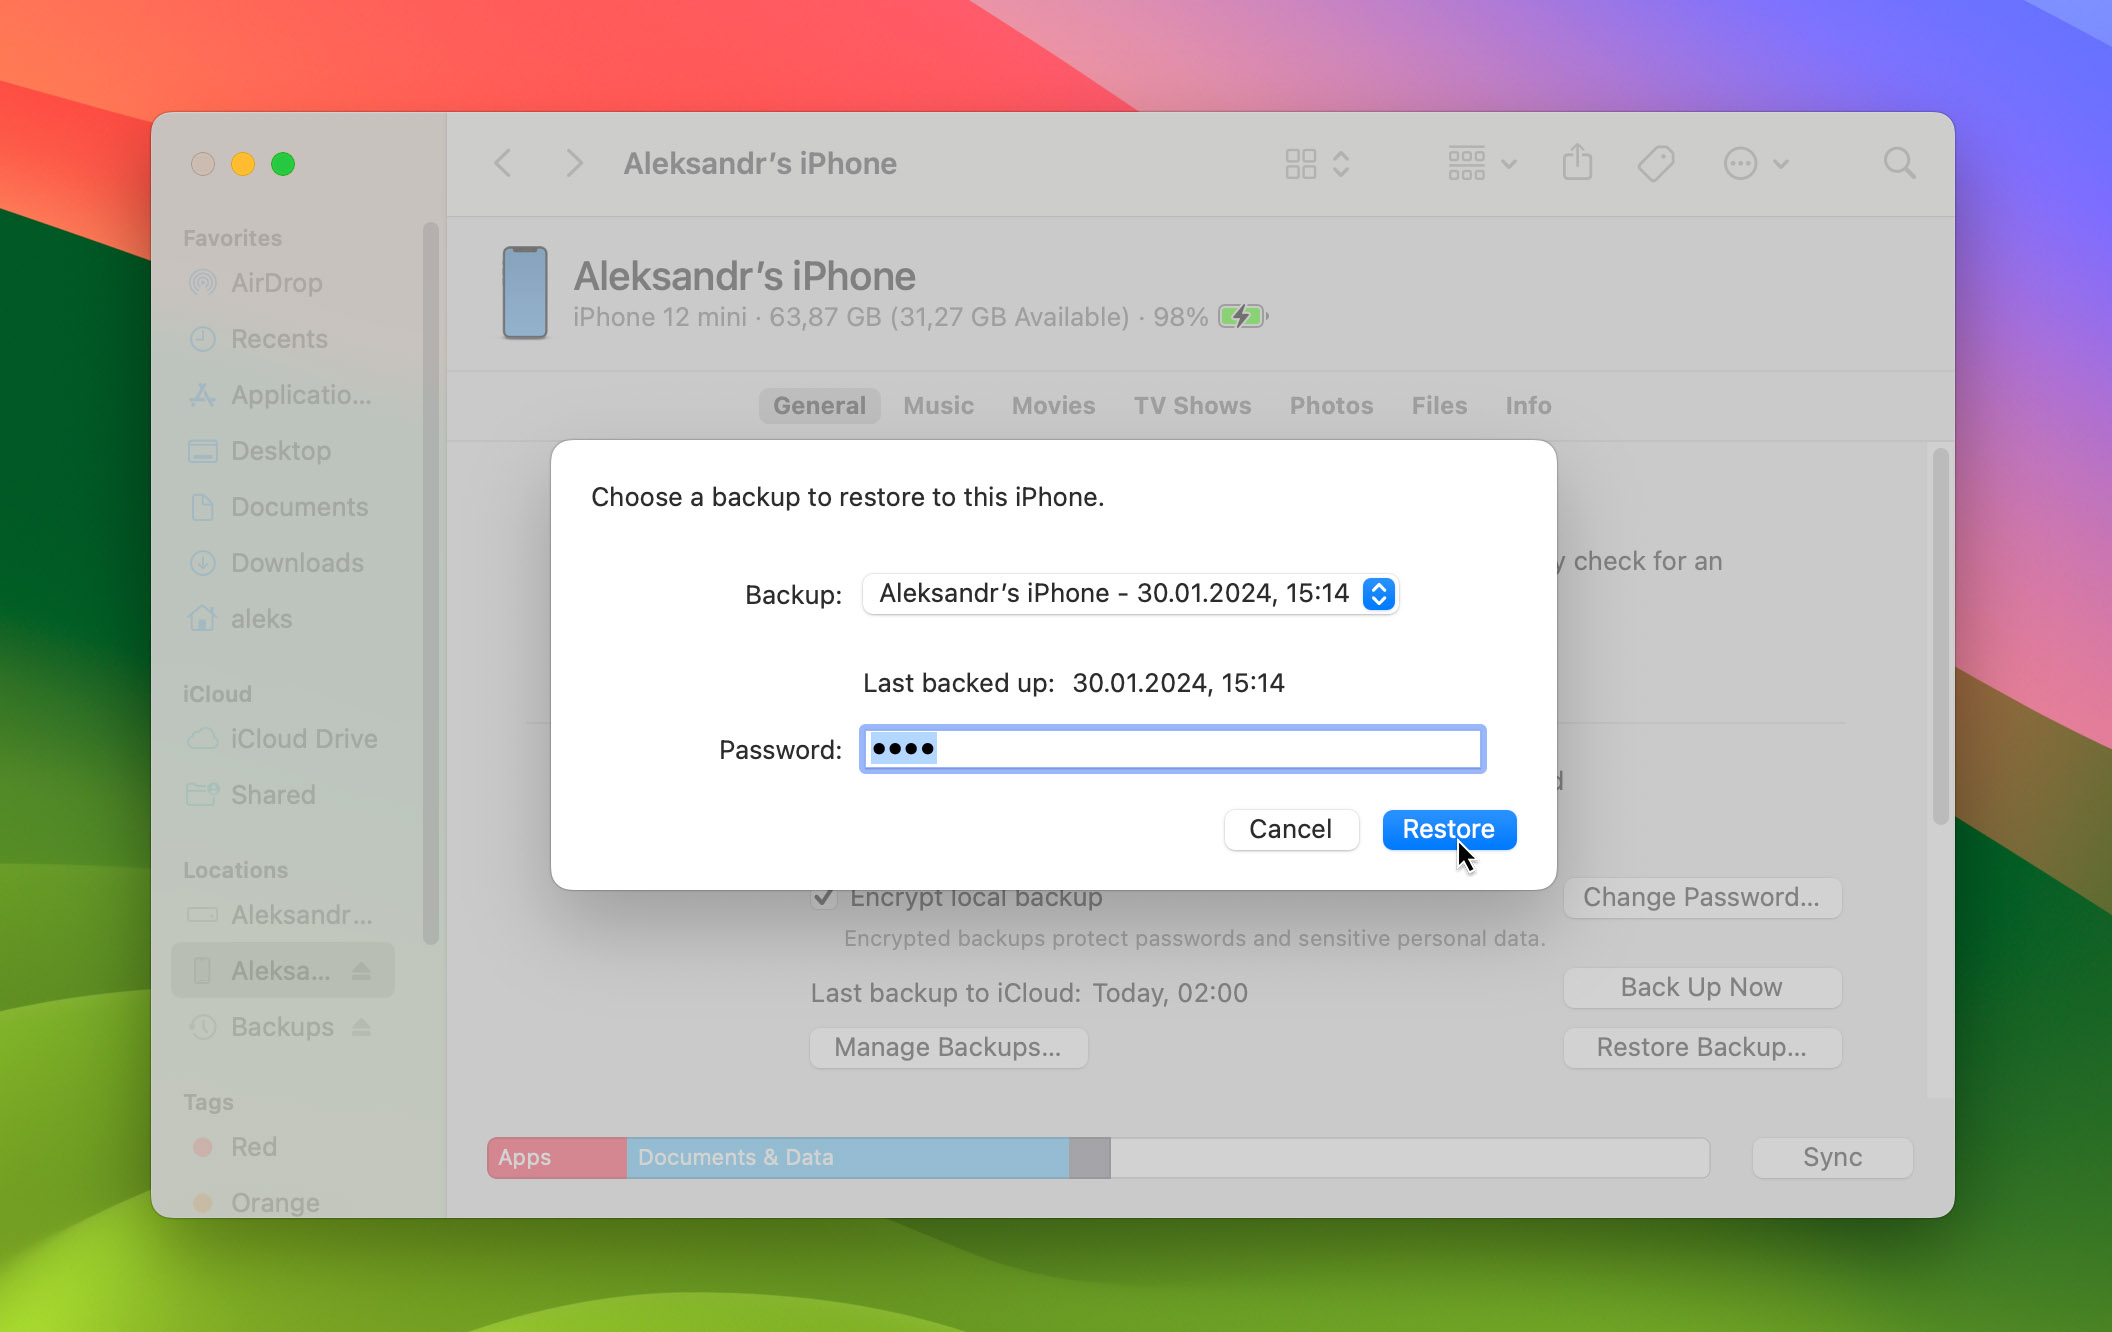
Step 4. Click the Restore Backup button located in the General tab.
Step 5. Choose the backup you want to restore from. In most cases, you should choose the latest backup you have. Only if you know that the latest backup doesn’t include the data you’re trying to recover should you choose an earlier backup.
Step 6. Click the Restore button to confirm that you’re ready to restore your iPhone from the selected backup. Enter your password if prompted to do so.
Way 2. How to Recover Deleted Photos from iTunes Backup
![]() On macOS Mojave or earlier, or on a PC, you can restore deleted photos from an iTunes backup. Because iTunes can do a lot more besides restoring deleted data from backups, iPhone users are often afraid of going through the recovery process on their own. But with our instructions, you’ll be able to get your photos back with just a few clicks.
On macOS Mojave or earlier, or on a PC, you can restore deleted photos from an iTunes backup. Because iTunes can do a lot more besides restoring deleted data from backups, iPhone users are often afraid of going through the recovery process on their own. But with our instructions, you’ll be able to get your photos back with just a few clicks.
To recover deleted photos from iTunes backup follow these steps:
Step 1. Open iTunes.
Step 2. Use an original Apple cable to connect your iPhone to your computer.
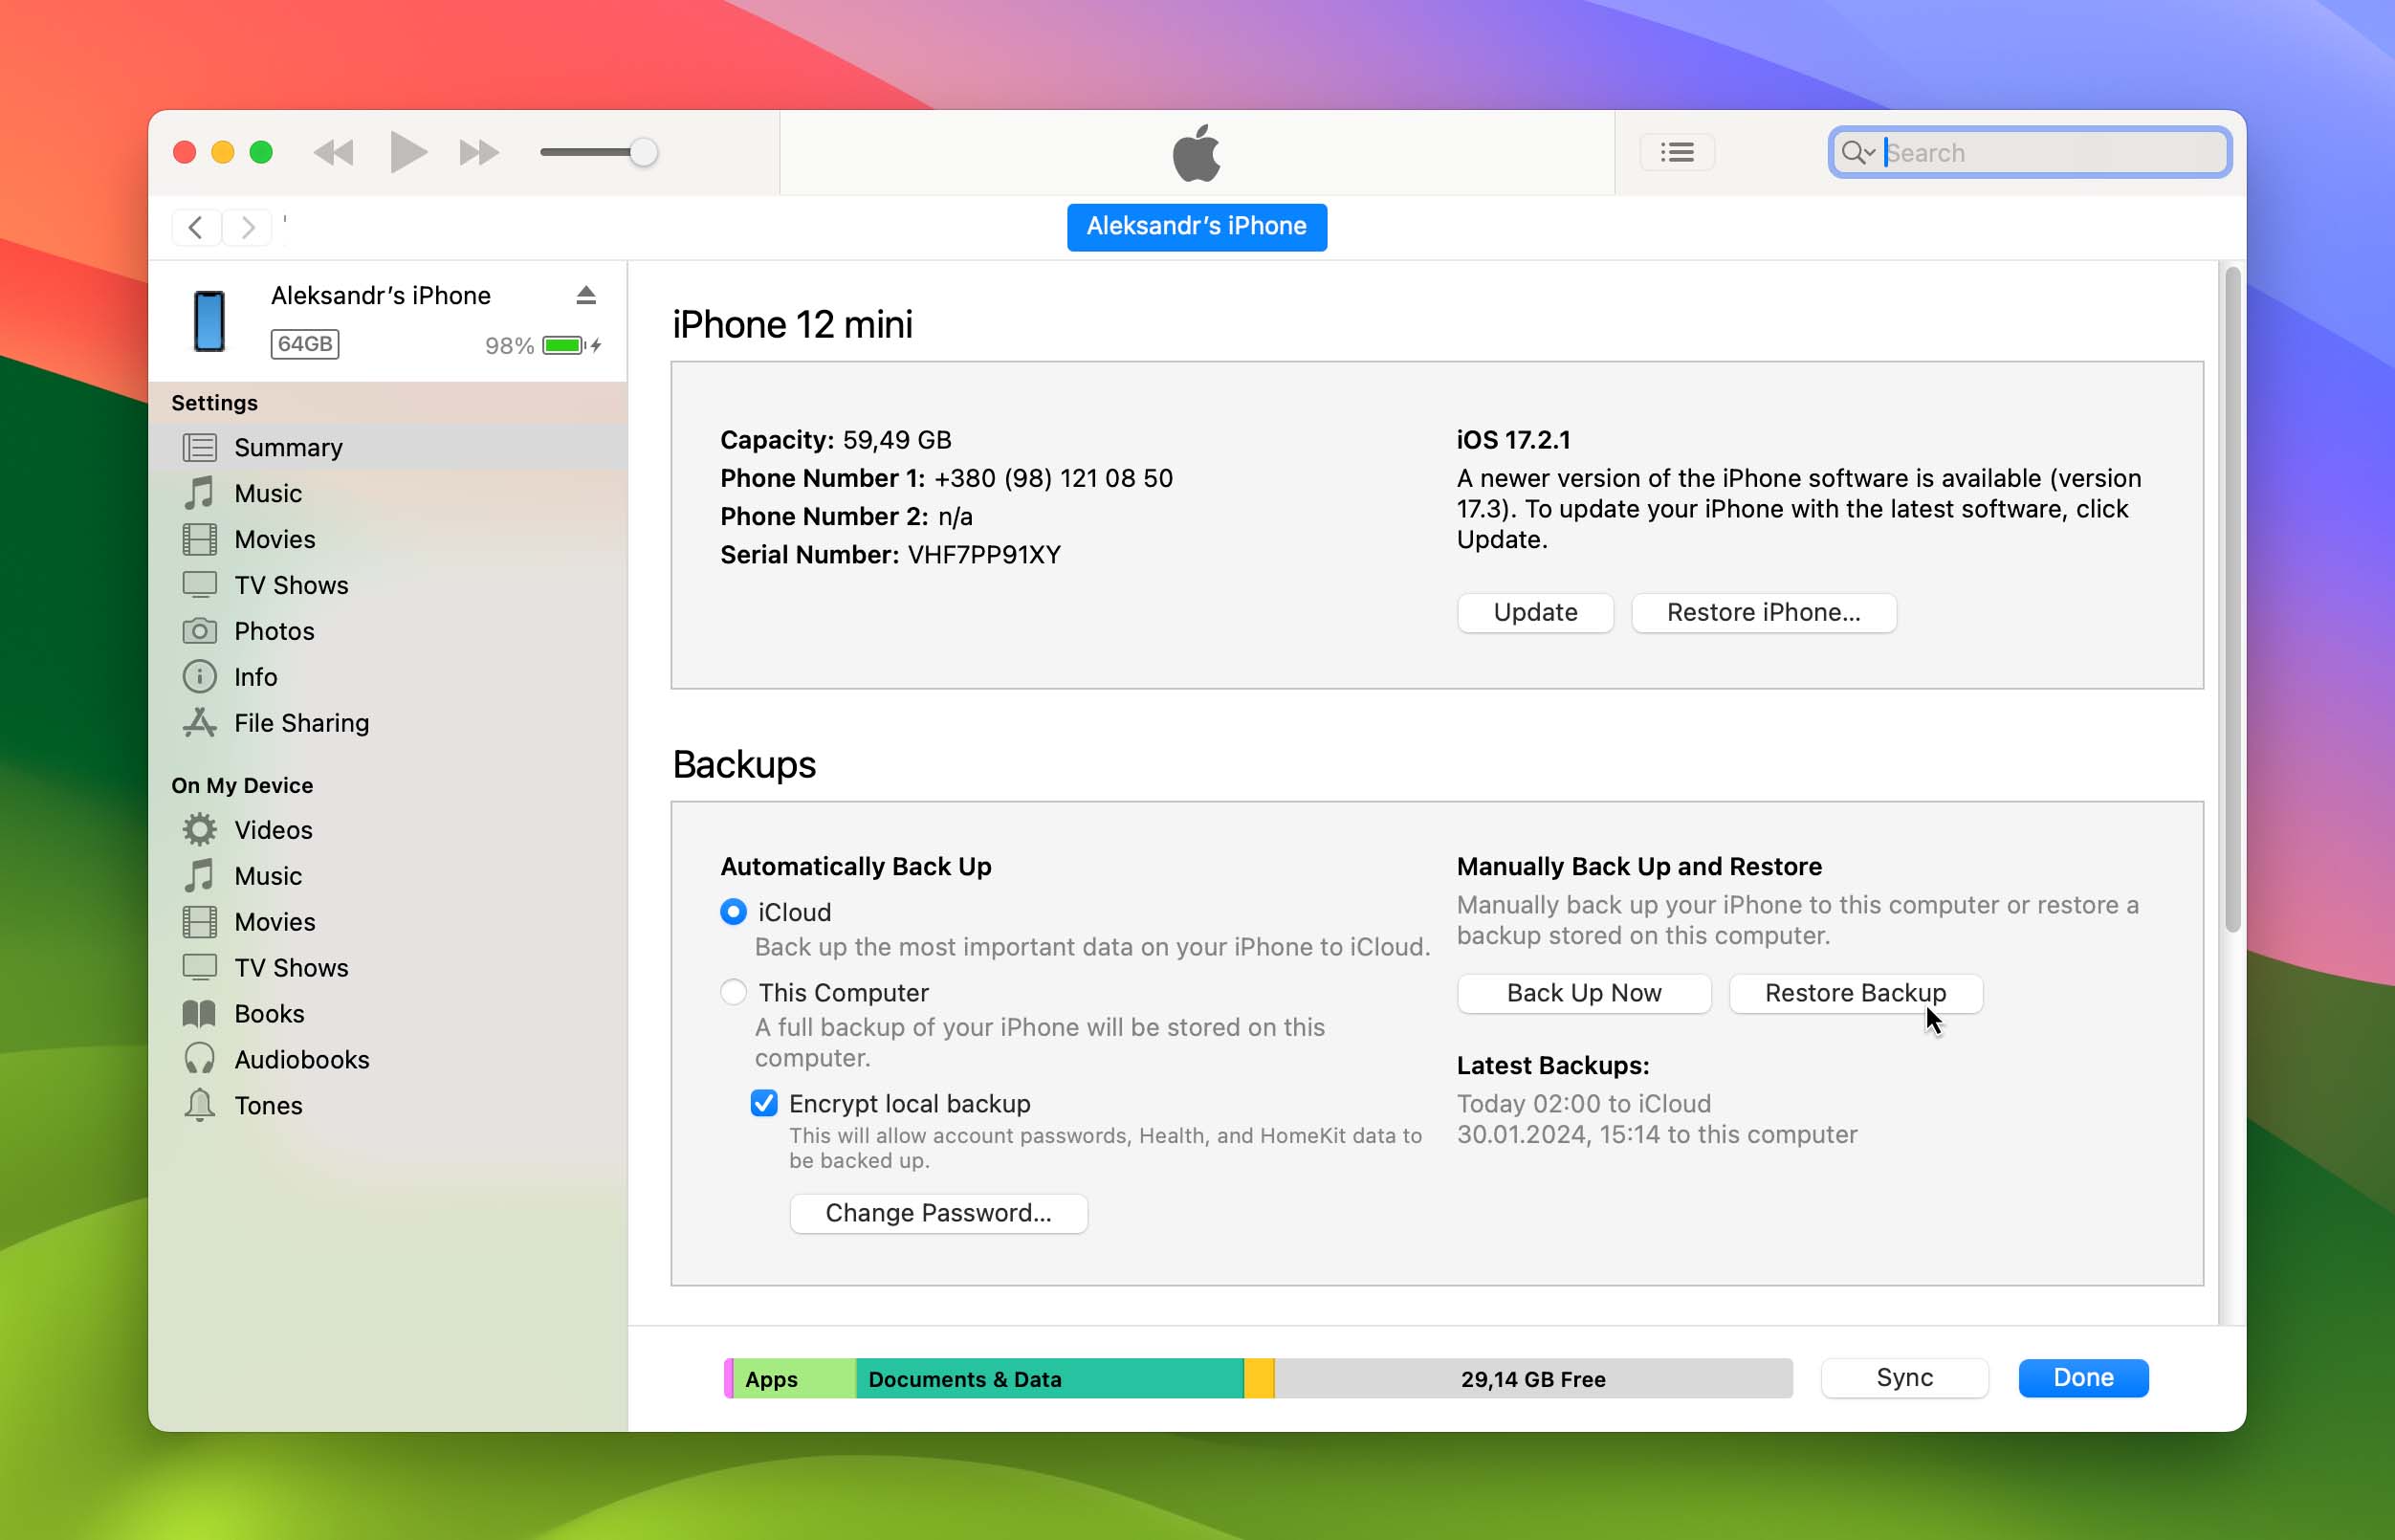
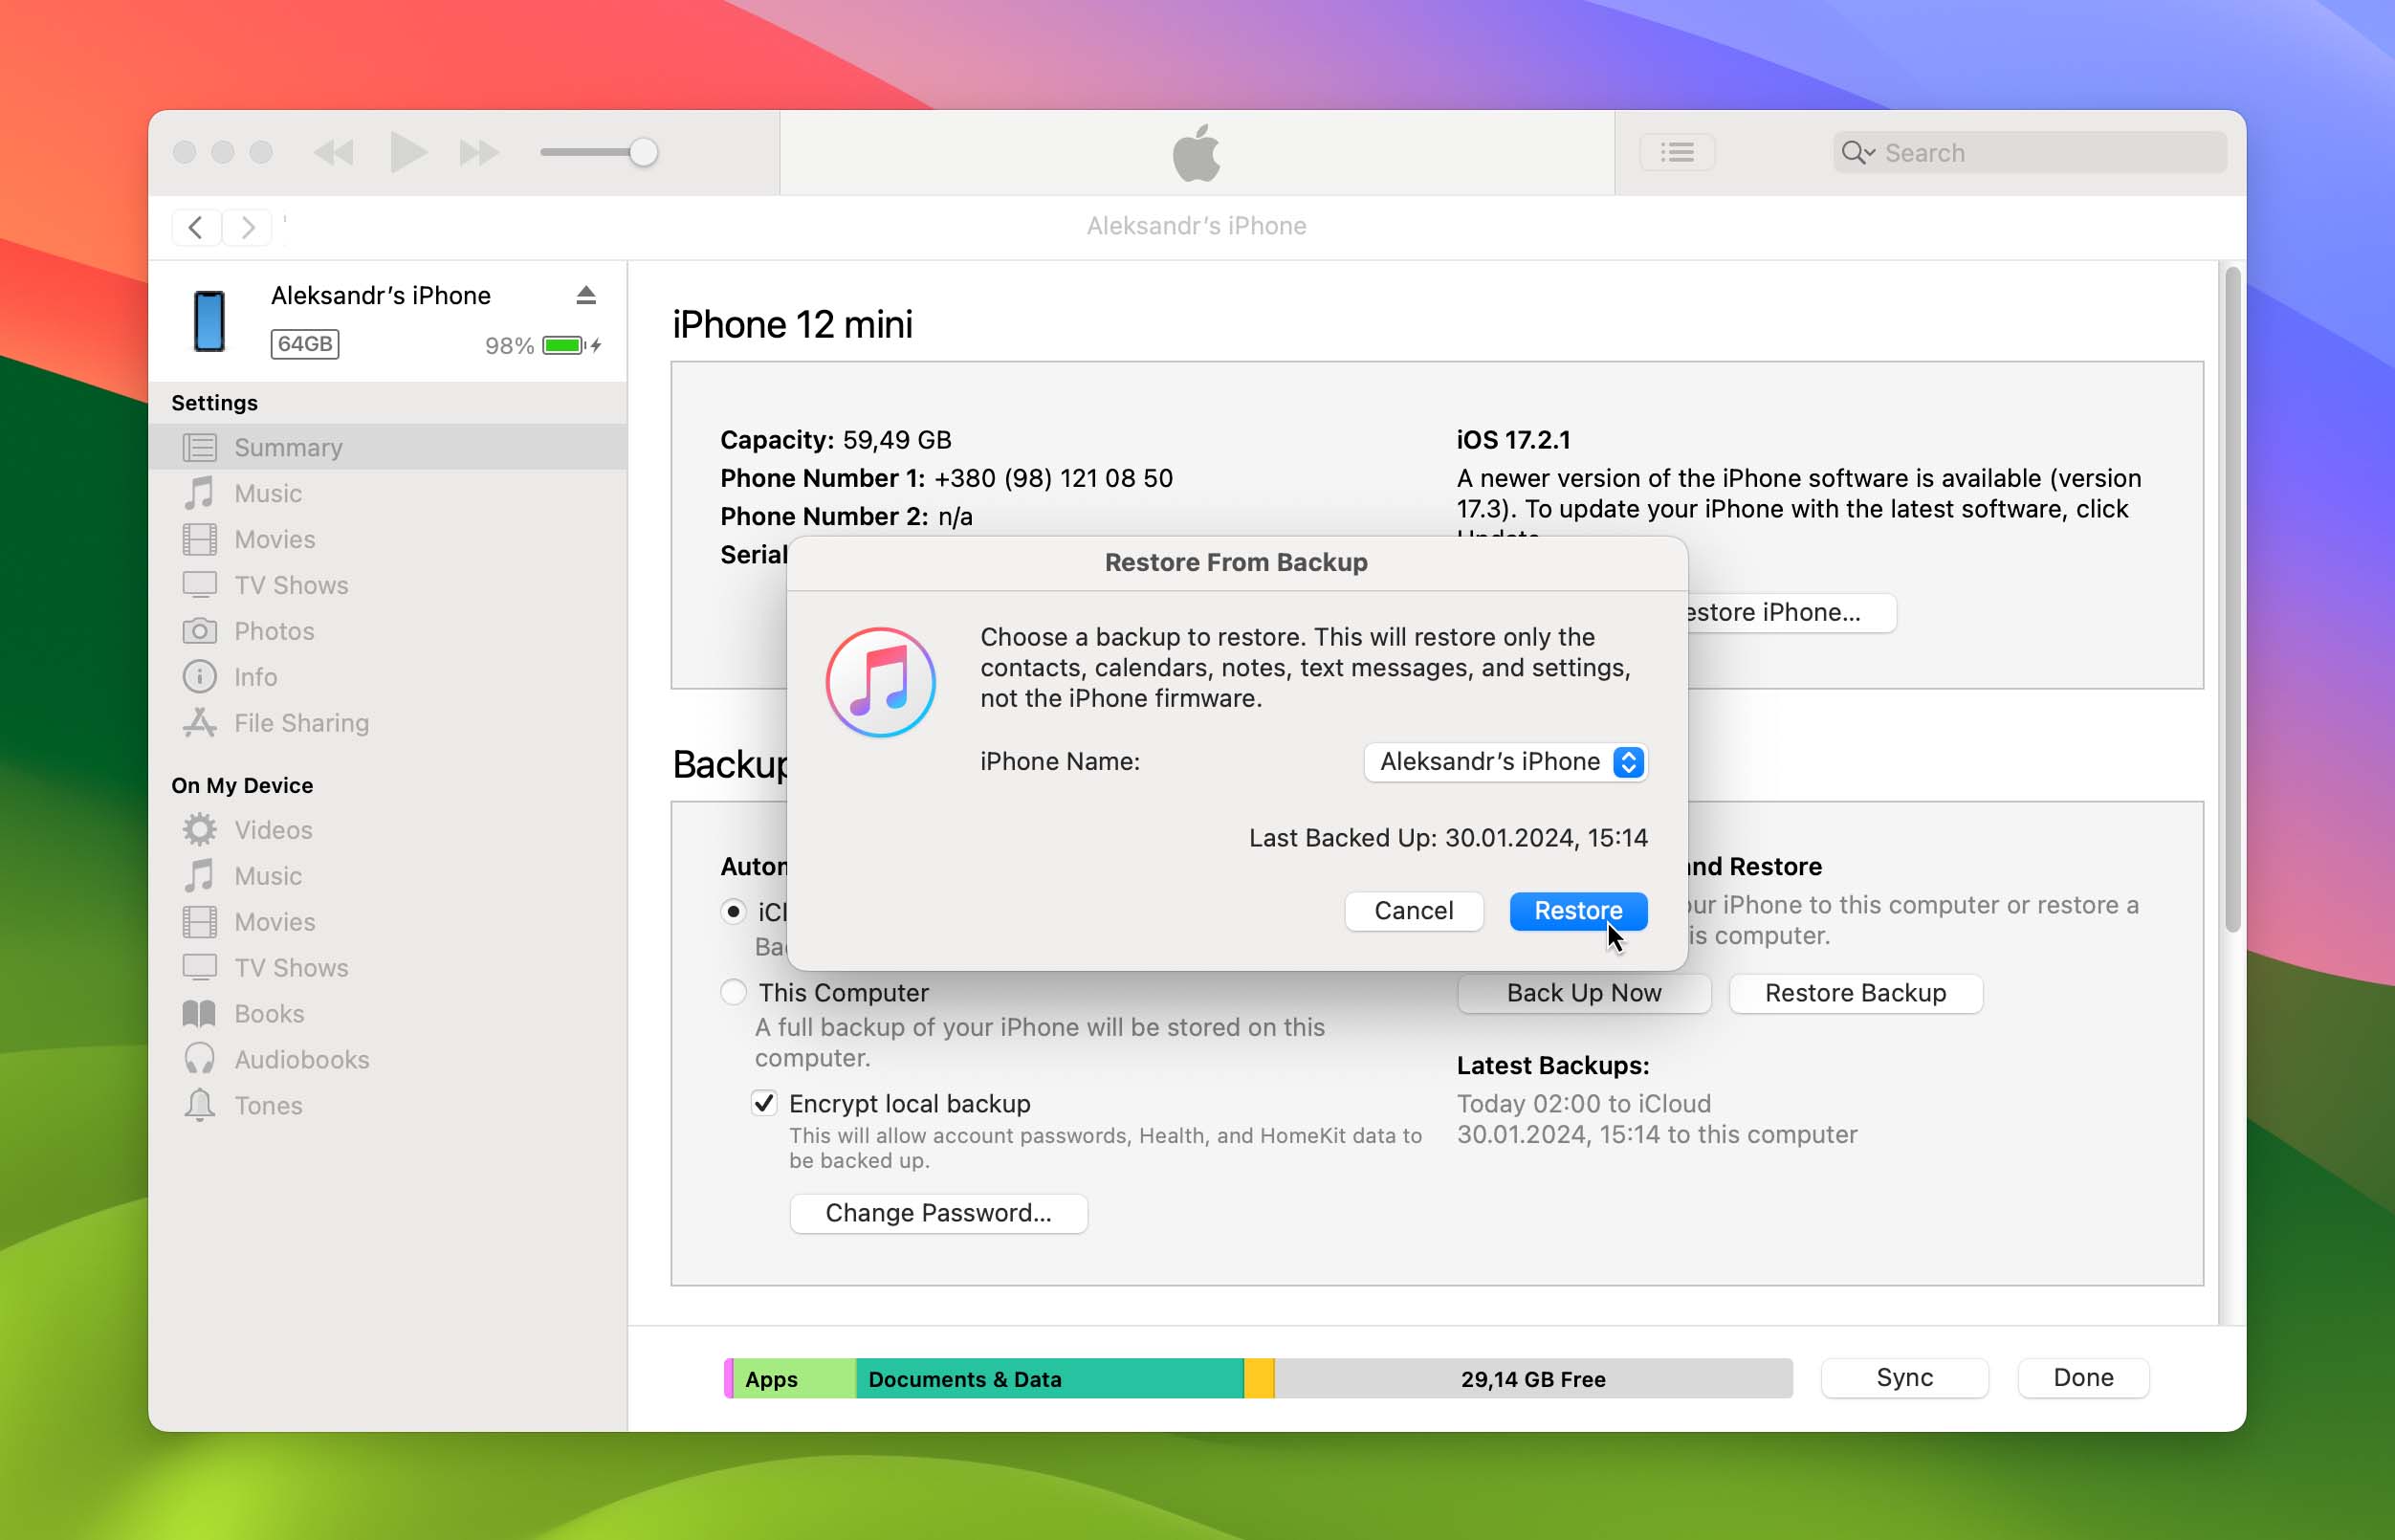
Step 3. Select the Restore Backup option.
Step 4. Pick the most relevant backup.
Step 5. Click Restore and wait for the restore process to finish.
Way 3. How to Recover Deleted Photos via iCloud
 If for some reason the photo isn’t in the Photos “Recently Deleted” area, there’s still a chance it can be recovered via iCloud. Here’s how to restore deleted photos on iPhone without backing it up to the computer first:
Follow these steps to recover deleted photos via iCloud:
- Go to https://www.icloud.com. This provides access to Apple’s cloud services, offered for free.
- Log in with your username and password.
- Once logged in, select “Photos” from the web page.

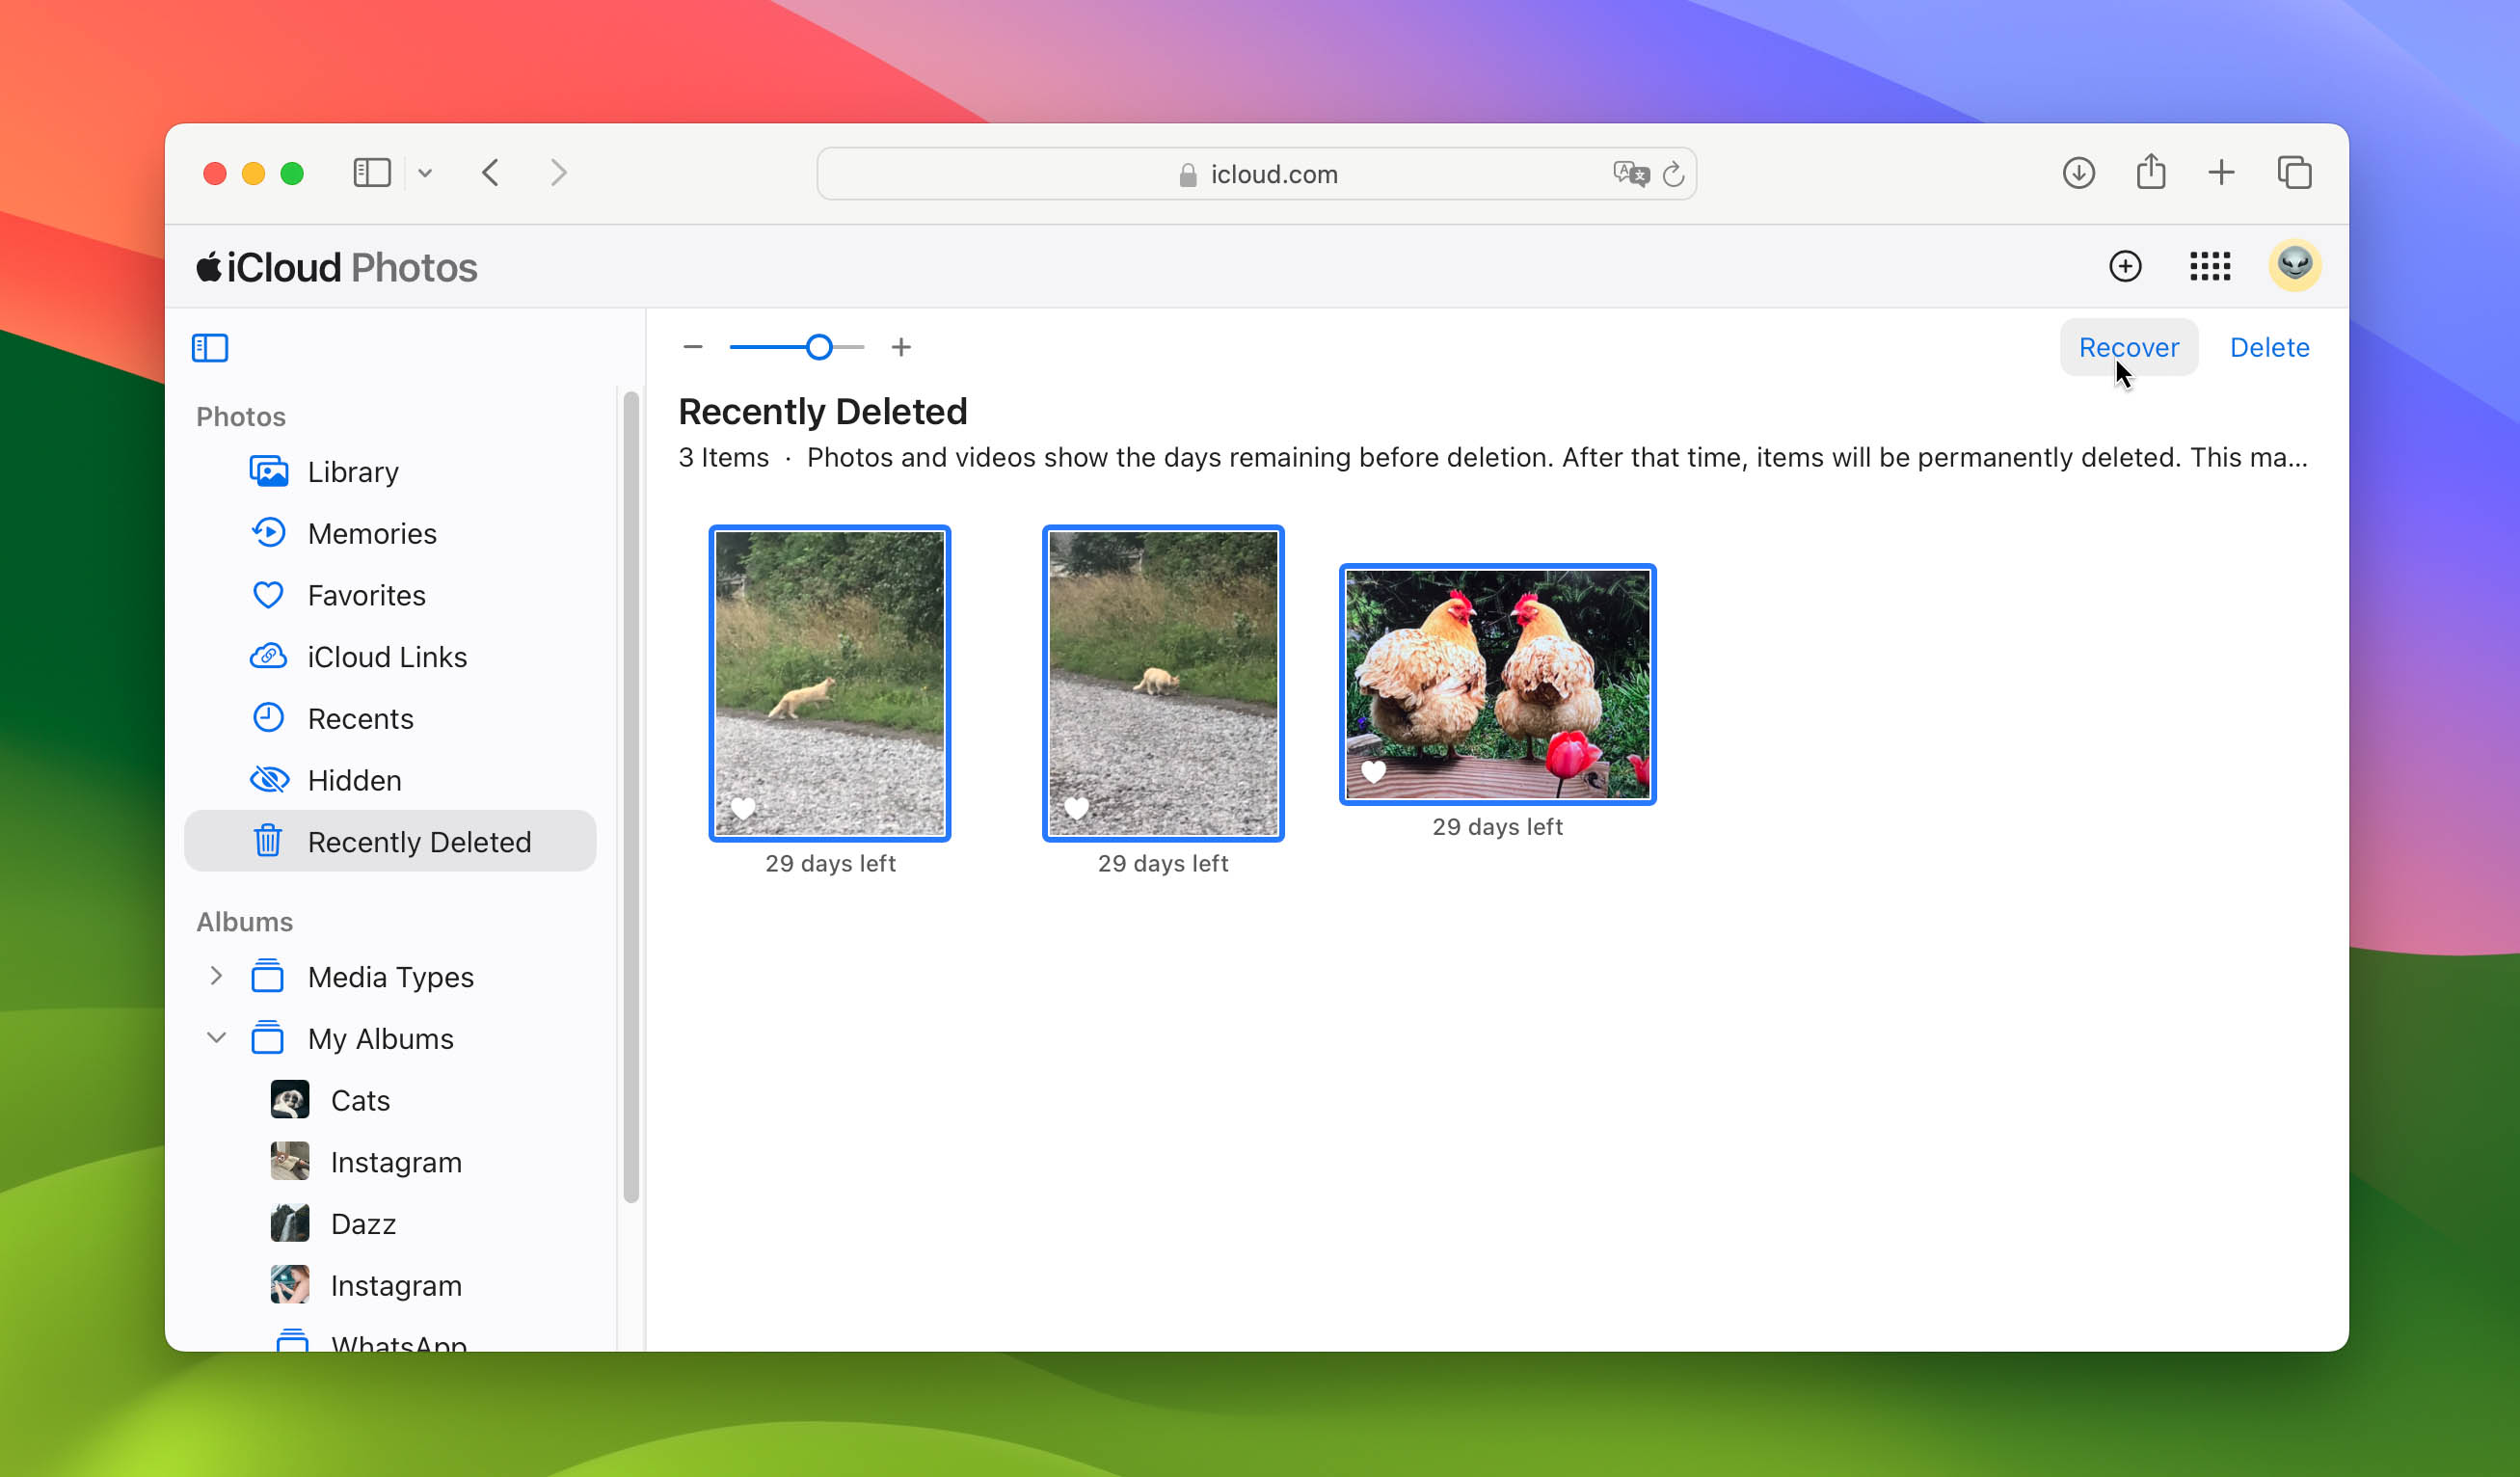
- Click the album marked “Recently Deleted”. Now we have a list of the photos ready for deletion within the next 40 or less days.
- Select the photo we want to restore and click “Recover”. It’ll be back into our photo albums. It will also be restore onto the iPhone once it syncs with the iCloud service again.
Retrieve Deleted Photos on iPhone with Software (without backup) ✅
With the help of a capable third-party iPhone recovery software solution, you may be able to recover deleted photos even without a backup. The likelihood of retrieving deleted files from an iPhone without any backup is quite slim. It is advisable to verify the existence of any overlooked backups, possibly stored in iCloud or created via iTunes (Finder) during previous connections of your iPhone to a computer. Disk Drill iPhone Recovery free version is designed to assist in locating and recuperating data from such overlooked backups.
Steps to Recover Deleted Photos from an iPhone on Mac
You can download Disk Drill for free at the official website on your Mac computer, It supports all current iOS devices, including the iPhone 15 Plus, iPhone 15, and iPhone 15 Pro Max running the latest iOS 17.
- Download Disk Drill. Open the .dmg file and drag the Disk Drill application to the Applications folder on your Mac hard drive.
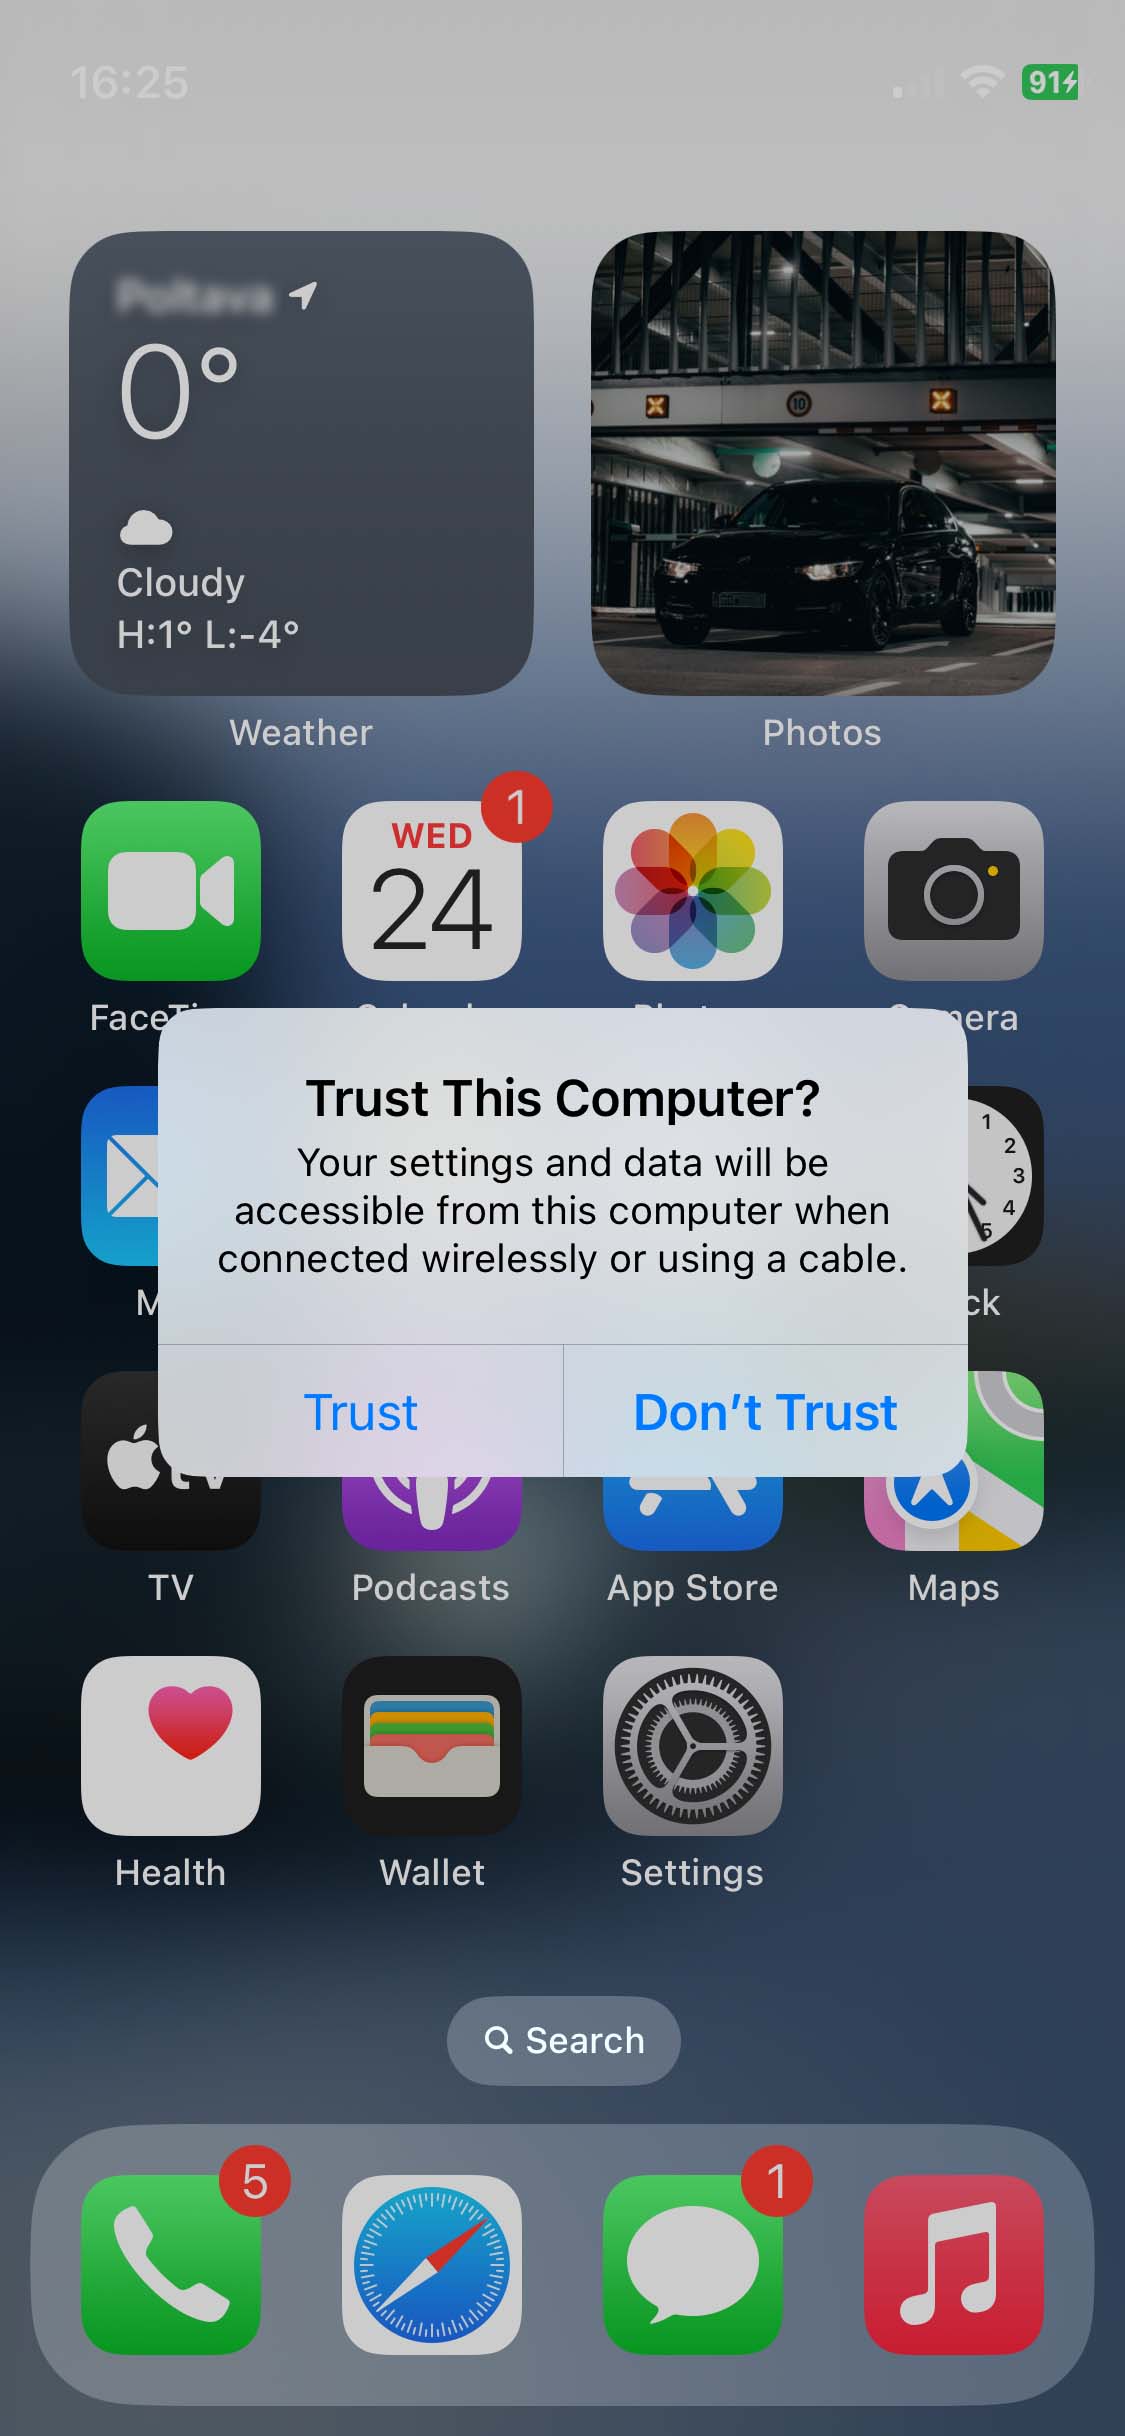
- Plug the iPhone into the computer. If asked by the iPhone if we trust this computer, select “Trust” and enter the unlocking code.
- Close all programs on the Mac. Especially those that connect to the iPhone like iTunes, iPhoto, and the like. The less communication that other applications have with the iPhone, the better it will be.
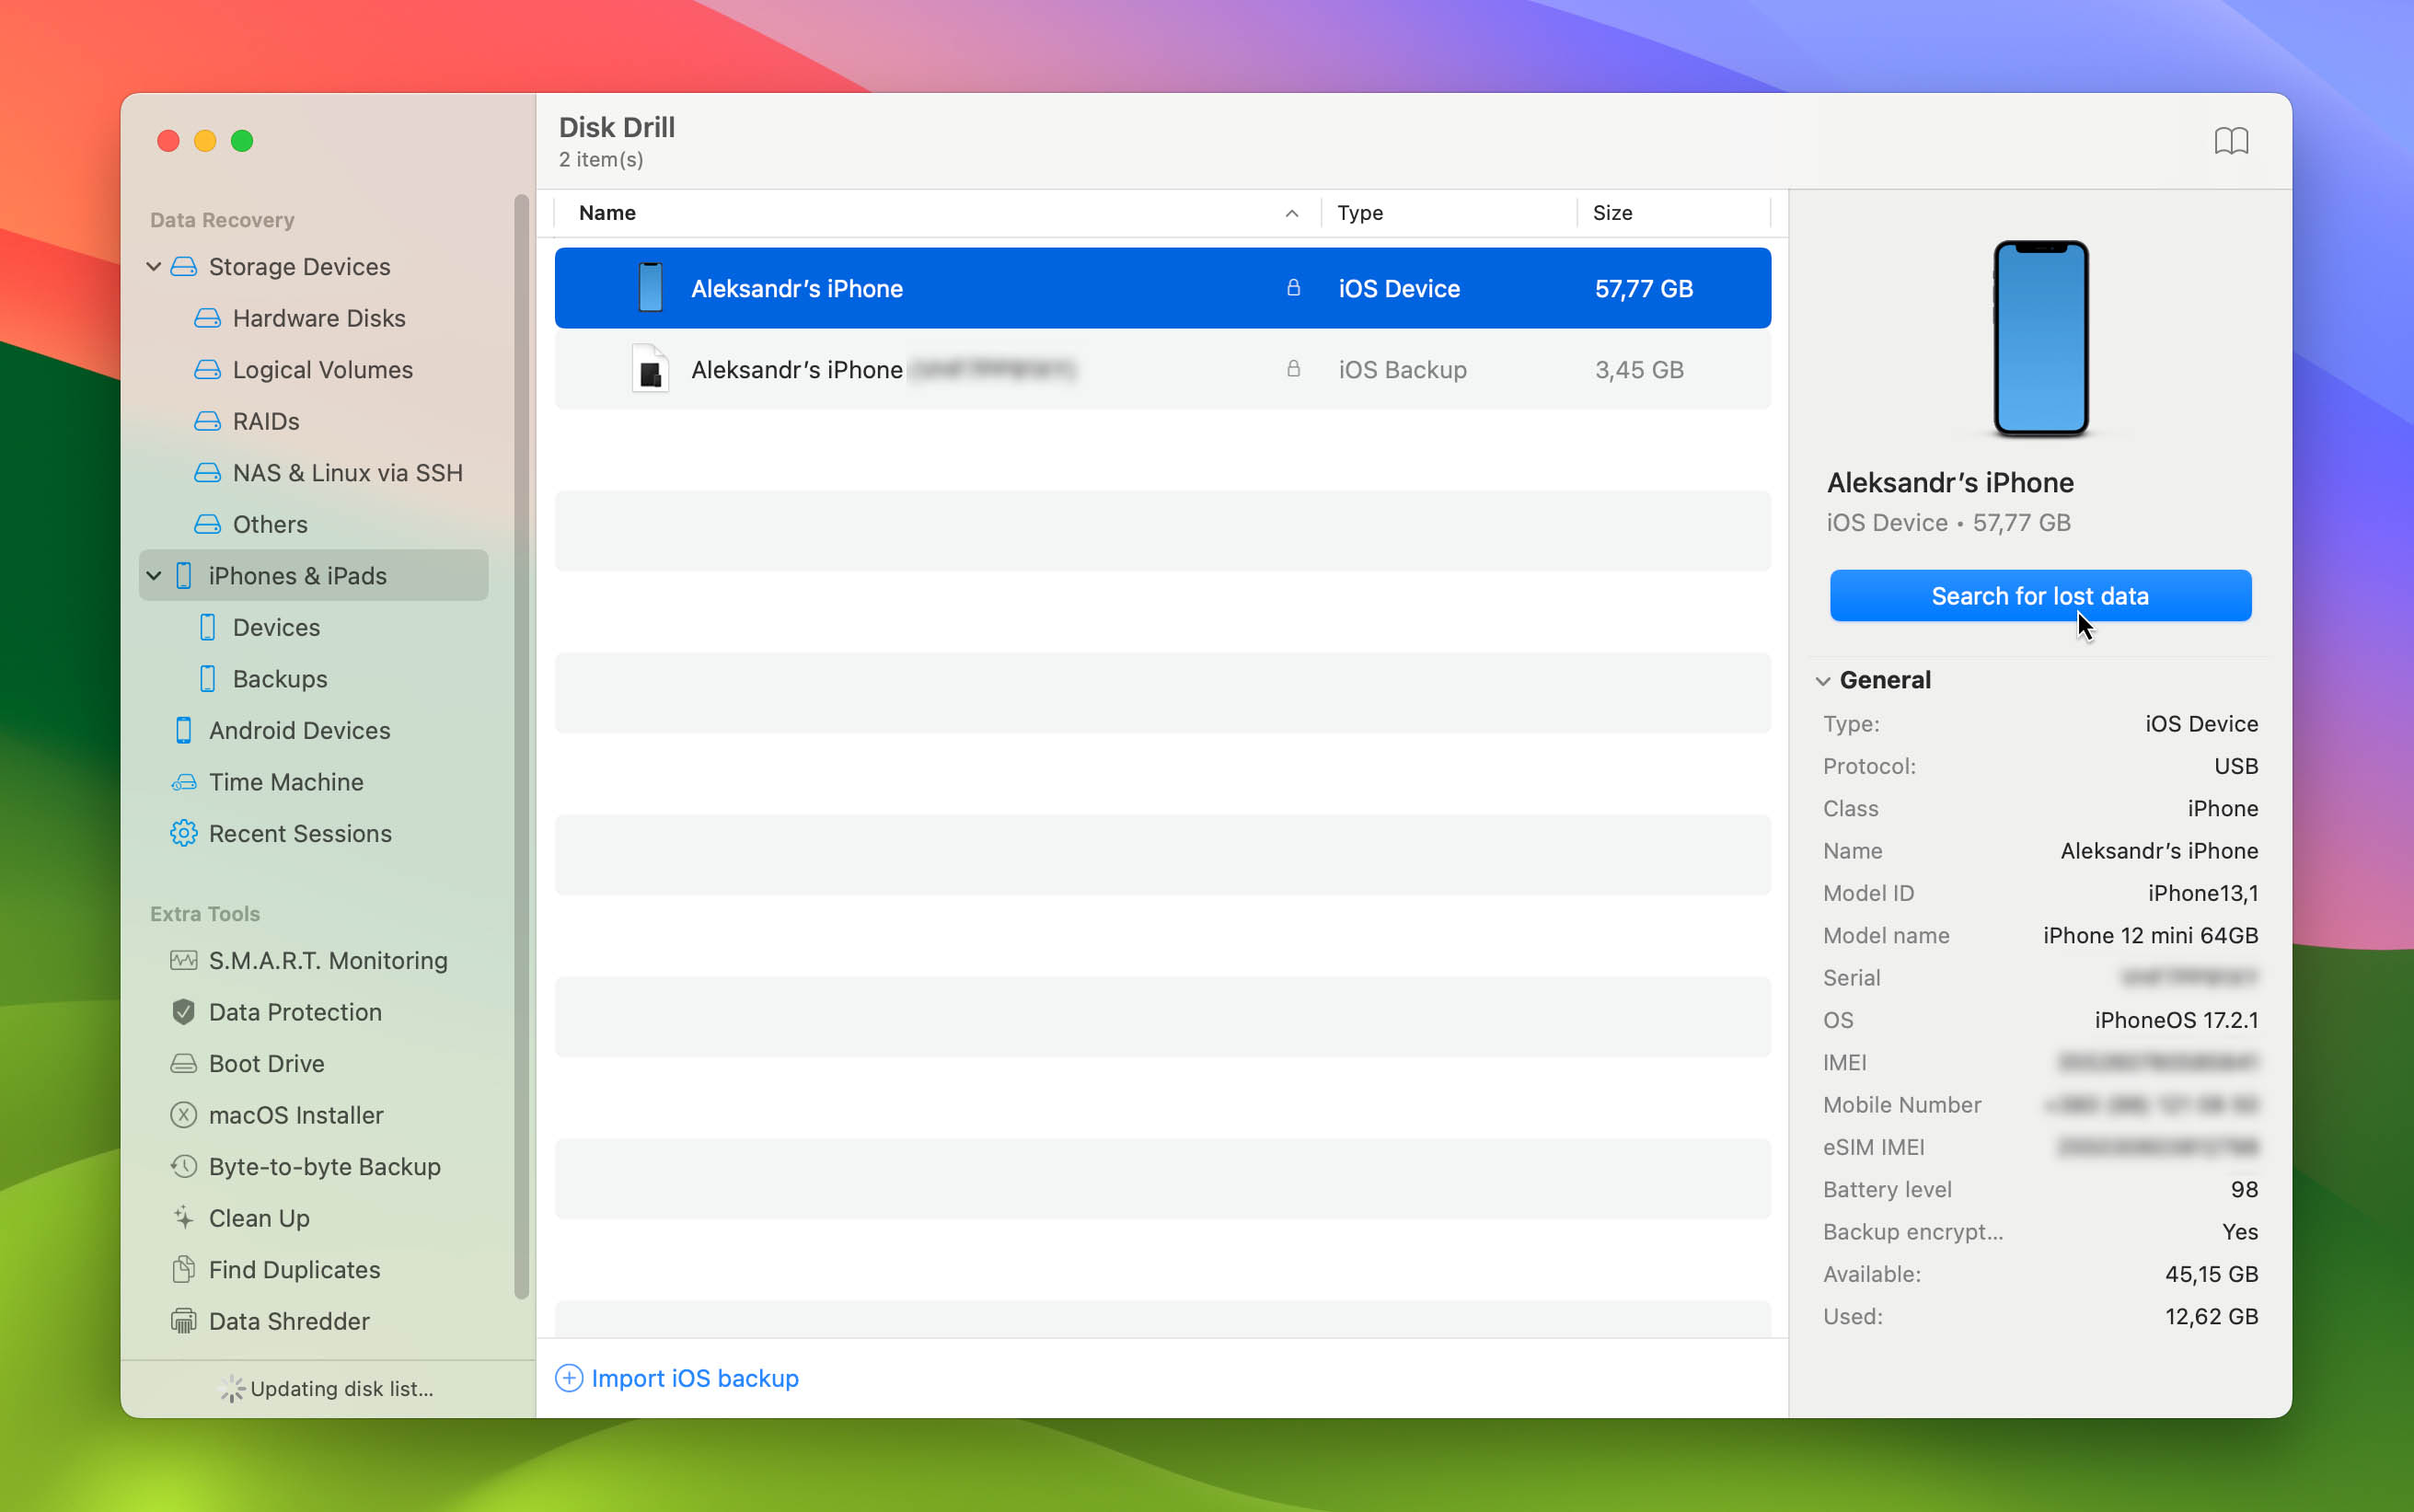
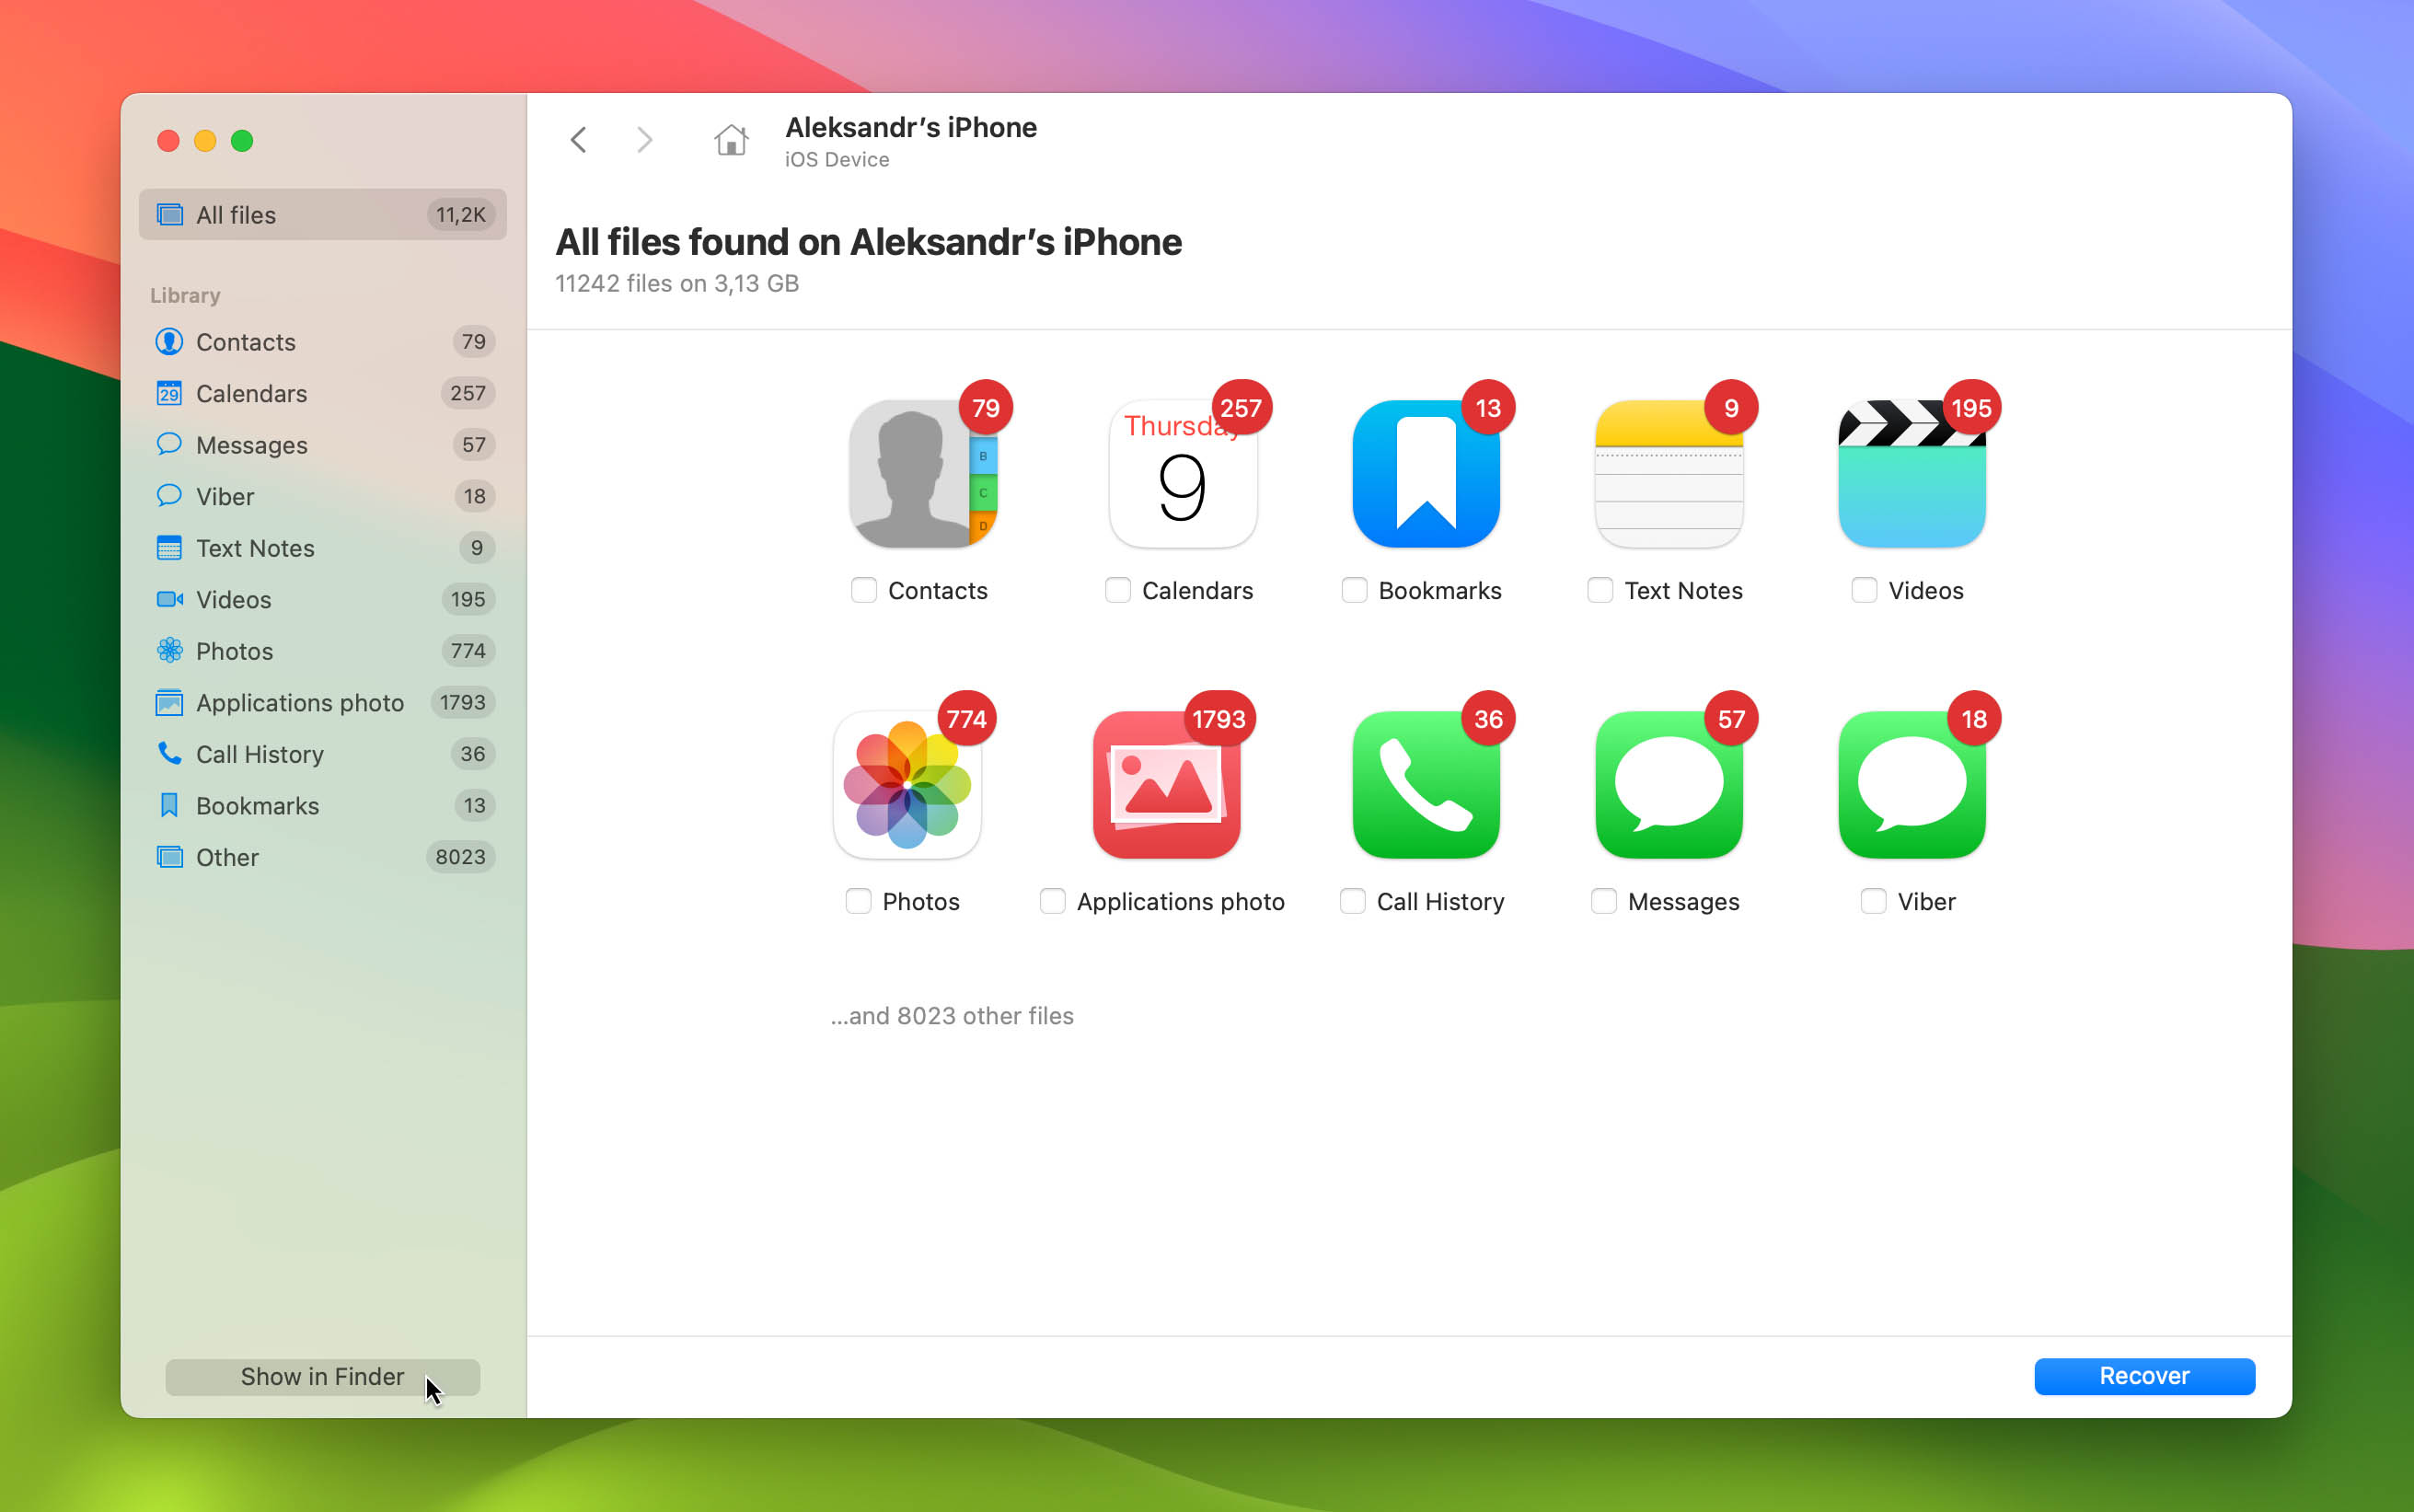
- Double click on Disk Drill to run it. There are several installation procedures to be aware of, as well as additional file protections and monitoring that Disk Drill offers. When everything is finished, we’ll see a list of drives and devices.
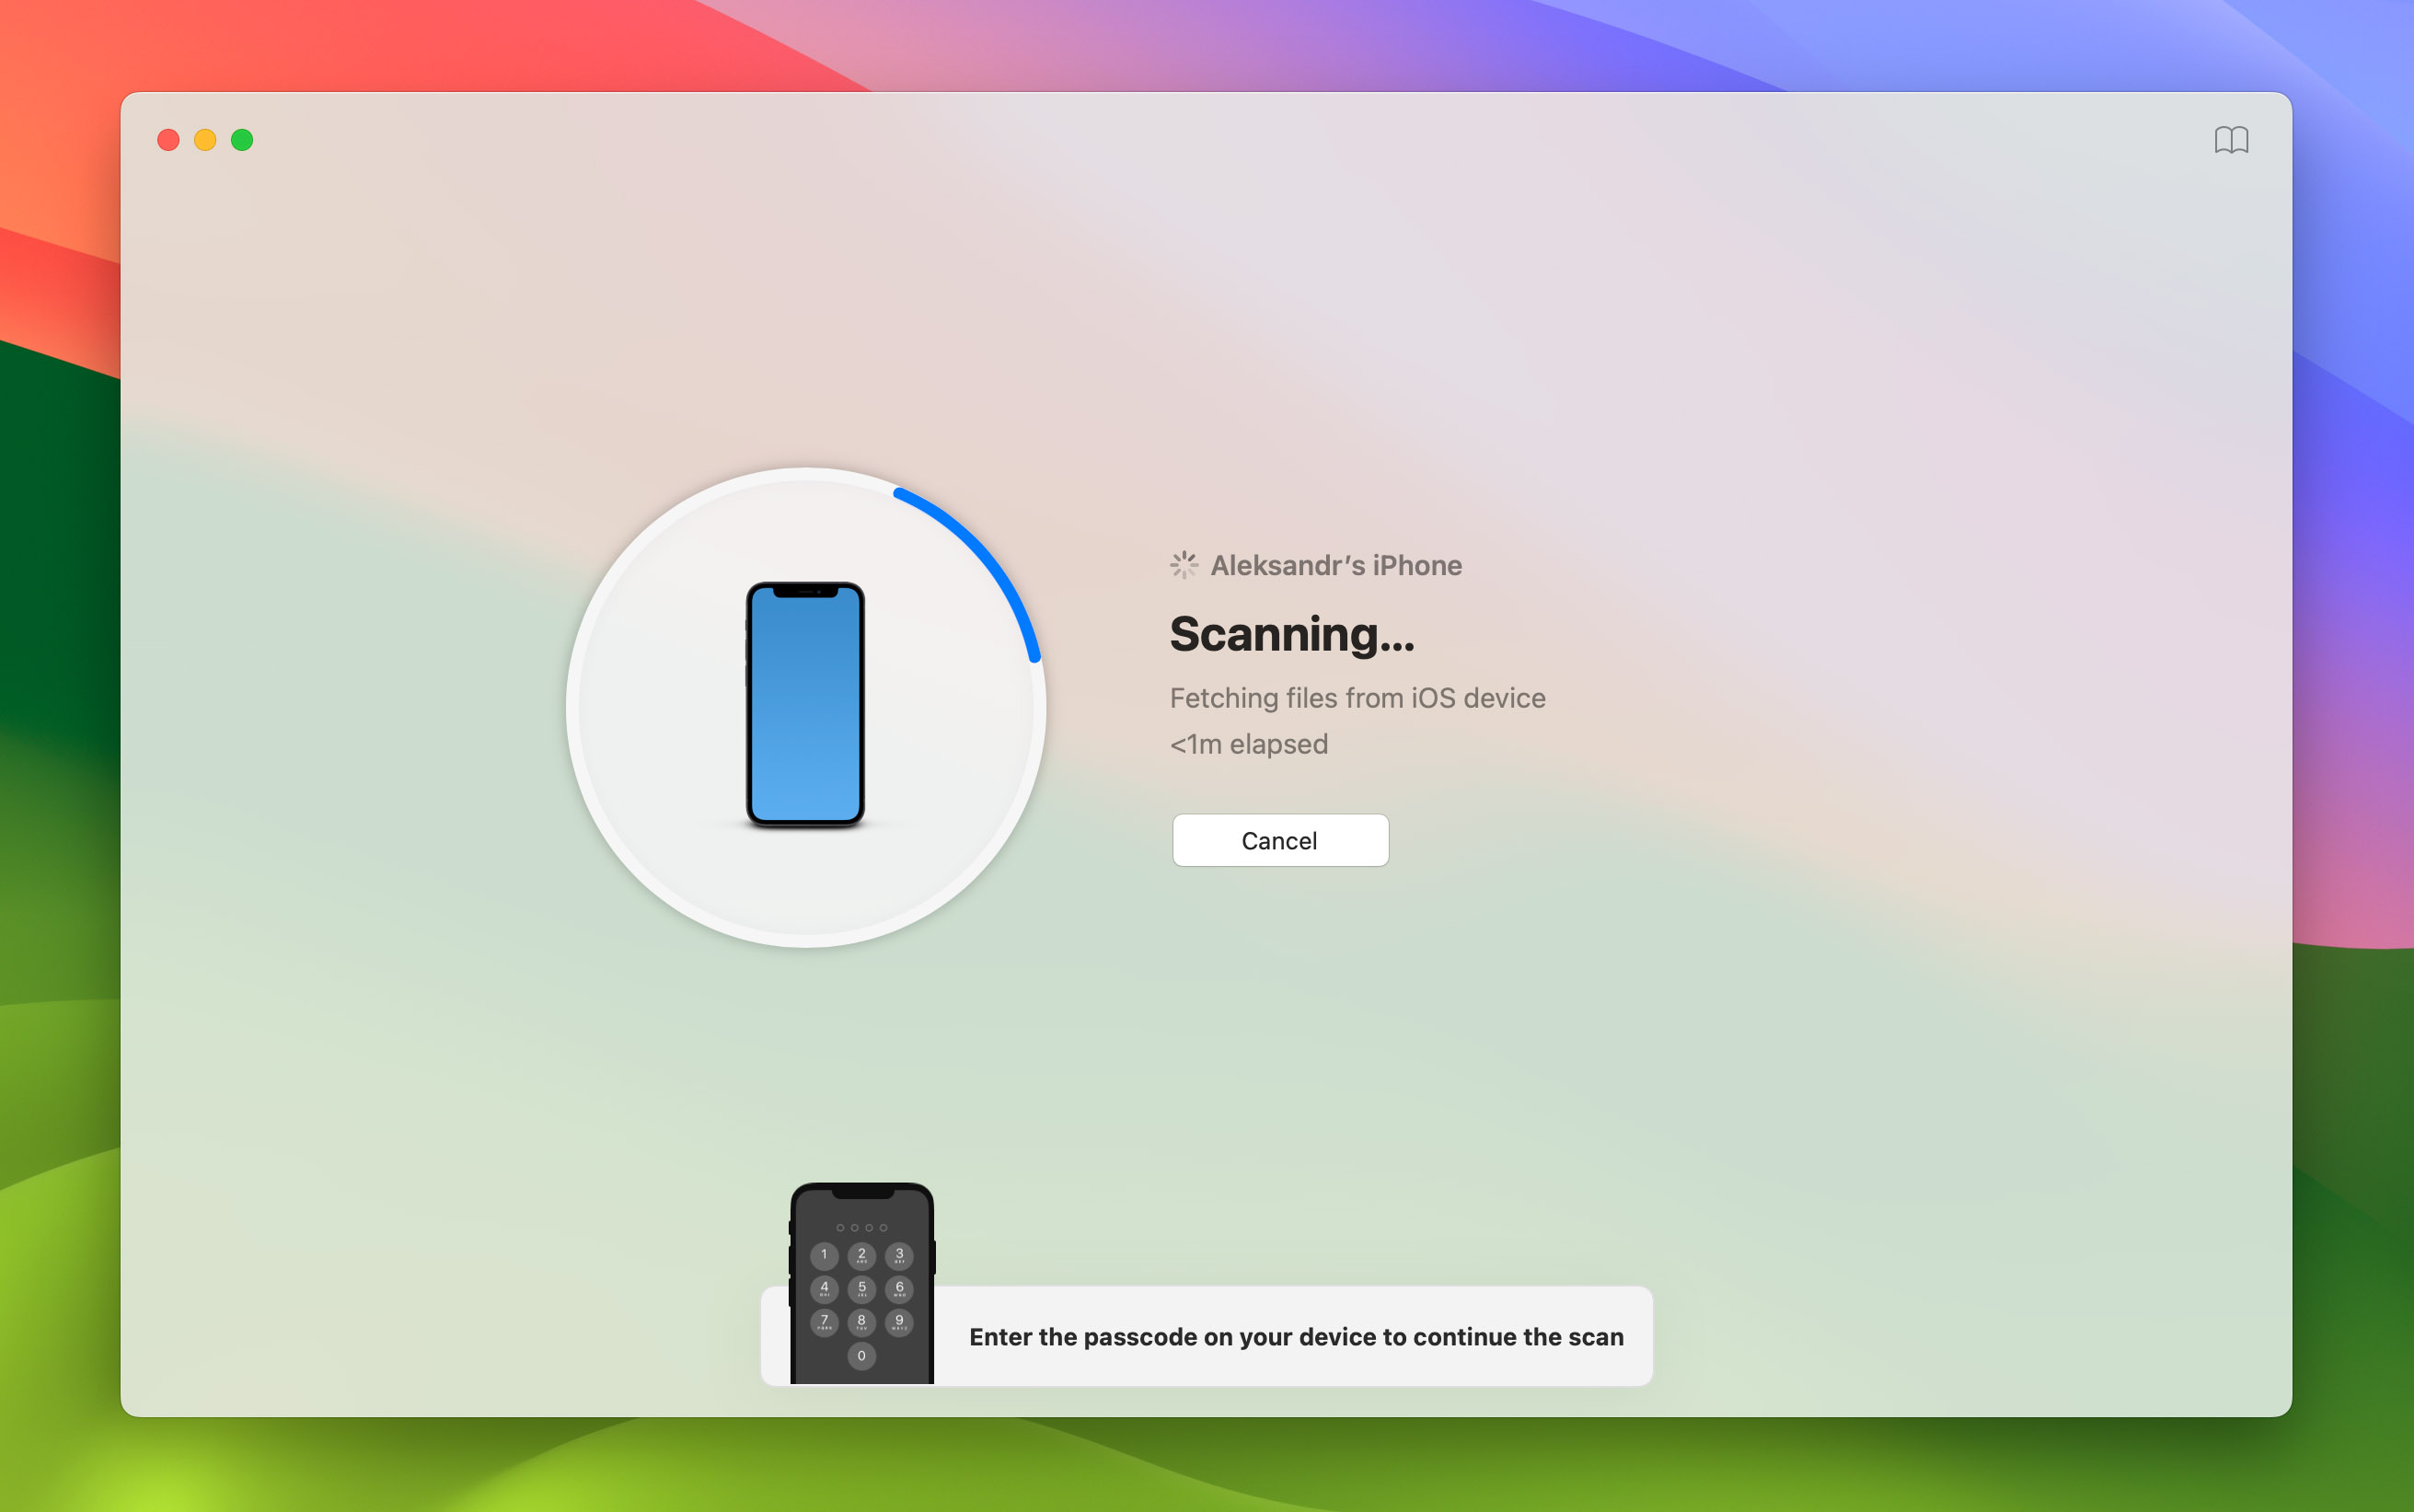
- Navigate to the iPhones & iPad section in the left pane, select your iPhone, and then click on “Search for lost data”. This will prompt Disk Drill to create a backup of your iPhone and then analyze that backup for recoverable files. Keep in mind that with iOS 16 and later, you’ll need to enter your iPhone unlock code directly on your iPhone during this process.
- Enter the iPhone’s encryption password if Disk Drill asks for it. This is the one used for encrypting iPhone backups through iTunes on the local computer.
- Wait. This is an important part. Disk Drill will be analyzing the iPhones databases and files, and analyzing what can be recovered. During this time, don’t use the iPhone or anything that might interact with it. We want to maximize our chances of getting back information.
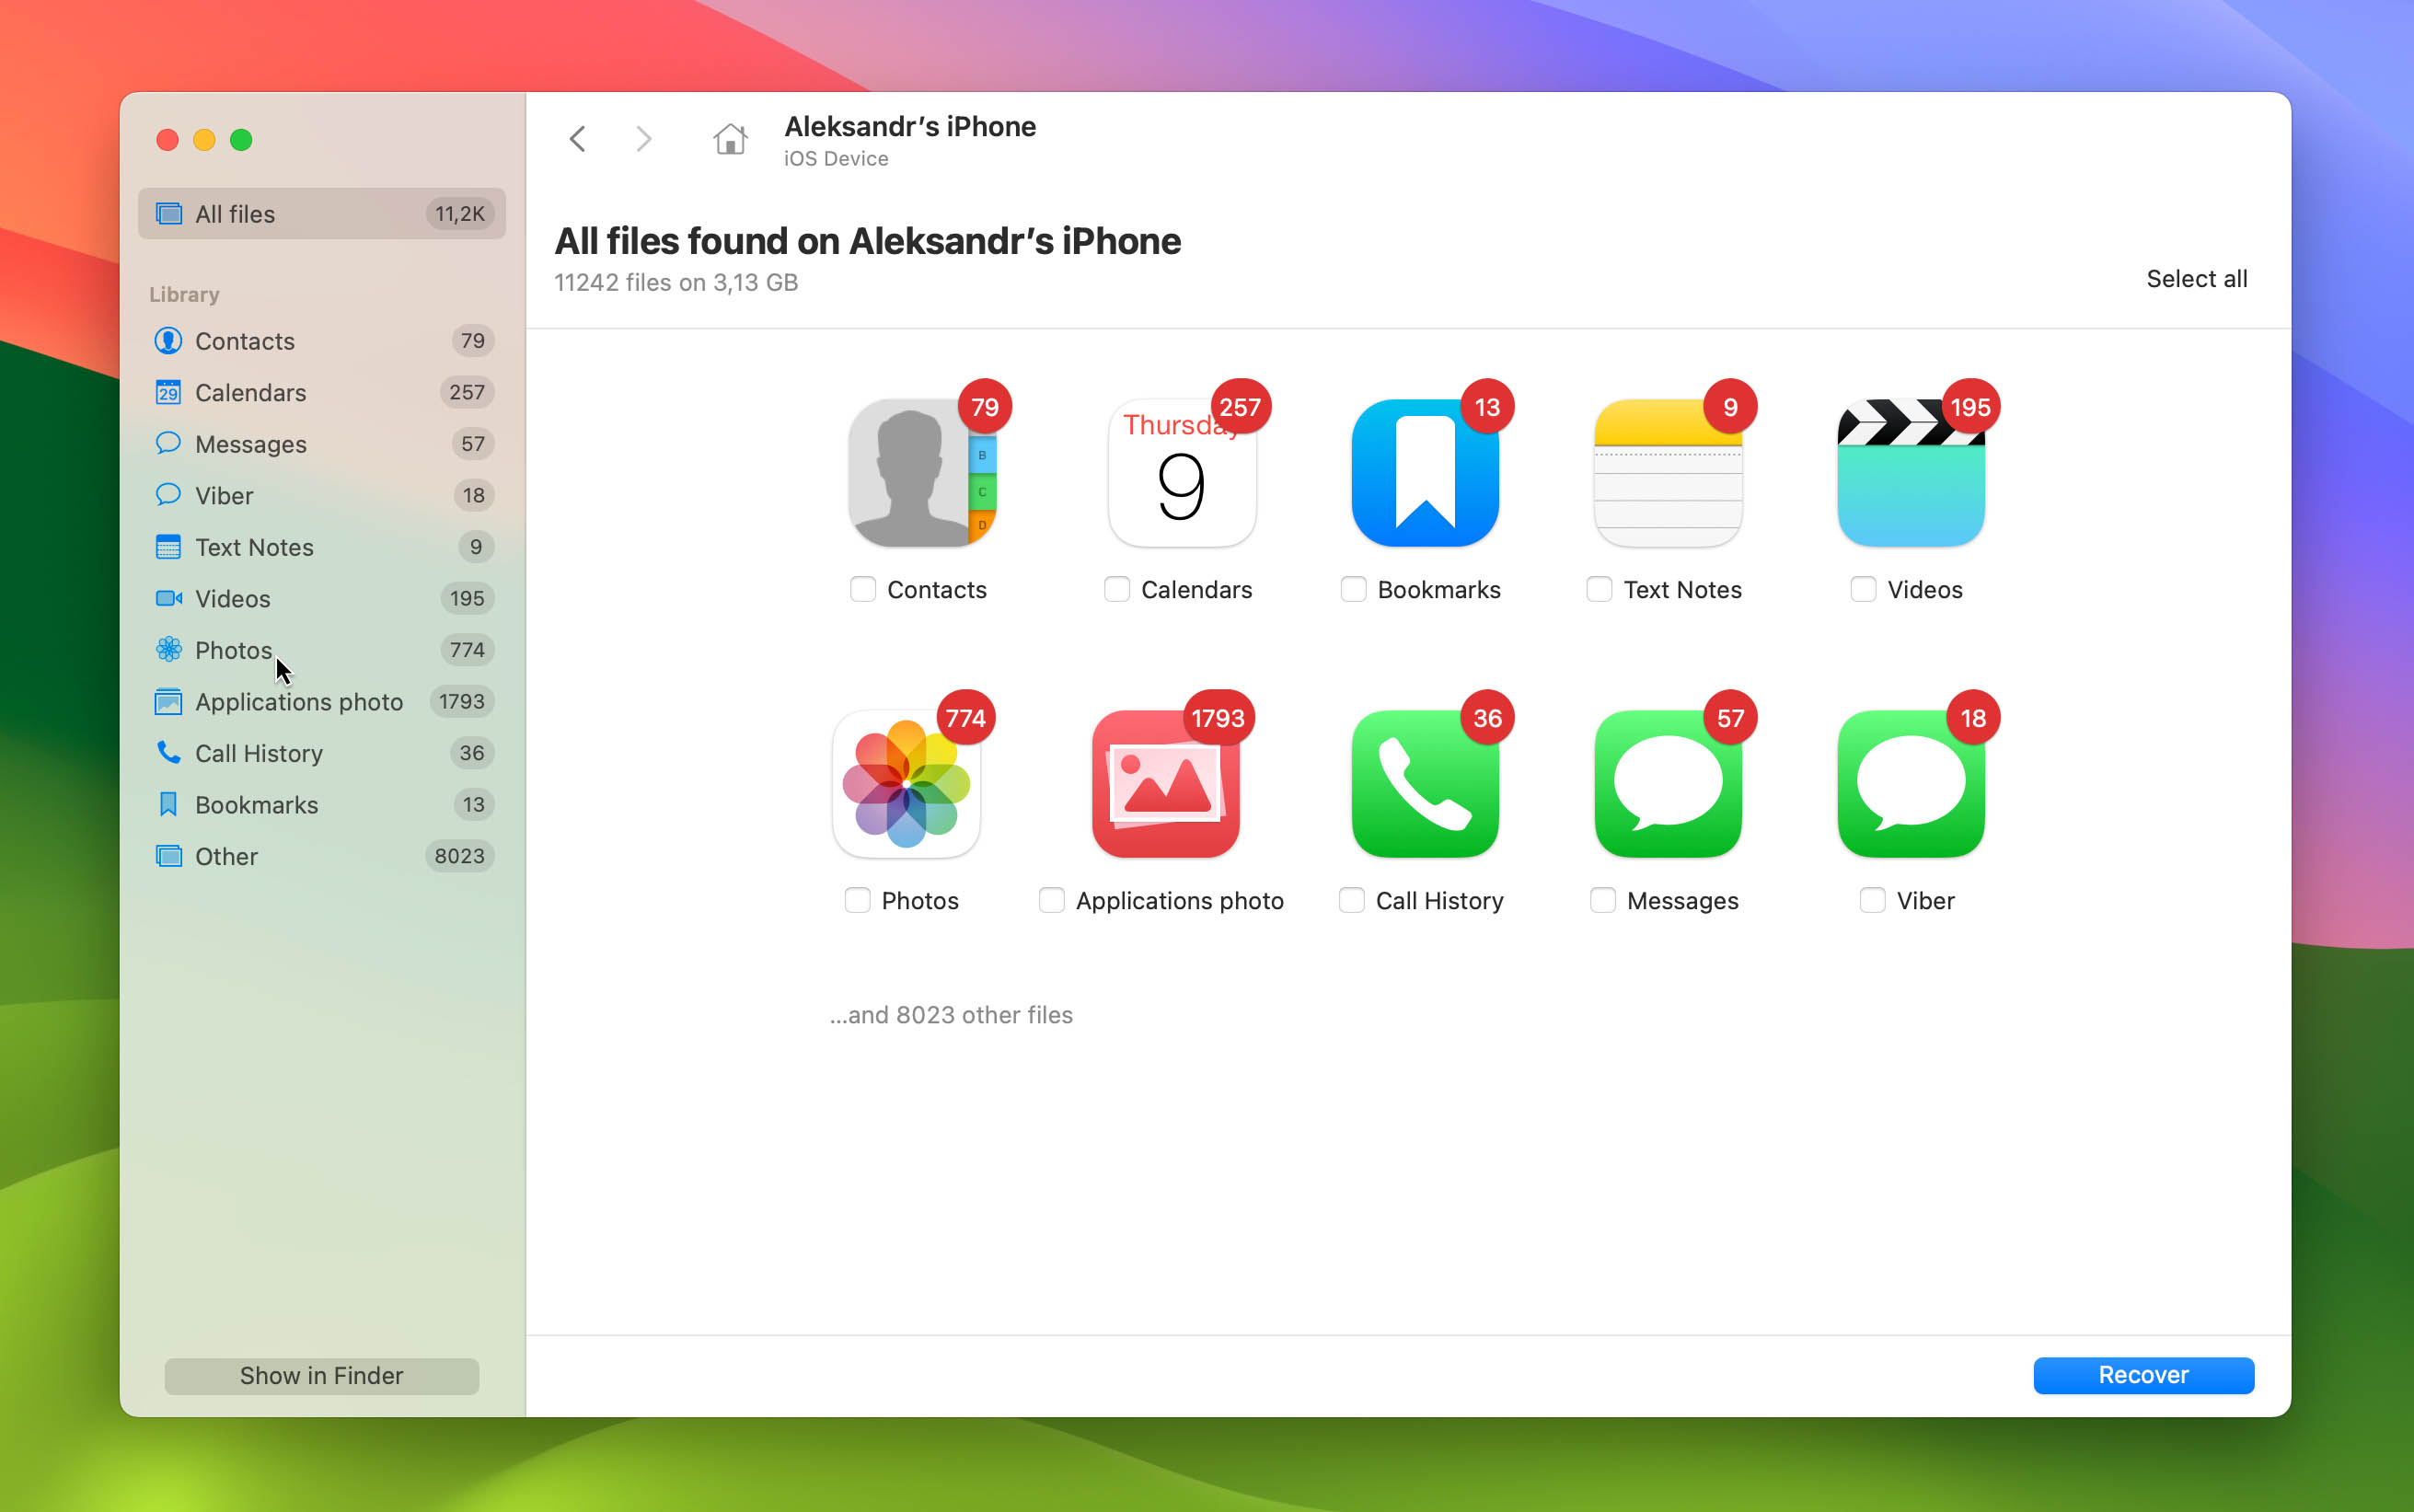
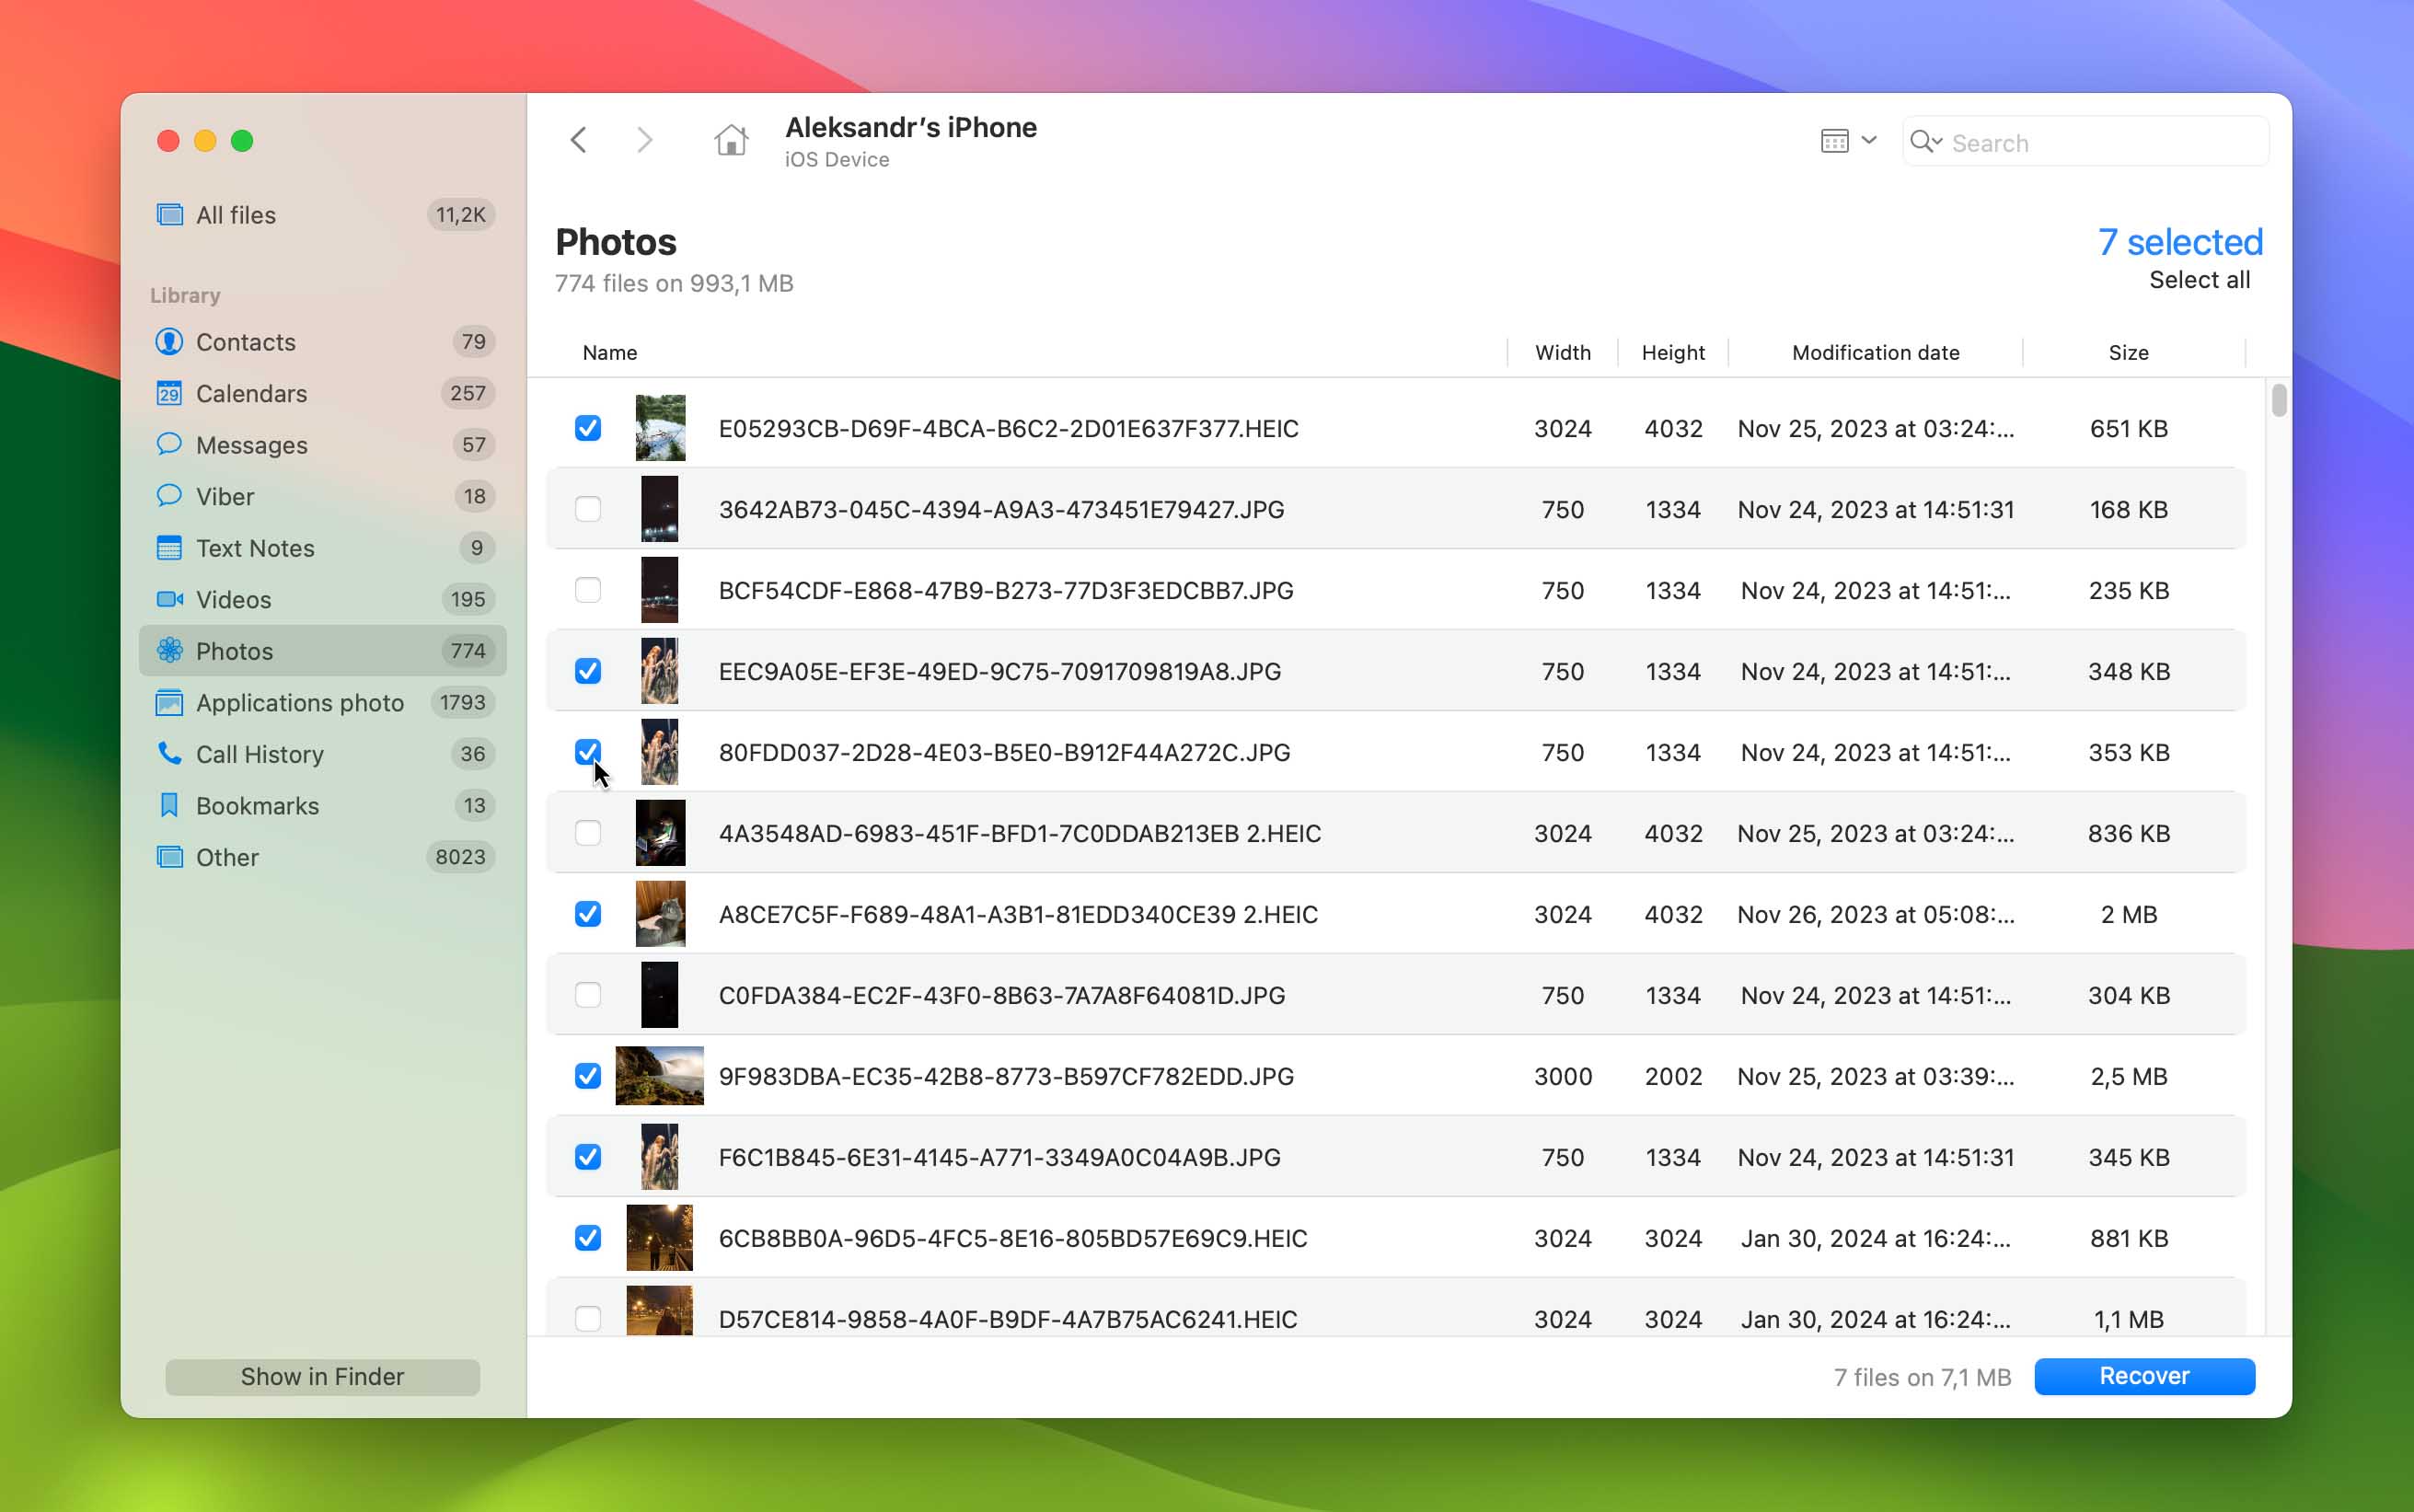
- Review the files that Disk Drill displays when the scan is complete. This will include everything from iMessages, Notes, and other information that the iPhone can store. Since we’re only interested in photos, you can activate the corresponding filter in the left pane. You can click on any photo to preview it before recovery.
- Once you’ve identified the photos you want to restore, select them, click the “Recover” button, and choose a safe location to save them. Click the “Next” button to finalize the recovery process.

Alternatively, you can tell Disk Drill to show your recoverable photos directly in Finder by following these alternative steps:
- Click “Show in Finder.” Note that this option is available only in the Pro version of Disk Drill.
- Navigate to a folder marked
“Recoverable,”which is where the recovered files will be mounted.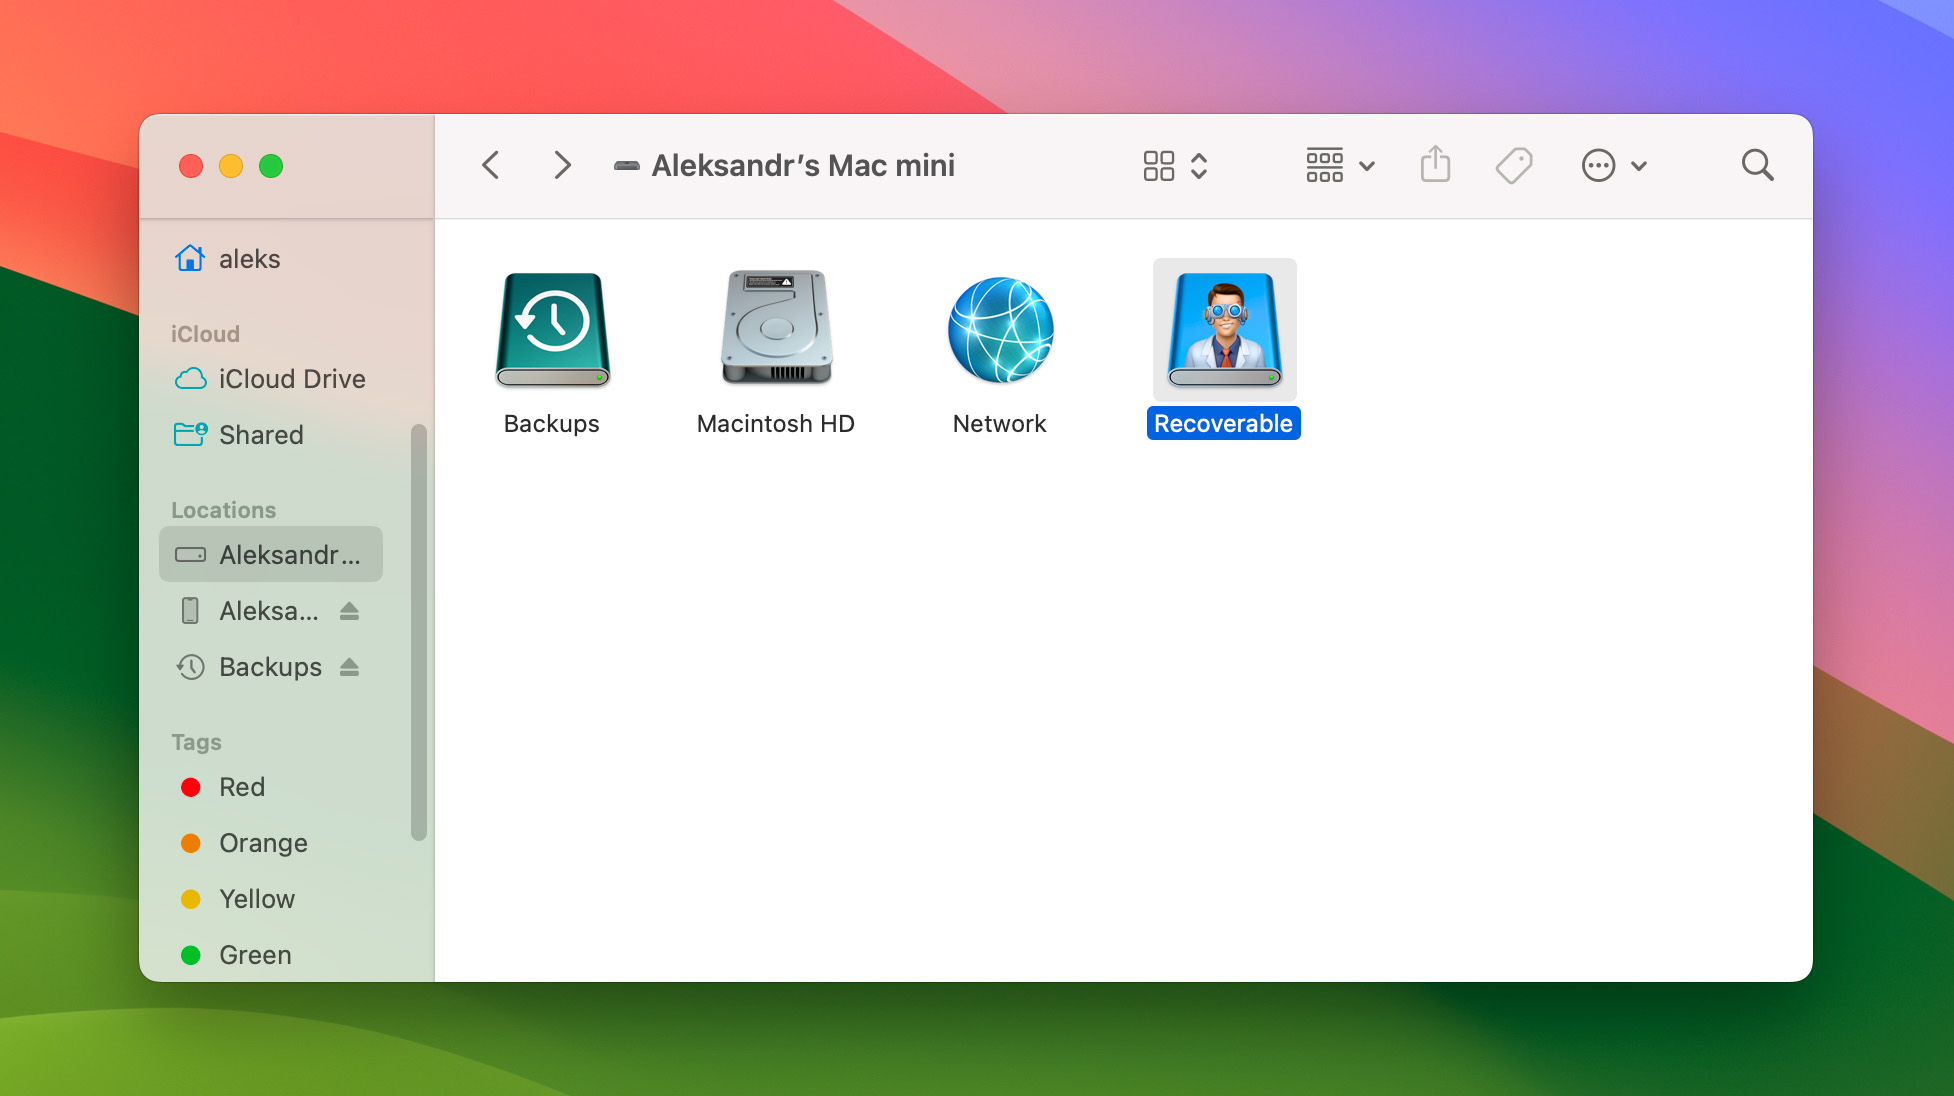
- Open the mounted disk called “Recoverable” and go to the directory “Files”, then “CameraRollDomain”, then “Media”, and finally “DCIM”. From there, go through the subfolders to locate the photo you want.
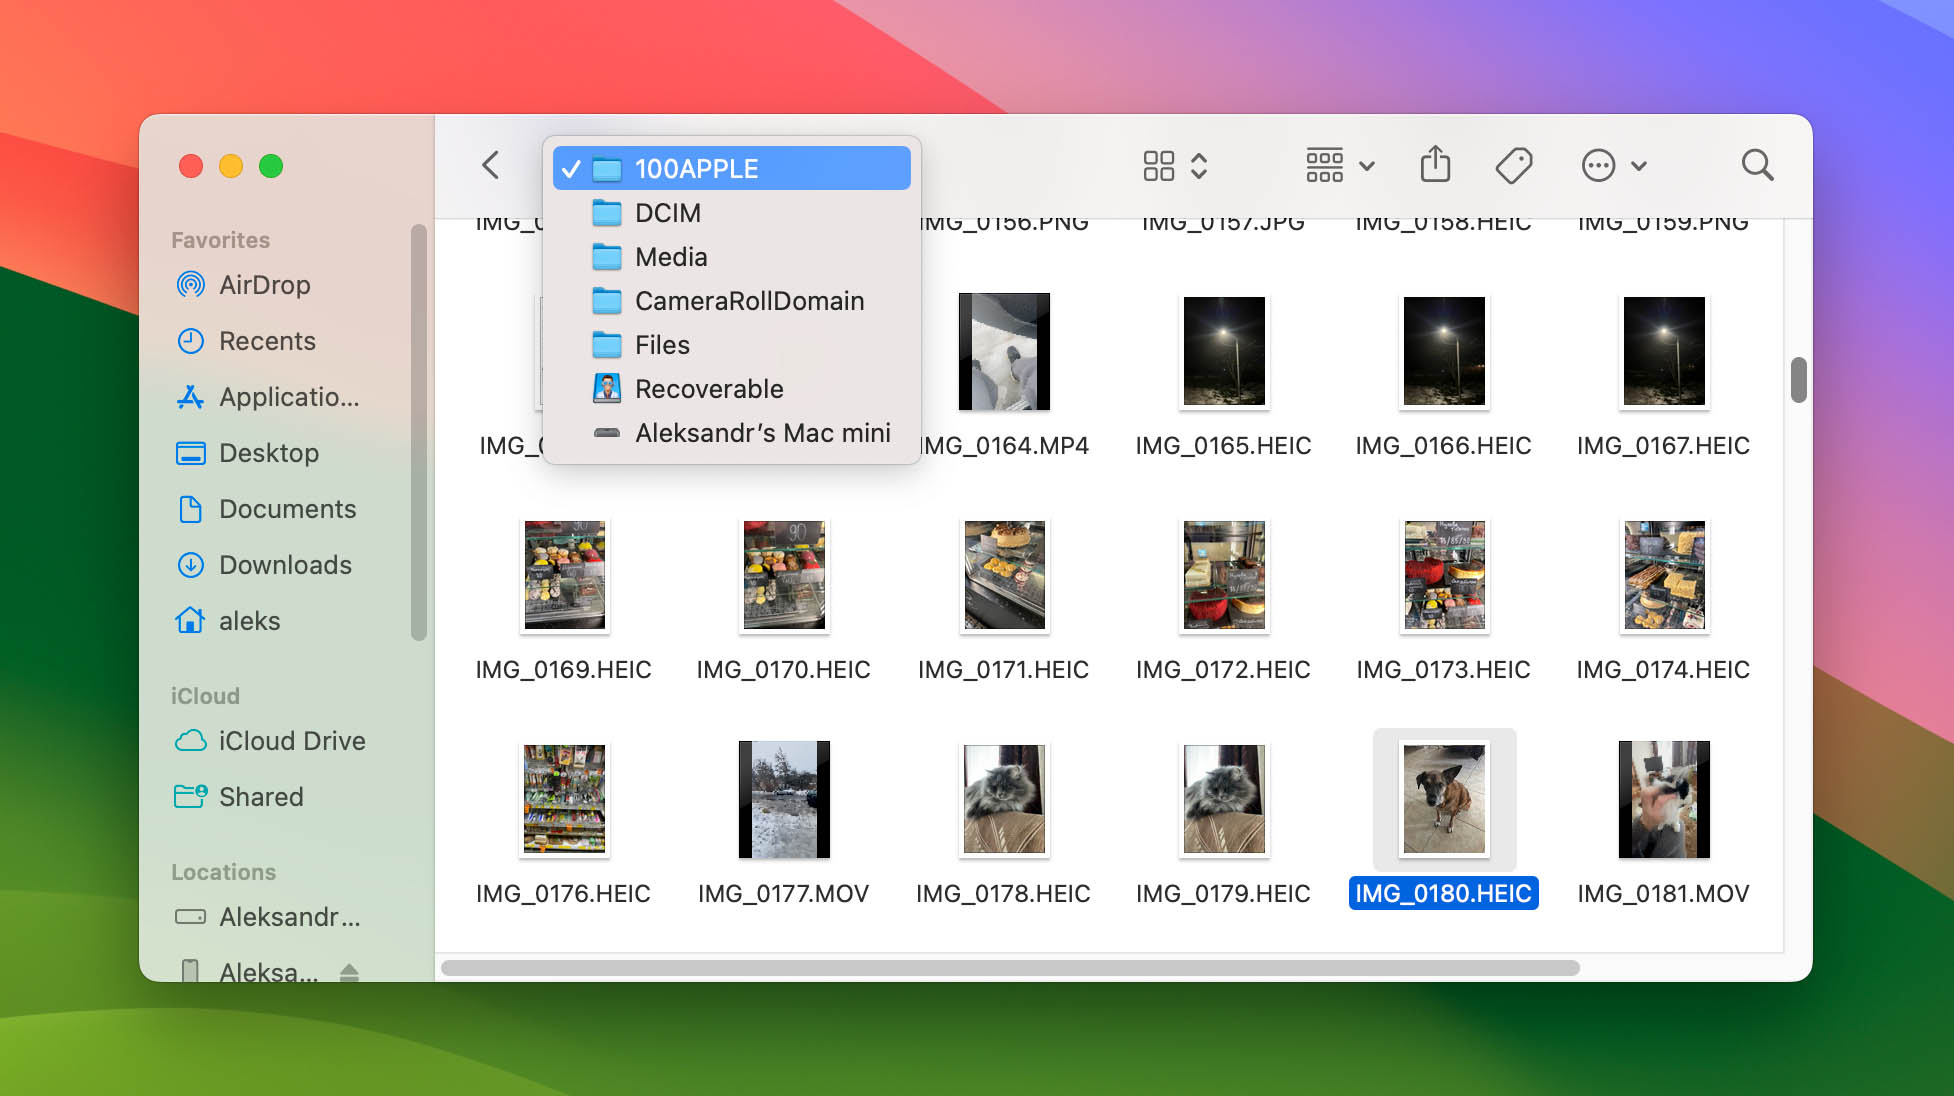
- Copy the photos in finder that we want to recover. What’s our final result? Our friend is back! He’s sad because we wouldn’t share our donut with him. Don’t worry – we gave him a treat later to make up for it.


Steps to Recover Deleted Photos from an iPhone on Windows
If you don’t have access to Mac OS X and can’t use Disk Drill to recover deleted photos from your iPhone, you can use dr.fone by Wondershare, a Windows data recovery application capable of recovering deleted photos from any iOS device.
Step 1: Download dr.fone. Launch the downloaded installation file and follow the installation instructions.
Step 2: Connect your iPhone to your Windows PC. Make sure to use the USB cable that came with your iPhone. Third-party USB cables can sometimes cause connection issues.
Step 3: Launch dr.fone and choose the Recover iOS Data option.
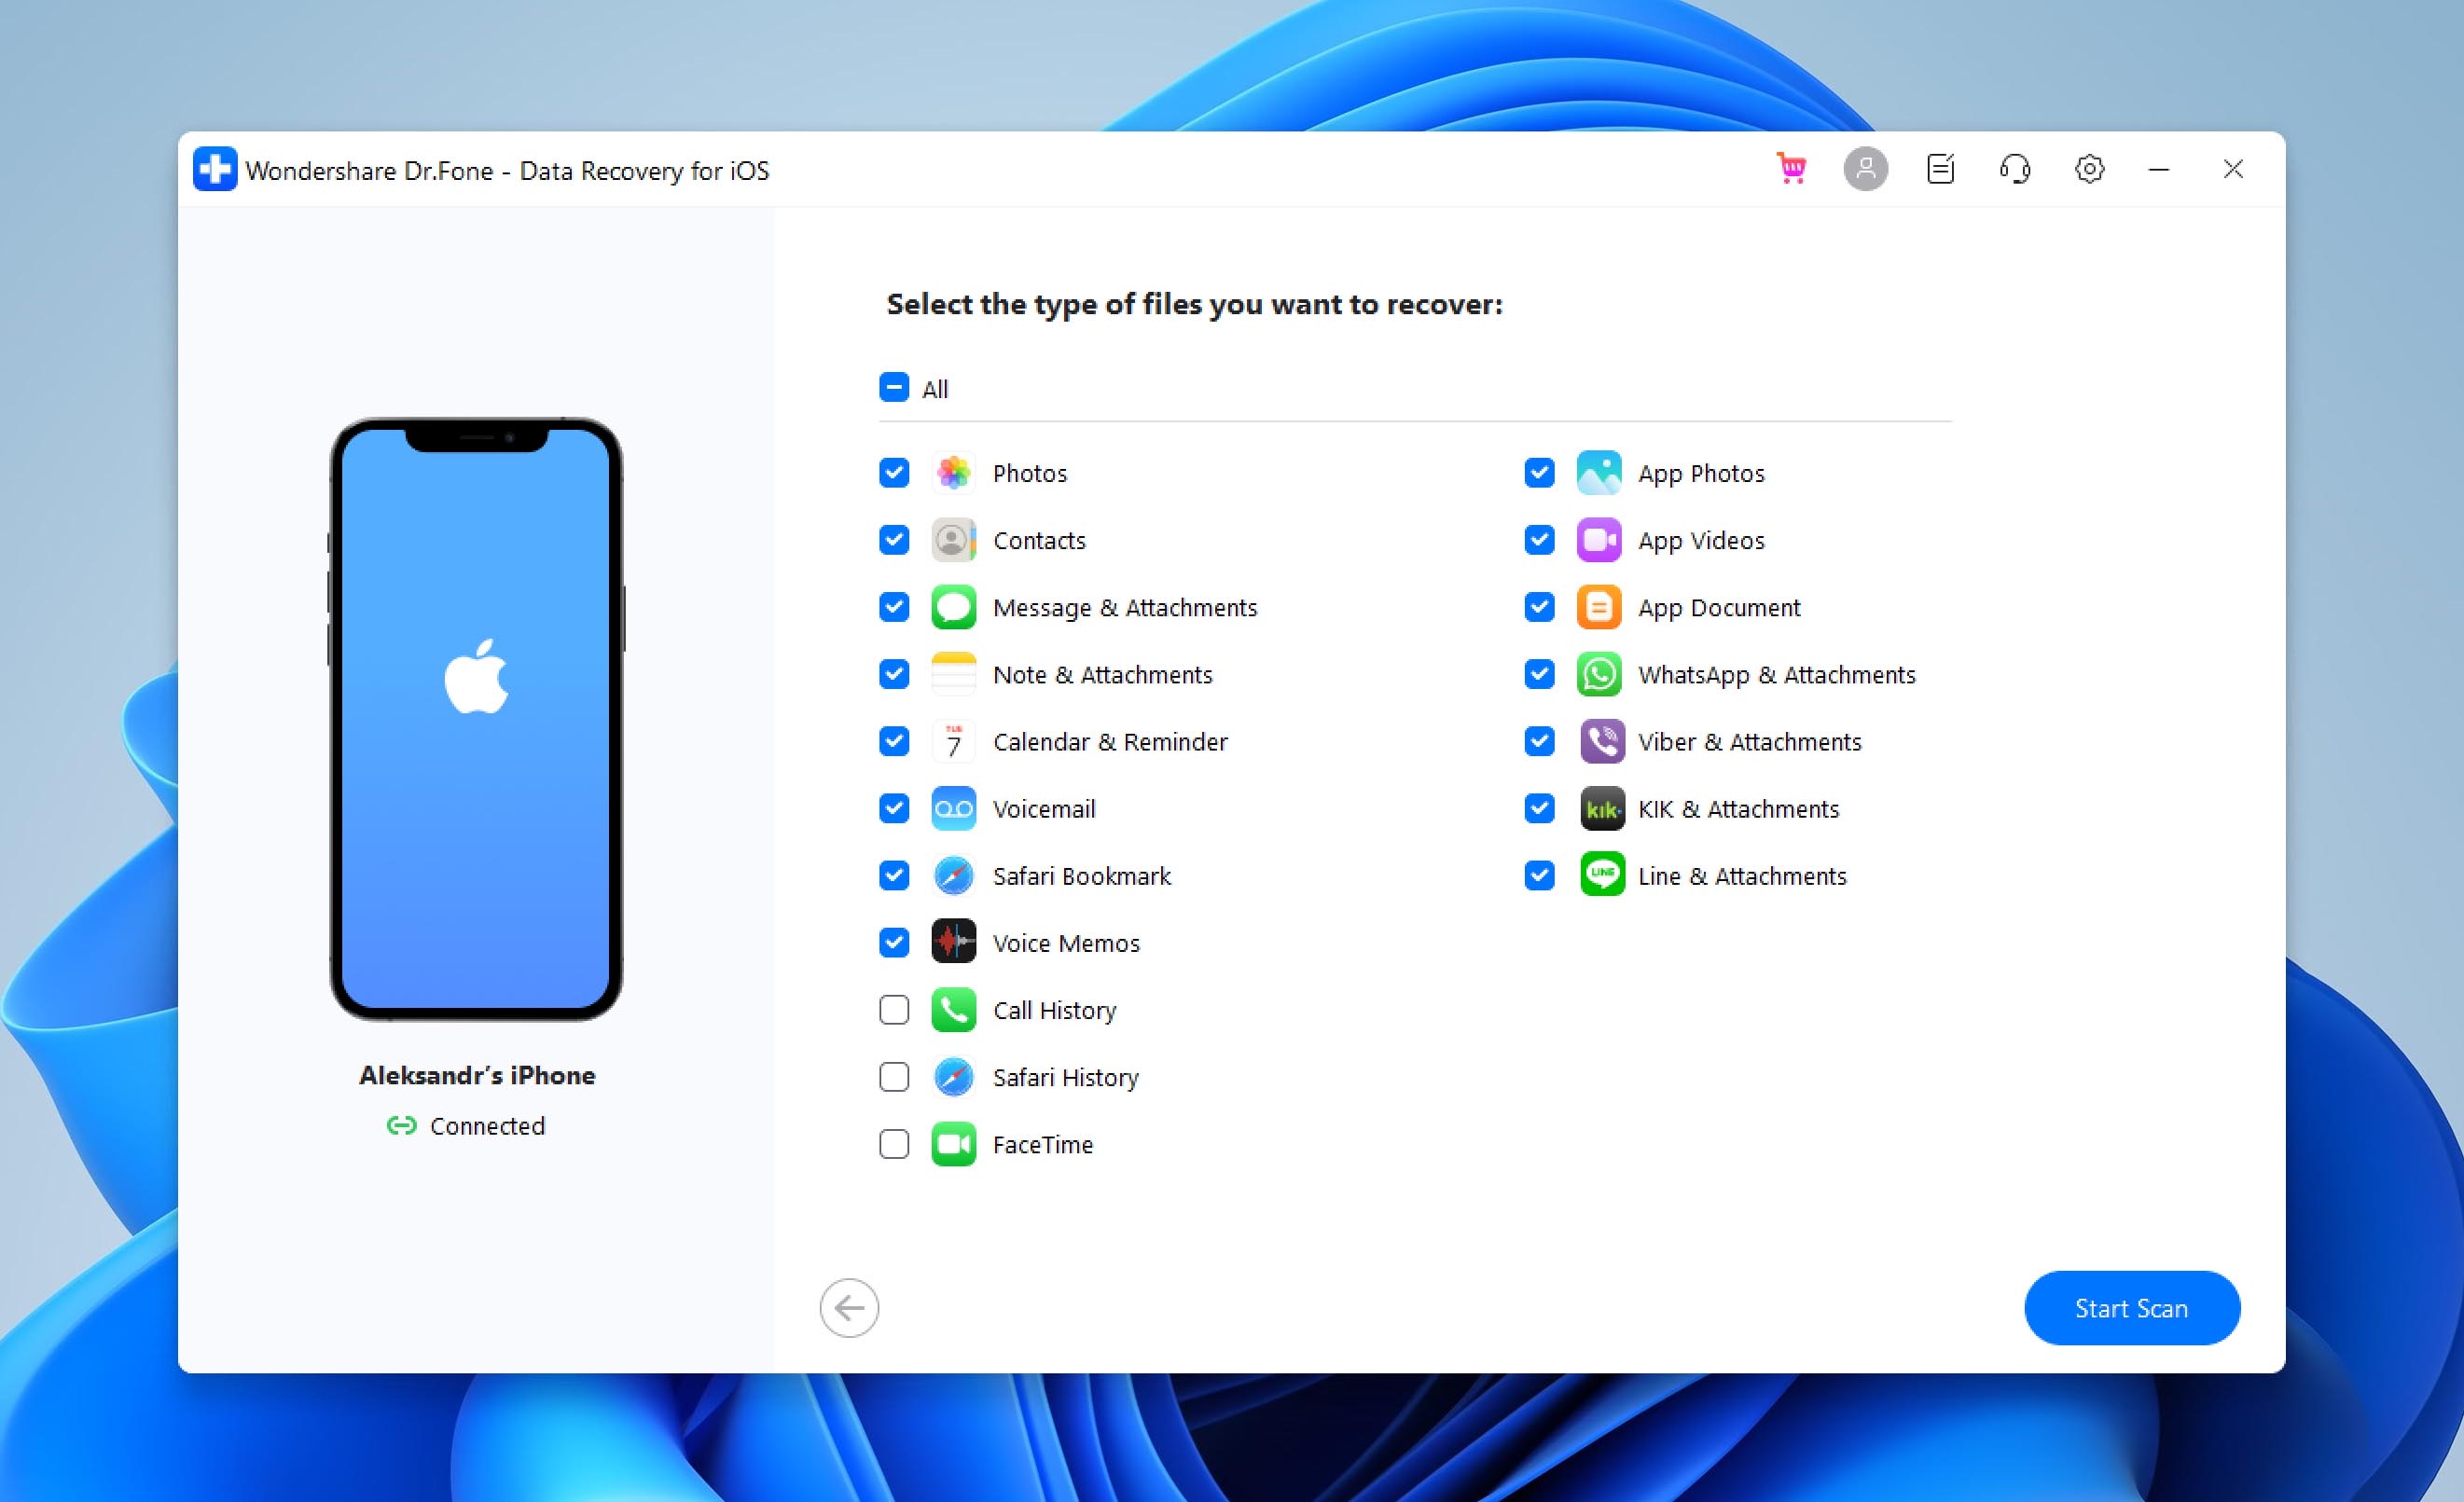
Step 4: Wait for dr.fone to detect your iPhone and click the Start Scan button. The application will scan your iPhone for deleted photos.
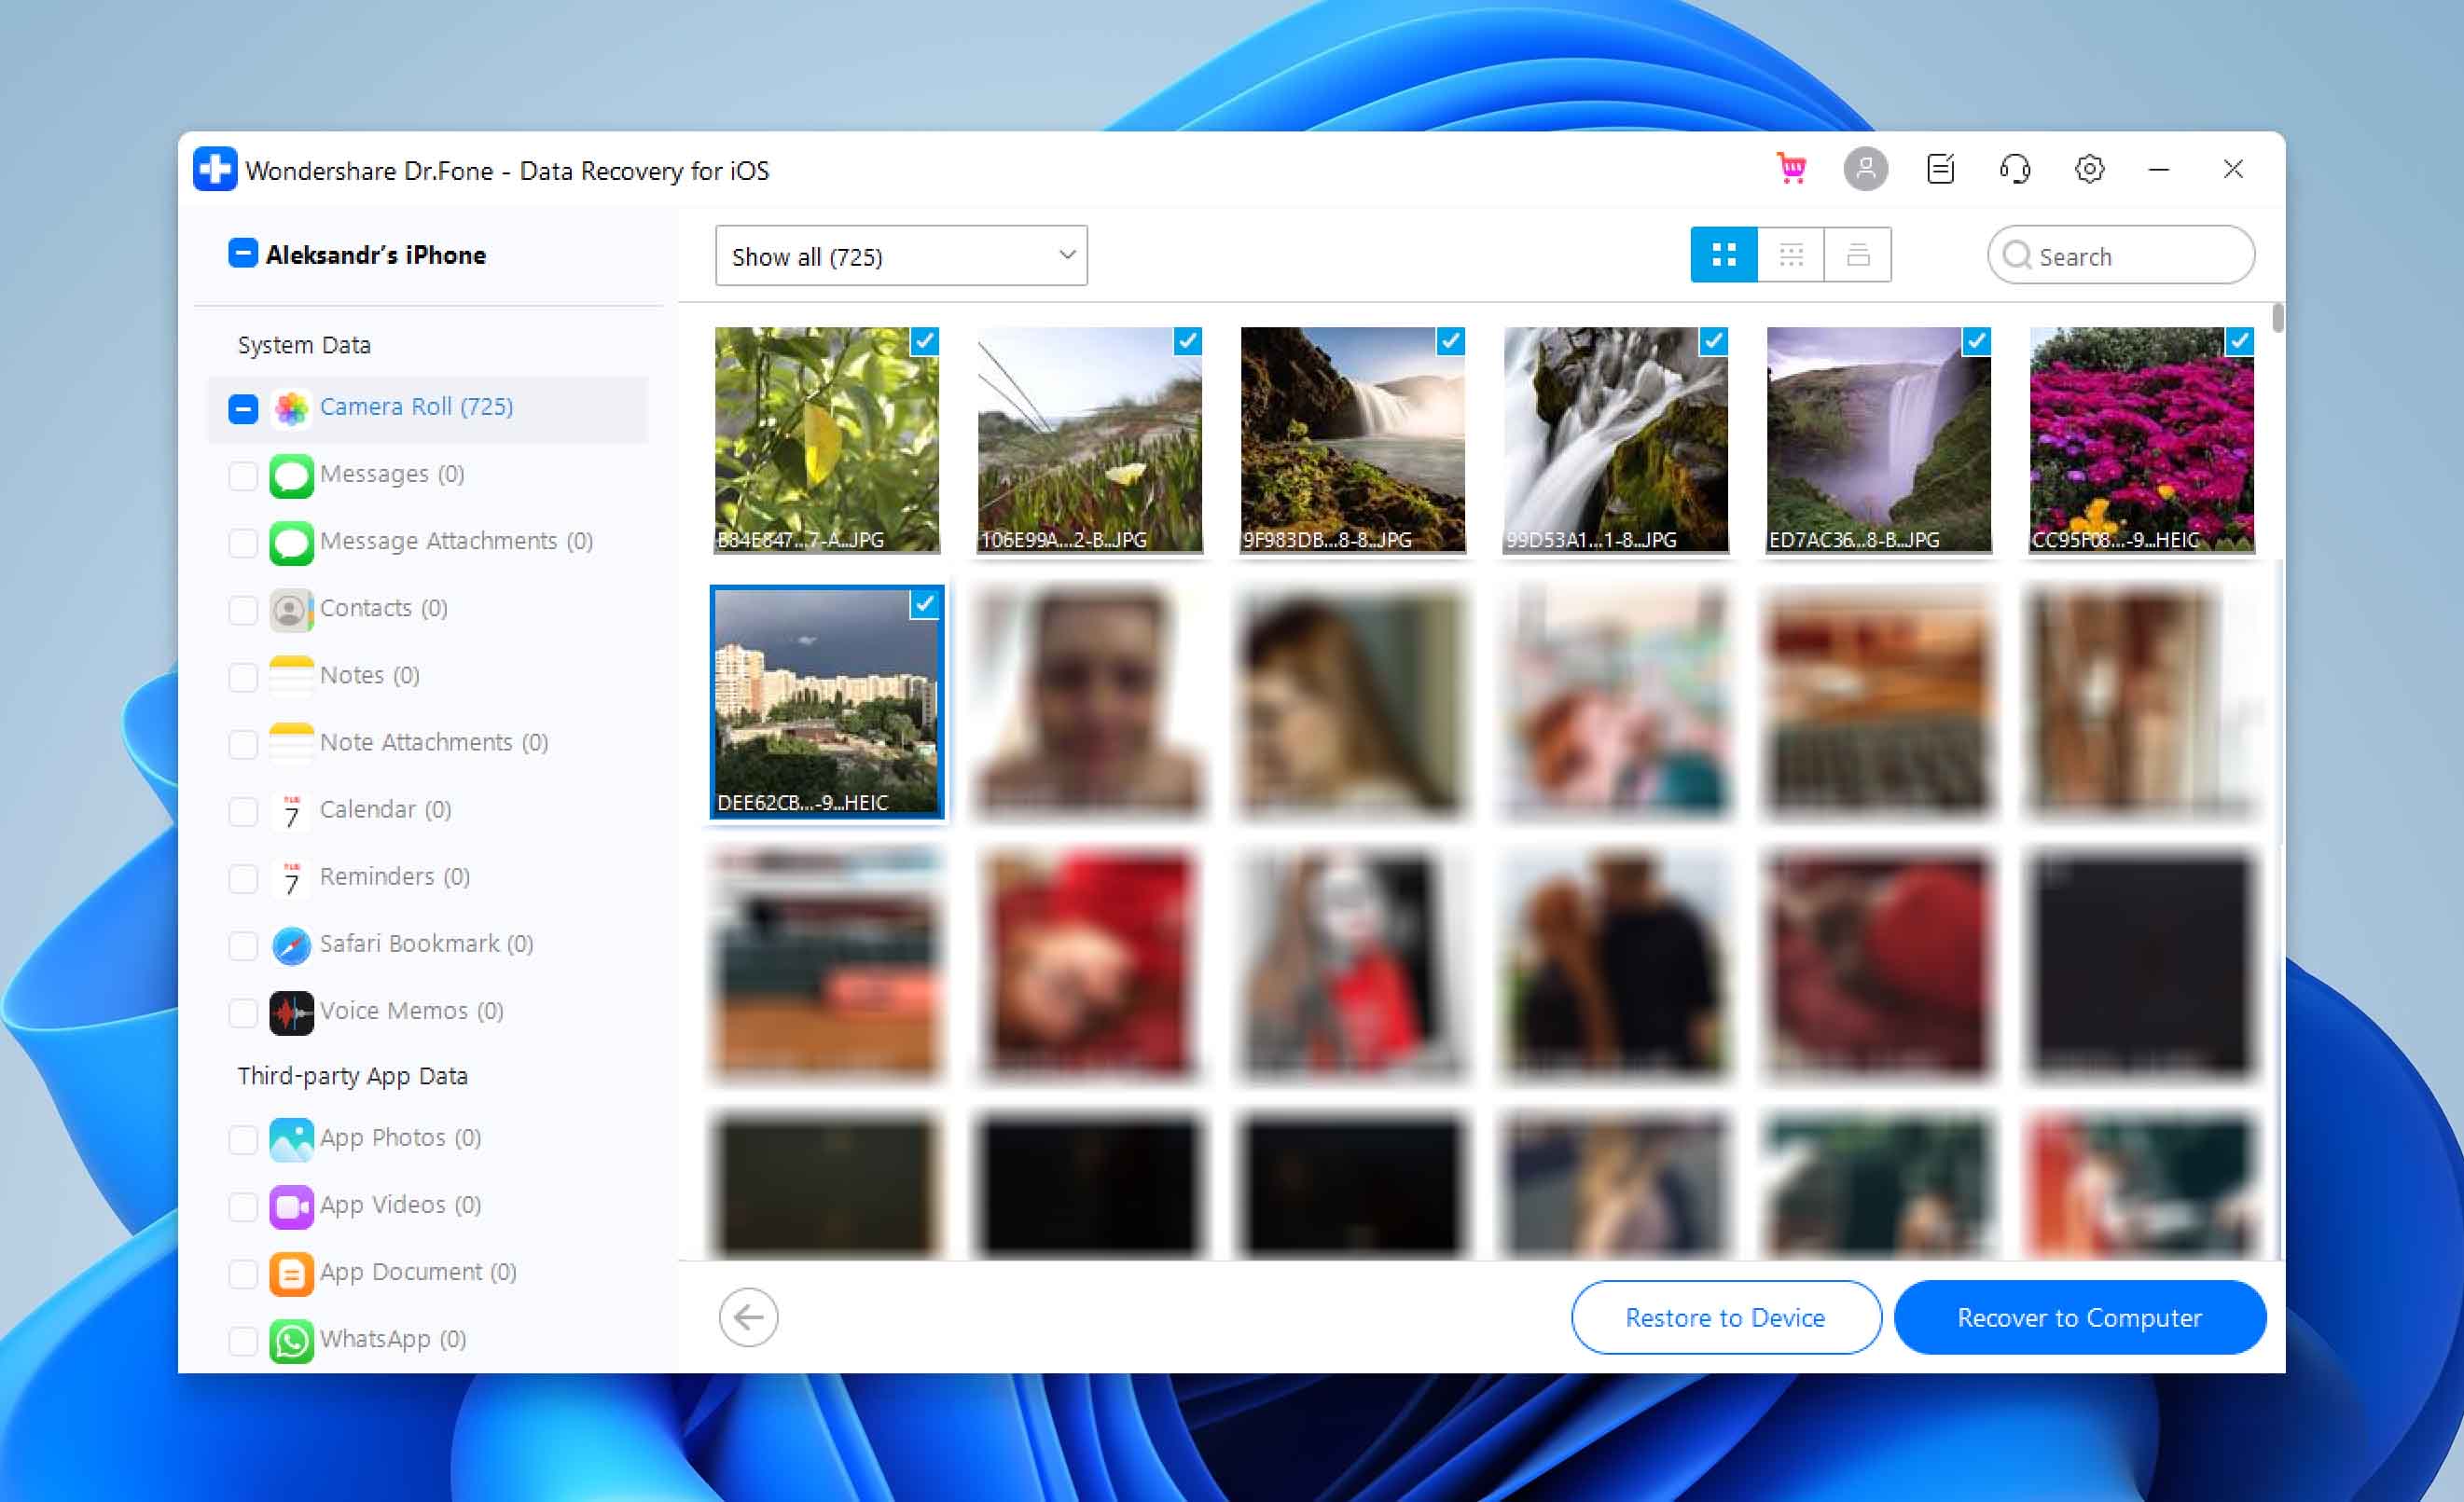
Step 5: Select Camera Roll from the list of options on the left and preview the deleted photos.
Step 6: Select which photos you want dr.fone to recover and click the Restore to Device button.
How to Recover Deleted Photos from iPhone with Messaging Apps
If the above methods fail, you might still have a chance to recover some photos if you’ve shared them via any IM apps like WhatsApp or Viber. Even if a photo is deleted from your phone after you’ve sent it, it will still exist on the app’s servers.
In the worst case, you might lose some of the original quality if the app compresses its images. But it’s certainly better than losing the picture altogether!
Some apps like Messenger and Viber allow you to view all shared media in one place. This can make it easy to browse through all pictures you’ve shared with a contact and extract the ones you want to recover. In other cases, you might be able to use filters to bring out the messages you’re after.
In Discord, for example, you can use the search modifier has:image to filter all messages containing an embedded picture. If you want to only see messages you’ve sent, you can also add from:your-user-name.
How to Recover Deleted Photos from a Damaged iPhone

The above-described methods can help you recover lost photos from your iPhone if the device is working correctly. Unfortunately, they won’t help you in data loss situations involving physical damage, such as a cracked display that doesn’t turn on or a Lighting port that’s so worn out that it’s not possible to charge the battery.
In such situations, it’s necessary to repair the damage first, and that’s where professional data recovery services come in. The experts they employ can fix even serious physical damage and use sophisticated recovery techniques to get back as much lost data as possible.
Yes, the cost of professional data recovery may be high depending on how bad the damage is, but you can always ask for a free price quote to know what to expect.
How to Avoid iPhone Photo Loss in Future
Anyone who has ever experienced the loss of a treasured photo wants nothing more than to avoid the same thing happening again in the future. The good news is that there are several ways how you can make your images more resilient to data loss.
Because even the most reliable data backup strategy in the world can fail, we recommend you always have more than one backup ready. A backup of a backup can save you when a disaster strikes, and you’ll be very glad that you have it.
1. Back up your iPhone
The first way to prevent photos from being lost from an iPhone is to have it registered with a cloud service like Apple’s iCloud. It provides several services such as backups to Apple’s cloud service storing photos, documents, and most importantly “Find my Phone” so if it gets lost or misplaced, the iPhone can tell us where it’s at. In addition to using iCloud, you should also create a local iPhone backup using iTunes (macOS 10.14 and older) or Finder (macOS 10.15 and newer).
2. Use services like Mega or Google Photos
Another option is to use another backup service such as Mega or Google Photos. Both services can work as a “backup to the backup”, so even if we delete it from the iPhone or iCloud, another copy might be on those systems as well. Mega offers 50 GB of free online storage, and it gives its users a chance to earn additional storage space by completing various challenges.
3. Safeguard your iPhone
Do you have kids and often leave your iPhone unattended? If so, don’t be surprised when they wipe out all photos from it. That’s why you should activate either Touch ID or Face ID and keep your iPhone locked when it’s not in use. You will also appreciate Touch ID and Face ID if you ever lose your iPhone because the person who finds it won’t be able to look at your personal pictures and potentially steal them from you.
4. Don’t Jailbreak Your iPhone
When you jailbreak your iPhone, you gain access to a huge amount of useful apps and tweaks, but you also greatly increase the chance of losing your photos. Apps on a jailbroken iPhone don’t have to abide by the restrictions imposed by Apple, which means they can modify system files and other applications. Unless you know exactly what you’re doing, stay away from jailbreaking or be ready to face the consequences.
5. Be More Careful
We know that this is easier said than done, but the fact is that being more careful is the only way how to avoid accidentally deleting important photos from your iPhone. Ask yourself if you really need to take your phone with you when you go out drinking with your best friends or when you go on an epic bike right in the mountains. Even if you keep your photos backed up in the cloud, there’s no point in having to recover them because of a silly mistake.
Summary
As we’ve explained in this article, there are several ways how to retrieve deleted photos on iPhone. You should always start by checking the Recently Deleted album, which is where all deleted photos are kept for 30 days.
If you miss this critical window, your only option is a third-party data recovery application like Disk Drill. Since Disk Drill’s success rate decreases over time, we highly recommend you begin the recovery as soon as possible.
FAQ
If you still have your iPhone, you should first check the Recently Deleted album in the Photos app. You can also use a data recovery solution like Disk Drill to recover deleted photos that are not in the Recently Deleted album. Finally, you can recover them from your iCloud backup.
It’s often possible to recover permanently deleted photos from an iPhone without backup, but the chance of success depends on several factors, including how soon you begin the recovery process (the sooner, the better!) and your choice of photo recovery software (we recommend Disk Drill).
The recovery of permanently deleted photos from iPhone 8 can be accomplished with the help of Disk Drill:
- Download and install Disk Drill.
- Connect your iPhone 8 to your Mac.
- Launch Disk Drill and begin recovery by clicking on the Recover button next to your iPhone 8.
A third-party data recovery software application like Disk Drill is the best way how to recover permanently deleted photos from my iPhone 7. This is what you need to do:
- Download and install Disk Drill on your macOS.
- Connect your iPhone 7 to your Mac.
- Start Disk Drill and click the Recover button next to your iPhone 7 to begin recovery.
Your deleted pictures can be found in several places:
- Check the Recently Deleted folder in the Photos app, right under the iPhone camera roll.
- If you can’t find the pictures there, look for them in the same folder on iCloud.
- Still nothing? Then use Disk Drill to recover them from your iPhone’s memory.
When you delete a photo on your iPhone, the photo doesn’t immediately disappear from your device. Instead, it’s moved to the Recently Deleted folder, which you can find among your albums in the Photos app, below the iPhone camera roll. To recover a deleted photo from it, simply tap on it and select Recover.
Your best option how to recover deleted photos after 30 days is to restore them from a local iTunes backup:
- Connect your iPhone to your Mac.
- Open iTunes.
- Select your iPhone.
- Click on the Restore Backup button.
- Select your backup and wait for the process to finish.
To retrieve deleted pictures from your iPhone photo gallery:
- Open the Photos app.
- Tap on the Albums icon on the bottom.
- Select which deleted pictures you want to retrieve.
HINT: You can choose to recover all deleted pictures at the same time. - Tap the Recover button.
A common way how to get old pictures back on iPhone without a computer is with the help of iCloud, a cloud storage service that lets you store backups of your pictures on Apple’s servers:
- Open Safari and go to iCloud.com
- Sign in.
- Go to Photos > Albums > Recently Deleted.
- Select the images you want to recover.
- Click the Recover button.
If you don’t have a backup of your photos, you will have to use external software like Disk Drill. To recover your files using Disk Drill:
- Download Disk Drill on your Mac.
- Connect your iPhone to your computer, and set it as a trusted device when prompted.
Start Disk Drill - Select your iPhone in the list of devices and click “Recover” next to it.
- If your phone is encrypted, enter the password to unlock it.
- Once Disk Drill is finished searching for files to recover, browse through the results and pick the ones you want to save.
To recover deleted photos from an iPhone, try the following approach:
- Launch Photos
- Navigate to Albums
- Navigate to Utilities, and open Recently Deleted
- You might have to authenticate yourself to access this section of the app
- Select each photo you want to recover – you can use the Recover All option to select everything in the folder in one go
- Tap on Recover Photo
Keep in mind that this method is only valid for 30 days after the photos were deleted. After that, they are gone for good – although you might still be able to recover them using some of the other methods on this list, in particular by scanning your device for deleted media.