ARW stands for Sony Alpha Raw, except they don’t put the S in the abbreviation. Sony digital cameras use it to store raw image files.
On this page, we’ll explain what ARW files are in more detail. We’ll also show you how to recover deleted, corrupted, and otherwise lost ARW files from any device.
What is ARW Filetype?
ARW files store raw image data. All digital cameras use raw files, but ARW is unique to Sony. In the past, Sony used Sony Raw Format (SRF) and Sony Raw Format 2 (SR2), but as of 2022, their new cameras use only ARW.
Data in raw files are lossless (information isn’t lost upon saving) and uncompressed. Raw is not an acronym. It means just what the word means—unfinished, unprocessed, and unpolished. The raw format allows a great deal of editing and ensures that as much of the image’s original information as possible is retained.
Different companies use different sorts of raw files. For instance, Fuji uses RAF format while Canon uses CRW, CR2, or CR3. Sony uses ARW.
You can tell if your image file has the .arw extension on the end of the file name. If your files are on or from a newer Sony digital camera, though, you don’t really need to check. They will be ARW.
How to Recover Deleted ARW Files
Deleted ARW files are rarely beyond the point of recovery. In some cases, you only need a couple of mouse-clicks to get back a missing file. In others, you may need to use a data recovery center or download data recovery software. Whatever the case, your deleted files are rarely gone completely.
The appropriateness of the method to retrieve your files will depend on how you lost them. We are going to cover methods to retrieve data with:
- Data recovery software
- Restoration from Windows Recycle Bin or Mac Trash
- Restoring from a Recent Files folder
How to Recover ARW Files with Software
The first method we’ll cover is also the most thorough one available. Data recovery software can help restore missing files, frequently long after deletion.
Multiple alternatives exist on the market, but our favorite solution is Disk Drill. It’s fast, effective, and free up to 50 MB of information, which is almost certainly enough to cover most uses. For the remainder of this section, we’ll show you how to use Disk Drill.
One. To start, you’ll need to download Disk Drill. It’s free!

Two. Open Disk Drill and click yes when it asks for permission to make changes to your system. This will start the data recovery process.
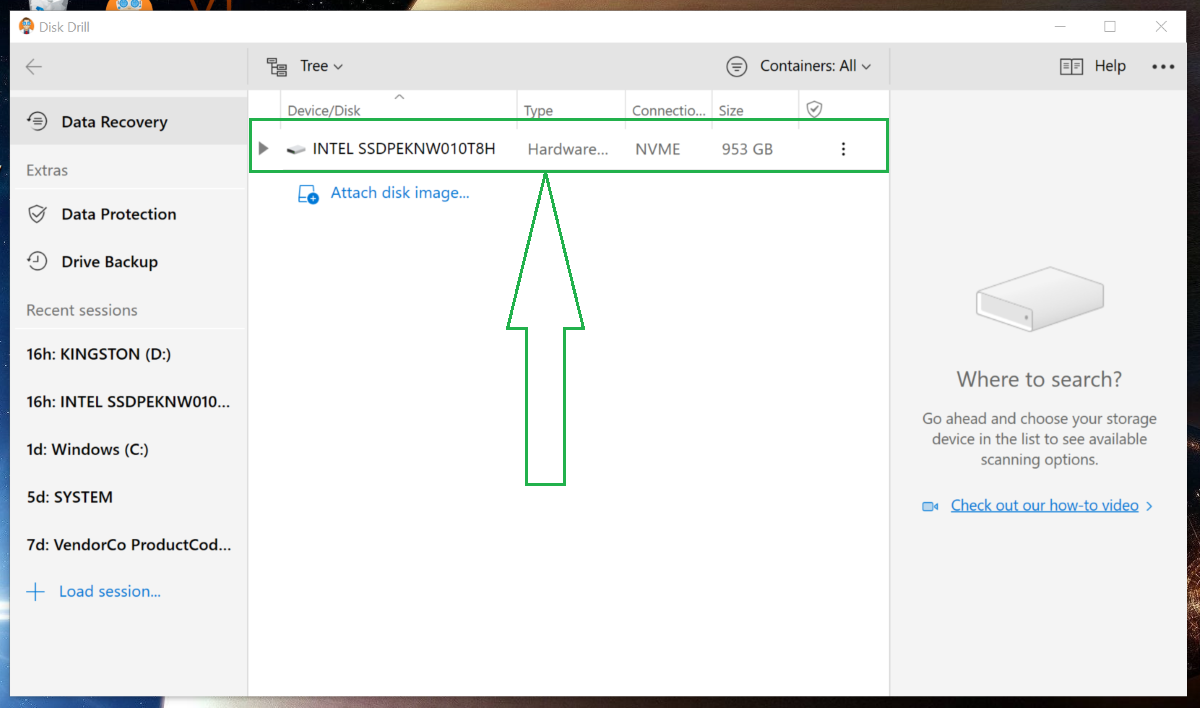
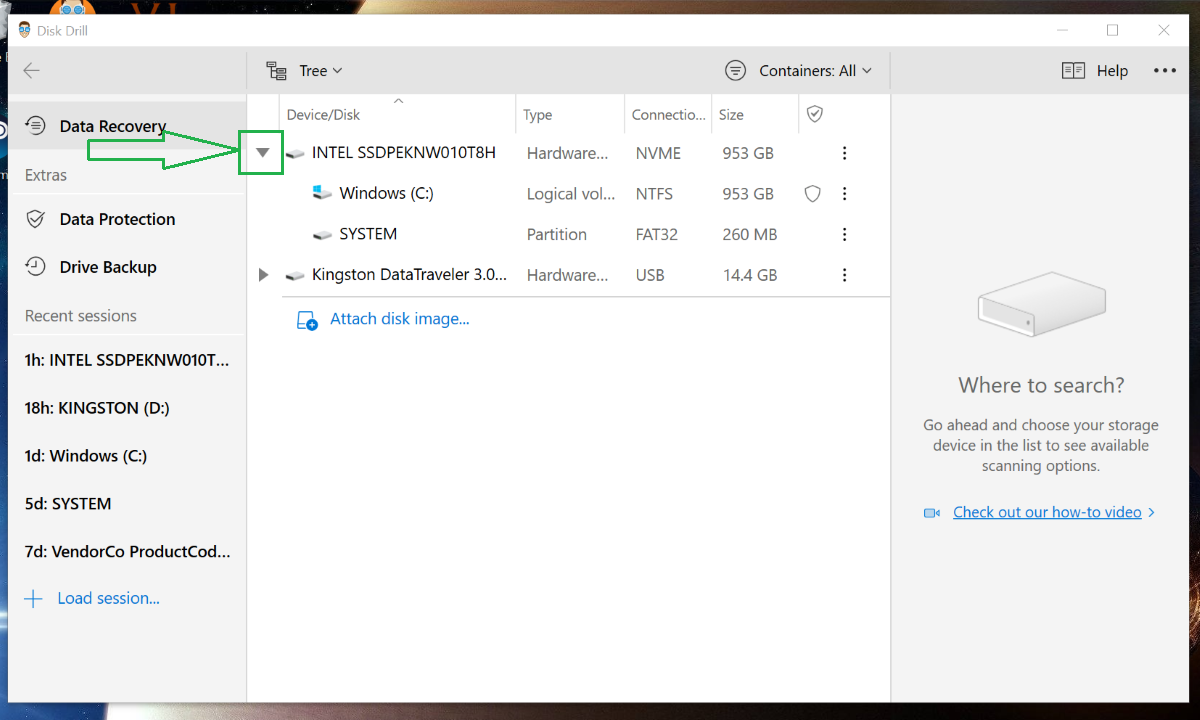
Three. You’ll land on the main interface, which will have a list of devices in the center. These are all locations in or attached to your computer. Choose the device you want to recover from or select the gray dropdown arrow that allows you to select from finer partitions within that device.
The advantage of selecting a narrower sub-device is that there will be fewer files to scan, meaning the process will go faster. Disk Drill is extremely fast, but it also goes through every deleted and lost file. You might be amazed at how much information it ends up churning up.
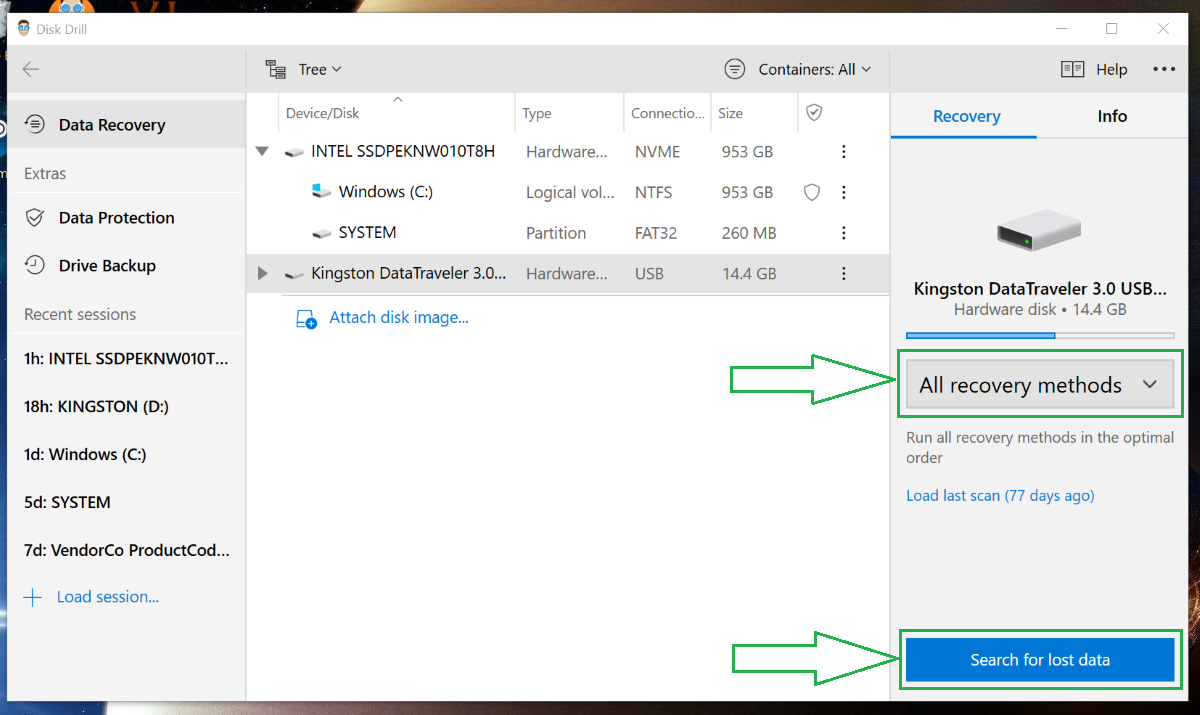
Four. Upon selecting your device, bars will appear on the right side of your screen. The one higher on the screen will say All recovery methods. The lower one will say Search for lost data. These two work together. The All recovery methods selection in the higher bar is telling the lower Search for lost data button which method to activate. For now, keep the default and hit Search for lost data.
Five. Disk Drill will now initiate its scan of your selected device. You have three options at this point:
- Let the scan run to completion.
- Stop it, restore your files, and either let the scan resume later or leave it alone.
- The review found items while the scan continues running in the background.
Six. For this step, you can either recover every scanned file at once by clicking Recover all, or you can click individual files and select Recover.
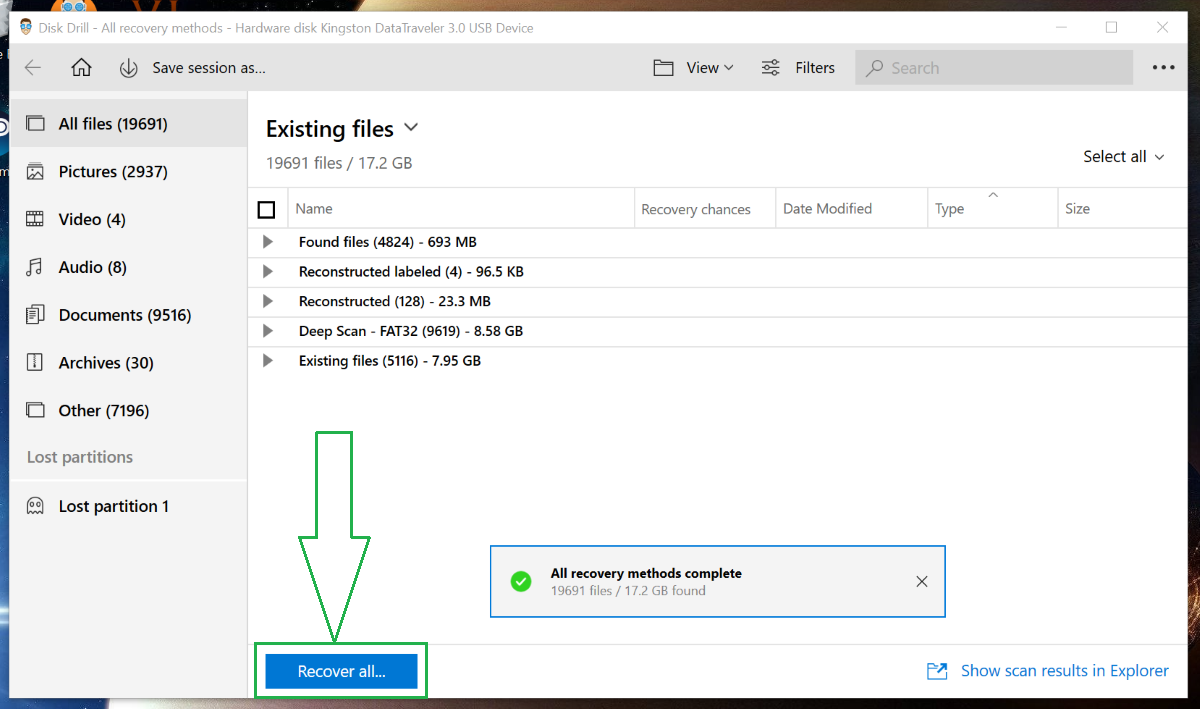
Choosing individual files will change the Recover all bar to simply Recover.
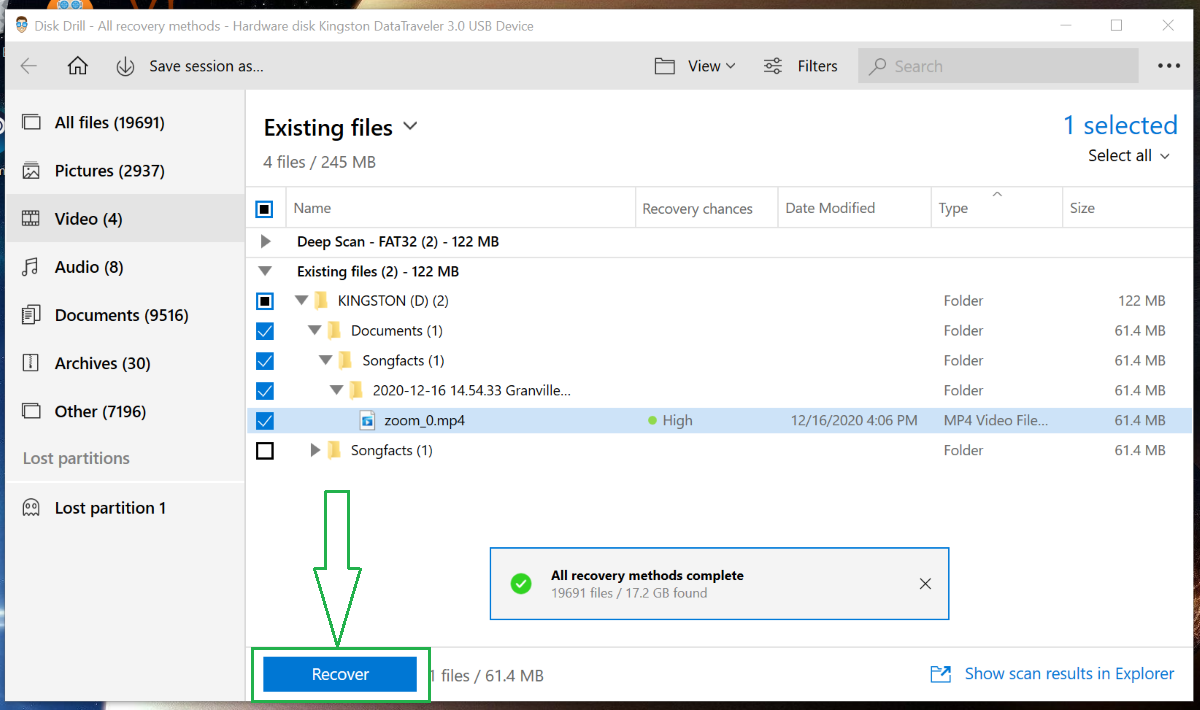
Seven. The software will ask where you’d like to restore your files. Choose any location you’d like but be sure to note where it’s pointing so that you don’t wind up with the files buried somewhere you have a hard time finding.
If any issues come up that complicate the process, check out the Disk Drill help center or troubleshooting page.
Recover ARW Files from Windows Recycle Bin or Mac Trash
Users that accidentally delete files can get their files back rather easily. Both Windows and Mac send deleted items first to what are essentially temporary storage locations that can easily be drawn from.
Recovering ARW files from Your Windows Recycle Bin
One. Open your Windows Recycle Bin (nearly always located on your desktop). Inside, you’ll see all your deleted files. Recycle Bins can be set to empty at certain intervals. Anything that was deleted within that time interval will still be there and easily accessible.
Two. There are two ways to recover the files from here. Both do the same thing, and there’s no real difference beyond what you do. Right-clicking or double-clicking on the file will open a different pane, but each one has a restore option that does the same thing.
Right-click Option

Double-click Option
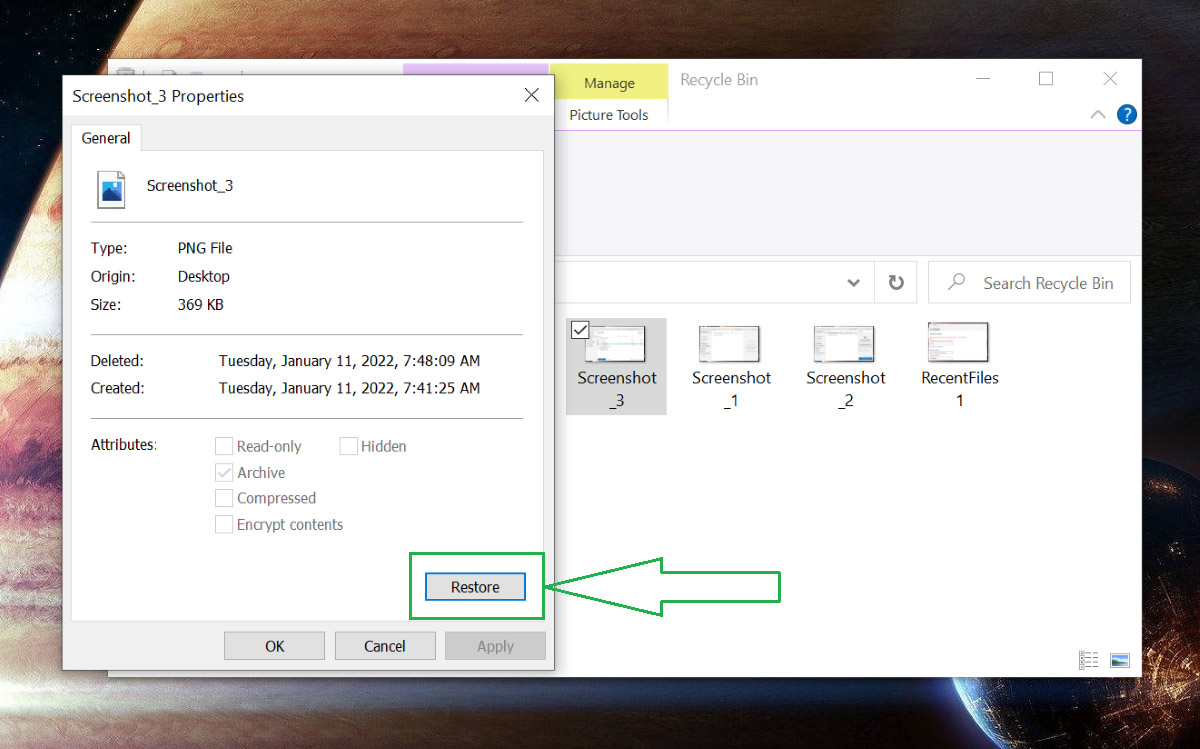
No matter which option you choose, the files will be restored to the locations that they were deleted from.
Recovering ARW Files from Mac Trash
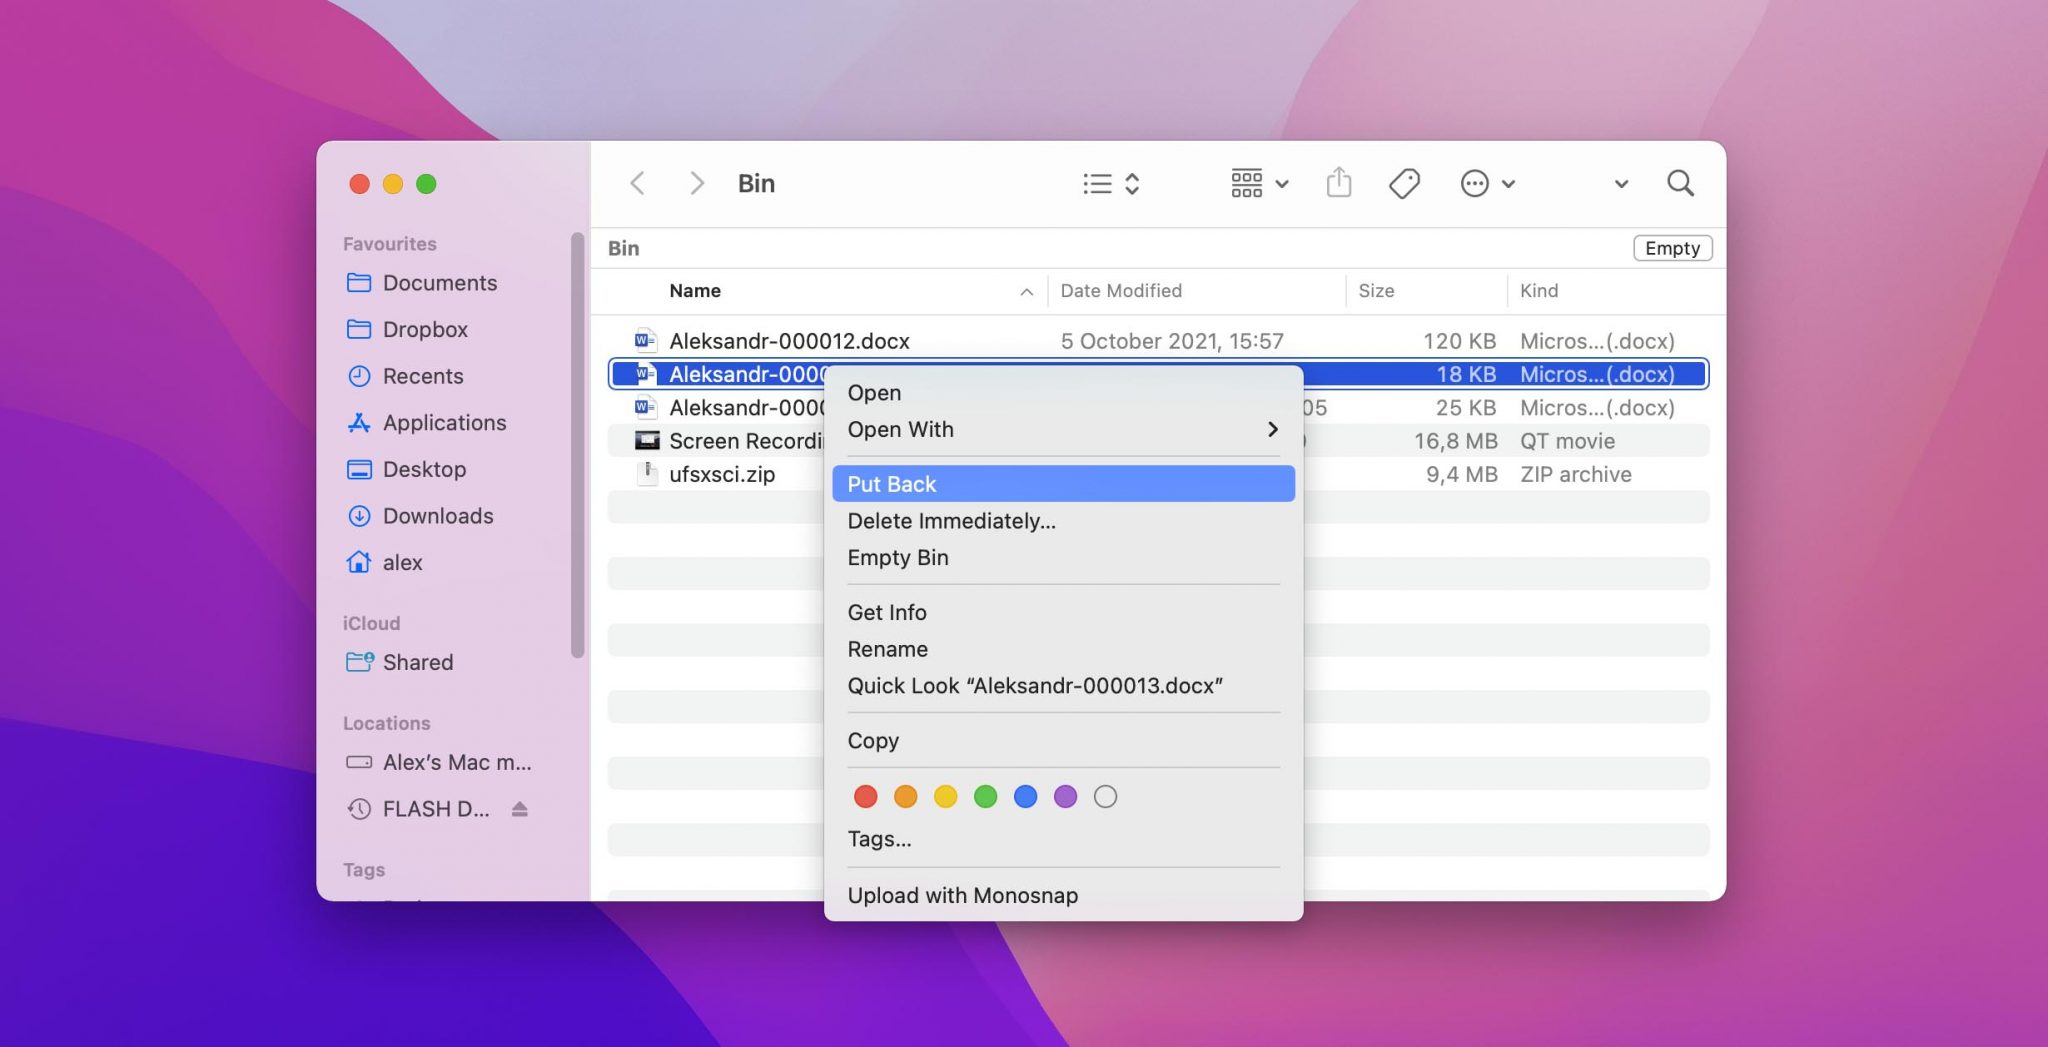
One. Find your Mac Trash (nearly always on desktop) and open it.
Two. Find the file that you want to restore. Control+click or right-click on the file to produce a dropdown menu. Select Put Back. The files will be restored to the locations they were deleted from.
Restore ARW Files from a Recent Files folder
Windows keeps track of the files you’ve recently accessed. It also sometimes records previous versions of the works, meaning that you could get back to an older version if you accidentally saved over it. There are two ways to get to the Recent files folder.
One. The first way to see recent files is to launch File Explorer. A list of recent files should appear in the initiating pane.
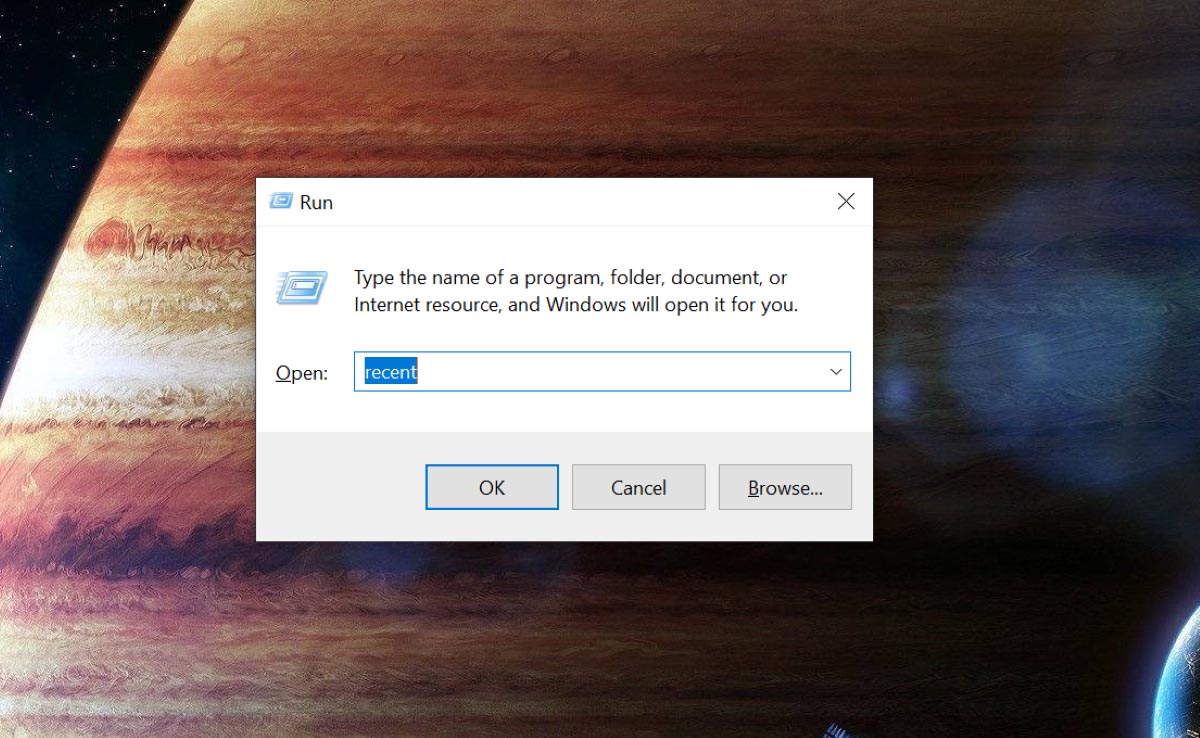
Two. Press Windows + R to pull up a run dialogue bar. Type recent into the dialogue bar and then Ok. This will bring up the recent files folder.
Three. Find the file that you want to recover. Right-click on it. Choose Restore previous versions.
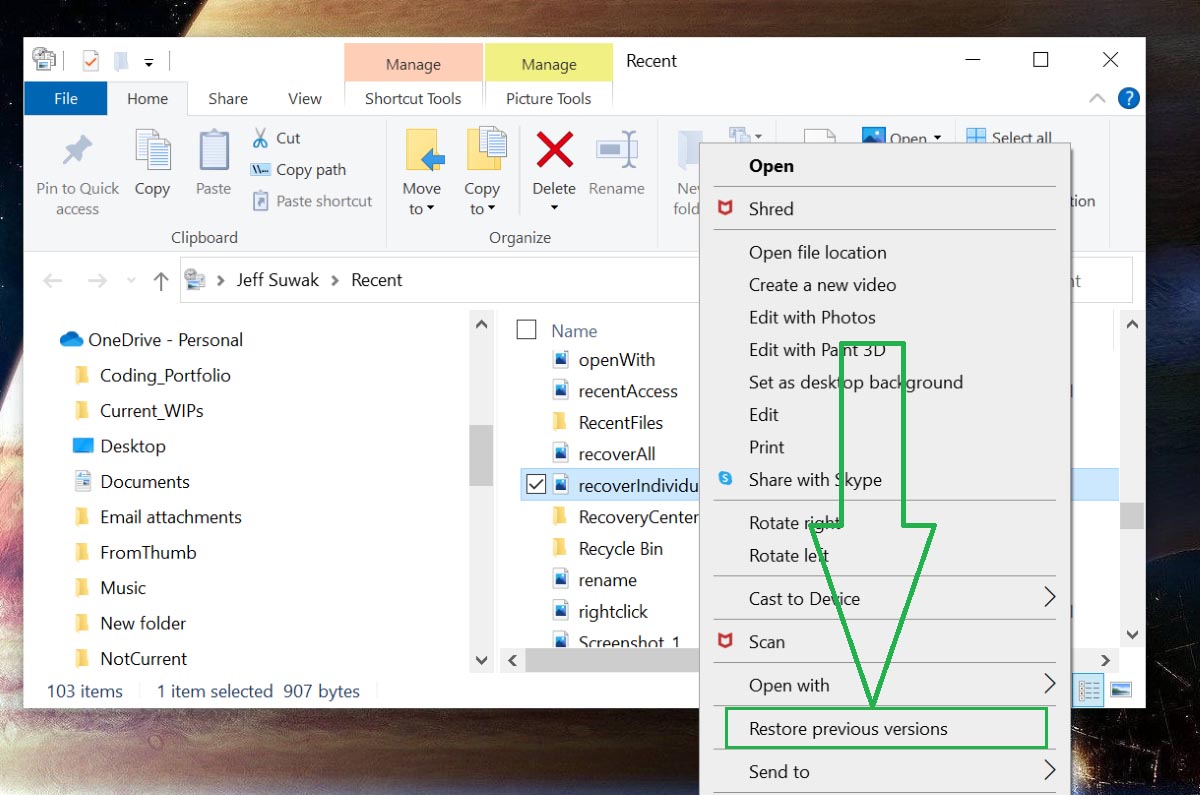
Previous versions of the file will show up. Check the timestamp for the one closest to the time you want to recover. This won’t always work. Its chances of success will depend on how your system is set up for backups.
How to Open ARW Files on Mac and Windows
ARW files are generally easy to open on either Mac or Windows.
If you’re using a Mac, double-click on the file or use Preview. This will open the file, but it will not allow you to edit it. You also won’t be able to change the extension or file type.
If you’re operating with Windows, use Windows Live Photo Gallery or Microsoft Windows Photos viewer. Both programs should have come bundled in your machine, but you might need to update Windows with a Sony raw driver.
Programs that open ARW files
In the previous section, we mentioned Windows Live Photo Gallery, Microsoft Windows Photos, and basic Mac setup as being capable of opening ARW files. There are many options besides those. In this section, we’ll cover a few of them.
- Adobe Lightroom: Part of the Creative Cloud subscription service, Adobe Lightroom is one of the most advanced image-manipulation software on the market. It is capable not only of opening ARW files but also of editing them extensively.
- Adobe Photoshop: Another Adobe product, Photoshop is available for both Windows and Mac. First built in 1988, it is an industry standard in 2022 for digital art and raster graphics editing. Photoshop will automatically force open its raw file converter plugin to open .arw files, meaning it converts to them in a more manageable format.
- Adobe Photoshop Express: This free application is the mobile version of Adobe Photoshop. You can use it on your phone. It will open ARW files.
- ARW Viewer: This free software can open and edit ARW files. It can also convert them to BMP, GIF, JPG, PNG, or TIFF.
- File Viewer Lite: Another free option, File Viewer Lite works with all kinds of raw image files, including ARW.
- GIMP: GIMP is remarkably diverse and effective for free application. With it, you can open, view, and edit ARW files.
Tips to Avoid ARW File Loss
Observing a few best practices can help prevent you from losing files so that you don’t have to deal with recovering them in the first place. We’ll cover the top four here.
🔐 Regularly Back Your Files Up: There are multiple ways to do this. You can manually save to multiple devices or sync your system to save to periodically save to a secondary location. Within those two umbrella options are multiple approaches. The central key is to back your files up in more than one.
💾Save Often: There are a few things more frustrating than losing work because you simply forgot to save. Unsaved information is often gone forever. To avoid this, either set up a personal saving regiment (perhaps set to a timer) or set the system you’re using to save automatically at regular intervals. Depending on what you’re working on, regular saving can be a bit annoying, but it’s far better than losing all your work.
😊Stick to Devices You Trust: Malware and viruses can destroy your files and, in some cases, your entire system. You can mitigate this threat by being vigilant about what devices you allow into your computer. Only use ones that you’re certain are safe. If you find a random flash drive, don’t just stick it into your computer.
🔌Use Uninterruptible Power Supplies: If a power surge hits while you’re saving work, that work can disappear forever. Anything that interrupts the saving or transfer of data can corrupt that data irretrievably. You can avoid this by using an uninterruptible power supply, which is simply a device that buffers your computer from the direct power source and any power surges it may suffer.