Losing print ready PostScript (PS) files can be scary, and it may seem like hours of hard work has been destroyed. Whether they were accidentally deleted or wiped out due to a system error, they can be recovered. In fact, you can do it right at home. The methods listed below can help you recover accidentally deleted or unsaved PS files.
What Is PS File Format?
The PS file has an interesting story. While the PostScript programming language’s history can be traced back to 1976, it wasn’t until 1984 that it was released in a usable format. The co-founders of Adobe, John Warnock and Chuck Geshke, were chiefly responsible for the format’s development.
The PS format was revolutionary because it allowed users to fully take advantage of laser printers. It could hold both text and high-quality images on the same page. A standard control language that was supported by almost all printers made printing more accessible and cohesive.
PS Files support “on the fly” rasterization which essentially allows you to transform the elements of the file in any way you desire. This is made possible due to elements being specified in terms of straight lines and cubic Bézier curves. You can directly print a PS file without having to open it in another program, provided your printer supports PostScript.
After a basic understanding of PS files, let’s find out how to recover the deleted files. There are multiple solutions listed below that will help you recover the files and as a result, resume day to day work on your PC.
How to Recover Deleted PS Files
As mentioned earlier, there are multiple ways to recover deleted PS files. The best part is, that you don’t need to be a veteran PC user to perform any of the steps.
Before that, you can greatly increase your chances of retrieving all your lost PS files, by keeping in mind the data recovery tips listed below:
- 🛑 AVOID creating new files or copying existing ones to the partition that has been affected by the data loss.
- 🛠️ BEGIN the data recovery steps as early as you can. This will greatly reduce the chances of you creating new files on the system.
- 🥇 USE the best data recovery method first. With each attempt, the chances of data recovery fall by a huge margin.
SSD users need to be extra careful because TRIM-enabled SSDs are not very receptive to data recovery. It’s best to contact a professional data recovery service in case you use a TRIM-enabled SSD.
How to Recover PS Files With Software
Using third-party data recovery software to retrieve lost PS files is recommended for beginners and experts alike. Most of these programs come with simple UIs and advanced functionality, allowing you to recover lost data within a few clicks.
While the steps largely remain the same for most data recovery software, here we will use Disk Drill. This is because it has an easy-to-use UI while being jam-packed with features such as S.M.A.R.T Disk Monitoring, and support for almost all file types. The Windows version also comes with a free trial that you can use to recover up to 400 MB data for free.
Here’s how to recover PS files using Disk Drill:
Step 1: Download Disk Drill for Windows or Mac.

Step 2: Run the setup file that you just downloaded. Follow the on-screen steps to proceed with the installation of the Disk Drill.
Step 3: Double-click on the Disk Drill icon on the desktop. Go through the license agreement and accept it to move forward.
Step 4: Select the partition which contained the deleted PS files, or you could scan the entire disk. To save some time, use the Quick Scan option, but it won’t be as effective as the All recovery methods option.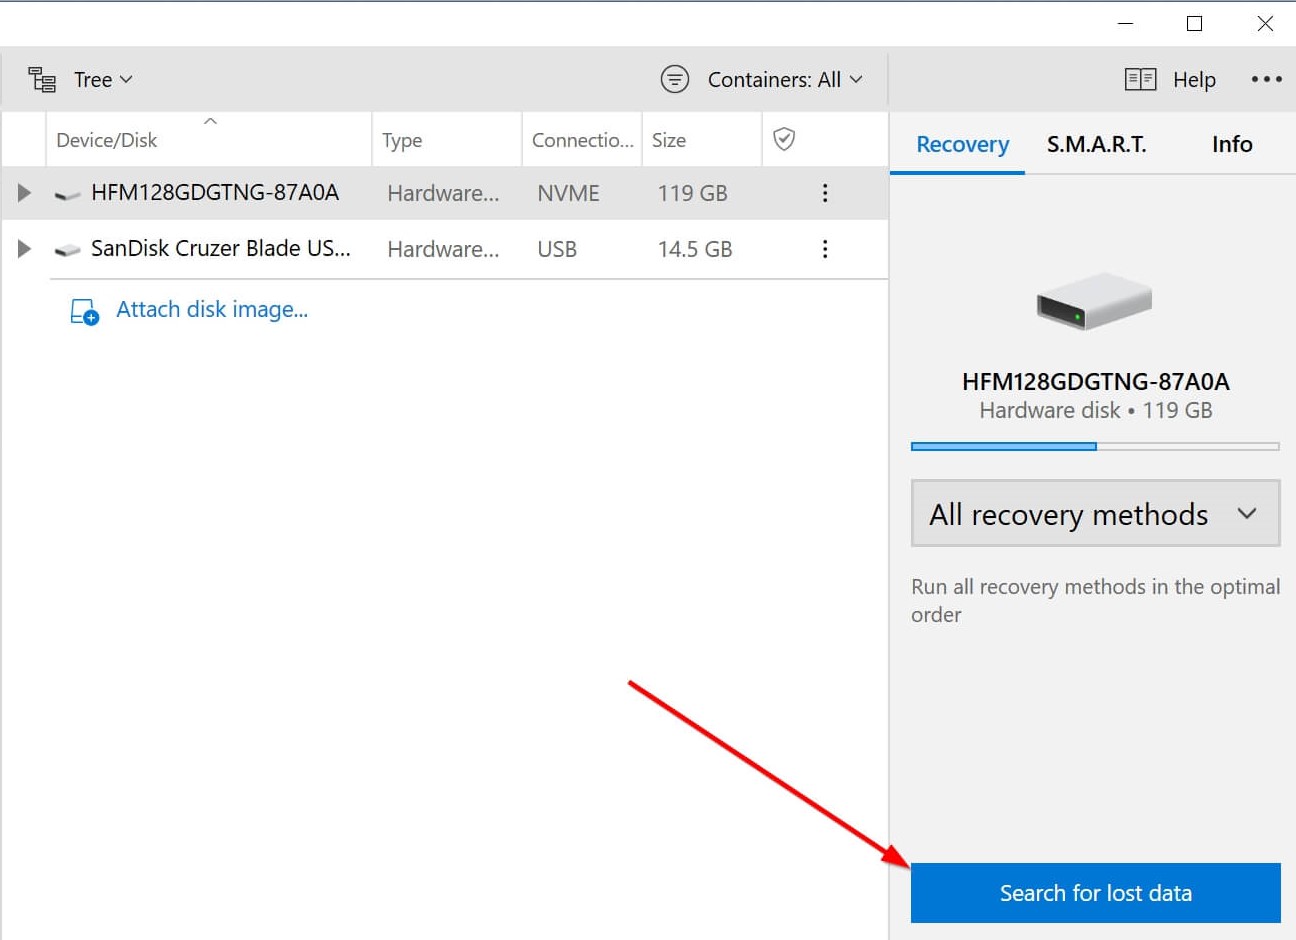
Step 5: Once the scan is over, choose the Review found items option in the top right corner of the screen. You can also look at recoverable files as they are found in real time.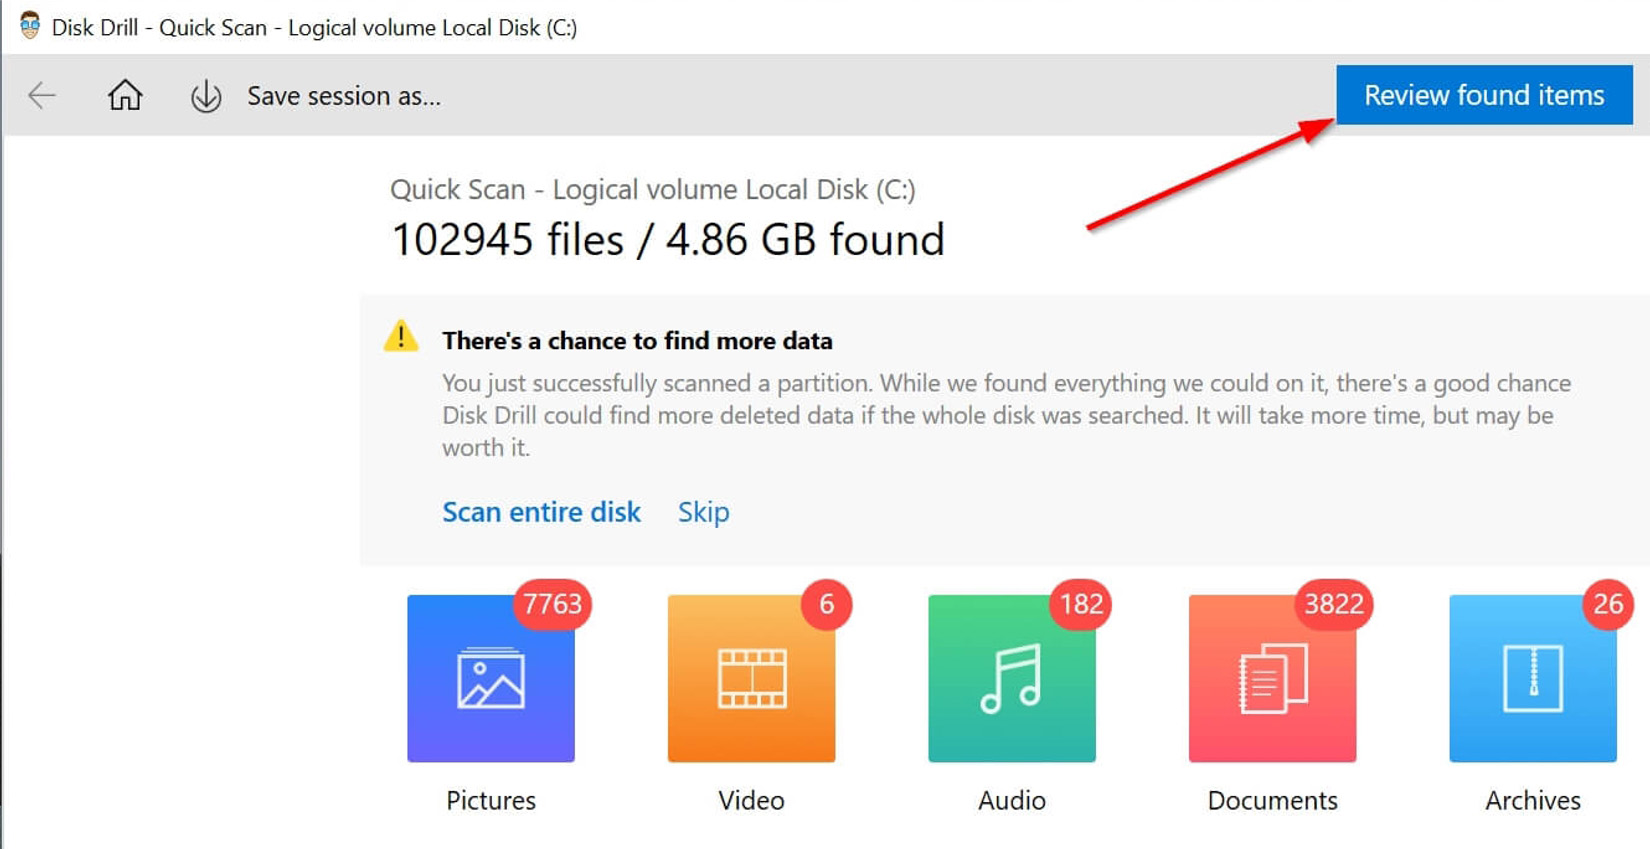
Step 6: Select the PS files you want to recover. You can use the filter feature to narrow down the results.
Step 7: Click on the Recover option and pick a recovery directory. It’s advisable to select one that is located on a different partition or storage device.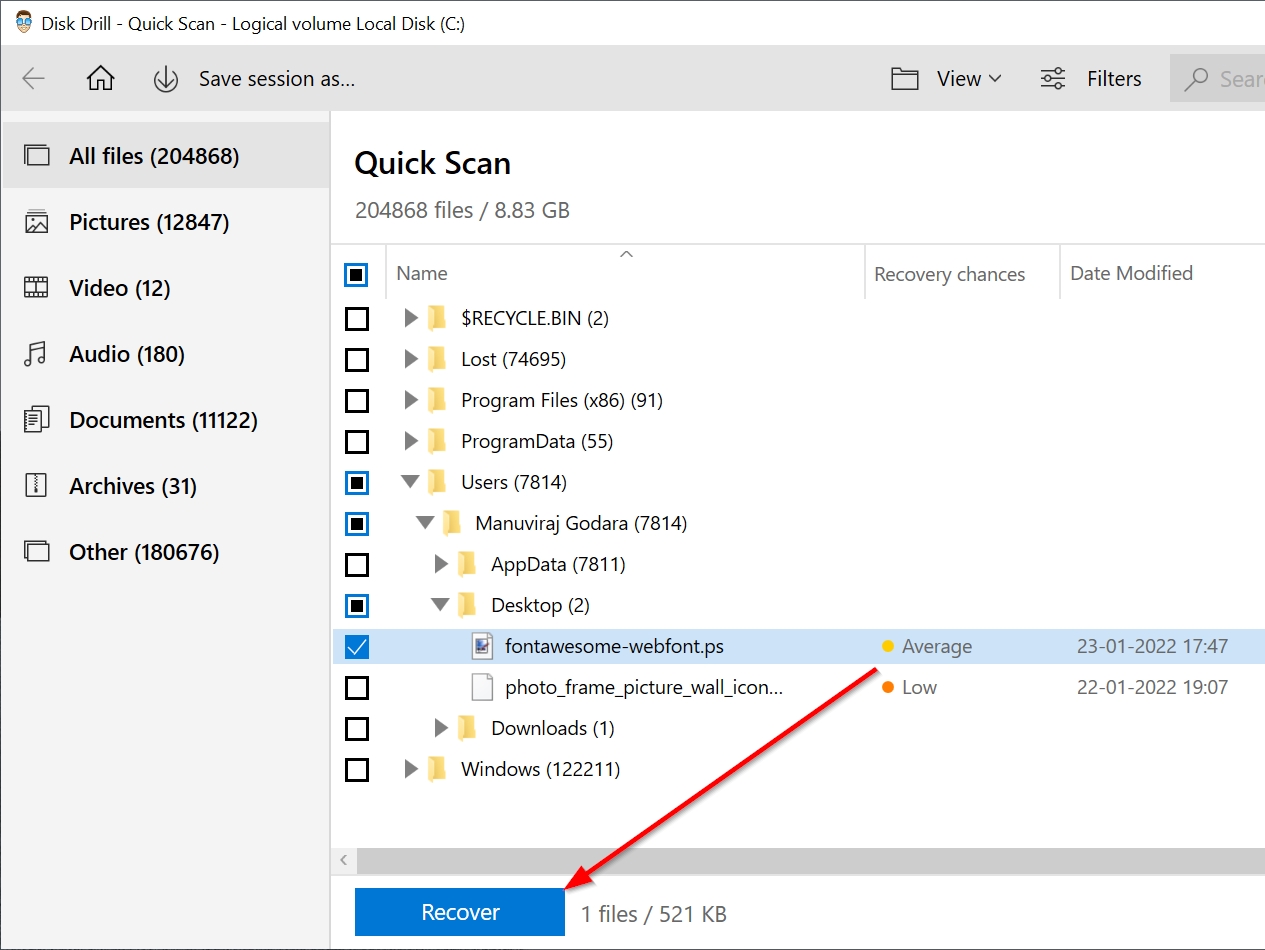
The steps listed above will help you recover your lost PS files in no time.
Recover PS from Windows Recycle Bin or Mac Trash
Both Windows and Apple’s macOS store temporarily deleted files in a dedicated directory. These directories are called the Recycle Bin and Trash, in Windows and Mac, respectively.
Here’s how you can recover deleted PS files from these folders:
Windows Recycle Bin
Step 1: Double-click the Recycle Bin icon on the desktop.
Step 2: Select the PS files you want to recover.
Step 3: Right-click the file, click Restore, and the file will be placed back in its original location. You can also drag and drop the file to a directory of your choice.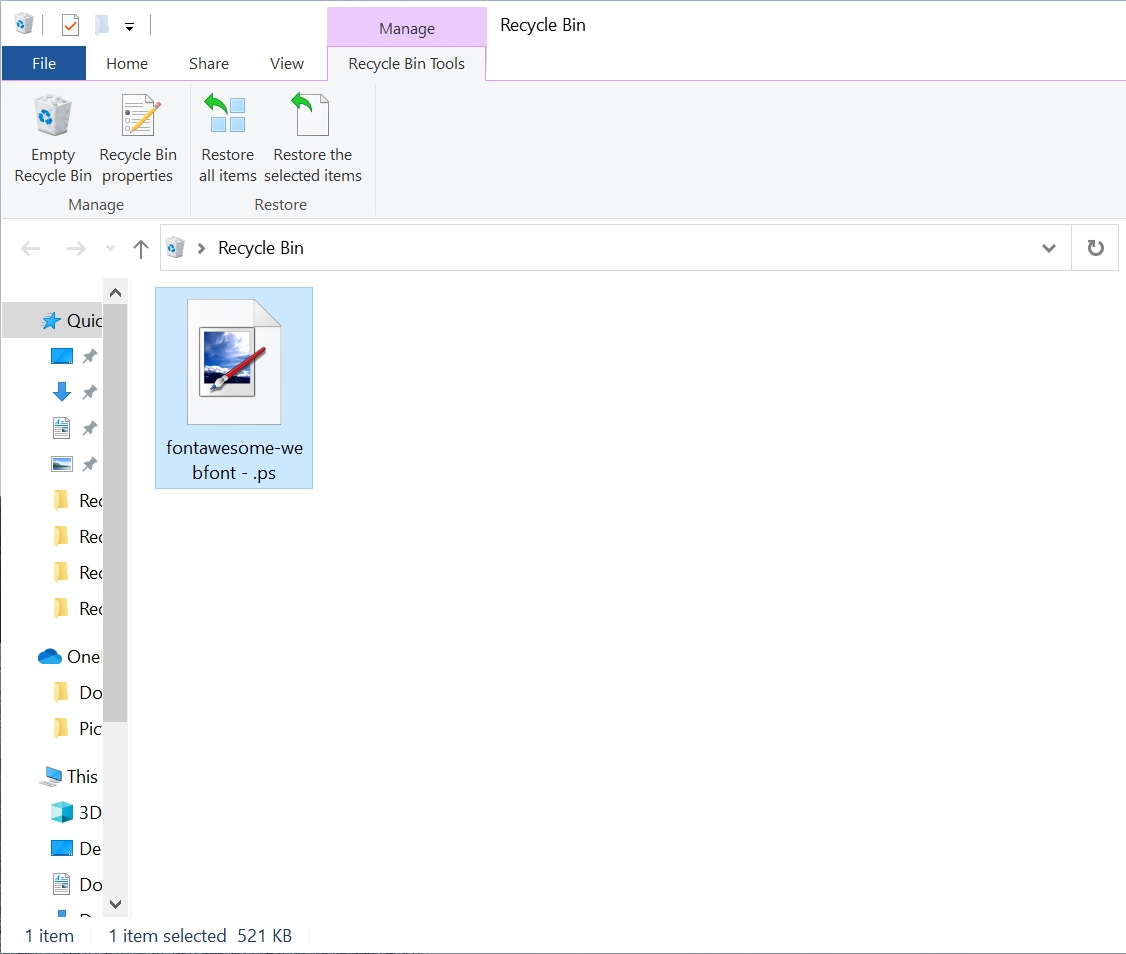
Mac Trash
Step 1: Click the Trash icon on the Dock.![]()
Step 2: Select the PS files you want to recover.
Step 3: Right-click the file and choose the Put Back option to move the file back to its original folder.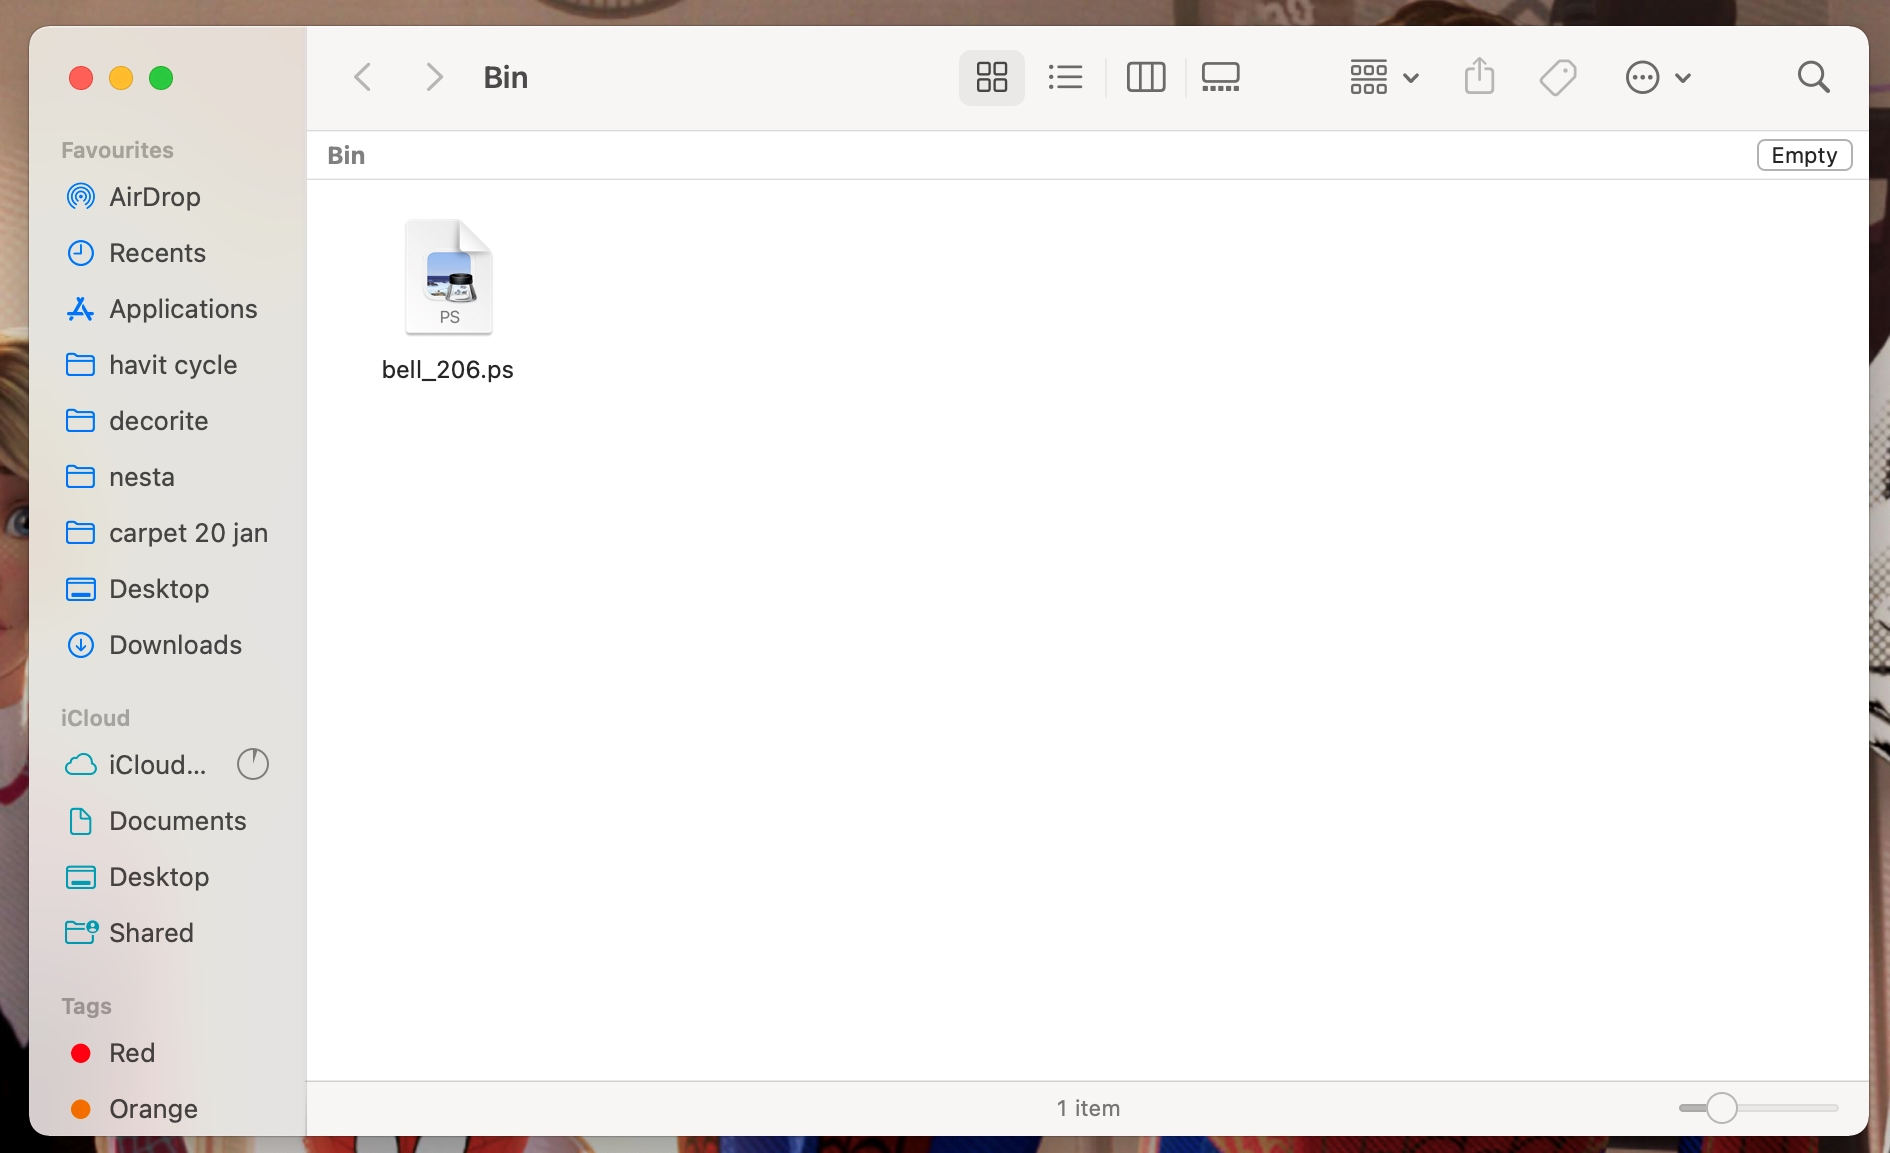
If you don’t see your PS files in the Recycle Bin or Trash, you likely deleted the files permanently.
Restore PS Files Using Windows File History and Mac Time Machine
Both Windows and macOS come bundled with automatic backup features. These are called Windows File History and Mac Time Machine. Both features store historical versions of files that can be easily restored.
Windows File History
Step 1: Search for “file history” using the search option in the Windows Start menu.
Step 2: Select the Restore your files with File History option. The icon will have a Windows directory icon with a clock next to it.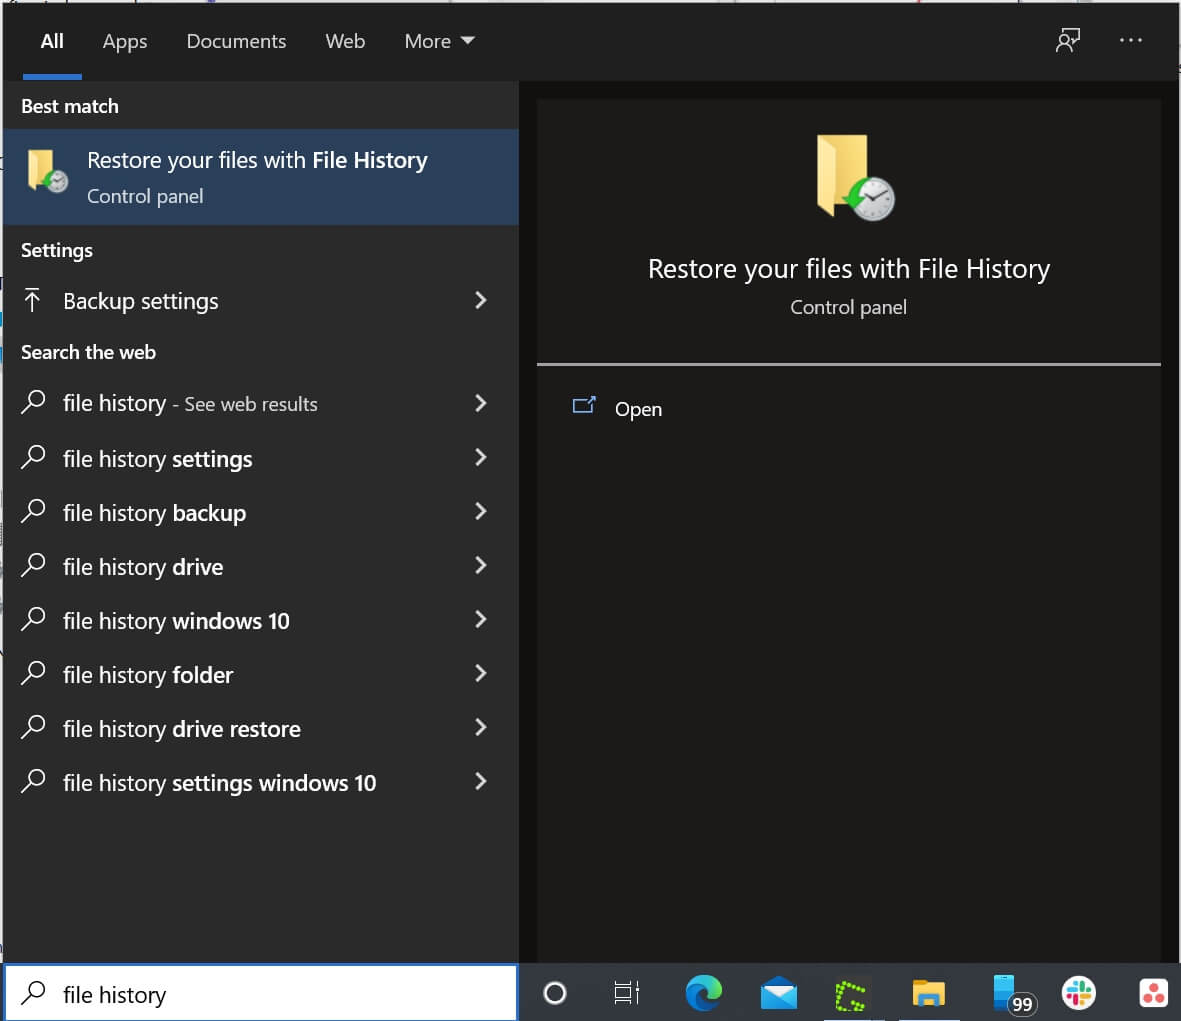
Step 3: Click the Restore personal files option on the left side of the window. You may not get this window at all if File History was properly configured.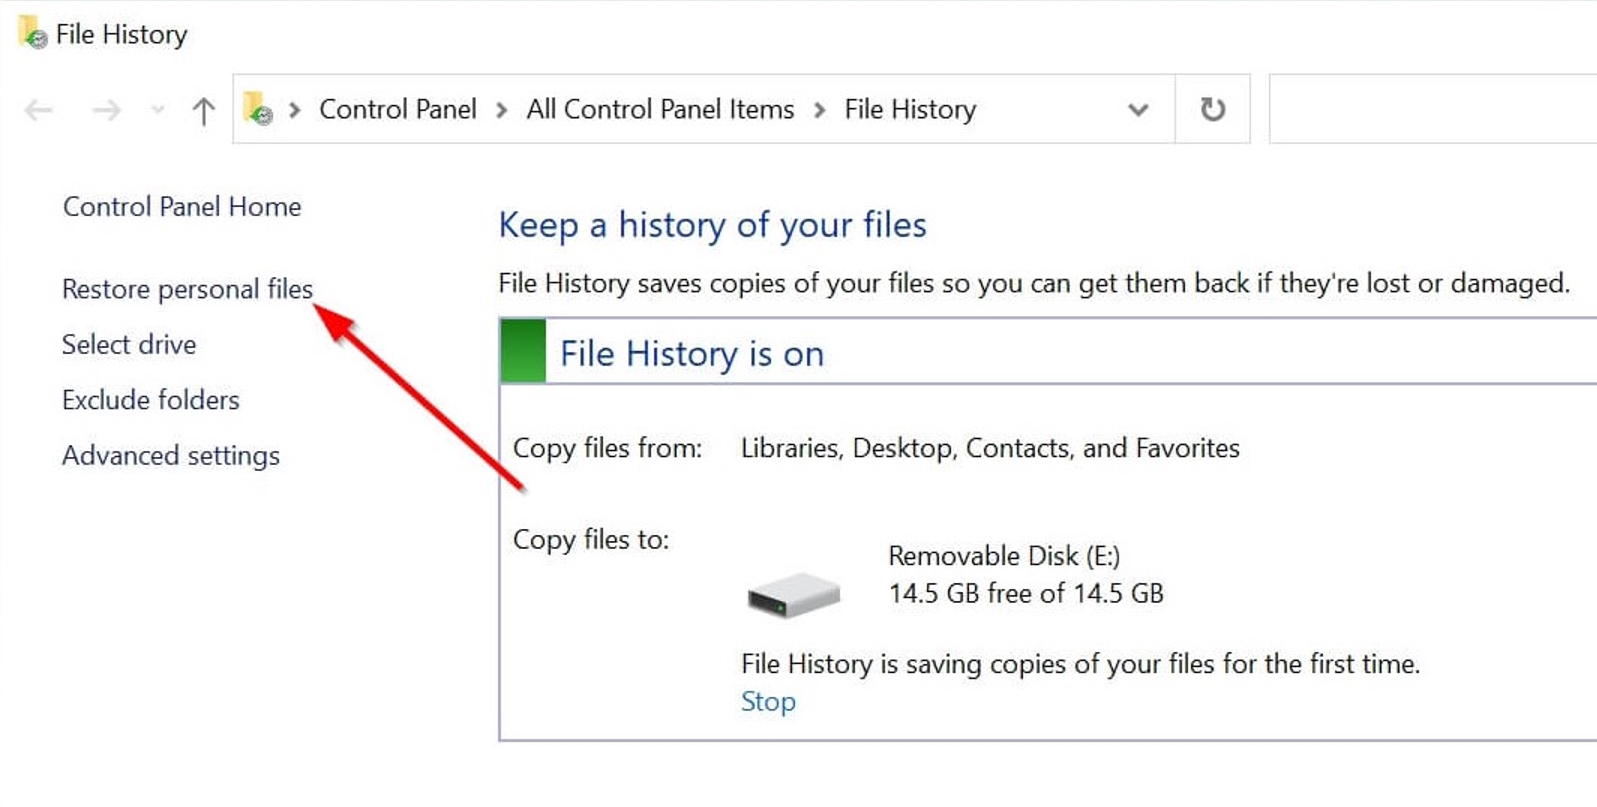
Step 4: Look for the folder that had your deleted PS files.
Step 5: Browse through the backups until you find the one containing your deleted PS files.
Step 6: Choose the PS files you would like to retrieve.
Step 7: Click on the Recover option at the foot of the page.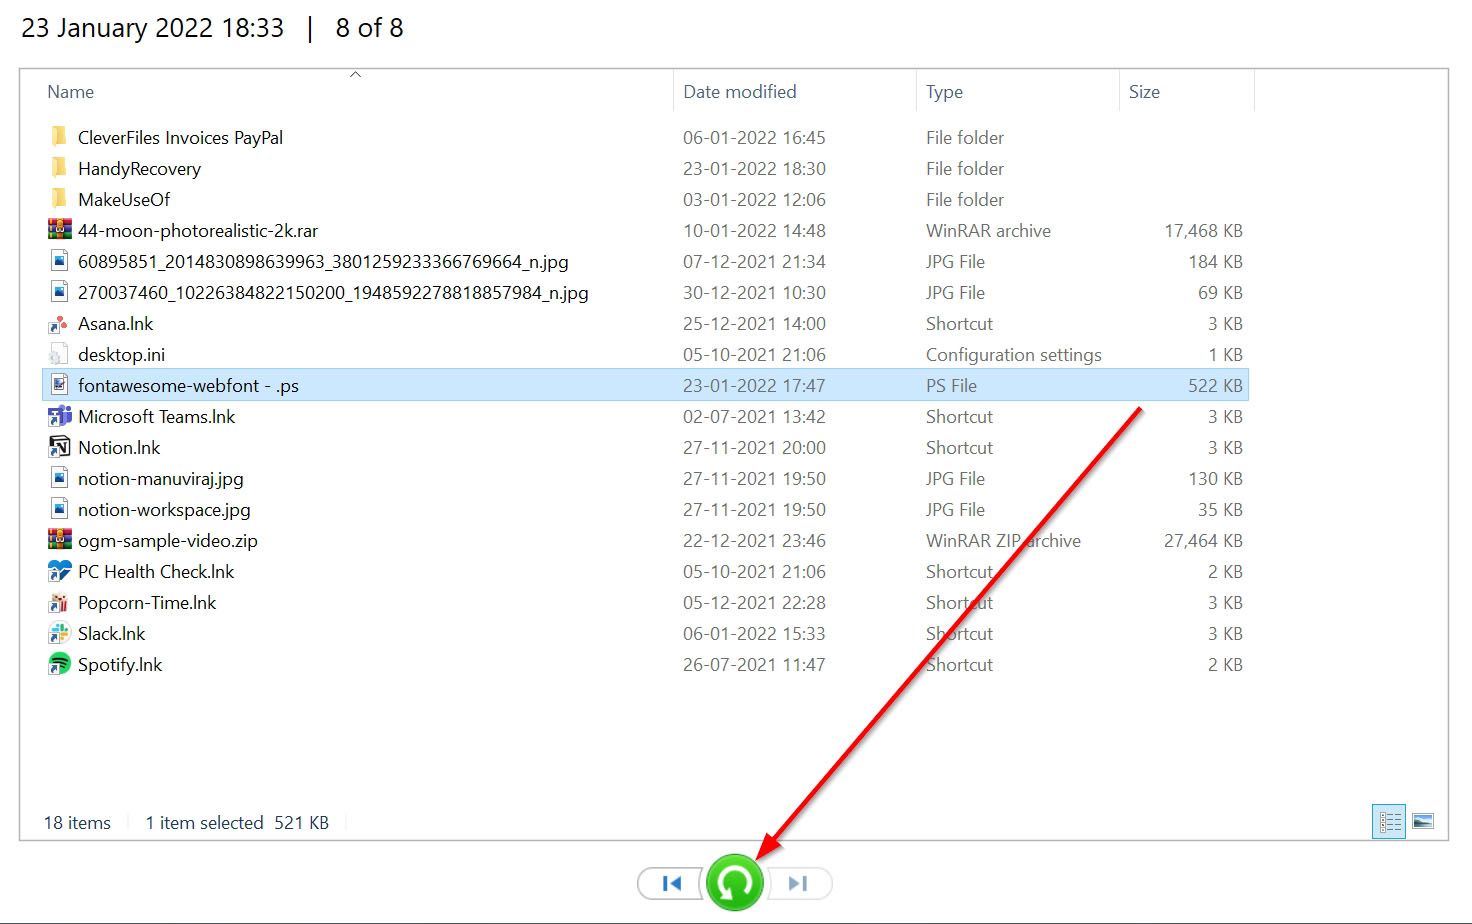
Mac Time Machine
Step 1: Open Spotlight using the Command + Space shortcut, and type “time machine” to find the Time Machine application. Open it.
Step 2: Navigate to the folder where your PS files are located.
Step 3: Browse through the backups until you find the one containing the deleted PS files.
Step 4: Select the PS files you want to recover, then click Restore.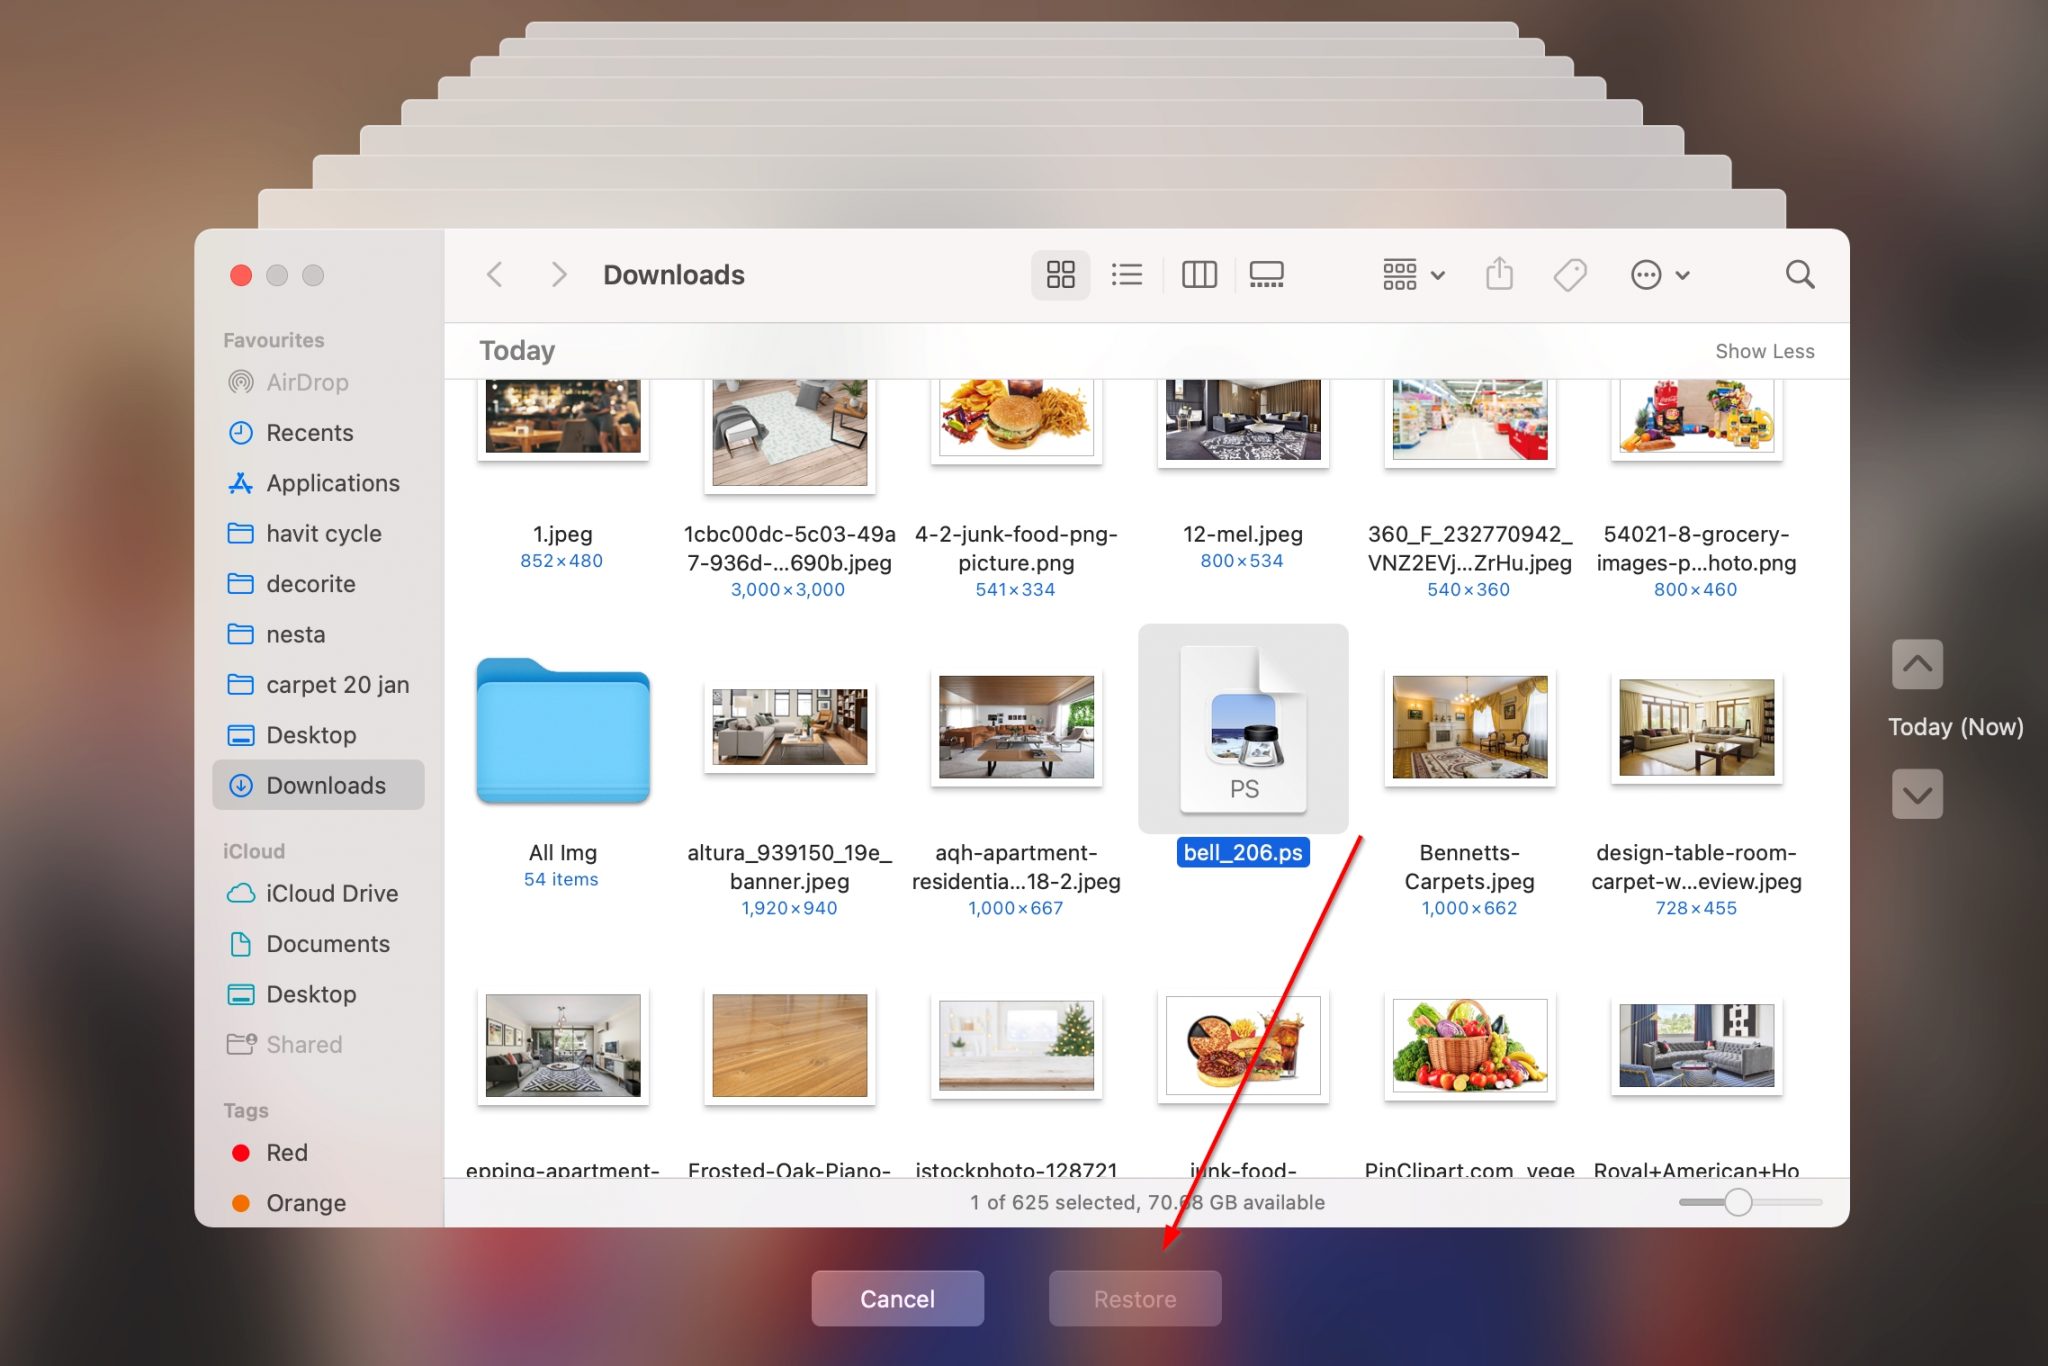
If the backup features were enabled, both File History and Time Machine will restore your deleted PS files to their original locations.
How to Open PS Files on Mac and Windows
There are many applications you can use to open a file with the PS extension. Unsurprisingly, a lot of them are part of Adobe’s Creative Suite. However, if you’re using macOS, you can open PS files using Apple Preview that comes bundled with the OS.
Windows users will have to download a third-party opener and associate it with PostScript files by right-clicking the file, then clicking Open with, followed by choosing the third-party program. If you want to skip downloading any software, you can make use of an online PS file viewer.
Programs That Open PS Files
- Adobe Illustrator(Windows, macOS): This vector graphics editor forms part of Adobe’s suite of software. It can open and edit PS files easily.
- Adobe Photoshop (Windows, macOS): Arguably, the most popular photo editing program. Naturally, it allows you to open PS files, and edit them.
- Canvas X (Windows): An image editing and publishing software for Windows. Comes with a free trial.
Tips to Avoid PS File Loss
While you can recover any lost PS file using the processes above, it’s always better that your file doesn’t disappear in the first place. Use the tips listed below to achieve the same:
- Back up your PS files: Upon buying a new device, always enable the backup features. Additionally, ensure that important folders are always selected when choosing folders to back up.
- Diversify your backup channels: Keep a backup of all your essential data in three different places – two external storage devices, and one cloud platform.
- Use a good antivirus program: It’s always a good idea to buy a good antivirus program. Computer viruses can cause extensive data loss, and it’s always best to follow safe browsing guidelines.
- Save your work regularly: When working on a project that uses PS files, save your work every few minutes to prevent data loss in case of a power outage or other uncontrollable factors.