Are you frustrated over that deleted MLV file? In this article, we have compiled a simple guide for quick and seamless data recovery. Stay tuned!
What is the MLV File Type?
Imagine having access to the features that an advanced and professional digital camera offers. The MLV or Magic Lantern is an open-source code software that essentially “upgrades” Canon cameras with enhanced capturing capabilities. Think of the MLV as an add-on to the Canon firmware. Anyone interested in using the software can add a memory card with the software to the camera. ![]()
However, it’s interesting to note that Canon never officially advocated for the MLV firmware. The latter just grew in popularity thanks to quite a few great features.
Users prefer the MLV format for its ability to save footage in raw data – producing images in a scintillating 14 bit and 4:4:4 format. The result is a wide array of color shades: over 68 billion! Consequently, there are way more versatile editing options in the post-production phase.
According to the official website, MLV can be used for functions like audio controls, exposure controls, image overlays, display tweaks, advanced scripting, movie hacks, shoot features, focus tools, among others.
How to Recover Deleted MLV Files?
Losing your data is never easy. While dealing with MLV or similar types of files, there might be common issues that you might want to avoid. Hence, understanding the cause of data loss will help you retrieve the file in a faster way. The common causes of losing a file include:
- Accidental formatting: This can happen while checking the properties of the file and formatting it by chance leading to the loss of the file.
- Deleting the file: Sometimes, we tend to delete a file by mistake and lose it. Usually, the files could be recovered from the Recycle Bin. However, permanently deleted files are hard to find.
- Unsaved Workflows: Well, even the most experienced techies sometimes complain that they forgot to save their sessions – resulting in file loss.
- Virus attack: The device, while connected to a system with an internet connection, can lead to a virus or malware download unknowingly, which might later affect the loss of files.
- Accidental changing of file systems: This might lead to not being able to access the file. However, in this case, the system needs to know how to read them and will not lead to the complete loss of file.
To deal with any kind of data or file loss, a few options to retrieve the files are given below with easy-to-follow steps for each of the options. We hope it helps you to recover your lost file.
How to Recover MLV Files with Software?
As the first option, it is advisable to use software like Disk Drill to restore the files as it is not only beginner-friendly but also has proficient data recovery capabilities.
The software is free to use and can be easily downloaded and installed in your system by following a few basic steps. It is available for both Windows and Mac. After the installation, it can be used to recover the deleted MLV files, steps for which are given below.
Let’s breakdown the method to recover MLV files using Disk Drill:
- Download Disk Drill and follow the guidelines in the application for easy installation of the software to your system.
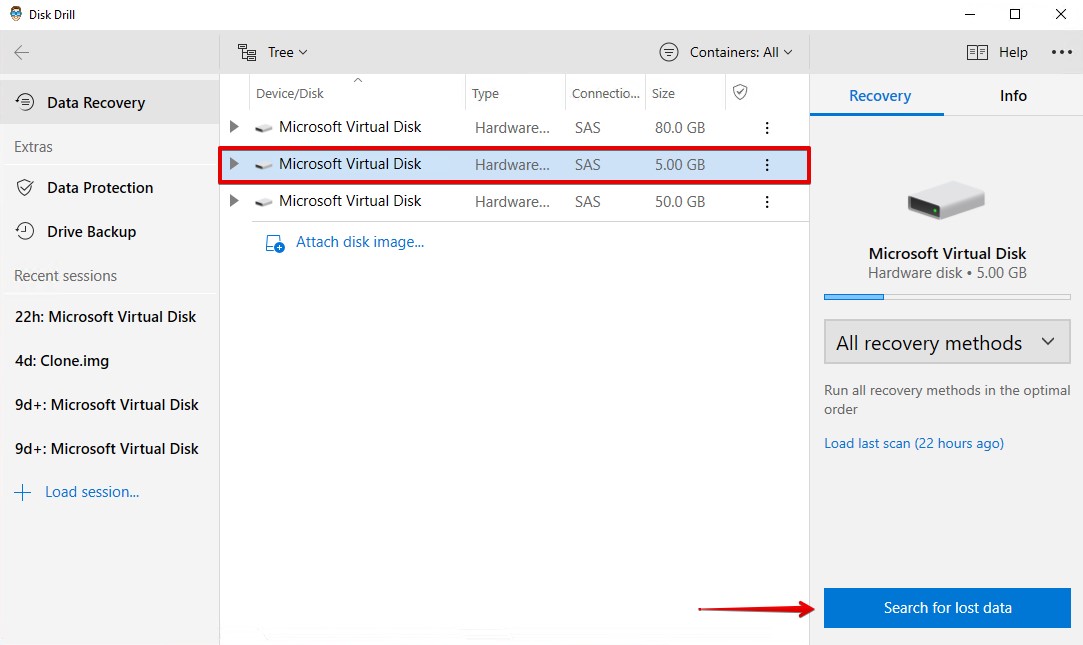
- Connect your device to the system, and from the list of all the connected devices visible on the screen, select the device that contains your deleted files. Select Search for Lost data.
- Choose the type of recovery you wish to make to retrieve your file: quick scan for recently deleted files and deep scan to find the elusive files. Also, opt for a proper recovery directory.
- The scan will begin to search the files. You can pause or cancel the session at your convenience. The work already done will be saved automatically and will be visible on your screen.
⏯️ Note: Disk Drill also allows you to pause and resume scans on demand.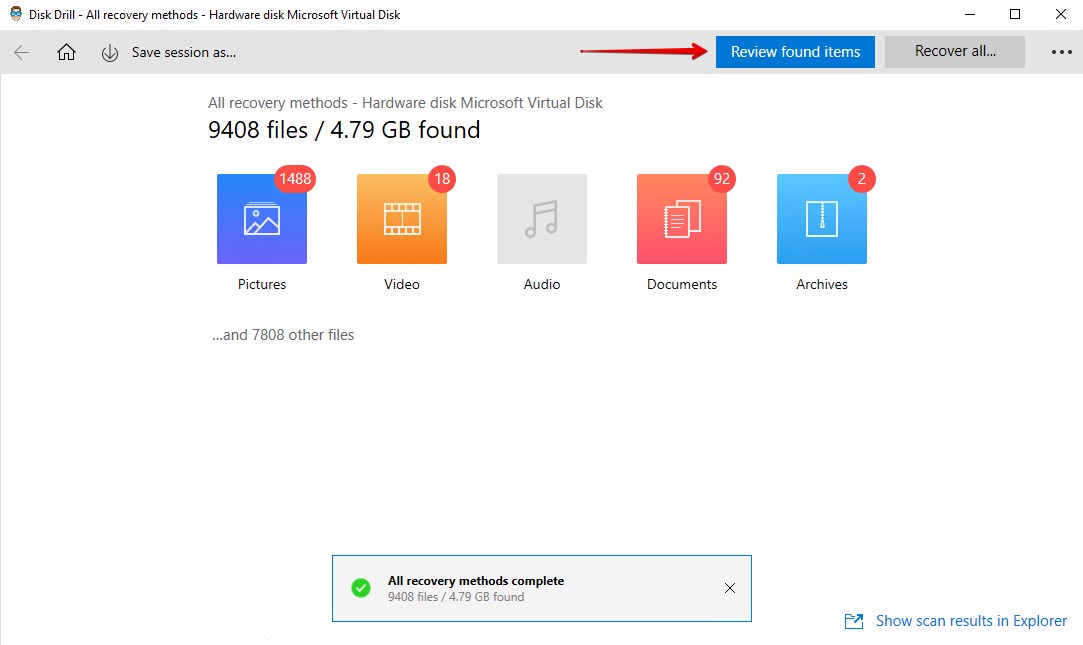
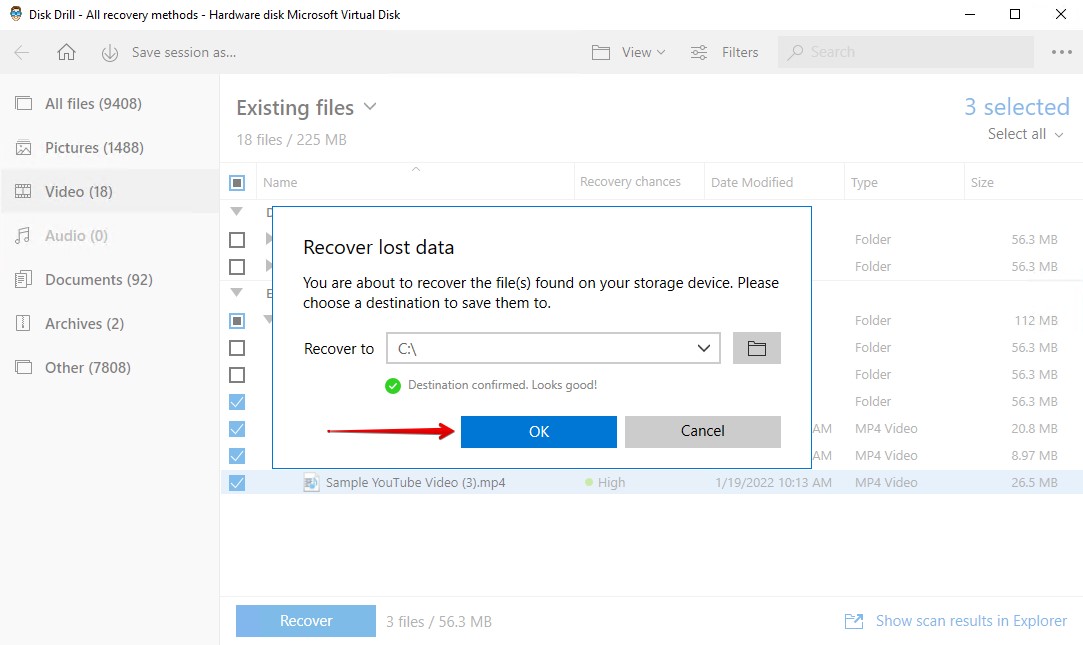
- Select the files you want to retrieve and click on Recover.
- After the scan is completed, a list of files will be visible on your screen from which you may select the files to be restored and save them to a folder of your choice.

Recover MLV Files from Windows Recycle Bin and Mac Trash
Recovering MLV Files from Windows Recycle Bin:
- Select the Recycle bin icon on your desktop.
- Pick the MLV files that you need to recover. Drag these files to a preferred folder on your system.
OR
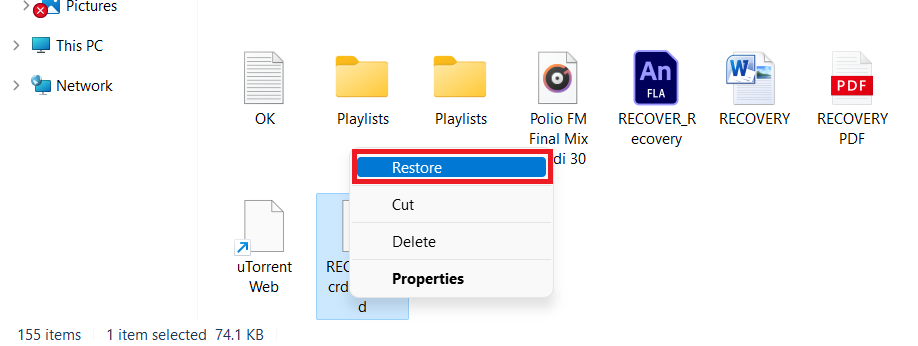
Individually, select each file and execute the command Restore. This will move the files to its original folder.
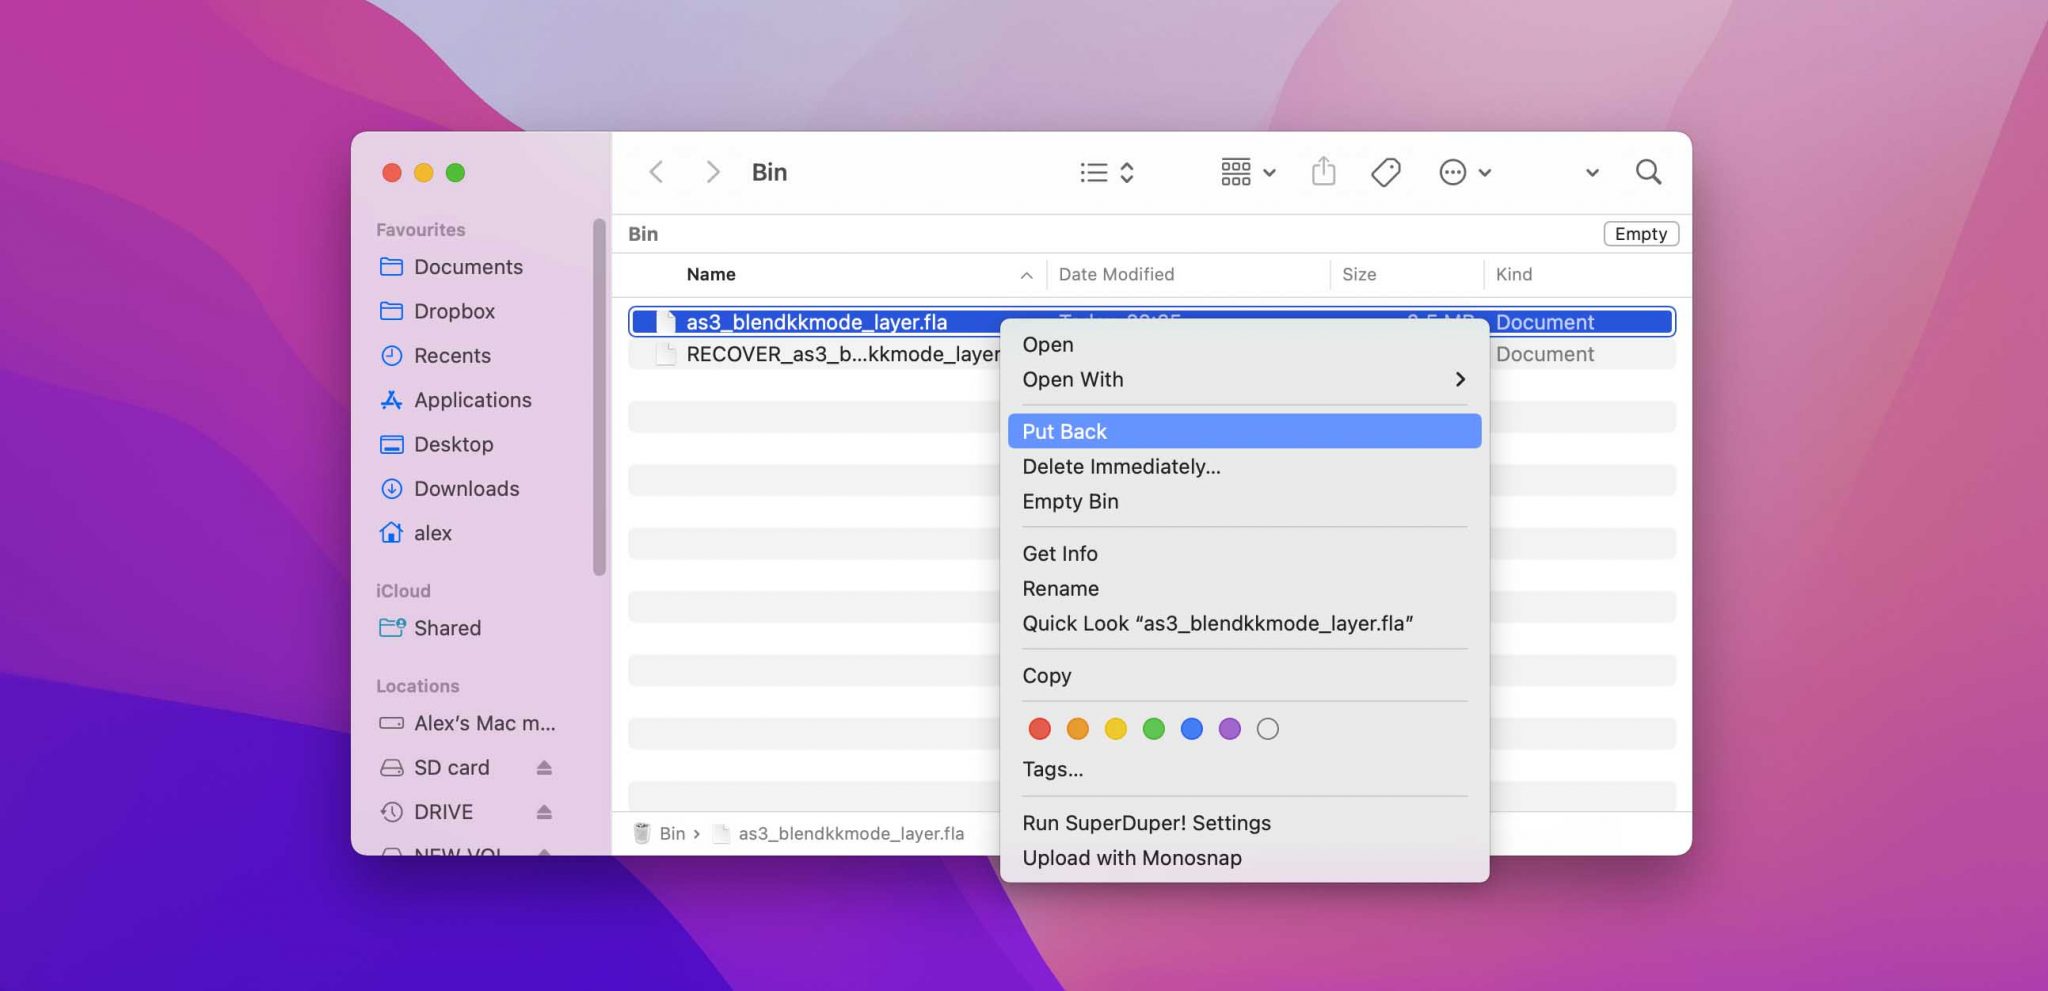
Recovering MLV Files from Mac Trash:
- Select the Trash icon on your dock.

- Select the MLV files that you wish to recover from the list of files visible on the screen. Drag the files to the preferred folder on your system.
OR
Select each file and execute the command PUT BACK. This will move the file to its original folder.
Restore from a Recent Files Folder
Apart from the above options, Windows and Mac have built-in backup solutions to recover a lost file. These include files that are damaged due to some reason, storage devices not being able to serve their functionality, and those lost during formatting.
In such cases, the options to use are File History on Windows and Time Machine on Mac.
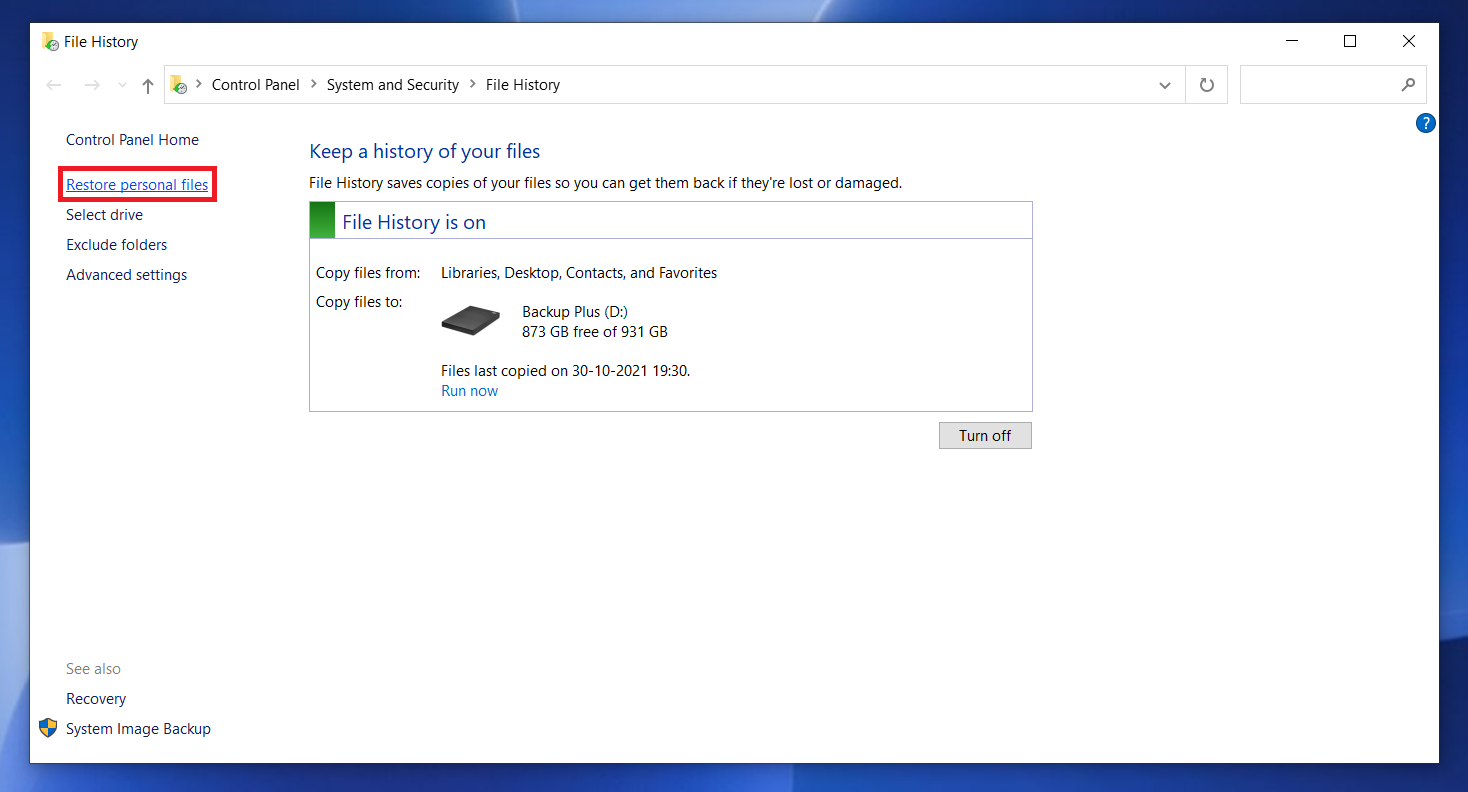
Recovering MLV Files using Windows File History
- Click on the Start Menu and type File History. Click on Restore your files using File history.
- Turn on the File History option by selecting an internal or external storage option where you wish to recover your files. (Ignore this step if already turned on)
- Click on the Restore personal files option.
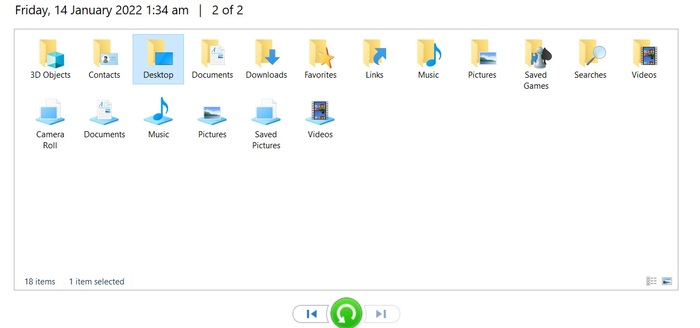
- Select the MLV files you wish to recover from the available backups.
- Click on the green recover option.
Recovering MLV Files using Mac Time Machine
- Open Spotlight (Command key+Space bar) and type Time Machine.

- Select the MLV files you wish to recover from the available backups.
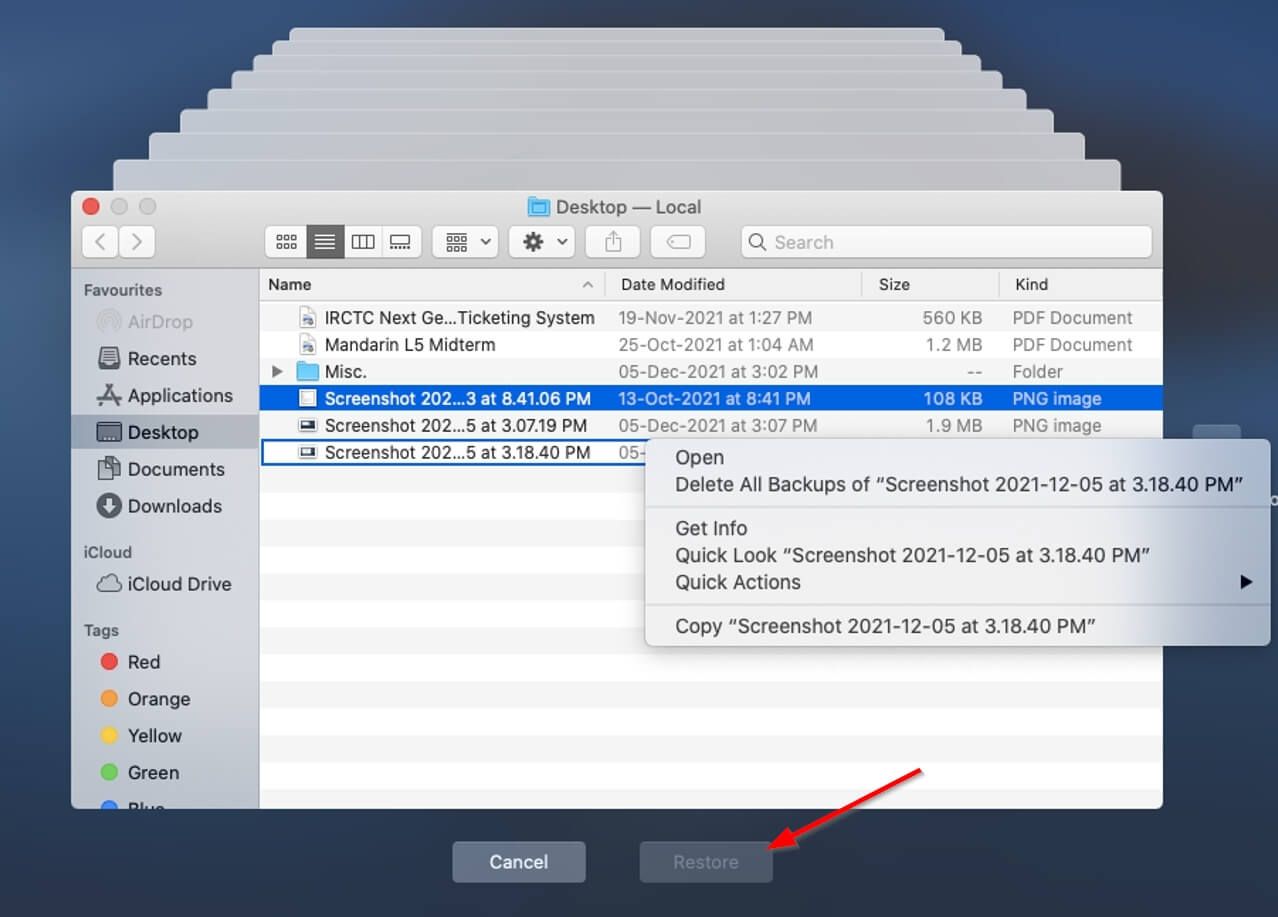
- Click Restore
How to Open MLV Files on Mac and In Windows
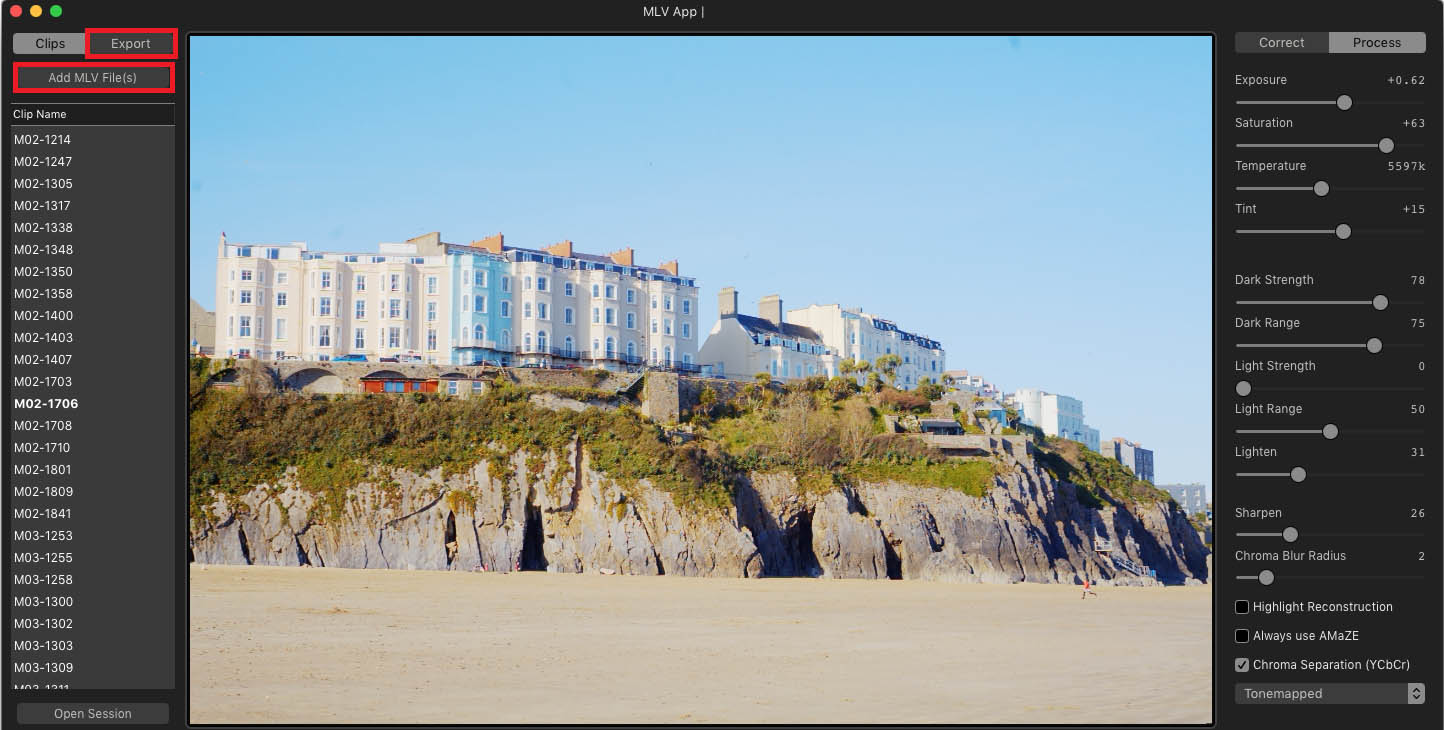
One of the easiest ways to use a file with an MLV extension is to convert these files into formats that could be used with software that is usually available to you. To do this, download and install the MLV app.
Use the import option to open the file that you want. Here you can playback your file to review it. You can also use the app to process the file even before converting it into another format. After making the required changes that you may want, use the export option. An array of file format options are available to choose from. This application is available for both Windows and Mac.
Sometimes due to an error, you may not be able to open your file. This can happen even if the program that should open your file is already installed on your computer. You can allow Windows to look it up automatically online. To fix this issue manually :
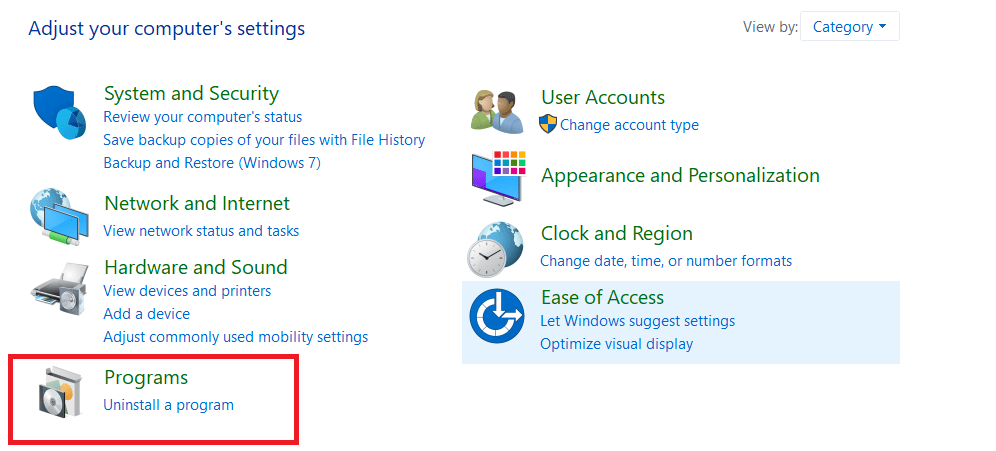
- Go to Start and Open Control Panel.
- Head over to Programs
- Now, select Default Programs.
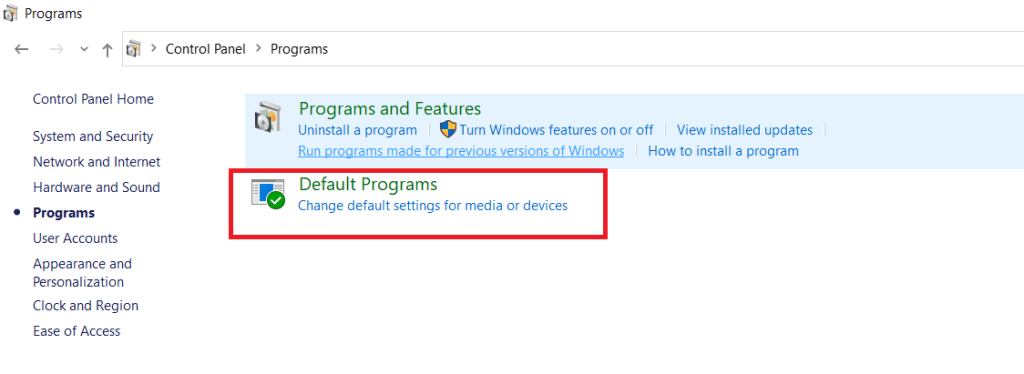
- Click on this option.
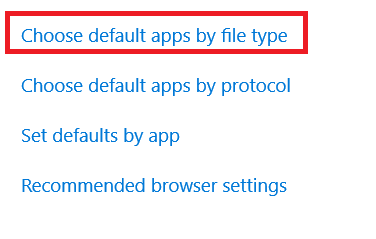
- Choose the required default app.
Programs that Open MLV Files
You can use the MIRawViewer to view files in the MLV format. The program is compatible with both Mac and Windows. It accommodates the original RAW format and also the new RAW v2.0 format.
A few other applications that can read MLV files are:
- RAWMagic
- Raw2dng
- Raw2cdng
- MLV Converter
- Rawanizer
Tips to Avoid MLV Files Loss
You surely must have heard the phrase; prevention is better than cure. While the above-mentioned steps will help you recover your files, it is important to take preventive measures that will keep your files secure and save you from ending up in a data loss situation. Some of the safety measures you can take are as follows:
- 💾 Save your data periodically– When you are working on a project, saving it manually from time to time is an important step to remember. This simple act can save you a lot of time in what could otherwise be a data loss situation.
- 📀 Keep multiple backups – In case of a system crash or any other type of malfunction, backups can help you seamlessly recover your data. Use backup options available on both Microsoft Windows and Mac. Also, you can use external storage devices for the same.
- 🌐 Maintain a good network connection – Projects that involve working with file types such as MLV may require a stable internet connection. Have a network connection that you can rely on.
- 🔋 Maintain decent power supply – An uninterrupted power supply is among the primary needs while working on laptops and computers. Investing in Uninterruptible Power Supply or UPS might help in data loss situations due to power outages. It will provide you with valuable time to save your work and turn off your system safely.
- 🏴☠️ Avoid using pirated software – When you are in the process of video or photo editing, using pirated versions of software may seem like a quick way to save money. This might lead to malware attacks and systems crashing due to the modifications used to make the software work. Therefore, it is crucial to use the software provided by reputable companies. Moreover, sometimes, users complain that their files disappear while using a cracked tool.
- 💉 Use a reliable antivirus– By installing a reliable antivirus program on your computer, you can prevent malware attacks and data loss scenarios. Look up some technical information online to find which program might suit your system requirements will help you in the long run.
These simple measures can help you to save your data.