TAR.XZ may not be as common as some of the other compression archives out there, but it’s an excellent way to reduce the size of some of your files so you can store them away for later use. Just like any other information on your computer. TAR.XZ files are prone to accidental deletion or data loss, leaving you scrambling to retrieve your important information.
In this guide, you’ll learn a little more about what a TAR.XZ file is and we’ll provide you with the best methods to recover files of this format in case they’re ever missing or compromised for whatever reason.
What Is TAR.XZ?
Despite this file type being relatively rare nowadays, it has actually been around as far back as the 1980s. It’s a compression archive much like ZIP, 7z, or RAR files and it’s used to compact your files and folders so they take up less space on your hard drive. This makes it easier to share the files through your network, upload them to a website, or store them on a storage medium for safekeeping.
A TAR.XZ file is a lossless data compression file format used for compressed streams. They are created by utilizing the “tar” command on Linux or UNIX operating systems, which is where the file type got its name. The “XZ” part is from a compression utility developed in 2005 that was meant to be an upgrade over the more common ZIP format.
It may not be as popular as some of the other compression archives, but TAR.XZ remains one of the best open-source compression formats available on account of its lossless nature. This means that no matter what you compress in this format, you’ll find no dip in quality once you unpack it.
How to recover deleted TAR.XZ files
There are a few ways you can get back lost or deleted TAR.XZ files, with some methods being more effective than others. Here are the best ways you can recover them:
How to Recover TAR.XZ with Software
The quickest and most painless way to retrieve your deleted TAR.XZ files would be through the use of premium data recovery software. Disk Drill is among the best in the business on account of its wonderfully intuitive interface, host of features, and, most importantly, its sky-high recovery rate. Follow the instructions below and Disk Drill will have you rescuing your TAR.XZ files in no time:
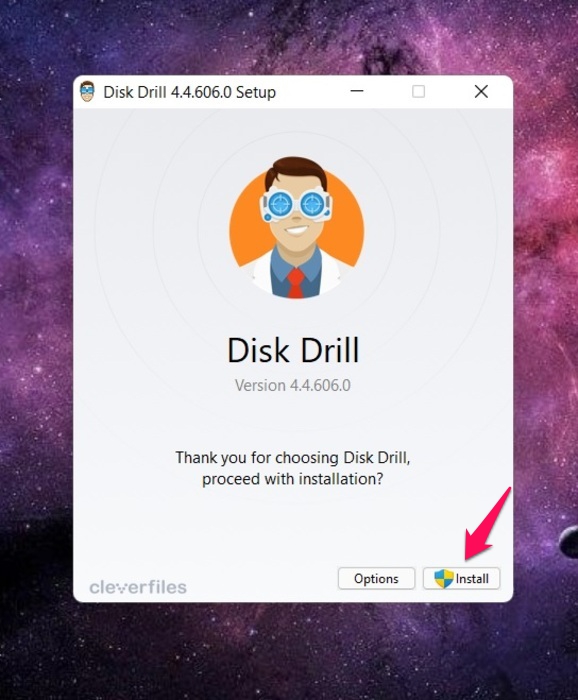
- Download the Disk Drill installation file from its official website.
- Open the downloaded file and follow the on-screen instructions until it’s successfully installed.
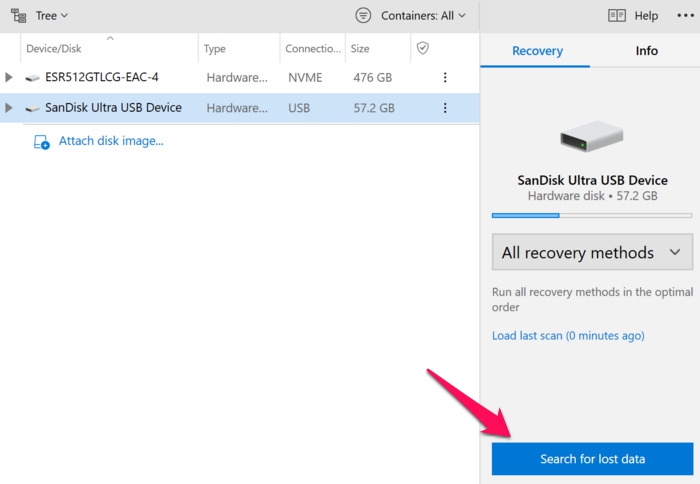
- Launch the Disk Drill app, select the storage medium you want to recover your TAR.XZ files from, and then click the Search for lost data button.
- The app will now start scanning your storage medium for recoverable files. How long this takes depends mostly on the size of the drive you’re scanning and its read speed. If you’d like to skim through the results as the program is scanning, you can click any of the category icons on the window and the files will appear in an Explorer-like view.

- Once you’re on the results page, you should be able to locate TAR.XZ files in the Other category. Simply head to the folder where the files were last located and they should appear there. Just keep in mind that you should be looking under the Found files dropdown and not any other ones.

- Tick the box next to the TAR.XZ file you want to retrieve and then click the Recover button along the bottom of the page. A pop-up will appear asking you to select the destination of the recovered file. This should be a different storage medium than the one you’re recovering from since that could cause some issues with overwriting.
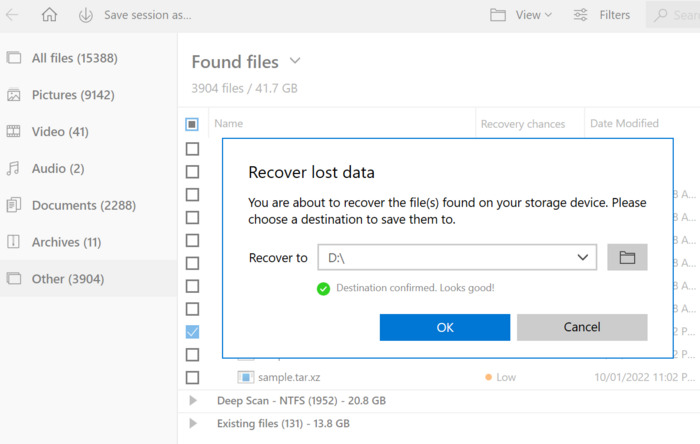
- When you’re ready, click the OK button and the program will begin recovering your files. Upon completion, there’ll be a Show recovered data in Explorer button that you can click that takes you straight to your recovered file.

Recover LXO from Windows Recycle Bin or Mac Trash
Windows Recycle Bin
Unless you use the Shift + Delete command on a Windows PC, deleted files are generally sent to the Recycle Bin which you have to empty out to permanently delete. To restore files from your Recycle Bin, just follow these steps:
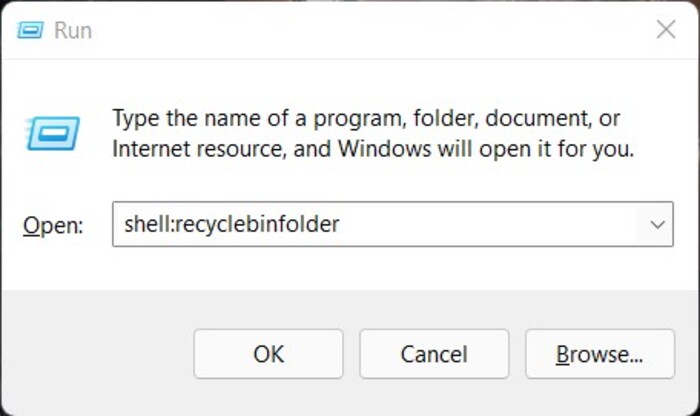
- The Recycle Bin icon is usually located on your desktop and you can access it by just double-clicking it. Alternatively, if you like to keep a clean desktop, you can bring up the Run command window by pressing Windows + R, then type shell:RecycleBinFolder and hit Enter.
- If your TAR.XZ is in the Recycle Bin, simply right-click the file and select Restore.
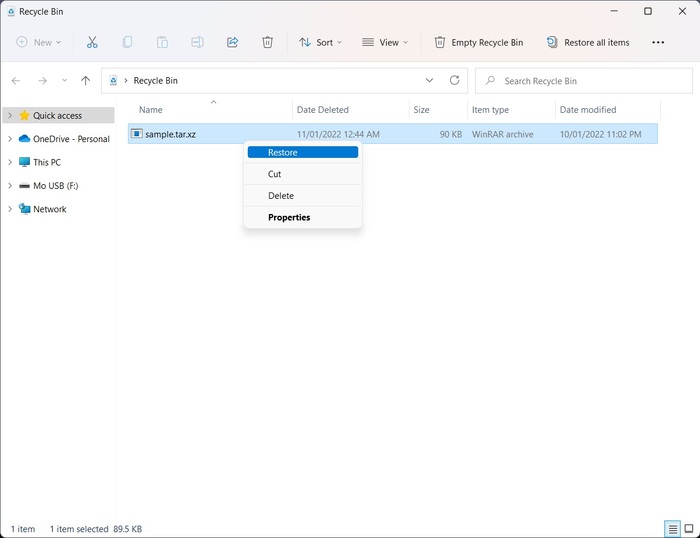
- Your file should appear in the same location you deleted it from.
Mac Trash
When using a Mac device, any deleted files are first sent to the Trash before being deleted permanently. Restoring them from the Trash is a very simple process.
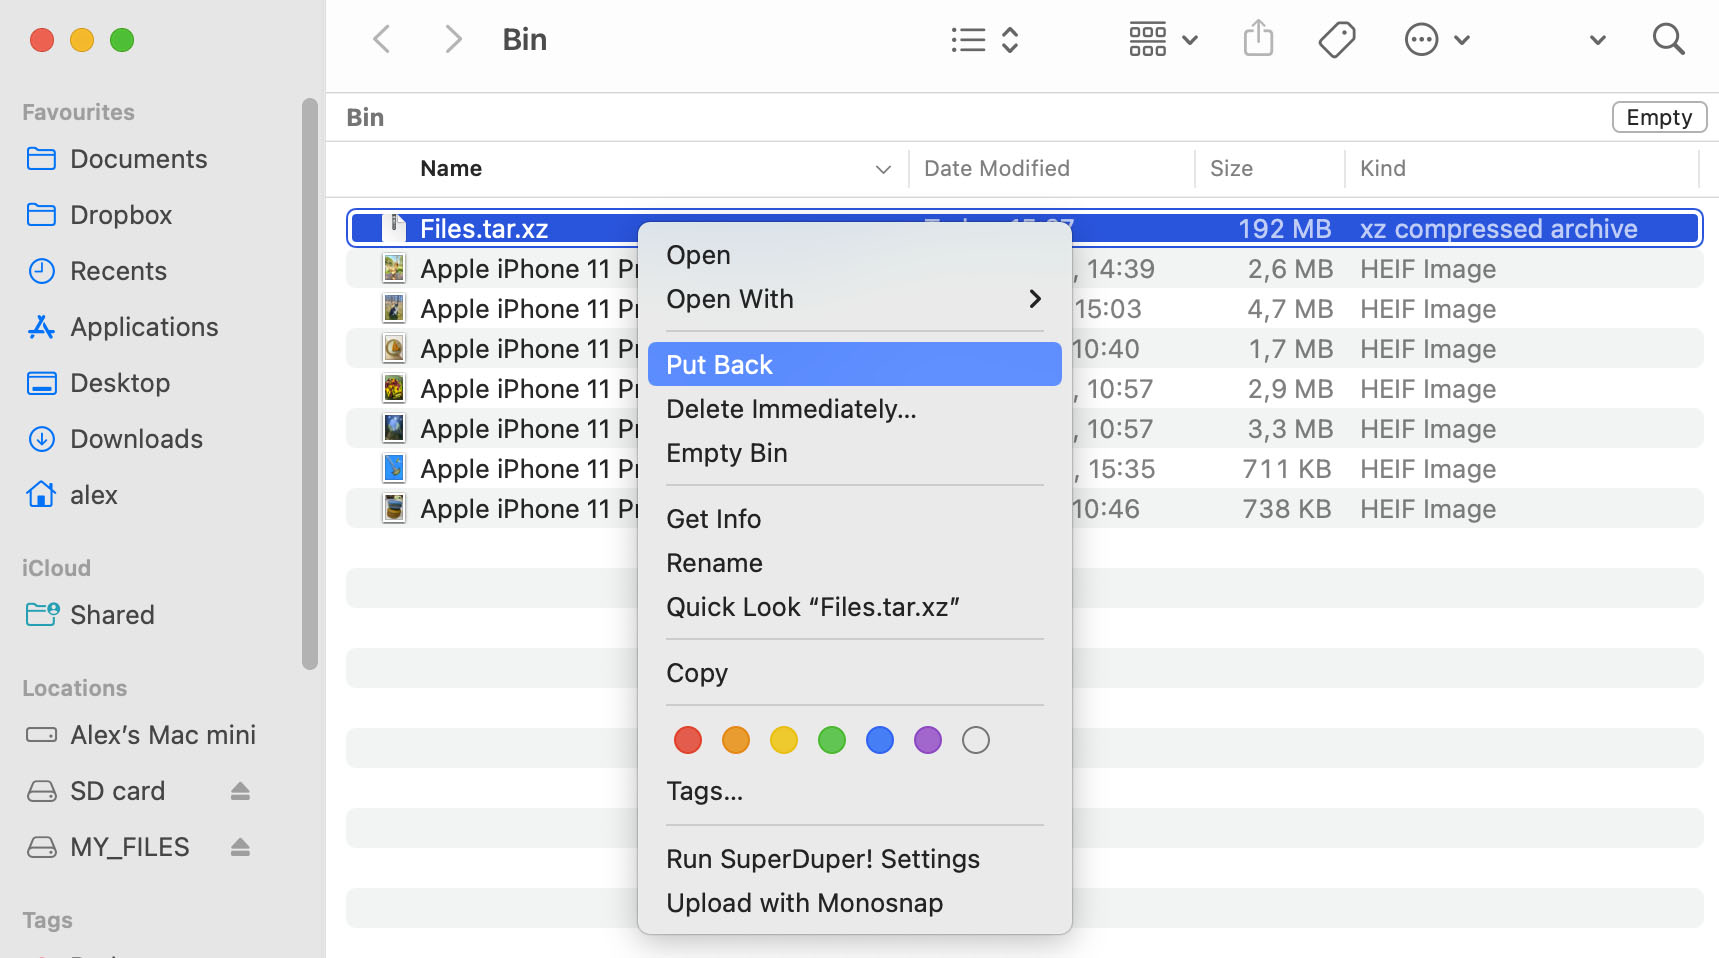
- Click on the Trash icon in your dock.
- Highlight the TAR.XZ files you want to recover, right-click any of them, and then select the Put Back option.
- The files will be returned to the location from where they were deleted.
Restore from File History
Windows has a feature called File History that regularly backs up files from specific locations on your computer. This feature usually has to be manually enabled first and it requires you to have a second storage medium to store the backups on, but if you have it turned on, you can use it to restore deleted or lost TAR.XZ files.
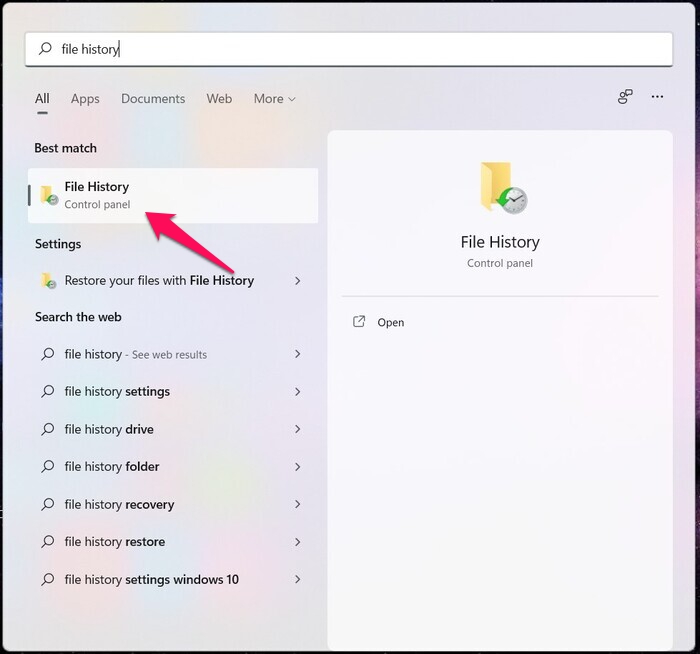
- Bring up the search tool from your taskbar and search for File History.
- Select File History from the search results to launch the feature.
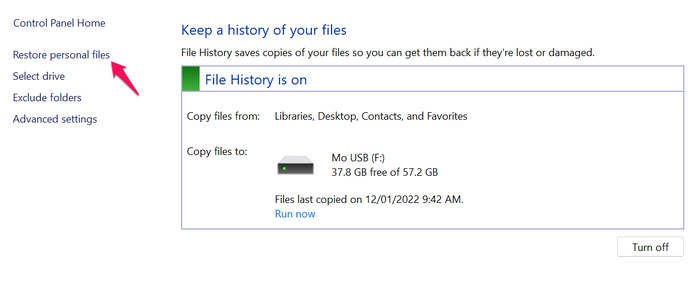
- Click the Restore personal files link from the left side of the window. This will redirect you to a window where all your backups are stored.
- Select the folder where your TAR.XZ files were last found.
- Choose the backup that contains your TAR.XZ files and click on the green button to have the files recovered.
How To Open TAR.XZ Files on Linux, Mac, and Windows
Just like most compressed archives, TAR.XZ can be accessed by some of the more popular file compression programs, like Winzip and WinRAR, most of which are free. For the purposes of this guide, we’ll show you how to use WinRAR to open the files, though it should work in the same way for other similar software.
How to Unzip TAR.XZ Files in Windows and Mac
- Download WinRAR from the official website and install it on your machine.
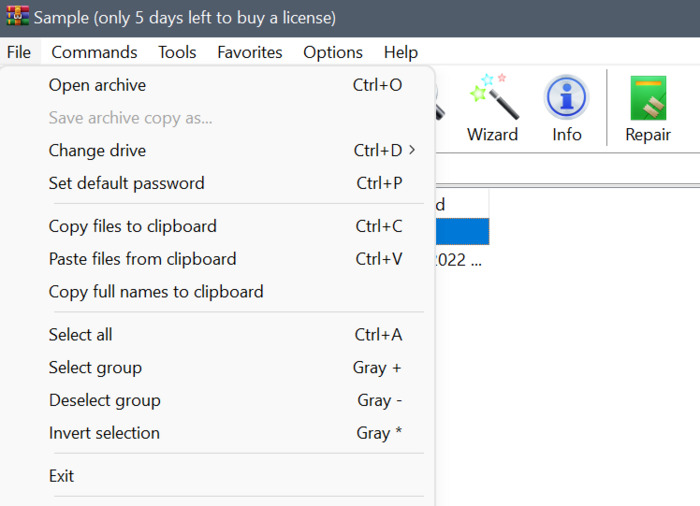
- Launch WinRAR and go to File > Open archive.
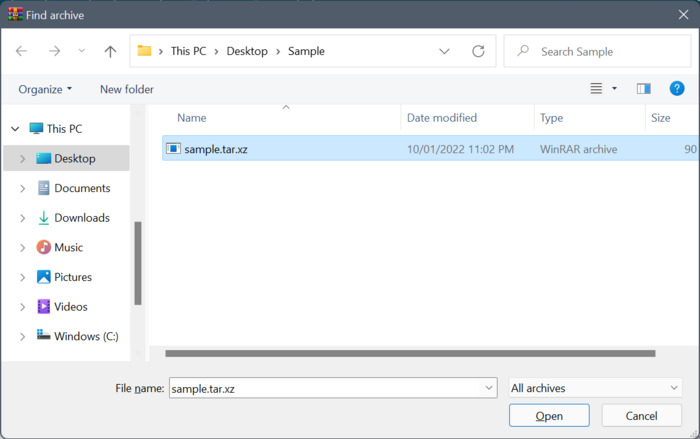
- Navigate to your TAR.XZ file and double-click it to open it in WinRAR.
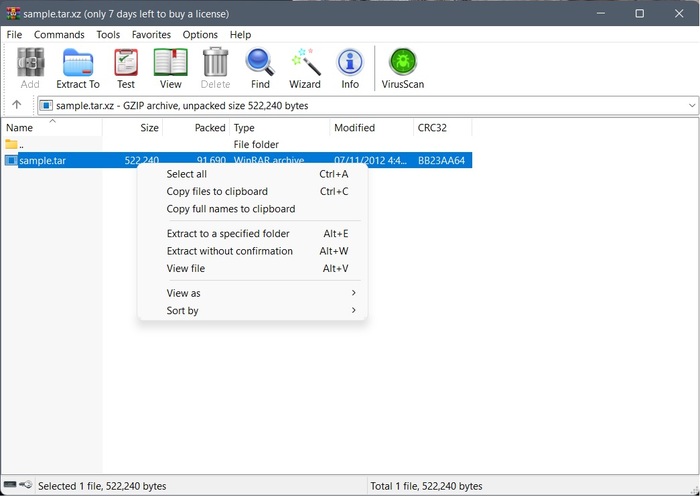
- Right-click the file and select Extract to a specified folder.
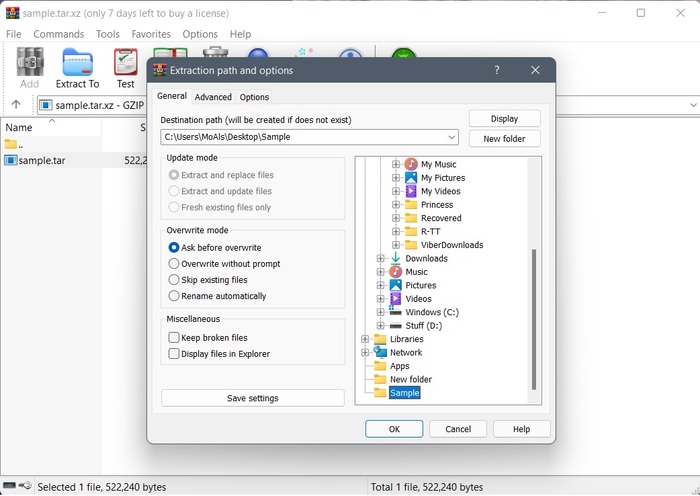
- Choose where you want the file to be extracted and click the OK button. All the contents of the file should be extracted to that folder.
How to Unzip TAR.XZ Files in Linux
Extracting a TAR.XZ archive in Linux is fairly straightforward. All you have to do is utilize the Unzip command. You can use the following command line:
unzip -q filename.tar.xz -d ./directory
For example, let’s say the file name is “sample” and your directory is “test”. Your command line would be “unzip -q sample.tar.xz -d ./test”.
Programs That Open TAR.XZ Files
Here are a few compression solutions that are capable of opening TAR.XZ files:
- WinRAR
- WinZIP
- 7-Zip
- PeaZip
- File Roller
- The Unarchiver
- XZ Utils (Linux)
Tips To Avoid TAR.XZ File Loss
For the most part, users can count on top-notch recovery programs and backup services to help them get their lost files back, but there’s always a chance that your files might just disappear for good. That said, it’s always best to avoid file loss altogether. Here are some tips on how you can do that:
- Always back up your files: No matter which operating system you’re running, there are various ways to back up your information, like the Mac Time Machine or Windows File History. It’s always a good idea to create regular backups using software or you could even save copies of your files on a separate storage medium for safe-keeping. That way, even if you forgot to save your work, you wouldn’t have to start from scratch. You can just resume from whatever stage your backup is on.
- Separate your work computer from your leisure one: Overloading your PC or laptop with lots of different files and programs could cause your operating system to become unstable. This could lead to abrupt shutdowns while your work is unsaved, failure to boot, or even some significant information loss. That’s why it’s best that you have a machine just for work, where you only install apps that are necessary for your job.
- Install effective antivirus software: Especially nasty viruses can cause some major issues to your machine, including significant file loss and even wiping out your hard drive completely. You’ll want to keep your computer inoculated from such things at all times.
- Perform regular computer or laptop maintenance: Not caring for your machine properly can lead to lots of serious issues. For example, failing to clean out your PC or laptop on a normal basis can cause some major dust build-up. As a result, the temperature of your machine could shoot up drastically and might end up frying some of your components. If that affects your hard drive, there’s a real chance that you might lose some important information.