What is an MXF File
Material Exchange file format, more commonly known as MXF, is an industry-standard audio and video file format used by professionals. It contains detailed file information such as frame rate, frame size, creation date, and other custom data that are provided by the professional.
MXF files are designed to be platform-agnostic. Meaning, video production studios or professionals can access it using different platforms even with the absence of editing software. The file also contains multiple tracks of video and audio content that provide seamless editing regardless of whether you’re switching from one editing program to another.
How to Recover Deleted MXF Files
Since MXF files are used in the video production industry and contain a lot of important information, professional videographers and editors cannot afford to lose them. Luckily, there are several methods to retrieve MXF files that are missing, disappeared, or deleted, and we’ll cover them in the next parts of this article.
Recover Permanently Deleted MXF File with Software
Thanks to technology, it is now easier to recover files using data recovery software. So, you no longer need professional help. All you have to do is to pick reliable software out there and install it on their computer.
Speaking of reliability, one of the most recommended data recovery tools is Disk Drill by CleverFiles. It is equipped with advanced data recovery algorithms and tools that can help prevent future data loss and is good for MXF file recovery. It’s powerful yet the recovery process is simple, even for beginners.
To start recovering your lost MXF file using Disk Drill, follow the steps below:
Step: 1 Visit an official website and download Disk Drill.

Step: 2 When the file is done downloading, install the Disk Drill. Do not install it on the drive where the files were lost, as this may overwrite them.
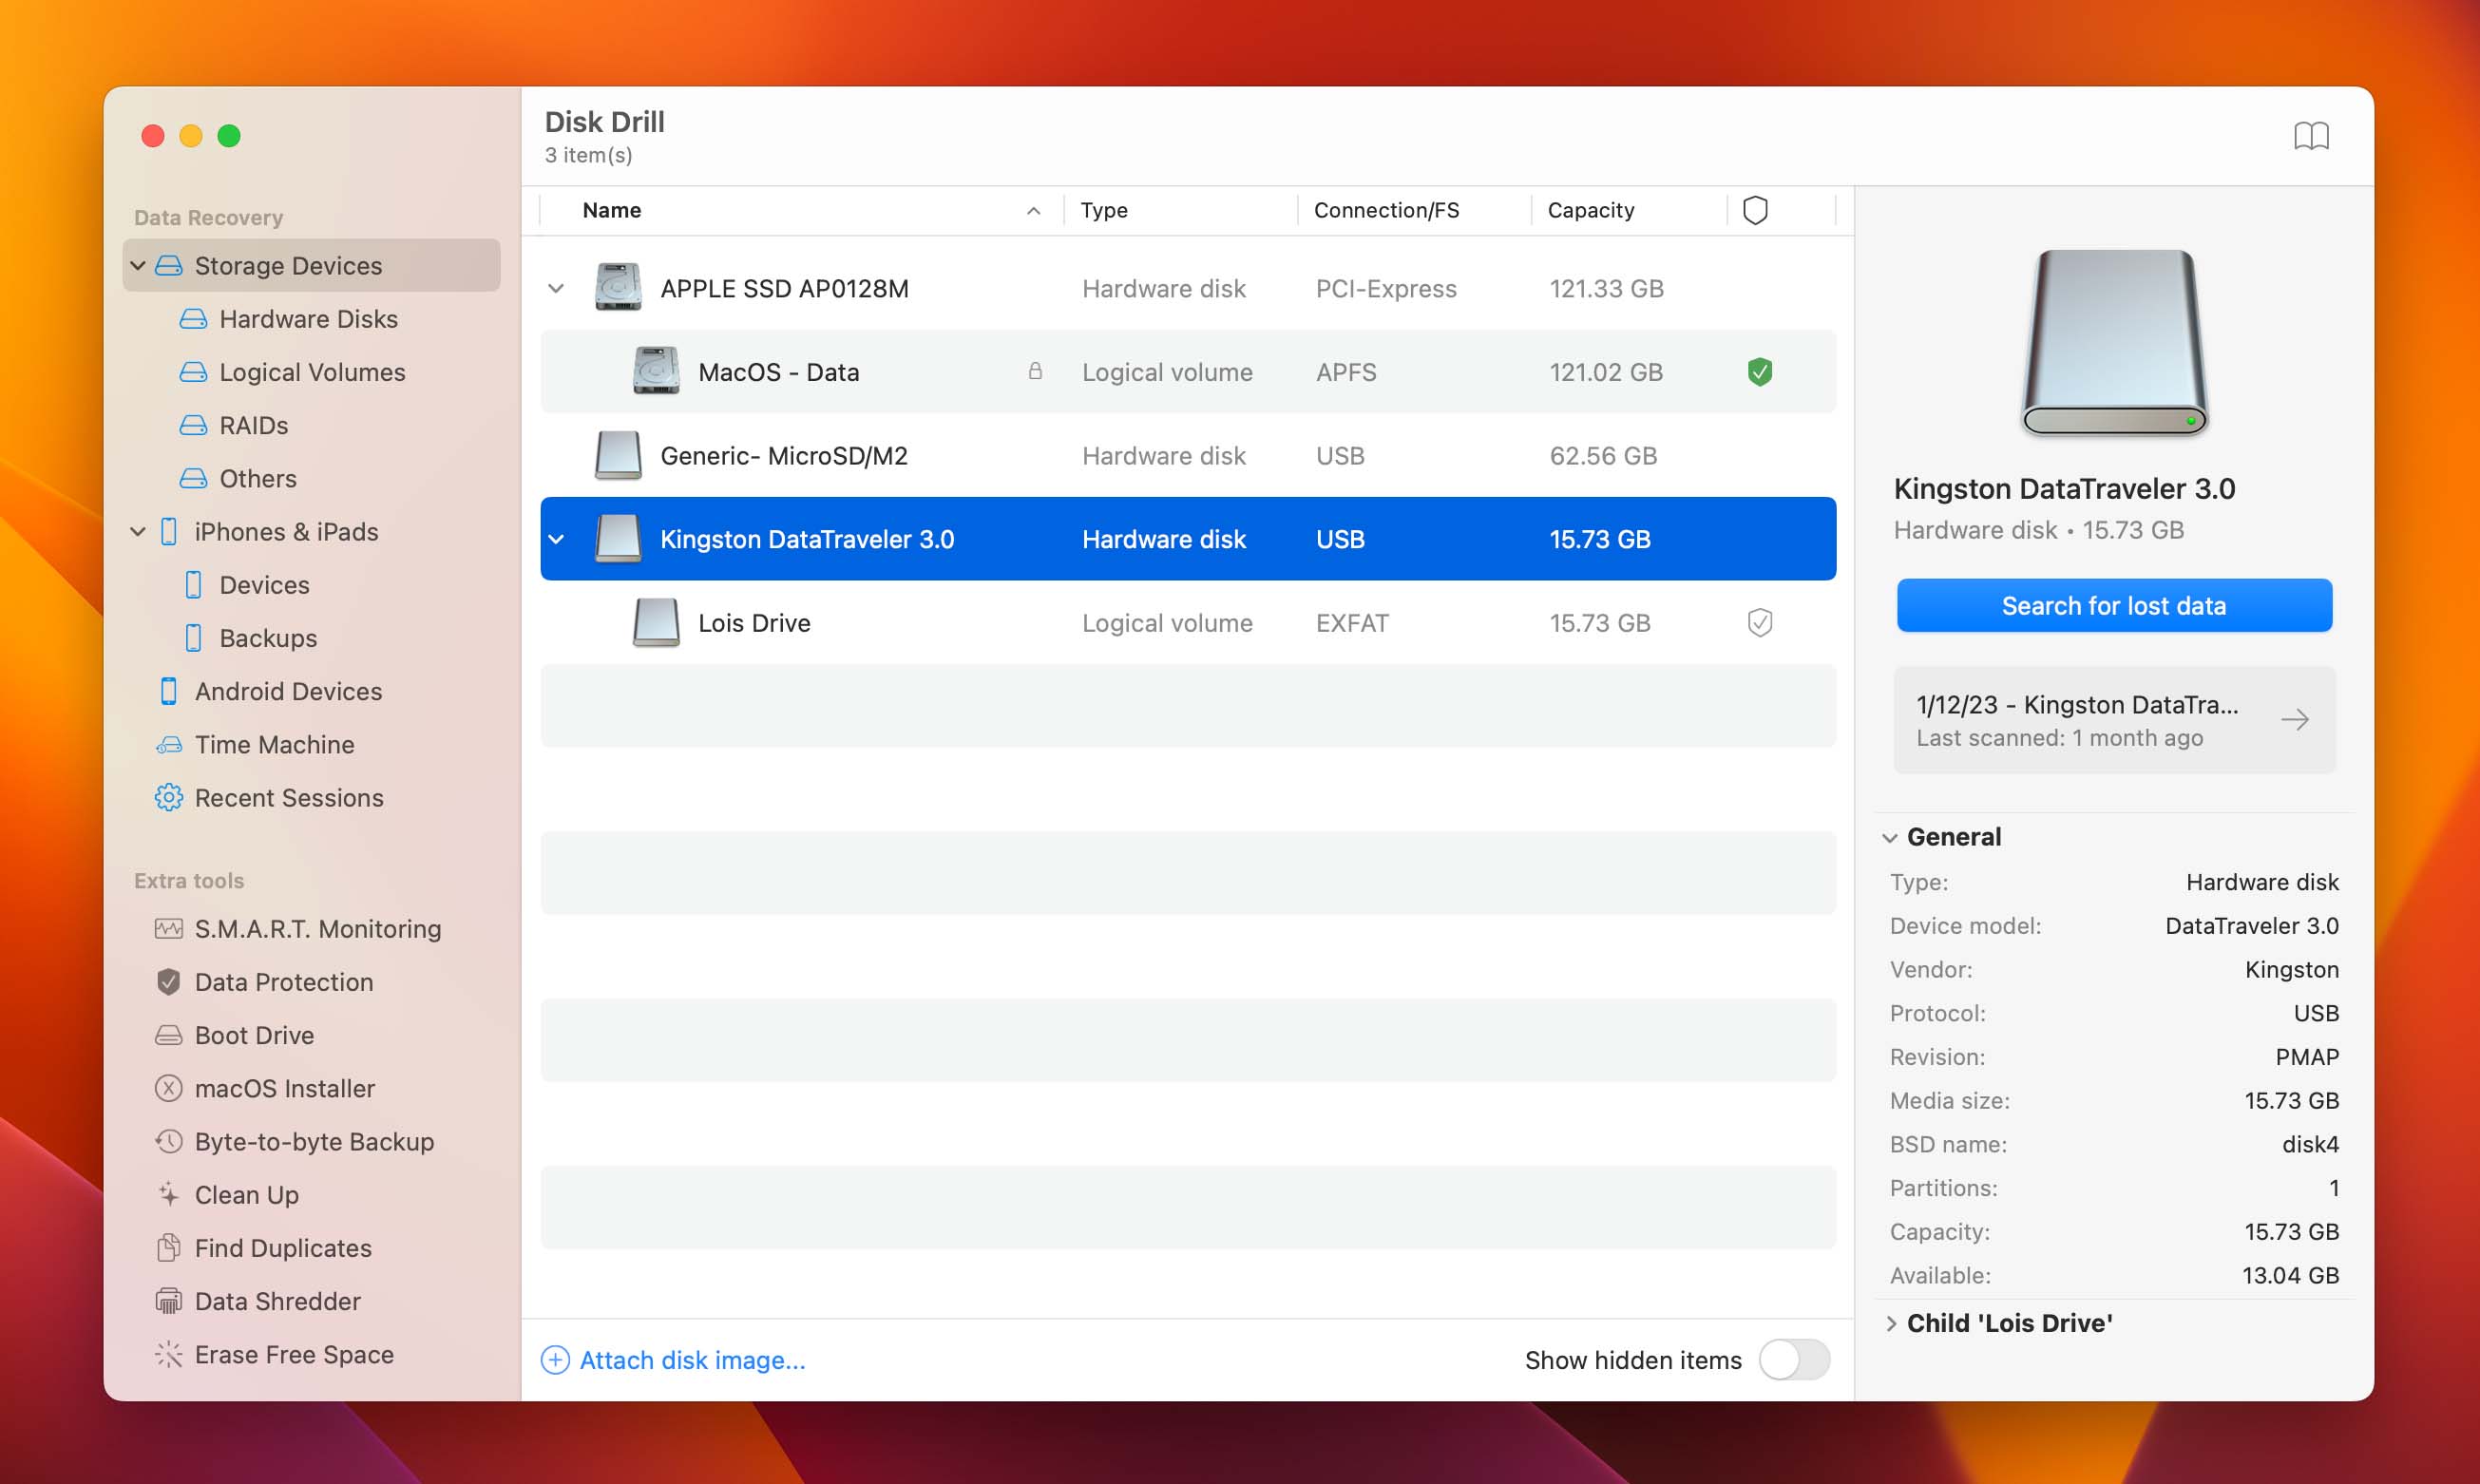
Step: 3 To open the app, click the Disk Drill icon in the Applications folder. Now on the homepage of Disk Drill, you can view all the disks that are available for scanning on the left sidebar under Storage Devices.
Step: 4 Select the disk that you want to scan, then click the button Search for lost data on the right corner of the screen.
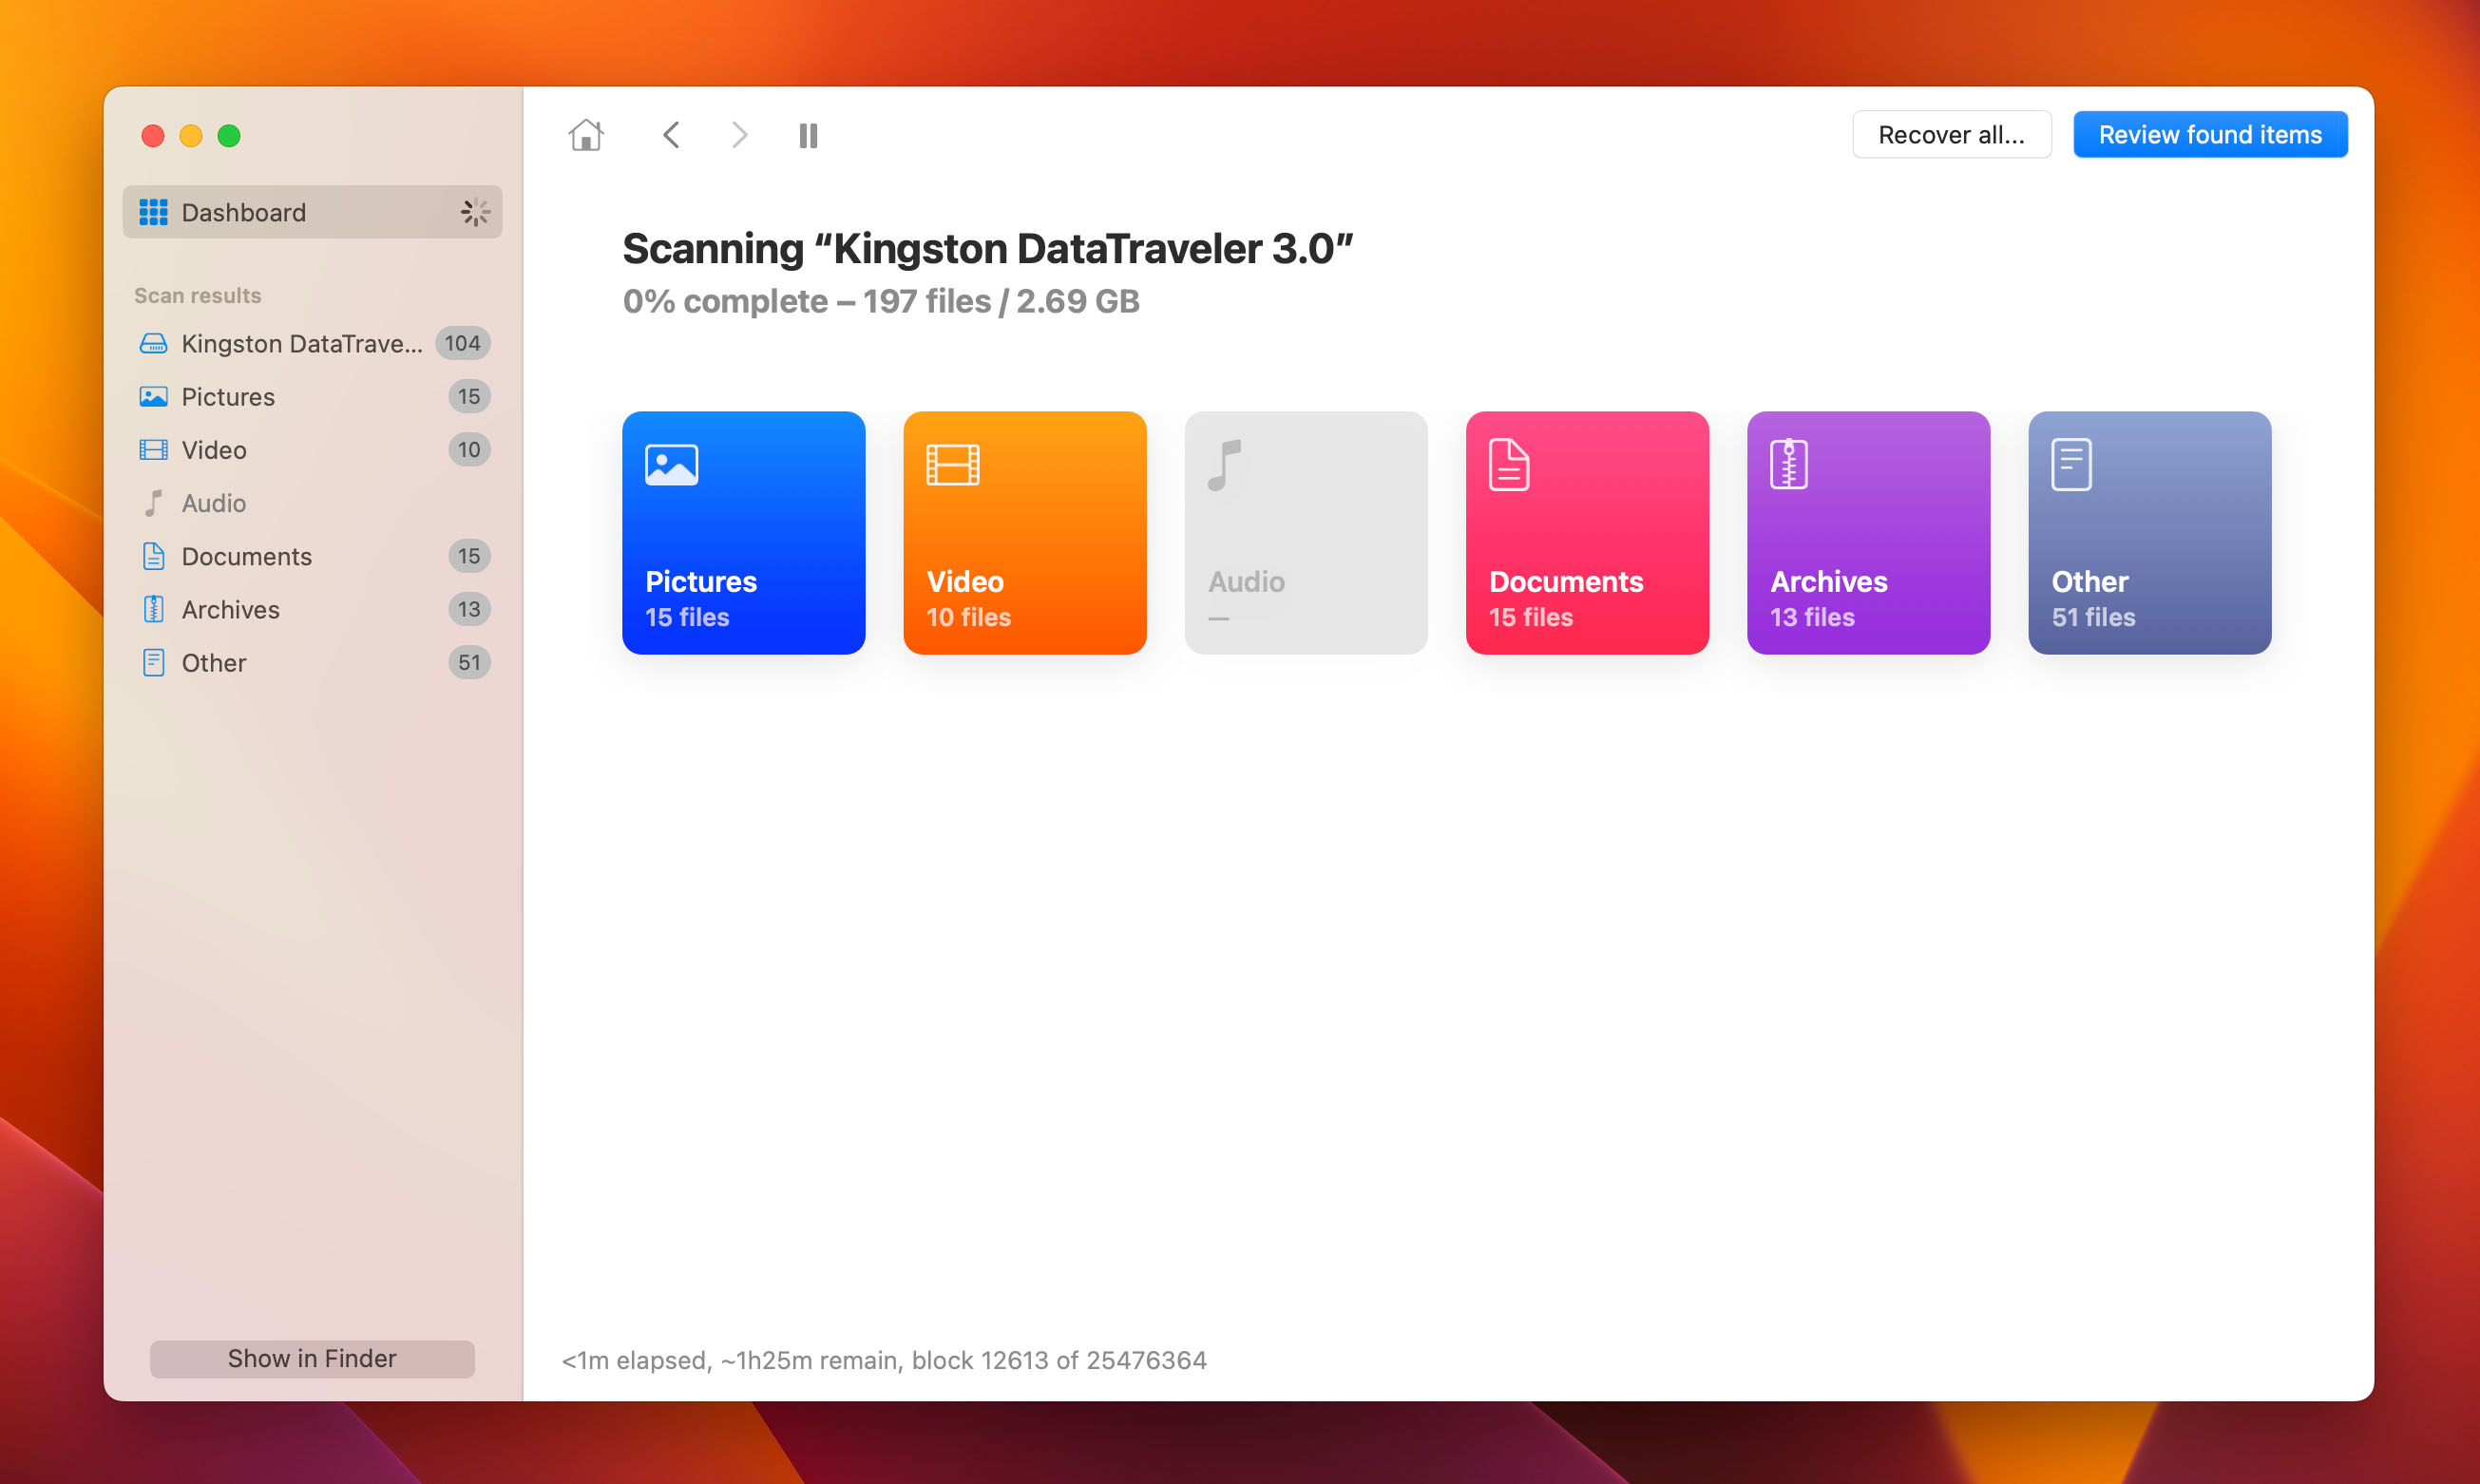
Step: 5 Disk Drill will now do a scan of your drive. After the scan is done, Disk Drill will show the items that you can recover, which will be separated by kind. You can even further filter the results by typing MFX or the name of the file on the search bar.
Step: 6 If you want, you can preview the file to make sure that you are retrieving the correct one. Then, click the Recover button to proceed.
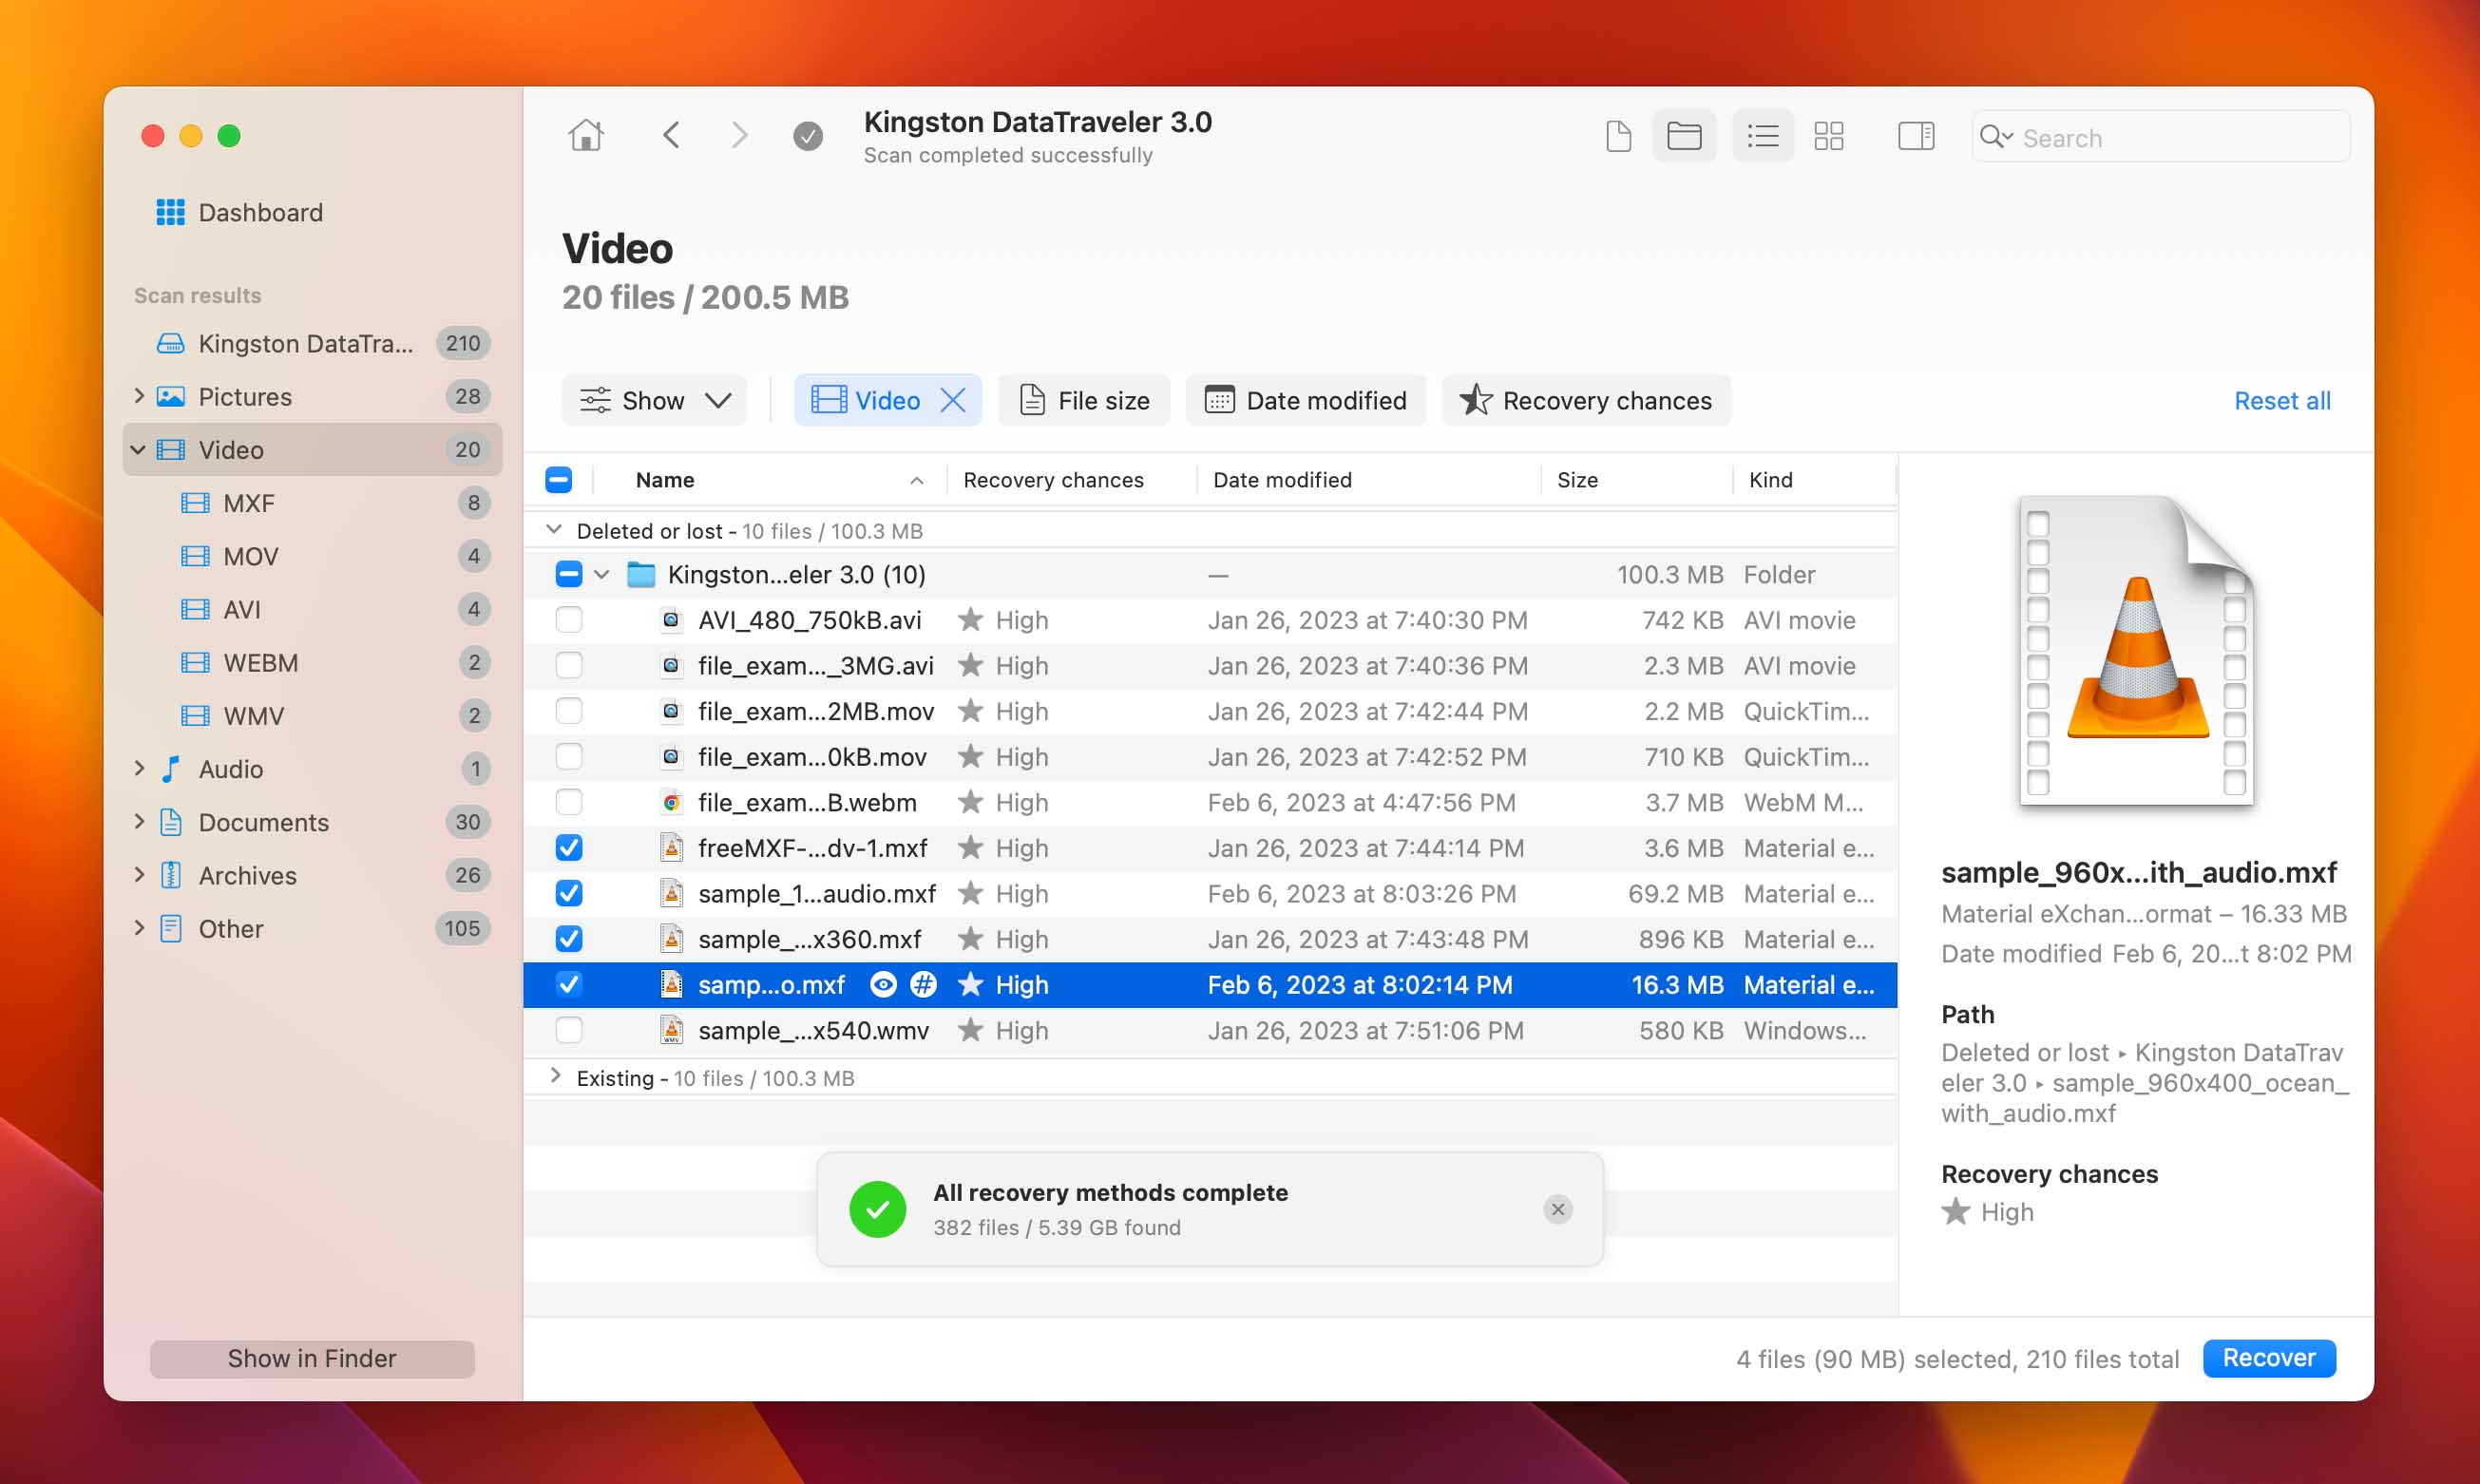
Step: 7 Finally, select the folder in which to place the retrieved file. Do not select the same device on which the files were lost to avoid overwriting other files that were deleted from the disk.

Recover MXF from Windows Recycle Bin or Mac Trash
The easiest way to get back deleted files is by accessing Recycle Bin or Trash. If you accidentally deleted a file, this is the first place it will go to. The steps to recover your files on Windows Recycle Bin or Mac Trash are very simple. Read on below:
Step: 1 First, open the Recycle Bin icon on your desktop. You will find the deleted files displayed on the window.
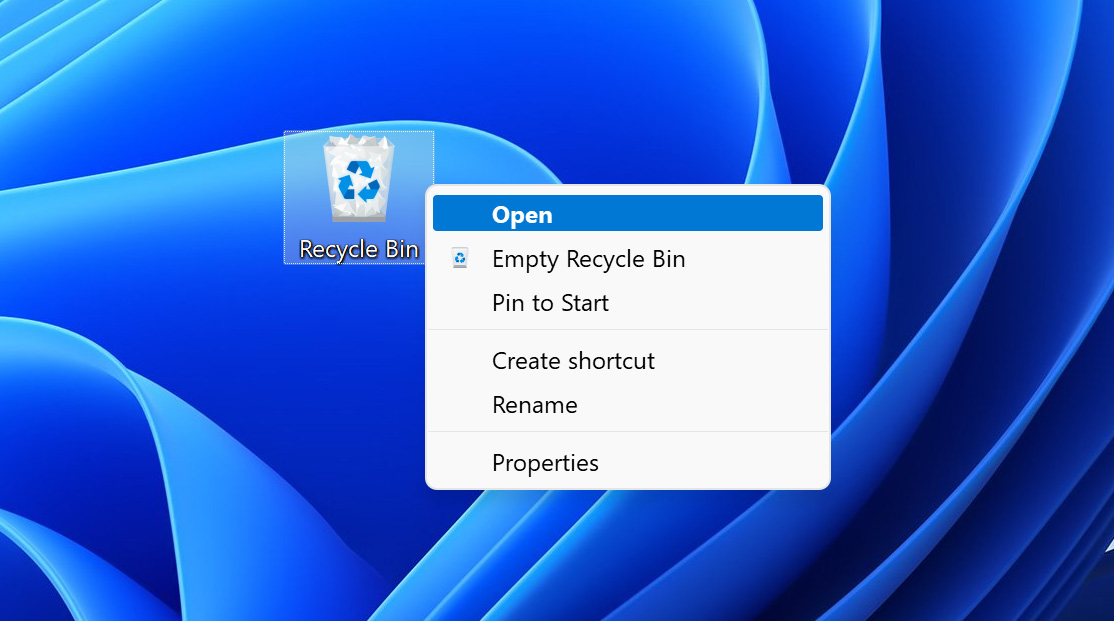
Step: 2 To restore your MXF file, simply right-click it and click Restore this item.
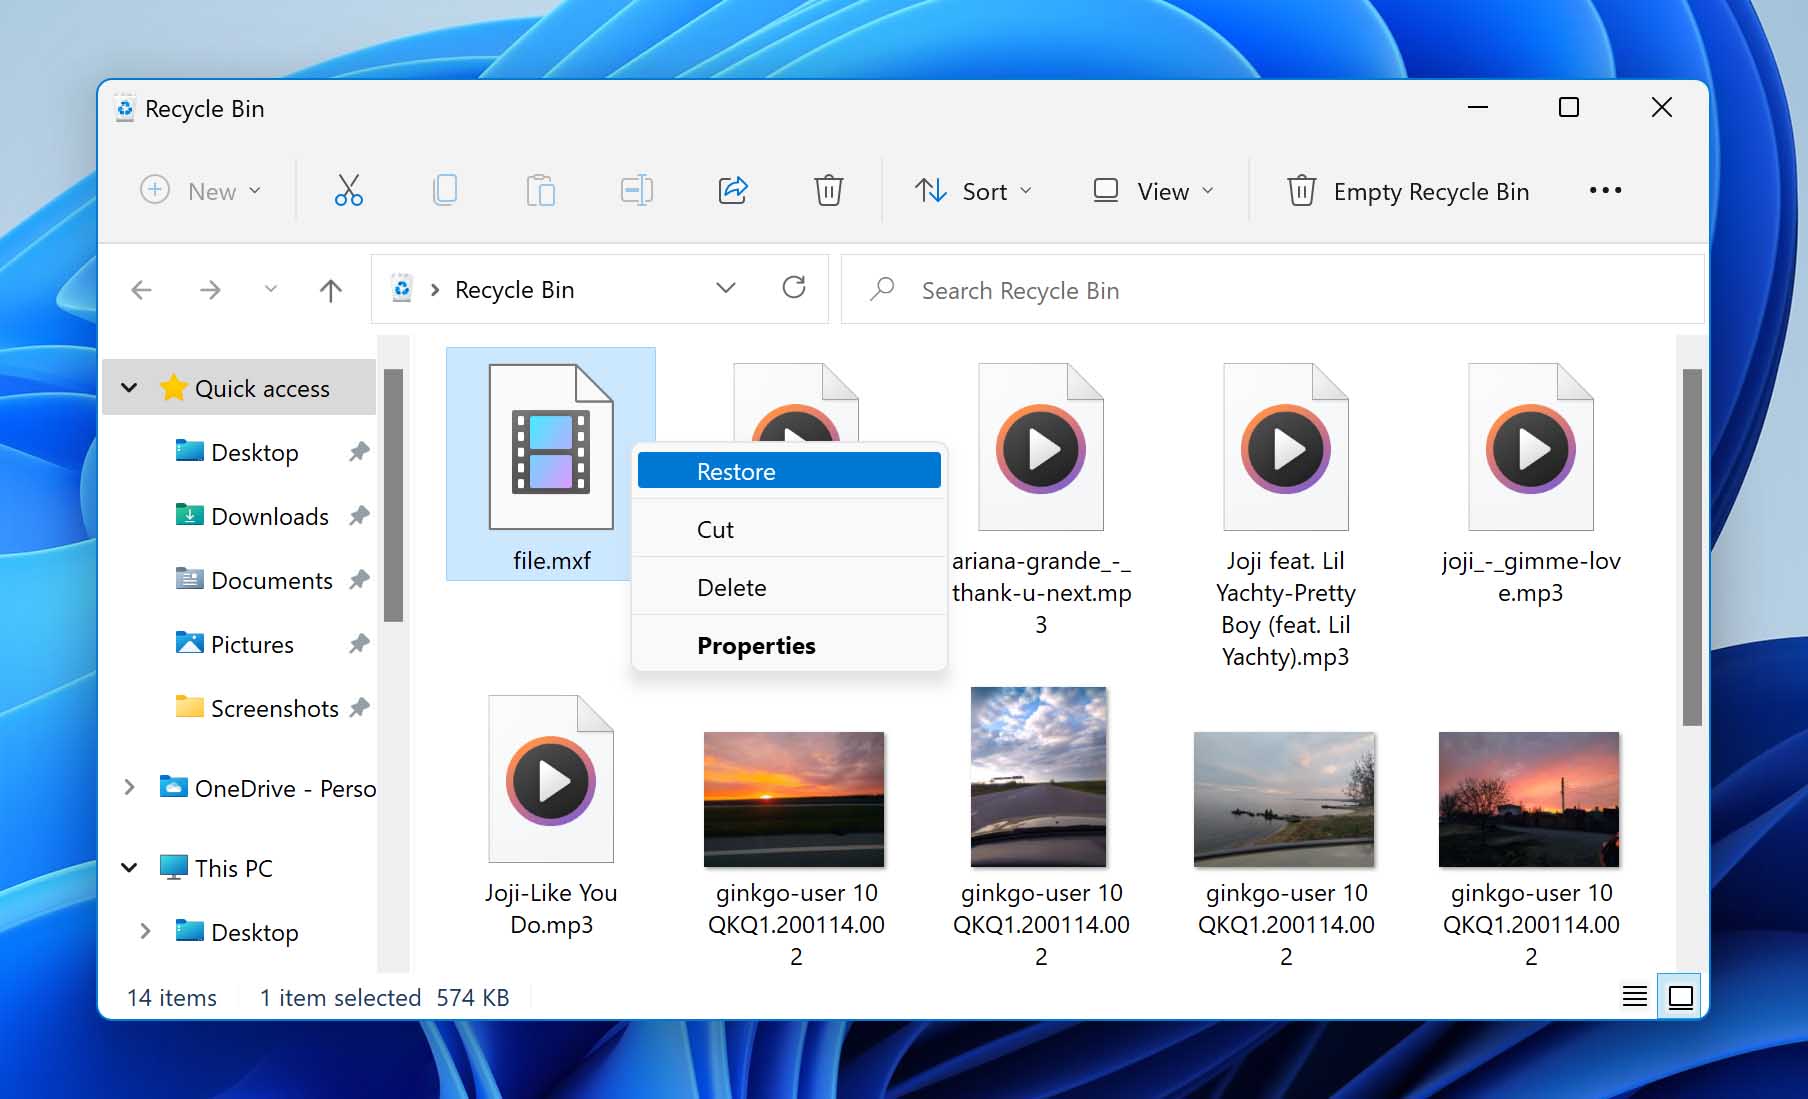
Step: 3 By default, Recycle Bin will bring back the file to its original folder. You also have the option to drag and drop the file to another folder on your computer.
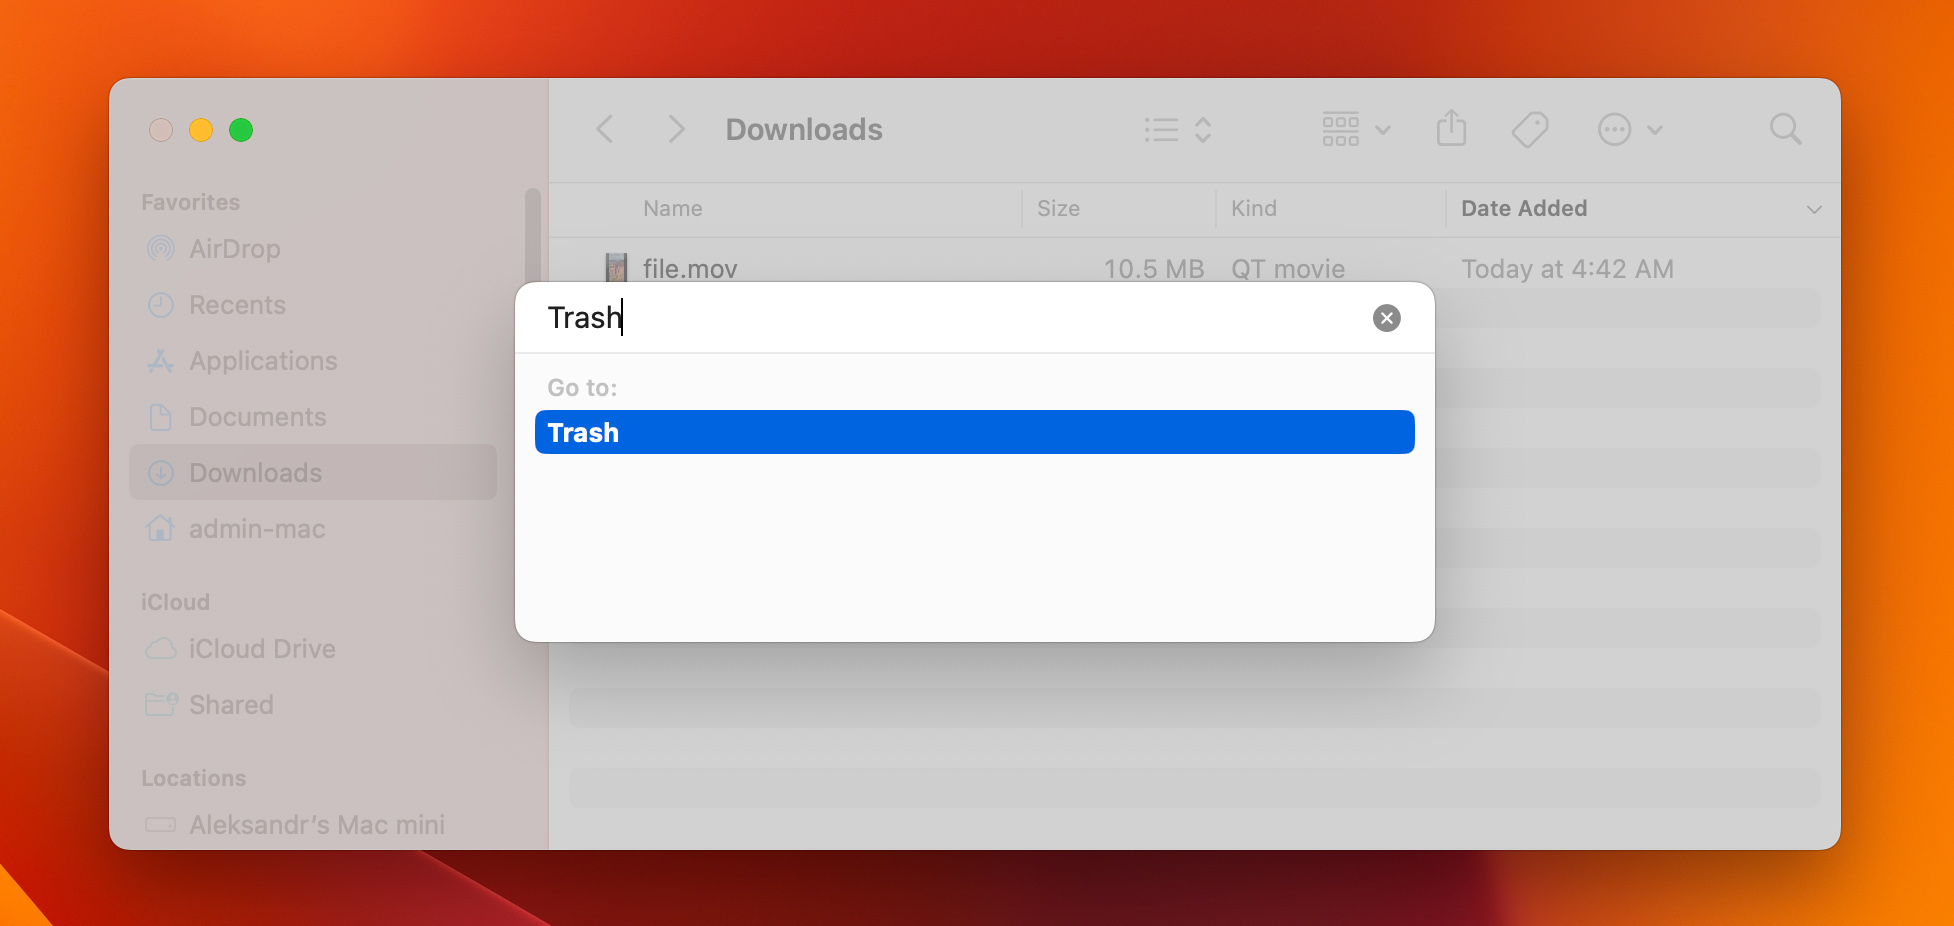
There are two ways to Access a Mac Trash. First, on your dock. Second, via the Finder’s Go To folder. We’ll discuss the latter below:
Step: 1 Using the Finder’s Go To folder function, navigate the Finder bar at the top of your screen. Click Go > Go To Folder, then type Trash as the path. Then press Enter button.
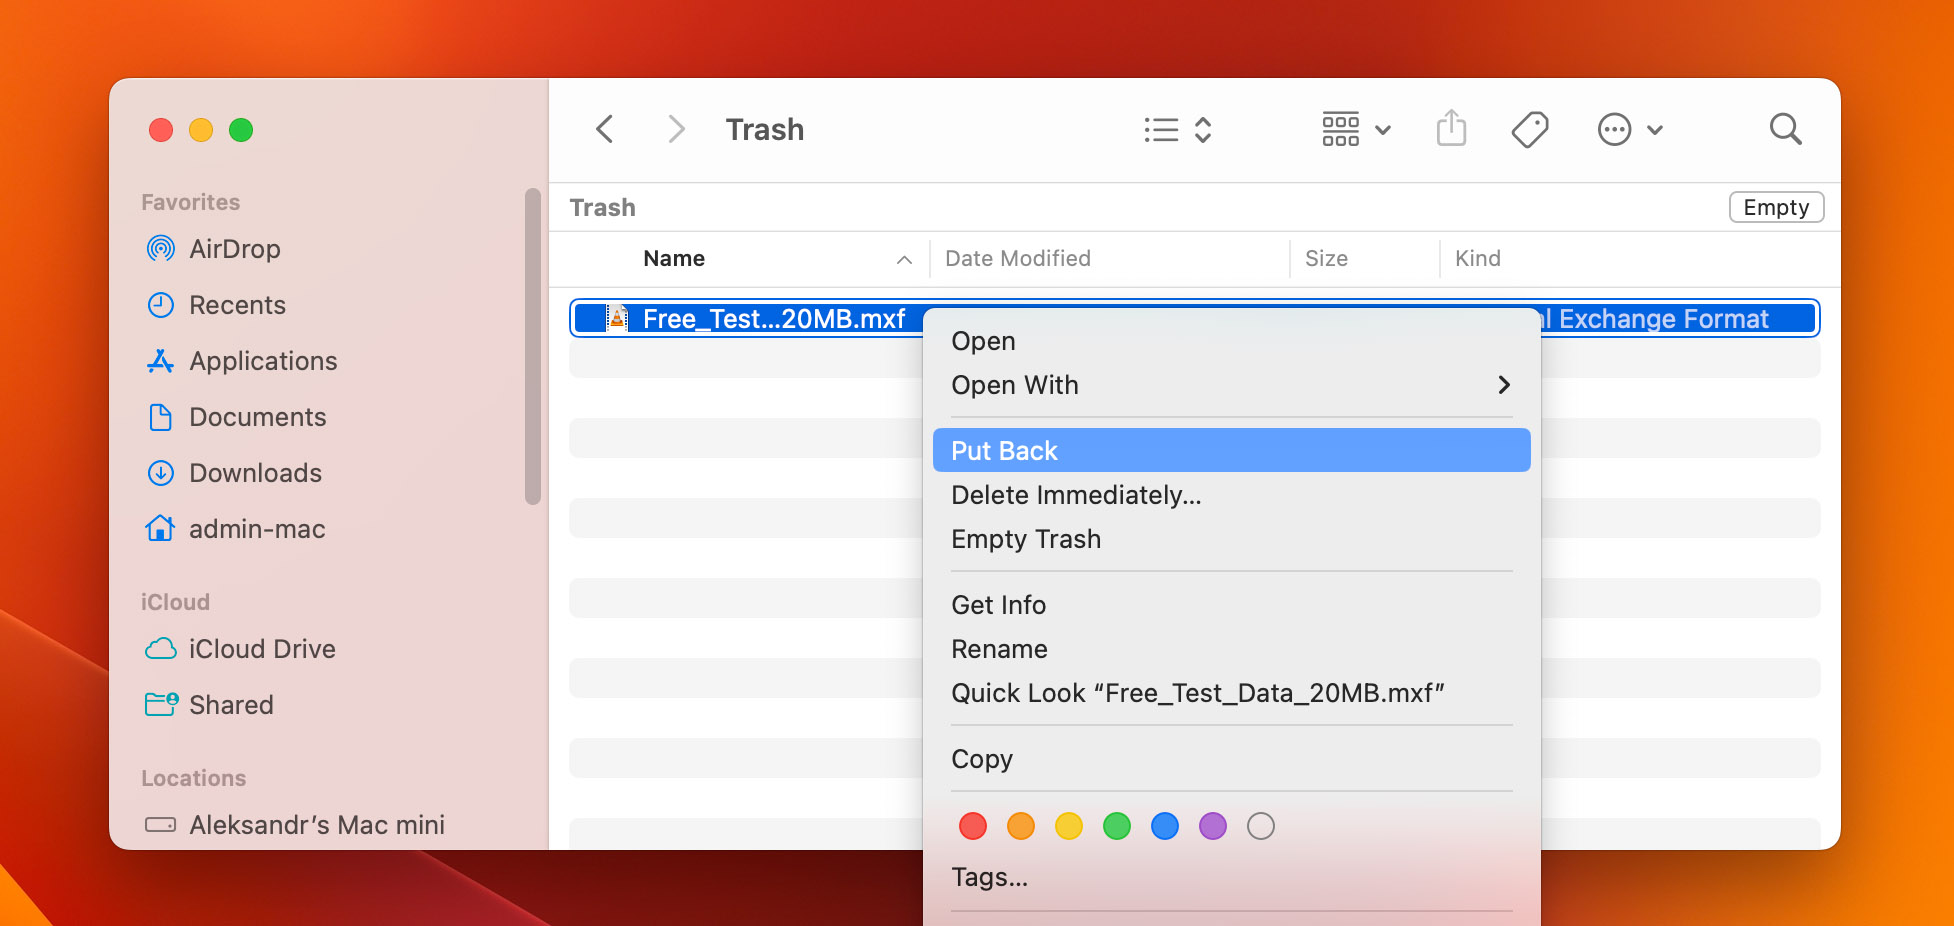
Step: 2 Once you are in Trash, right-click the file that you want to restore and click Put Back. Doing so will bring the file back to its original destination.
Restore from a Recent File Folder
The Recents folder, as its name suggests, is where all your recent files can be found. These include not only files you recently worked on but also the files you forgot to save, recently viewed, or opened.
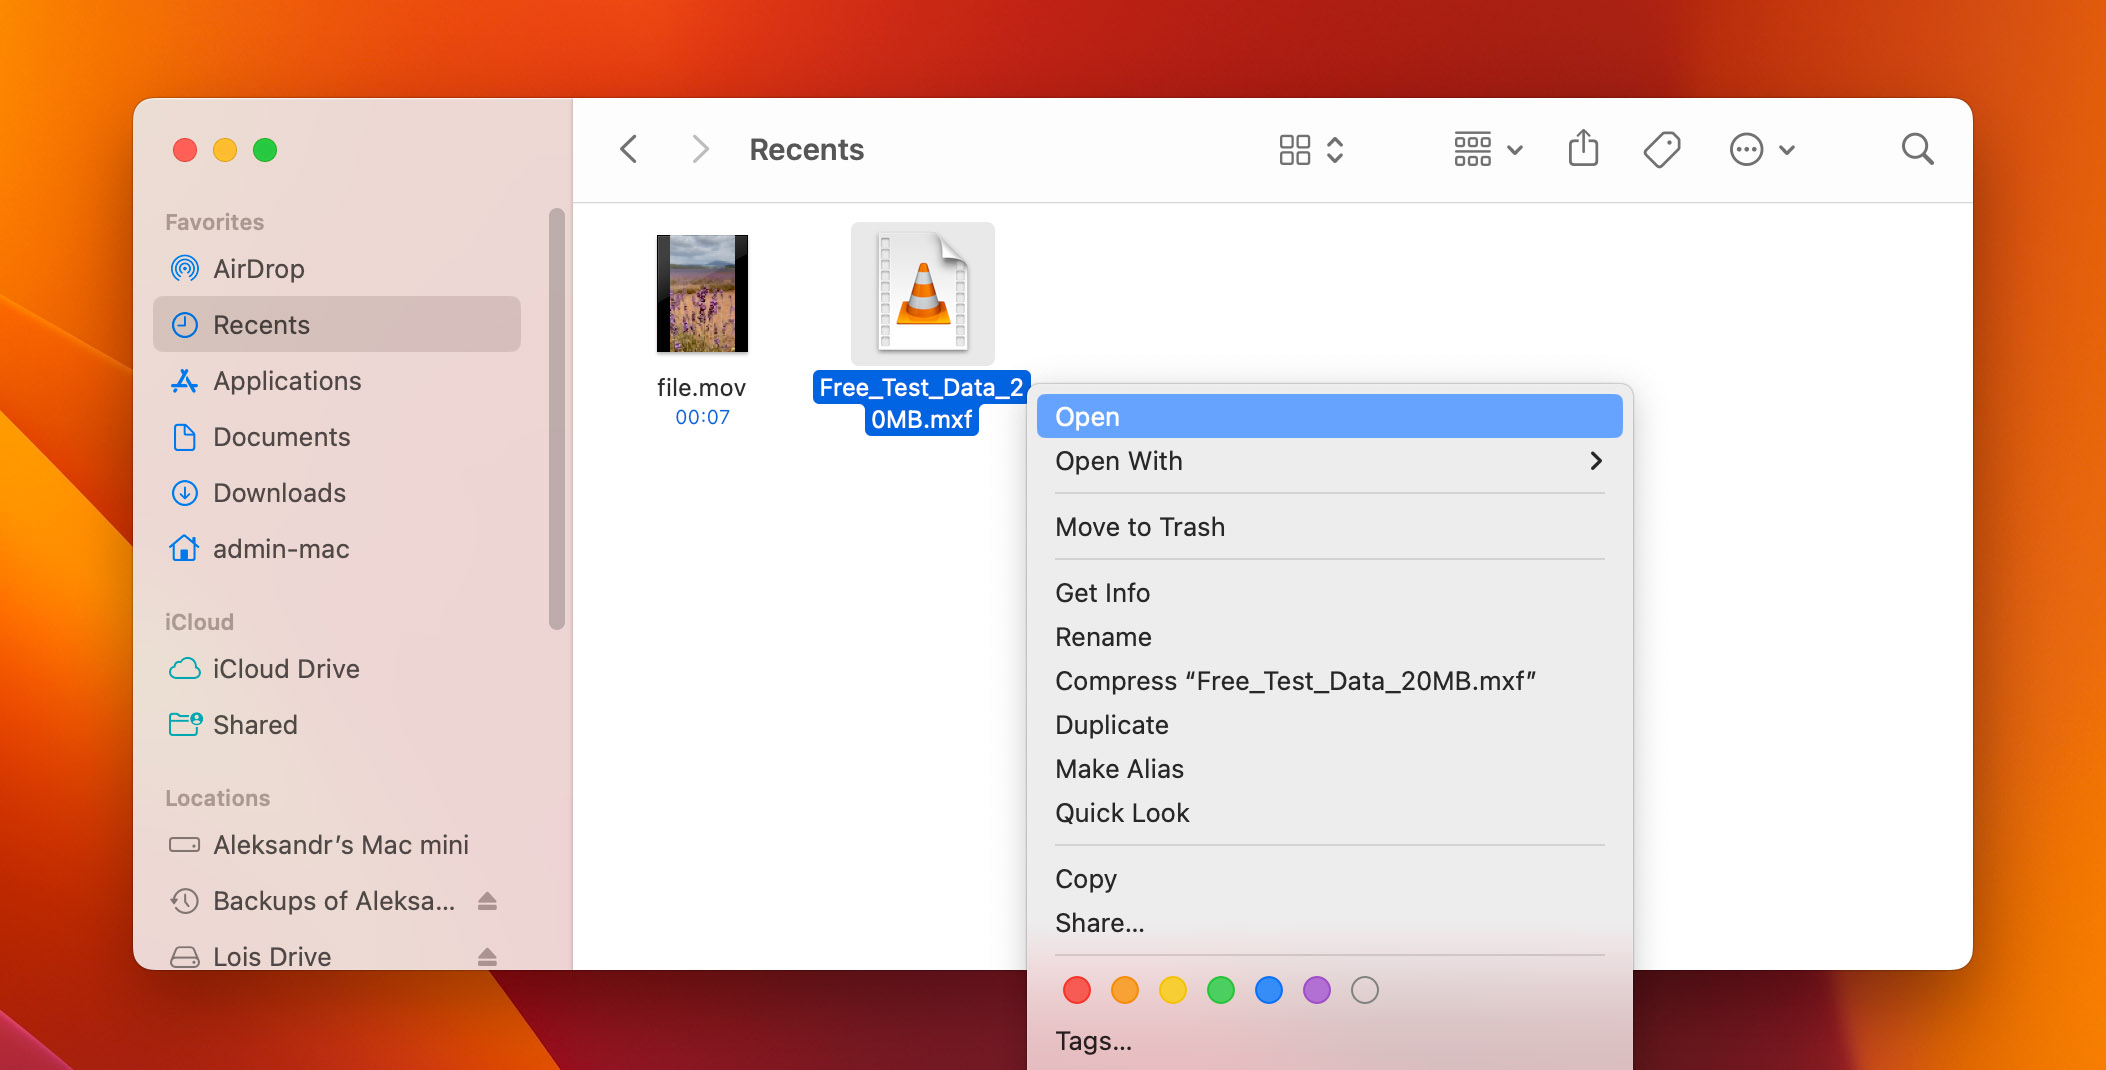
So, if you have an unsaved MXF file and need to access it again, or if you accidentally deleted it, the Recents folder is another solution you can try.
The Undo command is very useful in recovering accidentally deleted files from the Recents folder. But you need to act fast because you can only undo the most recently deleted files. There are two ways to do this:
Step: 1 First, by pressing Command + Z on your keyboard.
Step: 2 Second, via the top bar–select Edit. From there, click Undo Move of [file name].
Recover MXF File Using Time Machine
Time Machine is a built-in backup feature for Macs that automatically backs up your files every hour. This removes the need to manually back up your files. However, if you hadn’t used Time Machine to backup your MXF files beforehand, then you won’t find them in Time Machine. Regardless, this feature is useful and learning how to use it for future use should be in your interest.
Keep in mind that Time Machine deletes the oldest backups to make space for new backup files if your disk is full.
Here’s how you can recover an MXF file with Time Machine:
Step: 1 First, connect your backup hard drive to your Mac.
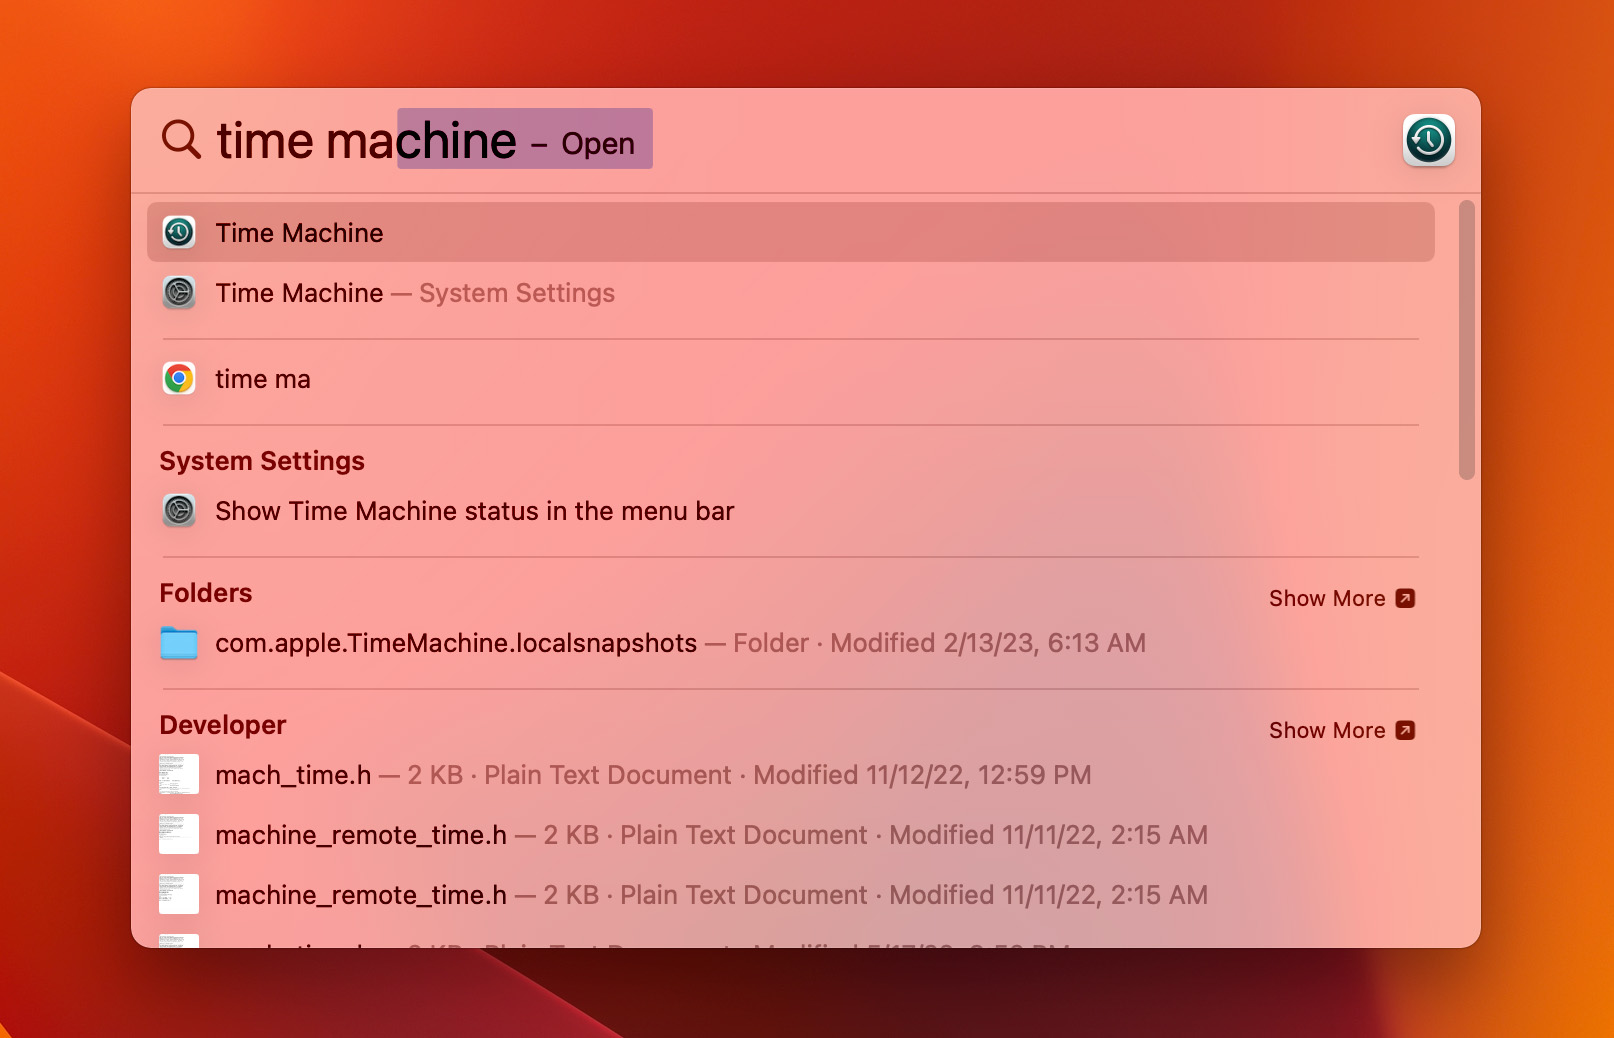
Step: 2 Now, open Time Machine through the menu bar or with Spotlight. If you cannot find this on the menu bar, you may have to configure some Time Machine settings on your System Preferences.
Step: 3 Once Time Machine opens. Scroll to find the missing file that you want to retrieve.
Step: 4 You can press the spacebar on your keyboard to preview the file.
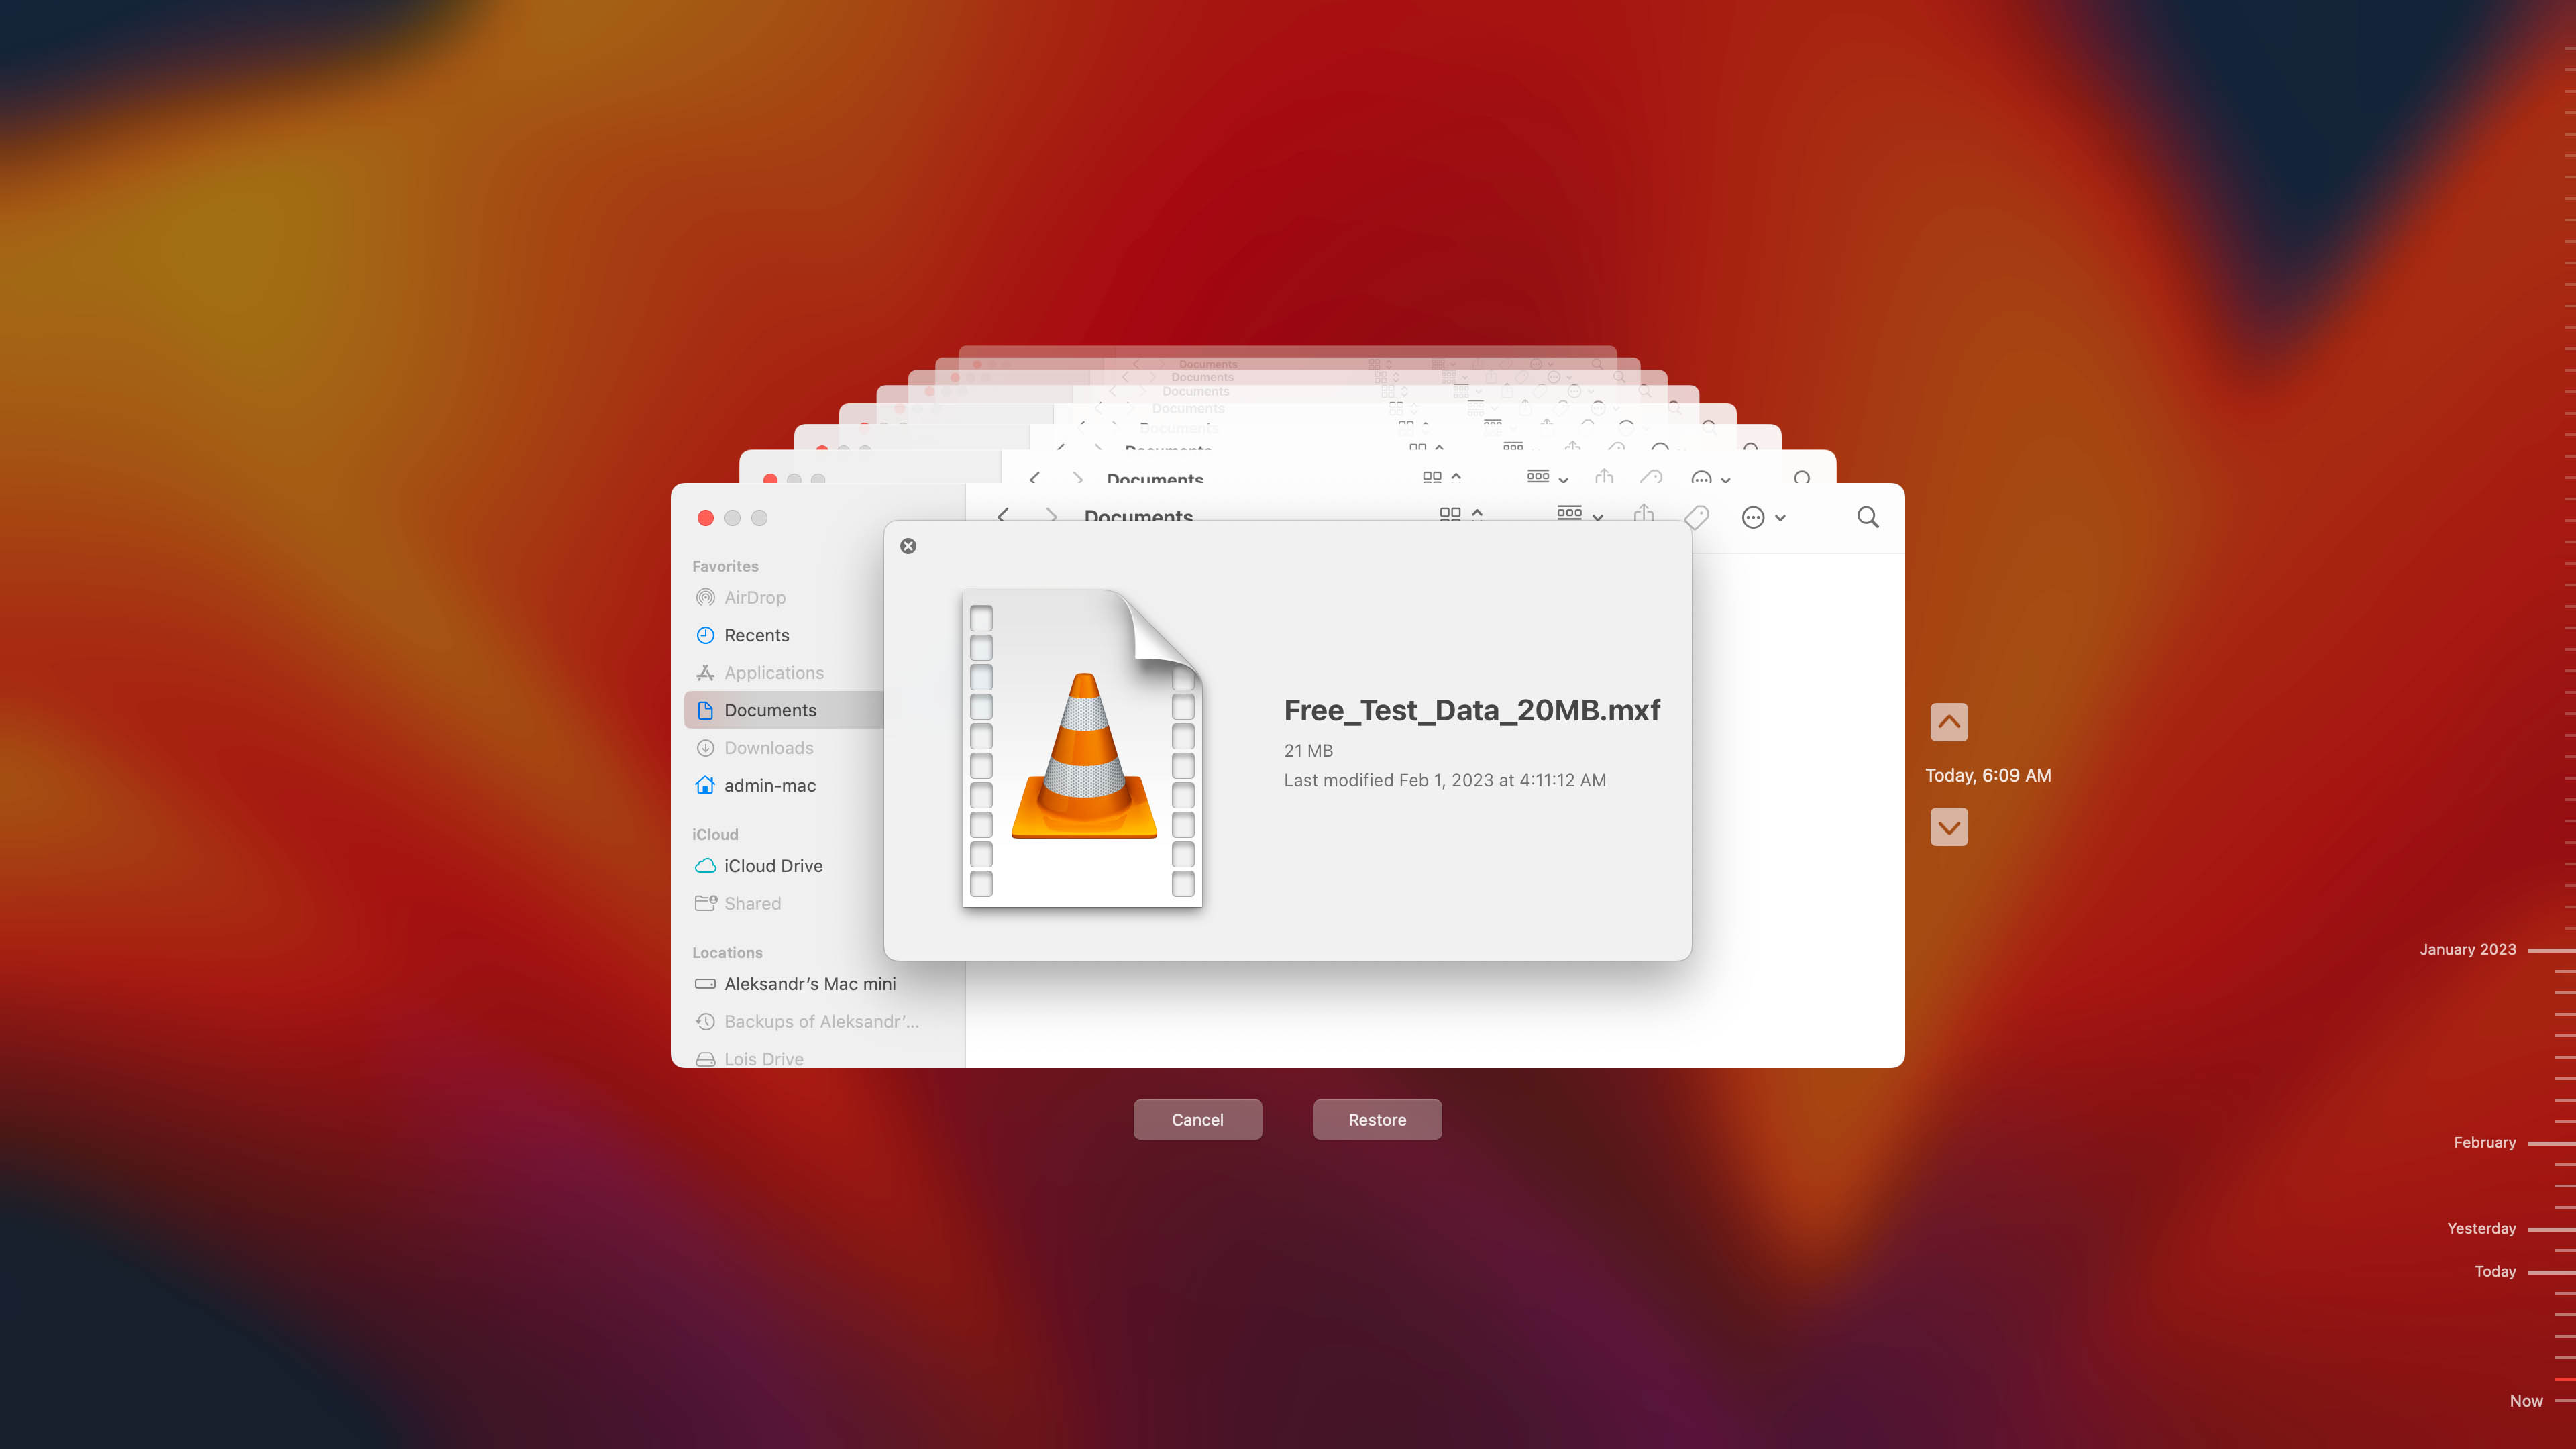
Step: 5 Once you’ve located your MXF file, click the Restore button at the bottom of the window to begin recovery.
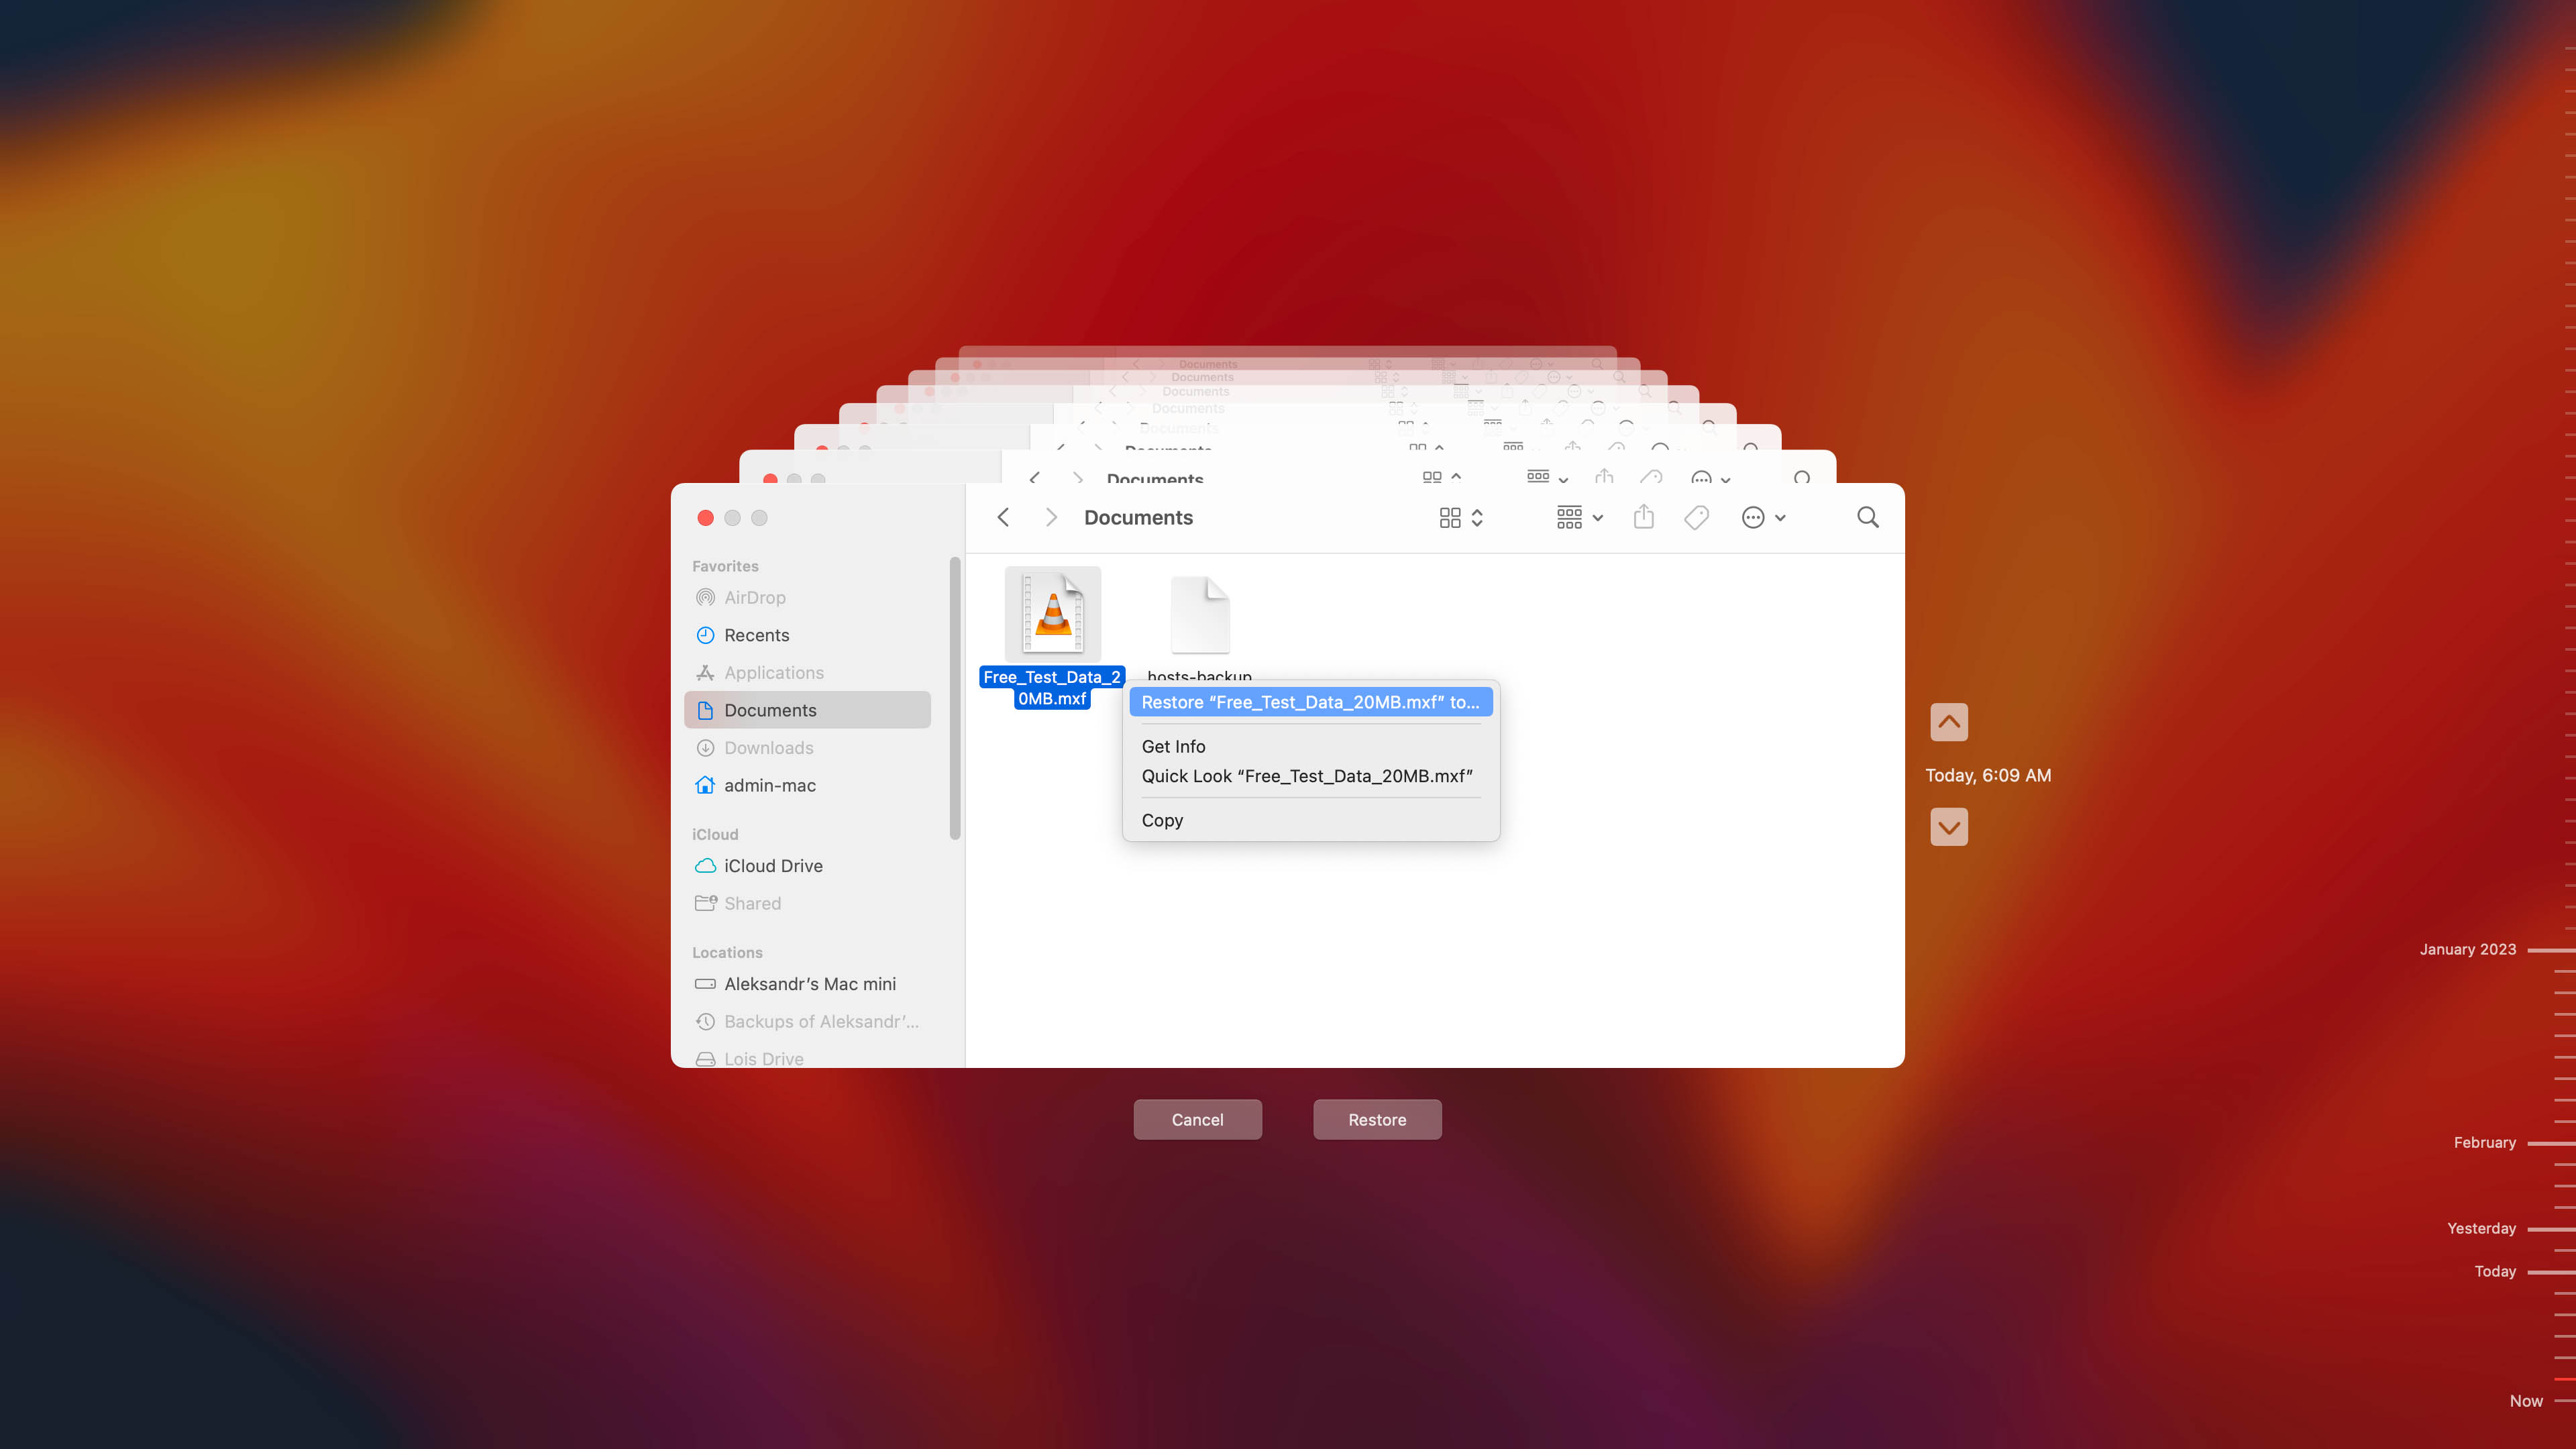
Step: 6 Exit Time Machine and look for your file! Recovered files are typically restored in their original location prior to being deleted.
Step: 7 Finally, if you want to retrieve more files, simply return to step 2 and go from there.
How to Open MXF Files on Mac and Windows
If you’re not using your MXF files for the main purpose of editing, you can convert them into an extension that is compatible with your current media player instead. But if you would rather keep the MXF files as they are, then below is our list of recommended apps that you can download to open them.
Programs That Open MXF Files
For Windows, it’s best to use these programs to open and convert MXF files:
- File Viewer Plus
- Adobe Premiere Pro
- VideoLAN VLC media player
- Avid Media Composer
- MAGIX Vegas Pro 18
- Grass Valley EDIUS
- Avid Pro Tools
- OpenCube XFReader
- OpenCube XFConverter
- Aiseesoft MXF Converter
For Mac, you can download the following programs:
- Apple QuickTime Player
- Adobe Premiere Pro
- Avid Media Composer
- Avid Pro Tools
- VideoLAN VLC media player
- Aiseesoft MXF Converter for Mac
Tips to Prevent MXF File Loss
Though modern technology has made almost everything possible, losing files is still something that we cannot completely avoid. But we can definitely do our best. We’ve got some tips for you on how to prevent MXF file loss:
- 💾 Practice good working habits. If you are editing using an MXF file, make it a habit to save your work every 15 minutes so your files are protected in case of power interruption or anything unexpected that may come up.
- 💽 Regularly backup your data. Having a backup not only helps to restore lost files but also makes it easier for you to access your files and work on multiple devices. Make use of Mac’s built-in Time Machine and set up the automatic backup, or you can also backup your data using Cloud storage.
- 🛡️ Enhance your device’s security and privacy. Avoid opening suspicious links or content to prevent your device from malware attacks that can lead to data loss. You can set up your privacy or security settings, and use a firewall as an added layer of protection.
- 🧹 Keep your device safe. Accidents, whether natural or human error, are inevitable. Avoid placing your device near liquids or leaving it unattended and out in the open for too long.