Have you lost or deleted your M2TS file and can’t seem to figure out how to retrieve it? Don’t worry; this article will help you restore your files effortlessly. Data loss due to accidental deletion, malware attacks, file corruption, etc., is widespread.
What is the M2TS File Type?
The M2TS File Type refers to MPEG-2 Transport Stream. It is used to contain files in the Blu-ray BDAV (Blu-ray Disc Audio/Visual) format, AVCHD, and other high-definition video formats. An M2TS file compresses the video, audio, and metadata and is primarily associated with AVCHD footage recorded on camcorders.
![]()
The M2TS file extension has been developed under the Blu-ray Disc Association. This association was announced and inaugurated in 2004 and includes several big names like Sony, Panasonic, Pioneer, Hitachi, Samsung Electronics, etc. Since M2TS is a high-definition digital video camera recorder format, it maintains this quality after transfer and is quite suitable for editing videos.

Although M2TS files have been mostly related to Sony, other companies also relied on this format to convert their high-definition video content. If these files are lost or deleted, it can result in the loss of important footage. While these data-loss scenarios can be pretty daunting, there are several methods available on the market to help you restore your information.
Let’s go through some of the most productive data-recovery solutions available.
How to Recover Deleted M2TS Files?
You will come across an array of data recovery methods to assist you with restoring your M2TS file. While the process can appear confusing, most of these DIY tools offer stress-free file recovery. They are mostly straightforward, reliable, and work efficiently. These solutions can help you get back unsaved or deleted files and even through other data-loss situations like system crashes, data corruption, etc.
While these tools can make file recovery quite convenient, it’s helpful to keep some best practices in mind when working with or transferring your M2TS files. Some of these useful pointers are:
- 💿 The M2TS transfer process requires external applications and is slightly more complicated than other file formats. Thus, it can be a good idea to take more than one backup of your desired files. This will also help make the editing process smoother.
- ❌ If your system crashes or your files disappear, stop writing new files to the device or drive from which you want to retrieve your data. Otherwise, it can cause overwrites or reduce restoration chances.
- ⌛ Start the data recovery process as soon as possible. The more time passes, the more unreliable data recovery becomes.
- 💯 Apply the most dependable data recovery method first. This would increase the chances of file retrieval in the first go itself.
These tips can help prevent permanent damage to your M2TS file and make the recovery process easy and effective.
How to Recover M2TS Files with Software?
There are various available tools to guide users through the data recovery process. However, using software to restore your M2TS file is one of the most preferred methods. While in-built computer features or temporary backups can work to a certain extent, professional recovery software like Disk Drill can assist in retrieving files from a wide variety of storage devices and even formatted drives.
Disk Drill is an industry-leading software solution. It is available for free download and supports both Windows and Mac Operating Systems. The software offers additional features, intelligent algorithms, and filter options to locate and retrieve your files without any complications. While these add to the sophistication of the software, it remains accessible to beginners, has an easy-to-use interface, and protects your files. Collectively, these aspects make Disk Drill a trustworthy option for data recovery.
Let’s have a look at how to recover your M2TS files with Disk Drill:
- Download and Install Disk Drill from the official website. Once the installation is complete on your device, launch the application.
🏳️ For the low, low cost of free: Disk Drill allows up to 500 MB of free data recovery! - Configure your settings and finish the basic setup. Once you’ve accepted the Privacy Policy and the User Agreement begin the file restoration process.
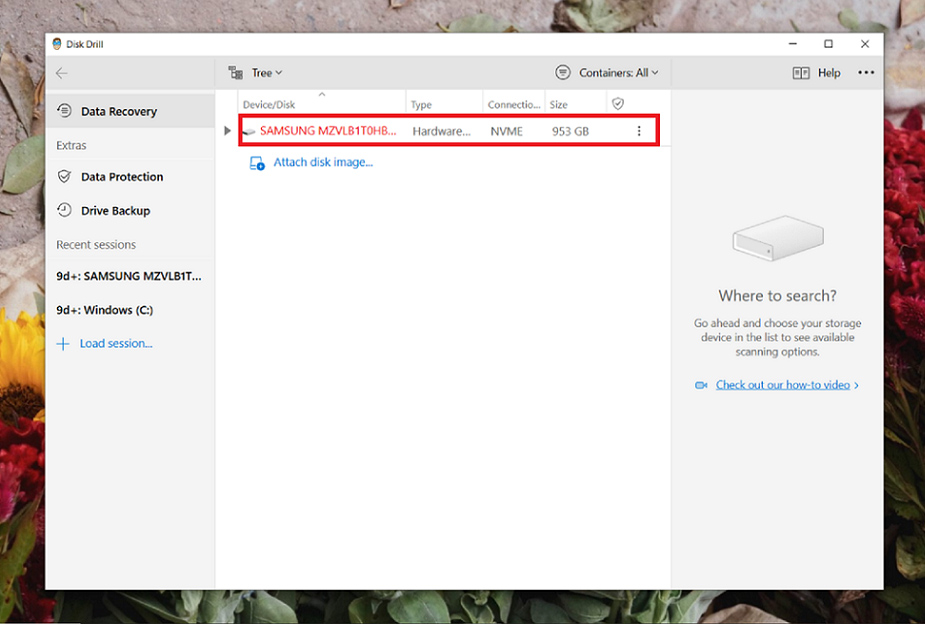
- Select the drive or the external device from which you want to recover your M2TS file. Once you’ve made your choice, choose your recovery method. You can choose between the Quick Scan or Deep Scan options.
- Now, click on Search for Lost Data. While the software scans through your system, you can preview found files, filter through the search and select the files you want to recover.
⏯️ Pro tip – Disk Drill gives you the option to pause, save or resume the scan whenever you like. You can also save and load your scan sessions to save time and make the recovery process more manageable.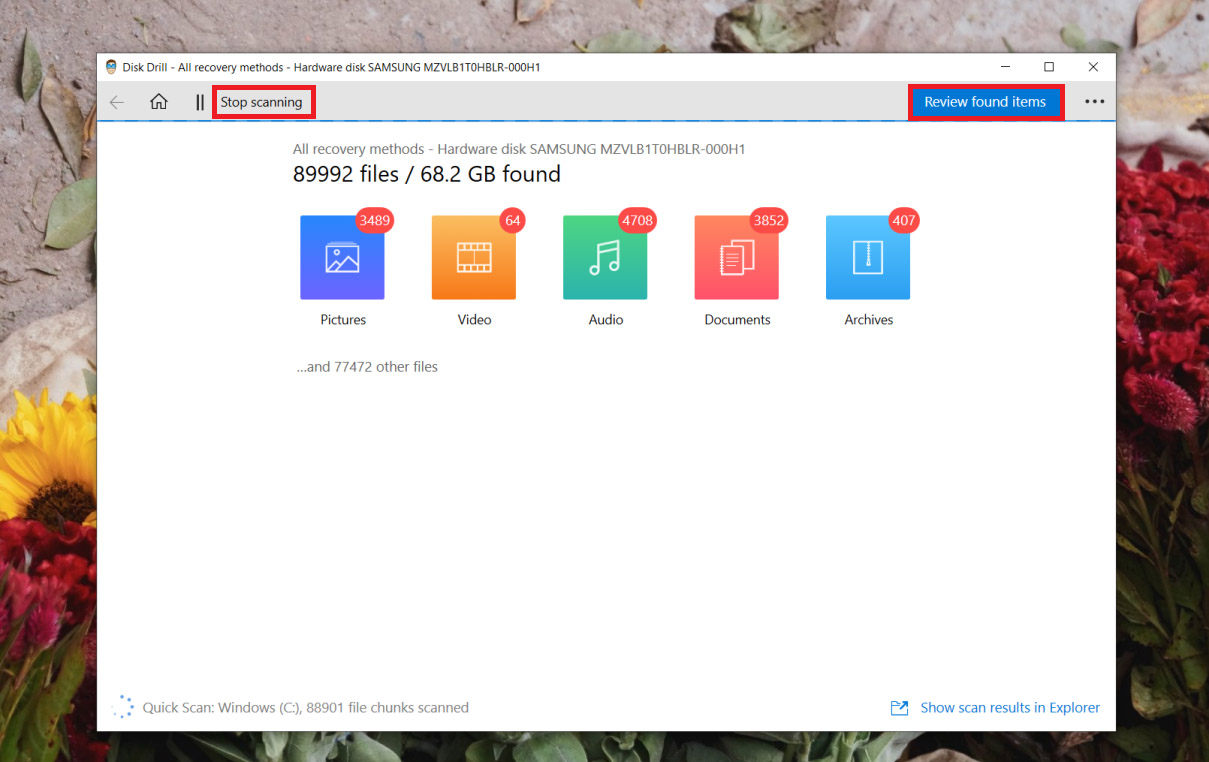
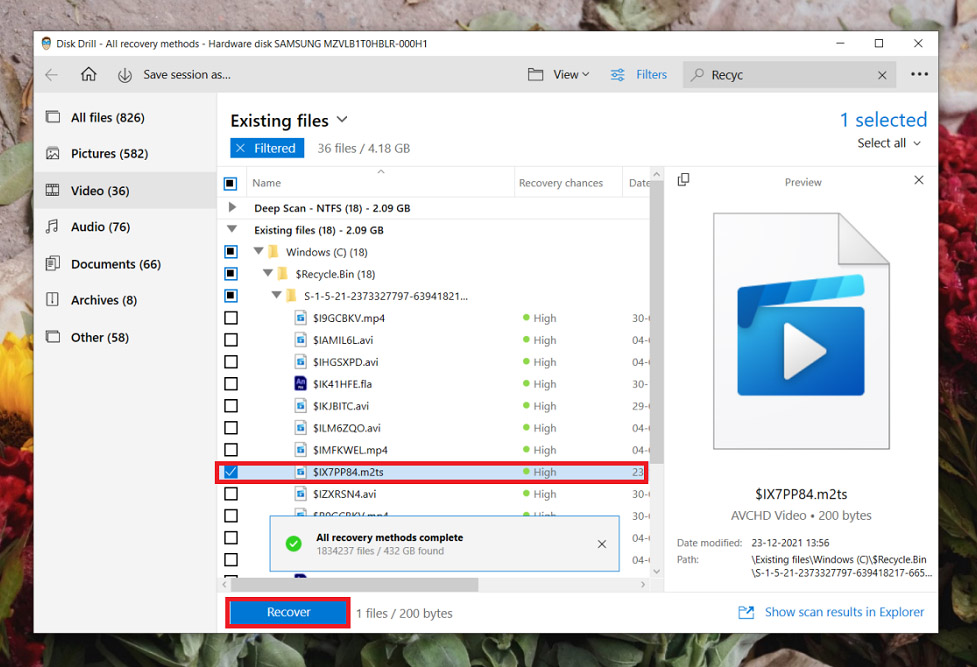
- Once the scan is complete, locate your M2TS file. Now, click Recover.
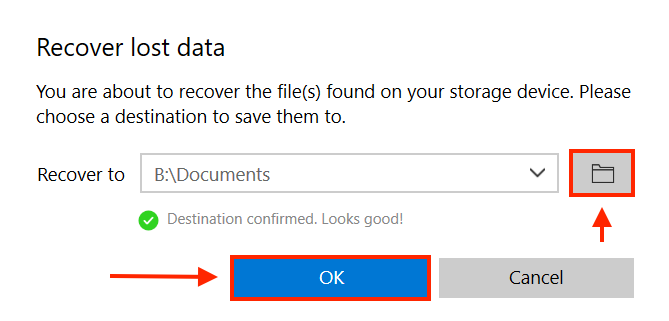
- Finally, choose the file recovery location, and you’re good to go. You can find your restored files in the Found Files folder or the Reconstructed Folder.

With Disk Drill, you can recover your lost M2TS files in just a few steps. It makes the entire data-recovery process relatively uncomplicated. Moreover, it allows users to retrieve many other file formats by following the same instructions.
Recover M2TS Files from Windows Recycle Bin and Mac Trash
Suppose you’ve accidentally deleted your M2TS files or forgot to save them. In that case, there’s a quick and simple solution to help you recover them. You can retrieve your files with the Windows Recycle Bin or the Mac Trash on your Apple device.
These folders store your deleted files temporarily. You can recover all your data with this method without any hassles.
Recovering M2TS files from the Windows Recycle Bin:
- Search for the Recycle Bin icon on your computer’s desktop and click on it.

- Once you’ve opened the folder, find and choose the M2TS file you wish to restore.
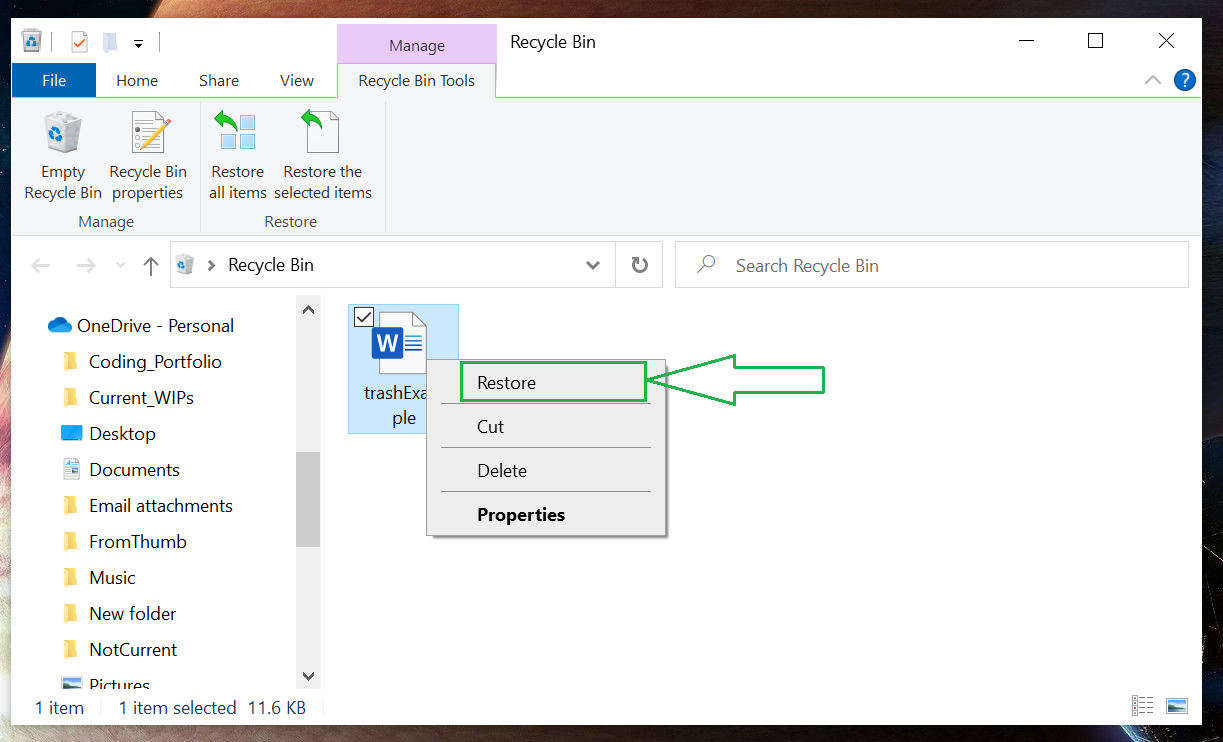
- Right-click on the selected file. Now, use the Restore option to send the file back to its original location.
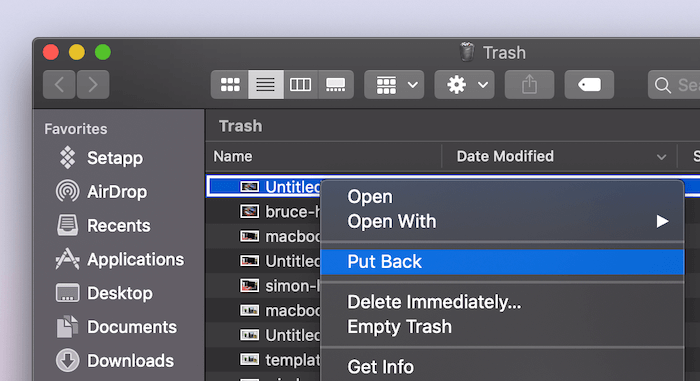
Recovering M2TS files from Mac Trash
- Find the Trash icon on the dock of your Apple Device.

- Once you’ve opened the folder, find and select the M2TS file you want to recover.
- Now, you have two options – you can either drag and drop the chosen file to another folder or right-click and select the Put Back option. Once you complete this step, the file will be restored to its original location.
Restore From a Recent Files Folder
File recovery using Windows Recycle Bin and Mac Trash is a great method to retrieve your deleted files easily. However, it has its limitations. If you wish to recover files lost due to file corruption, computer crashes, malware attacks, etc., you must use other restoration tools. However, if you don’t want to resort to third-party software for file recovery, there’s another solution to help retrieve your M2TS file.
Both Windows and Mac operating systems have backup options to help you with file restoration. If you turn on File History or navigate to the Time Machine on your system, they will grant you access to backups.
Let’s go through both the options step-by-step:
Recovering Files Using Windows File History
- Open the Windows menu and type in Restore your files using File History. It will lead you to the Control Panel.
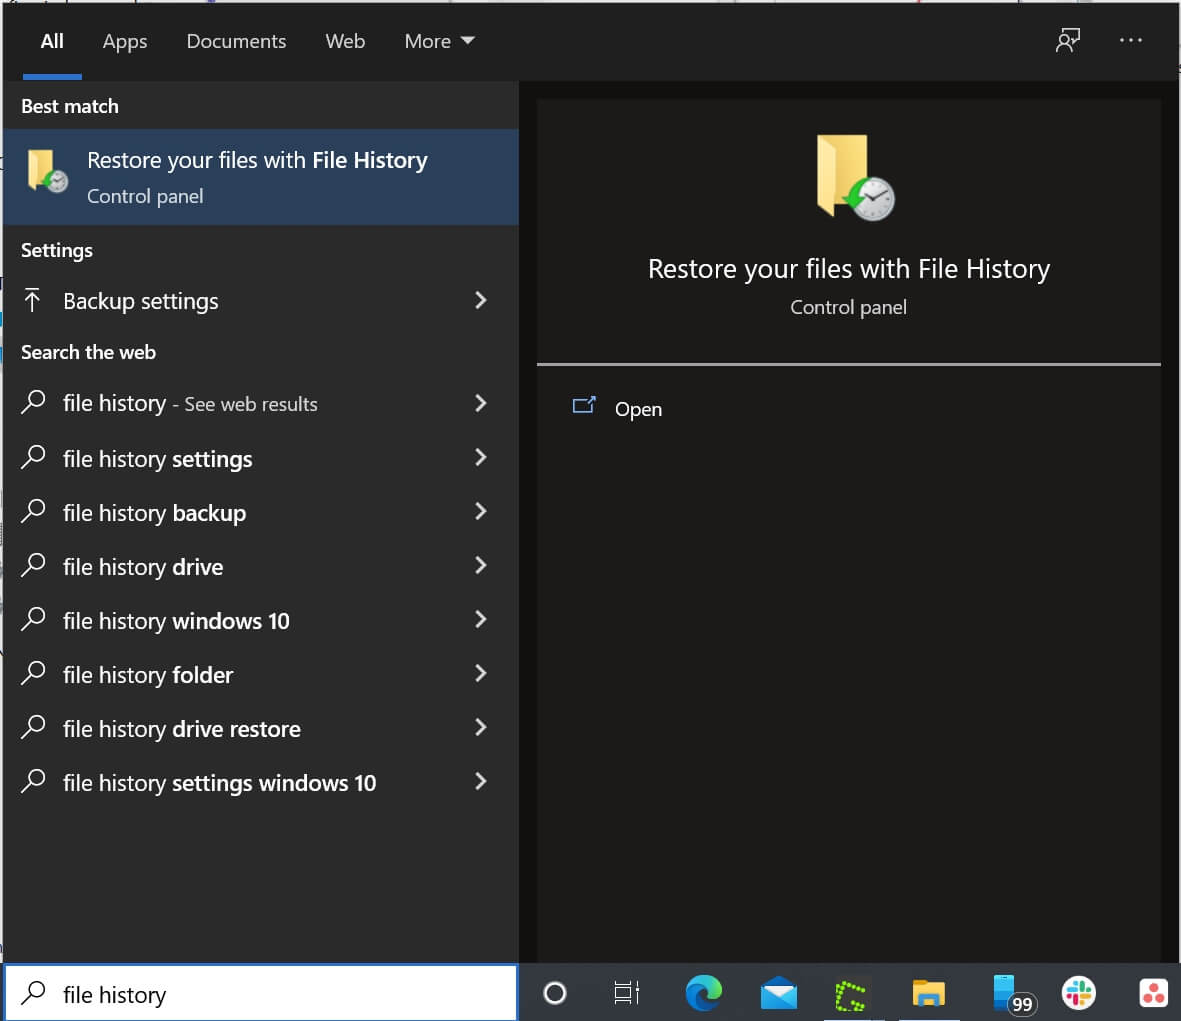
- Make sure your File History option is turned on. To turn it on, select an internal or external drive to which you want to backup your information.
- Now, click on the Restore personal files option.
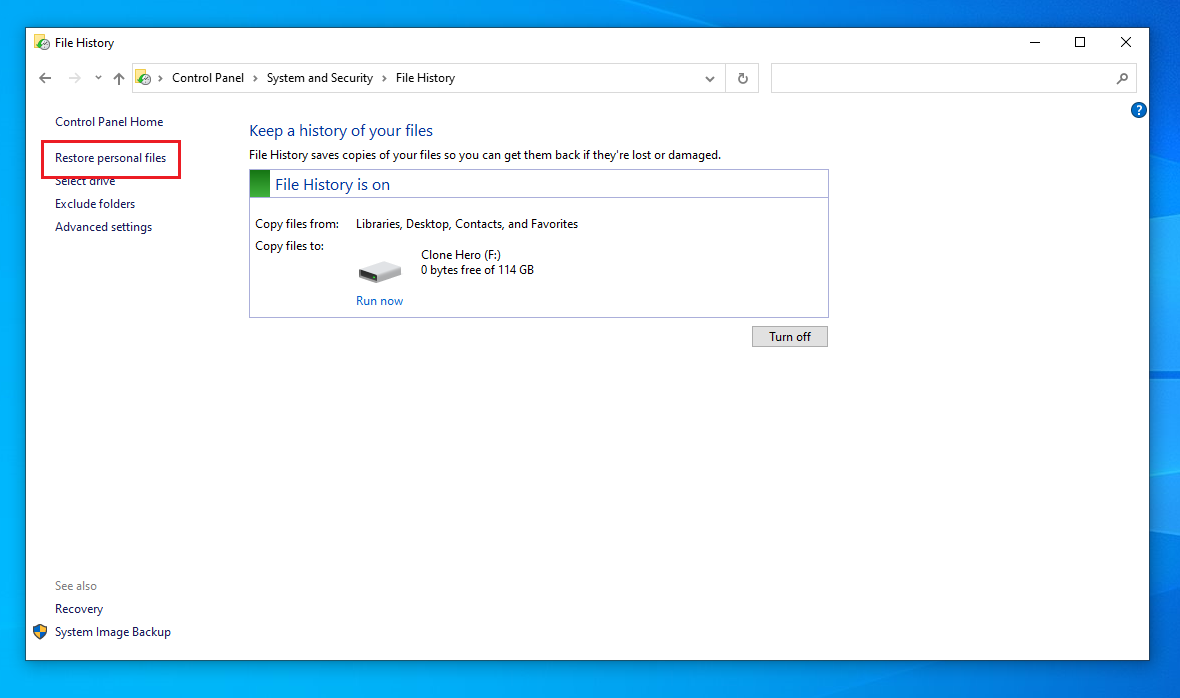
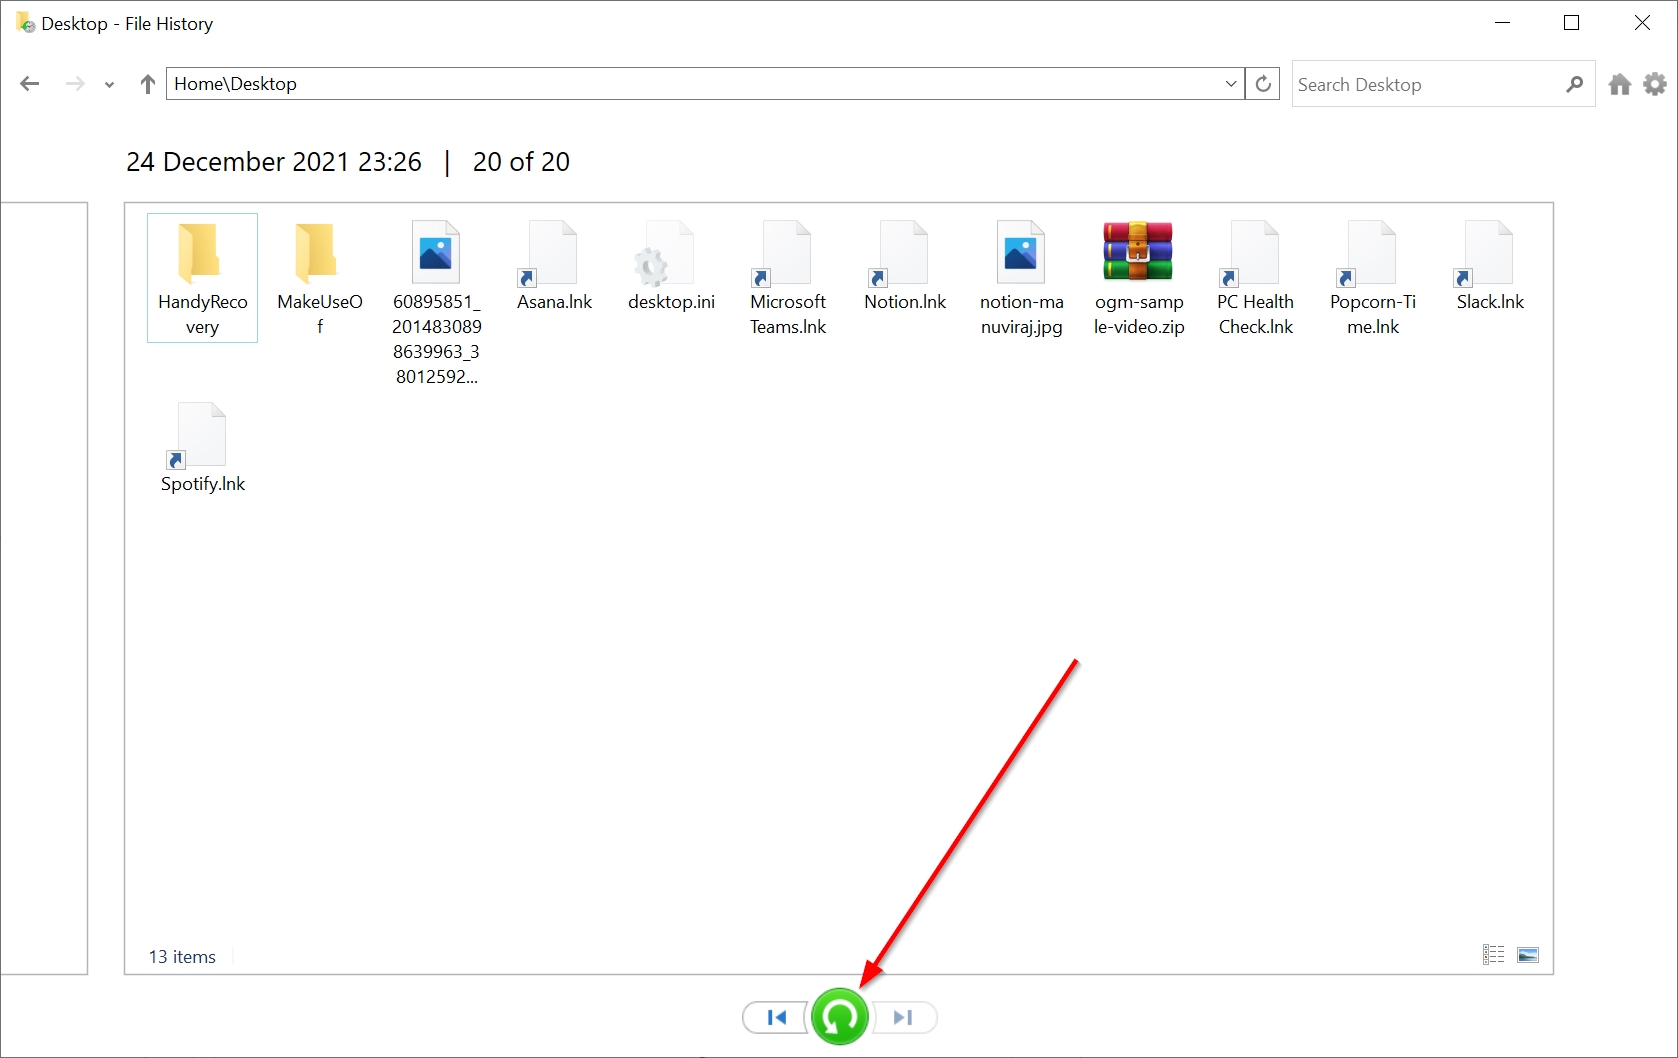
- Filter through available backups and locate the M2TS file you want to recover.
- Once you’ve found the desired file, click on the green Recover button. Your file will be restored to its original location.
Recovering Files Using Mac Time Machine
- Open Spotlight [Command key + Spacebar].

- Now, type in Time Machine.
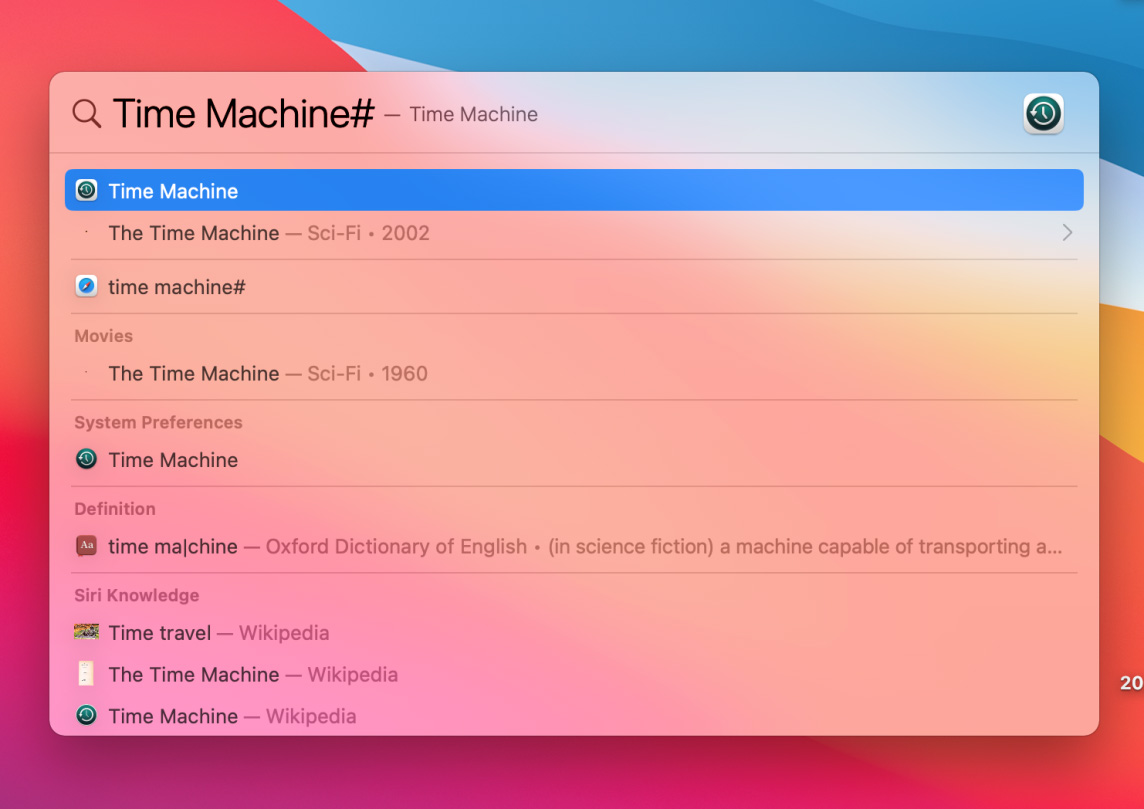
- Navigate through the folders to locate your missing M2TS file from available backups.
- Once you’ve selected the file, click Restore.
How to Open M2TS Files on Mac and Windows
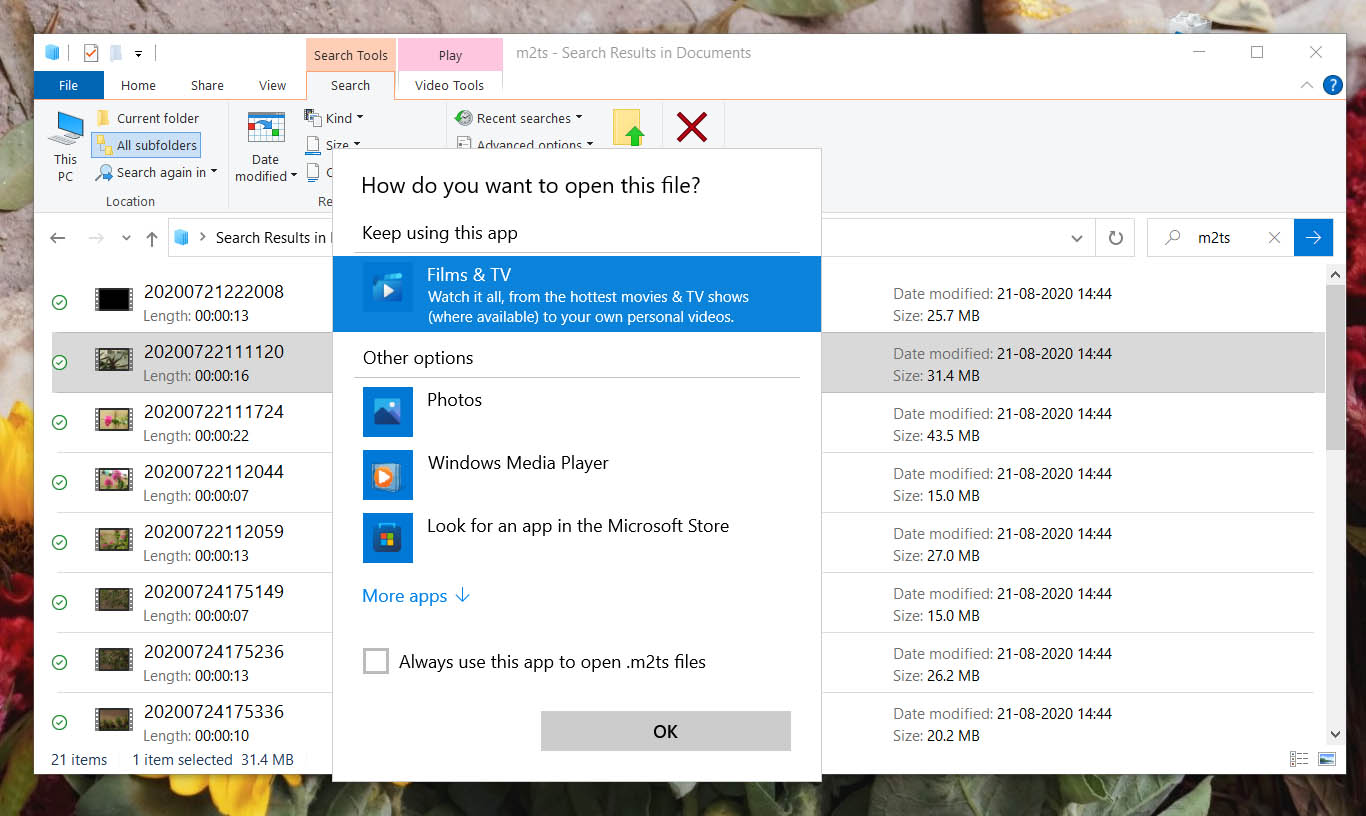
If you try to open your M2TS file on your system directly, you would most probably have prompts like Windows cannot open this file appear on your screen. You would find similar alerts on Mac/Linux/Android/iPhone. This happens because the M2TS file cannot open directly on your computer.
Once you’ve installed the appropriate software, follow these steps to open the M2TS file:
Right-click on the file> Open With > Select the desired app (e.g., VLC Media Player)
Moreover, you can also playback M2TS files on Sony PlayStations and other HDTVs that support the AVCHD file format.
Programs that Open M2TS Files
On Windows:
- Microsoft Windows Media Player
- File Viewer Plus
- Roxio Creator NXT Pro 7
- CyberLink PowerDVD 20 / PowerDirector 365 / PowerProducer 6
- MAGIX VEGAS Pro 18
- Audials One 2019
- VideoLAN VLC media player
- Mirillis Splash
On Mac:
- Roxio Toast 18
- VideoLAN VLC media player
On Linux:
- VideoLAN VLC media player
Tips to Avoid M2TS File Loss
By following the methods mentioned in this article, you can recover your lost or deleted M2TS files quite efficiently. While this shows that file recovery doesn’t have to be intimidating, you should also follow some preventive practices to lessen the risk of file damage.
Pro Backup Tips
Keep multiple backups – The entire conversion and transferring process of the M2TS file can be long and requires patience. Since the files are saved in high-definition, they are also quite bulky, and it takes time to save them. Many users find the entire process tiresome and forget to save backups of their files. However, keeping backups of your file is essential to prevent data loss. Make sure you follow these backup steps:
- ⏱️ Backup your data regularly – We advise users to keep saving backups of their data regularly. Have a routine to backup your important information and ensure these files are protected.
- 🧪 Test backup solutions – While having backups is a great way to prevent file loss or damage, make sure these backup mechanisms work during emergencies. Technology can sometimes be unpredictable, and it’s a good practice to test your backup solutions at regular intervals.
- 💾 Diversifying backups – Ensure that your backups are sent to more than one location. It can be risky only to have a single backup or even multiple backups in one place. You can diversify their locations by saving them with cloud storage, local disks, external drives, etc.
Generic Tips to Prevent Data Loss
- 🤝 Pick trusted applications to open your file – Opening and converting M2TS files requires third-party applications or codec packs. Ensure that you pick a trusted, reliable application for this work. Sometimes, downloading such apps off the internet can lead to malware attacks and file corruption.
- 🚑 Install an efficient Antivirus – Computer virus and malware attacks can lead to significant and permanent data loss. To prevent this, you must invest in good, effective antivirus software. It will safeguard your files and block any corrupt bugs attaching to your M2TS files.
- 🔋 Invest in an Uninterrupted Energy Supply – Sometimes, you can lose your work due to sudden power cuts and interruptions in the energy source. To avoid such a situation, we recommend that users invest in an Uninterrupted Energy Supply (UPS). It would allow users to shut down their systems properly in emergencies.
- ⚡ Stop overloading your drive – Overloading a single drive with information and data can result in disk failure or device crashes. Since M2TS files are pretty heavy, we suggest that you store your software and additional applications, media files, etc., on separate drives to prevent data loss.
Following these techniques can help prevent major data-loss scenarios. But if you find yourself in such a situation, the multiple methods mentioned in this article would assist you in data recovery.