Considered a standard storage solution, today, you can find MicroSD cards everywhere, from smartphones to digital cameras and from Internet-of-things connected devices to do-it-yourself SSDs in computers. However, one constant remains: like any storage device, they’re still prone to data loss.
Thankfully, there are solutions for such problems. In most cases, you can recover data from MicroSD cards, fix any filesystem problems, and keep using it as if it were brand-new. Read on to find the best file recovery solutions and file system corruption fixes for your MicroSD’s (SDHC, SDXC).
MicroSD Card Data Loss Situations and Ways to Fix Them
| Problem | Solution |
| I touched the wrong icon and deleted it instead of copying my files. What now? | Recover Data from MicroSD Cards with Data Recovery Software |
| I formatted the wrong MicroSD card! Can I fix it? |
Recover Files from MicroSD Cards with Data Recovery Software How to Access, Fix, and Get Your Data Back from your MicroSD Cards |
| My MicroSD card isn’t recognized and I can’t access its contents. Any help? | How to Access, Fix, and Get Your Data Back from your MicroSD Cards |
| Some files are inaccessible in an old MicroSD card I was using. Can I save them? |
Recover FIles from a MicroSD Cards= with Data Recovery Software How to Access, Fix, and Get Your Data Back from your MicroSD Cards |
Recover Data From MicroSD Cards With Data Recovery Software
Although today there are many data recovery solutions available, we usually go for Disk Drill.
Disk Drill can work with any corrupted or formatted storage device. It can bring back lost files from all brands of MicroSD cards, like SanDisk, Lexar, etc., or hard disk drives and SSDs from Western Digital, Seagate, Samsung, and others. It can save your pictures, images, videos, or any other type of file.
However, one of the primary reasons we like it is because it does all that through an extremely easy-to-use and streamlined interface.
Let’s see how in a real-world scenario, recovering data from a MicroSD card that shows up empty on a PC.
Steps to Recover Deleted Files from a MicroSD Card
- Download Disk Drill from its official website. Then, install it like any other application, and run it.
- Choose your MicroSD card from Disk Drill’s list of devices at the center of its window. If you are using a card reader – as we do – you might see that instead.
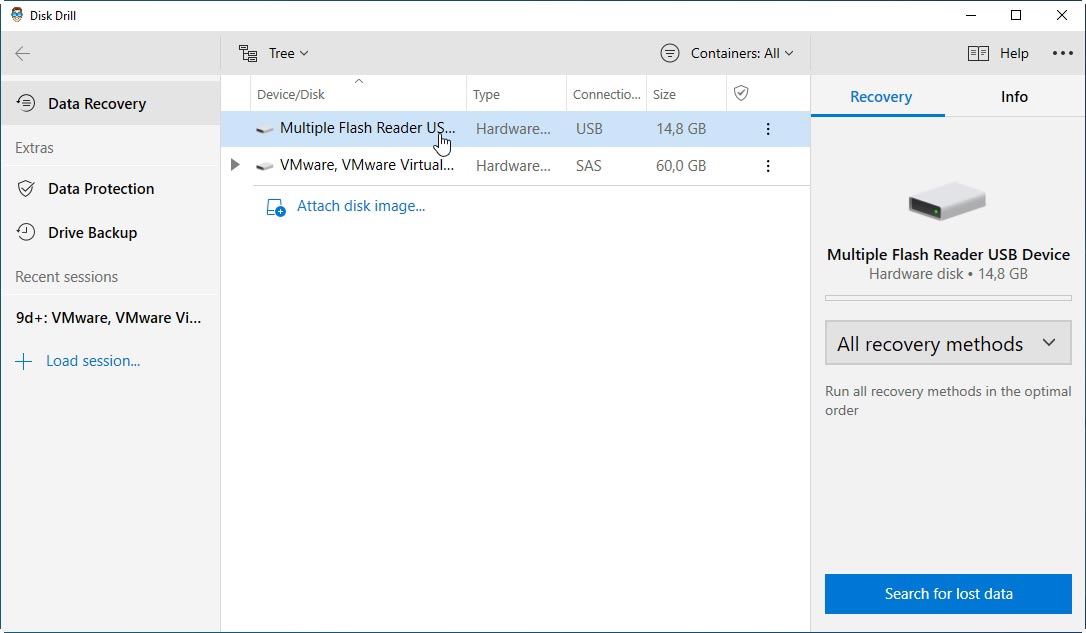
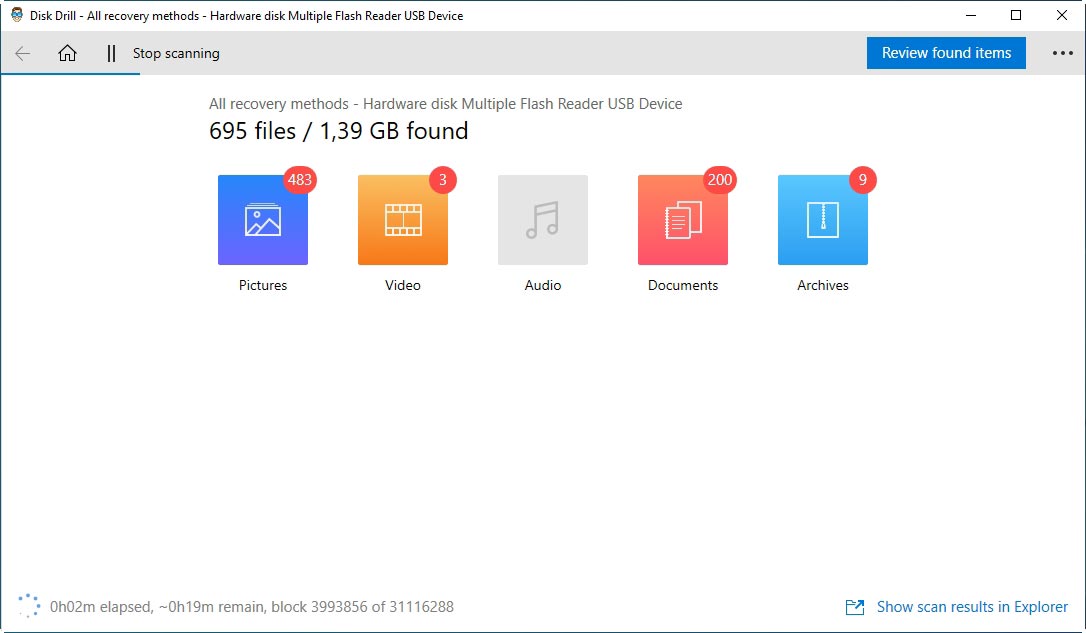
- Click on Search for lost data on the bottom right of its window. Then, give Disk Drill some time to scan your MicroSD.
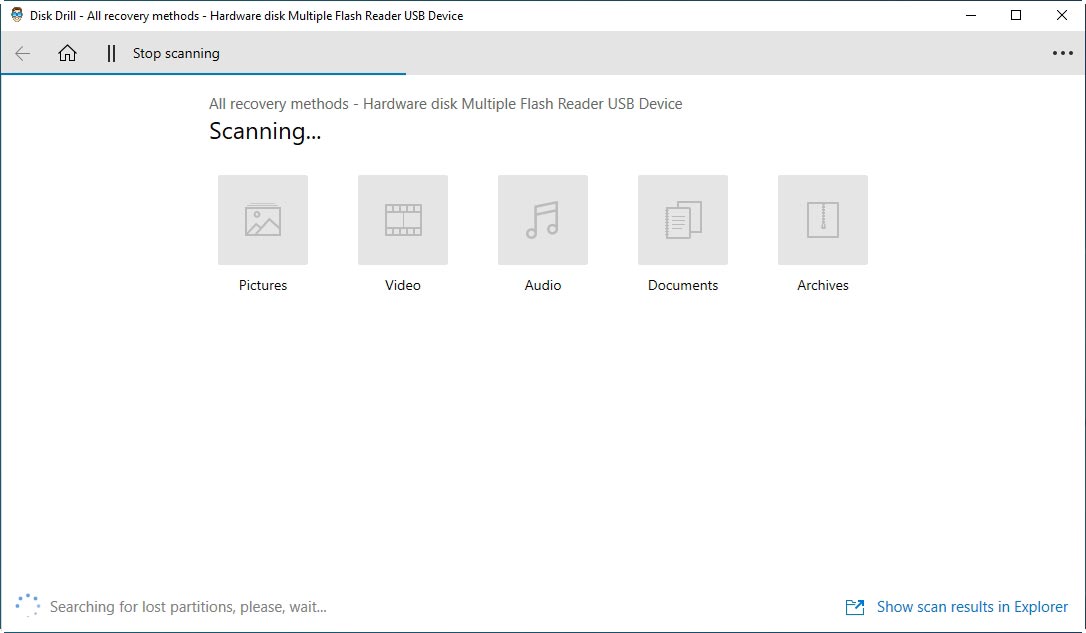
- Even if nothing seems to happen, don’t stop the scanning process. Neither go back and restart it. Disk Drill will be actually scanning for partitions. When it finds them, it will ask if you want to proceed to the actual scan.
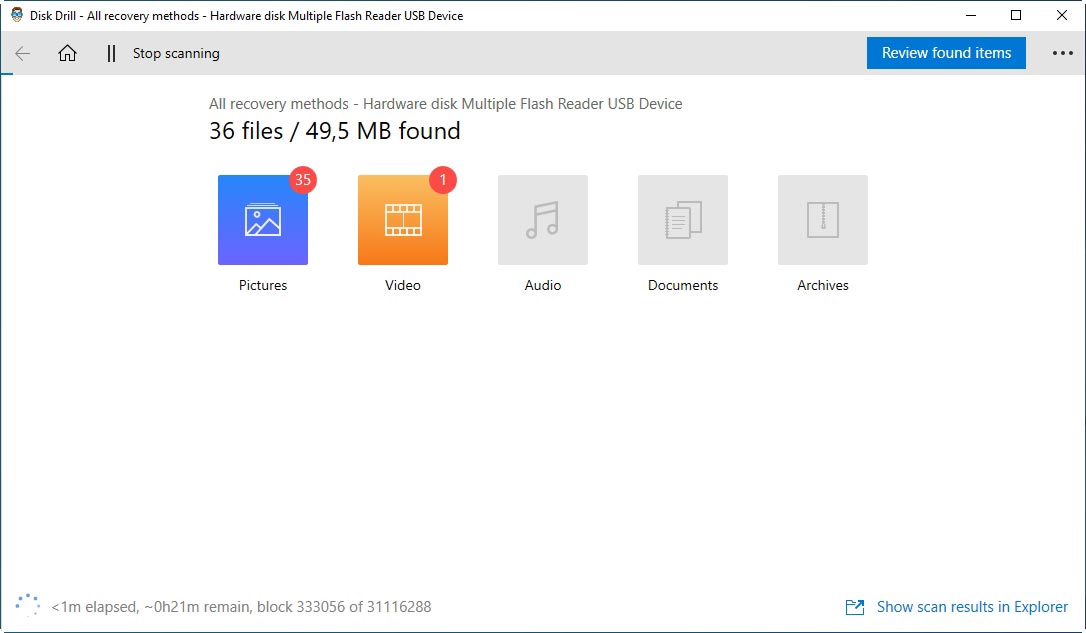
- You can check out what Disk Drill has found at any time with a click on Review found items at the top right of each window. The scan will continue running, trying to uncover even more lost data.
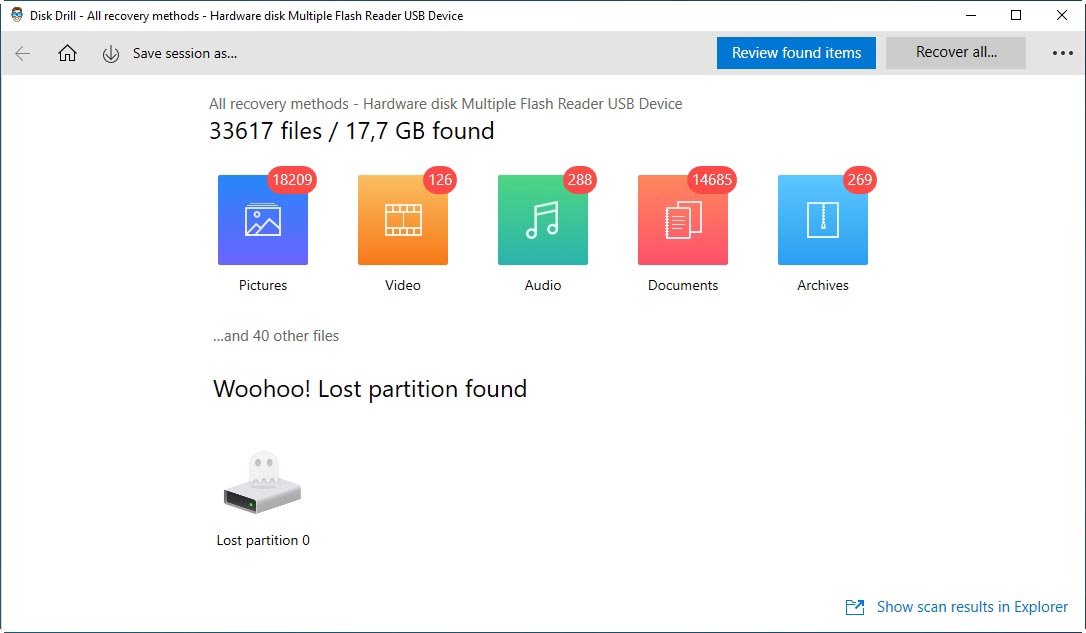
- If you allow the scan enough time to complete, and you are dealing with a data loss situation like ours, Disk Drill will also mention that it located a lost partition. To see the lost files and folders Disk Drill has found, click on the Review found items button on the top right, or on the partition’s icon. Alternatively, you can click on Recover all… to get back all your data without overthinking it.
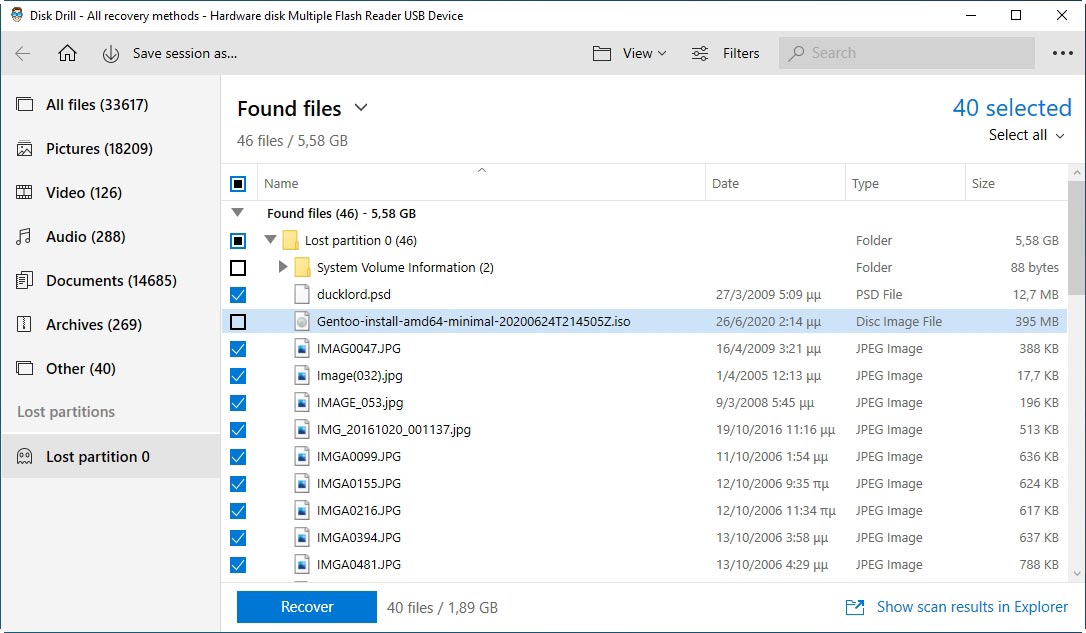
- Preview files to make sure they are recoverable. The estimated recovery chances are comprehensively color-coded for easy distinction.
- Expand Found files, and place a checkmark to the box on the left of the ones you want to recover. Then, click on Recover on the bottom left of the window.
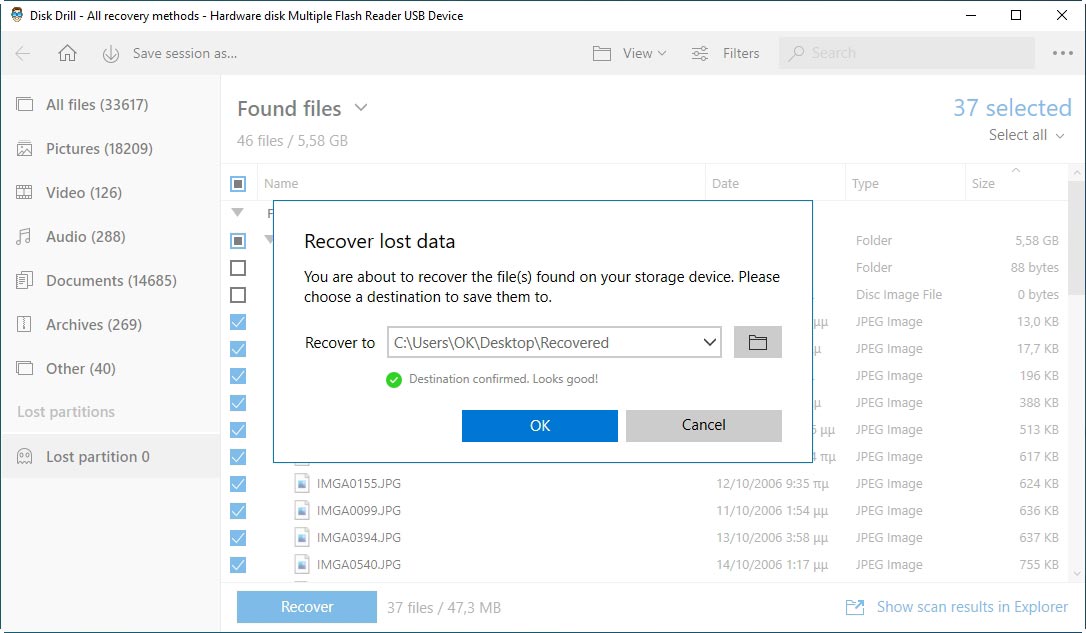
- Choose the location where you want to save your files, and click on OK to proceed with their recovery.
- Disk Drill will inform you when the process completes and offer the option to Show recovered data in Explorer. Click on that to see your recovered files.


Don’t worry if you don’t see your files in that folder. Disk Drill tries to keep a logical folder structure for the data it recovers, so, check inside the subfolders you’ll find in the recovery folder. 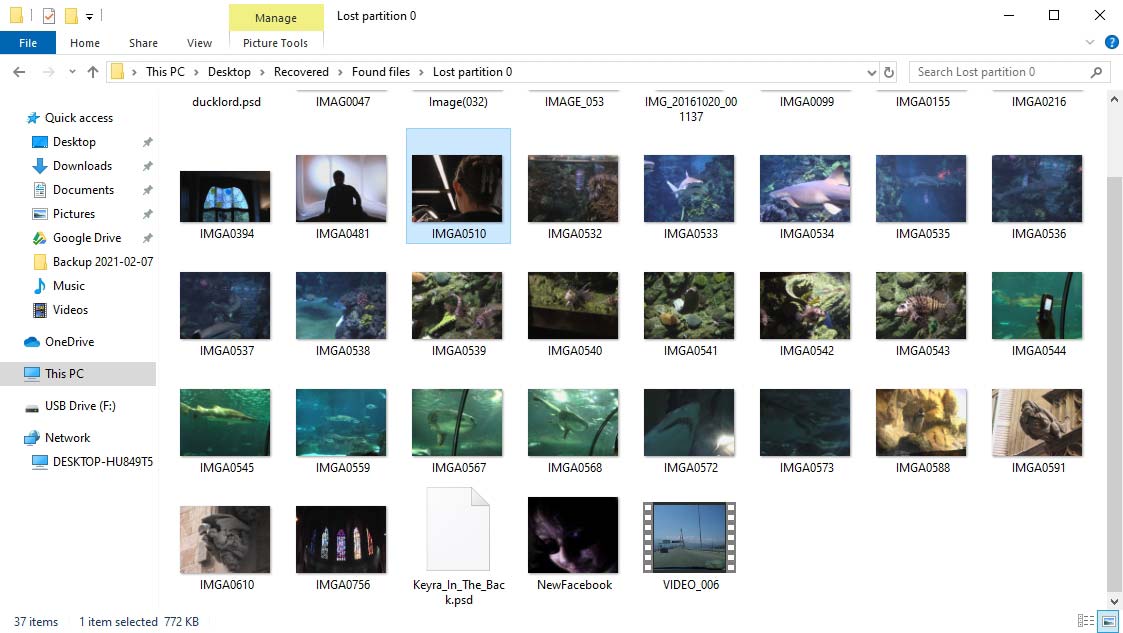
With your files back, you can now try to fix your MicroSD, as we’ll see in our next chapter.
How to Access, Fix, and Get Your Data Back From Your MicroSD Cards
There are many possible reasons a device won’t read the contents of a MicroSD card. Thankfully, there’s an almost equal number of simple solutions you can try to get back access to its contents.
No MicroSD Card Detected
You tried inserting your MicroSD card many times and even tried turning it around to ensure you’re inserting it the right way. However, your device insists on not detecting it.
- Is the card reader itself detected? If not, try connecting it to a different USB port. If it is, it’s worth trying another card reader.
- Your card’s connector might be bent or dirty. Inspect it for visible problems. Use a cotton pad and three or four drops of isopropyl alcohol to clean it. Let your MicroSD card dry for ten minutes and then try inserting it again.
MicroSD Card Detected but Not Accessible
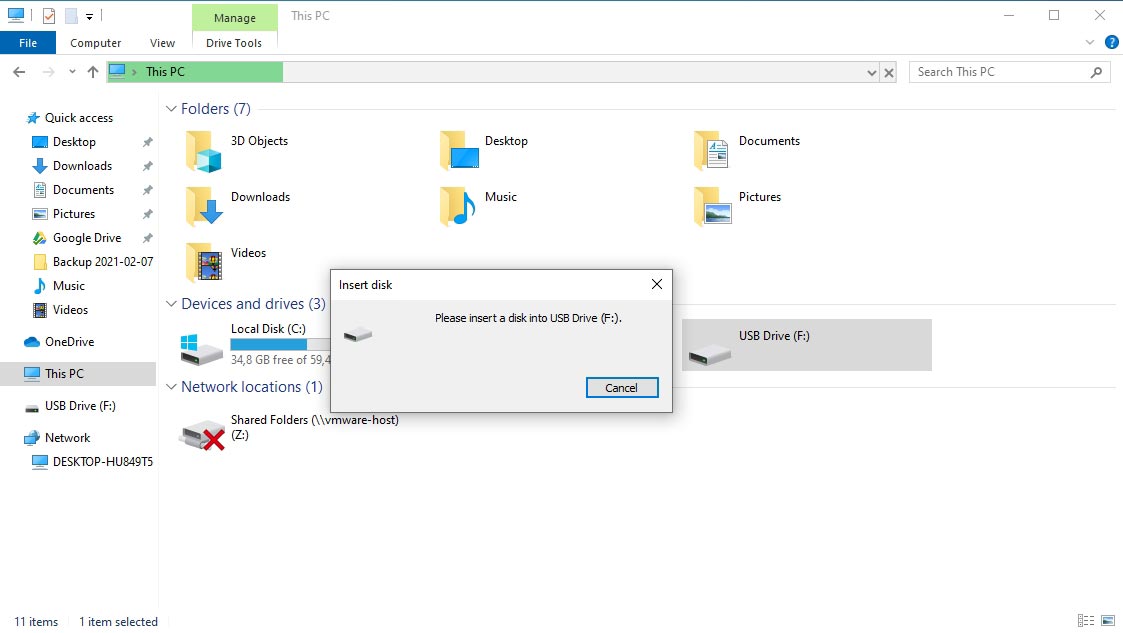
For some reason, your operating system might have not assigned your MicroSD card a drive letter to render it accessible.
To assign a letter to a storage device manually:
- Press Windows Key + X to access a quick menu of administrative tools on Windows 10.
- Choose Disk Management, and when there, right-click on your MicroSD card.
- Select “Change Drive Letter and Paths…” and assign your MicroSD card a letter.
Your MicroSD card’s contents should now be accessible from your favorite file manager, like Windows 10’s default File Explorer.
MicroSD Card Detected but Has Errors
If your MicroSD card is detected and mounted correctly, but you still can’t access your files, its filesystem might be corrupted.
Windows comes with a command-line utility, called CHKDSK (pronounced “check disk”), that can deal with such problems. Although you have to type commands to use it, as you’ll see, it’s a straightforward process.
- Press Windows Key + X to access Windows 10’s quick administrative tools menu, and choose Command Prompt (Admin) or Windows PowerShell (Admin).
- Type “chkdsk X: /f” (without the quotation marks), where “X” is the letter of the MicroSD card you want to check, and “/f” is a parameter that tells CHKDSK to try and fix any errors it finds.
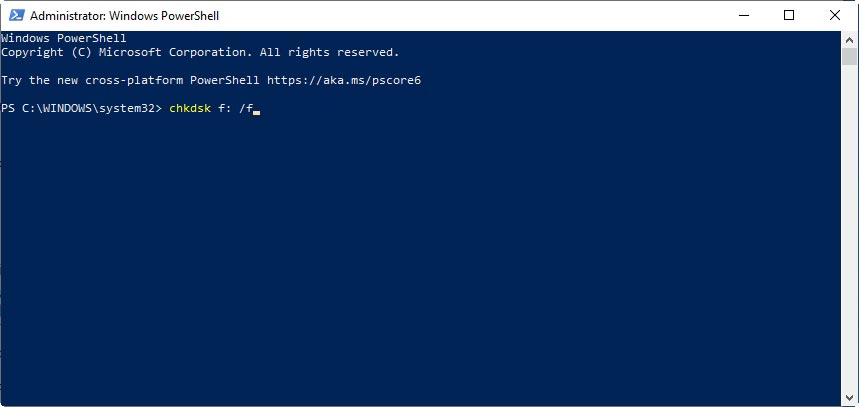
After chkdsk completes its task, something that could take a while depending on your MicroSD card’s size, its contents should be accessible again.
Those were only a small subset of the possible causes and solutions that can help you get your data back. We could go on, but that would require a whole article of its own. Thankfully, though, we’ve already written that, and you can check it out here. However, if nothing worked, it’s time to go nuclear.
When Nothing Else Works: Data Recovery Services
For every Titanic, there’s an iceberg. If you’ve tried every fix available without results, it’s time to turn to the experts. Many Data Recovery Services can save your data even from devices brought back from Mordor’s Mount Doom. However, as Tolkien fans know, that usually comes at a price.
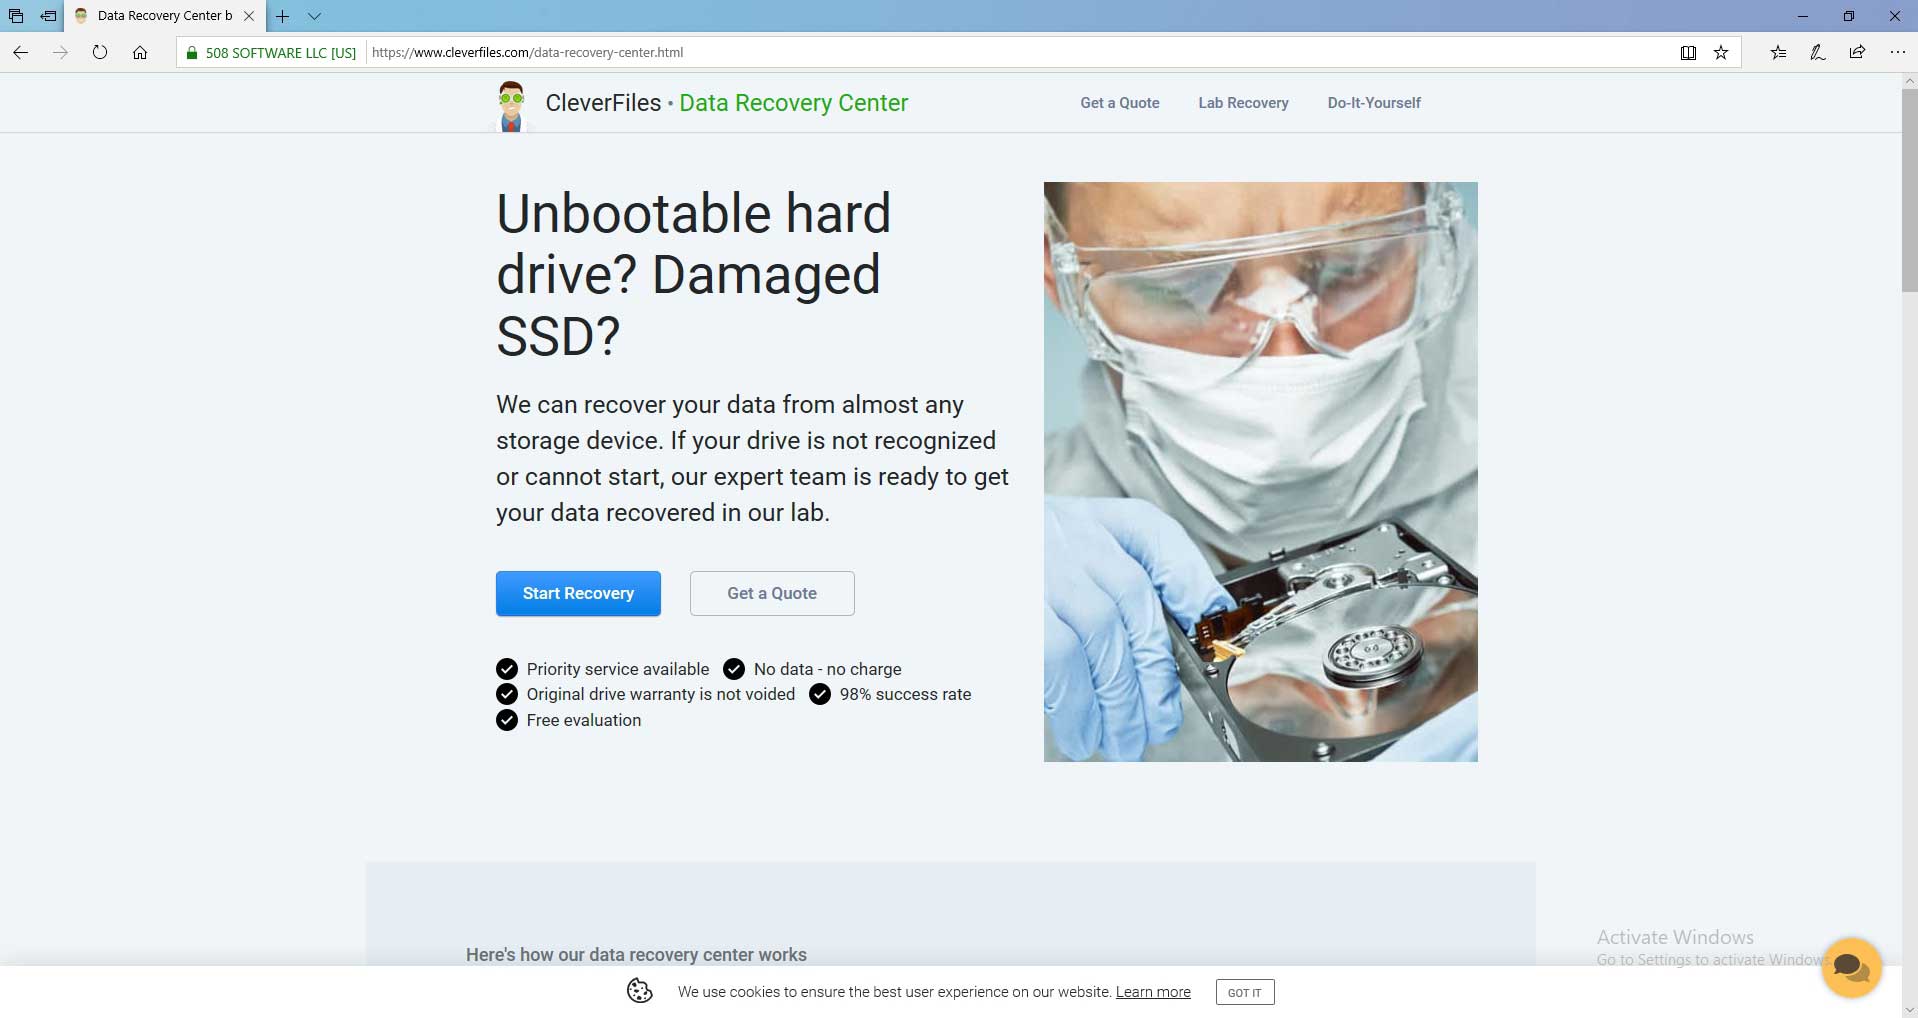
That’s why in such cases, we turn to CleverFiles’ Data Recovery Center: they guarantee a higher than 98% success rate and keep your device’s warranty intact. However, as the cherry on top, they also offer a free evaluation and don’t charge you if there is no data to be recovered.
How to Protect Your MicroSD Card and Keep Your Data Safe
When dealing with MicroSD cards, you can take some preemptive steps to minimize the chances of corruption and data loss.
- Even if MicroSD cards come preformatted, avoid using them immediately. Instead, perform a full format from scratch to ensure there aren’t any bad blocks.
- Modern devices and operating systems use caching to speed up read and write operations. However, this means interrupting a delayed write operation can lead to file corruption. To avoid that, always select the available option to remove/disconnect/eject the MicroSD card or power off your device before taking your MicroSD card out.
- If using the same MicroSD card in many devices, some might require a different format. They might suggest to format or, in some way, “prepare your card for use”. Refuse their offer, for that would erase your micro SD card’s contents and reformat it.
- Liquids and dust can cause oxidization on connectors. Carrying MicroSDs loose in your pocket can lead to scratches. And they’re also fragile enough to easily bend or break. That’s why you should always keep your MicroSD cards in protective cases and away from heat and direct sunlight.
- Small portable devices don’t come with the friendliest interfaces for managing dozens of files. To avoid missteps(AKA: deleting the wrong files), it’s better copying or moving your MicroSD card’s contents to your computer. Then and there, you’ll be able to do all the “file managing” from the comfort of a proper file manager.
- Avoid overfilling your MicroSD cards and then deleting some files to make space for new ones again and again. Fragmentation might not impact a MicroSD card’s performance as much as a computer’s hard disk drive, but repeated writes can reduce its life. It’s better to use multiple MicroSD cards, and when one is full, move to the next one. Then, copy everything from the one you’re not using to your computer. Finally, format it to erase its contents in one go after ensuring you have everything backed up.
Useful Info and the Lingo of SD Cards
Although we talked about MicroSD cards, everything we saw also applies to their siblings, MicroSDs, and the original SDs. Choosing the proper one for your device is easy if you look only at their size. For example, a full-sized SD wouldn’t fit in a modern smartphone. However, you should also consider other factors, like their speed, finding a combination that’s best for your needs (and wallet).
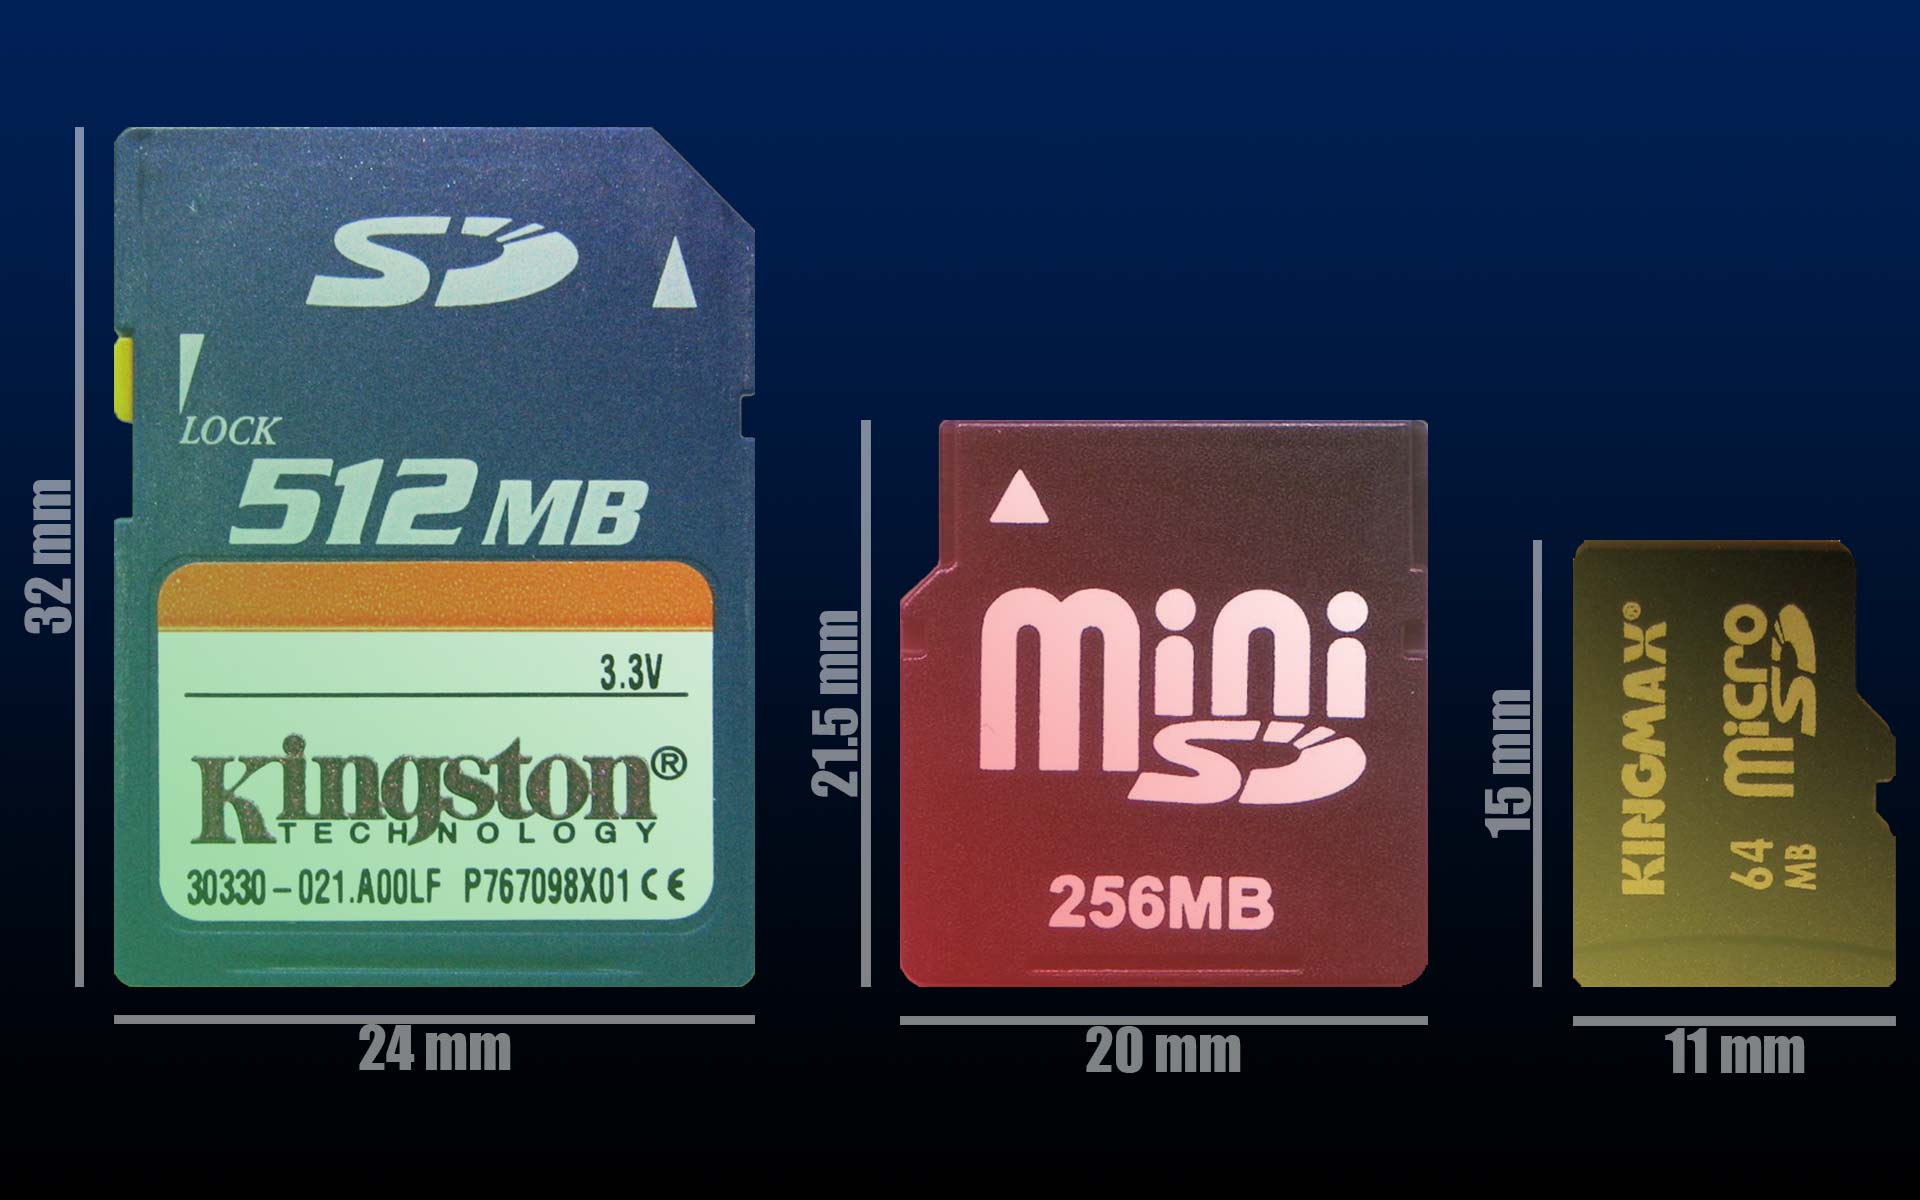
Size
- The standard size for SD cards is 32 x 24 x 2 mm.
- MiniSD cards are almost half the size, at 21.5 x 20 x 1.4 mm.
- Finally, MicroSD cards are close to half the size of miniSDs, and a quarter of full-size SDs, at 15 x 11 x 1 mm.
Capacity
- The original SD spec allowed storage capacities up to 2GBs.
- The SDHC spec that followed upgraded SD cards’ storage to 32 GB.
- The newer SDXC format boosted the storage for our modern needs up to 2 TB.
- The latest variant, SDUC, isn’t widespread yet since it far exceeds the average user’s needs by pushing the storage capacity up to 128 TB.
Speed
- Standard SDs cap at the ancient speed of 12.5 MB/s.
- The improved high-speed variant doubles the rate to 25 MB/s.
- UHS-1 makes speeds tolerable for modern needs, at rates from 50 MB/s up to 104 MB/s.
- UHS-II improves things more with full-duplex rates up to 156 MB/s and half-duplex rates at 312 MB/s.
- UHS-III looked like the best we could get, at 312 MB/s full-duplex and 624 MB/s half-duplex, but then the Express standard entered the picture.
- Express justify their price premium by offering blazingly fast speeds of over 985 MB/s full-duplex.
Conclusion
As we saw, even if your files disappeared from your MicroSD card, or your device won’t read its content no matter what you tried, there are solutions to most problems that can help you get your data back.
It can be as easy as firing up a memory card recovery software and having it run a zippy check-and-restore operation on your MicroSD card.
FAQ
Try wiggling it, use a different card slot, and move your card reader to a second USB slot. If those don’t work, try another card reader.
Check if it wasn’t assigned a letter through the Disk Management app. If it was or shows up as empty/unformatted space, have a specialized solution like Disk Drill run a scan on it.
Yes, either by using specialized software, or by fixing any file system problems in-place and then accessing your files. However, we always suggest recovering your precious files from it as the very first step.
Use specialized software, like the aforementioned Disk Drill.
- Download Disk Drill and then install and run it.
- Choose your MicroSD card from its list, then click on Search for lost data.
- If there were lost partitions, Disk Drill will run an initial scan for them. Give it some time, even if it seems like it hasn’t detected anything, and don’t cancel the scan or go back to the first screen.
- Soon Disk Drill will present you with the results of its scan. Click on Review found items, choose the ones you want to recover, and click on Recover to get your files back.
Afterwards, try fixing your card with a solution like CHKDSK.
- Press Windows Key + X and choose Command Prompt (Admin) or Windows PowerShell (Admin).
- Type “chkdsk X: /f” (without the quotation marks), where “X” is the letter of your MicroSD card.
- Wait for CHKDSK to scan and (try to) fix your MicroSD card. If all goes well, you’ll be able to keep using it afterward.
Despite MicroSD cards being, well, cards, compared to storage devices like hard disk drives and solid-state drives, they’re still storage devices. Thus, you don’t have to use software made specifically for them for successful data recovery. Any app on the following list can help you get your data back:
- CleverFiles Disk Drill
- EaseUS Data Recovery Wizard
- RecoverIt Data Recovery Software
- MiniTool Data Recovery Software
- R-Tools Technology R-Studio
However, some may manage to recover more files, or simply be more straightforward in their use. That’s why we always go for Disk Drill, which strikes a great balance between recovery prowess and ease of use.