The CR2 file extension stands for Canon Raw Version 2. CR2 files are created and used primarily by Canon cameras. Poser, a 3D-modelling program, also uses CR2 files, but Canon cameras are far and away from the most common sources of them.
In this piece, we’ll explain what CR2 files are and how you can get back CR2 files that have been accidentally lost or deleted.
What is the CR2 File Format
CR2 is the raw image file format used by Canon cameras. Raw image files are digital files that hold visual information in a minimally processed state. All digital cameras store photography data in raw formats.
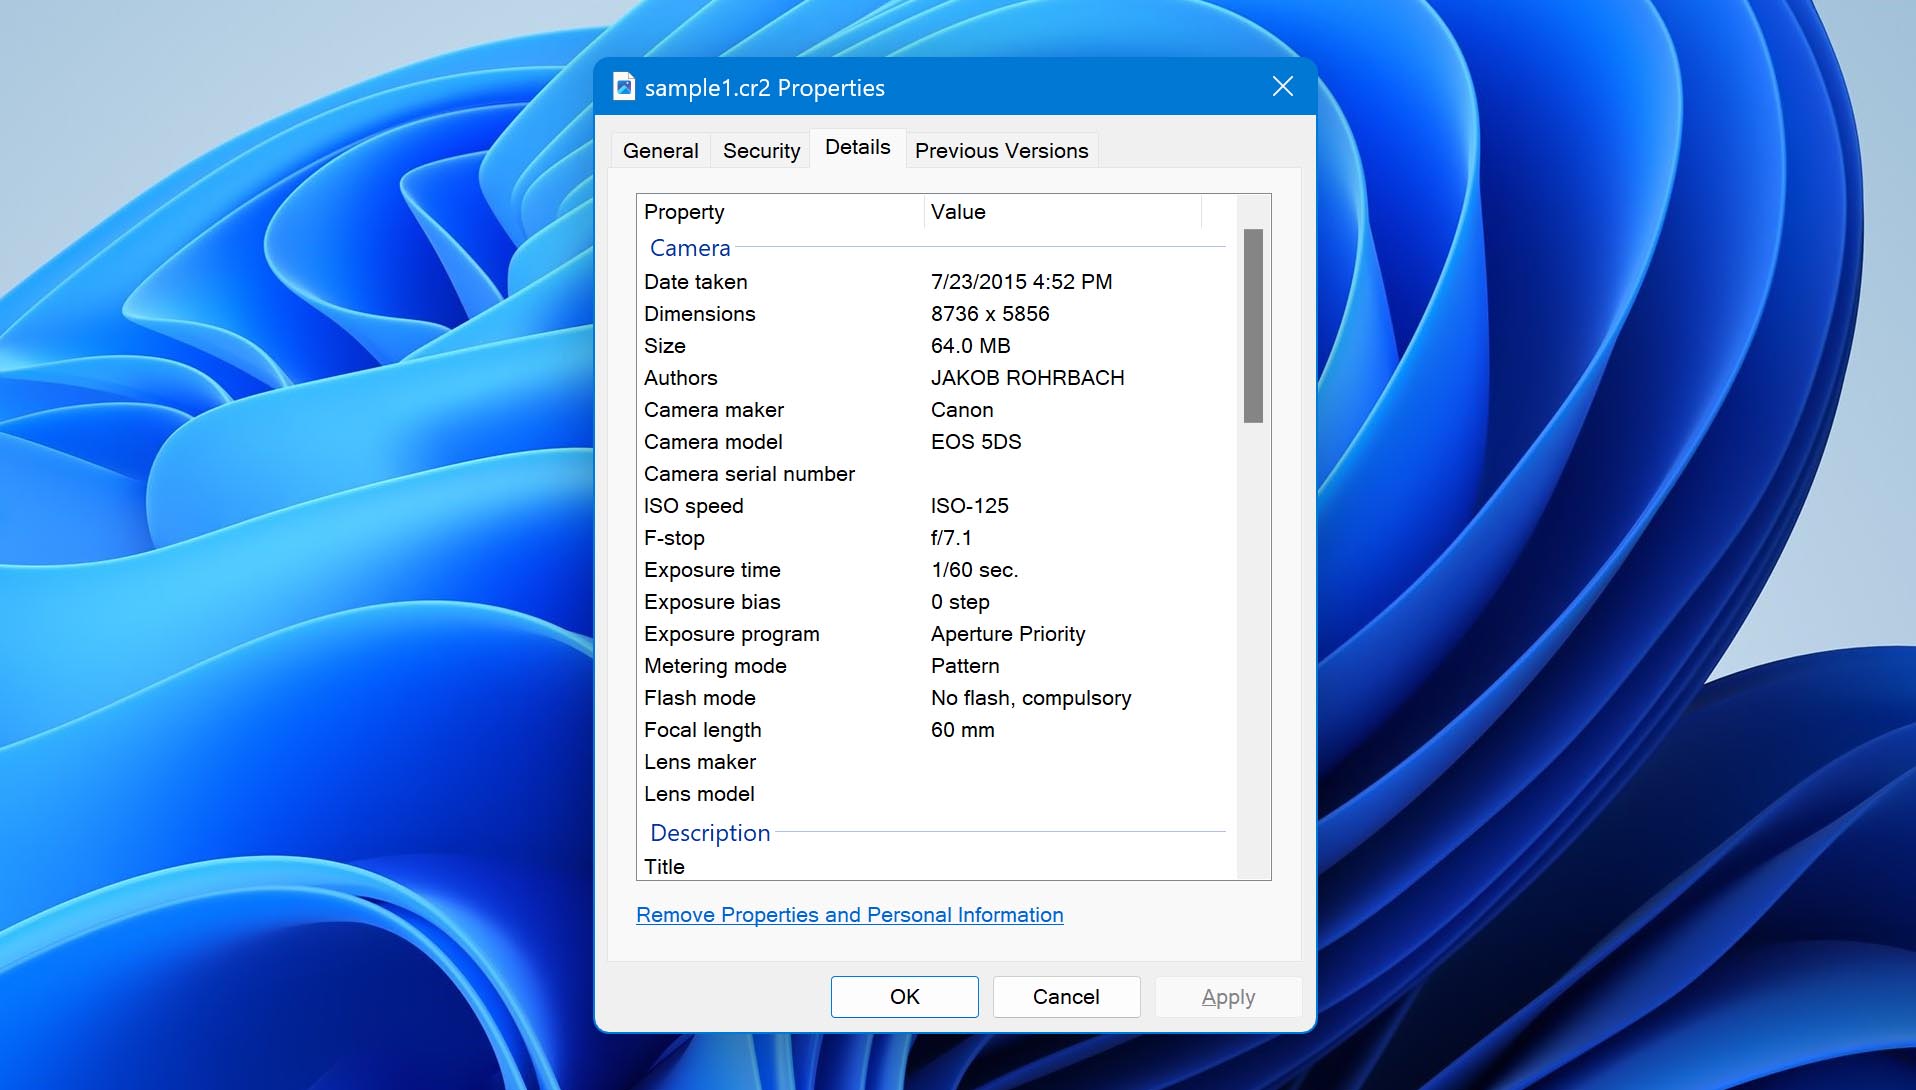
CR2 files are lossless. They record up to 14 bits of RGB data. They are a common file type among professional photographers because they hold so much information, which allows the production of premium-quality pictures.
How to Recover Deleted CR2 Files
Deleted files don’t truly disappear. They are put into another storage stage that allows them to be written over with new information, but they are still available until they’ve been overwritten to such an extent that the original deleted information is unreadable.
We further discuss several methods for recovering CR2 files. We will start with data recovery software and show you how to get it in the next section.
Recover CR2 Files with Software
To recover data, software must be able to access the location where the lost files are located.
Because CR2 files are Canon photo files, there’s a good chance that they’ll be on a Canon SD card or some other brand of SD card (mostly likely mini- or micro-SD). You’ll need a card reader to recover your photo files from any type of memory card. Plug it into your computer via a USB port.
With the recovery software, which is downloaded to your computer, needs to be able to access and read files on your memory card. So, you just need to plug the card reader into your computer and insert the card into the reader.
Disk Drill is one of the best data recovery software on the market for recovering deleted RAW files on Windows or Mac computers. It also happens to be free to download (and Windows users get 500 MB of free recovered data), easy to use, and highly effective. You can download Disk Drill from the link below:

Once you have Disk Drill installed, follow the steps below to get your files back:
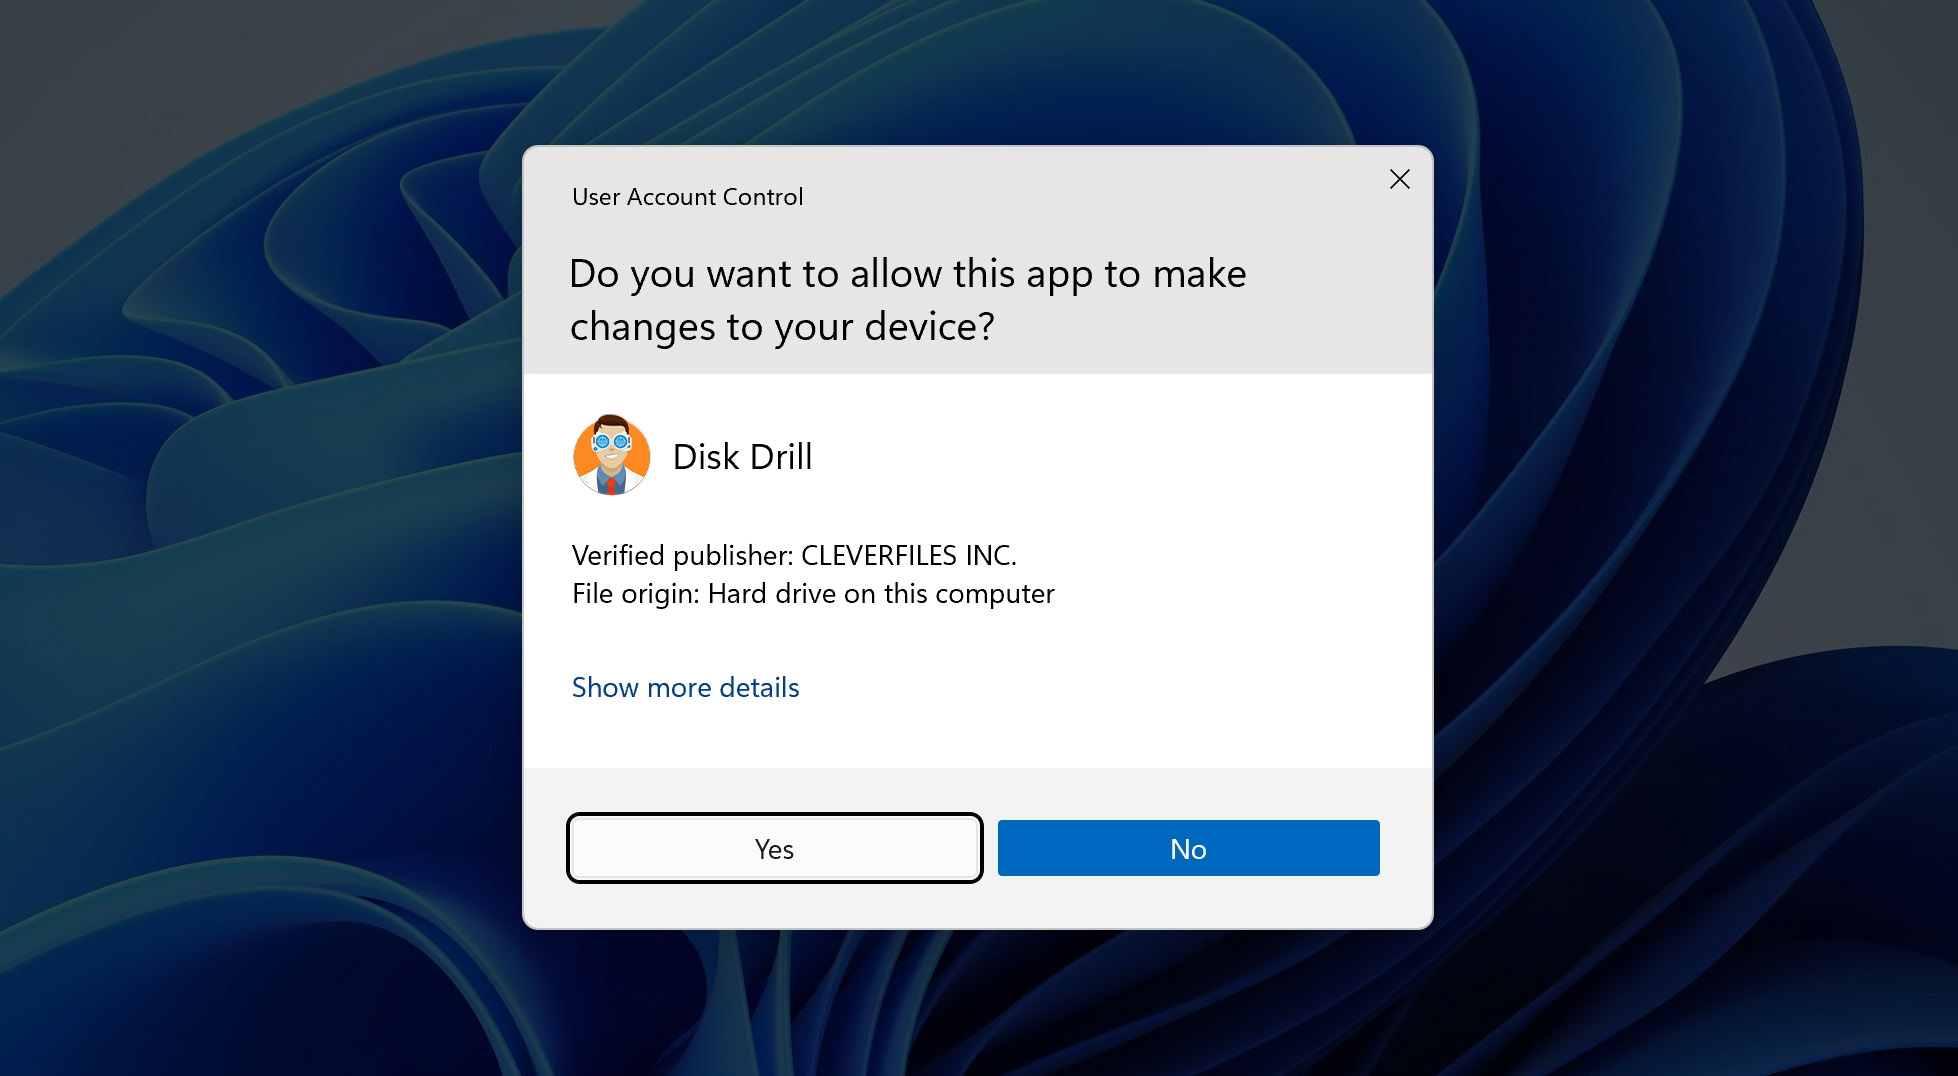
- Open Disk Drill as you would any other application. Just double-click or do the right-click and open approach. At this point, Disk Drill will ask for permission to make changes to your computer. Select Yes. Nothing will really happen at this point. You’re simply initiating the program.
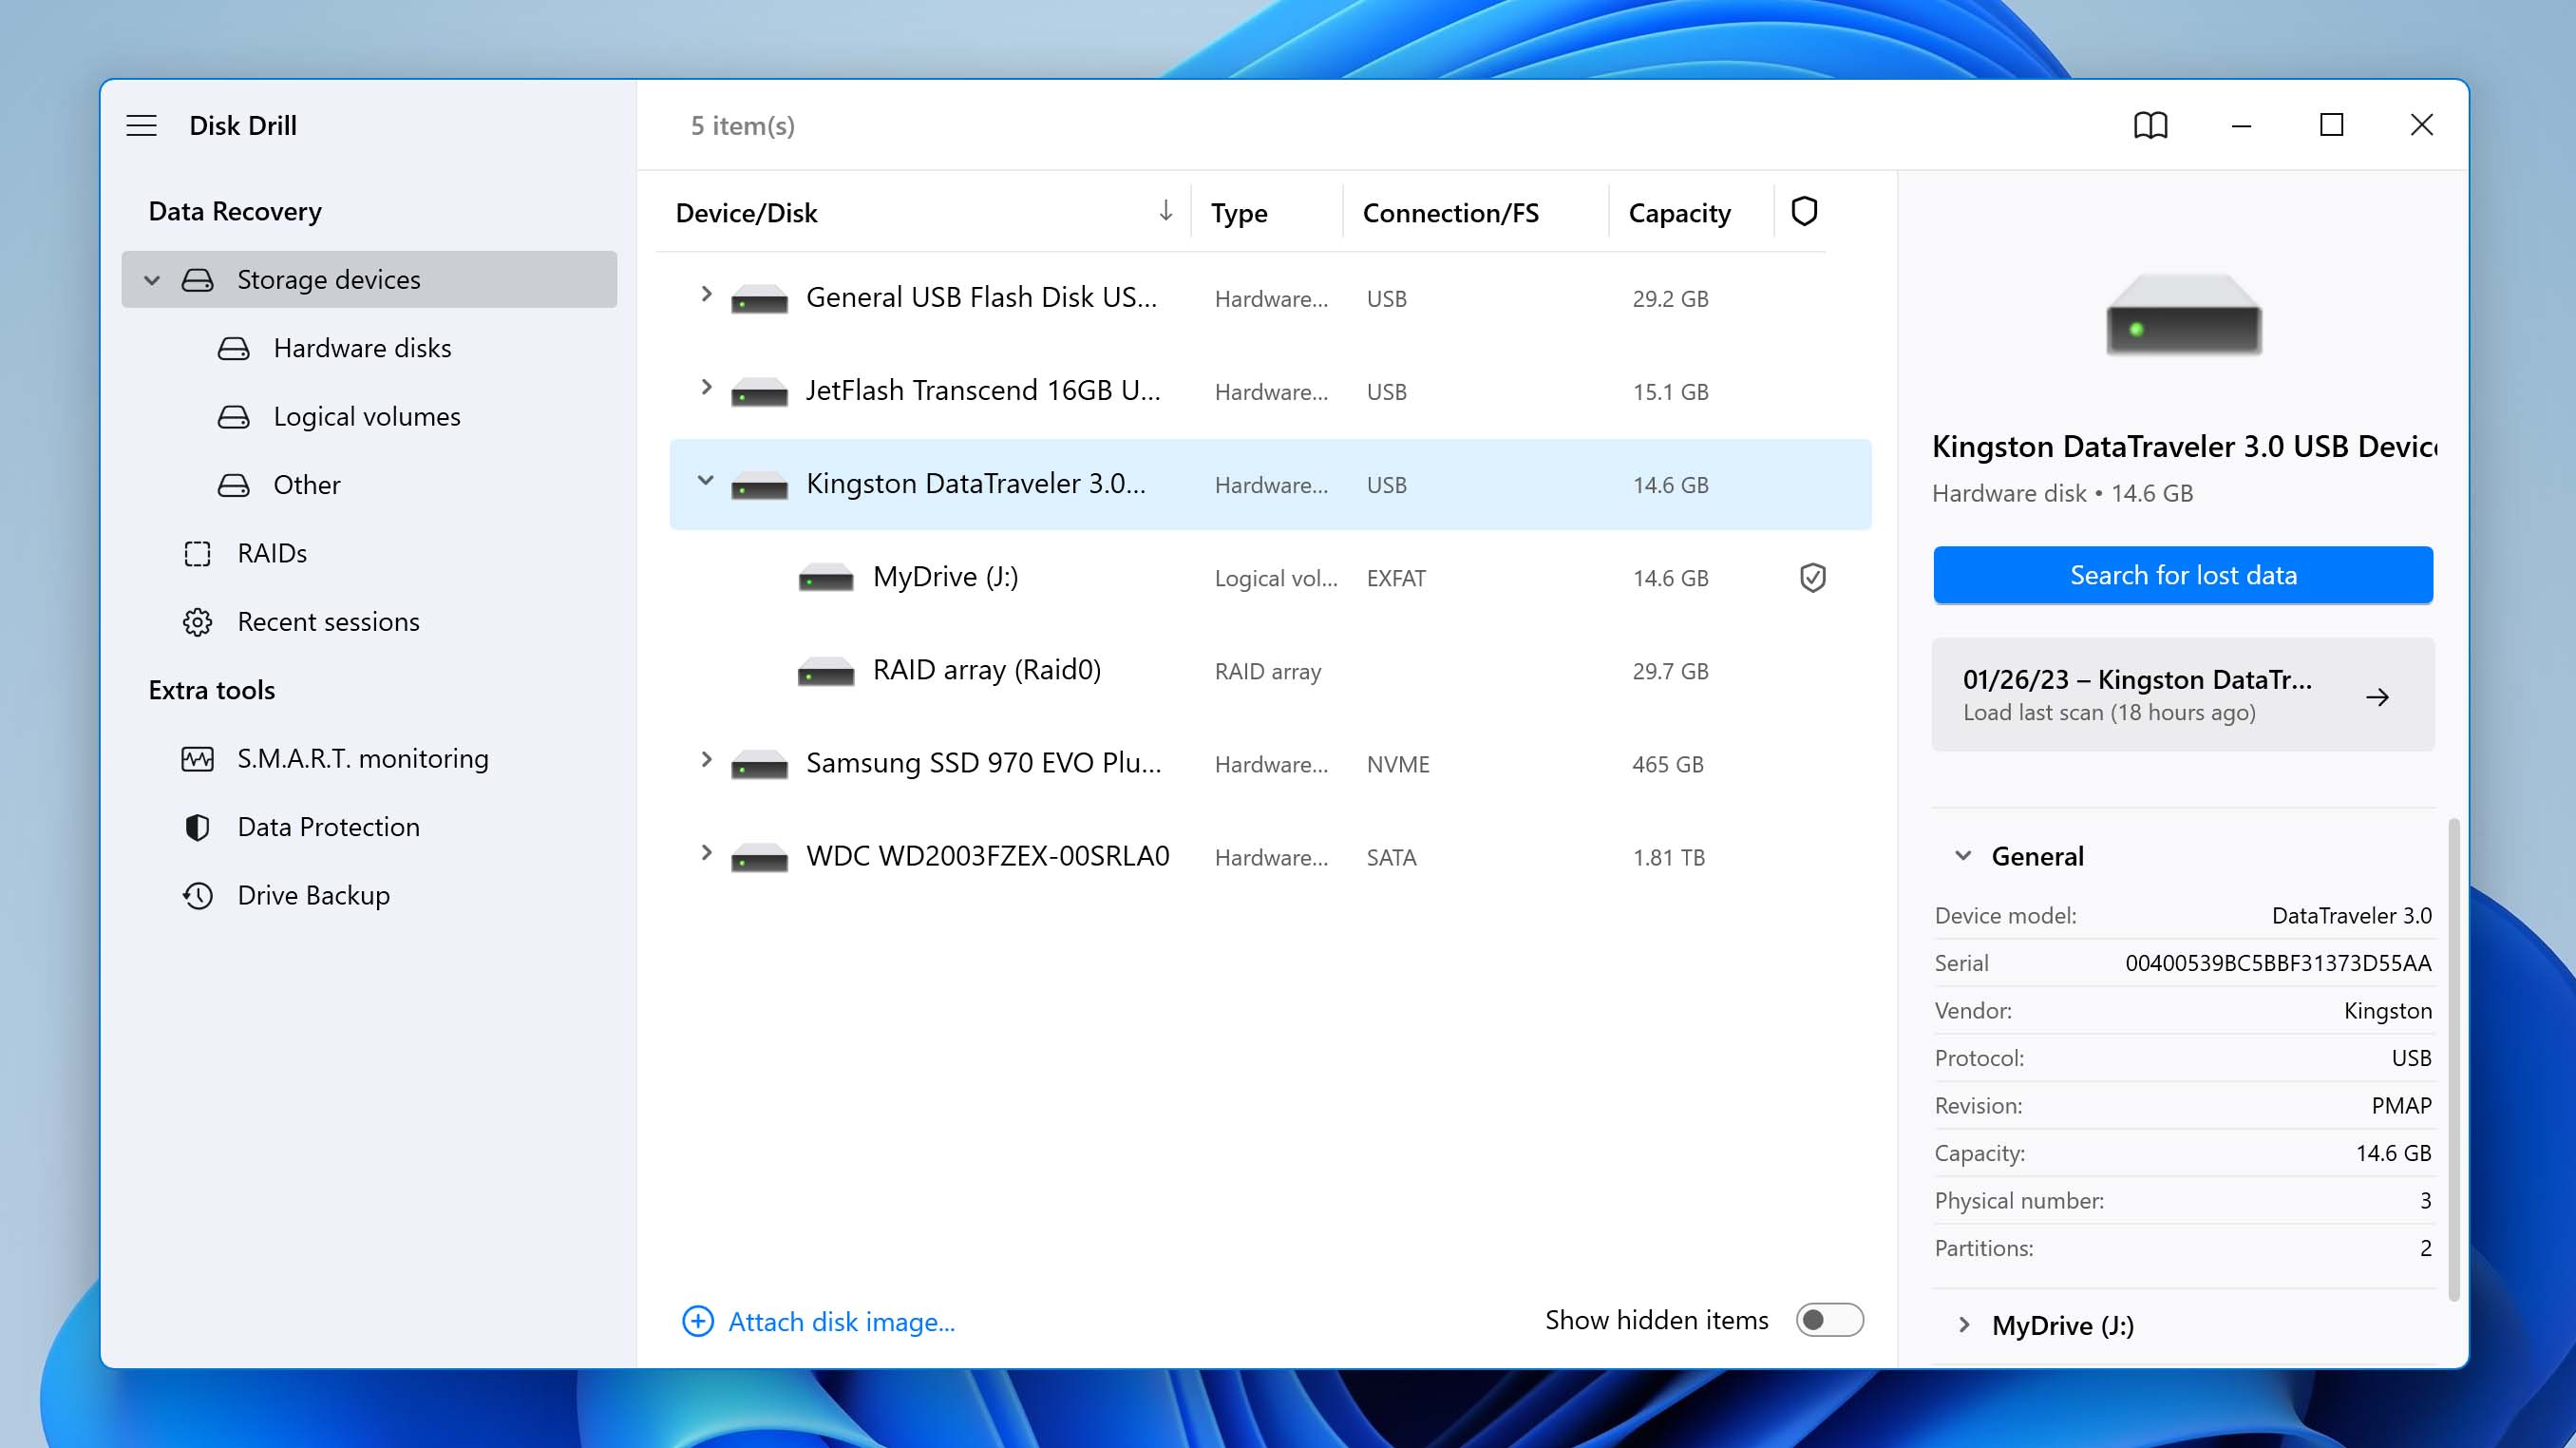
- At the center of the Disk Drill interface will be a list of devices from which you can restore and retrieve your missing files. Those devices are all in or attached to your computer, though the names may not be immediately recognizable to you.
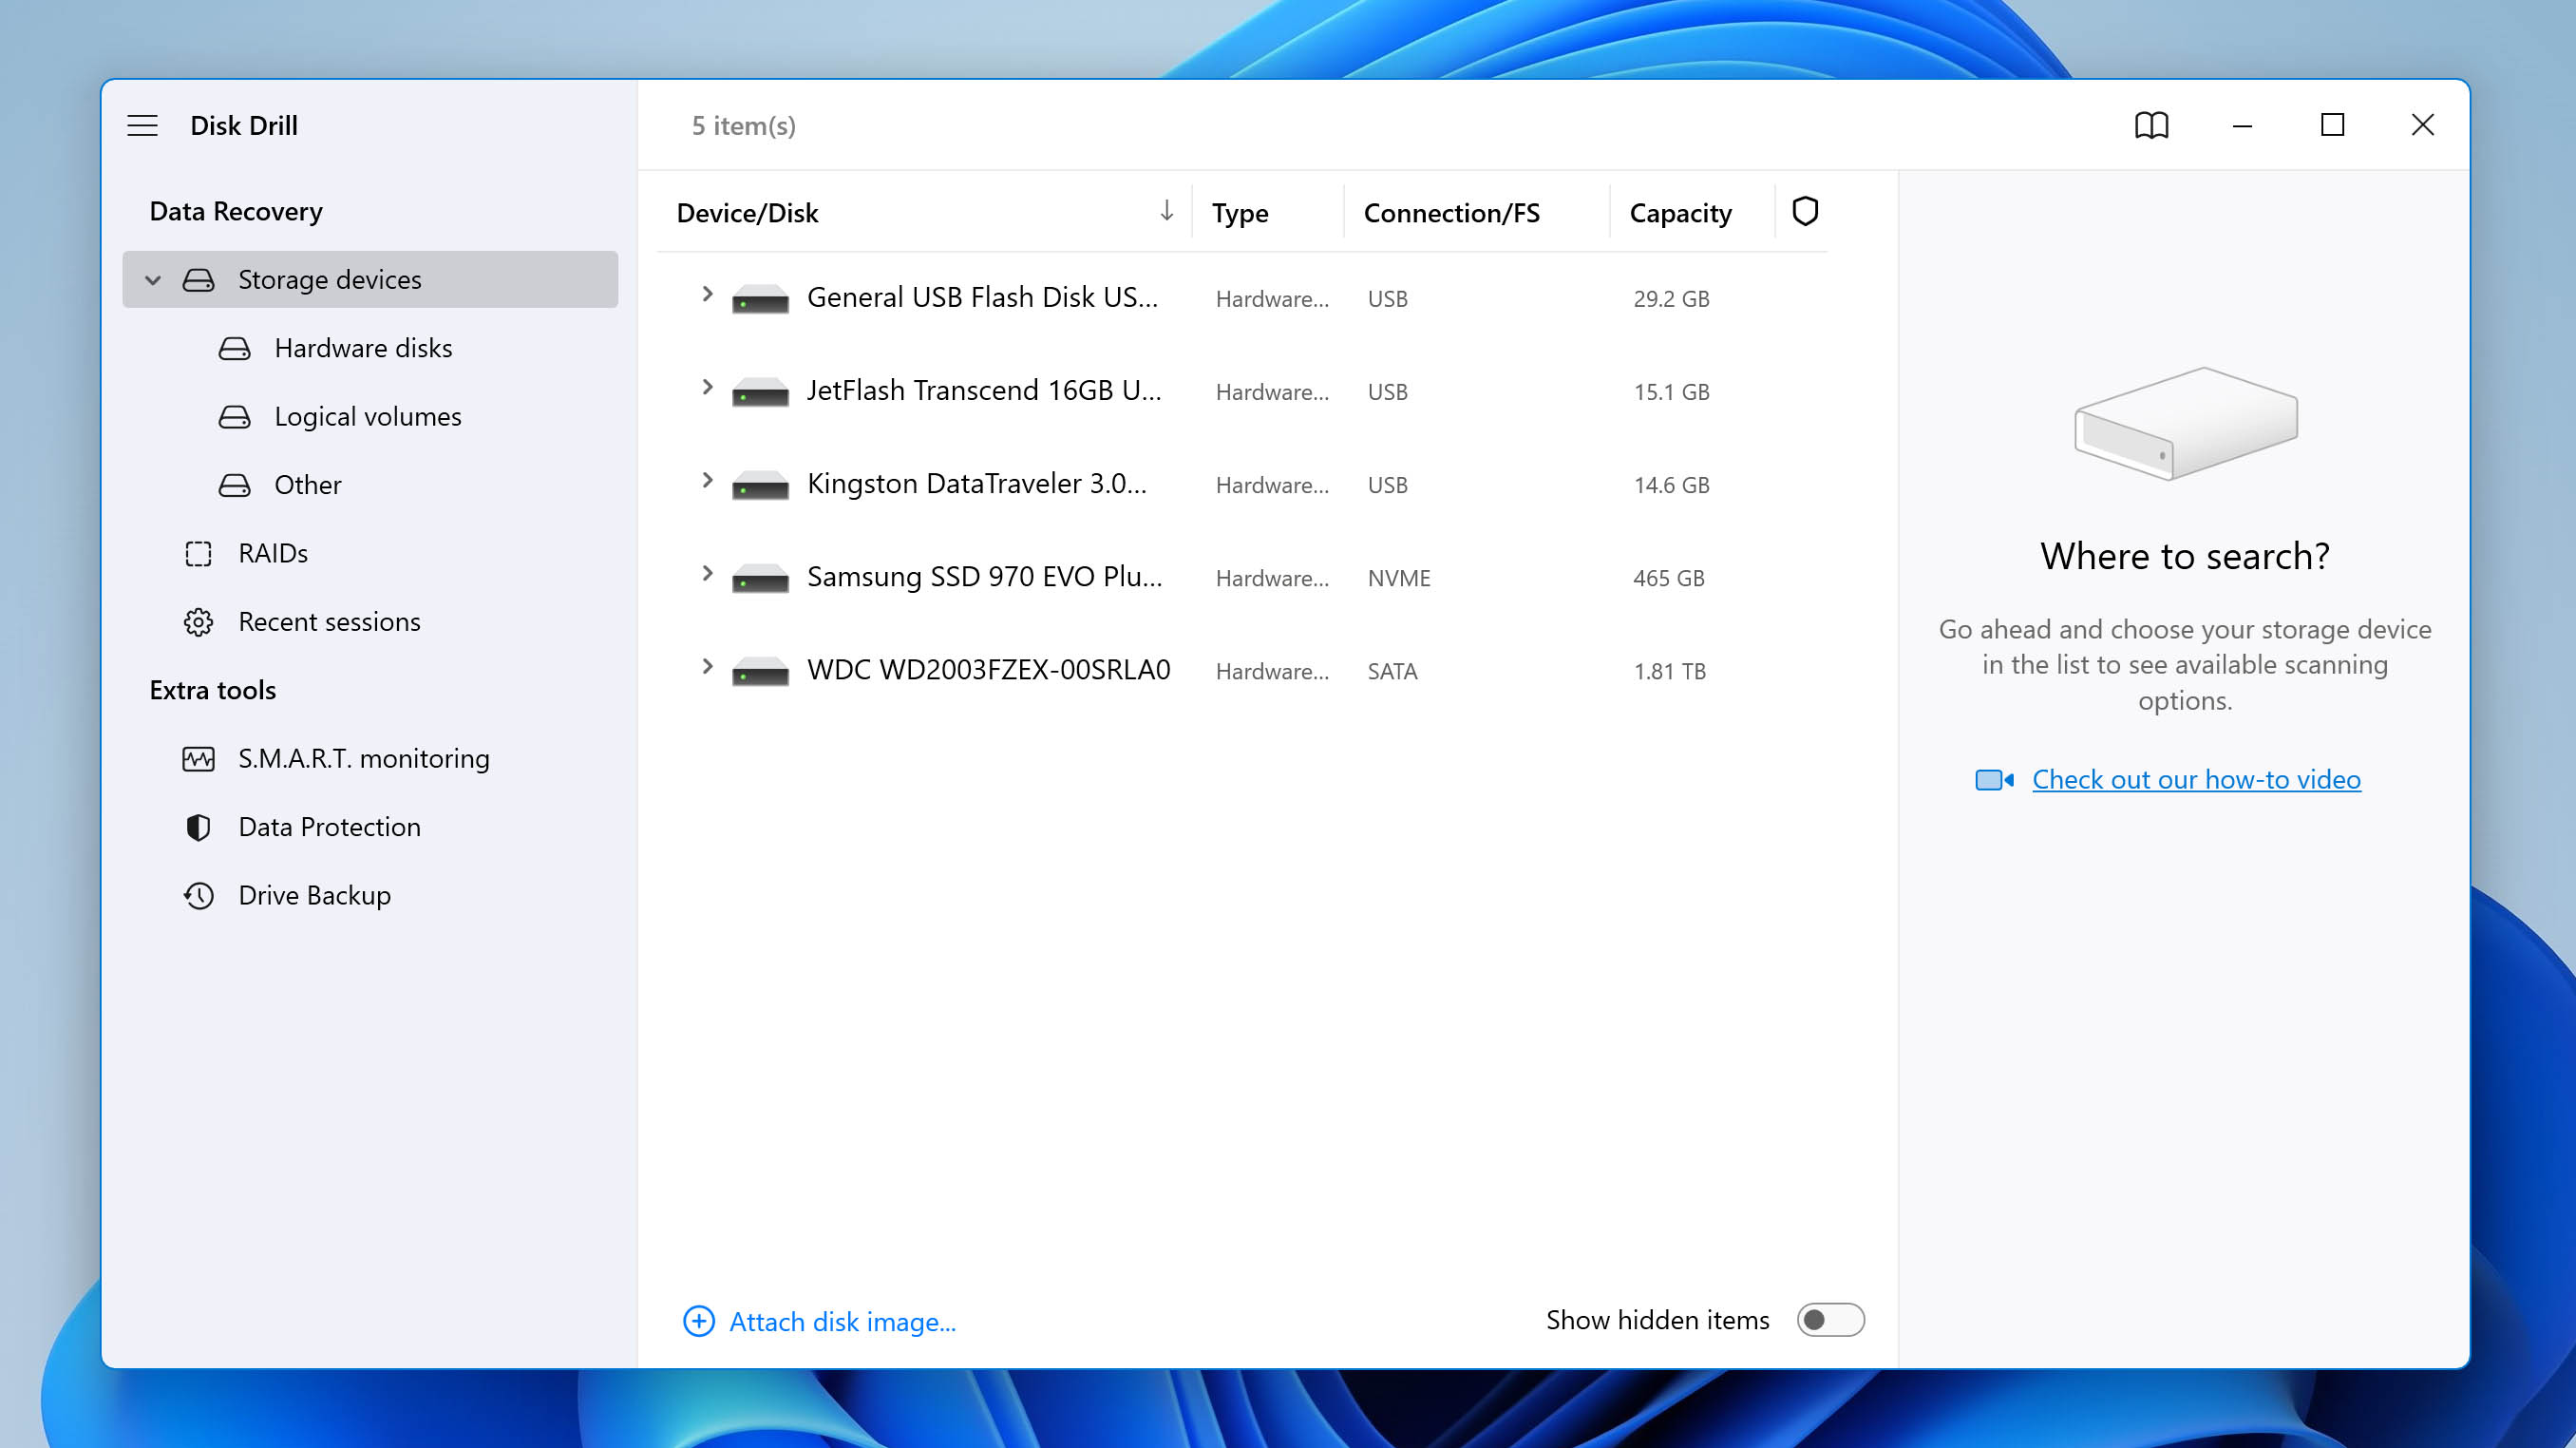
- On the right side of the interface is a button that reads All recovery methods and, on the lower right, one that reads Search for lost data. For now, keep the selection on All recovery methods. There are other options, but for this introductory section, the default will work great. Now select a disk you want to scan and click Search for lost data.
- After you’ve selected Search for lost data, Disk Drill is going to start scanning all your files. It’s looking at deleted files as well as at the ones that are visible to you, so it’s going to be sifting through tons of data. You don’t have to wait for Disk Drill to complete its scan. You can look at files that have already been found at any time by clicking on Review found items.
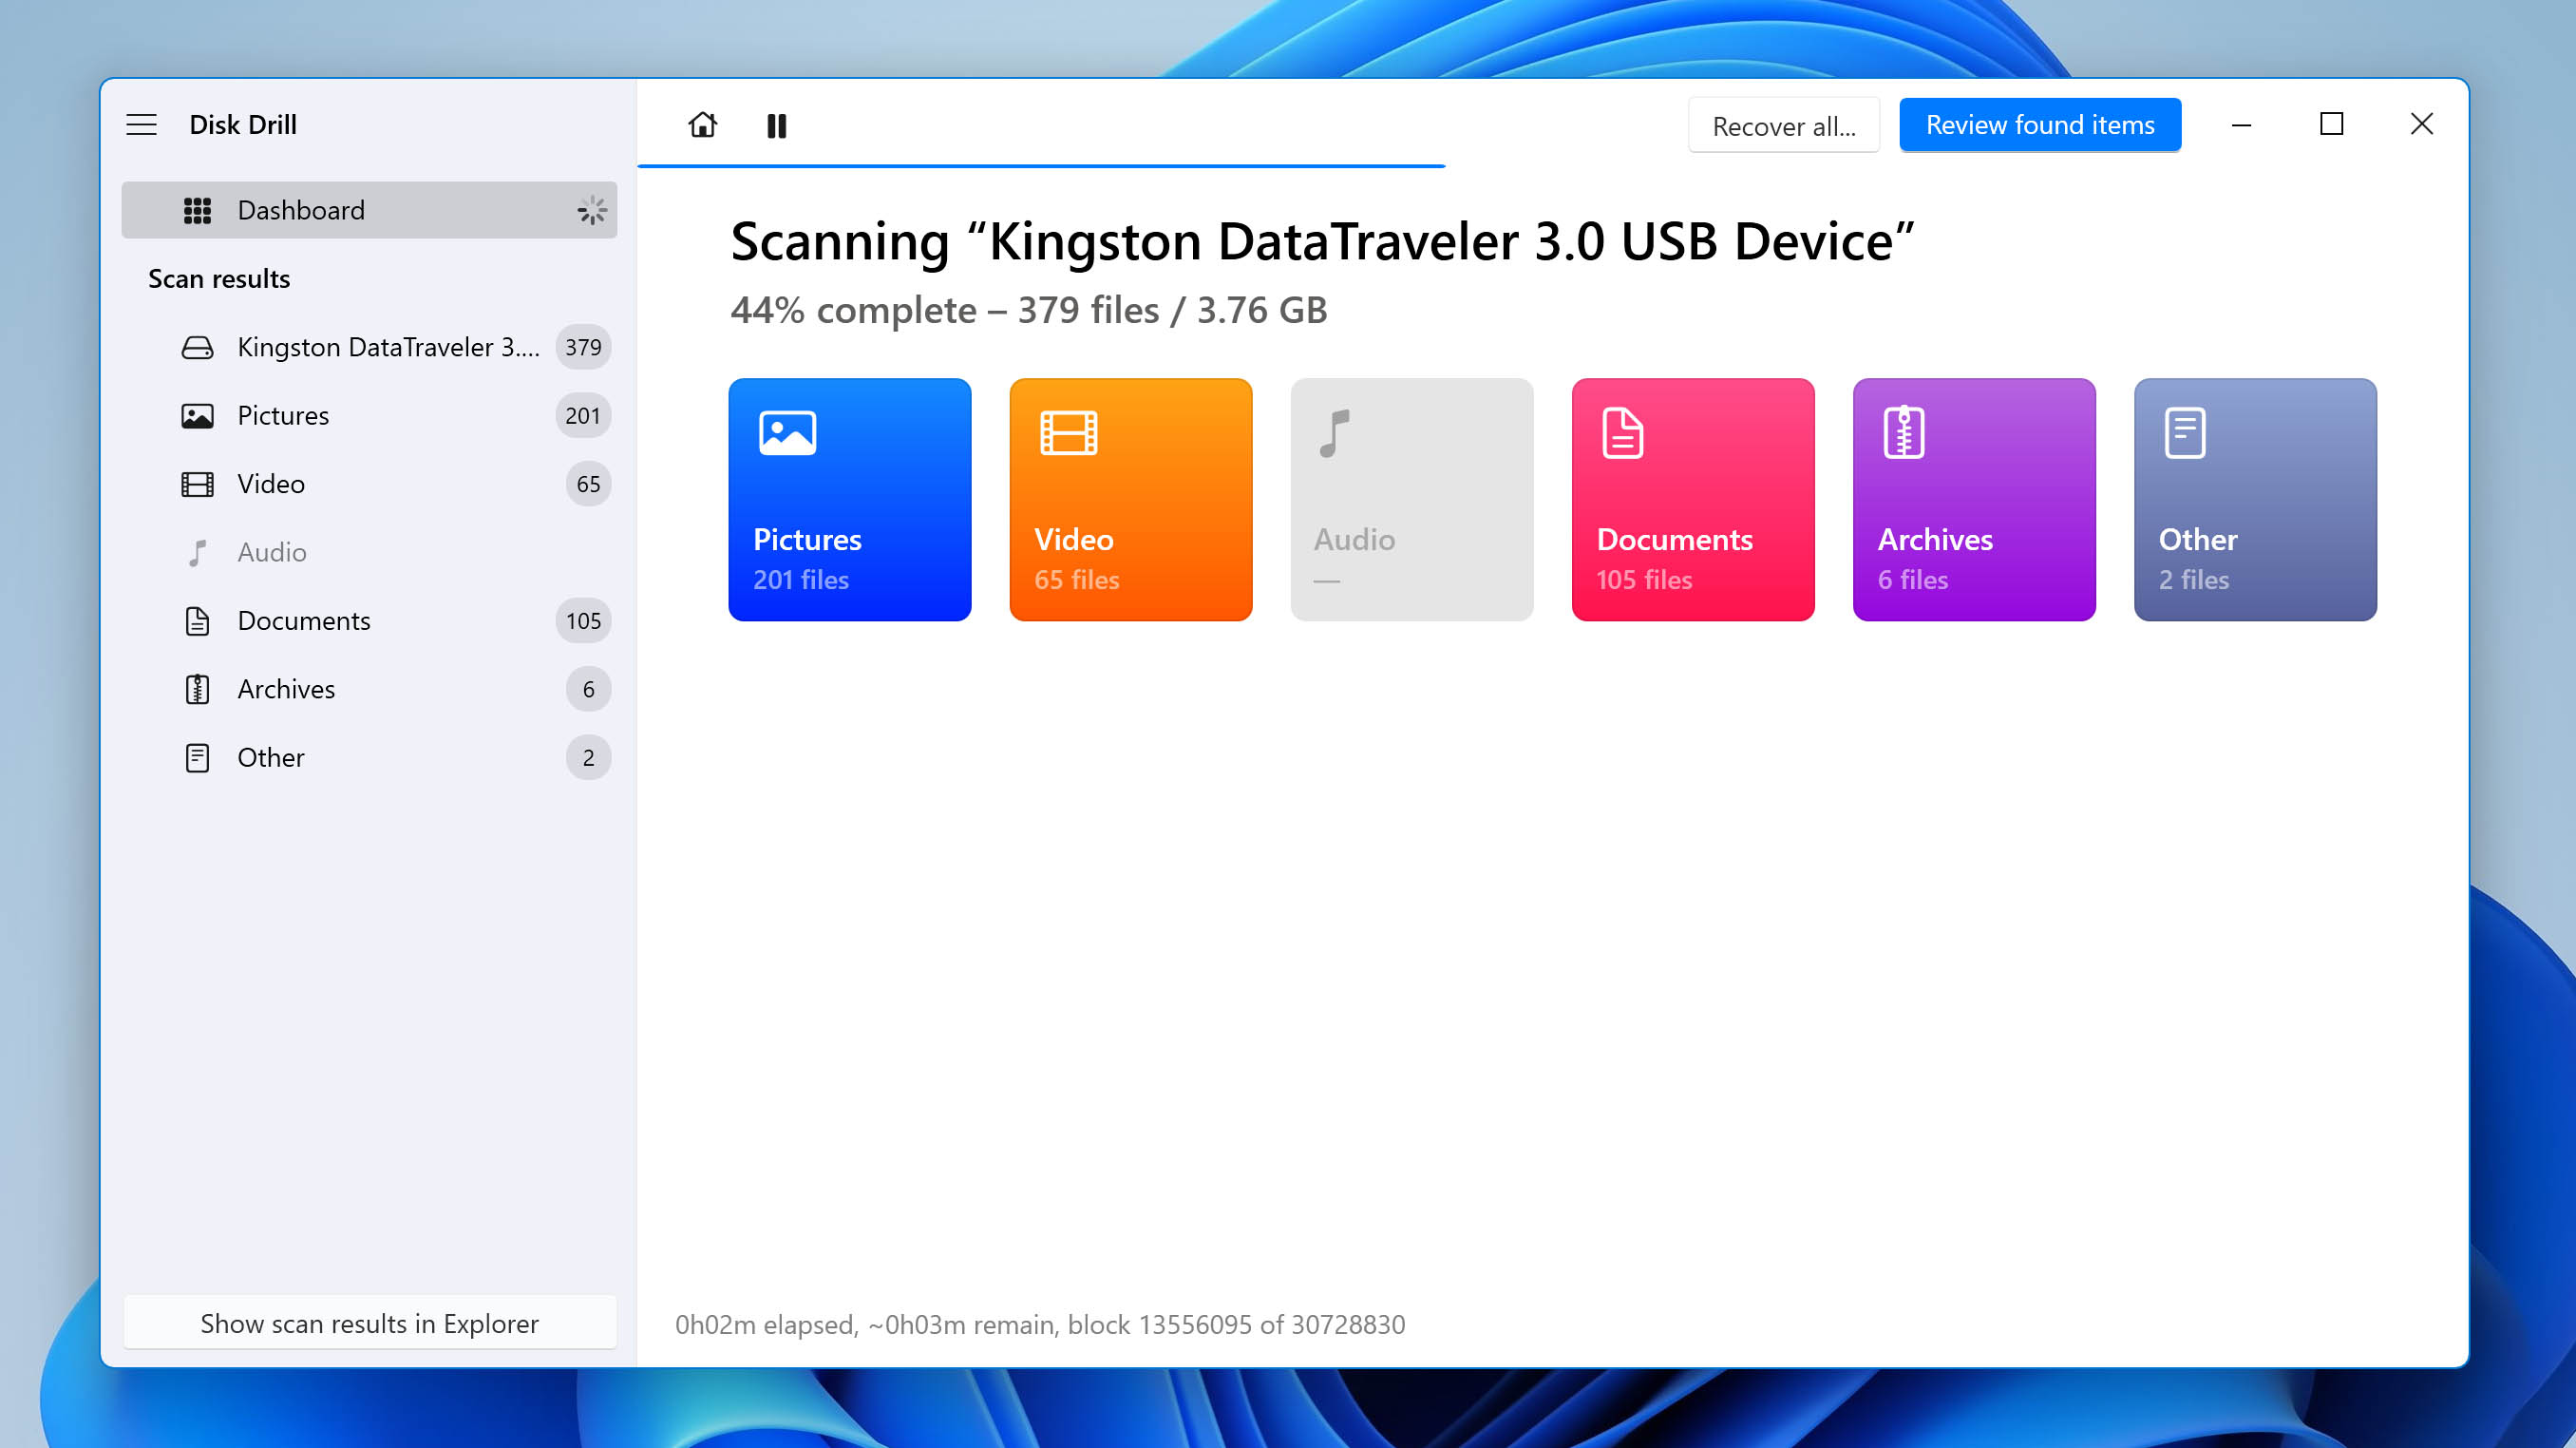 Disk Drill will keep scanning the rest of the device in the background. To search for files among the results, you can use filters by data type or file name. After the search is complete, you’ll be able to Recover all if you want to get every single file back.
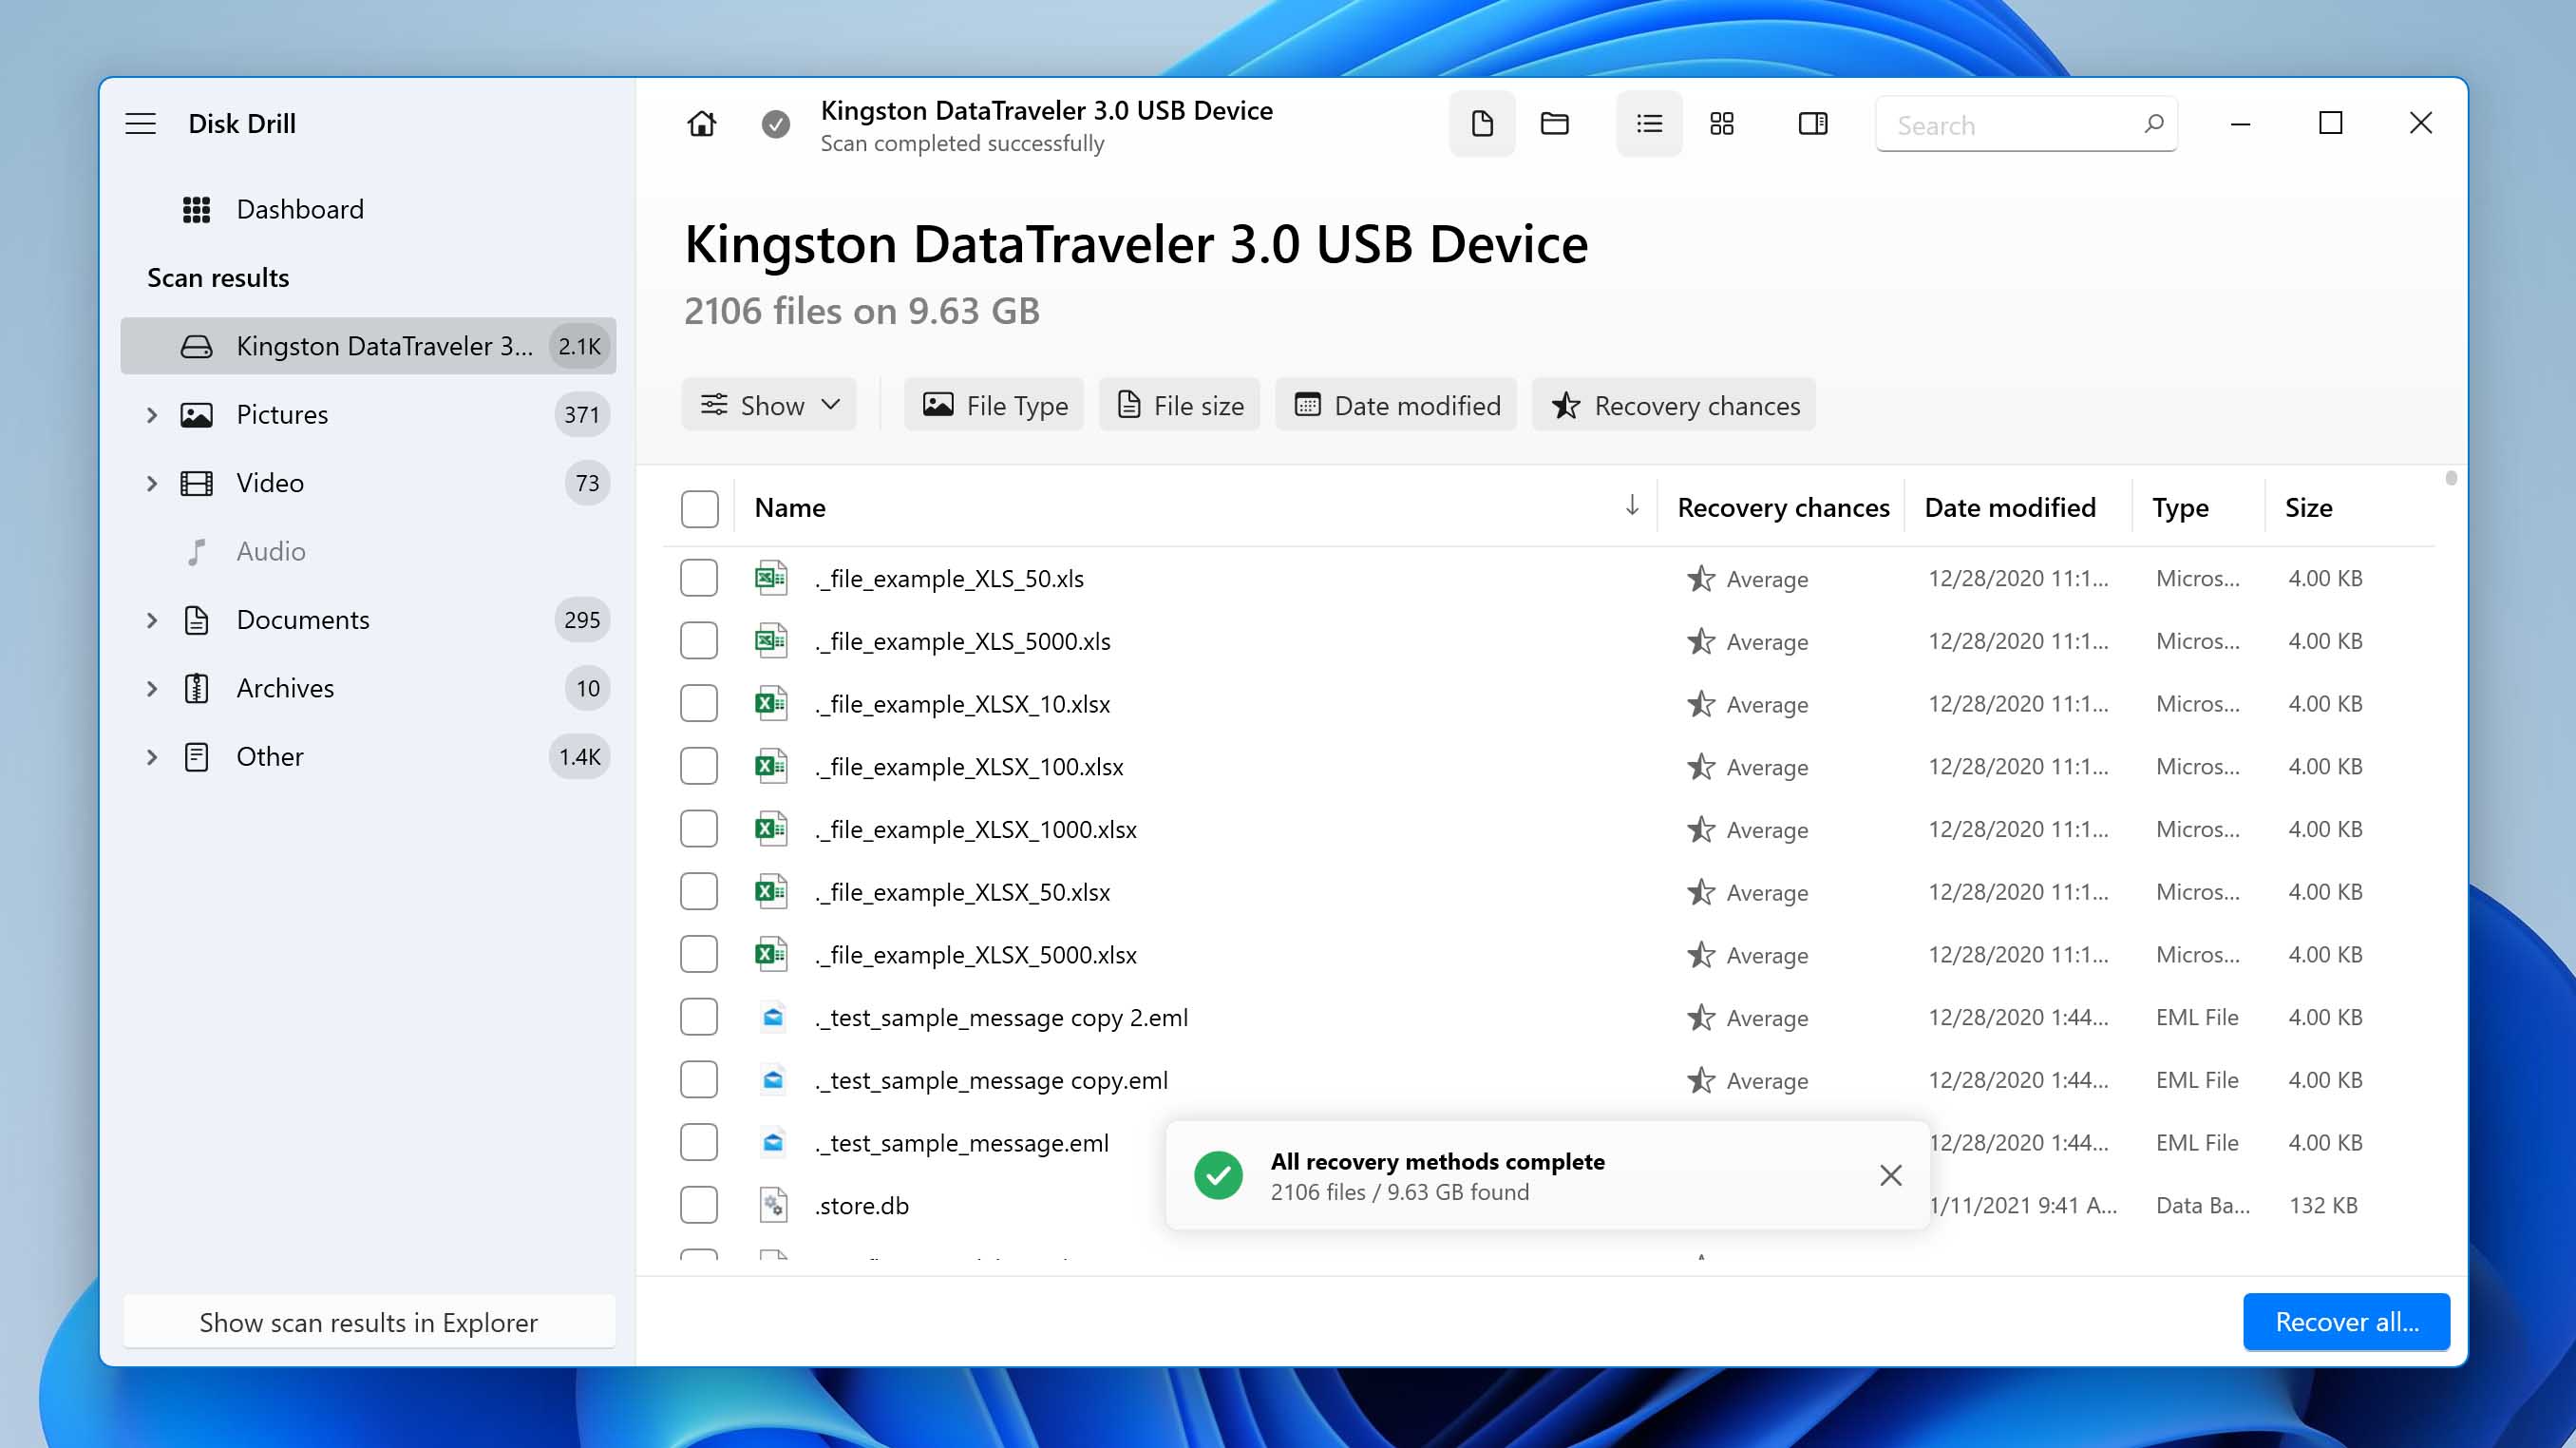
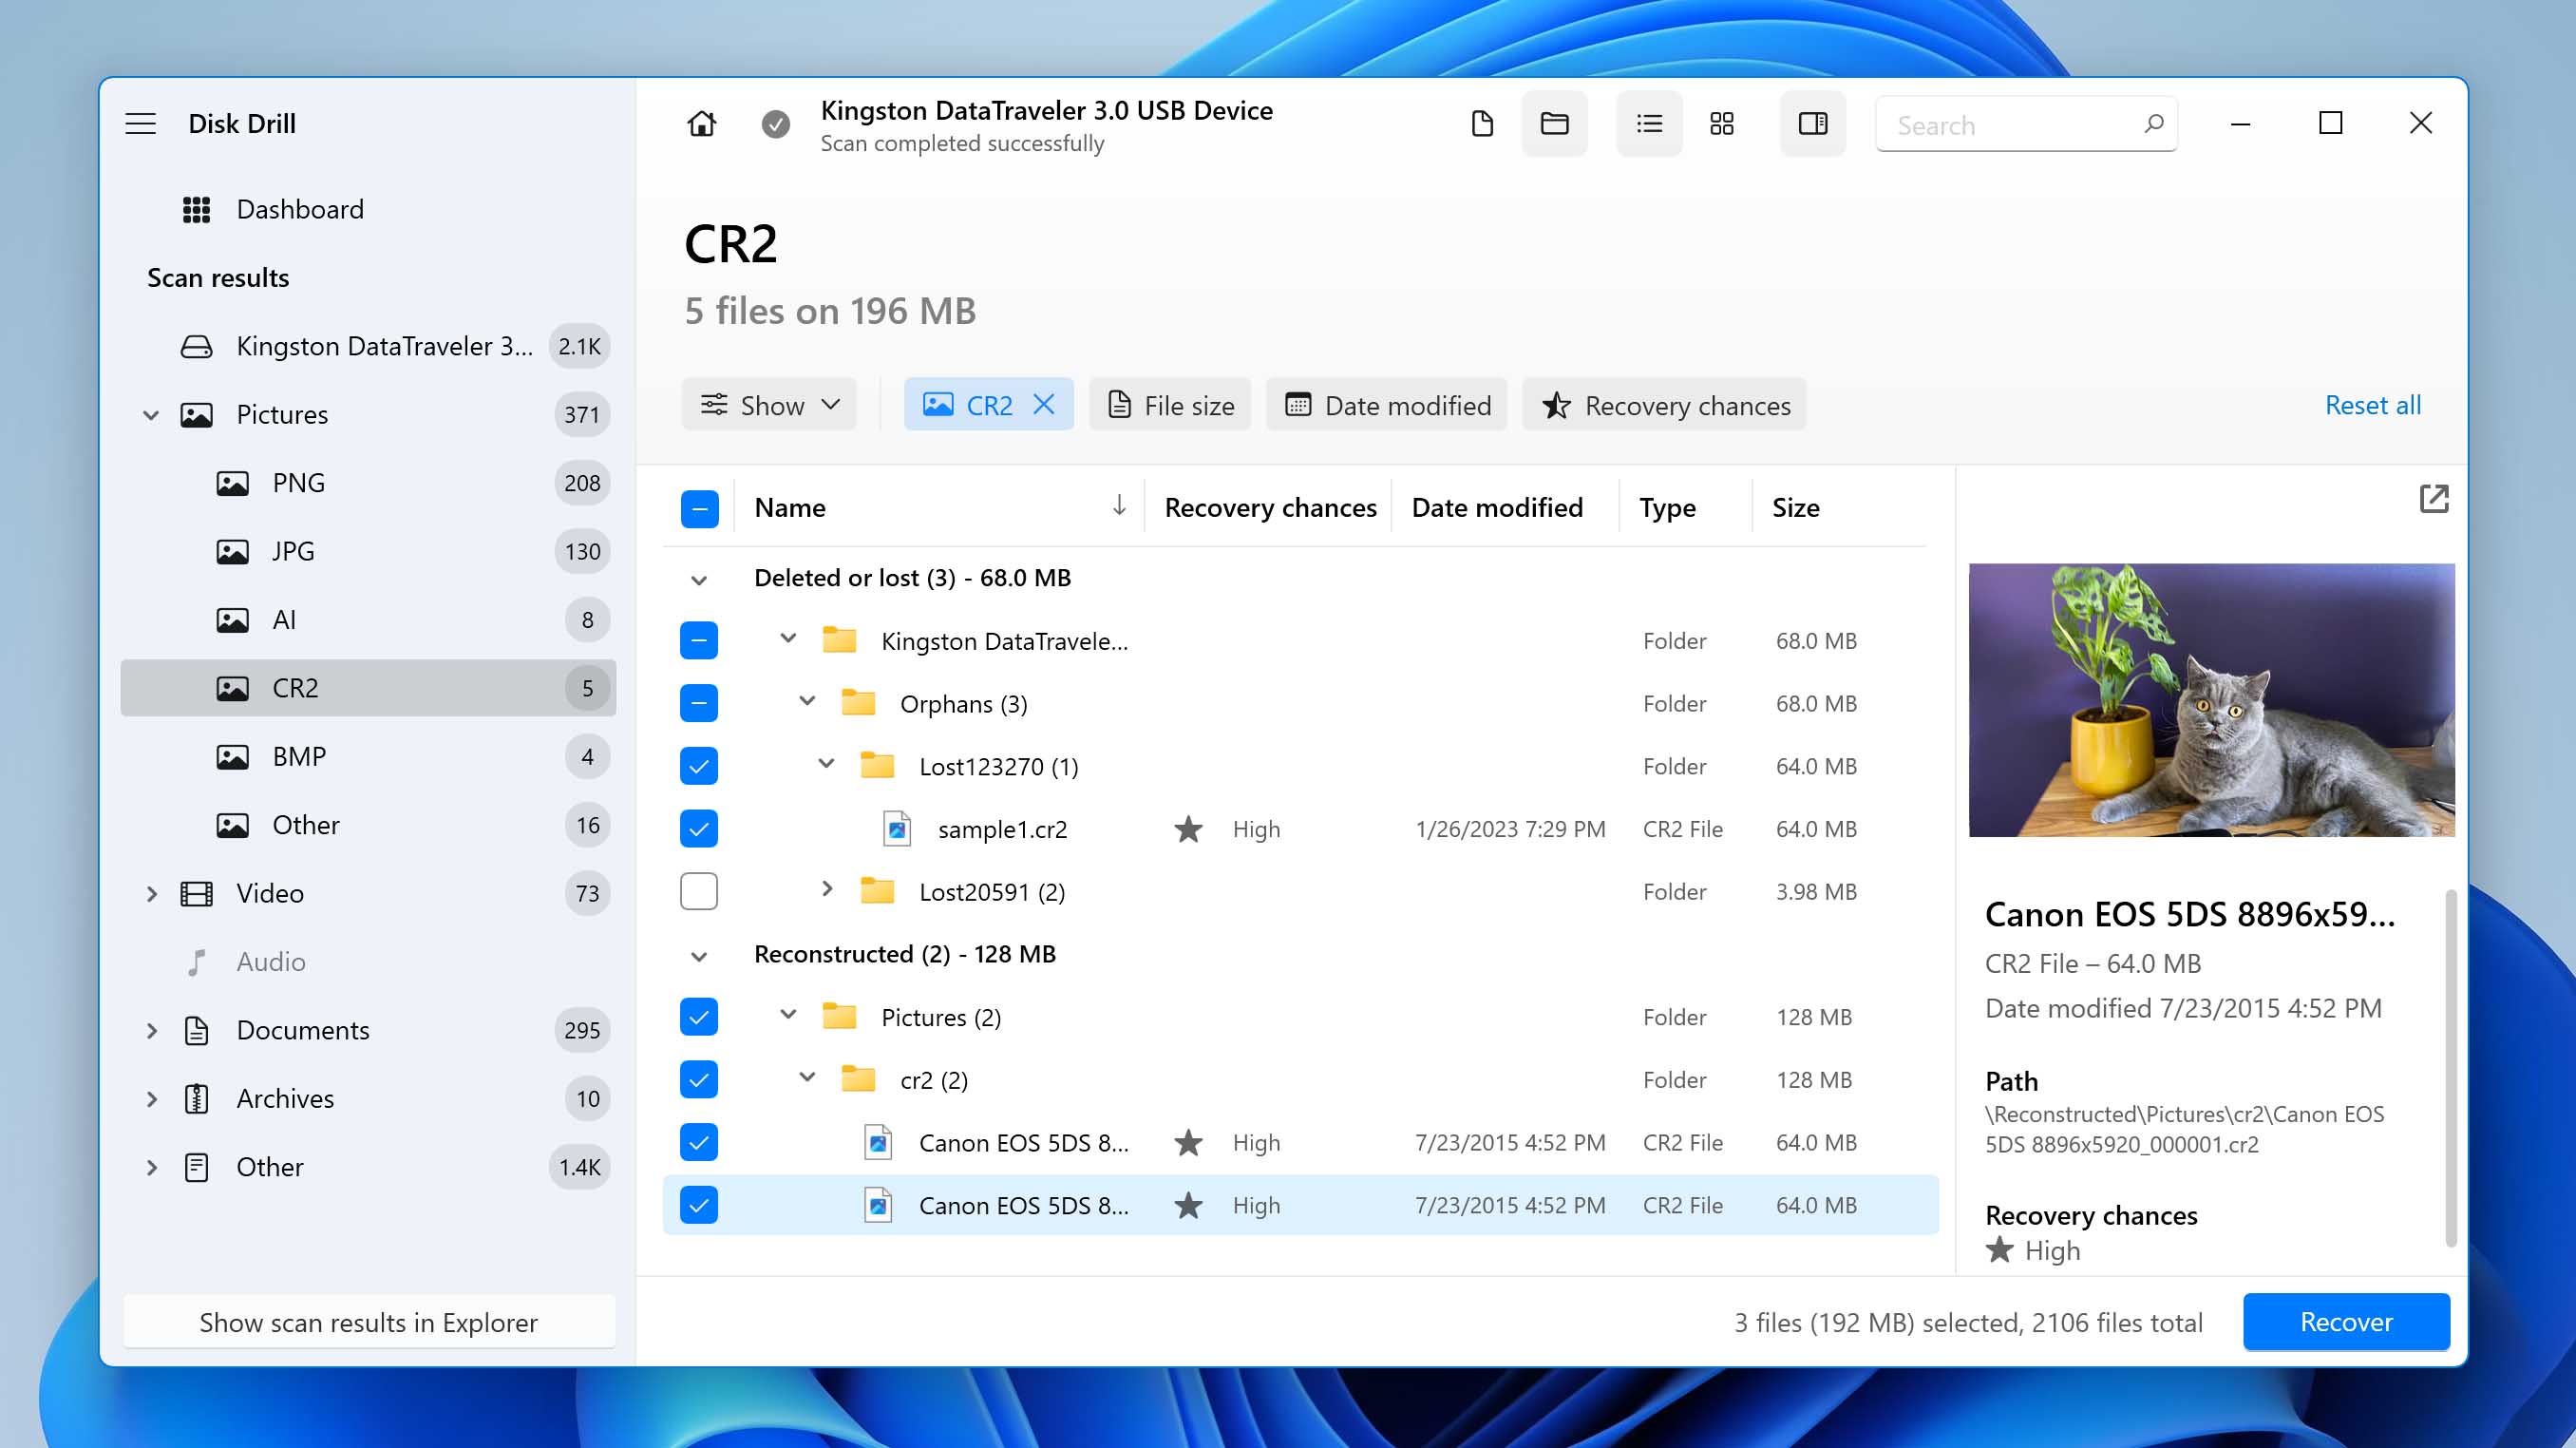
- You can also choose specific files, or just one file, and recover only that. To do so, click on the box to the left of the file. If you highlight one of the files, you will see a preview of the image show up on the right side of your screen. That preview is an approximation of what the recovered file will look like.
A column reading Recovery chances serves a similar function to the pane. If the chances of recovery are good, you will see a little green light with the word High next to it.Then, select the blue Recover button at the bottom of the interface.
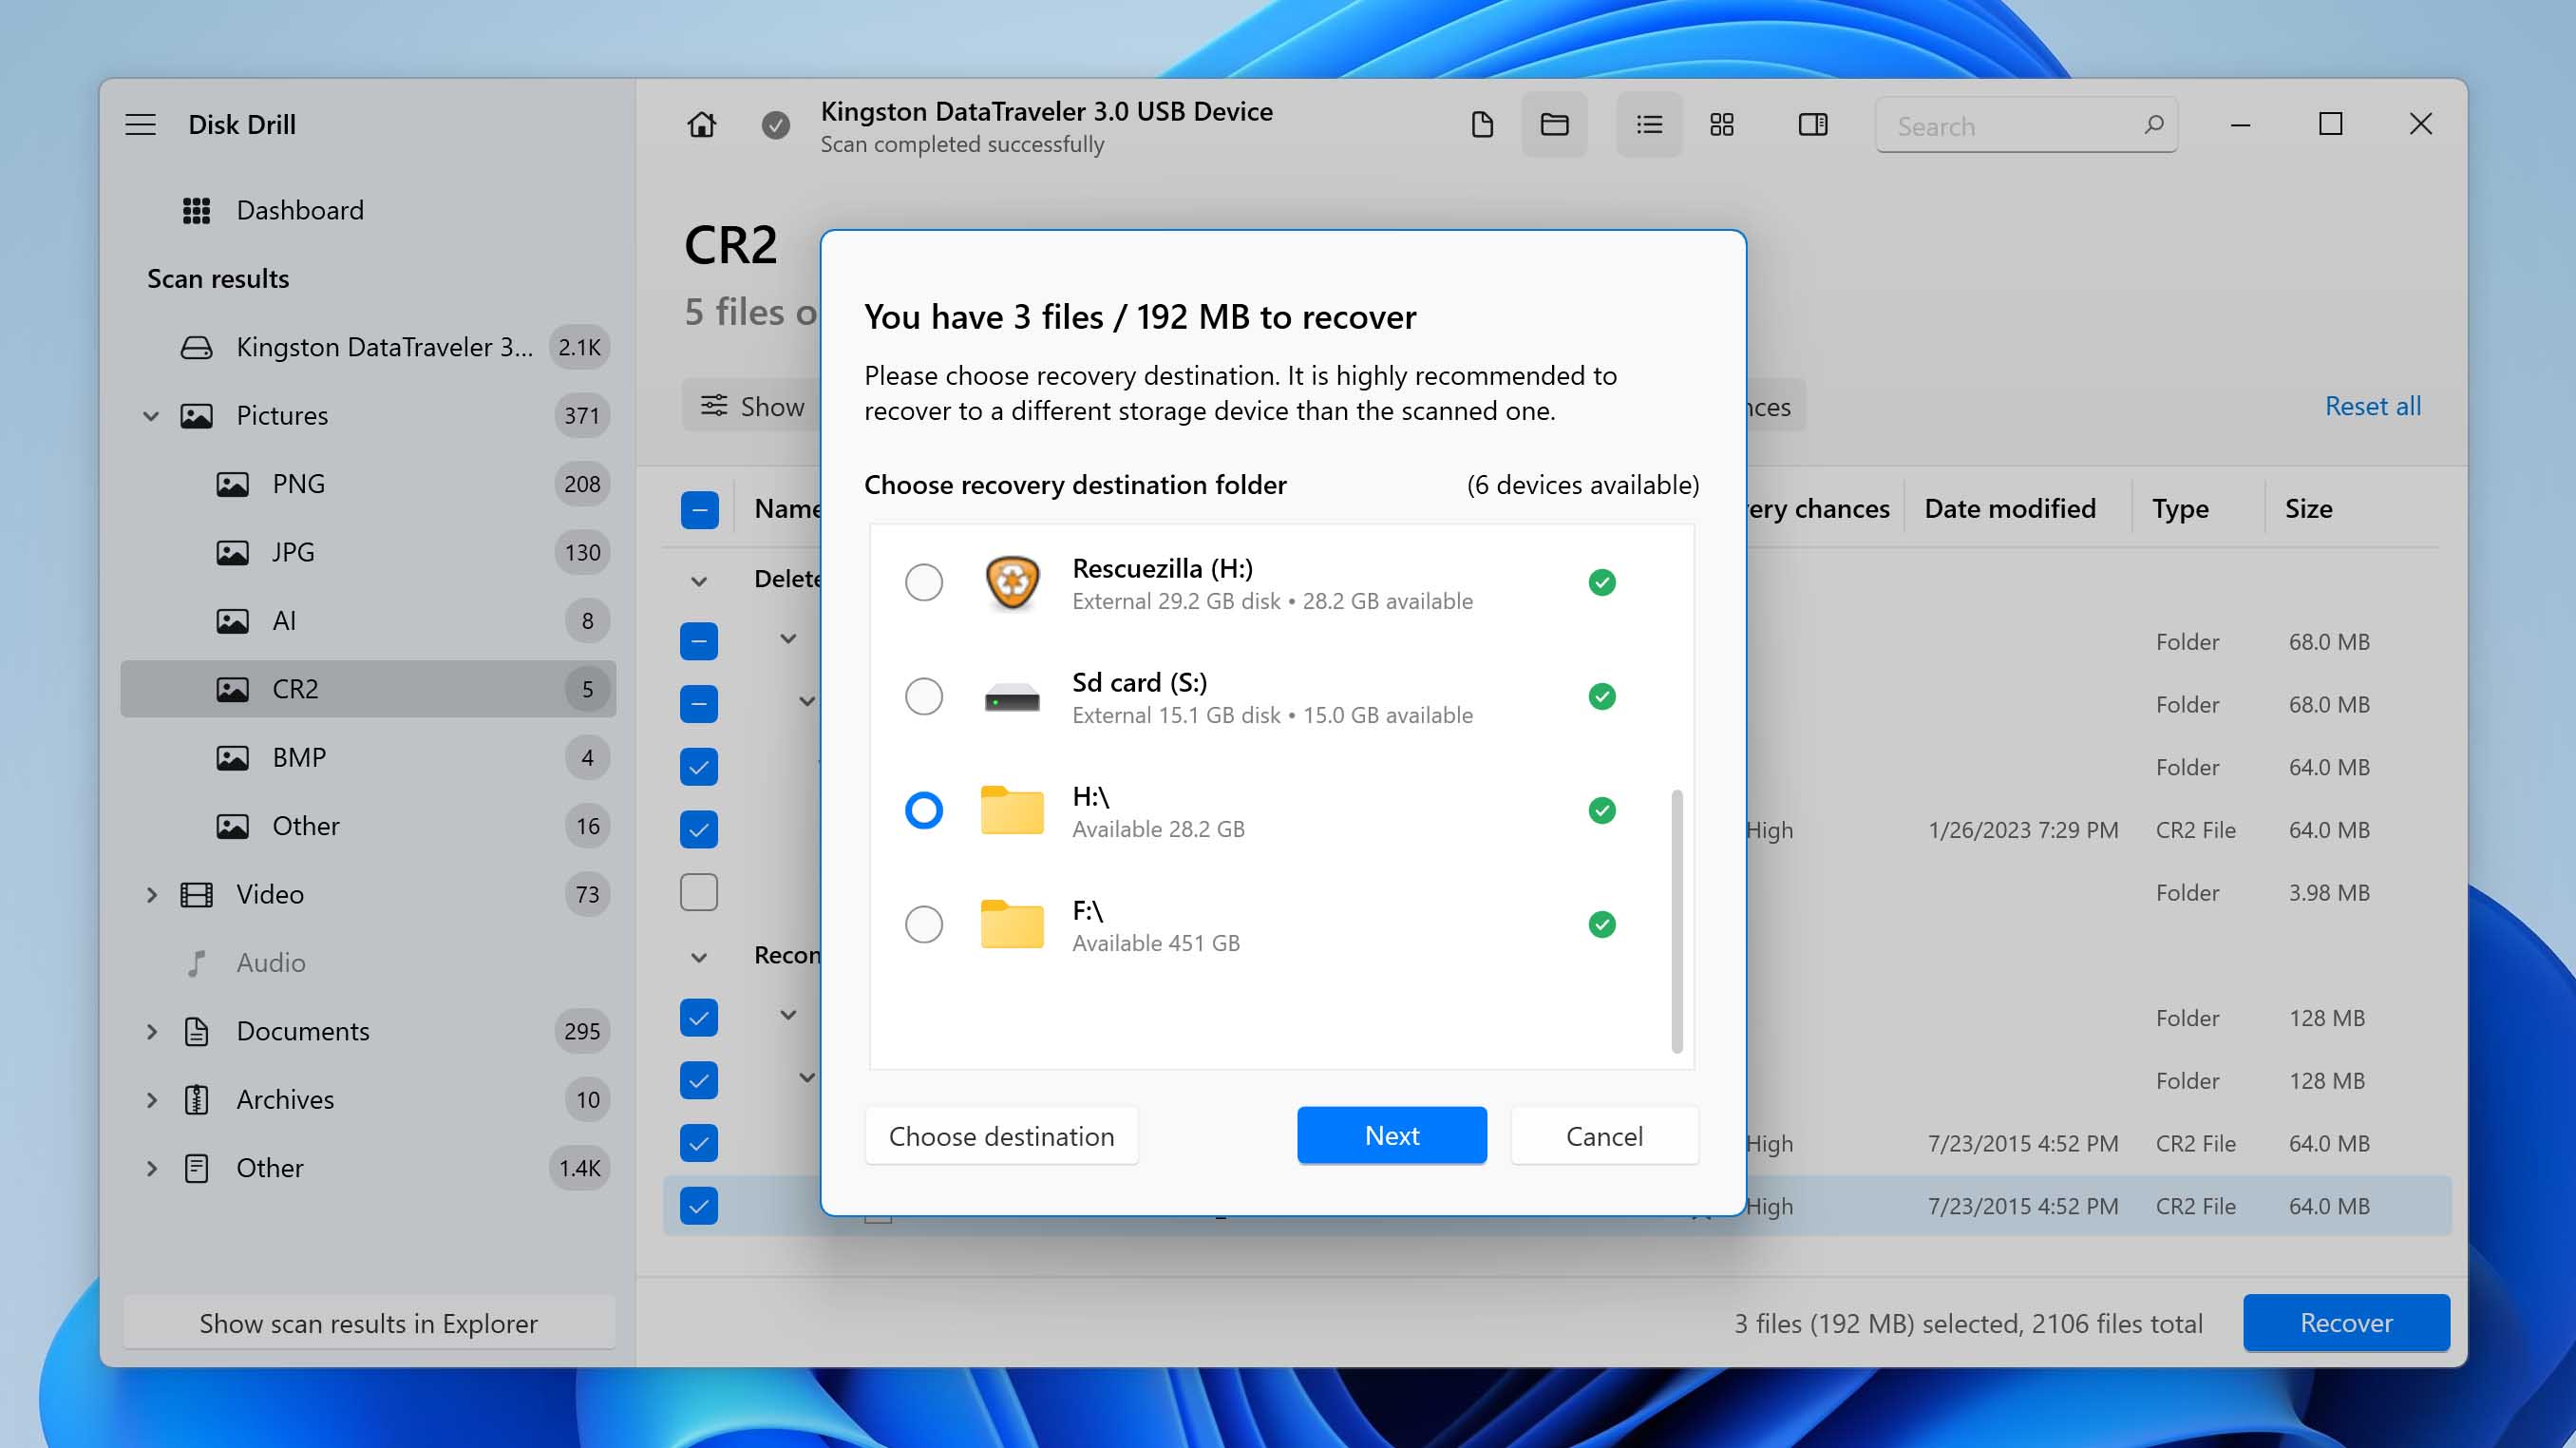
- Disk Drill has now recovered your files. It will ask where you want the system to save them. Choose where you want to save the files, but we do not recommend choosing the same device on which the files were lost to avoid overwriting other files that were deleted from the disk with the recovered files. Your work is now complete. Disk Drill will save the sessions so that you can get back to them any time later.
If there are any problems using Disk Drill, check out the Disk Drill help center and troubleshooting page.
Recover CR2 Files From Windows Recycle Bin or Mac Trash
Files sitting in your recycle bin or trash are not completely lost—in fact, they are nowhere close to completely lost. They are very easy to recover. Follow the brief guides below to get your CR2 files back from your recycle or trash bins.
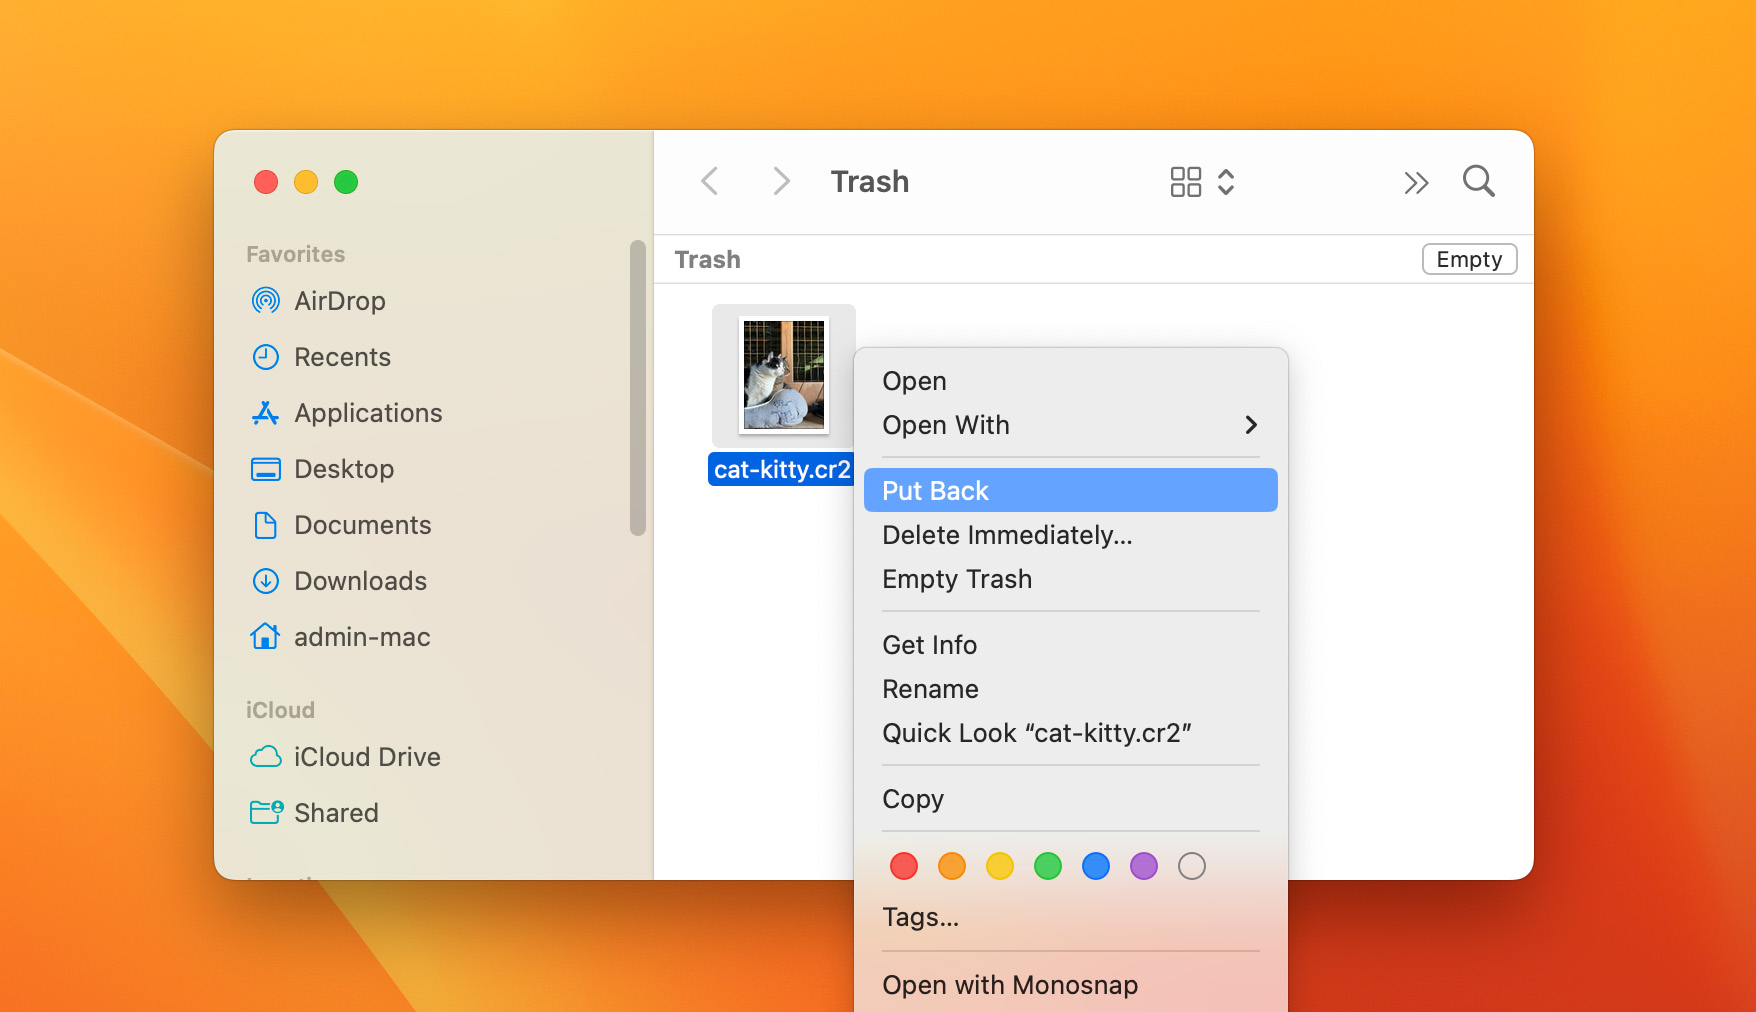
Recovering Files from Your Mac
- Find your Mac trash icon and open it.
- Find the files you want to recover. You can control-click or right-click on the file. Either way, you get a dropdown menu. Select Put Back to restore the files.
Recovering Files From Windows Recycle Bin
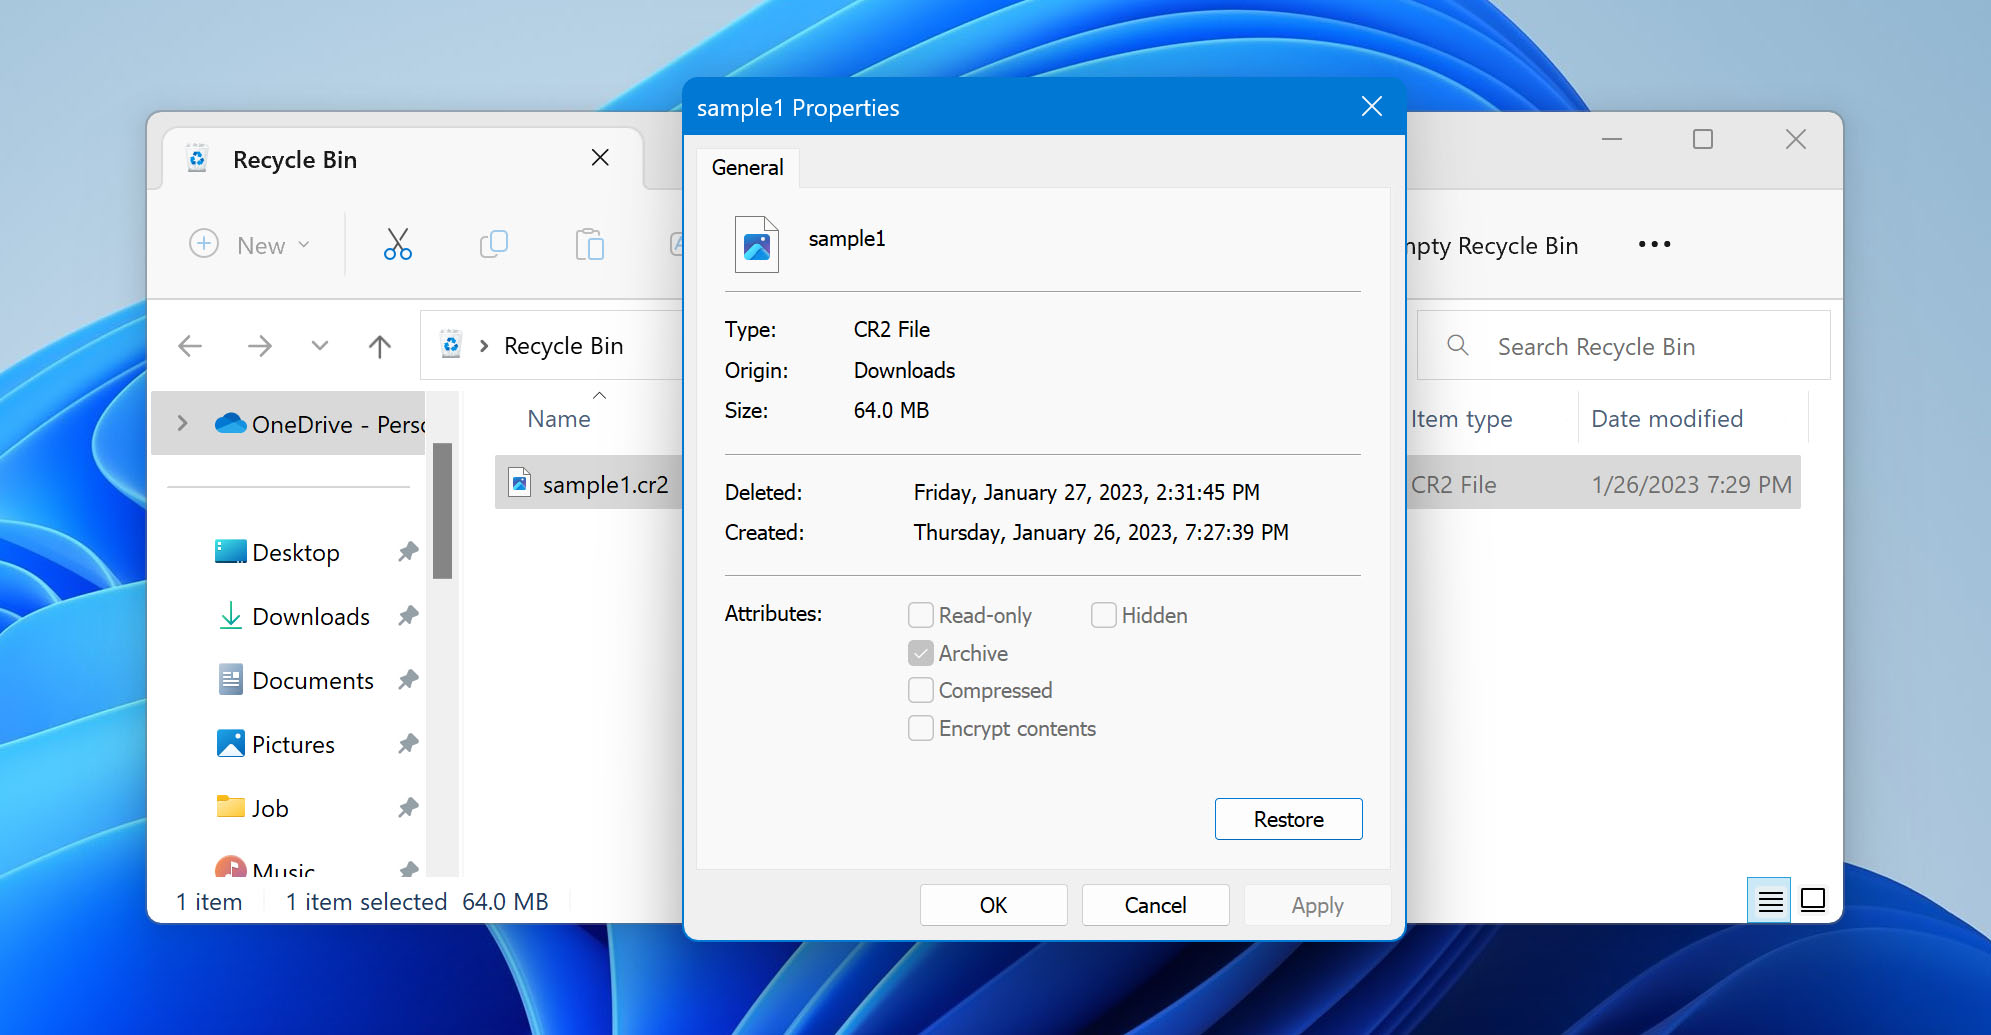
- Access the recycle bin by double-clicking on the icon on your desktop or right-clicking and selecting Open.
- Once inside the recycle bin, find the file you want to recover. Double-click on the file to get a flyout box. Select Restore. The system will restore the deleted file to its original location.
 Or, you can right-click on the file. A different flyout will open up, and the Restore option will look different than it does in the double-click method, but it’s ultimately the same thing. Click on it. The system will put the file back where you deleted it from.
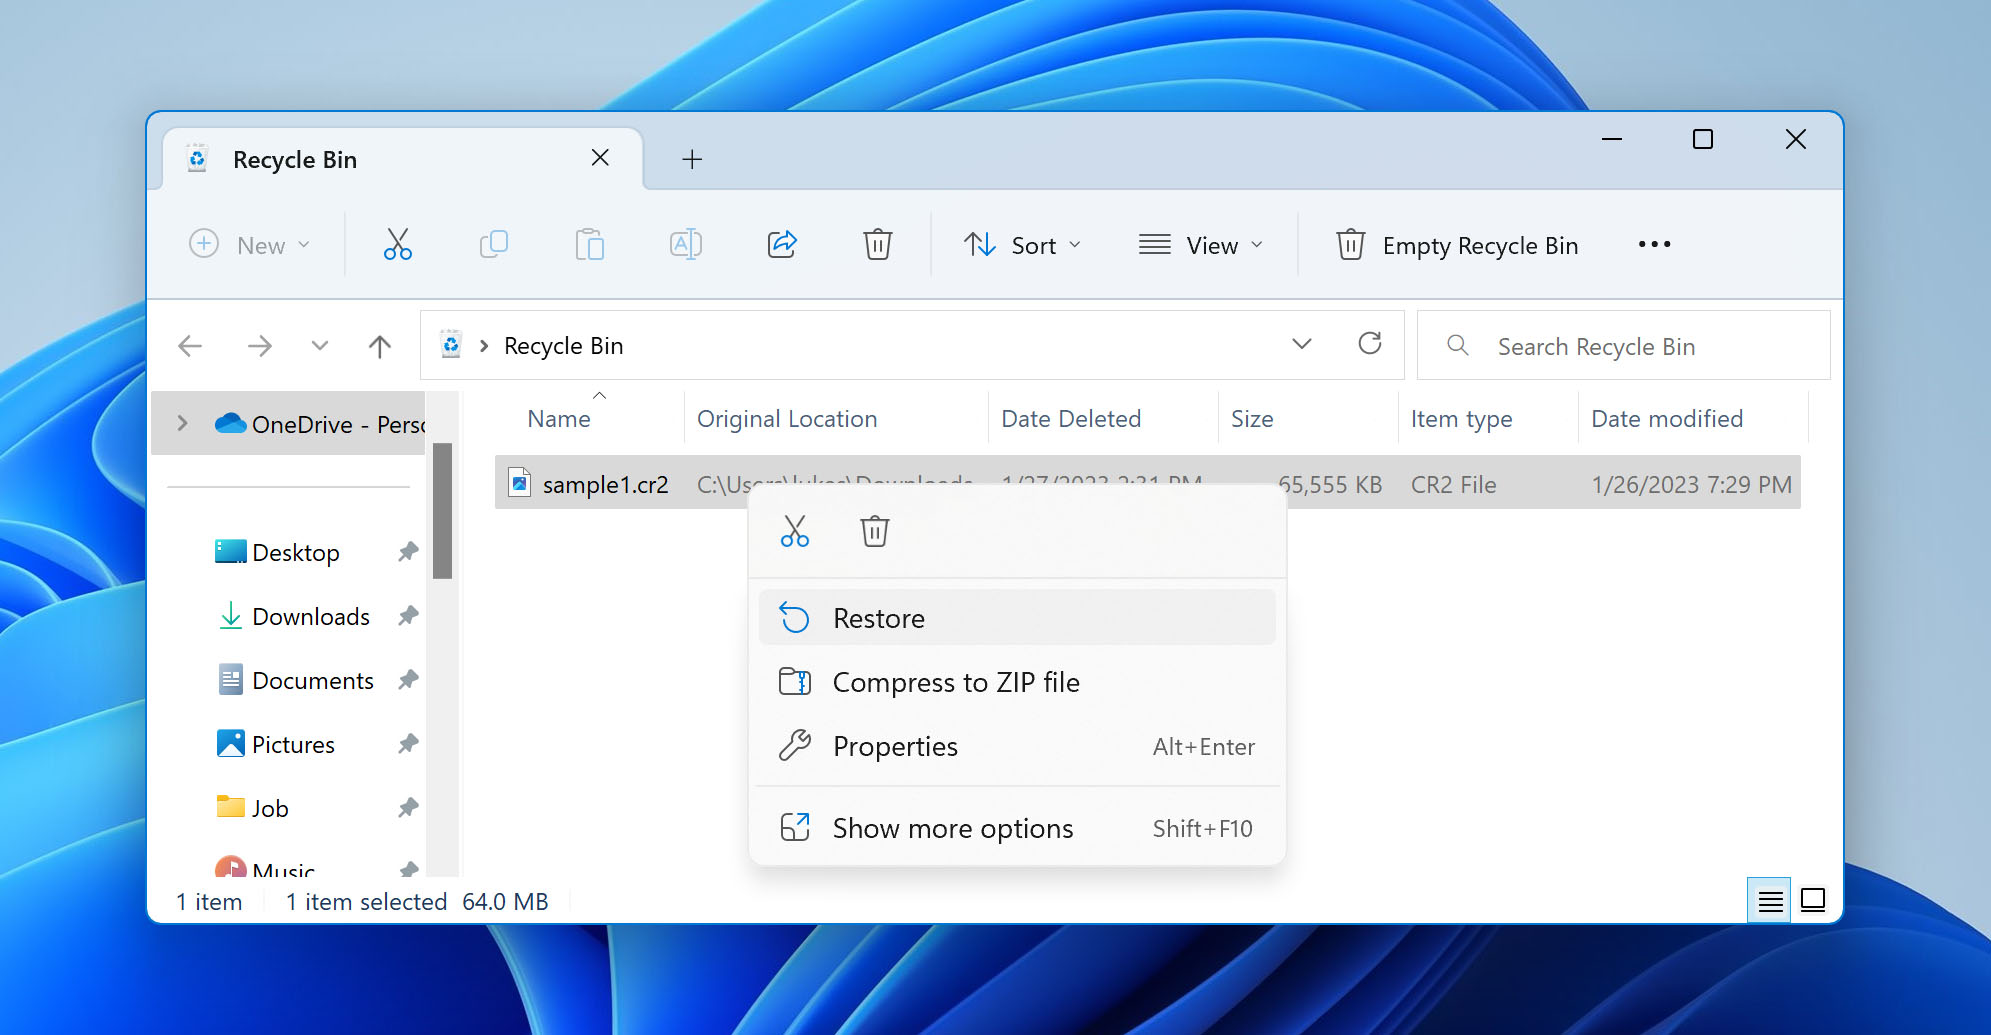
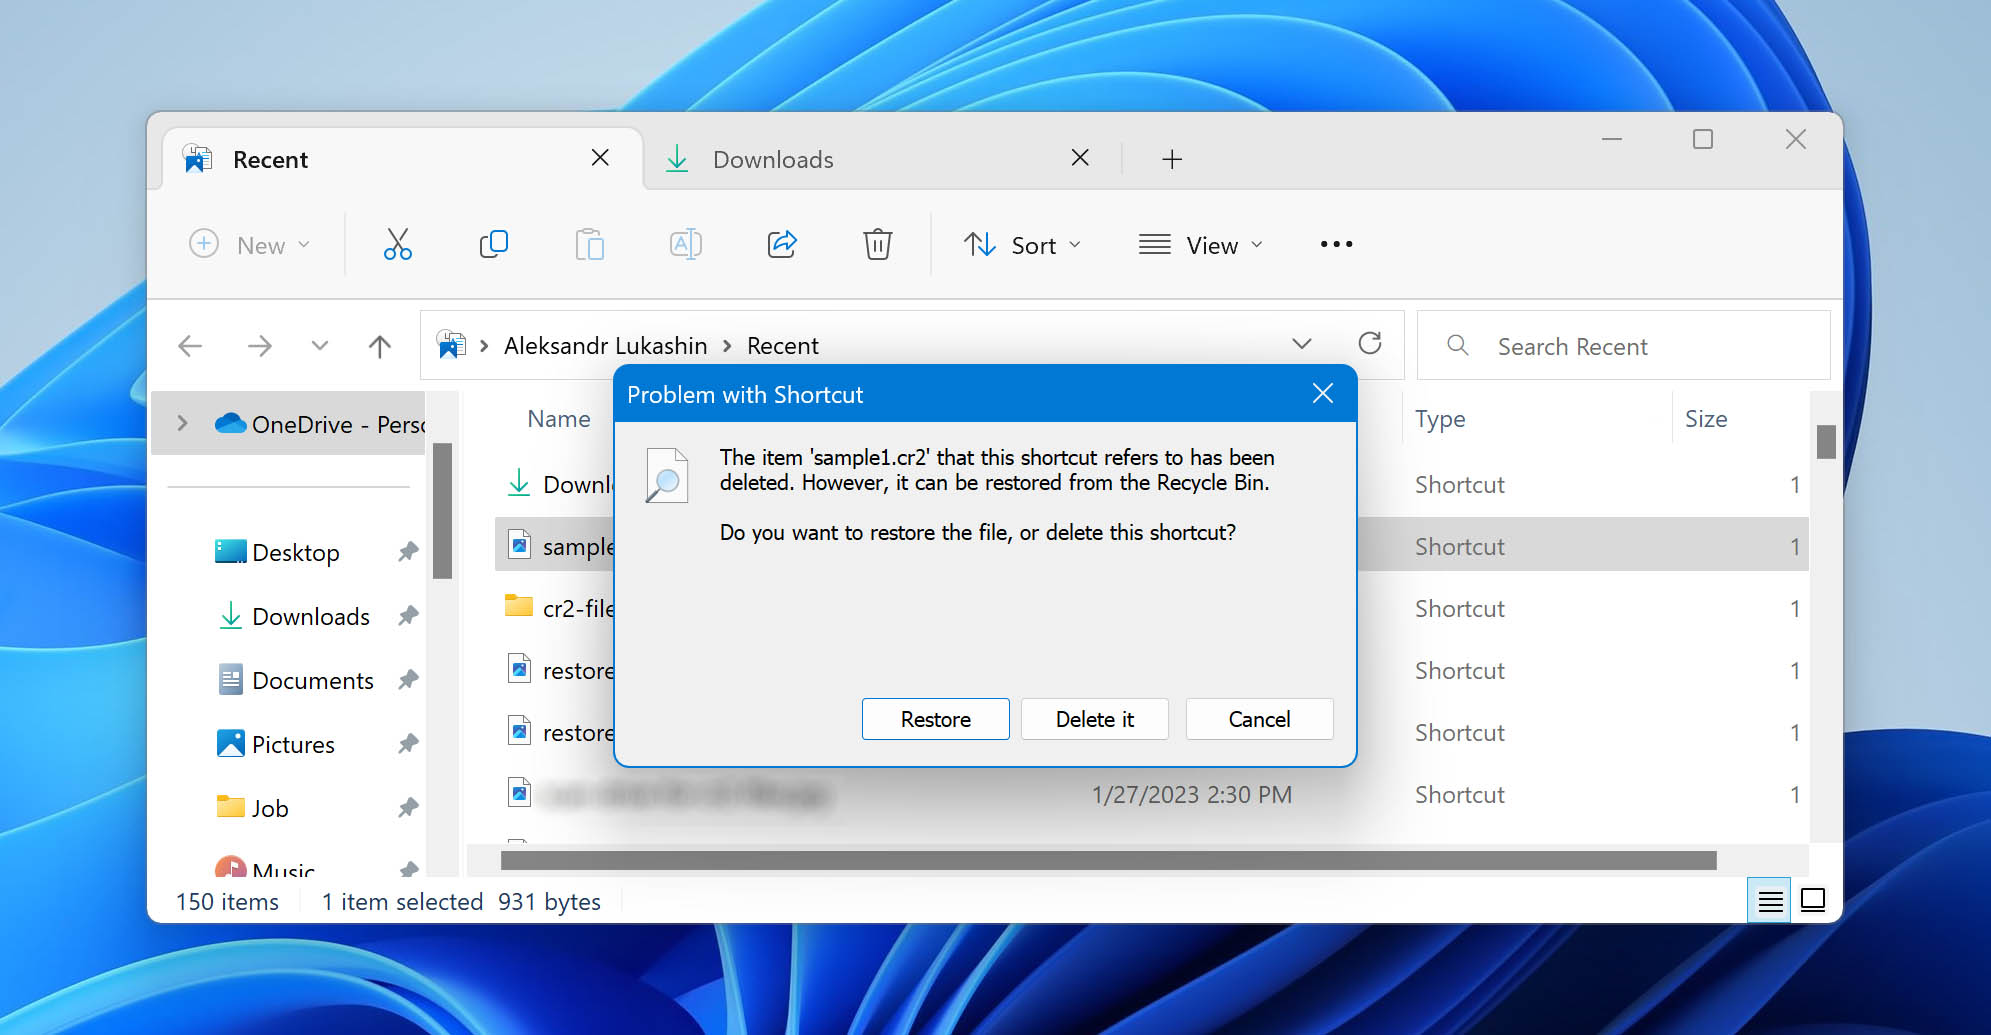
Restore a Previous Version of the Image
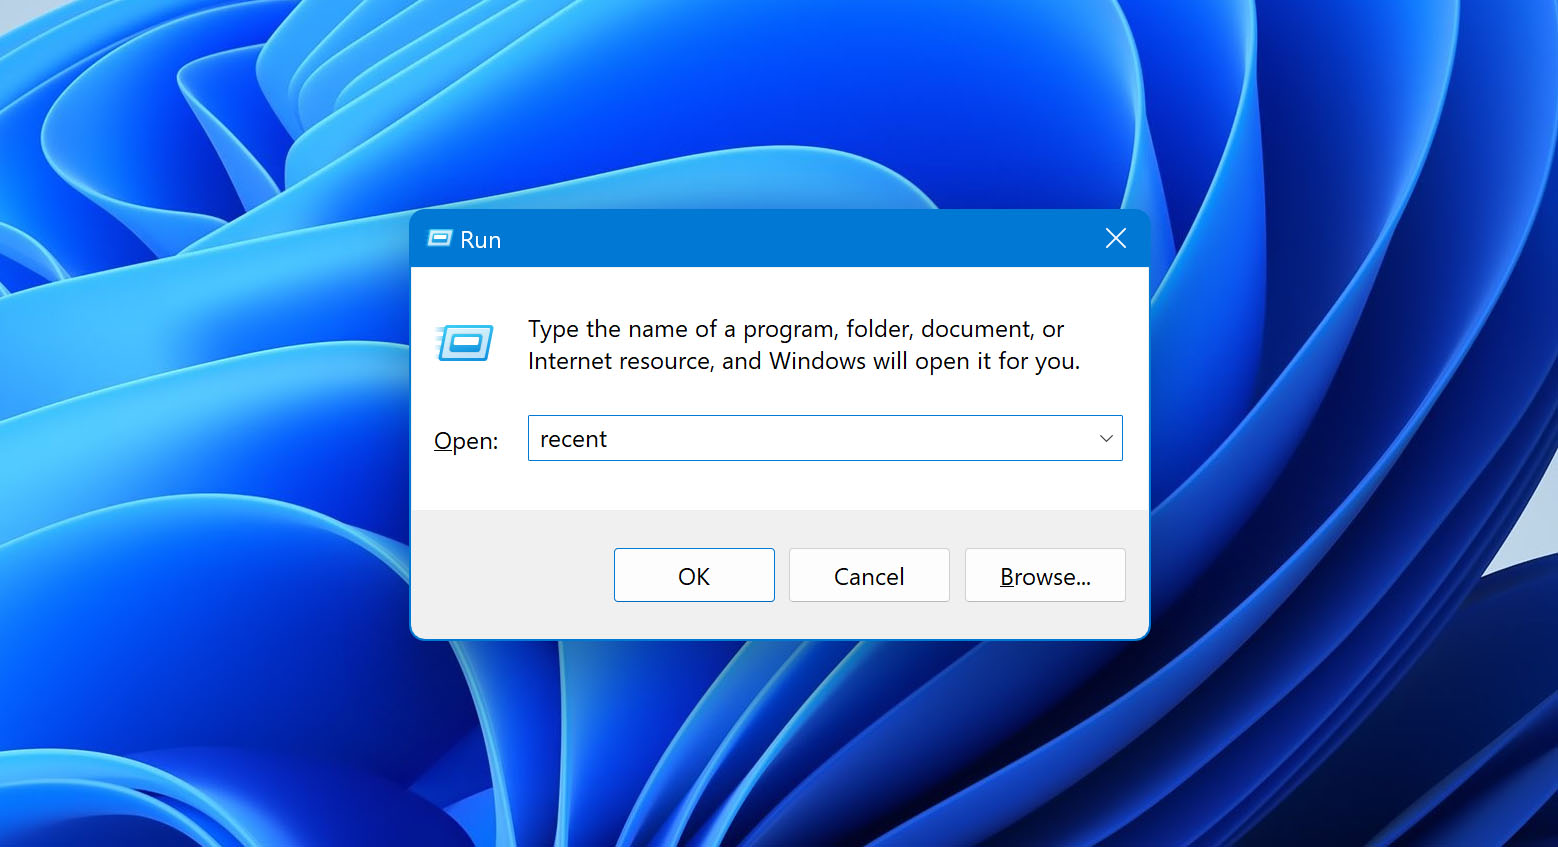
Windows’ Recent Files folder can be remarkably convenient. With it, you can see a list of all the files you’ve worked on recently, ordered sequentially. Even better, you can restore previous versions of each file. Follow the steps below to restore files from your Recent Files folder.
- Access your recent files folder. There are two ways to do this. One is to simply open File Explorer and scroll down the pane. The other is to hit Windows + R, which will open up a dialogue box. Enter the word “recent” (casing doesn’t matter) into that box and hit Enter.
- Go to the Recent Folder to find the file’s label you want to restore.
- Right-click on the file and select the Previous Versions tab.
- If the file has several versions, select the one you need and click Restore bottom.
How to Open CR2 Files on Mac and Windows
Mac and Windows operating systems both have options bundled into them that can open CR2 files. Mac has Apple Photos and Apple Preview, while Windows has Microsoft Photos. Any of those programs will open your CR2 files.
There are other programs that can open CR2 files. Below we look at examples of some of them:
- Able RAWer: free software allows you to not only open CR2 files but to edit them. It works with most versions of Windows.
- Photivo: is a simple, easy-to-use software that works with CR2 files and allows some simple editing. It’s available for Mac OSX, Linux, and Windows.
- Fotor: can opens CR2 files and has some of the most extensive editing features of all options on this list. You can not only manipulate colors and contrast but can also zoom in, crop, and apply visual effects. Fotor is available on Mac and Windows.
- RawTherapee: free and, like Fotor, has a number of editing options, including vibrance, sharpness, white balance, and exposure. It works on Mac, Windows, and Linux.
- Faststone Image Viewer: works with a wide range of raw file formats. It can be used to convert file types and to edit. It’s available for Mac and Windows alike.
- ExifPro Image Viewer: has a wide variety of options for viewing files and for altering them. Each time you use ExifPro, you’ll get a prompt asking you to upgrade to the paid version. You can simply choose to keep using the free option, though. It has different versions for different Windows operating system setups.
Tips to Avoid CR2 RAW Image File Loss
As shown above, you can get back lost CR2 files. The best option, though, is to not lose them at all. A few simple practices can ensure that you don’t lose your files in the first place.
- 💾 Hold to a Saving Regimen: It’s all too common that we lose our work because we simply forgot to save. A simple solution is to either automate saving or discipline a habit of regular saving. While deleted files can often be recovered, unsaved files are often lost forever. It’s easy to say “I’ll just remember to save,” but the reality is that such decisions frequently fade. It’s best to use automation features or timed saving regimens.
- 🔌 Protect your power supply: Some of the most common causes of data loss are power surges. If a surge hits your system while you’re in the process of saving or transferring files from your Canon camera, the files can be damaged. Uninterruptible power supplies are designed to circumvent this problem. They feed your system steady power regardless of the state of your main power source.
- 🏦 Backup Your CR2 files: You can back up your data manually, or you can use automated options that will back it up periodically for you. Choose one of them. If you don’t back your data up in at least one secondary location, then data loss can be permanent. If you’ve got stuff backed up then data loss isn’t even a major issue. You can just get your back up and resume your business.
- ⚠️ Stick to Known Devices and Software: There’s no better way to bring malware and viruses into your system than by using devices or software that you don’t know the origins of. Always ensure that either you are confident in the device’s safety or that you are (very) confident in the person who gives it to you.